Stuart I
| This page is about the British light tank Stuart I. For other versions, see M3 Stuart (Family). |
Contents
Description
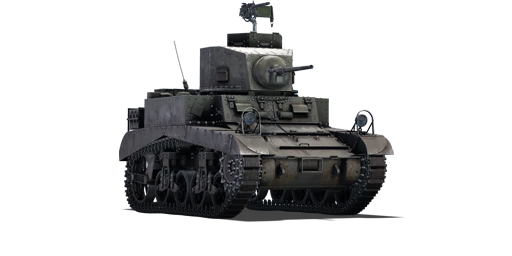
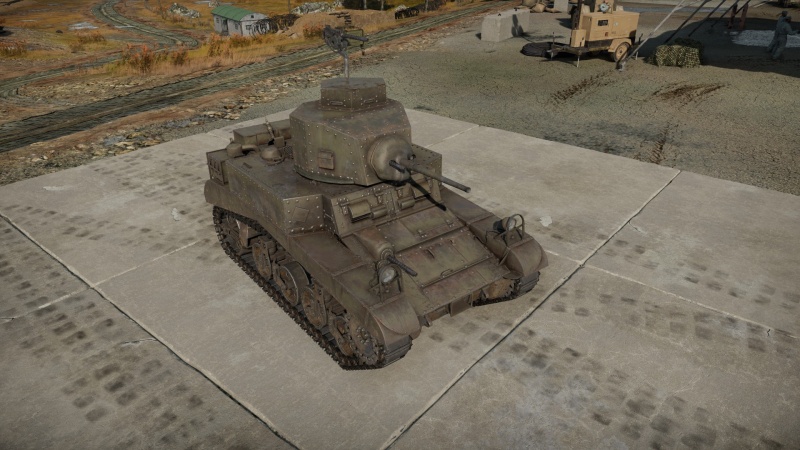
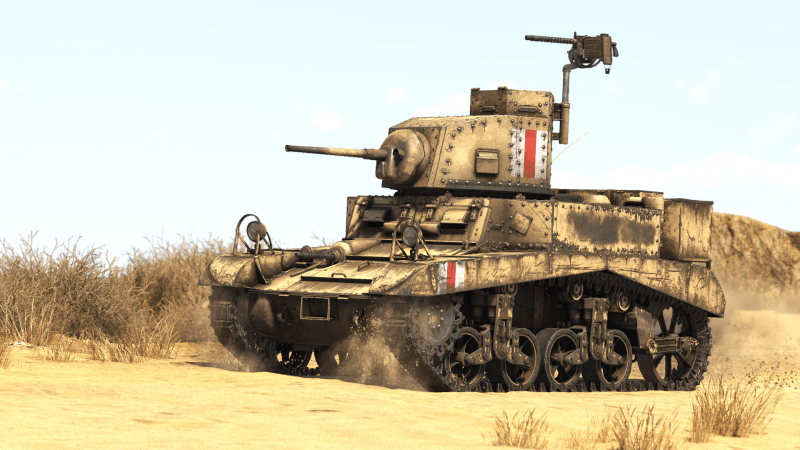
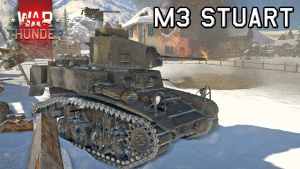
Stuart I was the British designation for the American M3 Stuart, supplied under the Lend-Lease programme. After heavy losses in 1940-41, Britain faced a shortage of armoured vehicles and turned to the USA. They were refused permission to manufacture their own tank models in American factories, leaving the purchase of American designs as the only solution. Under the Lend-Lease programme, 1,784 M3s and 1,594 M3A1s were sent to the British Army, where they received the designations Stuart I and Stuart III respectively.
Immediately after their arrival, the Stuarts were sent to Africa to fight against Germany and Italy. There they quickly proved themselves: they were fast, reliable, could withstand heavy fire, and, unlike the common Crusader II, they possessed HE rounds. However, there were also problems: the two hull machine guns, located close to the sides, were useless and discarded by crews; their range was insufficient for operations in Africa. One attempt to remedy the latter was the modification with Guiberson diesel engines, designated as Stuart II. After the end of the North African campaign, the tanks were redeployed to Asia, where some were handed over to China, while the rest fought against Japan until the end of World War II.
Introduced in Update "Starfighters", the Stuart is a light tank with a number of positive characteristics: it has good armour, pleasant mobility and excellent penetration. However, by its class standards, it is very tall, turns poorly on the spot, and the dense crew layout gives it poor survivability.
General info
Survivability and armour
Being a light tank, the Stuart I has fairly thin armour. It can generally protect against most machine guns but will usually not stand up against the main weapons of enemy tanks at its battle rating. The inside of the tank is fairly cramped with the two turret members standing, this means that the likelihood of a crew member being hit is fairly high.
Armour type:
- Rolled homogeneous armour
- Cast homogeneous armour (lower frontal plate)
| Armour | Front | Sides | Rear | Roof |
|---|---|---|---|---|
| Hull | 38.1 mm (18°) Driver Port 15.8 mm (69°) Front Glacis 44.4 mm (21°) Lower Glacis |
25.4 mm | 25.4 mm | 12.7 mm |
| Turret | 38.1 mm | 25.4 mm | 25.4 mm | 12.7 mm |
Notes:
- Suspension wheels, bogies and tracks are 15 mm thick.
- Most of the mantlet reaches 76.2 mm thickness due to overlapping plates.
Mobility
| Game Mode | Max Speed (km/h) | Weight (tons) | Engine power (horsepower) | Power-to-weight ratio (hp/ton) | |||
|---|---|---|---|---|---|---|---|
| Forward | Reverse | Stock | Upgraded | Stock | Upgraded | ||
| Arcade | Expression error: Unexpected * operator. | 406 | Expression error: Unexpected round operator. | __.__ | |||
| Realistic | 232 | Expression error: Unexpected round operator. | __.__ | ||||
The Stuart I feels fresh compared to most early British vehicles, and not even the Tetrarch can compare to its swiftness and manoeuvrability. The Stuart's speed both forward and backward is equal or better to the other vehicles in Rank I.
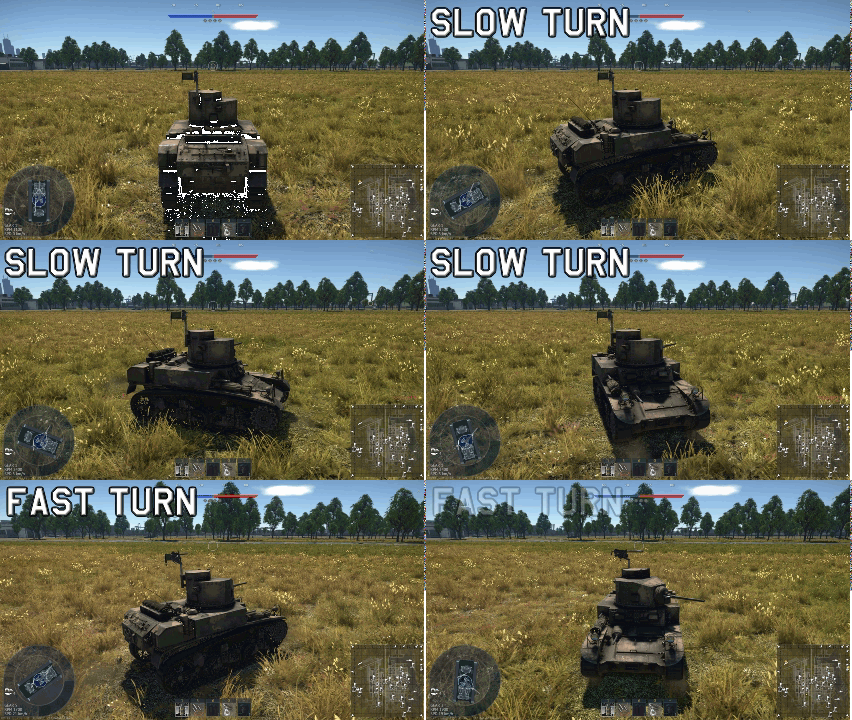
The Stuart I can reach a speed of 49 km/h off-road and up to 50 km/h on road. It can feel sluggish while turning at a slower speed as it lacks neutral steering, but when moving forward the turning is much smoother and quicker. The vehicle reverses at up to 6 km/h which, while somewhat slow, is still usable in most situations on the battlefield.
You will find this vehicle very useful at climbing up hills and flanking through the sides of the map. It feels better in the countryside or open places rather than urban areas. This helps it reach its full flanking potential and prevents it from being confined to close quarters.
Reverse speed, while still rather slow, is a refreshing leap from the usually lacking British reverse gear. Learn how to use it and remember it's not the same with all British tanks. The Stuart has a very fast turning rate and can easily sneak through tight spaces.
Modifications and economy
Armaments
Main armament
The main gun of the Stuart I is a 37 mm M5 cannon. This gun is also featured on the M2A4 and M3 Lee. On the Stuart I the M5 can use 2 round types, either M74 (AP) or M51 (APCBC) with the latter being a Tier 1 modification.
The overall firepower is decent. The main cannon has an adequate penetration of about 60 mm which is more than enough to go through most tanks below 2.0, such as the T-26, Pz.III and Pz.35t. Although the available ammunition is all solid shells, they still make quite a bit of shrapnel when penetrating which is enough to one-shot compact tanks like the T-26 and Pz.35t. For larger tanks like the LVT(A), accurate shots pinpointing the crew are required which might be a little hard for new players. The cannon has enough accuracy to precisely knock out the enemy's crew within 500 m. If one shot misses, the reload time of around 3.5 seconds allows quick following shots.
The cannon is provided with a nice shoulder stabiliser, which is a big advantage when exchanging fire, as it allows you to move out of cover and fire (usually before the enemy) without having to wait for your tank to stop wobbling. The stabiliser should be utilised to maximise your chance of surviving and killing. Note that it only works below 10 km/h, so remember to slow down or it will not stabilise the gun.
Targets like the 15cm sIG 33 B Sfl or M3 GMC can be quite hard to destroy, as their armour is thin enough to create little shrapnel, but are also thick enough to stop MG bullets. Against them, you can only rely on your fire rate, accuracy and of course your knowledge of their crew position to knock out their crew one by one. Always go for the gunners or drivers first, because if you fail to do so they can always fight back and one-shot you.
The main cannon is only effective in close quarters combat (usually within 200 m) or against weakly armoured targets, since the penetration drops drastically as the range increases, plus the small calibre makes the shells easy to ricochet. When encountering fairly well armoured tanks like the M13/40 or H.35, try and break their gun barrels first or track them. If they are too far away, pin them on the map and call teammates to help.
| 37 mm M5 | Turret rotation speed (°/s) | Reloading rate (seconds) | |||||||||||
|---|---|---|---|---|---|---|---|---|---|---|---|---|---|
| Mode | Capacity | Vertical | Horizontal | Stabilizer | Stock | Upgraded | Full | Expert | Aced | Stock | Full | Expert | Aced |
| Arcade | 103 | -10°/+20° | ±180° | Vertical | 19.04 | 26.35 | 32.00 | 35.00 | 37.65 | 3.77 | 3.33 | 3.07 | 2.90 |
| Realistic | 11.90 | 14.00 | 17.00 | 18.80 | 20.00 | ||||||||
Ammunition
| Penetration statistics | |||||||
|---|---|---|---|---|---|---|---|
| Ammunition | Type of warhead |
Penetration @ 0° Angle of Attack (mm) | |||||
| 10 m | 100 m | 500 m | 1,000 m | 1,500 m | 2,000 m | ||
| M74 shot | AP | 77 | 74 | 64 | 53 | 44 | 36 |
| M51B1 | APCBC | 86 | 83 | 71 | 59 | 49 | 40 |
| Shell details | ||||||||||||
|---|---|---|---|---|---|---|---|---|---|---|---|---|
| Ammunition | Type of warhead |
Velocity (m/s) |
Projectile mass (kg) |
Fuse delay | Fuse sensitivity (mm) |
Explosive mass (TNT equivalent) (g) |
Ricochet | |||||
| 0% | 50% | 100% | ||||||||||
| M74 shot | AP | 870 | 0.87 | - | - | - | 47° | 60° | 65° | |||
| M51B1 | APCBC | 870 | 0.87 | - | - | - | 48° | 63° | 71° | |||
Ammo racks
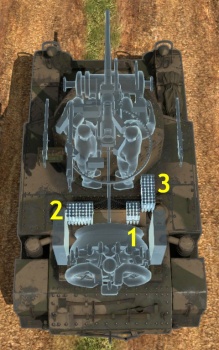
| Full ammo |
1st rack empty |
2nd rack empty |
3rd rack empty |
Visual discrepancy |
|---|---|---|---|---|
| 103 | 84 (+19) | 41 (+62) | 1 (+102) | No |
Machine guns
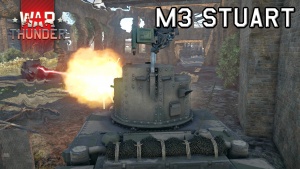
Alongside the main gun, the Stuart I has 2 additional 7.62 mm M1919A4 machine guns. The first machine gun noted is in a coaxial mount aligned with the gun, second is mounted on the turret top in a pintle mount. Unlike its American counterpart, the Stuart I lacks the two machine guns mounted on the hull sides. The Stuart I does also have a hull front machine gun but this cannot be fired.
The machine gun is only enough to destroy poorly protected vehicles such as AS 42, Flakpanzer I and GAZ-AAA. The penetration of around 10 mm is not enough to go through the frontal armour of those not-so-weakly-armoured tanks like SU-5-1, Panzerjager I or 15cm sIG 33 B Sfl. If you are skilled the two MG can effectively damage low-flying biplanes.
The machine guns will allow you to shoot low-flying planes, but do very poor damage. Biplanes may be easily shot down, but anything more durable will likely be too tough to damage significantly. The pintle MG has good elevation allowing it to aim high enough to target even planes almost directly above, but its traverse speed is often too slow to keep up with aircraft. Moving the turret or sometimes the hull itself may be necessary in order to successfully attack an airplane.
| 7.62 mm M1919A4 | ||||
|---|---|---|---|---|
| Mount | Capacity (Belt) | Fire rate | Vertical | Horizontal |
| Pintle | 3,000 (250) | 500 | -10°/+70° | ±60° |
| Coaxial | 3,250 (250) | 500 | N/A | N/A |
Usage in battles
When driving the Stuart I, it is best to maintain some distance from enemy vehicles, this is advisable due to the somewhat thin armour and closely packed crew that you have to work with, if you are on a smaller map where keeping distance from enemy vehicles is not possible then it would be a good idea to use buildings and landscape features for cover and to keep your vehicle concealed.
Offensive rear support
A way to use this tank is as a support vehicle behind the main tank offensive, with your high reloading gun, velocity and decent pen you will be able to provide quick support firing for the vehicles advancing.
In the majority of cases, you will be able to go through the frontal armour of enemy tanks (best pen is 86 mm) although some vehicles with heavily angled front armour may be able to stop your round being effective. A consistently effective tactic is to flank an enemy vehicle and fire into the side of the crew compartment, aiming near the turret to disable their ability to fire is a good way to use your first shot, thanks to the quick (at best 2.9s) reload of the Stuart I, you can then put second and third shots into the enemy if needed to finish off their crew.
If the assault seems deemed to fail, you can quickly turn back and speed your escape out the frontline, this thanks to its highly mobile transmission.
Flanker
Another aspect worth mentioning here is the mobility of the Stuart I, while not the fastest vehicle at its BR it certainly still has competitive mobility that will allow it to reach capture points in quickly or get to a good camping or flanking position before most enemy or friendly vehicles alike.
Using the map to your advantage, choosing rather lonely areas of the map and lurking in the smallest of the corners is the little Stuart's job. Covering with the forest or using the landscape for attacking the enemy with surprise by the sides, or the rear. This tactic applies even when using the vehicle in an up-tiered battle rating match, as there will be plenty of light tanks trying to do the same as you.
Enemies worth noting
German tanks - Specific enemy vehicles that bear mentioning are any German vehicles with the 20 mm KwK/FlaK38 cannon, this gun might be small but can have up to 64 mm of penetration, which is enough to go through the Stuart I at almost any point even frontally, these guns can also fire 10 rounds at 280 rounds/min before having to reload the clip, this means that they will easily take out your crew before you have a chance to respond. As far as countering, the best chance you have is to angle your frontal armour, which can make it difficult for the PzGr 40 rounds to penetrate. It will also help to to maintain distance from enemy, because the PzGr 40 round loses penetration very quickly. However generally speaking you will not stand much of a chance against vehicles equipped with this gun if you are openly exposed to their fire. Some German medium tanks can be surprisingly tough frontally. Use the Protection Analysis feature in the hangar to know where to properly shoot them.
Swedish tanks - Swedish tanks are usually lacking in the armour department, so the Stuart I, it's able to do good work with its gun. Keep in mind that they have powerful guns and fast-firing tanks. Be aware of their APDS shells, which are very fast and easy to aim at long ranges, don't try to fight them at long distances. Tankers must be precise when engaging them. Their shaped turret is capable of even bouncing some of the inbound shots, it is best to always aim for the centre area of the hull or the turret.
Pros and cons
Pros:
- Good front armour, can deflect weak shells when angled
- Fast and agile, competitive with the BT-5
- Decent firepower: good rate of fire and penetration
- -10 degrees gun depression means good terrain adaptation
Cons:
- Crew are located close together, lowering survivability
- Brakes are weak especially at high speed
- Turning can be bad at slower speeds
- No ammunition with HE filler (only solid shots) meaning poor damage
- Despite being a small tank, quite tall and boxy profile
History
Development
The American light tank design prior to World War II, the M2 light tank, was seen as obsolete after observing Germany's Panzer forces tear through Europe. The design was to be upgraded with more armour, a better suspension, and a new gun recoil system. The revised version was designated the Light Tank M3, which the British named the Stuart. At its basis, the light tank had a 37 mm cannon with a similar layout as the M2 light tank, with the radial engine at the rear and the transmission on the front, though the radial engine was in high demand so the Guiberson diesel T-1210 were fitted in some models to substitute the engine. The design used the VVSS bogie system seen on previous American tank designs. The tank had a crew of four: driver, assistant driver, gunner, and commander, who doubled as the loader.
The first variant of the M3 Stuart light tank was very similar to the M2 light tanks. It had five machine gun armaments scattered around like the M2, but featured better armour and a better cannon with the 37 mm M6 cannon. The design did not have a turret basket for the crew and it was constructed out of rivets, which increased the chance of spalling in the tank. Nevertheless, the first variant M3 saw about 5,811 units produced. The second variant, the M3A1 Stuart, featured a new turret with no cupola on it, plus an added gun stabilizer. The machine guns on the hull sides were removed, so now the total machine guns were reduced from five to three. The design also featured a welded armour design to remove the weakness of riveted armour. 4,621 of this variant was produced from May 1942 to February 1943. The most used variant, the M5A1 Stuart, had a completely redesigned hull and turret, with the hull most notably having a full sloping frontal armour than the previous designs. This variant had about 6,810 units produced. All in all, the M3 light tank design and all its later variants were produced in massive quantities from March 1941 to October 1943 with a total of 25,000 units produced.
Combat usage
The British were the first to use the M3 Stuart in Africa in 1941, using it in Operation Crusader. However, the result ended with heavy losses, due to the better training the German Afrika Korps had compared to the British tank doctrine. The encounter also pointed out many flaws in the M3, mainly the cramped interior and limited operational range, but was praised for its high mobility and reliability when compared to the British contemporary designs. In 1942, the Stuarts were generally kept as recon units rather than combat units, and some were even modified to improve speed and range by removing the turret, and others were converted to armoured personnel carriers and command vehicles. Though the British used it extensively, it was still in small proportion compared to American usage. The Soviet Union was also another user of the M3 but found it unfavourable due to their own logistics, plus it was not made to withstand the Russian Rasputitsa or even the winter. The Soviet eventually turned down any more offers for the Stuart by 1943. The M3s also supported the British and Chinese forces in Asia against the Japanese Army, and also France and Yugoslavia in Europe against the German Wehrmacht.
The Americans used it widely in both operational theatres. In the Pacific, the M3s were the first tanks America used in a tank vs. tank operation against the Imperial Japanese Army, where five M3s fought Type 95 Ha-Gos in a well-known action in the Phillippines. In total 108 M3s served with the 192nd and 194th Tank Battalions, also known as the 1st Provisional Tank Group, in the 1941 U.S. defence of the Phillippines, despite having no HE ammo issued. More than 30 were captured by the Japanese, who equipped their 7th Tank Regiment with them, who used them to defend the Philippines again, against the US in 1944. M3s were also used by Company B of the 1st Marine Tank Battalion at Guadalcanal in 1942. Though the Stuarts were newer than the Japanese tank designs by about five years, they were seen as equal in performance and firepower, but the M3 benefited by the support of the American industry arm. The Stuarts served in the Pacific slightly better than its heavier counterparts such as the M4 Shermans due to its lighter weight and manoeuvrability in the poor jungle terrain, but the M3 Stuarts in the Pacific were gradually replaced by M4 Shermans due to heavy losses from its thinner armour. The M3 was also some of the first US tanks to be converted into flamethrower tanks, named as the "Satan". The Satan tanks provided favourable results to the concept of a flamethrower tank and were replaced by flamethrower-equipped M4 Shermans in 1945.
In Europe, the M3 formed a large part of the American tank battalions, though following the British path by sidelining the Stuarts from combat duties after heavy losses and to serve alongside Shermans as scouting units. A typical tank battalion for the US Army consisted of three companies of Shermans and one of Stuarts. Other than scouting, the M3s were also used in cavalry roles and infantry support since their cannon are unable to compete with the German tank designs. Despite their dwindling capabilities in battle, the M3 was kept in service up until the end of the war due to the large production numbers.
After World War II, the Stuarts were given out as cheap surplus, countries such as China, India, and Pakistan picked up a few and used them in their conflicts. Portuguese also picked up a few M3s for the war in Angola, and the South African Corps continued using the Stuarts until 1955, where some were still kept in service until 1968 due to available parts. Today, Paraguay is still a user of the M3 light tanks, though as the only tracked armour used in the country.
The Stuart light tank design was also quite versatile that it was made into different variants for different roles on the battlefield. It served as an infantry support vehicle as to the 75 mm GMC M8 and experiments were also taken to see if it could be adapted to an anti-aircraft gun and a flamethrower as well. However, the M3 was becoming an ageing design with inferior armour, cramped interior layout, and a small 37 mm gun, so a program to replace the light tank began in 1943 and became the M24 Chaffee, which would eventually replace the M3 Light Tank mostly after World War II.
Media
- Skins
See also
Links to the articles on the War Thunder Wiki that you think will be useful for the reader, for example:
- reference to the series of the vehicles;
- links to approximate analogues of other nations and research trees.
External links
Paste links to sources and external resources, such as:
- topic on the official game forum;
- other literature.
| Britain light tanks | |
|---|---|
| A13 | A13 Mk I · A13 Mk I (3rd R.T.R.) · A13 Mk II · A13 Mk II 1939 |
| A15 | Crusader II · Crusader "The Saint" · Crusader III |
| A17 | Tetrarch I |
| IFV | Warrior · Desert Warrior (Kuwait) |
| Wheeled | Daimler Mk II · AEC Mk II · Fox · Vickers Mk.11 |
| Other | VFM5 |
| South Africa | |
| SARC | SARC MkIVa · SARC MkVI (2pdr) · SARC MkVI (6pdr) |
| Ratel | Ratel 90 · Ratel 20 |
| Rooikat | Rooikat Mk.1D · Rooikat 105 · Rooikat MTTD |
| Other | Concept 3 · Eland 90 Mk.7 |
| USA | Stuart I · Stuart III |


