M26A1
| This page is about the Italian medium tank M26A1. For other versions, see M26 (Family). |
Contents
Description
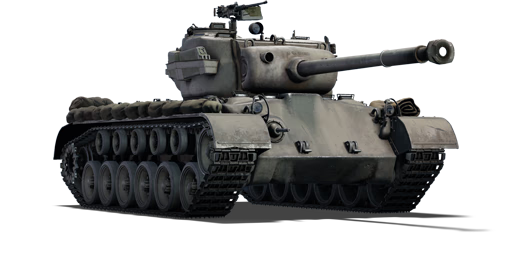
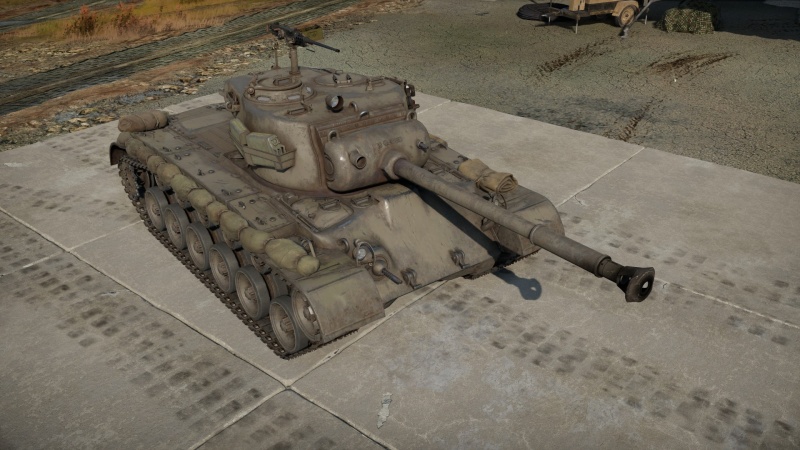
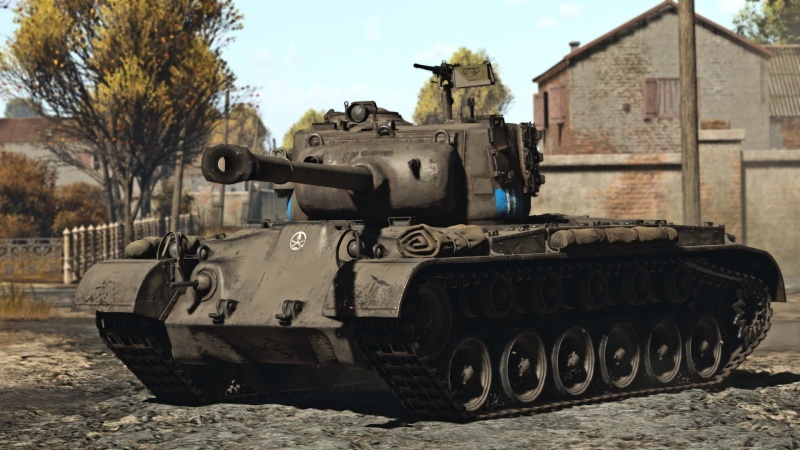
The M26A1 is an American-made tank which was widely used by Italy during the early stages of the Cold War. The Italian Army would receive Pershing tanks from the USA as part of the Mutual Defense Assistance Act at the beginning of the 1950s. The previously supplied M4 Sherman had become obsolete and needed replacement. They would be in service for many years and quickly became one of the strongest platforms at their disposal.
Introduced in Update 1.85 "Supersonic", the Italian M26A1 can be quite an effective machine at its battle rating; however, there are some notable weaknesses that players must be aware of when using this tank. The M26A1 is quite a big platform, therefore when in tight urban maps you can be easily taken care of by enemy players which fire at you from positions you aren't able to see. Without its mobility upgrades it is also very slow, so until you unlock them you'll need to play a more supportive role rather an offensive one. Armour-wise, the M26A1 can protect you from a lot of medium calibre shells that will come your way, hull down positions are recommended if you're not advancing. The firepower of the M26A1 is good enough for you to be able to take out the majority of enemies you'll face in 1-2 shots, granted you know their weakspots. You have access to a 90 mm Cannone da 90/50 M3A1 and machine guns which will come in handy against lightly armoured vehicles. Overall, it is a great tank to have for your lineup.
General info
Survivability and armour
Armour type:
- Cast homogeneous armour (Front, turret)
- Rolled homogeneous armour (Side, Rear, Roof)
| Armour | Front (Slope angle) | Sides | Rear | Roof |
|---|---|---|---|---|
| Hull | 101.6 mm (42-46°) Front Glacis 162.5 mm (25-60°) Upper front glacis 76.2 mm (28-53°) Lower Glacis |
76.2 mm (0-1°) Front 50.8 mm (0-3°) Rear |
50.8 mm (7°) Top 22.2 mm (71°) Bottom |
22.2 mm |
| Turret | 101.6 mm (1-55°) Turret front 114.3 mm (1-84°) Gun mantlet |
76.2 mm (2-54°) | 76.2 mm (0-79°) | 25.4 mm |
| Cupola | 76.2 mm | 76.2 mm | 76.2 mm | 25.4 mm |
Notes:
- Suspension wheels and tracks are 20 mm thick.
- Belly armour is 25.4 mm thick.
Mobility
| Game Mode | Max Speed (km/h) | Weight (tons) | Engine power (horsepower) | Power-to-weight ratio (hp/ton) | |||
|---|---|---|---|---|---|---|---|
| Forward | Reverse | Stock | Upgraded | Stock | Upgraded | ||
| Arcade | Expression error: Unexpected * operator. | 775 | Expression error: Unexpected round operator. | __.__ | |||
| Realistic | 442 | Expression error: Unexpected round operator. | __.__ | ||||
Modifications and economy
It's recommended to unlock Parts and FPE first, then the M82 and APCR shots, and after that focus on mobility.
Armaments
Main armament
| 90 mm Cannone da 90/50 M3A1 | Turret rotation speed (°/s) | Reloading rate (seconds) | |||||||||||
|---|---|---|---|---|---|---|---|---|---|---|---|---|---|
| Mode | Capacity | Vertical | Horizontal | Stabilizer | Stock | Upgraded | Full | Expert | Aced | Stock | Full | Expert | Aced |
| Arcade | 70 | -10°/+20° | ±180° | N/A | 20.0 | 27.7 | 33.6 | 37.2 | 39.5 | 9.75 | 8.63 | 7.95 | 7.50 |
| Realistic | 12.5 | 14.7 | 17.9 | 19.7 | 21.0 | ||||||||
Ammunition
| Penetration statistics | |||||||
|---|---|---|---|---|---|---|---|
| Ammunition | Type of warhead |
Penetration @ 0° Angle of Attack (mm) | |||||
| 10 m | 100 m | 500 m | 1,000 m | 1,500 m | 2,000 m | ||
| M77 da 90/50 | AP | 162 | 160 | 148 | 135 | 123 | 112 |
| M82 da 90/50 | APCBC | 185 | 182 | 169 | 155 | 142 | 130 |
| M304 da 90/50 | APCR | 287 | 281 | 259 | 234 | 211 | 191 |
| M332 da 90/50 | APCR | 291 | 286 | 264 | 240 | 217 | 197 |
| M71 da 90/50 | HE | 20 | 20 | 18 | 17 | 16 | 16 |
| Shell details | ||||||||||||
|---|---|---|---|---|---|---|---|---|---|---|---|---|
| Ammunition | Type of warhead |
Velocity (m/s) |
Projectile mass (kg) |
Fuse delay (m) |
Fuse sensitivity (mm) |
Explosive mass (TNT equivalent) (g) |
Ricochet | |||||
| 0% | 50% | 100% | ||||||||||
| M77 da 90/50 | AP | 822 | 10.61 | - | - | - | 47° | 60° | 65° | |||
| M82 da 90/50 | APCBC | 853 | 10.91 | 1.2 | 14 | 137.2 | 48° | 63° | 71° | |||
| M304 da 90/50 | APCR | 1,021 | 7.62 | - | - | - | 66° | 70° | 72° | |||
| M332 da 90/50 | APCR | 1,165 | 5.7 | - | - | - | 66° | 70° | 72° | |||
| M71 da 90/50 | HE | 823 | 10.55 | 0.2 | 0.1 | 1,210 | 79° | 80° | 81° | |||
| Smoke shell characteristics | ||||||
|---|---|---|---|---|---|---|
| Ammunition | Velocity (m/s) |
Projectile mass (kg) |
Screen radius (m) |
Screen deploy time (s) |
Screen hold time (s) |
Explosive mass (TNT equivalent) (g) |
| M313 da 90/50 | 821 | 10.7 | 9 | 5 | 20 | 50 |
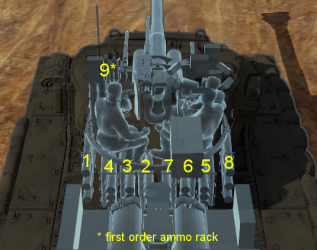
Ammo racks
| Full ammo |
1st rack empty |
2nd rack empty |
3rd rack empty |
4th rack empty |
5th rack empty |
6th rack empty |
7th rack empty |
8th rack empty |
9th rack empty |
Visual discrepancy |
|---|---|---|---|---|---|---|---|---|---|---|
| 70 | 64 (+6) | 55 (+15) | 47 (+23) | 39 (+31) | 31 (+39) | 23 (+47) | 16 (+54) | 10 (+60) | 0 (+70) | No |

Notes:
- Shells are modeled individually and disappear after having been shot or loaded.
- 1 shell from rack 7 is fired after rack 1 is emptied. For the purpose of clarity, it is counted as belonging to rack 2 in the table above.
- Rack 9 is a first stage ammo rack. It totals 10 shells and gets filled first when loading up the tank.
- This rack is also emptied early: the rack depletion order at full capacity is: 9 - 1 - 2 - etc. until 8.
- If you pack 16 (+54) shells, it will keep most of the hull empty of ammo.
- Full reload speed will be realized as long as shells are available in the ready rack 9. If the ready rack is empty, a penalty to reload speed will occur.
- Simply not firing when the gun is loaded will move ammo from racks 1-8 into rack 9. Firing will interrupt the restocking of the ready rack.
Machine guns
| 12.7 mm M2HB | ||||
|---|---|---|---|---|
| Mount | Capacity (Belt) | Fire rate | Vertical | Horizontal |
| Pintle | 600 (200) | 577 | -10°/+50° | ±120° |
The roof-mounted M2HB .50 cal heavy machine gun is very good at knocking out tracks, punching through lightly armoured vehicles and shooting down low-flying aircraft. Use it sparingly because of its low ammo count.
| 7.62 mm M1919A4 | ||||
|---|---|---|---|---|
| Mount | Capacity (Belt) | Fire rate | Vertical | Horizontal |
| Coaxial | 5,000 (250) | 500 | N/A | N/A |
The small calibre of the M1919A4 machine gun makes it largely ineffective against all armoured vehicles but the ones with an open compartment. It still can be used to ping targets as a rangefinding help or to mow down minor obstacles blocking your line of sight.
Usage in battles
The M26A1 is played in a very similar way to the normal M26, but it has more firepower and a slightly better APCR shell. One of the biggest differences is that it often faces Allied tanks instead of Axis tanks. It's as versatile as the original Pershing but with a better gun. It can be used for supporting a teammate whose tank has a long reload time such as IS-2 or T32. Participate in flanking manoeuvres — your speed and agility are not brilliant, but enough for that. Use the lower profile of Pershing compared to the Sherman's to navigate through the map more stealthily. Your vertical guidance (-10°/20°) allows you to shoot from higher positions without exposing too much of yourself.
The 90 mm gun offers a wide selection of ammunition to be used. The M82 APCBC shot with 140 g of explosive filler is extremely deadly — usually, a successful penetration with this shell will lead to a one hit kill. It lacks a bit of penetration for the rank this vehicle sits at, but it's great for attacking enemies from the side or behind. The M304 and M332 APCR shots give the vehicle the ability to penetrate thicker armour, but they perform poorly against angled armour and have terrible post penetration effects. This means you need to aim for flat surfaces and know the position of ammo or crew members in the enemy tank. Against a Tiger II (H) for example, this means aiming for the turret if he is looking directly at you on the gunner side. At that position, you can reliably penetrate the turret front from distances up to 1,800 m.
Although you are moderately armoured for your class, most enemies can easily kill you at this rank. A safe playstyle is a must. To reduce direct impacts in frontal engagements angle the M26A1, as the V-shaped frontal armour can deflect some shots and the tank has 76 mm of side armour. Your lower glacis is a big weak spot, try to keep it hidden from the enemy.
One downside to the Pershing is its engine — the power to weight ratio is poor and does not allow for very quick manoeuvring. It uses the same Ford GAF that can be found in the late series M4 Medium tanks, but the Pershing is 8 tons heavier. Being slightly underpowered, the Pershing has a hard time climbing hills. You will need to know the maps and areas you are operating in and use them wisely.
Tactics
Urban maps (Poland, Eastern Europe, Hürtgen Forest, Cologne, etc.) are perfect for ambushing, use your moderate speed to catch heavier enemy tanks off-guard. Drop artillery in front of suspected enemy positions if you need to cross a street or relocate, the smoke screen will cover you.
If you have successfully flanked an enemy, your first shot is decisive. If you know that you are not able to knock out the tank in one shot, you should always shoot the breech or the barrel to knock out the gun. The best ammo to do this is the M304 or M332 APCR shots, or the M82 APCBC shot. The APCR will guarantee a 100% successful shot, while the APCBC can also work very good and might destroy everything inside the turret. However, some German tanks have tracks on the turret's sides and if the enemy saw you and is turning their turret, the M82 could bounce. Make sure you don't miss. If you flank a SPG like a Jagdpanther, Jagdtiger or a Ferdinand just aim for the engine to immobilize it and you will have all the time needed to knock it out.
Arcade Battles
In arcade battles, it is much harder to flank and ambush enemy tanks because of the player-name system. However, the tank is still very playable and you can make use of different tactics depending on the situation. For urban environments, it's best to move with the team and only poke your head out when you have a good shot and the enemy tank isn't aimed at you. In open terrain, you will still be able to use the hills to your advantage and side-shot / pot-shot enemy tanks. It is worth mentioning, that the Pershing could face slightly heavier enemies due to its higher BR in Arcade Battles. The main rule here is don't show your sides and stay low.
Realistic/Simulator Battles
In realistic and simulator battles, The M26A1 shouldn't be in the toughest part of the match facing very heavily armoured enemies. It's better to stay behind front lines supporting teammates or to try a flank manoeuvre, as you can't be spotted on the minimap. The battle rating can up-tier you to some top tank battles in simulator mode. The compression and matchmaking can put you into situations where you have to fight Cold War era tanks, which are especially hard to penetrate, even from the sides.
Pros and cons
Pros:
- Uses the same gun as the M46 Patton; slightly better penetration compared to the original M26 Pershing
- M82 shot has great post-penetration damage; can easily knock out enemy tanks with a single shot
- Respectable mobility
- Great reverse speed
- Good accuracy on the move thanks to its stable suspension
- Good gun depression enables it to use hull-down tactics
- Fast turret rotation speed
- 76 mm of side armour allows the M26A1 some degree of angling
Cons:
- Armour can still be penetrated by most guns encountered at its rank
- Stock ammunition will have some difficulty destroying other tanks effectively
- Mediocre acceleration
- Turret ring can get damaged easily
History
Procurement
The Italian Army received Pershing tanks from the USA as part of the Mutual Defense Assistance Act at the beginning of the 1950s. The previously supplied M4 Sherman had become obsolete and needed replacement. The US Army armoured units stationed in West Germany transitioned from the M26 to the M47 Patton from 1952 through 1953. The M26 tanks, including the M26A1 version, were no longer needed by the US Army and thus given to Italy and France. Italy used their M26 Pershings operationally until 1963, after which they were gradually replaced by more recent M47, M60 and Leopard 1 tanks.
Usage
In terms of usage for the Italian M26A1 in its armed forces, the Italian Army received Pershing tanks from the USA as part of the Mutual Defense Assistance Act during the late 1950s. The previously supplied M4 Sherman had become obsolete and needed replacement, and Italy was very afraid that Yugoslavia would invade Italy to try take land they claimed to be the rightful owners of. The US Army armoured units stationed in West Germany transitioned from the M26 to the M47 Patton from 1952 through 1953. The M26 tanks, including the M26A1 version, were no longer needed by the US Army and thus given to Italy and France at a very favourable price. Italy used their M26 Pershings operationally until 1963, after which they were gradually replaced by more recent M47 Patton, M60 and Leopard 1 tanks. Some Italian M26's would be reconfigured for troop transport, but overall the M26A1 would be stationed at Eastern border in Italy with Yugoslavia but never saw combat action.
Media
- Skins
- Videos
See also
- Vehicles equipped with the same chassis
External links
- [Wikipedia] M26 Pershing
- [Tanks Encyclopedia] Medium/Heavy Tank M26 Pershing
- [Military Factory] M26 Pershing
| Italy medium tanks | |
|---|---|
| Italy | |
| M13/40 | M13/40 (I) · M13/40 (II) · M13/40 (III) |
| M14/41 | M14/41 · M14/41 (47/40) |
| M15/42 | M15/42 |
| M16/43 | Celere Sahariano |
| P26/40 | P40 · P40 "G.C. Leoncello" |
| OF-40 | OF-40 · OF-40 Mk.2A · OF-40 (MTCA) |
| Ariete | Ariete (P) · Ariete · Ariete PSO · Ariete AMV |
| Germany | ▄Pz.III N · ▄Pz.IV G · ▄Leopard 1A5 |
| Allied powers | ▄Sherman I Composito · Sherman Ic · ▄Sherman Vc · ▄Sherman V · M26 "D.C.Ariete" · M26A1 · M47 (105/55) · M60A1 "D.C.Ariete" |
| Hungary | |
| Turán | Turan I · Turan II · Turan III |
| Germany | ◔Leopard 2A4 · Leopard 2A7HU |
| USSR | ◔T-72M1 |


