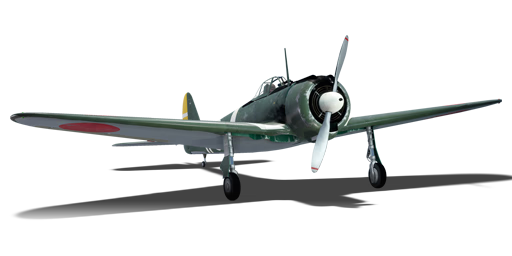
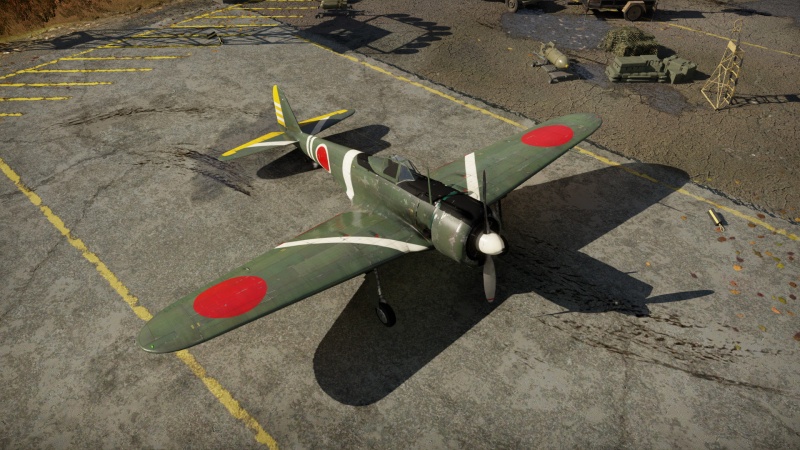
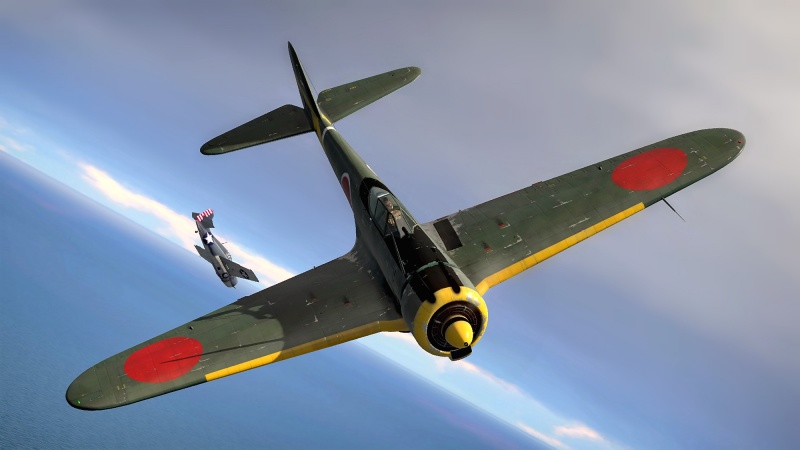
Ki-43-I
| This page is about the Japanese fighter Ki-43-I. For other versions, see Ki-43 (Family). |
Contents
Description
The Ki-43-I Hayabusa is a rank Japanese fighter with a battle rating of (AB), (RB), and (SB). It was introduced in Update 1.43.
General info
Flight performance
| Characteristics | Max Speed (km/h at 4,000 m) |
Max altitude (metres) |
Turn time (seconds) |
Rate of climb (metres/second) |
Take-off run (metres) | |||
|---|---|---|---|---|---|---|---|---|
| AB | RB | AB | RB | AB | RB | |||
| Stock | 476 | 461 | 14.2 | 15.0 | 11.9 | 11.9 | 120 | |
| Upgraded | 517 | 495 | 13.8 | 14.0 | 19.6 | 15.3 | ||
Details
| Features | ||||
|---|---|---|---|---|
| Combat flaps | Take-off flaps | Landing flaps | Air brakes | Arrestor gear |
| ✓ | ✓ | ✓ | X | X |
| Limits | ||||||
|---|---|---|---|---|---|---|
| Wings (km/h) | Gear (km/h) | Flaps (km/h) | Max Static G | |||
| Combat | Take-off | Landing | + | - | ||
| 630 | 416 | 373 | 250 | ~10 | ~5 | |
| Optimal velocities (km/h) | |||
|---|---|---|---|
| Ailerons | Rudder | Elevators | Radiator |
| < 370 | < 350 | < 450 | > 318 |
Survivability and armour
The Ki-43 I is quite vulnerable, thanks to its lack of armour. Also, the fuel tanks are not self-sealing. They are located in the inner part of the wings, 2 on each side.
Modifications and economy
Armaments
Offensive armament
The Ki-43-I is armed with:
- A choice between three presets:
- 2 x 7.7 mm Type 89 machine guns, nose-mounted (500 rpg = 1,000 total)
- 1 x 12.7 mm Ho-103 machine gun, nose-mounted (270 rpg) + 1 x 7.7 mm Type 89 machine gun, nose-mounted (500 rpg)
- 2 x 12.7 mm Ho-103 machine guns, nose-mounted (270 rpg = 540 total)
Usage in battles
In all modes, the Ki-43 can perform both BnZ fighting and turnfighting with the correct opponent. It can easily accelerate to 500 km/h in a dive while still having responsive controls. However its speed retention is quite poor and will lose lots of speed as soon as you level out. For turnfighting, you can out-turn most monoplanes and almost all heavy fighters/attackers even without combat flaps deployed, but never turn with Spitfires and Zeros. Note that this aircraft will experience severe rudder lockup when faster than around 450 km/h, resulting in awkward aiming adjustments if the target manoeuvres, so you need to cut throttle appropriately to control your speed.
While having sufficient flight characteristics, the Ki-43 is extremely fragile and can get critically damaged by almost all guns. From the hard-hitting M2 Browning to the fast-firing MG 15, any gun can badly hurt the Ki-43 especially on the engine, fuel tanks, and pilot which can always lead to a later crash. Before attacking try to get an altitude advantage and perform deflection shots. To maximise the damage aim for their wings and engines, as the fuselage usually soaks up lots of bullets. Only fire when the target passes in front of your guns. This short window might seem inadequate to do anything... and it usually is, unfortunately. The slow velocity, light projectiles and low one-second burst mass usually guarantee no critical damage. However sometimes it only takes one bullet to set the target aflame, if you are lucky.
- In Simulator, the Ki-43 is overall a decent plane. It has very forgiving characteristics such as good over-the-nose visibility, a clear bubble canopy without much framing and good backwards visibility. This increases your chance of spotting, tracking, and/or dodging since you can see targets from almost every direction with ease (except the underside, of course). It is recommended to set keybind for moving your head vertically to make full use of the great forward vision in a dogfight. However, its wings are located directly below the cockpit meaning that you cannot see what is below your sides which can lead to you losing track of the enemy. You should get used to searching towards your 2, 4, 5, 7, 8, 10 o'clock, avoiding the wings.
- Note that when taking off the Ki-43 will shift severely to the left due to the propeller torque, so it is recommended to set keybinds for left and right brakes to effectively control your direction on the runway. Using rudder alone will not work at low speed and you will either circle around or lose control and crash into nearby structures like tents/hangars.
- Landing is very beginner-friendly too. It is able to decelerate quickly while also having low stall speed, allowing you to quickly slow down and descend onto the runway. Takeoff and landing flaps do not lift up the nose a lot so you can easily remain overall parallel to the ground. It also performs great when braking as its nose will not usually dip into the ground, so you can keep braking until it fully stops (given that you deflect elevators fully upwards) which is vital for preparing the next fight quickly.
- It has very good handling at most speeds. It does not wobble a lot which is an advantage over the biplanes and early monoplane fighters, making it easier to smooth the aim. You should familiarise the shape of those that you should not turn with: the Spitfires have long, straight nose with an inline engine, rather large and elliptical wings. The Zeros have an overall cylindrical fuselage that merges into a pointy tail after the stabilisers, a radial engine and are usually painted white (early models). If you see them on your tail try outrunning them by diving at around -40 degrees. The Ki-43 still remains responsive handling at 500 km/h, but its speed retention is poor, meaning it will start to lose speed quickly and the enemy might catch up. If you are near a friendly airfield, great. If not, then hope for the best and run towards the friendly side. Don't forget to pitch up and down a little to mess up their aim, the early Spitfires and A6M only have a 60-round drum per cannon which will run out fairly fast. The leftover 7.7 mm machine guns will not be as destructive but still might destroy you.
- It will be very challenging when facing against the Chinese/American Ki-43, as both of you have the same characteristics. You cannot outrun each other and cannot out-turn each other, so the fight will be a combination of various manoeuvres and techniques, and of course, the pilot's skills. Note that the Ki-43 has similar appearance as the Ki-44 and can be misjudged as a Ki-44 or a Zero which are also in the Chinese/American tree. Comparing to the Ki-43, the Ki-44 has a slightly bigger engine and the canopy is shifted backwards. The Chinese Zero is painted dark brown with a silver spinner, while the American one is in greyish-blue. They all turn well and have accelerate well in a dive.
- When it comes to intercepting ground pounders or bombers, the Ki-43 generally performs poorly since the targets are all quite robust against your weak guns. Some examples are the IL-2 which is commonly seen in Sim. It can get mistakenly seen as other aircraft from a distance due to its common appearance. But up close you will see two bomb-like structures underneath its wings and triangular stabilisers with rounded tips. The early IL-2s have no defensive guns so it is safe to sit behind and carefully aim. They are heavily armoured in the cockpit and engine so avoid aiming at these areas. Instead target the tail to hope for disabling their tail control. The late IL-2s, however, have a rear-facing Berezin UB which is something you definitely want to avoid. Perform deflection shots or just disengage.
Enemies worth noting:
- Typhoon Mk Ia: this is a very capable opponent, it is quite fast, climbs well, manoeuvres decently and has 12 x 7.7 mm MGs that can fatally damage the Ki-43. If you are attacking, get an altitude advantage first and BnZ it. If you are being attacked by it, evade its first pass and immediately start a turnfight. You need to deploy combat/takeoff flaps, or even landing flaps if needed to push your turn rate to the limit. Several circles are needed, don't panic if you see the Typhoon keeping up with your turns at first. With appropriate flaps, the Ki-43 will slowly out turn it, allowing you to get onto its tail. The Typhoon overall resembles a Hurricane, except its symbolic giant intake below the engine.
Manual Engine Control
| MEC elements | ||||||
|---|---|---|---|---|---|---|
| Mixer | Pitch | Radiator | Supercharger | Turbocharger | ||
| Oil | Water | Type | ||||
| Not controllable | Controllable Not auto controlled |
Controllable Not auto controlled |
Controllable Not auto controlled |
Separate | Not controllable 1 gear |
Not controllable |
Pros and cons
Pros:
- Turns quickly
- Decent level & dive speed for its rank
- Good climb rate
- Great acceleration
- Great roll rate
- Reasonably powerful armament
- Useful flaps in a turnfight
- Good all-round cockpit visibility in simulator
- Forgiving landing characteristics
Cons:
- Doesn't turn as fast as the biplanes it typically faces
- Stealth belts are the only viable belt to use for both Ho-103 & Type 89
- Fragile frame
- Easily set afire
- Engine can be easily damaged
- Lacks self-sealing fuel tanks
- Absence of any armour protection
- Ho-103 (12.7 mm) has an abysmal ammo capacity in Realistic and Simulator battles (540 total)
- Rudder locks up at around >450 km/h, meaning that you will miss quite some passes due to the aim not being able to adjust horizontally
History
Describe the history of the creation and combat usage of the aircraft in more detail than in the introduction. If the historical reference turns out to be too long, take it to a separate article, taking a link to the article about the vehicle and adding a block "/History" (example: https://wiki.warthunder.com/(Vehicle-name)/History) and add a link to it here using the main template. Be sure to reference text and sources by using <ref></ref>, as well as adding them at the end of the article with <references />. This section may also include the vehicle's dev blog entry (if applicable) and the in-game encyclopedia description (under === In-game description ===, also if applicable).
Media
- Skins
- Videos
See also
Links to the articles on the War Thunder Wiki that you think will be useful for the reader, for example:
- reference to the series of the aircraft;
- links to approximate analogues of other nations and research trees.
External links
| Nakajima Aircraft Company (中島飛行機株式会社 ) | |
|---|---|
| Fighters | Ki-27 otsu · Ki-27 otsu Tachiarai |
| Ki-43-I · Ki-43-II · Ki-43-III otsu | |
| Ki-44-I · Ki-44-I 34 · Ki-44-II otsu · Ki-44-II hei | |
| Ki-84 ko · Ki-84 otsu · Ki-84 hei | |
| Ki-87 | |
| Hydroplanes | A6M2-N* |
| Interceptors | J1N1 · J5N1 |
| Bombers | B5N2 |
| B6N1 Model 11 · B6N2 Model 12 · B6N2a Model 12Ko | |
| G5N1 · G8N1 | |
| Ki-49-I · Ki-49-IIa · Ki-49-IIb · Ki-49-IIb/L | |
| Recon | E8N2 |
| Jet Fighters | Kikka |
| Captured | ␗Ki-27 otsu · ▃Ki-43-II · ␗Ki-43-III ko · ␗Ki-44-II hei · ␗Ki-84 ko |
| *Refit of the Mitsubishi A6M2 mod. 11 | |
| See also | Fuji Heavy Industries (1957-2017) |
| Japan fighters | |
|---|---|
| Navy | |
| Carrier-based fighter | |
| A5M | A5M4 · Hagiri's A5M4 |
| A6M | A6M2 mod. 11 · A6M2 · A6M3 · A6M3 mod. 22 · A6M3 mod. 22Ko · A6M5 · A6M5 Ko · A6M5 otsu · A6M5 Hei · A6M6c |
| A7He | A7He1* |
| A7M | A7M1 (NK9H) · A7M2 |
| Land-based Fighter | |
| J2M | J2M2 · J2M3 · J2M4 Kai · J2M5 · J2M5 (30 mm) |
| J6K | J6K1 |
| J7W | J7W1 |
| N1K-J | N1K1-Ja · N1K2-J · N1K2-Ja |
| Fighter seaplane | |
| N1K | N1K1 |
| A6M-N | A6M2-N |
| Army | |
| Ki-10 | Ki-10-I · Ki-10-I C · Ki-10-II · Ki-10-II C |
| Ki-27 | Ki-27 otsu · Ki-27 otsu Tachiarai |
| Ki-43 | Ki-43-I · Ki-43-II · Ki-43-III otsu |
| Ki-44 | Ki-44-I · Ki-44-I 34 · Ki-44-II otsu · Ki-44-II hei |
| Ki-61 | Ki-61-I ko · Ki-61-I otsu · Ki-61-I hei · Tada's Ki-61-I hei · Ki-61-I tei · Ki-61-II Otsu Kai |
| Ki-84 | Ki-84 ko · Ki-84 otsu · Ki-84 hei |
| Ki-87 | Ki-87 |
| Ki-94 | Ki-94-II |
| Ki-100 | Ki-100 · Ki-100-II |
| Other countries | ▅F4U-1A · ▅P-51C-11-NT · ▅Bf 109 E-7 · ▅Fw 190 A-5 |
| *Imported designation of the He 112 (A6M was in development - A7M would take A7 designation after the cancelation of the A7He) | |


