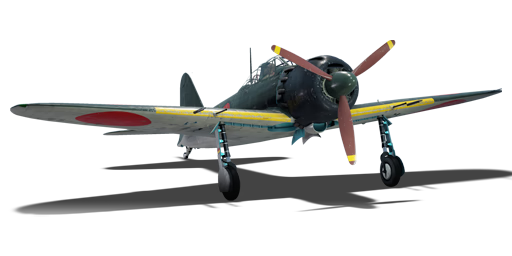
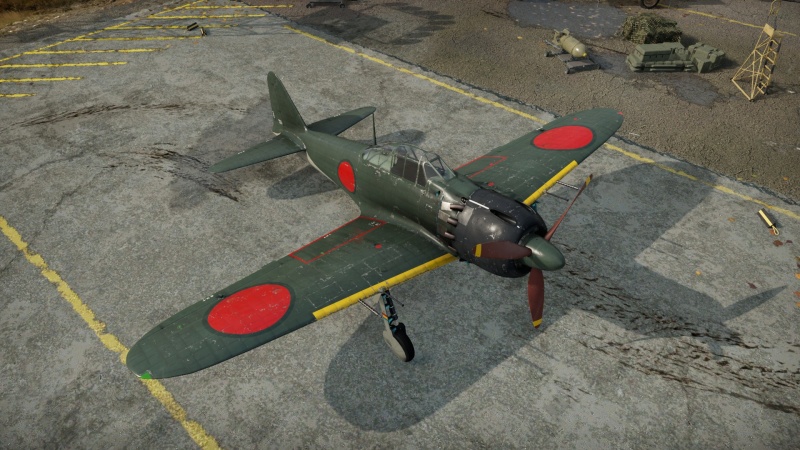
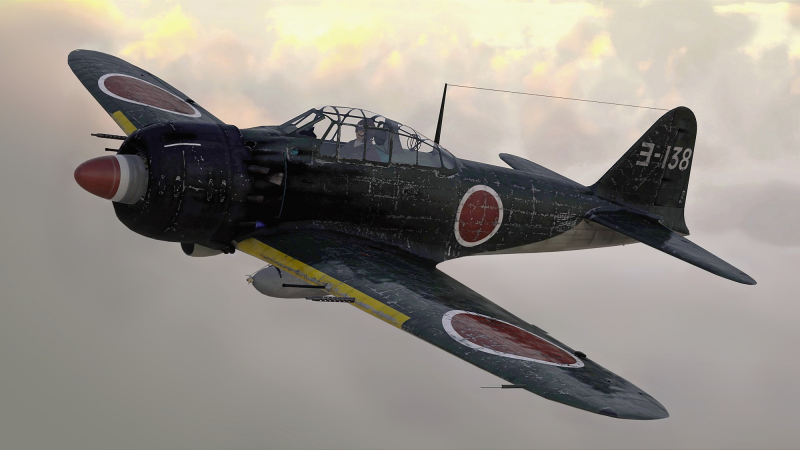
A6M6c
| This page is about the Japanese fighter A6M6c. For other versions, see A6M (Family). |
Contents
Description
The A6M6 mod. 53, designated as the Type 0 Carrier-based Fighter Model 53 (零式艦上戦闘機五三型), was a prototype on the A6M5 mod. 52C (Hei) developed to carry the Sakae 31a engine, featuring a water-methanol engine boost which slightly improves engine power but during testing proved unsatisfactory due to the unreliability of the prototype engine. It also includes fuel tanks that were made self-sealing.
It was introduced during Update "Red Skies" as a reward for Battle Pass: Season IV, "Fearless Voltigeur". Essentially the "black sheep" of the Zero family together with the A6M5 mod.52 Hei, the A6M6 sacrifices manoeuvrability for more armament, ordnance, and survivability, though at a much larger degree. While it is noticeably less capable in dogfighting compared to its peers, the A6M6's improved protection means that it can afford to take punishment, making it very forgiving to fly. The plane's reinforced airframe also makes the A6M6 highly capable at boom-and-zoom tactics and high speed dogfights, especially when using snap turns to catch the enemy off-guard. It is also capable of ground attacking due to the generous amount of machine gun rounds and payload.
- Nicknames
- IJN Pilot nickname: Reisen (零戦) / Zerosen (ゼロ戦) (Abbreviation of 0 - 戦).
- Allied reporting name: Zeke / Zero.
General info
Flight performance
With the new Sakae 31a engine, the A6M6c has a water-methanol injection that makes the engine less vulnerable to overheating under WEP. The main flaw of this engine is that once the water-methanol mixture runs out, WEP cannot be utilized anymore. The B7A2 also shares this similar flaw with the A6M6c. The WEP lasts for a total of 8 minutes, so it's recommended to conserve it once cruising altitude is reached. Saving a few minutes of WEP for a dogfight can make a vital difference in combat effectiveness. In total, the WEP setting adds 136 additional horsepower compared to 100% throttle setting.
The general flight performance of this Zero will match the traditional expectations. It is relatively light and nimble, it has an excellent turn rate, and it has great low altitude performance. However, when compared with other late war Zeros such as the A6M5 Ko/Otsu, it feels much heavier and more sluggish due to reinforced airframe, which results poor rate of climb but significantly improves its high-speed handling (especially in a dive), this means boom-and-zoom and dive attack can be performed with ease, a feat that other Zeros would struggle to execute otherwise. It behaves similarly to the A6M5 Hei, and if the pilot is familiar with the Hei, the pilot can master the A6M6.
| Characteristics | Max Speed (km/h at 6,400 m) |
Max altitude (metres) |
Turn time (seconds) |
Rate of climb (metres/second) |
Take-off run (metres) | |||
|---|---|---|---|---|---|---|---|---|
| AB | RB | AB | RB | AB | RB | |||
| Stock | 522 | 506 | 20.9 | 21.7 | 7.8 | 7.8 | 350 | |
| Upgraded | 566 | 543 | 19.1 | 20.0 | 14.4 | 10.7 | ||
Details
| Features | ||||
|---|---|---|---|---|
| Combat flaps | Take-off flaps | Landing flaps | Air brakes | Arrestor gear |
| ✓ | ✓ | ✓ | X | ✓ |
| Limits | ||||||
|---|---|---|---|---|---|---|
| Wings (km/h) | Gear (km/h) | Flaps (km/h) | Max Static G | |||
| Combat | Take-off | Landing | + | - | ||
| 740 | 398 | 369 | 220 | ~14 | ~6 | |
| Optimal velocities (km/h) | |||
|---|---|---|---|
| Ailerons | Rudder | Elevators | Radiator |
| < 280 | < 420 | < 410 | > 336 |
Survivability and armour
The A6M6c boasts pilot armour, armoured glass, and self-sealing fuel tanks, elements missing on earlier models of the A6M. It has increased survivability because of these bonus features. However, it isn't as tough as a P-51, as it is still a Zero, and the wings are vulnerable to incendiary rounds. The armour will save you, but you should not rely on it as your primary advantage.
Modifications and economy
Armaments
Offensive armament
The A6M6c is armed with:
- 2 x 20 mm Type 99 Model 2 cannons, wing-mounted (125 rpg = 250 total)
- 1 x 13.2 mm Type 3 machine gun, nose-mounted (230 rpg)
- 2 x 13.2 mm Type 3 machine guns, wing-mounted (240 rpg = 480 total)
The A6M6c features two 20 mm Type 99 Model 2 autocannons mounted on the wings, and three 13.2 mm Type 3 machine guns with two on the wings and one on the nose. Both guns are mostly accurate and hard-hitting, and has enough ammo to take down a handful of aircraft and soft ground targets.
As all ammo belt options were unlocked by default, the A6M6c offers handy choices depending on your preference. For the 20 mm, the "tracer" belt are the most reliable option, as it is consisted entirely of an HEF-T rounds with good filler and is capable of dealing consistent damage, though the "universal" and "stealth" options features HEF shell that sacrifice tracer properties for twice the filler of the HEF-T, making it capable of dealing a lot of damage. Meanwhile, the 13.2 mm has a choice between a "ground targets" and "stealth" belts with focus on API and API-T rounds that can easily light up the enemy planes on fire, or the "universal" belt with more IAI rounds for dealing structural damage.
Suspended armament
The A6M6c can be outfitted with the following ordnance:
- Without load
- 2 x 60 kg Navy Type 97 Number 6 bombs (120 kg total)
- 1 x 250 kg Navy Type Number 25 Model 2 bomb (250 kg total)
- 10 x Type 3 No.1 Mod.28 Mk.1 rockets
- 2 x Type 3 No.6 Mod.27 Mk.1 rockets
Usage in battles
The A6M6c sacrifice some of its manoeuvrability and climb rate in favor of reinforced airframe, improved protection, and high-speed handling. Due to this, the A6M6c is less specialized in dogfight compared to the other Zeros, but is generally more versatile and forgiving than the its peer. The plane is capable of executing high-speed manoeuvres and diving attacks, and is capable of taking damage. Though, being a Zero, it also inherit weakness from the other Zeros such as slow speed and volatile fuel tanks.
To master the A6M6c in the air, the pilot needs to channel all of the Zero's strengths and exploit them against the enemy. The primary goal is to set up a turning engagement and open fire roughly 300 m from the target in a turn. The Zero is vulnerable to energy fighting, and as such it doesn't perform well in a prolonged dogfight. As the A6M6c has a poor climb rate, it is recommended to side climb slightly and engage targets that are low in energy and altitude. While side climbing, the most optimal angle to do so is at 20° maximum. This will allow you to climb without stalling your engines. When attacking bombers, your fighter cannot take much punishment so make sure to only pick targets that you can kill easily. An experienced bomber gunner can obliterate you out of the sky due to how relatively frail the Zero's airframe is.
Manual Engine Control
| MEC elements | ||||||
|---|---|---|---|---|---|---|
| Mixer | Pitch | Radiator | Supercharger | Turbocharger | ||
| Oil | Water | Type | ||||
| Controllable | Controllable Not auto controlled |
Controllable Not auto controlled |
Controllable Not auto controlled |
Separate | Controllable 2 gears |
Not controllable |
The Zero's manual engine controls are simple to learn. The propeller pitch should be kept at 95% at all times. The radiators both should be kept between 5 and 15% depending if you are on a hot or cold map. The second supercharger gear should be activated at 3,500 m and above. The Mixture can be kept at 60% percent for all altitudes.
Pros and cons
Pros:
- Powerful armament with good ammo count, the 13 mm MGs are effective
- Retains some of the famous manoeuvrability of the A6M series, makes for a capable dogfighter
- Reinforced airframe improves its high speed handling, thus allowing the plane to do boom-and-zoom and dive attacks
- Has some armour, combined with better guns it makes the plane capable for bomber hunting
- Somewhat more durable airframe than other Zeros with self-sealing fuel tanks, capable of taking hits unlike the other Zeros
- Can carry effective rockets
Cons:
- Heavier than other zeros, does not handle as well
- Mediocre climb rate, needs to side climb in order to gain altitude
- Vulnerable to incendiary rounds
- Very poor top speed
- Not potent at high altitude
- Limited WEP mode (only 8 minutes)
History
In late 1944 into early 1945, the skies over the Pacific Ocean were ruled by US military aviation. The Japanese Empire was forced to deploy the already obsolete Zero against up-to-date Corsairs and Hellcats, because the development of new models of carrier-based fighter aircraft was delayed, and new Japanese army fighters often lacked range to win a tactical initiative. The design team of Mitsubishi did everything possible in an attempt to bring the Zero to the level of modern Allied combat aviation.
One of the latest versions of the Japanese carrier-based fighter was the Model 53 hei (A6M6c), developed after the design of the previous version, the A6M5 hei. Efforts to strengthen the structure and increase firepower were also traced in the new model: the A6M6c, like its predecessor, was armed with a pair of automatic cannons and three high-caliber machine guns, and also had protected wing tanks. In addition, this modification was supposed to install a new Nakajima Sakae 31 engine with a water-methanol injection system. As tests showed, the promising afterburner proved to be very unreliable in operation, so only a few A6M6c units were produced - one prototype at the Mitsubishi plant and several units of the testing batch at the Nakajima plant.
-From Devblog
Media
- Skins
- Videos
See also
Links to the articles on the War Thunder Wiki that you think will be useful for the reader, for example:
- reference to the series of the aircraft;
- links to approximate analogues of other nations and research trees.
External links
| Mitsubishi Company (三菱商会) | |
|---|---|
| Fighters | A5M4 · Hagiri's A5M4 |
| A6M2 mod. 11 · A6M2 · A6M3 · A6M3 mod. 22 · A6M3 mod. 22Ko · A6M5 · A6M5 Ko · A6M5 otsu · A6M5 Hei · A6M6c | |
| A7M1 (NK9H) · A7M2 | |
| J2M2 · J2M3 · J2M4 Kai · J2M5 · J2M5 (30 mm) | |
| Hydroplanes | F1M2 |
| Interceptors | Ki-83 · Ki-109 |
| Bombers | G4M1 |
| Ki-21-Ia · Ki-21-I hei · Ki-67-I Ko · Ki-67-I otsu | |
| Jet Fighters | Ki-200 |
| Captured | ▃A6M2 · ␗A6M2 |
| See also | Mitsubishi Heavy Industries, Ltd. (Post-War) |
| Japan fighters | |
|---|---|
| Navy | |
| Carrier-based fighter | |
| A5M | A5M4 · Hagiri's A5M4 |
| A6M | A6M2 mod. 11 · A6M2 · A6M3 · A6M3 mod. 22 · A6M3 mod. 22Ko · A6M5 · A6M5 Ko · A6M5 otsu · A6M5 Hei · A6M6c |
| A7He | A7He1* |
| A7M | A7M1 (NK9H) · A7M2 |
| Land-based Fighter | |
| J2M | J2M2 · J2M3 · J2M4 Kai · J2M5 · J2M5 (30 mm) |
| J6K | J6K1 |
| J7W | J7W1 |
| N1K-J | N1K1-Ja · N1K2-J · N1K2-Ja |
| Fighter seaplane | |
| N1K | N1K1 |
| A6M-N | A6M2-N |
| Army | |
| Ki-10 | Ki-10-I · Ki-10-I C · Ki-10-II · Ki-10-II C |
| Ki-27 | Ki-27 otsu · Ki-27 otsu Tachiarai |
| Ki-43 | Ki-43-I · Ki-43-II · Ki-43-III otsu |
| Ki-44 | Ki-44-I · Ki-44-I 34 · Ki-44-II otsu · Ki-44-II hei |
| Ki-61 | Ki-61-I ko · Ki-61-I otsu · Ki-61-I hei · Tada's Ki-61-I hei · Ki-61-I tei · Ki-61-II Otsu Kai |
| Ki-84 | Ki-84 ko · Ki-84 otsu · Ki-84 hei |
| Ki-87 | Ki-87 |
| Ki-94 | Ki-94-II |
| Ki-100 | Ki-100 · Ki-100-II |
| Other countries | ▅F4U-1A · ▅P-51C-11-NT · ▅Bf 109 E-7 · ▅Fw 190 A-5 |
| *Imported designation of the He 112 (A6M was in development - A7M would take A7 designation after the cancelation of the A7He) | |
| Japan premium aircraft | |
|---|---|
| Fighters | Hagiri's A5M4 · A7He1 · Ki-27 otsu Tachiarai |
| Ki-44-II otsu · ▅Bf 109 E-7 · ▅F4U-1A · Ki-100-II · Ki-44-I 34 | |
| ▅Fw 190 A-5 · A7M1 (NK9H) · Tada's Ki-61-I hei · ▅P-51C-11-NT | |
| J2M4 Kai · A6M5 Ko · A6M6c · J2M5 · Ki-87 · J6K1 | |
| Twin-engine fighters | Ki-96 |
| Jet fighters | F-86F-40 JASDF▅ · T-2 Early · F-4EJ ADTW |
| Strike aircraft | ▄AV-8S |
| Bombers | Ki-21-I hei · Ki-48-II otsu · H8K3 · B7A2 (Homare 23) · ▅B-17E |


