Turm III
Contents
Description
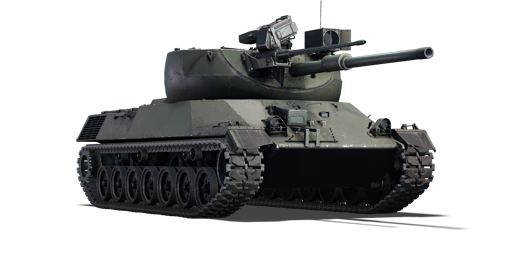
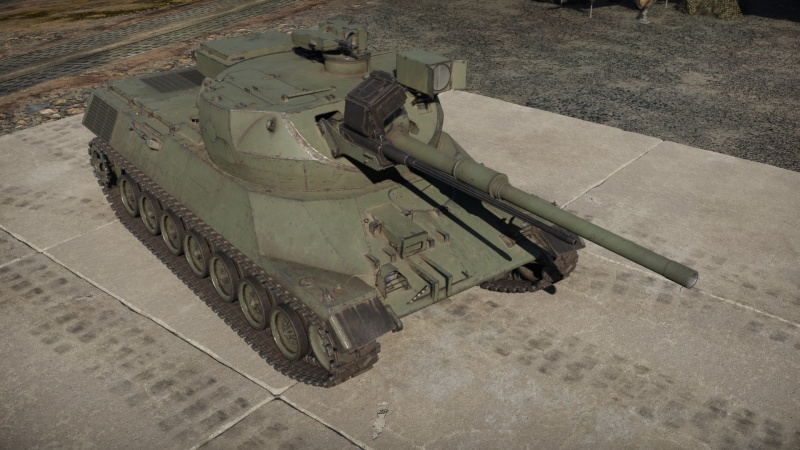
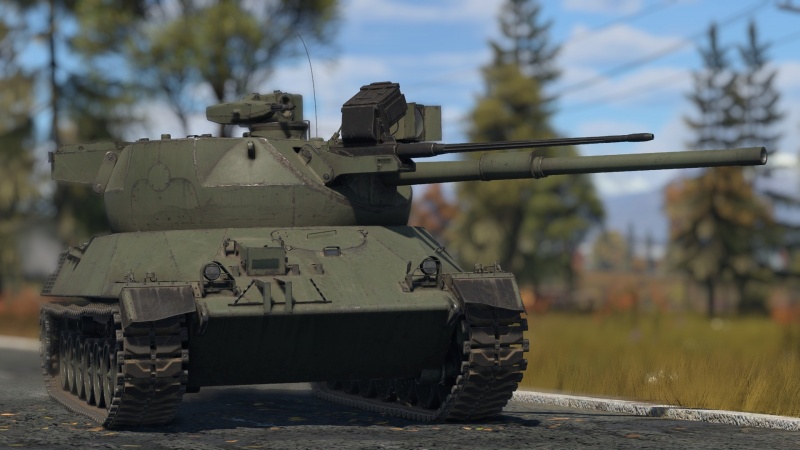
The Erprobungsträger mit 3-achs-stabilisiertem Turm is a premium gift rank German medium tank with a battle rating of (AB), (RB), and (SB). It was introduced in Update "Wind of Change".
General info
Survivability and armour
Armour type:
- Rolled homogeneous armour
| Armour | Front (Slope angle) | Sides | Rear | Roof |
|---|---|---|---|---|
| Hull | 30 mm (60°) Front glacis 30 mm (51°) Lower glacis |
20 mm (26°) Top 10 mm (26°) Engine vents 20 mm Bottom |
20 mm Upper plate 20 mm (10°) Lower plate 20 mm (47°) Lower glacis |
30 mm (30°) Front glacis 10 mm Engine compartment |
| Turret | 30 mm (45°) Turret front 20 mm (spherical) Turret ball |
20 mm (spherical) Turret ball | 20 mm (spherical) Turret ball | 10 mm |
| MG cupola | 10 mm | 10 mm | 10 mm | 10 mm |
Notes:
- Suspension wheels, tracks, and torsion bars are 20 mm thick.
Mobility
| Game Mode | Max Speed (km/h) | Weight (tons) | Engine power (horsepower) | Power-to-weight ratio (hp/ton) | |||
|---|---|---|---|---|---|---|---|
| Forward | Reverse | Stock | Upgraded | Stock | Upgraded | ||
| Arcade | Expression error: Unexpected * operator. | 1,327 | Expression error: Unexpected round operator. | __.__ | |||
| Realistic | 757 | Expression error: Unexpected round operator. | __.__ | ||||
Modifications and economy
Armaments
Main armament
| 105 mm L7A3 | Turret rotation speed (°/s) | Reloading rate (seconds) | ||||||||
|---|---|---|---|---|---|---|---|---|---|---|
| Mode | Capacity | Vertical | Horizontal | Stabilizer | Stock | Upgraded | Full | Expert | Aced | Autoloader |
| Arcade | 47 | ±12° | ±180° | Two-plane | 22.8 | 31.6 | 38.4 | 42.5 | 45.2 | 5.00 |
| Realistic | 14.3 | 16.8 | 20.4 | 22.6 | 24.0 | |||||
Ammunition
- DM13; APDS (Armour-Piercing Discarding Sabot) will comfortably penetrate the armour of most foes; be aware however that some vehicles such as the IS-4 or M103 are only vulnerable in specific weak spots. APDS rounds do require some finesse with their placement due to their lack of explosive filler. Unless you're confident you can destroy the enemy before they can respond, you should attempt to disable their weaponry first to ensure your own safety. Against targets with known ammunition storage, it's possible to try to detonate it with a well-placed shot. Keep in mind, however, that ammo detonations always occur with a random chance, so taking out crew members is a more reliable method to destroy your enemies. This, of course, requires knowledge about the vehicles you may face - so be sure to use the game's X-Ray view in the hangar and analyse your potential foes for their weak spots! Also, keep in mind that with increased armour thickness, the amount of shrapnel shrinks.
- DM512; HESH (High-Explosive Squash-Head) works very differently than other shell types. It ignores any angle, except for ricochet and deals damage by metal-flakes which are blown off inside the armour by the exterior explosion. To create this deadly shrapnel inside the tank, make sure to only hit armour plates which are directly adjacent to the interior crew compartment of the tank. Hitting exterior parts of a tank like spaced armour, the suspension, tracks etc. will not harm crew members/modules at all. Unfortunately, HESH is particularly ineffective against particularly high true armour values (as opposed to high 'effective' armour values sourced from highly angled but thin armour - HESH loves angles!). Like all high-explosive shells, the fuse is very sensitive and can be set-off by most objects e.g. fences, trees, shrubbery. The low muzzle velocity of this shell can make it quite hard to hit targets at larger distances, although an experienced tanker may be able to use this to their advantage by lobbing a round over a small defilade or hill. It's also worth noting that HESH can be rather unreliable at times; it's best used as a fall-back ammo, or saved for particularly lightly armoured targets.
- DM12; HEATFS (High-Explosive Anti Tank Fin-Stabilised): Knowledge of potential opponents vehicle layouts can be very handy - as you now have a round at your disposal that can penetrate essentially any vehicle's armour frontally. Like the APDS shot, increased armour thickness results in a reduced amount of shrapnel after penetration. You are able to take out enemies on any distance since the HEAT round does not lose penetration effectiveness with distance - very handy on big scaled maps like Kursk. There is, however, a significant downside to HEATFS. Given that it is a chemical energy round, its fuse is highly sensitive in regards to its practical application in battle. As a result, virtually anything, such as trees or even a fence, will set it off prematurely, so you cannot fire through obstructions with this kind of round. It's often a good idea to clear bushes and fences with your machine guns quickly before taking a shot. Finally, the HEATFS round is relatively expensive in terms of SL, so keep that in mind when loading up.
| Penetration statistics | |||||||
|---|---|---|---|---|---|---|---|
| Ammunition | Type of warhead |
Penetration @ 0° Angle of Attack (mm) | |||||
| 10 m | 100 m | 500 m | 1,000 m | 1,500 m | 2,000 m | ||
| DM13 | APDS | 350 | 347 | 333 | 317 | 302 | 287 |
| DM512 | HESH | 127 | 127 | 127 | 127 | 127 | 127 |
| DM12 | HEATFS | 400 | 400 | 400 | 400 | 400 | 400 |
| Shell details | ||||||||||||
|---|---|---|---|---|---|---|---|---|---|---|---|---|
| Ammunition | Type of warhead |
Velocity (m/s) |
Projectile mass (kg) |
Fuse delay (m) |
Fuse sensitivity (mm) |
Explosive mass (TNT equivalent) (kg) |
Ricochet | |||||
| 0% | 50% | 100% | ||||||||||
| DM13 | APDS | 1,478 | 4 | - | - | - | 75° | 78° | 80° | |||
| DM512 | HESH | 732 | 11.2 | 0.1 | 4 | 4.31 | 73° | 77° | 80° | |||
| DM12 | HEATFS | 1,174 | 10.5 | 0.05 | 0.1 | 1.27 | 65° | 72° | 77° | |||
Ammo racks
| Full ammo |
1st rack empty |
2nd rack empty |
3rd rack empty |
4th rack empty |
5th rack empty |
6th rack empty |
Visual discrepancy |
|---|---|---|---|---|---|---|---|
| 47 | __ (+__) | __ (+__) | __ (+__) | __ (+__) | __ (+__) | __ (+__) | __ |
Notes:
- Shells are modeled individually, and disappear when fired.
Additional armament
| 30 mm HSS 831L | Reloading rate (seconds) | |||||||
|---|---|---|---|---|---|---|---|---|
| Capacity (Belt) | Fire rate | Vertical | Horizontal | Stabilizer | Stock | Full | Expert | Aced |
| 300 (50) | 600 | N/A | N/A | N/A | 15.00 | 15.00 | 15.00 | 15.00 |
Ammunition
- Default: SAP-I · HEI-T*
| Penetration statistics | |||||||
|---|---|---|---|---|---|---|---|
| Ammunition | Penetration @ 0° Angle of Attack (mm) | ||||||
| 10 m | 100 m | 500 m | 1,000 m | 1,500 m | 2,000 m | ||
| SAP-I | 53 | 50 | 39 | 29 | 21 | 16 | |
| HEI-T* | 9 | 8 | 7 | 5 | 4 | 4 | |
| Shell details | ||||||||||||
|---|---|---|---|---|---|---|---|---|---|---|---|---|
| Ammunition | Velocity (m/s) |
Projectile mass (kg) |
Fuse delay (m) |
Fuse sensitivity (mm) |
Explosive mass (TNT equivalent) (g) |
Ricochet | ||||||
| 0% | 50% | 100% | ||||||||||
| SAP-I | 1,080 | 0.36 | 1.2 | 9 | 30.6 | 47° | 56° | 65° | ||||
| HEI-T* | 1,080 | 0.36 | 0.1 | 0.1 | 85 | 79° | 80° | 81° | ||||
Ammo racks
| Full ammo |
1st rack empty |
2nd rack empty |
3rd rack empty |
4th rack empty |
5th rack empty |
6th rack empty |
Visual discrepancy |
|---|---|---|---|---|---|---|---|
| 6 | __ (+__) | __ (+__) | __ (+__) | __ (+__) | __ (+__) | __ (+__) | __ |
Machine guns
| 7.62 mm MG3A1 | ||||
|---|---|---|---|---|
| Mount | Capacity (Belt) | Fire rate | Vertical | Horizontal |
| Pintle | 2,000 (200) | 1,200 | -8°/+25° | ±180° |
Usage in battles
The Turm III has a good amount of firepower, courtesy of both its 105 mm cannon and the 30 mm autocannon. This can be taken advantage of in open areas to quickly penetrate the armour of enemies with APDS. Light vehicles can also easily be penetrated by the 30 mm autocannon, making it easy to spray opponents with the 30 mm while the main armament is reloading. Although the 30 mm has limited elevation, it can still be suitable for anti-aircraft purposes and easily defeats helicopters and aircraft that stray within range.
Due to its weak armour, which is penetrable by most MBTs, it's not necessarily best to use the Turm III to attack head-on. However, it is ahead of most MBTs in terms of mobility, allowing it to rush capture points, get into favourable positions, or quickly retreat into cover when necessary.
Pros and cons
Pros:
- First stage ammo rack houses all of the ammo
- Has a fast autoloader for the main armament
- Has an autocannon for coaxial weapon that can defeat even some MBTs through the side armour
- Two-axis stabilizer, unlike its equivalent counterpart, the Leopard I
- Weak armour can cause some shells to over-penetrate and do almost nothing
- Familiar Leopard 1 chassis
Cons:
- Nearly nonexistent armour
- Ammunition practically fills up the turret ball, making almost any shell that penetrates end up detonating it
- Machine gun cannot aim directly level to the main gun, making it disorienting when you are reloading the 30 mm autocannon and want to spray a lightly armoured target
- Poor gun elevation, making it difficult to use the 30 mm against aircraft
History
Describe the history of the creation and combat usage of the vehicle in more detail than in the introduction. If the historical reference turns out to be too long, take it to a separate article, taking a link to the article about the vehicle and adding a block "/History" (example: https://wiki.warthunder.com/(Vehicle-name)/History) and add a link to it here using the main template. Be sure to reference text and sources by using <ref></ref>, as well as adding them at the end of the article with <references />. This section may also include the vehicle's dev blog entry (if applicable) and the in-game encyclopedia description (under === In-game description ===, also if applicable).
Media
- Skins
See also
- Related development
External links
| Germany medium tanks | |
|---|---|
| Pz.III | Pz.III B · Pz.III E · Pz.III F · Pz.III J · Pz.III J1 · Pz.III J1 TD · Pz.III L · Pz.III M · Pz.III N |
| Pz.IV | Pz.IV C · Pz.IV E · Pz.IV F1 · Pz.IV F2 · Pz.IV G · Pz.IV H · Pz.IV J · Pz.Bef.Wg.IV J |
| Pz.V | VK 3002 (M) · Panther A · Panther D · Panther F · Panther G · Ersatz M10 · Panther II |
| M48 upgrades | M48A2 G A2 · M48 Super |
| Leopard 1 | Leopard I · Leopard A1A1 · Leopard A1A1 (L/44) · Leopard 1A5 · C2A1 · Turm III |
| Leopard 2 | PT-16/T14 mod. · Leopard 2K · Leopard 2AV |
| Leopard 2A4 · Leopard 2 (PzBtl 123) · Leopard 2A4M · Leopard 2 PL · Leopard 2A5 · Leopard 2 PSO · Leopard 2A6 · Leopard 2A7V | |
| Trophies | ▀M4 748 (a) · ▀T 34 747 (r) |
| Other | Nb.Fz. · KPz-70 |
| USA | mKPz M47 G · M48A2 C |
| USSR | ◊T-72M1 |
| Germany premium ground vehicles | |
|---|---|
| Light tanks | Pz.II C (DAK) · Pz.Sfl.Ic · Pz.Sp.Wg.P204(f) KwK · Sd.Kfz. 140/1 · Sd.Kfz.234/1 · Ru 251 · SPz 12-3 LGS · TAM 2IP |
| Medium tanks | Nb.Fz. · Pz.III N · Pz.Bef.Wg.IV J · ▀M4 748 (a) · ▀T 34 747 (r) · Ersatz M10 |
| mKPz M47 G · Turm III · Leopard A1A1 (L/44) · Leopard 2 (PzBtl 123) · Leopard 2A4M | |
| Heavy tanks | ▀Pz.Kpfw. Churchill · ▀KV-IB · ▀KW I C 756 (r) · ▀KW II 754 (r) |
| VK 45.01 (P) · ␠Tiger · Pz.Bef.Wg.VI P · Tiger II (H) Sla.16 | |
| Tank destroyers | Sd.Kfz.234/3 · Sd.Kfz.234/4 · Sd.Kfz.251/10 · Sd.Kfz.251/22 · 15 cm Pz.W.42 |
| Brummbär · Panzer IV/70(A) · VFW · Bfw. Jagdpanther G1 · Elefant · 38 cm Sturmmörser | |


