Leopard A1A1
| This page is about the German medium tank Leopard A1A1. For other versions, see Leopard 1 (Family). For other uses, see Leopard (Disambiguation). |
Contents
Description
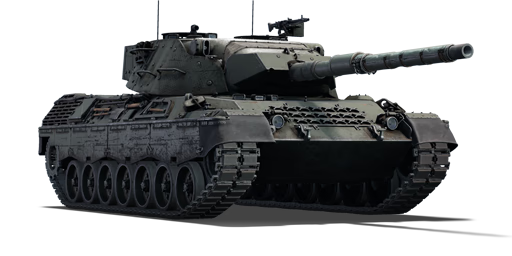
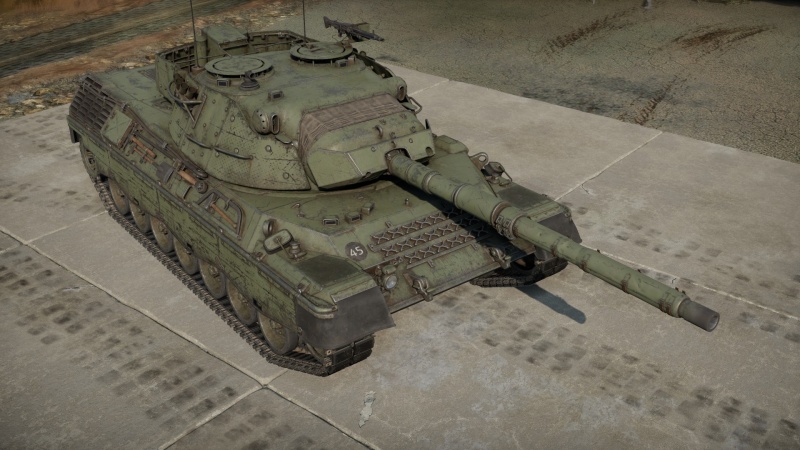
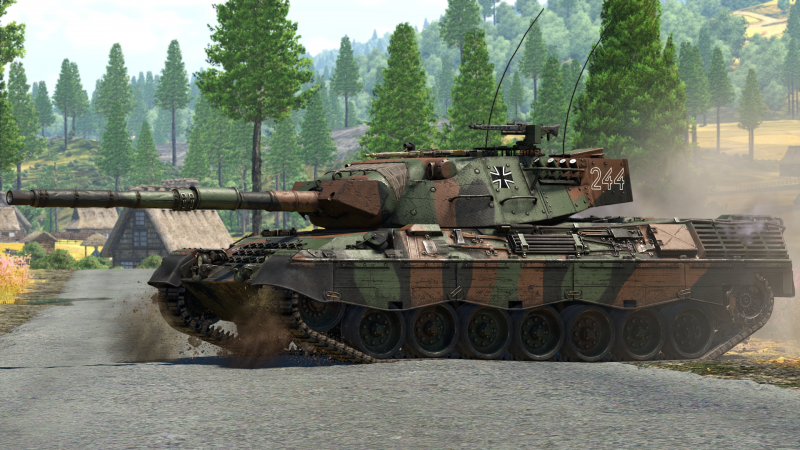
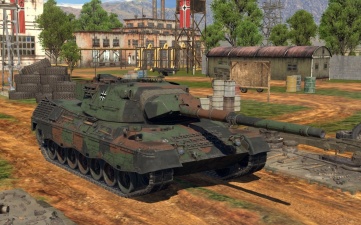
The Leopard 1A1A1 is the first subvariant of the Leopard 1A1, which is the second variant of the Leopard 1 main battle tank family. Following the delivery of the first batch of the Leopard 1 variant, the next three batches were the Leopard 1A1 variant, which had a new tank gun two-plane fully automatic stabilization system from Cadillac Gage, allowing the tank to fire effectively while moving. The Leopard 1A1 received the now-famous "skirts" along the sides to protect the upper tracks, as well as a new thermal jacket on the gun barrel to regulate temperature. A less significant modification was the use of rectangular rubber blocks secured to the treads with a single pin rather than the previous two-pin "shaped" ones. For winter movement on ice and snow, the rubber blocks may be readily replaced with metal X-shaped crampons. All of the tanks in the first four batches received upgrades between 1974 and 1977 to the improved Leopard 1A1 first subvariant standard, the Leopard 1A1A1, which included extra turret armour produced by Blohm & Voss. In the 1980s, the Leopard 1A1A1 received an upgrade with leftover image-intensifier night sights from the Leopard 2 main battle tank family. The Leopard 1A1A2 subvariant was created by mounting the PZB 200 image intensification equipment in a big box on the upper right of the cannon. The Leopard 1A1A3 subvariant was established after an upgrade with SEM80/90 all-digital radios. The Leopard 1A1A4 subvariant was manufactured later as the picture intensifier was improved.
Introduced in Update 1.63 "Desert Hunters", the Leopard 1A1A1 is a refinement of the Leopard 1 design, with marginally enhanced turret protection and, most importantly, a two-plane fully automatic stabilization system. The Leopard 1A1A1 is a swift, powerful, and feral predator that combines agility and lethality on the battlefield. The armour-piercing fin-stabilised discarding sabot (APFSDS) is a new ammunition type that ensures the player always has a firepower advantage over its foes. The Leopard 1A1A1 remains a mobility-focused main battle tank that prioritizes mobility to ensure crew survival on the battlefield. Overall, the Leopard 1A1A1 prioritizes ambush attacks over exchanging shots with adversaries, a trait that will be maintained throughout the Leopard 1 main battle tank family.
General info
Survivability and armour
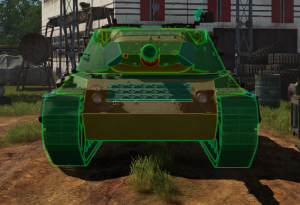
The Leopard A1A1's armour, much like its predecessor, is relatively negligible: designed with the intention of mobility and firepower over survivability, the Leopard will survive hits from little more than 20 mm cannons frontally, and full-calibre rounds will have no trouble penetrating it. As such, the Leopard's armour shouldn't be relied on, even when combating light vehicles such as the M3 Bradley or Warrior IFVs. Notably, the Leopard A1A1's light armour often results in kinetic rounds penetrating the vehicle without significant damage being caused, allowing it surprising survivability against rounds such as APFSDS. It is, however, particularly vulnerable to chemical or HE-filled rounds. The A1A1 does utilise some add-on armour in locations (noticeable on the UFP and the gun mantlet) which slightly increases its survivability against some autocannons.
Armour type:
- Rolled homogeneous armour (Hull, Turret roof)
- Cast homogeneous armour (Turret)
| Armour | Front (Slope angle) | Sides (Slope angle) | Rear | Roof |
|---|---|---|---|---|
| Hull | 70 mm (60°) Front glacis 50 mm (50°) Bottom glacis |
35 (39-41°) mm Top hull side 30 + 5 mm Bottom hull side |
25 mm (14-48°) | 30 mm Front area 15 mm Rear area |
| Turret | 65 + 35 mm Turret front 45-200 + 35 mm Gun mantlet |
37-45 + 10-20 mm | 38-52 + 10 mm | 25-35 mm Turret roof 20 mm Cupola area |
Notes:
- Suspension wheels and tracks are 20 mm thick.
- The turret mantlet has a varying thickness of 45 - 200 mm thick. It is thickest near the center.
- 20 mm of track armour added onto front hull glacis
- Additional spaced armour is added to the turret, 35 mm on the front and 20 to 10 mm on the sides and rear
- Hull roof is rated to be 54 mm effective against HE.
Mobility
| Game Mode | Max Speed (km/h) | Weight (tons) | Engine power (horsepower) | Power-to-weight ratio (hp/ton) | |||
|---|---|---|---|---|---|---|---|
| Forward | Reverse | Stock | Upgraded | Stock | Upgraded | ||
| Arcade | Expression error: Unexpected * operator. | 1,286 | Expression error: Unexpected round operator. | __.__ | |||
| Realistic | 734 | Expression error: Unexpected round operator. | __.__ | ||||
The Leopard A1A1, while somewhat heavier than its predecessor, still displays reasonably good mobility with a power to weight ratio of 19.57 when upgraded. Despite this, it will regularly face faster competitors - of note, the XM-1 (GM) and the OF-40 (MTCA). The mobility should not be overestimated - but it often is acceptable for flanking manoeuvres or quickly moving into advantageous positions.
Modifications and economy
After the Parts and FPE modules are researched, the NVD modification and the DM23 are the priority for research. These drastically improve the Leopard's lethality. After that, the Rangefinder module may be useful for those looking for a long-range sniping playstyle. The Smoke grenade module and mobility upgrades are useful in a more close-up playstyle.
Armaments
Main armament
The Leopard A1A1 mounts a late-generation L7 cannon. With the addition of a two-plane stabilizer, this gun can be easily used on the move, it also negates the gun 'bounce' when stopping. The A1A1 also has the optional DM23 APFSDS available as a tier 4 upgrade, with improved penetration values and ballistics. These combined make the Leopard a tank to be reckoned with.
| 105 mm L7A3 | Turret rotation speed (°/s) | Reloading rate (seconds) | |||||||||||
|---|---|---|---|---|---|---|---|---|---|---|---|---|---|
| Mode | Capacity | Vertical | Horizontal | Stabilizer | Stock | Upgraded | Full | Expert | Aced | Stock | Full | Expert | Aced |
| Arcade | 60 | -9°/+20° | ±180° | Two-plane | 22.85 | 31.62 | 38.40 | 42.46 | 45.18 | 8.71 | 7.70 | 7.10 | 6.70 |
| Realistic | 14.28 | 16.80 | 20.40 | 22.60 | 24.00 | ||||||||
Ammunition
- DM13; APDS - (Armour-Piercing Discarding Sabot) is capable of penetrating the majority of the foes it meets, but these rounds do require finesse as to their placing. Because the shell lacks an explosive filler, your best bet is to try and either knock out the majority of the enemy tank's crew or to destroy the enemy by ammo or fuel detonation through hitting their respective storage capacities. Keep in mind though that ammo and fuel detonations always occur with a random chance, taking out crew members is more reliable to destroy your enemies. This, of course, requires knowledge about the vehicles you may face - so be sure to use the X-Ray view in the hangar and analyse your potential foes for their weak spots! Also, keep in mind that with increased armour thickness the amount of shrapnel shrinks.
- DM512; HESH - (High-Explosive Squash-Head) works very differently to other shell types. It ignores any angle, except for ricochet, and deals damage by metal-flakes which are blown off inside the armour by the exterior explosion. To create this deadly shrapnel inside the tank, make sure to only hit armour plates which are a direct part of the interior crew compartment of the tank. Hitting exterior parts of a tank like spaced armour, the suspension, tracks etc. will not harm crew members/modules at all. Currently, only true armour thickness (as opposed to the line of sight thickness) will provide sufficient means of protection, benefitting the USSR turret designs and in general German tanks. Like all high-explosive shells, the fuse is very sensitive and can be set-off by most objects e.g. fences, trees, pillars. The slow muzzle velocity of this shell can make it quite hard to hit targets at longer distances, but at the same time it can be handy because its arc trajectory, allows it to land hits on enemies hiding behind shallow hills.
- DM12; HEATFS - (High-Explosive Anti Tank Fin Stabilized): Knowledge of potential opponents vehicle layouts will be very handy to use - as you now have a round at your disposal that can penetrate any vehicle's armour frontally. Like the APDS shot, increased armour thickness results in reduced amount of spalling (shrapnel) after penetration. You are able to take out enemies on any distance, since the HEAT round does not lose penetration with distance travelled - very handy on large maps like Kursk. Unlike APDS it has one downside: given that it is a chemical round, its fuse is highly sensitive in regards to its practical application in battle. As a result, virtually anything, such as trees or even a fence, will set it off prematurely, so you cannot fire through obstructions with this kind of round.
- DM23; APFSDS - (Armour-Piercing Fin-Stabilized Discarding Sabot) is the best ammunition choice for the battle rating. It has great muzzle velocity and can penetrate almost every opponent frontally with ease, with the T-64B and IS-7 being the exceptions.
| Penetration statistics | |||||||
|---|---|---|---|---|---|---|---|
| Ammunition | Type of warhead |
Penetration @ 0° Angle of Attack (mm) | |||||
| 10 m | 100 m | 500 m | 1,000 m | 1,500 m | 2,000 m | ||
| DM13 | APDS | 350 | 347 | 333 | 317 | 302 | 287 |
| DM512 | HESH | 127 | 127 | 127 | 127 | 127 | 127 |
| DM12 | HEATFS | 400 | 400 | 400 | 400 | 400 | 400 |
| DM23 | APFSDS | 337 | 335 | 330 | 322 | 314 | 306 |
| Shell details | ||||||||||||
|---|---|---|---|---|---|---|---|---|---|---|---|---|
| Ammunition | Type of warhead |
Velocity (m/s) |
Projectile mass (kg) |
Fuse delay (m) |
Fuse sensitivity (mm) |
Explosive mass (TNT equivalent) (kg) |
Ricochet | |||||
| 0% | 50% | 100% | ||||||||||
| DM13 | APDS | 1,478 | 4 | - | - | - | 75° | 78° | 80° | |||
| DM512 | HESH | 732 | 11.2 | 0.1 | 4 | 4.31 | 73° | 77° | 80° | |||
| DM12 | HEATFS | 1,174 | 10.5 | 0.05 | 0.1 | 1.27 | 65° | 72° | 77° | |||
| DM23 | APFSDS | 1,455 | 4.2 | - | - | - | 78° | 80° | 81° | |||
Ammo racks
| Full ammo |
1st rack empty |
2nd rack empty |
3rd rack empty |
4th rack empty |
5th rack empty |
Visual discrepancy |
|---|---|---|---|---|---|---|
| 60 | 57 (+3) | 54 (+6) | 15 (+45) | 12 (+48) | 1 (+59) | No |
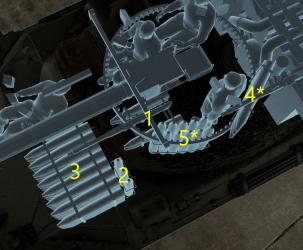
Machine guns
The Leopard A1A1 mounts one coaxial 7.62 mm machine gun and one pintle-mounted 7.62 mm machine gun. These both have particularly high rates of fire, and can be used as a deterrent for close air support as well as clearing light obstacles and crew in open-top vehicles.
| 7.62 mm MG3A1 | ||||
|---|---|---|---|---|
| Mount | Capacity (Belt) | Fire rate | Vertical | Horizontal |
| Coaxial | 5,000 (200) | 1,200 | N/A | N/A |
| Pintle | 2,000 (200) | 1,200 | -8°/+20° | ±120° |
Usage in battles
The recommended usage is the Hit and Run tactic. Try to avoid detection.
Scan and use the terrain to your advantage. Take into consideration the moderate vehicle height, which allows you to go turret down in certain locations, allowing you to safely use your commander's binoculars to locate targets! Then, after you have located the enemy, fire a few rounds in quick succession and relocate when spotted, especially when the enemy shots come dangerously close. The Leopard is quite fast, so taking hits from a distance while on the move is a risk that you may consider worth taking.
Always remember: The Leopard is not designed to take hits from large calibre guns, nor fight in stand-off situations against heavier enemy vehicles. Frontally, the angle of the hull can bounce shots once in awhile, but you're better off not to rely on this. The turret front is also the same, it's best to attempt to only fire when you can avoid receiving a shot or relocating to a position if possible. The main goal is to make the opponent incapable of returning fire. The majority of Soviet rank V tanks (IS-3, IS-4M, T-10M, T-54s, SU-122-54, T-62 or ZSU-57-2) gunners are disabled by penetrating the right side of the turret or hull, if they are faced towards you. If you have the possibility to hit a Soviet tanks hull, which is again faced towards you, prioritize it because it is likely to take it out with one shot to the right side of the hull (3 out of 4 crew members are sitting in a row). American top tier tanks like the M103, M47 or M60 are harder to take out. It is advised to take out the gunner first, which is located on the left side of the turret and then take out the rest of the remaining crew members. Hitting the ammo rack of your opponent is often the fastest way to take out an enemy vehicle, keep in mind though there is a small chance the ammo will not blow up (Best ammo types to ammo rack: HEATFS > APDS > HESH).
Sometimes moving is not an option, but remember, directly behind your hull front sits a large portion of your ammunition, at least if you're fully loaded. Always have that in mind when positioning yourself against the enemy - and don't forget that you don't have to stack all of your ammunition racks to their maximum capacity! Sometimes it can be wise to take less ammunition with you, as it will increase your survivability when taking hits - especially with the Leopard. The Leopard's worst nemeses are the ZSU-57-2 and the IT-1. The ZSU-57-2 can be easily killed if hitting one of the many ammo racks in the big turret, which most often leads to an explosion of the whole tank. The IT-1 on the other hand can be quite hard to deal with, since they are able to operate perfectly hull down only exposing the roof mounted ATGM. Hitting (only black damage status counts, red damage does not prevent from firing ATGM) the rocket mount/cannon barrel forces the IT-1 to repair for a whole 27 seconds (maxed out + expert crew). To perform a full 360° turn use the neutral (N) or third (3) gear (~11 sec).
In a nutshell: Use the superb mobility with the cannon's perfection to flank and spank enemies, wait and hunt for the perfect positions and kill the enemy tanks one by one, while always maintaining a good situational awareness. Patience is the key to success. That is the Leopard 1, a perfect tactical MBT!
Pros and cons
Pros:
- Fast, agile, and a relatively good acceleration
- Very efficient and flat-shooting DM23 APFSDS shell
- Good optics providing a nice zoom for longer distances
- Wide gun depression and elevation, good slew and elevation rates
- Better fire on the move accuracy due to its good stabilizer
- Side skirts provide additional spaced armour, which protects against HESH shells as well as some heavier MG/autocannon fire, and can help bounce bigger shells
Cons:
- Extra armour increases weight - slightly reducing mobility
- Insufficient armour (basically a glass cannon) for protection
- APFSDS is tier 3 modification - there is a long grind with APDS and HEATFS before it is unlocked
- Ammo rack in the front - a very easy target, and if more ammo than minimum is carried, the tank will blow up once the ammo is struck
- No available heavy machine gun, often helpless against helicopter attacks
- Small internal compartment (only 4 crew members) - a penetrating hit, which happens more often than a nonpenetrating one, can easily disable the tank by killing three crew members
- Stock APDS is rather lacklustre, especially against angled Soviet armour
- Bad gun elevation speed
History
Development
The project for the Leopard started as far back as 1956 as an attempt to replace the American M47 and M48 Patton tanks in service at the time as they were becoming outdated to newer anti-tank technology. Specifications for the new tank came in July 1957 asking for a design weighing no more than 30 tons, with a power-to-weight ratio of 30 horsepower per ton and could withstand 20 mm gunfire alongside protection against chemical weapons and radiation fallout, which was becoming extremely common protection system for the modern tank designs. The design stressed mobility as the main focus, while firepower comes next and armour was relegated to minimum priority. The lack of focus on armour was because of the belief that no matter how much armour a tank can have, it will eventually fall obsolete to the advent of newer anti-tank weapons such as the HEAT rounds, which was becoming stronger and stronger by the years.
In the initial stages of development, France, and West Germany, interested in this tank design, worked on it from 1957 to build a common tank and the project was designated the Europa-Panzer. France had AMX, SLD Lorraine, and SOMUA with FCM Renault working on the project, while Germany had Porsche, Rheinmetall with Henschel, and Borgward working on the project. In 1958, Italy entered into the development as well, though it's not sure if they provided much to the program. By 1960, Porsche and Rheinmetall had prototypes submitted, as well as AMX from France, all the others failed to provide a prototype in time. In 1963, the Porsche prototype was selected as the winner in 1963, though even before this decision the vehicle already has priority in being built in greater number than the others. Though a tank is set, France and Germany split in the joint tank project in 1963 after France opted out of standardization with the NATO forces. This left Germany alone with their Leopard tank development, which they continued.
The Porsche Prototype II was well received, though changes were made to the design such as a new cast turret, hull design change, and relocating the radiators. The tank now mounted the 105 mm L7 gun over the Rheinmetall design, as well as adding an optical range-finding system for increased gunnery. The design finished trials by the end of 1963 and production started in Munich in February 1964. The first batches began arriving to the Bundeswehr (German Army) in September of 1965 and were put into units by November of that same year. The tank was finally designated the Leopard 1, with the prototype stage labelled as the Leopard 1A0.
Usage
After the first delivery, many upgrades were made on the tank throughout its production and service life. The first few Leopards were designated Leopard 1A1 and continued all the way to Leopard 1A6 as it incorporates new technology such as sights, gun, radios, armour, or even small upgrades or redesigns on some parts. Some of these Leopards are even upgraded further in each variant form, for example, the Leopard 1A1A1 which had it fitted with new turret armour and night sights. Other than the different variants, the Leopard 1 was also extensively modified or made into derivatives in roles such as anti-aircraft guns, armour recovery vehicles, bridge layers, and such.
The versatility of the Leopard 1 design and its rather cheap cost in comparison to other tanks at the time made it a useful tank and it was sought out by many different countries in and out of the NATO force group. These countries put them into service in the conflict, such as Denmark, which is believed to be the first country to use the Leopard 1 in hostile engagement, when going against Bosnian Serb forces. Canada also used the Leopard 1 extensively in the War in Afghanistan in 2006 as convoy protection units. Greece also had Leopard 1s and is the largest user of it, with over 500 units of Leopard 1A5s in service.
The Leopard 1 versatility and widespread use compared to other tanks in the NATO service made it a very useful weapon system for armies that couldn't afford the new American Pattons or Abrams tanks or the British Challengers and Chieftains. The Leopard 1 in German service was eventually replaced by the Leopard 2 design, which entered into service in 1979 as the main battle tank with better armour and better gun compared to the Leopard 1, fully replacing it in 2003. Other countries followed suit by upgrading their tanks to either the Leopard 2, the American M1 Abrams, or their own domestic tank designs. The vehicle in its various modernized forms are still operated by third parties such as Canada, Brazil, Turkey, and Greece. Some are kept in reserve in Chile and Ecuador due to their light frames and ease of use in soft soils like in the jungles in their countries.
Media
- Skins
- Images
- Videos
See also
- Leopard A1A1 (L/44) - premium version of the vehicle
External links
| Krauss-Maffei Wegmann (KMW) | |
|---|---|
| MBTs | |
| Leopard 1 | Leopard I · Leopard A1A1 · Leopard A1A1 (L/44) · Leopard 1A5 · C2A1 |
| Leopard 2 | PT-16/T14 mod. · Leopard 2K · Leopard 2A4 · Leopard 2 (PzBtl 123) · Leopard 2A4M · Leopard 2 PL · Leopard 2A5 · Leopard 2 PSO · Leopard 2A6 · Leopard 2A7V |
| KPz-70 | KPz-70* |
| *By the Deutsche Entwicklungsgesellschaft consortium, in collaboration with the General Motors Company. | |
| IFVs | PUMA |
| SPAAs | Gepard · Gepard 1A2 |
| Export | |
| Leopard 1 | ▄Leopard 1A5 · Leopard 1A5NO2 |
| Leopard 2 | Strv 121 · ▄Leopard 2A4 · ◔Leopard 2A4 · ▄Leopard 2A6 · Leopard 2A7HU |
| See Also | BAE Systems AB |
| Germany medium tanks | |
|---|---|
| Pz.III | Pz.III B · Pz.III E · Pz.III F · Pz.III J · Pz.III J1 · Pz.III J1 TD · Pz.III L · Pz.III M · Pz.III N |
| Pz.IV | Pz.IV C · Pz.IV E · Pz.IV F1 · Pz.IV F2 · Pz.IV G · Pz.IV H · Pz.IV J · Pz.Bef.Wg.IV J |
| Pz.V | VK 3002 (M) · Panther A · Panther D · Panther F · Panther G · Ersatz M10 · Panther II |
| M48 upgrades | M48A2 G A2 · M48 Super |
| Leopard 1 | Leopard I · Leopard A1A1 · Leopard A1A1 (L/44) · Leopard 1A5 · C2A1 · Turm III |
| Leopard 2 | PT-16/T14 mod. · Leopard 2K · Leopard 2AV |
| Leopard 2A4 · Leopard 2 (PzBtl 123) · Leopard 2A4M · Leopard 2 PL · Leopard 2A5 · Leopard 2 PSO · Leopard 2A6 · Leopard 2A7V | |
| Trophies | ▀M4 748 (a) · ▀T 34 747 (r) |
| Other | Nb.Fz. · KPz-70 |
| USA | mKPz M47 G · M48A2 C |
| USSR | ◊T-72M1 |


