Difference between revisions of "TOG II"
U132149638 (talk | contribs) (edited my edit a bit.) (Tag: Visual edit) |
|||
| Line 12: | Line 12: | ||
{{Specs-Tank-Armour}} | {{Specs-Tank-Armour}} | ||
<!-- ''Describe armour protection. Note the most well protected and key weak areas. Appreciate the layout of modules as well as the number and location of crew members. Is the level of armour protection sufficient, is the placement of modules helpful for survival in combat? If necessary use a visual template to indicate the most secure and weak zones of the armour.'' -->[[File:Tog II Front Armor Potential Weakspts.png|alt=With the GWP modification enabled, the potential weakspots are highlighted in red|thumb|Potential Weak spots Highlighted in Red with GWP modification Installed]] | <!-- ''Describe armour protection. Note the most well protected and key weak areas. Appreciate the layout of modules as well as the number and location of crew members. Is the level of armour protection sufficient, is the placement of modules helpful for survival in combat? If necessary use a visual template to indicate the most secure and weak zones of the armour.'' -->[[File:Tog II Front Armor Potential Weakspts.png|alt=With the GWP modification enabled, the potential weakspots are highlighted in red|thumb|Potential Weak spots Highlighted in Red with GWP modification Installed]] | ||
| − | Now while the TOG II's armor may seem sufficient, in reality you are going to have to angle to increase your survivability. In terms of weak spots, the TOG II is nearly devoid of any such weak spots, besides the turret cheeks | + | |
| + | Now while the TOG II's armor may seem sufficient, in reality you are going to have to angle to increase your survivability. In terms of weak spots, the TOG II is nearly devoid of any such weak spots, besides the turret cheeks which are 38mm thinner than the middle of the turret face. If you decide to equip the TOG II GWP modification, than you gain a extra two weak spots and a extra vulnerability. This is of course the two sponsons on the sides and the smoke launcher. Despite the sponsons having the same thickness as the side armor, it is big weak spot when angling effectively ruling angling as an option. It is Highly recommended to keep the GWP modification uninstalled for the highest chance of surviving a encounter. | ||
'''Armour type:''' <!-- The types of armour present on the vehicle and their general locations --> | '''Armour type:''' <!-- The types of armour present on the vehicle and their general locations --> | ||
| Line 145: | Line 146: | ||
== Usage in battles == | == Usage in battles == | ||
<!-- ''Describe the tactics of playing in the vehicle, the features of using vehicles in the team and advice on tactics. Refrain from creating a "guide" - do not impose a single point of view but instead give the reader food for thought. Describe the most dangerous enemies and give recommendations on fighting them. If necessary, note the specifics of the game in different modes (AB, RB, SB).'' --> | <!-- ''Describe the tactics of playing in the vehicle, the features of using vehicles in the team and advice on tactics. Refrain from creating a "guide" - do not impose a single point of view but instead give the reader food for thought. Describe the most dangerous enemies and give recommendations on fighting them. If necessary, note the specifics of the game in different modes (AB, RB, SB).'' --> | ||
| − | '''Play style:''' | + | '''Play style:''' |
| − | '''Ammunition:''' | + | In general, you should play this tank like any other land ship: slowly make your way to the front line, destroy everything, and make sure you have backup just in case. Despite having a slow speed, you have a reverse gear box, enabling you to "swiftly" retreat if you must. A important thing to keep in mind is that you should try not to over extend, doing so will likely end your game with you becoming surrounded and unable to retreat. With the side armour as a huge weak spot, all someone has to do is to shoot that the frontal third to the side and your entire crew being blown to smithereens, most of the time. One option available to the player is to enter the battle facing backwards, with the tank's rear towards the enemies with the transmission and engine soaking up damages for the cost of extra module damage and vastly reduced gun depression. This is up to the player's descretion however |
| + | |||
| + | |||
| + | '''Ammunition:''' | ||
| + | |||
| + | One important thing to keep in mind is that your tank is given two shells: high-explosives and solid shot. It is recommended to bring 26 shells as this will put all your ammunition under your turret crew, this will greatly improve your survivability. However, the sheer size of the ammunition mean that it is still likely the ammunition can be hit and cook-off, destroying the TOG II tank. | ||
'''Defensive Capabilities:''' With a fast turret traverse, it will be quite easy to react to incoming threats. Even though your crew are all bunched up, it is surprisingly easy to avoid too many losses due to the sheer size of the tank itself. As a side note, you are defenseless against CAS due to your size and speed so expect to be bombed. | '''Defensive Capabilities:''' With a fast turret traverse, it will be quite easy to react to incoming threats. Even though your crew are all bunched up, it is surprisingly easy to avoid too many losses due to the sheer size of the tank itself. As a side note, you are defenseless against CAS due to your size and speed so expect to be bombed. | ||
| + | |||
| + | For improved survivability, uninstall the GWP modification. This is because not only it introduces weaknesses as described in the armour section, but the modification also introduces a different ammunition rack arrangement that causes the front to be filled with ammo, which makes them easier to be hit and detonate the tank. | ||
'''Notable Enemies:''' | '''Notable Enemies:''' | ||
| − | * ISU-122: Big gun and notable | + | * ISU-122: Big gun and notable armour. It is recommended to try to ambush it or attack when it is distracted or reloading. |
| − | * SU- | + | * SU-85M: Their gun is able to penetrate you at close and medium range. Try to shoot first. |
| − | * Waffentrager: Able to | + | * Waffentrager: Able to penetrate you anywhere, with devastating post-penetration damage. Try to hit its ammo. |
| − | * Tiger I: Big gun, good | + | * Tiger I: Big gun, good armour when it's angling. Try to shoot first. |
| − | * M4/T26: Can | + | * M4/T26: Can penetrate the TOG II almost anywhere. Shoot the ammo rack. |
| − | * | + | * M36 GMC: Good gun, shoot at its ammo rack. |
| − | * M4A4(SA50): Good gun, but it's a | + | * M4A4(SA50): Good gun, but it's a Sherman so you can just shoot centre mass. |
=== Pros and cons === | === Pros and cons === | ||
| Line 174: | Line 182: | ||
* Has 8 crew members. | * Has 8 crew members. | ||
* Fast reload for a gun of this calibre | * Fast reload for a gun of this calibre | ||
| − | |||
'''Cons:''' | '''Cons:''' | ||
| Line 184: | Line 191: | ||
* The vehicles is absolutely huge. | * The vehicles is absolutely huge. | ||
* Due to its huge size and low speed, the tank is an easy prey for aircraft. | * Due to its huge size and low speed, the tank is an easy prey for aircraft. | ||
| − | * Even though the tank is huge, the crew is all very close together in the front under the | + | * Even though the tank is huge, the crew is all very close together in the front under the turret, which means the tank can be knocked out by one well aimed APHE shell. |
* Huge engine and transmission, making them easy targets. | * Huge engine and transmission, making them easy targets. | ||
Revision as of 07:46, 18 December 2023


Contents
Description
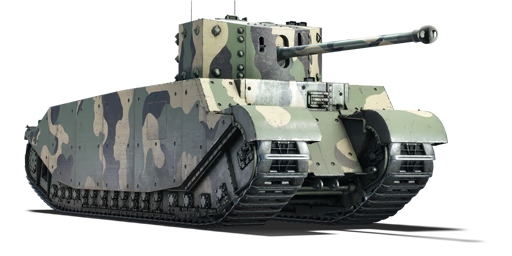
The TOG II is a premium gift rank British heavy tank with a battle rating of (AB), (RB), and (SB). It was introduced during Update "Kings of Battle" as the reward for the "Dreams Come True" 11th Anniversary event.
General info
Survivability and armour

Now while the TOG II's armor may seem sufficient, in reality you are going to have to angle to increase your survivability. In terms of weak spots, the TOG II is nearly devoid of any such weak spots, besides the turret cheeks which are 38mm thinner than the middle of the turret face. If you decide to equip the TOG II GWP modification, than you gain a extra two weak spots and a extra vulnerability. This is of course the two sponsons on the sides and the smoke launcher. Despite the sponsons having the same thickness as the side armor, it is big weak spot when angling effectively ruling angling as an option. It is Highly recommended to keep the GWP modification uninstalled for the highest chance of surviving a encounter.
Armour type:
| Armour | Front (Slope angle) | Sides | Rear | Roof |
|---|---|---|---|---|
| Hull | ___ mm | ___ mm Top ___ mm Bottom |
___ mm | ___ - ___ mm |
| Turret | ___ - ___ mm Turret front ___ mm Gun mantlet |
___ - ___ mm | ___ - ___ mm | ___ - ___ mm |
| Cupola | ___ mm | ___ mm | ___ mm | ___ mm |
Notes:
Mobility
| Game Mode | Max Speed (km/h) | Weight (tons) | Engine power (horsepower) | Power-to-weight ratio (hp/ton) | ||||
|---|---|---|---|---|---|---|---|---|
| Forward | Reverse | Stock | AoA | Stock | Upgraded | Stock | Upgraded | |
| Arcade | 72.5 | 5 | 775 | 10.69 | __.__ | |||
| Realistic | 531 | 7.32 | __.__ | |||||
Modifications and economy
Armaments
Main armament
| 94 mm 28pdr OQF | Turret rotation speed (°/s) | Reloading rate (seconds) | |||||||||||
|---|---|---|---|---|---|---|---|---|---|---|---|---|---|
| Mode | Capacity | Vertical | Horizontal | Stabilizer | Stock | Upgraded | Full | Expert | Aced | Stock | Full | Expert | Aced |
| Arcade | 68 | -10°/+20° | ±180° | - | 26.7 | 37.0 | 44.9 | 49.6 | 52.8 | 7.80 | 6.90 | 6.36 | 6.00 |
| Realistic | 19.6 | 23.1 | 28.1 | 31.0 | 33.0 | ||||||||
Ammunition
| Penetration statistics | |||||||
|---|---|---|---|---|---|---|---|
| Ammunition | Type of warhead |
Penetration @ 0° Angle of Attack (mm) | |||||
| 10 m | 100 m | 500 m | 1,000 m | 1,500 m | 2,000 m | ||
| Shot Mk.1 | APCBC | 204 | 202 | 192 | 180 | 169 | 159 |
| Shell Mk.1 | HE | 13 | 13 | 13 | 13 | 13 | 13 |
| Shell details | ||||||||||||
|---|---|---|---|---|---|---|---|---|---|---|---|---|
| Ammunition | Type of warhead |
Velocity (m/s) |
Projectile mass (kg) |
Fuse delay (m) |
Fuse sensitivity (mm) |
Explosive mass (TNT equivalent) (g) |
Ricochet | |||||
| 0% | 50% | 100% | ||||||||||
| Shot Mk.1 | APCBC | 792 | 14.5 | - | - | - | 48° | 63° | 71° | |||
| Shell Mk.1 | HE | 792 | 12.7 | 0.4 | 0.5 | 920 | 79° | 80° | 81° | |||
Ammo racks
| Full ammo |
1st rack empty |
2nd rack empty |
3rd rack empty |
4th rack empty |
5th rack empty |
6th rack empty |
Visual discrepancy |
|---|---|---|---|---|---|---|---|
| 68 | __ (+__) | __ (+__) | __ (+__) | __ (+__) | __ (+__) | __ (+__) | __ |
Additional armament
| 76 mm OQF 3-inch Howitzer Mk I | Turret rotation speed (°/s) | Reloading rate (seconds) | |||||||||||
|---|---|---|---|---|---|---|---|---|---|---|---|---|---|
| Mode | Capacity | Vertical | Horizontal | Stabilizer | Stock | Upgraded | Full | Expert | Aced | Stock | Full | Expert | Aced |
| Arcade | 45 | ±3° | ±4° | - | 12 | 17 | 20 | 23 | 24 | 8.1 | 7.2 | 6.6 | 6.2 |
| Realistic | 8.9 | 11 | 13 | 14 | 15 | ||||||||
Ammunition
| Smoke shell characteristics | ||||||
|---|---|---|---|---|---|---|
| Ammunition | Velocity (m/s) |
Projectile mass (kg) |
Screen radius (m) |
Screen deploy time (s) |
Screen hold time (s) |
Explosive mass (TNT equivalent) (g) |
| 3-inch Smoke | 210 | 3.18 | 9 | 5 | 20 | 8 |
Ammo racks
| Full ammo |
1st rack empty |
2nd rack empty |
3rd rack empty |
4th rack empty |
5th rack empty |
6th rack empty |
Visual discrepancy |
|---|---|---|---|---|---|---|---|
| 45 | __ (+__) | __ (+__) | __ (+__) | __ (+__) | __ (+__) | __ (+__) | __ |
Machine guns
| 7.92 mm BESA | ||||
|---|---|---|---|---|
| Mount | Capacity (Belt) | Fire rate | Vertical | Horizontal |
| Coaxial | 4,950 (225) | 600 | - | - |
Usage in battles
Play style:
In general, you should play this tank like any other land ship: slowly make your way to the front line, destroy everything, and make sure you have backup just in case. Despite having a slow speed, you have a reverse gear box, enabling you to "swiftly" retreat if you must. A important thing to keep in mind is that you should try not to over extend, doing so will likely end your game with you becoming surrounded and unable to retreat. With the side armour as a huge weak spot, all someone has to do is to shoot that the frontal third to the side and your entire crew being blown to smithereens, most of the time. One option available to the player is to enter the battle facing backwards, with the tank's rear towards the enemies with the transmission and engine soaking up damages for the cost of extra module damage and vastly reduced gun depression. This is up to the player's descretion however
Ammunition:
One important thing to keep in mind is that your tank is given two shells: high-explosives and solid shot. It is recommended to bring 26 shells as this will put all your ammunition under your turret crew, this will greatly improve your survivability. However, the sheer size of the ammunition mean that it is still likely the ammunition can be hit and cook-off, destroying the TOG II tank.
Defensive Capabilities: With a fast turret traverse, it will be quite easy to react to incoming threats. Even though your crew are all bunched up, it is surprisingly easy to avoid too many losses due to the sheer size of the tank itself. As a side note, you are defenseless against CAS due to your size and speed so expect to be bombed.
For improved survivability, uninstall the GWP modification. This is because not only it introduces weaknesses as described in the armour section, but the modification also introduces a different ammunition rack arrangement that causes the front to be filled with ammo, which makes them easier to be hit and detonate the tank.
Notable Enemies:
- ISU-122: Big gun and notable armour. It is recommended to try to ambush it or attack when it is distracted or reloading.
- SU-85M: Their gun is able to penetrate you at close and medium range. Try to shoot first.
- Waffentrager: Able to penetrate you anywhere, with devastating post-penetration damage. Try to hit its ammo.
- Tiger I: Big gun, good armour when it's angling. Try to shoot first.
- M4/T26: Can penetrate the TOG II almost anywhere. Shoot the ammo rack.
- M36 GMC: Good gun, shoot at its ammo rack.
- M4A4(SA50): Good gun, but it's a Sherman so you can just shoot centre mass.
Pros and cons
Summarise and briefly evaluate the vehicle in terms of its characteristics and combat effectiveness. Mark its pros and cons in a bulleted list. Try not to use more than 6 points for each of the characteristics. Avoid using categorical definitions such as "bad", "good" and the like - use substitutions with softer forms such as "inadequate" and "effective".
Pros:
- Good survivability when driving with the rear part forwards.
- The AP shell has quite good penetration for its battle rating.
- The tank has a reverse gear box, giving it the same speed in both directions.
- The turret and track traverse speeds are surprisingly good, especially for the size of the vehicle.
- The side of the vehicle has decent armor values, making armor angling and side scraping a viable tactic to improve the vehicles survivability.
- Has 8 crew members.
- Fast reload for a gun of this calibre
Cons:
- One of the slowest vehicles in the game.
- The TOG II GWP modification also gives the vehicle side sponsons, which create a big weak spot to its side armor, making side scraping an unusable tactic.
- The cannon only has 1 anti armor shell, an AP round, which means you rarely oneshot vehicles.
- The turret armor is not very thick, and isnt angled, which makes it a big weakspot.
- The vehicles is absolutely huge.
- Due to its huge size and low speed, the tank is an easy prey for aircraft.
- Even though the tank is huge, the crew is all very close together in the front under the turret, which means the tank can be knocked out by one well aimed APHE shell.
- Huge engine and transmission, making them easy targets.
History
Describe the history of the creation and combat usage of the vehicle in more detail than in the introduction. If the historical reference turns out to be too long, take it to a separate article, taking a link to the article about the vehicle and adding a block "/History" (example: https://wiki.warthunder.com/(Vehicle-name)/History) and add a link to it here using the main template. Be sure to reference text and sources by using <ref></ref>, as well as adding them at the end of the article with <references />. This section may also include the vehicle's dev blog entry (if applicable) and the in-game encyclopedia description (under === In-game description ===, also if applicable).
Media
Excellent additions to the article would be video guides, screenshots from the game, and photos.
See also
Links to the articles on the War Thunder Wiki that you think will be useful for the reader, for example:
- reference to the series of the vehicles;
- links to approximate analogues of other nations and research trees.
External links
Paste links to sources and external resources, such as:
- topic on the official game forum;
- other literature.
| Britain heavy tanks | |
|---|---|
| Matilda | Matilda III · Matilda Hedgehog |
| Churchill | Churchill I · Churchill III · Churchill VII · Churchill Crocodile · Churchill NA75 · Black Prince |
| Post-war | Caernarvon · Conqueror |
| Other | Independent · Excelsior · TOG II |
| Britain premium ground vehicles | |
|---|---|
| Light tanks | A13 Mk I (3rd R.T.R.) · A13 Mk II 1939 · AEC Mk II · Crusader "The Saint" · Rooikat 105 |
| Medium tanks | A.C.I · Grant I · Cromwell V (RP-3) · Sherman IC "Trzyniec" · A.C.IV · Comet I "Iron Duke IV" |
| Centurion Mk.2 · ▄Strv 81 (RB 52) · Centurion Mk.5 AVRE · Centurion Mk.5/1 · ▄Sho't Kal Dalet · Centurion Action X | |
| Vijayanta · Khalid · Challenger DS · Challenger 2 OES | |
| Heavy tanks | Independent · Matilda Hedgehog · Excelsior · TOG II · Churchill Crocodile · Black Prince |
| Tank destroyers | Alecto I · Achilles (65 Rg.) · QF 3.7 Ram |
