Difference between revisions of "IJN Yugumo"
m (Fixed headers) |
m (fuze -> fuse) |
||
| (25 intermediate revisions by 6 users not shown) | |||
| Line 1: | Line 1: | ||
| − | {{Specs-Card|code=jp_destroyer_yugumo}} | + | {{Specs-Card |
| + | |code=jp_destroyer_yugumo | ||
| + | |images={{Specs-Card-Image|GarageImage_{{PAGENAME}}.jpg}} | ||
| + | }} | ||
== Description == | == Description == | ||
| − | <!--In the first part of the description, cover the history of the | + | <!-- ''In the first part of the description, cover the history of the ship's creation and military application. In the second part, tell the reader about using this ship in the game. Add a screenshot: if a beginner player has a hard time remembering vehicles by name, a picture will help them identify the ship in question.'' --> |
| − | + | The '''{{Specs|name}}''' (夕雲, [[Abbreviations#.28JP.29_Naval|namesake]]: Evening Clouds) is a rank {{Specs|rank}} Japanese destroyer {{Battle-rating}}. It was introduced in [[Update 1.89 "Imperial Navy"]]. | |
| − | |||
| − | The '''{{ | ||
== General info == | == General info == | ||
=== Survivability and armour === | === Survivability and armour === | ||
| − | <!-- ''Talk about the vehicle's armour. Note the most well-defended and most vulnerable zones, e.g. the ammo magazine. Evaluate the composition of components and assemblies responsible for movement and manoeuvrability. Evaluate the survivability of the primary and secondary | + | {{Specs-Fleet-Armour}} |
| − | + | <!-- ''Talk about the vehicle's armour. Note the most well-defended and most vulnerable zones, e.g. the ammo magazine. Evaluate the composition of components and assemblies responsible for movement and manoeuvrability. Evaluate the survivability of the primary and secondary armaments separately. Don't forget to mention the size of the crew, which plays an important role in fleet mechanics. Save tips on preserving survivability for the "Usage in battles" section. If necessary, use a graphical template to show the most well-protected or most vulnerable points in the armour.'' --> | |
| − | |||
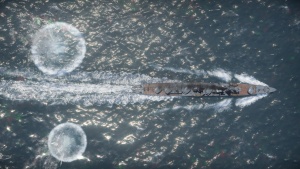
[[File:Yugumo tight turn.png|thumb|left|Fully-spaded {{PAGENAME}} is both: fast and manoeuvrable, allowing it to quickly face the enemy for an optimal torpedo deployment]] | [[File:Yugumo tight turn.png|thumb|left|Fully-spaded {{PAGENAME}} is both: fast and manoeuvrable, allowing it to quickly face the enemy for an optimal torpedo deployment]] | ||
| − | + | IJN Yugumo upgrades over [[IJN Ayanami]] in survivability, primarily due to its lower profile, but also higher crew count. Notably Yugumo has a much lower freeboard, lower forecastle and much smaller smoke funnels. This in effect gives it a better chance of avoiding enemy fire, especially at the long range, even though overall it is a longer ship. Additionally its survivability further is aided by having ammunition stored deep underneath the water line, what ensures survival if faced with AP shells, and having torpedo turrets protected against fragmentation damage, though they are still one of the easiest components to damage on the ship. | |
That said though, comparing to the equivalents in its BR, the ship has a relatively low crew count, sailing just a 2/3 of the [[Leningrad (leader)|Leningrad]] men, in a short-range fights Yugumo has to rely on its overwhelming firepower to take down the enemy before suffering overwhelming causalities itself. | That said though, comparing to the equivalents in its BR, the ship has a relatively low crew count, sailing just a 2/3 of the [[Leningrad (leader)|Leningrad]] men, in a short-range fights Yugumo has to rely on its overwhelming firepower to take down the enemy before suffering overwhelming causalities itself. | ||
=== Mobility === | === Mobility === | ||
| − | <!--''Write about the | + | {{Specs-Fleet-Mobility}} |
| − | + | <!-- ''Write about the ship's mobility. Evaluate its power and manoeuvrability, rudder rerouting speed, stopping speed at full tilt, with its maximum forward and reverse speed.'' --> | |
| + | Stock Yugumo has a maximum speed of 58 km/h, which upgrades to 79 km/h with all the seakeeping modifications. Overall its relatively comparable with equivalents in other nations, if not slightly slower, though the differences are within 5% range between most of the destroyers in the same BR. Maximum reverse speed is -23 km/h stock and -31 km/h spaded. | ||
| + | {{NavalMobility | ||
| + | |SpeedForwardStockAB = 58 | ||
| + | |SpeedBackStockAB = 23 | ||
| + | |TurnTimeStockAB = 111.783 | ||
| + | |TurnSpeedStockAB = 41 | ||
| + | }} | ||
{| class="wikitable" | {| class="wikitable" | ||
! rowspan="2" | Modules | ! rowspan="2" | Modules | ||
| Line 57: | Line 64: | ||
{{clear}} | {{clear}} | ||
| + | |||
| + | === Modifications and economy === | ||
| + | {{Specs-Economy}} | ||
| + | |||
| + | As always, the highest priority in modification research should be put on Tool Set and FPE. Beyond that primary focus should be on Unsinkability part of the tree, possibly with an addition of Rudder Replacement. Note that Targeting upgrades are not mandatory, as guns can keep up with a turning rate of even a fully upgraded Seakeeping. Finally, as with all of the destroyers, Bomb mortar is the least important upgrade of the bunch. | ||
== Armament == | == Armament == | ||
| − | + | {{Specs-Fleet-Armaments}} | |
=== Primary armament === | === Primary armament === | ||
| − | {{ | + | {{Specs-Fleet-Primary}} |
<!-- ''Provide information about the characteristics of the primary armament. Evaluate their efficacy in battle based on their reload speed, ballistics and the capacity of their shells. Add a link to the main article about the weapon: <code><nowiki>{{main|Weapon name (calibre)}}</nowiki></code>. Broadly describe the ammunition available for the primary armament, and provide recommendations on how to use it and which ammunition to choose.'' --> | <!-- ''Provide information about the characteristics of the primary armament. Evaluate their efficacy in battle based on their reload speed, ballistics and the capacity of their shells. Add a link to the main article about the weapon: <code><nowiki>{{main|Weapon name (calibre)}}</nowiki></code>. Broadly describe the ammunition available for the primary armament, and provide recommendations on how to use it and which ammunition to choose.'' --> | ||
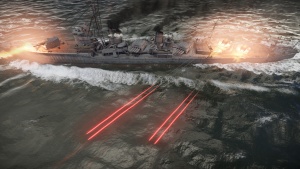
| + | [[File:Yugumo Main guns.jpg|thumb|right|[[Type 3 (127 mm)|Primary guns]] firing with other weapon systems clearly visible on the hull]] | ||
| + | {{main|127 mm/50 3rd Year Type (127 mm)}} | ||
| + | |||
Yugumo's primary guns are shared with [[IJN Ayanami#Primary armament|Ayanami]], offering the same capabilities and the same shell choice. Despite of being in a higher BR the ship stands a fair chance against its counterparts, though with increasingly challenging opponents and added care has to be put in an accurate gunnery and torpedoes play an even more important role in disposing opponents. | Yugumo's primary guns are shared with [[IJN Ayanami#Primary armament|Ayanami]], offering the same capabilities and the same shell choice. Despite of being in a higher BR the ship stands a fair chance against its counterparts, though with increasingly challenging opponents and added care has to be put in an accurate gunnery and torpedoes play an even more important role in disposing opponents. | ||
| + | |||
| + | {{:127 mm/50 3rd Year Type (127 mm)/Ammunition|127 mm Type 1 HE, 127 mm HE-TF}} | ||
=== Secondary armament === | === Secondary armament === | ||
| − | <!--Some ships are fitted with weapons of various calibres. Secondary armaments are defined as weapons chosen with the control <code>Select secondary weapon</code>. Evaluate the secondary armaments and give advice on how to use them. Describe the ammunition available for the secondary armament. Provide recommendations on how to use them and which ammunition to choose. Remember that any anti-air armament, even heavy calibre weapons, belong in the next section. If there is no secondary armament, remove this section.--> | + | {{Specs-Fleet-Secondary}} |
| + | <!-- ''Some ships are fitted with weapons of various calibres. Secondary armaments are defined as weapons chosen with the control <code>Select secondary weapon</code>. Evaluate the secondary armaments and give advice on how to use them. Describe the ammunition available for the secondary armament. Provide recommendations on how to use them and which ammunition to choose. Remember that any anti-air armament, even heavy calibre weapons, belong in the next section. If there is no secondary armament, remove this section.'' --> | ||
{{main|25 mm/60 Type 96 (25 mm)}} | {{main|25 mm/60 Type 96 (25 mm)}} | ||
The Yugumo is equipped with two twin mountings of the 25 mm Type 96 autocannon. Its setup clearly plays a primary role as an anti-aircraft weaponry, having turrets located to provide optimal AA coverage, however they are classified as an auxiliary armament and will use those crew skills instead of anti-aircraft. The high-explosive type rounds this gun fires will have no trouble knocking out any airplane it hits. AP type rounds are also available and can be used against small torpedo boats that want to sneak. Each twin mounting is placed on side of the ship which mean they can't shoot at the same target unless its aircraft. | The Yugumo is equipped with two twin mountings of the 25 mm Type 96 autocannon. Its setup clearly plays a primary role as an anti-aircraft weaponry, having turrets located to provide optimal AA coverage, however they are classified as an auxiliary armament and will use those crew skills instead of anti-aircraft. The high-explosive type rounds this gun fires will have no trouble knocking out any airplane it hits. AP type rounds are also available and can be used against small torpedo boats that want to sneak. Each twin mounting is placed on side of the ship which mean they can't shoot at the same target unless its aircraft. | ||
| − | * Universal | + | * '''Universal:''' {{Annotation|HEF-T*|High-explosive fragmentation tracer (self-destroying)}}{{-}}{{Annotation|HEF|High-explosive fragmentation}}{{-}}{{Annotation|AP-T|Armour-piercing tracer}}{{-}}{{Annotation|HEI|High-explosive incendiary}} - good balance between firepower and tracer contents, useful for newcomers to the Japanese 25 mm autocannon. |
| − | * APT | + | * '''25 mm APT belt:''' {{Annotation|AP-T|Armour-piercing tracer}}{{-}}{{Annotation|AP-T|Armour-piercing tracer}}{{-}}{{Annotation|AP-T|Armour-piercing tracer}}{{-}}{{Annotation|HEF|High-explosive fragmentation}} - Full of AP shells, good against boats but you might not meet lots of them in destroyer. |
| − | * | + | * '''25 mm HEIT belts:''' {{Annotation|HEF-T*|High-explosive fragmentation tracer (self-destroying)}}{{-}}{{Annotation|HEI|High-explosive incendiary}}{{-}}{{Annotation|HEI|High-explosive incendiary}}{{-}}{{Annotation|HEI|High-explosive incendiary}} - Trades tracer rounds for extra firepower, harder to aim but very good at knocking out aircraft. |
| − | === | + | {{:25 mm/60 Type 96 (25 mm)/Ammunition|HEF-T*, HEF, AP-T, HEI}} |
| + | |||
| + | === Additional armament === | ||
| + | {{Specs-Fleet-Additional}} | ||
| + | <!-- ''Describe the available additional armaments of the ship: depth charges, mines, torpedoes. Talk about their positions, available ammunition and launch features such as dead zones of torpedoes. If there is no additional armament, remove this section.'' --> | ||
[[File:Yugumo torpedoes.jpg|thumb|right|Front torpedo turret releasing Type 93s, with both 25 mm/60 Type 96 visible]] | [[File:Yugumo torpedoes.jpg|thumb|right|Front torpedo turret releasing Type 93s, with both 25 mm/60 Type 96 visible]] | ||
| − | {{main|Type 93 Model 1, Mod 2 (610 mm)}} | + | {{main|Type 93 Model 1, Mod 2 (610 mm)|Type 95 depth charge}} |
| − | |||
| − | |||
| − | Unlike its predecessors, Yugumo uses a new, Type 93 Model 1, Mod 2 torpedoes. Those are much more powerful, having over 30% more explosive power, which enables it to sink nearly any destroyer with a single hit. To compare with equivalents of other nations, Yugumo's torpedoes have an equivalent of 627.2 kg TNT, while German [[G7a (533 mm)|G7a]] has 358.4 kg, British [[Mk.IX (533 mm)|Mk.IX]] has | + | Unlike its predecessors, Yugumo uses a new, Type 93 Model 1, Mod 2 torpedoes. Those are much more powerful, having over 30% more explosive power, which enables it to sink nearly any destroyer with a single hit. To compare with equivalents of other nations, Yugumo's torpedoes have an equivalent of 627.2 kg TNT, while German [[G7a (533 mm)|G7a]] has 358.4 kg, British [[Mk.IX (533 mm)|Mk.IX]] has 340 kg or US [[Mk.15 (533 mm)|Mk.15]] has 224 kg, all also having much lower range and slower speed. It's one of the best torpedoes available, bested only by [[Type 93 Model 3 (610 mm)|Type 93 Model 3]] or more modern anti-ship torpedoes, such as [[Mk.16 (533 mm)|Mk.16]]. |
{| class="wikitable sortable" | {| class="wikitable sortable" | ||
| Line 95: | Line 115: | ||
| [[IJN Ayanami]] [[IJN Mutsuki]] | | [[IJN Ayanami]] [[IJN Mutsuki]] | ||
| 3 | | 3 | ||
| − | | | + | | 2,540 |
| 85 | | 85 | ||
| 7 | | 7 | ||
| Line 103: | Line 123: | ||
| [[IJN Ayanami]] [[IJN Mutsuki]] | | [[IJN Ayanami]] [[IJN Mutsuki]] | ||
| 3 | | 3 | ||
| − | | | + | | 2,540 |
| 65 | | 65 | ||
| 15 | | 15 | ||
| Line 111: | Line 131: | ||
| [[IJN Yugumo]] | | [[IJN Yugumo]] | ||
| 4 | | 4 | ||
| − | | | + | | 2,700 |
| 91 | | 91 | ||
| 20 | | 20 | ||
| Line 119: | Line 139: | ||
| [[IJN Akizuki]] | | [[IJN Akizuki]] | ||
| 4 | | 4 | ||
| − | | | + | | 2,800 |
| 91 | | 91 | ||
| 15 | | 15 | ||
| 998.4 | | 998.4 | ||
| + | |- | ||
|} | |} | ||
| − | + | [[File:Yugumo Depth Charges Distance.jpg|thumb|right|Explosion size and distance of the depth charges released from Yugumo with a minimal fuse time]] | |
| − | [[File:Yugumo Depth Charges Distance.jpg|thumb|right|Explosion size and distance of the depth charges released from Yugumo with a minimal | + | |
| − | + | Yugumo has a tier IV modification available that unlocks the Bomb Mortar, allowing it to equip 8 Type 95 depth charges. All are stored above deck and ejected pneumatically to either port or starbord, up to four on each side. | |
| − | |||
| − | Yugumo has a | ||
Depth charges currently have an extremely limited use, having no submarines in the game and being limited to a combination of a static position where they were dropped at, and a specific time at which enemy has to arrive in order to risk any damage from the charge. Realistically it should be the last modification researched on the ship, as it provides no palatable benefit during the gameplay. | Depth charges currently have an extremely limited use, having no submarines in the game and being limited to a combination of a static position where they were dropped at, and a specific time at which enemy has to arrive in order to risk any damage from the charge. Realistically it should be the last modification researched on the ship, as it provides no palatable benefit during the gameplay. | ||
== Usage in battles == | == Usage in battles == | ||
| − | <!-- ''Describe the technique of using this ship, the characteristics of her use in a team and tips on strategy. Abstain from writing an entire guide – | + | <!-- ''Describe the technique of using this ship, the characteristics of her use in a team and tips on strategy. Abstain from writing an entire guide – don't try to provide a single point of view, but give the reader food for thought. Talk about the most dangerous opponents for this vehicle and provide recommendations on fighting them. If necessary, note the specifics of playing with this vehicle in various modes (AB, RB, SB).'' --> |
| − | + | IJN Yugumo is one of the most formidable destroyers, owning it largely to its outstanding torpedo armament, but also otherwise well-rounded mix of survivability, mobility and the firepower. Due to lack of AP rounds and a relatively low crew complement Cruisers are its absolute bane, being able to knock it out with a single lucky salvo, while themselves not having to worry much about anything but torpedoes. Like all torpedo-centric destroyers Yugumo excels in Arcade Battles with an ability to re-spawn torpedoes mid-battle, while having much tougher time in Realistic Battles. | |
=== Pros and cons === | === Pros and cons === | ||
| − | <!-- | + | <!-- ''Summarise and briefly evaluate the vehicle in terms of its characteristics and combat effectiveness. Mark its pros and cons in the bulleted list. Try not to use more than 6 points for each of the characteristics. Avoid using categorical definitions such as "bad", "good" and the like - use substitutions with softer forms such as "inadequate" and "effective".'' --> |
'''Pros:''' | '''Pros:''' | ||
| + | |||
* Can release 8 torpedoes at once | * Can release 8 torpedoes at once | ||
| − | * | + | * Very effective torpedoes (Long Lance) |
* Good mobility | * Good mobility | ||
* Small profile | * Small profile | ||
'''Cons:''' | '''Cons:''' | ||
| + | |||
* No access to armour-piercing shells | * No access to armour-piercing shells | ||
* Weak anti-aircraft armament, especially against higher altitude bombers | * Weak anti-aircraft armament, especially against higher altitude bombers | ||
| Line 153: | Line 174: | ||
== History == | == History == | ||
| − | <!--Describe the history of the creation and combat usage of the ship in more detail than in the introduction. If the historical reference turns out to be too long, take it to a separate article, taking a link to the article about the | + | <!-- ''Describe the history of the creation and combat usage of the ship in more detail than in the introduction. If the historical reference turns out to be too long, take it to a separate article, taking a link to the article about the ship and adding a block "/History" (example: <nowiki>https://wiki.warthunder.com/(Ship-name)/History</nowiki>) and add a link to it here using the <code>main</code> template. Be sure to reference text and sources by using <code><nowiki><ref></ref></nowiki></code>, as well as adding them at the end of the article with <code><nowiki><references /></nowiki></code>. This section may also include the ship's dev blog entry (if applicable) and the in-game encyclopedia description (under <code><nowiki>=== In-game description ===</nowiki></code>, also if applicable).'' --> |
| − | {{Main| | + | {{Main|Yugumo_(Family)#History|l1=History of the Yūgumo-class}} |
| + | |||
| + | IJN Yugumo (夕雲, Yūgumo, literally: Evening Clouds) was the lead ship of her class (夕雲型駆逐艦, Yūgumo-gata kuchikukan, also called Third class) laid down on June 1940 at the Maizuru Naval Arsenal (located in the Kyoto Prefecture), launched on 16 March 1941 and completed on 5 December 1941. | ||
| + | |||
| + | Soon after commissioning on 18 April 1942 she took part in an intercept in an attempt to engage the U.S. fleet group which launched the Doolittle Raid, however, all attempts to locate any of the hostile ships failed. In June 1942 Yūgumo took part in the Battle of Midway as a principle defender to the aircraft carrier Hiryū, and later on, took part in rescuing a number of survivors from the battle (although not from the Hiryū herself). In August she took a part in the battle of the Eastern Solomons as the screen for the Fleet Carriers Shōkaku and Zuikaku, and two months later in the battle of the Santa Cruz Islands as a part of the Vanguard group lead by the battleships Hiei and Kirishima. After the battle, she took part as the rat transport (or as it was nicknamed by US forces: Tokyo Express) moving supplies and troops into the Guadalcanal Island while brining back wounded soldiers. It continued till Operation Ke when Japanese retreated from the island. During the retreat, The Yūgumo rescued all 237 survivors of her sister-ship Makigumo after it struck a naval mine while executing a manoeuvre to avoid torpedos from a pursuing U.Ss PT boat. Yūgumo continued in a troop and supply transport role between Pacific islands till May 1943 when she docked to the Yokosuka port at the home island, where she received maintenance and an additional crew training. In June she sailed north to the Kuril Islands and then to the Aleutians, evacuating Kiska island with 479 men returned safely to Japan. | ||
| + | |||
| + | ===The final battle=== | ||
| + | The Yūgumo's final encounter was the Battle of Vella Lavella in the Solomon Islands on October 6. Here, during a night encounter shrouded with poor visibility and terrible weather conditions, Commander Matsuji Ijuin failed to identify U.S. ships in the local area and sailed his formation of four destroyers right into their line of fire. At 20:55, upon finally realizing the error of the predicament, both sides released torpedoes, with Japanese ships turning hard to the starboard (right) and opened fire with their deck guns. Yūgumo being the closest to the enemy received the bulk of the gunfire and soon started burning. At 21:01 Yūgumo's torpedo hit USS Chevalier (DD-451, [[Fletcher (Family)|Fletcher-class]]) detonating the forward magazine and tearing her bow off all the way to the superstructure. Despite this brutal blow, the Chevalier still stood afloat and fired torpedoes back at Yūgumo, resulting in a direct hit at 21:05. Unthinkable, only five minutes later at 21:10, the Yūgumo sunk, while surprisingly Chevalier was still afloat. Unable to be saved, at 23:26 Chevalier's captain gave the abandon ship order, followed by scuttling by a torpedo from the USS La Vallette. Later, the detached, still-floating bow of the Chevalier was found approximately mile away and also scuttled with depth charges. After the Yūgumo's sinking several sailors were rescued by her sister ship Kazagumo, however, a number of Japanese sailors were captured by the U.S. PT boats. There are two accounts of the events following the sinking, with one reporting a story of a captured U.S. lifeboat from the wrecked Chevalier, while the other reports a raft made of Yūgumo's remains. Either way, over 20 sailors made it back to the Japanese-controlled Bougainville island after refusing a rescue from one of the PT boats. | ||
| − | + | Out of the 241 man crew at the time of her sinking most died at the sea that fateful day. | |
== Media == | == Media == | ||
<!-- ''Excellent additions to the article would be video guides, screenshots from the game, and photos.'' --> | <!-- ''Excellent additions to the article would be video guides, screenshots from the game, and photos.'' --> | ||
| + | |||
| + | ;Skins | ||
| + | * [https://live.warthunder.com/feed/camouflages/?vehicle=jp_destroyer_yugumo Skins and camouflages for the {{PAGENAME}} from live.warthunder.com.] | ||
| + | |||
;Images | ;Images | ||
| − | < | + | <gallery mode="packed" heights="200"> |
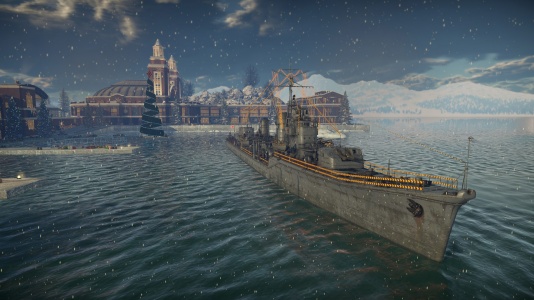
| − | + | File:Yugumo Front Day Operation FROST.jpg|Front profile in the Operation FROST garage. | |
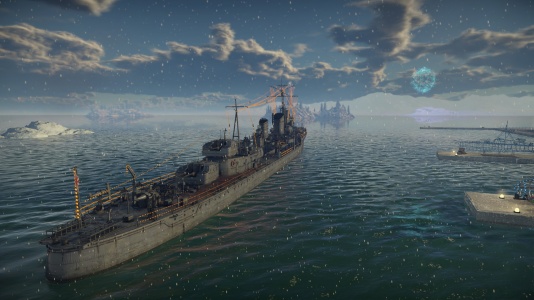
| − | + | File:Yugumo Rear Day Operation FROST.jpg|Rear profile in the Operation FROST garage. | |
| − | + | </gallery> | |
| + | |||
| + | ;Videos | ||
| + | {{Youtube-gallery|OO1p-dpJOa8|'''The Shooting Range #54''' - ''Metal Beasts'' section at 04:03 discusses the IJN Yugumo.}} | ||
== See also == | == See also == | ||
| − | <!-- ''Links to | + | <!-- ''Links to articles on the War Thunder Wiki that you think will be useful for the reader, for example:'' |
| − | |||
* ''reference to the series of the ship;'' | * ''reference to the series of the ship;'' | ||
* ''links to approximate analogues of other nations and research trees.'' --> | * ''links to approximate analogues of other nations and research trees.'' --> | ||
| − | + | ;Related development | |
| + | * [[Yugumo (Family)]] | ||
| + | *Kagero-class* <small>(predecessor)</small> | ||
| + | *[[IJN Shimakaze|Shimakaze-class]] <small>(parallel successor)</small> | ||
| − | * [[ | + | <sup>*Not in-game</sup> |
| − | + | ||
| − | * [[Type 1934A ( | + | ;Ships of comparable role, configuration and era |
| − | * [[ | + | *[[USS Fletcher]] <small>([[Fletcher (Family)|Fletcher-class]])</small> |
| − | * [[Tribal ( | + | *[[Z15 Erich Steinbrinck]] <small>([[Type 1934A (Family)|Type 1934A-class]])</small> |
| + | *[[Tashkent]] <small>(Tashkent-class)</small> | ||
| + | *[[HMCS Haida]] <small>([[Tribal (Family)|Tribal-class]])</small> | ||
| + | *[[RN Corazziere]] <small>(Soldati-class)</small> | ||
== External links == | == External links == | ||
<!-- ''Paste links to sources and external resources, such as:'' | <!-- ''Paste links to sources and external resources, such as:'' | ||
| + | * ''topic on the official game forum;'' | ||
| + | * ''other literature.'' --> | ||
| − | * | + | * [[wt:en/news/4838-development-yugumo-class-destroyer-en|[Devblog] Yugumo Class Destroyer]] |
| − | |||
| − | |||
* [[Wikipedia:Y%C5%ABgumo-class_destroyer|[Wikipedia] ''Yūgumo''-class destroyer]] | * [[Wikipedia:Y%C5%ABgumo-class_destroyer|[Wikipedia] ''Yūgumo''-class destroyer]] | ||
* [[Wikipedia:Japanese_destroyer_Y%C5%ABgumo_(1941)|[Wikipedia] Japanese destroyer ''Yūgumo'' (1941)]] | * [[Wikipedia:Japanese_destroyer_Y%C5%ABgumo_(1941)|[Wikipedia] Japanese destroyer ''Yūgumo'' (1941)]] | ||
| + | {{ShipManufacturer Maizuru Naval Arsenal}} | ||
{{Japan destroyers}} | {{Japan destroyers}} | ||
Latest revision as of 18:00, 4 November 2024
Contents
Description
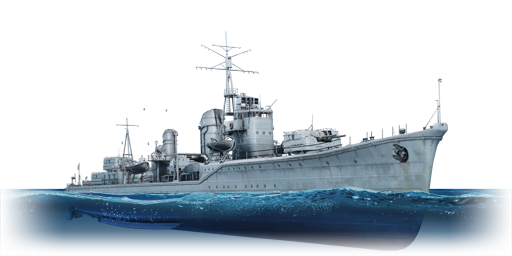
The Yugumo-class, IJN Yugumo, 1942 (夕雲, namesake: Evening Clouds) is a rank Japanese destroyer with a battle rating of (AB), (RB), and (SB). It was introduced in Update 1.89 "Imperial Navy".
General info
Survivability and armour
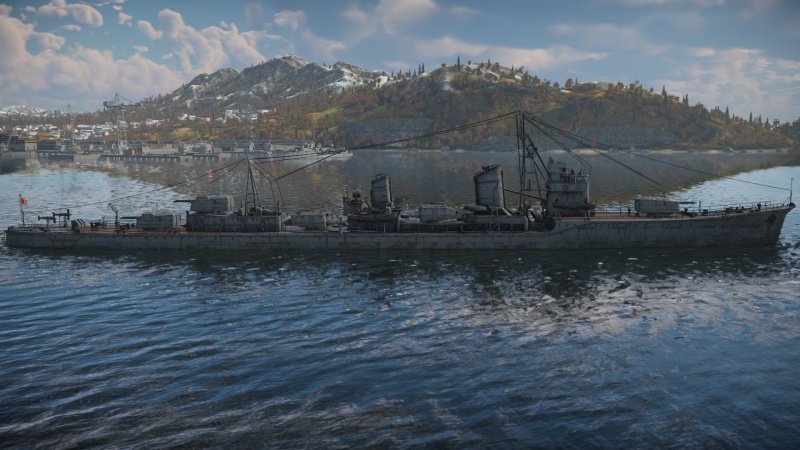
IJN Yugumo upgrades over IJN Ayanami in survivability, primarily due to its lower profile, but also higher crew count. Notably Yugumo has a much lower freeboard, lower forecastle and much smaller smoke funnels. This in effect gives it a better chance of avoiding enemy fire, especially at the long range, even though overall it is a longer ship. Additionally its survivability further is aided by having ammunition stored deep underneath the water line, what ensures survival if faced with AP shells, and having torpedo turrets protected against fragmentation damage, though they are still one of the easiest components to damage on the ship.
That said though, comparing to the equivalents in its BR, the ship has a relatively low crew count, sailing just a 2/3 of the Leningrad men, in a short-range fights Yugumo has to rely on its overwhelming firepower to take down the enemy before suffering overwhelming causalities itself.
Mobility
Stock Yugumo has a maximum speed of 58 km/h, which upgrades to 79 km/h with all the seakeeping modifications. Overall its relatively comparable with equivalents in other nations, if not slightly slower, though the differences are within 5% range between most of the destroyers in the same BR. Maximum reverse speed is -23 km/h stock and -31 km/h spaded.
| Mobility Characteristics | |||||
|---|---|---|---|---|---|
| Game Mode | Upgrade Status | Maximum Speed (km/h) | Turn Time (s) | Turn Radius (m) | |
| Forward | Reverse | ||||
| AB | Stock | 58 | 23 | ~111.78 | ~202.62 |
| Upgraded | ___ | ___ | |||
| RB/SB | |||||
| Upgraded | ___ | ___ | |||
| Modules | Crew skill | Time till (seconds) | Speed (km/h) | |||||
|---|---|---|---|---|---|---|---|---|
| 10 km/h | Flank ahead | -10 km/h | Full back | 180° turn | Flank ahead | Full back | ||
| Stock | 0 | 5.57 | 30.17 | 5.50 | 14.17 | 50.50 | 58 | 23 |
| Spaded | 0 | 4.03 | 29.70 | 3.90 | 14.17 | 28.17 | 80 | 31 |
Modifications and economy
As always, the highest priority in modification research should be put on Tool Set and FPE. Beyond that primary focus should be on Unsinkability part of the tree, possibly with an addition of Rudder Replacement. Note that Targeting upgrades are not mandatory, as guns can keep up with a turning rate of even a fully upgraded Seakeeping. Finally, as with all of the destroyers, Bomb mortar is the least important upgrade of the bunch.
Armament
Primary armament
Yugumo's primary guns are shared with Ayanami, offering the same capabilities and the same shell choice. Despite of being in a higher BR the ship stands a fair chance against its counterparts, though with increasingly challenging opponents and added care has to be put in an accurate gunnery and torpedoes play an even more important role in disposing opponents.
| Penetration statistics | |||||||
|---|---|---|---|---|---|---|---|
| Ammunition | Type of warhead |
Penetration @ 0° Angle of Attack (mm) | |||||
| 1,000 m | 2,500 m | 5,000 m | 7,500 m | 10,000 m | 15,000 m | ||
| Type 1 HE | HE | 28 | 28 | 28 | 28 | 28 | 28 |
| HE-TF | HE-TF | 26 | 26 | 26 | 26 | 26 | 26 |
| Shell details | ||||||||||||
|---|---|---|---|---|---|---|---|---|---|---|---|---|
| Ammunition | Type of warhead |
Velocity (m/s) |
Projectile mass (kg) |
Fuse delay (m) |
Fuse sensitivity (mm) |
Explosive mass (TNT equivalent) (kg) |
Ricochet | |||||
| 0% | 50% | 100% | ||||||||||
| Type 1 HE | HE | 910 | 23 | 0 | 0.1 | 2.31 | 79° | 80° | 81° | |||
| HE-TF | HE-TF | 910 | 23 | 0 | 0.1 | 2.07 | 79° | 80° | 81° | |||
Secondary armament
The Yugumo is equipped with two twin mountings of the 25 mm Type 96 autocannon. Its setup clearly plays a primary role as an anti-aircraft weaponry, having turrets located to provide optimal AA coverage, however they are classified as an auxiliary armament and will use those crew skills instead of anti-aircraft. The high-explosive type rounds this gun fires will have no trouble knocking out any airplane it hits. AP type rounds are also available and can be used against small torpedo boats that want to sneak. Each twin mounting is placed on side of the ship which mean they can't shoot at the same target unless its aircraft.
- Universal: HEF-T* · HEF · AP-T · HEI - good balance between firepower and tracer contents, useful for newcomers to the Japanese 25 mm autocannon.
- 25 mm APT belt: AP-T · AP-T · AP-T · HEF - Full of AP shells, good against boats but you might not meet lots of them in destroyer.
- 25 mm HEIT belts: HEF-T* · HEI · HEI · HEI - Trades tracer rounds for extra firepower, harder to aim but very good at knocking out aircraft.
| Penetration statistics | |||||||
|---|---|---|---|---|---|---|---|
| Ammunition | Penetration @ 0° Angle of Attack (mm) | ||||||
| 10 m | 100 m | 500 m | 1,000 m | 1,500 m | 2,000 m | ||
| HEF-T* | 2 | 2 | 2 | 2 | 2 | 2 | |
| HEF | 2 | 2 | 2 | 2 | 2 | 2 | |
| AP-T | 55 | 53 | 43 | 33 | 25 | 19 | |
| HEI | 2 | 2 | 2 | 2 | 2 | 2 | |
| Shell details | ||||||||||||
|---|---|---|---|---|---|---|---|---|---|---|---|---|
| Ammunition | Velocity (m/s) |
Projectile mass (kg) |
Fuse delay (m) |
Fuse sensitivity (mm) |
Explosive mass (TNT equivalent) (g) |
Ricochet | ||||||
| 0% | 50% | 100% | ||||||||||
| HEF-T* | 900 | 0.24 | 0 | 0.1 | 8.5 | 79° | 80° | 81° | ||||
| HEF | 900 | 0.25 | 0 | 0.1 | 23.93 | 79° | 80° | 81° | ||||
| AP-T | 900 | 0.28 | - | - | - | 47° | 60° | 65° | ||||
| HEI | 900 | 0.26 | 0 | 0.1 | 5.52 | 79° | 80° | 81° | ||||
Additional armament
Unlike its predecessors, Yugumo uses a new, Type 93 Model 1, Mod 2 torpedoes. Those are much more powerful, having over 30% more explosive power, which enables it to sink nearly any destroyer with a single hit. To compare with equivalents of other nations, Yugumo's torpedoes have an equivalent of 627.2 kg TNT, while German G7a has 358.4 kg, British Mk.IX has 340 kg or US Mk.15 has 224 kg, all also having much lower range and slower speed. It's one of the best torpedoes available, bested only by Type 93 Model 3 or more modern anti-ship torpedoes, such as Mk.16.
| Number per turret |
Mass (kg) | Maximum speed in water (km/h) | Travel Distance (km) | Explosive TNT equivalent (kg) | ||
|---|---|---|---|---|---|---|
| Type 90 | IJN Ayanami IJN Mutsuki | 3 | 2,540 | 85 | 7 | 480 |
| Type 90 + Torpedo Mode | IJN Ayanami IJN Mutsuki | 3 | 2,540 | 65 | 15 | 480 |
| Type 93 Model 1, Mod 2 | IJN Yugumo | 4 | 2,700 | 91 | 20 | 627.2 |
| Type 93 Model 3 | IJN Akizuki | 4 | 2,800 | 91 | 15 | 998.4 |
Yugumo has a tier IV modification available that unlocks the Bomb Mortar, allowing it to equip 8 Type 95 depth charges. All are stored above deck and ejected pneumatically to either port or starbord, up to four on each side.
Depth charges currently have an extremely limited use, having no submarines in the game and being limited to a combination of a static position where they were dropped at, and a specific time at which enemy has to arrive in order to risk any damage from the charge. Realistically it should be the last modification researched on the ship, as it provides no palatable benefit during the gameplay.
Usage in battles
IJN Yugumo is one of the most formidable destroyers, owning it largely to its outstanding torpedo armament, but also otherwise well-rounded mix of survivability, mobility and the firepower. Due to lack of AP rounds and a relatively low crew complement Cruisers are its absolute bane, being able to knock it out with a single lucky salvo, while themselves not having to worry much about anything but torpedoes. Like all torpedo-centric destroyers Yugumo excels in Arcade Battles with an ability to re-spawn torpedoes mid-battle, while having much tougher time in Realistic Battles.
Pros and cons
Pros:
- Can release 8 torpedoes at once
- Very effective torpedoes (Long Lance)
- Good mobility
- Small profile
Cons:
- No access to armour-piercing shells
- Weak anti-aircraft armament, especially against higher altitude bombers
- Torpedo tubes are damaged easily
- Low crew count
History
IJN Yugumo (夕雲, Yūgumo, literally: Evening Clouds) was the lead ship of her class (夕雲型駆逐艦, Yūgumo-gata kuchikukan, also called Third class) laid down on June 1940 at the Maizuru Naval Arsenal (located in the Kyoto Prefecture), launched on 16 March 1941 and completed on 5 December 1941.
Soon after commissioning on 18 April 1942 she took part in an intercept in an attempt to engage the U.S. fleet group which launched the Doolittle Raid, however, all attempts to locate any of the hostile ships failed. In June 1942 Yūgumo took part in the Battle of Midway as a principle defender to the aircraft carrier Hiryū, and later on, took part in rescuing a number of survivors from the battle (although not from the Hiryū herself). In August she took a part in the battle of the Eastern Solomons as the screen for the Fleet Carriers Shōkaku and Zuikaku, and two months later in the battle of the Santa Cruz Islands as a part of the Vanguard group lead by the battleships Hiei and Kirishima. After the battle, she took part as the rat transport (or as it was nicknamed by US forces: Tokyo Express) moving supplies and troops into the Guadalcanal Island while brining back wounded soldiers. It continued till Operation Ke when Japanese retreated from the island. During the retreat, The Yūgumo rescued all 237 survivors of her sister-ship Makigumo after it struck a naval mine while executing a manoeuvre to avoid torpedos from a pursuing U.Ss PT boat. Yūgumo continued in a troop and supply transport role between Pacific islands till May 1943 when she docked to the Yokosuka port at the home island, where she received maintenance and an additional crew training. In June she sailed north to the Kuril Islands and then to the Aleutians, evacuating Kiska island with 479 men returned safely to Japan.
The final battle
The Yūgumo's final encounter was the Battle of Vella Lavella in the Solomon Islands on October 6. Here, during a night encounter shrouded with poor visibility and terrible weather conditions, Commander Matsuji Ijuin failed to identify U.S. ships in the local area and sailed his formation of four destroyers right into their line of fire. At 20:55, upon finally realizing the error of the predicament, both sides released torpedoes, with Japanese ships turning hard to the starboard (right) and opened fire with their deck guns. Yūgumo being the closest to the enemy received the bulk of the gunfire and soon started burning. At 21:01 Yūgumo's torpedo hit USS Chevalier (DD-451, Fletcher-class) detonating the forward magazine and tearing her bow off all the way to the superstructure. Despite this brutal blow, the Chevalier still stood afloat and fired torpedoes back at Yūgumo, resulting in a direct hit at 21:05. Unthinkable, only five minutes later at 21:10, the Yūgumo sunk, while surprisingly Chevalier was still afloat. Unable to be saved, at 23:26 Chevalier's captain gave the abandon ship order, followed by scuttling by a torpedo from the USS La Vallette. Later, the detached, still-floating bow of the Chevalier was found approximately mile away and also scuttled with depth charges. After the Yūgumo's sinking several sailors were rescued by her sister ship Kazagumo, however, a number of Japanese sailors were captured by the U.S. PT boats. There are two accounts of the events following the sinking, with one reporting a story of a captured U.S. lifeboat from the wrecked Chevalier, while the other reports a raft made of Yūgumo's remains. Either way, over 20 sailors made it back to the Japanese-controlled Bougainville island after refusing a rescue from one of the PT boats.
Out of the 241 man crew at the time of her sinking most died at the sea that fateful day.
Media
- Skins
- Images
- Videos
See also
- Related development
- Yugumo (Family)
- Kagero-class* (predecessor)
- Shimakaze-class (parallel successor)
*Not in-game
- Ships of comparable role, configuration and era
- USS Fletcher (Fletcher-class)
- Z15 Erich Steinbrinck (Type 1934A-class)
- Tashkent (Tashkent-class)
- HMCS Haida (Tribal-class)
- RN Corazziere (Soldati-class)
External links
- [Devblog] Yugumo Class Destroyer
- [Wikipedia] Yūgumo-class destroyer
- [Wikipedia] Japanese destroyer Yūgumo (1941)
| Maizuru Naval Arsenal (舞鶴海軍工廠) | |
|---|---|
| Torpedo Boats (TB) | |
| Chidori-class | Chidori |
| Destroyers (DD) | |
| Yugumo-class | IJN Yugumo · IJN Hayanami |
| Shimakaze-class | IJN Shimakaze |
| Akizuki-class | IJN Akizuki · IJN Hatsuzuki |
| Japan destroyers | |
|---|---|
| IJN | |
| Momi-class | IJN Momi |
| Mutsuki-class | IJN Mutsuki · IJN Satsuki |
| Fubuki-class | IJN Ayanami |
| Hatsuharu-class | IJN Hatsuharu · IJN Nenohi |
| Shiratsuyu-class | IJN Yuudachi |
| Yugumo-class | IJN Yugumo · IJN Hayanami · IJN Kiyoshimo |
| Shimakaze-class | IJN Shimakaze |
| Akizuki-class | IJN Akizuki · IJN Hatsuzuki |
| JMSDF | |
| Ariake-class* | JDS Yūgure (DD-184) |
| Harukaze-class | JDS Harukaze (DD-101) |
| Murasame-class | JDS Murasame (DD-107) |
| * Modified Fletcher-class destroyers | |


