IJN Shimakaze
Contents
Description
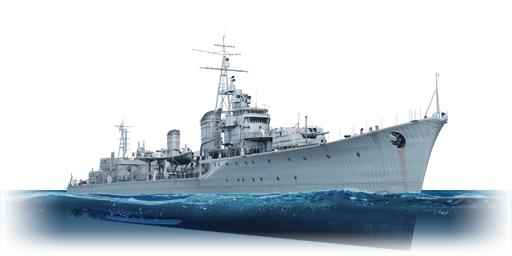
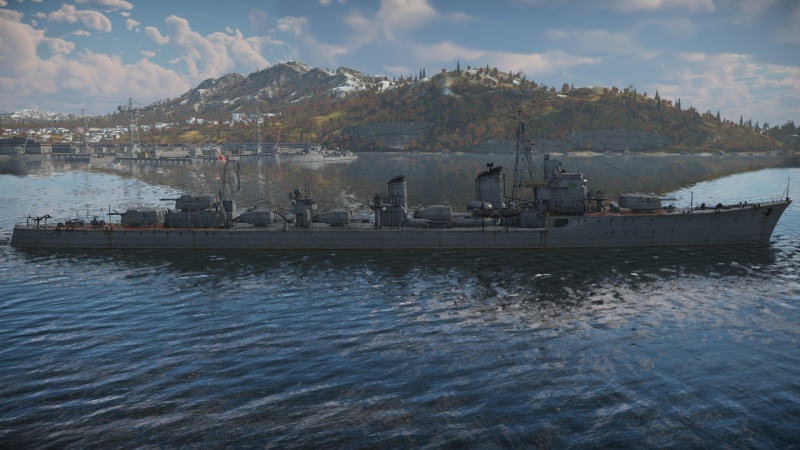
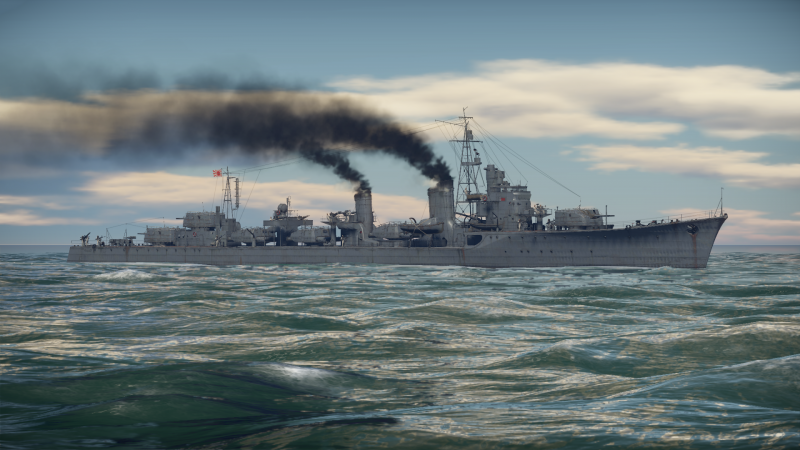
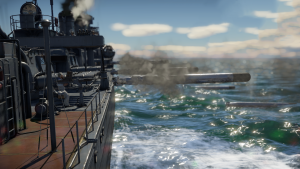
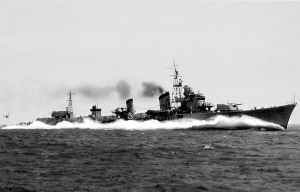
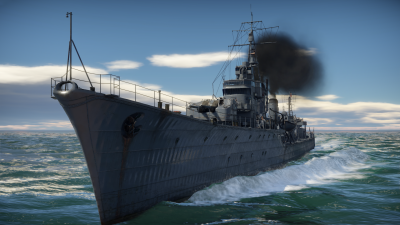
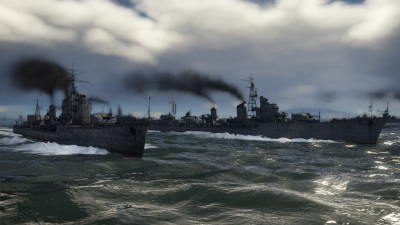
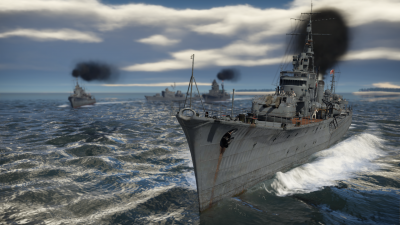
The Shimakaze-class, IJN Shimakaze, 1944 (島風, namesake: Island Wind) is a heavy-duty destroyer focused on torpedoes. She was the fastest ship in the Japanese Navy at 40.9 knots and the only one of her class. Commissioned in 1939 to lead a class of 16 ships and with future plans extending to 32 ships, her kind was cancelled with the Pacific war and funds relocated. She's essentially an elongated Yūgumo-class destroyer allowing her to fit 3 quintuple torpedo launchers and keeping the same main and anti-air armament as shorter ships. Seeing little combat action, Shimakaze primarily took part in Operation Sword and afterwards escorted other ships.
She was introduced in War Thunder during Update "Raining Fire" and excels at her primary function of torpedo-centric gameplay, with 15 tubes loaded with the deadly Type 93 oxygen torpedoes, she can send a full wall of torpedoes in a single salvo. This gameplay is dampened in realistic battles where she can only launch a single salvo, so it's better to conserve torpedoes for certain hits. In arcade battles it's best to launch all torpedoes at targets when possible, having as many fish in the water as possible while reloading the tubes in the meantime. At the battle rating Shimakaze sits, her primary cannons will be outgunned by other destroyers and cruisers, keep distance and use her speed to evade shells at long range.
General info
Survivability and armour
Shimakaze is an extended Yugumo-class hull which comparatively gives her more displacement for an additional torpedo launcher, place for more anti-air and also a higher crew count (+40 men). Additionally, her survivability is further aided by having ammunition stored deep underneath the waterline, which ensures survival if faced with AP shells and having torpedo turrets protecting the tubes against fragmentation damage. However, they are still one of the easiest components to damage on the ship.
That said though, compared to the equivalents in its BR, the ship has a relatively low crew count, sailing just a 2/3 of the Leningrad's men, in short-range fights, Shimakaze has to rely on dealing overwhelming damage to take down the enemy before suffering overwhelming causalities herself. This can either be the use of aiming her main armament at weak spots, her plentiful arsenal of torpedoes and/or Type 96 25 mm's.
Mobility
Shimakaze is by far the fastest Japanese ship ever made. She can reach speeds of 40.9 knots (~76 km/h) due to her new experimental high temperature and pressure Kampon boilers that developed 79,240 shaft horsepower, powering a new type of turbine, which generated 50 per cent more power than typical turbines used in previous destroyers.
| Mobility Characteristics | |||||
|---|---|---|---|---|---|
| Game Mode | Upgrade Status | Maximum Speed (km/h) | Turn Time (s) | Turn Radius (m) | |
| Forward | Reverse | ||||
| AB | Stock | 68 | 23 | ~115.87 | ~245.88 |
| Upgraded | ___ | ___ | |||
| RB/SB | |||||
| Upgraded | ___ | ___ | |||
Modifications and economy
Armament
Primary armament
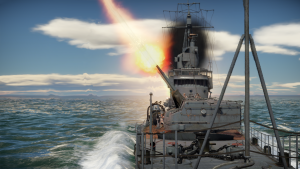
Shimakaze's primary guns are shared with Yugumo and Ayanami, offering the same capabilities and the same shell choice. They are quite accurate and have a higher muzzle velocity than most other destroyer guns. As she starts seeing end-of-the-line heavy cruisers, her guns are only beneficial on other destroyers at best and added care must be put in accurate gunnery. Her torpedoes play an even more important role in disposing of opponents. But like her parallel predecessor (Yugumo-class), her main armament isn't her selling point at this BR.
| Penetration statistics | |||||||
|---|---|---|---|---|---|---|---|
| Ammunition | Type of warhead |
Penetration @ 0° Angle of Attack (mm) | |||||
| 1,000 m | 2,500 m | 5,000 m | 7,500 m | 10,000 m | 15,000 m | ||
| Type 1 HE | HE | 28 | 28 | 28 | 28 | 28 | 28 |
| HE-TF | HE-TF | 26 | 26 | 26 | 26 | 26 | 26 |
| Shell details | ||||||||||||
|---|---|---|---|---|---|---|---|---|---|---|---|---|
| Ammunition | Type of warhead |
Velocity (m/s) |
Projectile mass (kg) |
Fuse delay (m) |
Fuse sensitivity (mm) |
Explosive mass (TNT equivalent) (kg) |
Ricochet | |||||
| 0% | 50% | 100% | ||||||||||
| Type 1 HE | HE | 910 | 23 | 0 | 0.1 | 2.31 | 79° | 80° | 81° | |||
| HE-TF | HE-TF | 910 | 23 | 0 | 0.1 | 2.07 | 79° | 80° | 81° | |||
Secondary armament
Unlike other early refits of Japanese destroyers, which have very little anti-air defence, Shimakaze is refitted in her 1944 fit, which gives her tons of the infamous Type 96 25 mm AA gun, which in volume works well enough for air cover and decimates smaller patrol vessels up to a range of about 2-3 km.
- Universal: HEF-T* · HEF · AP-T · HEI - a good balance between firepower and tracer contents, useful for newcomers to the Japanese 25 mm autocannon.
- 25 mm APT belt: AP-T · AP-T · AP-T · HEF - Full of AP shells, good against small boats.
- 25 mm HEIT belts: HEF-T* · HEI · HEI · HEI - Trades tracer rounds for extra firepower, harder to aim but very good at knocking out aircraft.
| Penetration statistics | |||||||
|---|---|---|---|---|---|---|---|
| Ammunition | Penetration @ 0° Angle of Attack (mm) | ||||||
| 10 m | 100 m | 500 m | 1,000 m | 1,500 m | 2,000 m | ||
| HEF-T* | 2 | 2 | 2 | 2 | 2 | 2 | |
| HEF | 2 | 2 | 2 | 2 | 2 | 2 | |
| AP-T | 55 | 53 | 43 | 33 | 25 | 19 | |
| HEI | 2 | 2 | 2 | 2 | 2 | 2 | |
| Shell details | ||||||||||||
|---|---|---|---|---|---|---|---|---|---|---|---|---|
| Ammunition | Velocity (m/s) |
Projectile mass (kg) |
Fuse delay (m) |
Fuse sensitivity (mm) |
Explosive mass (TNT equivalent) (g) |
Ricochet | ||||||
| 0% | 50% | 100% | ||||||||||
| HEF-T* | 900 | 0.24 | 0 | 0.1 | 8.5 | 79° | 80° | 81° | ||||
| HEF | 900 | 0.25 | 0 | 0.1 | 23.93 | 79° | 80° | 81° | ||||
| AP-T | 900 | 0.28 | - | - | - | 47° | 60° | 65° | ||||
| HEI | 900 | 0.26 | 0 | 0.1 | 5.52 | 79° | 80° | 81° | ||||
Anti-aircraft armament
Shimakaze has a single 13.2 mm HMG on the stern which has little to nothing to bring to the table for additional firepower. Her 25 mm's are responsible for air cover and under manual control aren't grouped together with the 13 mm.
Additional armament
Shimakaze uses the Type 93 Model 3 torpedoes, which have a reduced range of 15 km compared to the standard 20 km Type 93 Model 1 found on other Japanese ships. While not gaining any speed advantage, it does gain an even larger warhead: ~1000 kg of TNT instead of ~600, which makes it possible to sink nearly any ship short of the heaviest cruisers and battleships with a single hit.
On top of having one of the best torpedoes, she racks a total of 15 torpedoes she can fire all at once due to her lengthened hull compared to the Yugumo-class allowing for heavier quintuple launchers and an extra 3rd torpedo turret due to the added buoyancy.
| Torpedo Characteristics | |||||||
|---|---|---|---|---|---|---|---|
| Mass (kg) | Maximum speed in water (km/h) | Travel distance (km) | Depth stroke (m) | Arming distance (m) | Explosive type | Explosive mass (kg) | TNT equivalent (kg) |
| 2,800 | 91 | 15.00 | 1 | 50 | Type 97 | 780 | 998.4 |
Without the presence of submarines, the usage of depth charges is very situational. Using the depth charges that drop off stern racks, there is no reason to use any depth charge activation time setting above the minimum 3 seconds since higher times means the depth charge will sink further and thus away from the target. With a fast boat, sailing up right next to a slower target and dropping the depth charges can lead to some success.
The depth charges mounted on depth charge throwers are even more situational. They cannot be aimed and have a long flight time, making them difficult to use against moving targets. Their detonation times also cannot be changed, detonating 3 seconds after hitting the water. They can be used to hit an enemy behind cover, though this is extremely situational as with other depth charge uses. They can also be detonated, instantly destroying the ship.
Usage in battles
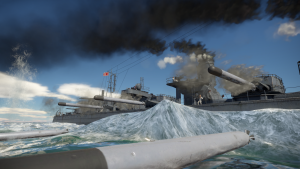
Shimakaze is one of the most formidable destroyers Japan can offer, owing largely to its outstanding torpedo armament of 3 quintuple launchers and only beaten by the Italian built Tashkent and French Le Fantasque-class for fastest ship.
Otherwise, she has a well-rounded mix of survivability and firepower, lagging behind slightly due to the lack of AP ammunition options, making it cannon fodder for most cruisers if the manoeuvrability isn't made use of. On the contrary, cruisers only have to worry about Shimakaze like any other Japanese destroyer for the arsenal of torpedoes that will most likely wall them off in a wave of torpedoes and sink them instantly.
The Long Lance is among the best torpedo in-game with excellent range, speed and explosive filler. Like all torpedo-centric destroyers, Shimakaze excels in Arcade Battles with the ability to re-spawn torpedoes mid-battle and is better than other Japanese destroyers, which have a 2nd reload for torpedoes which takes a few seconds between torpedo bursts, unlike the full burst Shimakaze can do at once and instantly reload the full rack. Meanwhile, in realistic battles, torpedoes should be used sparing as you can't reload them out of the capture zone and only reloads one torpedo per torpedo turret.
Shimakaze is best used as a sniper of sorts, using her massive arsenal of powerful, long-range torpedoes and accurate, relatively high-velocity main armament to engage enemy ships at the range while using her speed and manoeuvrability to avoid return fire. At close range, the slow turret traverse and reload as well as her relatively average survivability make Shimakaze very vulnerable, especially against destroyers with harder-hitting main armament, like most American destroyers armed with the 5 inch/38 Mk.12 (127 mm).
Pros and cons
Pros:
- Fastest Japanese destroyer
- Good manoeuvrability
- Top speed of 93 / 76 km/h
- 3 quintuple torpedo launchers
- Can release 15 torpedoes at once
- Very deadly torpedoes (Type 93 Model 3)
- 127 mm guns have good ballistics
- 21 x 25 mm AA cannons with a lot of ammunition
Cons:
- Average Japanese destroyer turrets (Type 3 (127 mm))
- Slow turret traverse
- 127 mm guns have no AP (only HE and HE-DF)
- 127 mm guns are almost useless against air targets (due to slow traverse)
- Turrets tend to be taken out often
- Torpedo launchers are easily disabled
- 25 mm AA are only effective at close range (max range about 3 km)
History
Shimakaze (島風, Island Wind) (Project N° F52;2 Hull N° 125) was a new end of the line experimental heavy destroyer which would be the lead ship of this new class of C-Type destroyers.
She was built under the Maru 4 programme, and another 16 of her kind planned and long-term plans to extend her class to 32 ships to form 4 destroyer squadrons. These ambitious plans would be dropped down to 8 in the Maru 5 programme, and eventually, her sister ships would all be cancelled and re-planned on 30 June 1942 to 8 x Yūgumo-class and 7 x Super Akizuki-class
Development
By 1939, the Imperial Japanese Navy had expanded massively with 3 Naval Armaments Supplement programmes, and it wouldn't stop there. With their 4th Naval Armament Supplement programme (マル4計画, 第四次海軍軍備充実計画), otherwise known as Maru 4, they planned to expand their navy with an additional 80 warships and 75 Naval Air Groups costing 1.6 billion Japanese Yen.
Under this Maru 4, there would be 3 modernized destroyer types.
- Type A: Kagerō-class, Yūgumo-class - Regular destroyers (further expansion Of Maru 3)
- Type B: Akizuki-class - Dedicated anti-air destroyers
- Type C: Shimakaze-class - High-end heavy duty destroyers
The top speed of any Japanese warship within the IJN went to a previous generation of Shimakaze (1920) from the Minekaze-class destroyers with a max speed of 40.7 knots on her sea trials compared to her ship-class speed of 39 knots. After that, the Navy was seeking to improve cruising speed yet keeping the possibility of armament and hull improvements open.
These demands arose after Japan abolished the Washington Naval Treaty and withdrew from the London Naval Treaty in 1938, and began the rapid modernization of their navy in both tonnage and equipment. Together with Japanese intelligence gathering information on the USN, developing a new destroyer with a top speed of 38 kn or more and the new generation of American cruisers and battleships with a projected speed of 27 - 33 kn. For those reasons, the Navy wanted to outshine the Americans by having faster ships and high-power torpedoes which they already had developed.
Design
With the Maru 4 being specified and funded, the construction of Shimakaze started in 1941 at the Maizuru Naval Arsenal. She was to be built as a high-speed ship, heavily armed with torpedoes to excel at her role as a destroyer in the purpose of torpedo combat.
Shimakaze's hull was essentially an elongated Type A (Yūgumo-class) destroyer hull with the same main armament but having an additional 7.62 m of added length allowing for a third torpedo launcher. But because she was already quite top-heavy like other Japanese destroyers, her additional length could only cover an additional torpedo launch turret and AA mounts but would become too heavy if she carried an additional reload for her torpedoes at sea.
She was initially planned to carry 2 x 7 tube torpedo launchers, but due to the weight of the turret, it would be impossible to hand crank the turret in case of a power outage, and with this, she got 3 x 5 tube torpedo launchers instead.
Her new experimental high temperature and pressure Kampon boilers which were designed further upon from the Kagerō-class, Amatsukaze that developed 79,240 shaft horsepower and would prove to be a perfect combination with a new type of turbine would allow her to put out 50% more power compared to other destroyers.
Due to setbacks in the Pacific War, other priorities shifted the budget of the Maru 4 plan, and fewer resources would be spent on more of the already expensive Type C destroyer. After many delays of the lead ship Shimakaze, her sister ships were cancelled and allocated to Type A & B destroyers. Shimakaze would finally leave port on the 10th of May, 1943.
Shimakaze was one of the first Japanese ships to be equipped with a radar with her Type 22 radar due to her long time in port. This would be supplemented with a Type 13 radar in June 1944, together with an increase in 25 mm AA guns.
Service History
1943
- May
As she left port on the 10th, she would be handed over to the Navy and assigned to the 11th destroyer squadron, 1st fleet. Desron 11 was a dedicated squadron to train crew on new or repaired destroyers before they were sent to the frontline waters.
- July
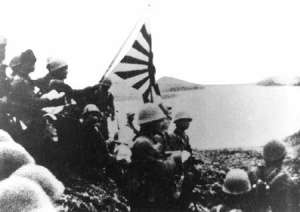
Shimakaze's first assignment was to escort and cover the evacuation of Japanese soldiers & personnel from Kiska, Aleutian Islands as part of the Japanese Operation One Sword「ケ」 (ケ号作戦), together with Desron 2 whom she would be assigned to after being fully trained in Desron 11.
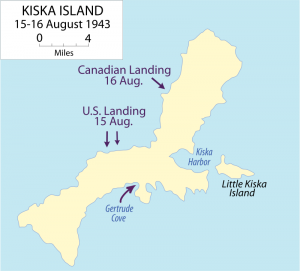
During 1943, the captured islands of Attu and Kiska were to be taken back by Allied forces as they were captured during the start of the Pacific War by Japan. The American recapture of these 2 islands started with taking the westmost island of Attu (Operation Landcrab), which was less militarily developed compared to Kiska, which had a port, airfield, and other military installations, and would create a naval blockade cutting off the island of Kiska completely from Japanese reach. In May, the Americans, together with Canadians, would be victorious in the Battle of Attu at great cost for both sides, which would lead to poor decision-making towards the capture of Kiska (Operation Cottage).
Even though Kiska was cut-off for the Japanese, making it no longer defensible, and Japan needed all the men they could muster, they wouldn't allow it to turn it into a repeat of the Battle of Attu. With this, command greenlit the evacuation of Kiska.
Shimakaze would take part in the evacuation as the flagship of the screening force. The initial evacuation run was planned for 7 - 17 July but was aborted due to bad weather on the 15th.
For the 2nd attempt, which was planned for 22 July - 1 August, weather conditions seemed very similar to those during the first evacuation run since the first day, but command was losing time, fuel, and patience. At first, command wanted to wait for the weather to clear up but decided to rush it through the weather regardless before they lost too much time due to the vocal opinion of Shigenori Kami, captain of the Tama, the lead ship of the operation.
The fleet was preparing to rush into Kiska bay without waiting for their fueling party to top them off outside the USS patrol area. The cruiser Abukuma pushed her fuel reserve and refuelled her accompanying destroyers. At midnight of the 29th, the fleet ran towards Kiska bay, following the island's shadow and passing from the west to evade any American patrols from the open south. On arrival at Kiska Bay, there was information on a detected vessel. However, what it was, was unknown, Shimakaze's radar detected it as well, thinking it might be a USS destroyer on patrol. Detecting an enemy, her crew were excited about her first naval engagement. At 13:00, she launched several torpedoes at the shadow of the enemy vessel together with the cruiser Abukuma who spotted it first and launched four torpedoes. But this target wasn't an allied vessel, but Little Kiska Island appeared to look like a ship in the very thick fog.
The fleet would anchor at Kiska Harbor at 13:40, where at the time, there was a temporary, clear fog in the bay. An approximate 5,200 Kiska Island garrison members waiting for their evacuation immediately embarked on the fleet. They left behind their Type 38 rifles, which would be grossly outdated and save on weight while doing so. The whole garrison would be fully accommodated in the short time of 55 minutes with the help of Daihatsu Landing Crafts. The fleet would leave Kiska at full speed (28 knots, ~52 km/h) surrounded once more by the deep fog they arrived in. In a detailed report, the number of men accommodated on ships was as follows:
| Recovered men | |||||
|---|---|---|---|---|---|
| Cruisers | Men | Yugumo-class | Men | Other | Men |
| Abukuma | 1,202 | Yugumo | 479 | Hibiki | 418 |
| Kiso | 1,189 | Kazagumo | 478 | ||
| Akigumo | 478 | ||||
| Asagumo | 468 | ||||
| Usugumo | 476 | ||||
| Total | 5,183 | ||||
The whole island garrison would be fully withdrawn to the island of Paramushir between 31 July to 1 August, fully returning 2,518 navy crew, 2,669 army men and 30 others, resulting in a total of 5,183 men. Because of the fog covering the withdrawal force, the success of Operation One Sword would be dubbed as a Miracle Operation (奇跡の作戦)
Even though Allied reconnaissance reported diminishing island movement, damage not being repaired, less and less anti-aircraft fire and on July 28, radio signals from Kiska completely went silent, American forces still proceeded to invade the island being fully prepared to fight Japanese soldiers dug into the mountains.
As US and Canadian forces landed on opposite shores, they mistook each other for Japanese and sporadic friendly fire once meeting. Together with Japanese booby-traps and the USS Abner Read (DD-526) hitting a stray sea-mine, losing a large chunk of its stern, the invasion ended in around 100 Allied deaths, and 221 more wounded against a defending force of null.
- August
On 5 July, Shimakaze arrived at Paramushir after her July operations near the Aleutian Islands. She would escort the cruiser Maya to Yokosuka, arriving on 6 August, where she then docked for maintenance.
- September
Once done with maintenance on the 15th, she would escort the cruisers Chokai and Maya to Truk. They would arrive on the 20th, and Shimakaze would escort the escort carriers Chūyō and Taiyō back to Yokosuka the next day.
3 days later, on the way to Yokosuka on the 24th, Taiyō would be hit by a torpedo by USS Cabrilla (SS-288) (3 torpedo launchers, 1 hit), and lost a propeller shaft. Shimakaze pulled 8 men that fell from the ship during the hit, and Chūyō would tow her sister as she couldn't navigate on her own anymore. Cabrilla wanted to attack the Chūyō as well to stop both ships from continuing but as Shimakaze launched a depth charge to scare off the submarine (Shimakaze reported it would sink), took evasive manoeuvres and lost sight of the ships after looking for them again.
While and after chasing the submarine, Shimakaze struck upon the destroyers Sazanami and Shiratsuyu and they joined the group to escort towards Yokosuka, where they would arrive on the 26th.
Name
Shimakaze isn't the only vessel named Shimakaze (島風, シマカゼ, しまかぜ, Island Wind);
- 1st generation: Shimakaze (1920 - 1940), Minekaze-class destroyer (1919).
- Renamed to "Patrol Boat No. 1" (第一号哨戒艇) in 1940.
- Sunk 12 January 1943
- 2nd generation: Shimakaze (1942 - 1945), Shimakaze-class destroyer (1942).
- Sunk 11 November 1944
- 3rd generation: Shimakaze (DDG-172) (1988 - 2021), Hatakaze-class guided missile destroyer (1988).
- Renamed to "Shimakaze (TV-3521)" in 2021.
Media
- Skins
- Images
- Videos
See also
- Related development
- Yugumo-class (parallel predecessor)
External links
- [Devblog] Shimakaze: Fast as the Wind
- [Wikipedia] Japanese destroyer Shimakaze (1942)
- [RV Petrel] IJN Shimakaze wreck
| Maizuru Naval Arsenal (舞鶴海軍工廠) | |
|---|---|
| Torpedo Boats (TB) | |
| Chidori-class | Chidori |
| Destroyers (DD) | |
| Yugumo-class | IJN Yugumo · IJN Hayanami |
| Shimakaze-class | IJN Shimakaze |
| Akizuki-class | IJN Akizuki · IJN Hatsuzuki |
| Japan destroyers | |
|---|---|
| IJN | |
| Momi-class | IJN Momi |
| Mutsuki-class | IJN Mutsuki · IJN Satsuki |
| Fubuki-class | IJN Ayanami |
| Hatsuharu-class | IJN Hatsuharu · IJN Nenohi |
| Shiratsuyu-class | IJN Yuudachi |
| Yugumo-class | IJN Yugumo · IJN Hayanami · IJN Kiyoshimo |
| Shimakaze-class | IJN Shimakaze |
| Akizuki-class | IJN Akizuki · IJN Hatsuzuki |
| JMSDF | |
| Ariake-class* | JDS Yūgure (DD-184) |
| Harukaze-class | JDS Harukaze (DD-101) |
| Murasame-class | JDS Murasame (DD-107) |
| * Modified Fletcher-class destroyers | |
| Squadron ships | |
|---|---|
| Germany | Karl Marx |
| USSR | SKR-7 |
| Britain | HMS Liverpool |
| Japan | IJN Shimakaze |


