Difference between revisions of "European Province"
(Fix in reference to EE GF map) |
(→External links: Edits) |
||
| (3 intermediate revisions by 3 users not shown) | |||
| Line 1: | Line 1: | ||
{{DISPLAYTITLE:European Province}} | {{DISPLAYTITLE:European Province}} | ||
| − | + | <div class="ttx"> | |
| − | + | <div class="ttx-image">[[File:MapIcon Ground EuropeanProvince.jpg]]</div> | |
| − | + | <div class="ttx-table"> | |
| − | + | <div class="ttx-table-line ttx-table-head">Possible Layouts</div> | |
| − | + | <div class="ttx-table-line"><span class="ttx-value">[[File:Icon GreenCheckmark.png|link=]]</span><span class="ttx-name">Domination</span></div> | |
| − | + | <div class="ttx-table-line"><span class="ttx-value">[[File:Icon GreenCheckmark.png|link=]]</span><span class="ttx-name">Conquest</span></div> | |
| − | + | <div class="ttx-table-line"><span class="ttx-value">[[File:Icon GreenCheckmark.png|link=]]</span><span class="ttx-name">Battle</span></div> | |
| − | + | <div class="ttx-table-line"><span class="ttx-value">[[File:Icon RedXCross.png|link=]]</span><span class="ttx-name">Break</span></div> | |
| − | + | <div class="ttx-table-line"><span class="ttx-value">[[File:Icon RedXCross.png|link=]]</span><span class="ttx-name">Skirmish</span></div> | |
| − | + | <div class="ttx-table-line ttx-table-head">Other Information</div> | |
| − | + | <div class="ttx-table-line"><span class="ttx-value">4 km x 4 km</span><span class="ttx-name">Full tank area size</span></div> | |
| − | + | <div class="ttx-table-line"><span class="ttx-value">Ukraine [[File:CountryIcon SUN.png]]</span><span class="ttx-name">Real World Location</span></div> | |
| − | + | <div class="ttx-table-line ttx-table-head">Full Map</div> | |
| − | + | <div class="ttx-image">[[File:MapLayout_Ground_EasternEurope.jpg]]</div> | |
| − | + | </div> | |
| − | + | </div> | |
__TOC__ | __TOC__ | ||
==Overview== | ==Overview== | ||
| − | + | <!--''Write an introduction to the article in 2-3 small paragraphs. Briefly tell about the location and also about its features.''--> | |
'''European Province''' is a ground forces map available in all modes, using the same map as the [[Eastern Europe (Ground Forces)|Eastern Europe]] map. It was added in [[Update 1.77 "Advancing Storm"]]. The difference between this map and the Eastern Europe map is that the battle area has been significantly increased; whereas on Eastern Europe the battle area is restricted to just that of the town and a small section of the surrounding area, on this map the battle area is most of the full map (seen to the right). | '''European Province''' is a ground forces map available in all modes, using the same map as the [[Eastern Europe (Ground Forces)|Eastern Europe]] map. It was added in [[Update 1.77 "Advancing Storm"]]. The difference between this map and the Eastern Europe map is that the battle area has been significantly increased; whereas on Eastern Europe the battle area is restricted to just that of the town and a small section of the surrounding area, on this map the battle area is most of the full map (seen to the right). | ||
| Line 28: | Line 28: | ||
The full Eastern Europe tank battles map (seen to the right) is 4km x 4km however. Dependent on the map configuration the tank battle area changes in size. The air battle area is 65km x 65km in all modes. The tank battle areas are: | The full Eastern Europe tank battles map (seen to the right) is 4km x 4km however. Dependent on the map configuration the tank battle area changes in size. The air battle area is 65km x 65km in all modes. The tank battle areas are: | ||
| − | + | {| class="wikitable" | |
| − | + | |+ Battle area Size | |
| − | + | ! Game Mode | |
| − | + | ! AB | |
| − | + | ! RB | |
| − | + | ! SB | |
| − | + | |- | |
| + | | Domination | ||
| + | | 3.3 km x 3.3 km | ||
| + | | 3.3 km x 3.3 km | ||
| + | | 3.3 km x 3.3 km | ||
| + | |- | ||
| + | | Conquest #1 | ||
| + | | 2.9km x 2.9km | ||
| + | | 2.9km x 2.9km | ||
| + | | 2.9km x 2.9km | ||
| + | |- | ||
| + | | Conquest #2 | ||
| + | | 3.3km x 3.3km | ||
| + | | 3.3km x 3.3km | ||
| + | | 3.3km x 3.3km | ||
| + | |- | ||
| + | | Conquest #3 | ||
| + | | 2.9km x 2.9km | ||
| + | | 2.9km x 2.9km | ||
| + | | 2.9km x 2.9km | ||
| + | |- | ||
| + | | Battle | ||
| + | | 3.5 km x 3.5 km | ||
| + | | 3.5 km x 3.5 km | ||
| + | | 3.5 km x 3.5 km | ||
| + | |} | ||
===Historical Background=== | ===Historical Background=== | ||
| + | <!--''Describe historical context of the location.''--> | ||
See the [[Eastern Europe (Ground Forces)|Eastern Europe]] map article for historical information. | See the [[Eastern Europe (Ground Forces)|Eastern Europe]] map article for historical information. | ||
==Map configuration== | ==Map configuration== | ||
| − | + | <!--Under this heading is the box to change game mode--> | |
| − | + | {| style="width:314; margin-left: auto; margin-right: auto; border: none;" class="wikitable" | |
| − | + | ! colspan="3" | Change Maps by Game Modes | |
| + | |- | ||
| + | ! <div class="ttx-switch-mode"><div class="ttx-switch-mode-button" id="ttx-ab-button">AB</div><div class="ttx-switch-mode-button" id="ttx-rb-button">RB</div><div class="ttx-switch-mode-button" id="ttx-sb-button" >SB</div></div> | ||
| + | |} | ||
| − | + | At present, this map has the same layouts in AB, RB and SB. | |
| − | |||
| − | |||
| − | |||
| − | |||
| − | + | ===Domination=== | |
| − | + | <!--Put map screenshot, layout sizes and basic description (where each cap point is) in table using ttx-ab, ttx-rb &ttx-sb spans appropriately. If a more detailed description is desired then insert it as a paragraph of text above the table--> | |
| − | [[File:MapLayout Battle EuropeanProvince.jpg| | + | {| style="width: 300px;" class="wikitable" |
| + | ! Domination Mode - Map Layouts | ||
| + | |- align="center" | ||
| + | | | ||
| + | <div style="float: none;" class="ttx-ab">[[File:MapLayout Domination EuropeanProvince ABRBSB.jpg|300px]]</div> | ||
| + | <div style="float: none;" class="ttx-rb">[[File:MapLayout Domination EuropeanProvince ABRBSB.jpg|300px]]</div> | ||
| + | <div style="float: none;" class="ttx-sb">[[File:MapLayout Domination EuropeanProvince ABRBSB.jpg|300px]]</div> | ||
| + | |- align="center" | ||
| + | | | ||
| + | <span class="ttx-ab">3.3 km x 3.3 km</span> | ||
| + | <span class="ttx-rb">3.3 km x 3.3 km</span> | ||
| + | <span class="ttx-sb">3.3 km x 3.3 km</span> | ||
| + | |- | ||
| + | | | ||
| + | <span class="ttx-ab">In AB point A is in the farm in the south of the map, B is in an open area in the middle of the town, and C is among some buildings, next to the fuel depot, north of the town.</span> | ||
| + | <span class="ttx-rb">In RB point A is in the farm in the south of the map, B is in an open area in the middle of the town, and C is among some buildings, next to the fuel depot, north of the town.</span> | ||
| + | <span class="ttx-sb">In SB point A is in the farm in the south of the map, B is in an open area in the middle of the town, and C is among some buildings, next to the fuel depot, north of the town.</span> | ||
| + | |} | ||
| + | |||
| + | ===Conquest=== | ||
| + | <!--Put map screenshots, layout sizes and basic descriptions (where each cap point is) in table using ttx-ab, ttx-rb &ttx-sb spans appropriately. If a more detailed description is desired then insert it as a paragraph of text above the table--> | ||
| + | {| style="width: 900px;" class="wikitable" | ||
| + | ! colspan="3" | Conquest Mode - Map Layouts | ||
| + | |- | ||
| + | ! Conquest #1 | ||
| + | ! Conquest #2 | ||
| + | ! Conquest #3 | ||
| + | |- align="center" | ||
| + | | | ||
| + | <div style="float: none;" class="ttx-ab">[[File:MapLayout Conquest1 EuropeanProvince ABRBSB.jpg|300px]]</div> | ||
| + | <div style="float: none;" class="ttx-rb">[[File:MapLayout Conquest1 EuropeanProvince ABRBSB.jpg|300px]]</div> | ||
| + | <div style="float: none;" class="ttx-sb">[[File:MapLayout Conquest1 EuropeanProvince ABRBSB.jpg|300px]]</div> | ||
| + | | | ||
| + | <div style="float: none;" class="ttx-ab">[[File:MapLayout Conquest2 EuropeanProvince ABRBSB.jpg|300px]]</div> | ||
| + | <div style="float: none;" class="ttx-rb">[[File:MapLayout Conquest2 EuropeanProvince ABRBSB.jpg|300px]]</div> | ||
| + | <div style="float: none;" class="ttx-sb">[[File:MapLayout Conquest2 EuropeanProvince ABRBSB.jpg|300px]]</div> | ||
| + | | | ||
| + | <div style="float: none;" class="ttx-ab">[[File:MapLayout Conquest3 EuropeanProvince ABRBSB.jpg|300px]]</div> | ||
| + | <div style="float: none;" class="ttx-rb">[[File:MapLayout Conquest3 EuropeanProvince ABRBSB.jpg|300px]]</div> | ||
| + | <div style="float: none;" class="ttx-sb">[[File:MapLayout Conquest3 EuropeanProvince ABRBSB.jpg|300px]]</div> | ||
| + | |- align="center" | ||
| + | | | ||
| + | <span class="ttx-ab">2.9km x 2.9 km</span> | ||
| + | <span class="ttx-rb">2.9km x 2.9 km</span> | ||
| + | <span class="ttx-sb">2.9km x 2.9 km</span> | ||
| + | | | ||
| + | <span class="ttx-ab">3.3 km x 3.3 km</span> | ||
| + | <span class="ttx-rb">3.3 km x 3.3 km</span> | ||
| + | <span class="ttx-sb">3.3 km x 3.3 km</span> | ||
| + | | | ||
| + | <span class="ttx-ab">2.9km x 2.9 km</span> | ||
| + | <span class="ttx-rb">2.9km x 2.9 km</span> | ||
| + | <span class="ttx-sb">2.9km x 2.9 km</span> | ||
| + | |- | ||
| + | | | ||
| + | <span class="ttx-ab">In AB the capture point is on a bridge in the centre of the town.</span> | ||
| + | <span class="ttx-rb">In RB the capture point is on a bridge in the centre of the town.</span> | ||
| + | <span class="ttx-sb">In SB the capture point is on a bridge in the centre of the town.</span> | ||
| + | | | ||
| + | <span class="ttx-ab">In AB the capture point is in the farm to the south of the town.</span> | ||
| + | <span class="ttx-rb">In RB the capture point is in the farm to the south of the town.</span> | ||
| + | <span class="ttx-sb">In SB the capture point is in the farm to the south of the town.</span> | ||
| + | | | ||
| + | <span class="ttx-ab">In AB the capture point is on the northern edge of the town.</span> | ||
| + | <span class="ttx-rb">In RB the capture point is on the northern edge of the town.</span> | ||
| + | <span class="ttx-sb">In RB the capture point is on the northern edge of the town.</span> | ||
| + | |} | ||
| + | |||
| + | ===Battle=== | ||
| + | <!--Put map screenshots, layout sizes and basic descriptions (where each cap point is) in table using ttx-ab, ttx-rb &ttx-sb spans appropriately. If a more detailed description is desired then insert it as a paragraph of text above the table--> | ||
| + | {| style="width: 300px;" class="wikitable" | ||
| + | ! Battle Mode - Map Layouts | ||
| + | |- align="center" | ||
| + | | | ||
| + | <div style="float: none;" class="ttx-ab">[[File:MapLayout Battle EuropeanProvince ABRBSB.jpg|300px]]</div> | ||
| + | <div style="float: none;" class="ttx-rb">[[File:MapLayout Battle EuropeanProvince ABRBSB.jpg|300px]]</div> | ||
| + | <div style="float: none;" class="ttx-sb">[[File:MapLayout Battle EuropeanProvince ABRBSB.jpg|300px]]</div> | ||
| + | |- align="center" | ||
| + | | | ||
| + | <span class="ttx-ab">3.5 km x 3.5 km</span> | ||
| + | <span class="ttx-rb">3.5 km x 3.5 km</span> | ||
| + | <span class="ttx-sb">3.5 km x 3.5 km</span> | ||
| + | |- | ||
| + | | | ||
| + | <span class="ttx-ab">In AB the capture points are located on the very western edge of the town and around a farm building to the east of the town.</span> | ||
| + | <span class="ttx-rb">In RB the capture points are located on the very western edge of the town and around a farm building to the east of the town.</span> | ||
| + | <span class="ttx-sb">In SB the capture points are located on the very western edge of the town and around a farm building to the east of the town.</span> | ||
| + | |} | ||
==Strategy== | ==Strategy== | ||
| + | ''Describe what focus a team should have when spawning into the map'' | ||
== Media == | == Media == | ||
| − | + | ''Excellent additions to the article would be video guides, screenshots from the game, and photos.'' | |
| − | == | + | == See also == |
| − | < | + | <!-- ''Links to the articles on the War Thunder Wiki that you think will be useful for the reader, for example:'' |
| + | * ''reference to related locations'' --> | ||
| + | * [[Eastern Europe (Ground Forces)]] | ||
| − | == | + | == External links == |
| − | <!--'' | + | <!-- ''Paste links to sources and external resources, such as:'' |
| − | * '' | + | * ''topic on the official game forum;'' |
| − | * '' | + | * ''other literature.'' --> |
| − | |||
| − | + | * [[wt:en/news/3909--en|[Devblog] Location: Eastern Europe]] | |
| − | + | * [[wt:en/news/3953--en|[Devblog] Ground Forces map changes]] | |
| − | * | ||
| − | |||
[[Category:Maps_and_missions]] | [[Category:Maps_and_missions]] | ||
[[Category:Ground forces maps]] | [[Category:Ground forces maps]] | ||
Latest revision as of 13:45, 2 March 2024
Contents
Overview
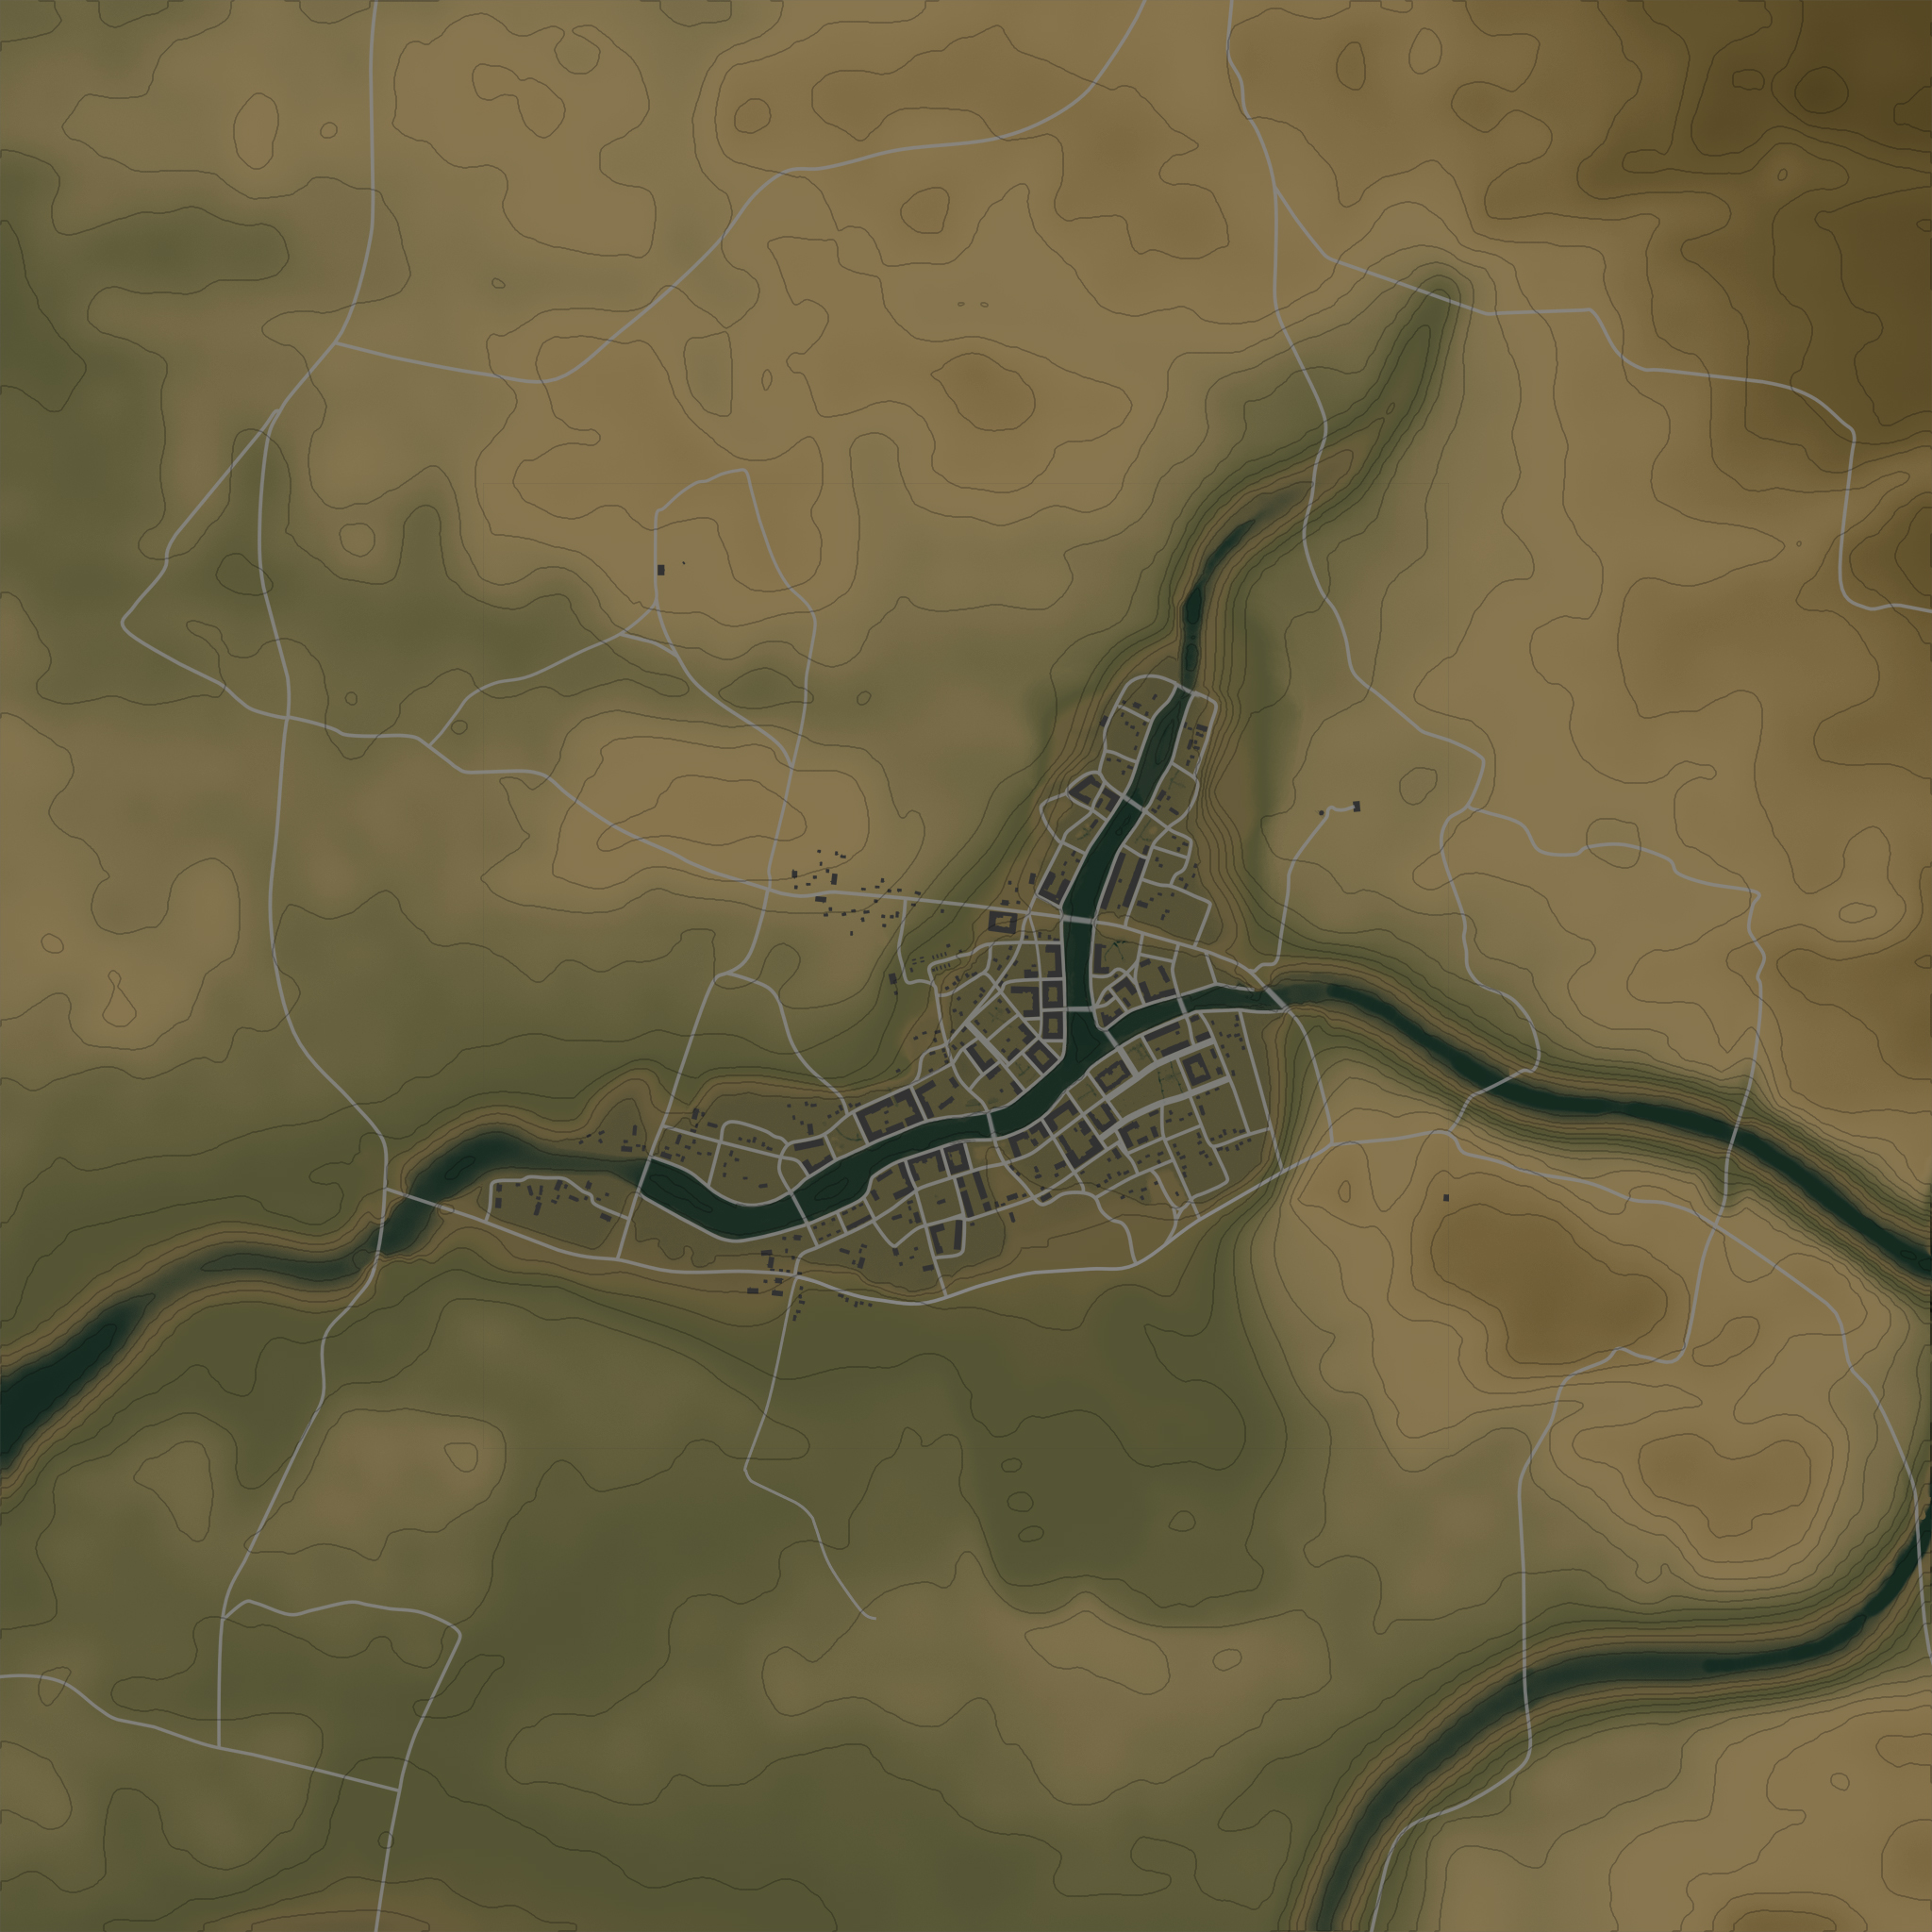
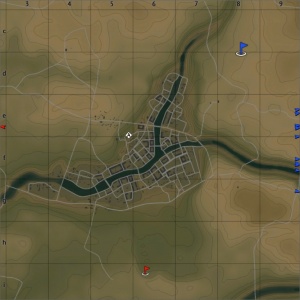
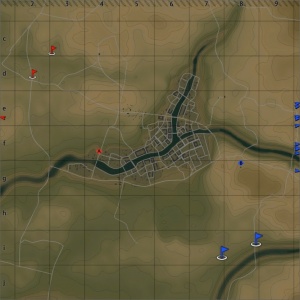
European Province is a ground forces map available in all modes, using the same map as the Eastern Europe map. It was added in Update 1.77 "Advancing Storm". The difference between this map and the Eastern Europe map is that the battle area has been significantly increased; whereas on Eastern Europe the battle area is restricted to just that of the town and a small section of the surrounding area, on this map the battle area is most of the full map (seen to the right).
Combat in the town is pretty much the same as on the Eastern Europe map. The increased battle area allows the fields around the town to be accessed, players can engage in long range combat shooting at other players in the fields on the other side of the town. The fields are generally pretty open with little cover, however there are clusters of farm buildings dotted across the map, and tree lines help break up the map and provide cover for players. There is a large farm in the fields south of the town, which is often used either as a capture point, or a spawn point for one of the teams.
The full Eastern Europe tank battles map (seen to the right) is 4km x 4km however. Dependent on the map configuration the tank battle area changes in size. The air battle area is 65km x 65km in all modes. The tank battle areas are:
| Game Mode | AB | RB | SB |
|---|---|---|---|
| Domination | 3.3 km x 3.3 km | 3.3 km x 3.3 km | 3.3 km x 3.3 km |
| Conquest #1 | 2.9km x 2.9km | 2.9km x 2.9km | 2.9km x 2.9km |
| Conquest #2 | 3.3km x 3.3km | 3.3km x 3.3km | 3.3km x 3.3km |
| Conquest #3 | 2.9km x 2.9km | 2.9km x 2.9km | 2.9km x 2.9km |
| Battle | 3.5 km x 3.5 km | 3.5 km x 3.5 km | 3.5 km x 3.5 km |
Historical Background
See the Eastern Europe map article for historical information.
Map configuration
| Change Maps by Game Modes | ||
|---|---|---|
| | ||
At present, this map has the same layouts in AB, RB and SB.
Domination
| Domination Mode - Map Layouts |
|---|
|
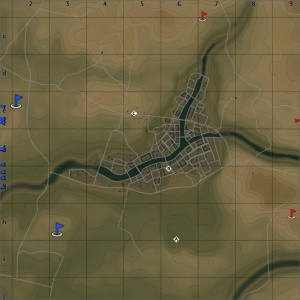
3.3 km x 3.3 km 3.3 km x 3.3 km 3.3 km x 3.3 km |
|
In AB point A is in the farm in the south of the map, B is in an open area in the middle of the town, and C is among some buildings, next to the fuel depot, north of the town. In RB point A is in the farm in the south of the map, B is in an open area in the middle of the town, and C is among some buildings, next to the fuel depot, north of the town. In SB point A is in the farm in the south of the map, B is in an open area in the middle of the town, and C is among some buildings, next to the fuel depot, north of the town. |
Conquest
| Conquest Mode - Map Layouts | ||
|---|---|---|
| Conquest #1 | Conquest #2 | Conquest #3 |
|
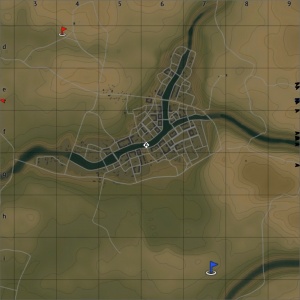
2.9km x 2.9 km 2.9km x 2.9 km 2.9km x 2.9 km |
3.3 km x 3.3 km 3.3 km x 3.3 km 3.3 km x 3.3 km |
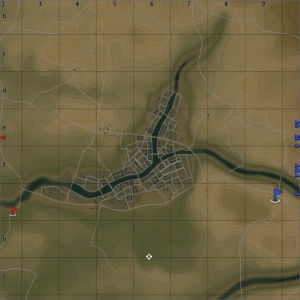
2.9km x 2.9 km 2.9km x 2.9 km 2.9km x 2.9 km |
|
In AB the capture point is on a bridge in the centre of the town. In RB the capture point is on a bridge in the centre of the town. In SB the capture point is on a bridge in the centre of the town. |
In AB the capture point is in the farm to the south of the town. In RB the capture point is in the farm to the south of the town. In SB the capture point is in the farm to the south of the town. |
In AB the capture point is on the northern edge of the town. In RB the capture point is on the northern edge of the town. In RB the capture point is on the northern edge of the town. |
Battle
| Battle Mode - Map Layouts |
|---|
|
3.5 km x 3.5 km 3.5 km x 3.5 km 3.5 km x 3.5 km |
|
In AB the capture points are located on the very western edge of the town and around a farm building to the east of the town. In RB the capture points are located on the very western edge of the town and around a farm building to the east of the town. In SB the capture points are located on the very western edge of the town and around a farm building to the east of the town. |
Strategy
Describe what focus a team should have when spawning into the map
Media
Excellent additions to the article would be video guides, screenshots from the game, and photos.


