Difference between revisions of "F3H-2"
(→Pros and cons: Removed one con for being too vague, edited other) |
U135506923 (talk | contribs) (→Pros and cons) (Tag: Visual edit) |
||
| (37 intermediate revisions by 14 users not shown) | |||
| Line 1: | Line 1: | ||
{{Specs-Card | {{Specs-Card | ||
|code=f3h-2 | |code=f3h-2 | ||
| − | |images={{Specs-Card-Image|GarageImage_{{PAGENAME}}.jpg}} | + | |images={{Specs-Card-Image|GarageImage_{{PAGENAME}}.jpg|ArtImage_{{PAGENAME}}.png}} |
|cockpit=cockpit_f3h-2.jpg | |cockpit=cockpit_f3h-2.jpg | ||
}} | }} | ||
| Line 7: | Line 7: | ||
== Description == | == Description == | ||
<!-- ''In the description, the first part should be about the history of and the creation and combat usage of the aircraft, as well as its key features. In the second part, tell the reader about the aircraft in the game. Insert a screenshot of the vehicle, so that if the novice player does not remember the vehicle by name, he will immediately understand what kind of vehicle the article is talking about.'' --> | <!-- ''In the description, the first part should be about the history of and the creation and combat usage of the aircraft, as well as its key features. In the second part, tell the reader about the aircraft in the game. Insert a screenshot of the vehicle, so that if the novice player does not remember the vehicle by name, he will immediately understand what kind of vehicle the article is talking about.'' --> | ||
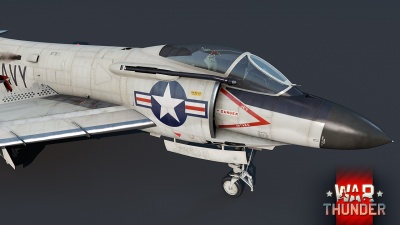
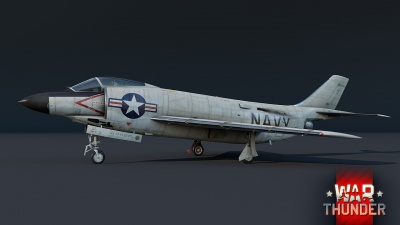
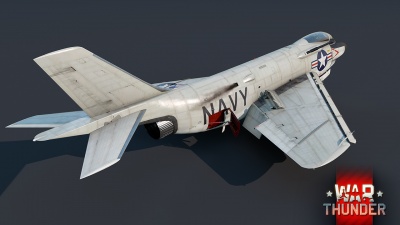
| − | The '''{{Specs|name}}''' is a | + | The F3H-2 Demon was a big improvement over the F3H-1N. Significant issues with the Westinghouse J40 almost killed the Demon project. As the J40 was being remedied, McDonnell inquired to the Navy about a new powerplant in case the J40 was deemed too far gone. After authorization, McDonnell chose the Allison J71 engine which was a vast improvement over the previous J40. Unlike previous versions of the Demon, the F3H-2 could launch the more advanced AIM-7C Sparrow. It could also carry AIM-9B Sidewinders and up to 6,000 lbs of ordnance. Although the F3H-2 was deemed somewhat favorable by its crews, newer and more advanced aircraft like the F-8 Crusader and F-4 Phantom numbered the Demon’s days. Finally, in 1964, the last naval squadron using Demons, VF-161, switched them out for the new Phantoms. |
| + | |||
| + | Introduced in [[Update "Starfighters"]], the '''{{Specs|name}}''' is a decent single-engine fighter. Although the engine issue was largely solved, the Demon was still quite heavy and underpowered. In-game players should not stick to lengthy dogfights due to the Demon’s weak energy retention and energy loss. With excess energy, the Demon can turn quite well however it’s only for a few turns before it becomes slow and an easy target. The AIM-7C Sparrows are very ineffective due to the weak motor, guidance delay time, and overall lacklustre performance. Players should opt for the AIM-9B Sidewinder instead of the AIM-7Cs. Overall, the F3H-2 Demon is a capable aircraft with some quirks that can be mitigated. | ||
== General info == | == General info == | ||
| Line 13: | Line 15: | ||
{{Specs-Avia-Flight}} | {{Specs-Avia-Flight}} | ||
<!-- ''Describe how the aircraft behaves in the air. Speed, manoeuvrability, acceleration and allowable loads - these are the most important characteristics of the vehicle.'' --> | <!-- ''Describe how the aircraft behaves in the air. Speed, manoeuvrability, acceleration and allowable loads - these are the most important characteristics of the vehicle.'' --> | ||
| − | + | On first glance the jet may look big and slow (and in many situations it is), but in comparison to the previous American naval aircraft it is an improvement. | |
| − | You are no longer confined to the slow acceleration, slower turns of the F9F series, but are | + | You are no longer confined to the slow acceleration, slower turns of the F9F series, but instead are capable of going tip of the spear with full afterburner and charging the enemy, in the event your allies don't have supersonic aircraft. Note that the leading edge slats can be controlled manually by engaged combat flaps (pressing F by default for flaps) which takes your elevator control to a next level at low speeds. |
| − | When flying this jet | + | When flying this jet against contemporaries you can really stretch your legs with different tactics, but are the safest in playing as a Close Air Patrol (CAP) aircraft. While you have average ordnance for ground attack, the Demon is much more oriented for using its radar guided missiles for an unparalleled air-to-air advantage. |
Important things to remember: | Important things to remember: | ||
| Line 86: | Line 88: | ||
|- | |- | ||
! colspan="2" | Engine name || Number | ! colspan="2" | Engine name || Number | ||
| − | ! colspan="3" | {{Annotation|Basic | + | ! colspan="3" | {{Annotation|Basic mass|Mass of the aircraft with pilot and engine oil, but no fuel or weapons load}} || colspan="3" | Wing loading (full fuel) |
|- | |- | ||
| colspan="2" | Allison J71-A-2 || 1 | | colspan="2" | Allison J71-A-2 || 1 | ||
| Line 92: | Line 94: | ||
|- | |- | ||
! colspan="3" | Engine characteristics | ! colspan="3" | Engine characteristics | ||
| − | ! colspan="5" | Mass with fuel (no weapons load) || rowspan="2" | Max Takeoff<br | + | ! colspan="5" | Mass with fuel (no weapons load) || rowspan="2" | Max Takeoff<br>Weight |
|- | |- | ||
! Weight (each) || colspan="2" | Type | ! Weight (each) || colspan="2" | Type | ||
| − | ! | + | ! 17m fuel || 20m fuel || 30m fuel || 45m fuel || 59m fuel |
|- | |- | ||
| 2,180 kg || colspan="2" | Afterburning axial-flow turbojet | | 2,180 kg || colspan="2" | Afterburning axial-flow turbojet | ||
| − | | 11, | + | | 11,296 kg || 11,465 kg || 12,216 kg || 13,341 kg || 14,405 kg || 18,000 kg |
|- | |- | ||
| − | ! colspan="3" | {{Annotation|Maximum engine thrust @ 0 m (RB / SB)|The maximum thrust produced by each engine, while mounted in the aircraft. NOTE: Thrust varies significantly depending on speed & altitude.}} | + | ! colspan="3" | {{Annotation|Maximum engine thrust @ 0 m (RB/SB)|The maximum thrust produced by each engine, while mounted in the aircraft. NOTE: Thrust varies significantly depending on speed & altitude.}} |
! colspan="6" | Thrust to weight ratio @ 0 m (WEP) | ! colspan="6" | Thrust to weight ratio @ 0 m (WEP) | ||
|- | |- | ||
! Condition || 100% || WEP | ! Condition || 100% || WEP | ||
| − | ! | + | ! 17m fuel || 20m fuel || 30m fuel || 45m fuel || 59m fuel || MTOW |
|- | |- | ||
| ''Stationary'' || 4,590 kgf || 6,334 kgf | | ''Stationary'' || 4,590 kgf || 6,334 kgf | ||
| − | | 0.56 || 0. | + | | 0.56 || 0.55 || 0.52 || 0.47 || 0.44 || 0.35 |
|- | |- | ||
| − | | ''Optimal'' || 4,774 kgf<br | + | | ''Optimal'' || 4,774 kgf<br>(1,200 km/h) || 8,169 kgf<br>(1,200 km/h) |
| − | | 0. | + | | 0.72 || 0.71 || 0.67 || 0.61 || 0.57 || 0.45 |
|- | |- | ||
|} | |} | ||
| Line 136: | Line 138: | ||
The '''''{{PAGENAME}}''''' is armed with: | The '''''{{PAGENAME}}''''' is armed with: | ||
| − | * 4 x 20 mm Browning-Colt Mk12 Mod 3 cannons, chin-mounted (190 rpg = 760 total) | + | * 4 x 20 mm Browning-Colt Mk12 Mod 3 cannons, chin-mounted (190 rpg = 760 total). |
| + | |||
| + | These guns have good muzzle velocity, good rate of fire and deal decent damage. Combined with their large ammo pool, they are effective offensive armament. The only real downside is the very poor accuracy without the "New 20 mm cannons" modification, making longer range shots problematic despite the good velocity. | ||
=== Suspended armament === | === Suspended armament === | ||
{{Specs-Avia-Suspended}} | {{Specs-Avia-Suspended}} | ||
<!-- ''Describe the aircraft's suspended armament: additional cannons under the wings, bombs, rockets and torpedoes. This section is especially important for bombers and attackers. If there is no suspended weaponry remove this subsection.'' --> | <!-- ''Describe the aircraft's suspended armament: additional cannons under the wings, bombs, rockets and torpedoes. This section is especially important for bombers and attackers. If there is no suspended weaponry remove this subsection.'' --> | ||
| − | |||
| − | |||
The '''''{{PAGENAME}}''''' can be outfitted with the following ordnance: | The '''''{{PAGENAME}}''''' can be outfitted with the following ordnance: | ||
| + | |||
| + | {| class="wikitable" style="text-align:center" width="100%" | ||
| + | |- | ||
| + | ! !! width="5%" | 1 !! width="5%" | 2 !! width="5%" | 3 !! width="5%" | 4 !! width="5%" | 5 !! width="5%" | 6 !! width="5%" | 7 !! width="5%" | 8 | ||
| + | | rowspan="12" width="30%" | <div class="ttx-image">[[File:Hardpoints_{{PAGENAME}}.png]]</div> | ||
| + | |- | ||
| + | ! [[AN-M57 (250 lb)|250 lb AN-M57]] bombs | ||
| + | | 1 || 1 || 1 || || || 1 || 1 || 1 | ||
| + | |- | ||
| + | ! [[LDGP Mk 81 (250 lb)|250 lb LDGP Mk 81]] bombs | ||
| + | | 1 || 1 || 1 || || || 1 || 1 || 1 | ||
| + | |- | ||
| + | ! [[AN-M64A1 (500 lb)|500 lb AN-M64A1]] bombs | ||
| + | | 1 || 1 || 1 || || || 1 || 1 || 1 | ||
| + | |- | ||
| + | ! [[LDGP Mk 82 (500 lb)|500 lb LDGP Mk 82]] bombs | ||
| + | | 1 || || 1 || || || 1 || || 1 | ||
| + | |- | ||
| + | ! [[LDGP Mk 83 (1,000 lb)|1,000 lb LDGP Mk 83]] bombs | ||
| + | | || || || 1 || 1 || || || | ||
| + | |- | ||
| + | ! [[LDGP Mk 84 (2,000 lb)|2,000 lb LDGP Mk 84]] bombs | ||
| + | | || || || 1 || 1 || || || | ||
| + | |- | ||
| + | ! [[M118 (3,000 lb)|3,000 lb M118]] bombs | ||
| + | | || || || || 1 || || || | ||
| + | |- | ||
| + | ! [[FFAR Mighty Mouse]] rockets | ||
| + | | 7, 19 || 7 || 7, 19 || 7, 19 || 7, 19 || 7, 19 || 7 || 7, 19 | ||
| + | |- | ||
| + | ! [[AIM-7C Sparrow]] missiles | ||
| + | | 1 || || 1 || || || 1 || || 1 | ||
| + | |- | ||
| + | ! [[AIM-9B Sidewinder]] missiles | ||
| + | | 1 || || 1 || || || 1 || || 1 | ||
| + | |- | ||
| + | | colspan="9" | Maximum permissible loadout weight: 1,850 kg | ||
| + | |- | ||
| + | |} | ||
| + | |||
| + | {{Navigation-Start|Default weapon presets}} | ||
| + | {{Navigation-First-Simple-Line}} | ||
* Without load | * Without load | ||
| + | * 2 x AIM-9B Sidewinder missiles | ||
| + | * 4 x AIM-9B Sidewinder missiles | ||
| + | * 4 x AIM-7C Sparrow missiles | ||
| + | * 56 x FFAR Mighty Mouse rockets | ||
| + | * 114 x FFAR Mighty Mouse rockets | ||
* 6 x 250 lb AN-M57 bombs (1,500 lb total) | * 6 x 250 lb AN-M57 bombs (1,500 lb total) | ||
| − | |||
* 6 x 250 lb LDGP Mk 81 bombs (1,500 lb total) | * 6 x 250 lb LDGP Mk 81 bombs (1,500 lb total) | ||
* 4 x 500 lb LDGP Mk 82 bombs (2,000 lb total) | * 4 x 500 lb LDGP Mk 82 bombs (2,000 lb total) | ||
| + | * 6 x 500 lb AN-M64A1 bombs (3,000 lb total) | ||
* 2 x 1,000 lb LDGP Mk 83 bombs (2,000 lb total) | * 2 x 1,000 lb LDGP Mk 83 bombs (2,000 lb total) | ||
| − | |||
* 2 x 2,000 lb LDGP Mk 84 bombs (4,000 lb total) | * 2 x 2,000 lb LDGP Mk 84 bombs (4,000 lb total) | ||
* 1 x 3,000 lb M118 bomb (3,000 lb total) | * 1 x 3,000 lb M118 bomb (3,000 lb total) | ||
| − | + | {{Navigation-End}} | |
| − | |||
| − | |||
| − | |||
| − | |||
| − | |||
| − | |||
== Usage in battles == | == Usage in battles == | ||
<!-- ''Describe the tactics of playing in the aircraft, the features of using aircraft in a team and advice on tactics. Refrain from creating a "guide" - do not impose a single point of view, but instead, give the reader food for thought. Examine the most dangerous enemies and give recommendations on fighting them. If necessary, note the specifics of the game in different modes (AB, RB, SB).'' --> | <!-- ''Describe the tactics of playing in the aircraft, the features of using aircraft in a team and advice on tactics. Refrain from creating a "guide" - do not impose a single point of view, but instead, give the reader food for thought. Examine the most dangerous enemies and give recommendations on fighting them. If necessary, note the specifics of the game in different modes (AB, RB, SB).'' --> | ||
| − | In Air Realistic | + | |
| + | Unfortunately for the F3H-2, its BR means that almost every battle will be an uphill battle: nearly every aircraft at this BR has either superior armament (better/more AA missiles, better/more cannons), or vastly superior performance (nearly all being supersonic, and the majority of non-supersonic aircraft being highly manoeuvrable VTOL jets), or radar warning receivers that nullify any surprise to using the Sparrow missiles, or most significantly, countermeasures. Quite often, opponents will have four of those advantages at once, meaning that F3H-2 pilots will have to resort to catching enemies off guard (a rarity due to the prevalence of radar and RWR systems at this BR) or get lucky in the classic head-on with your cannons. You can attempt to play as a CAS aircraft and hope you aren't shot down, but this can yield varying results due to its mediocre ground armament. If you choose to not outright purchase the AIM-7s with [[Golden Eagles]], this should be the modification you focus on obtaining the moment you acquire the aircraft. In the event you find yourself on the defensive in a dogfight, the most you can do is slow down and constantly manoeuvre on the deck, hoping to get them in front of you and to help defeat AAMs. Note that this strategy is almost always suicide against VTOL aircraft like the [[Yak-38 (Family)|Yak-38]] or Harrier variants (as they will easily out manoevre you if they haven't already fired their AAMs). | ||
| + | |||
| + | To truly use this aircraft's potential you must be lucky enough to be downtiered in an Air Realistic battle where one has the AIM-7C unlocked. Here it is recommended to start a match with a fuel load of 20 minutes, gaining speed of around 950 km/h, and putting the plane at a 15 to 20 degree climb. The amount of climb is entirely dependent on the pilots playstyle, as more aggressive players will enjoy a lower altitude. AIM-7C sparrows are best used at the beginning of the battle, on enemies that are climbing. It may be best to use the radar in ACM mode to get better chances of locking onto targets for the AIM-7C. As most planes around this BR do not have Radar Warning Receivers, if the target did not notice the Sparrow launch, it's likely to get hit by it. If it did notice the missile, it won't have a very hard time dodging it, as the AIM-7C has a considerably weaker performance compared to the AIM-7D/E (worse seeker angles, much weaker rocket engine combined with the slower speed of the F3H-2 leading to much shorter range, worse proximity fuse etc.). Since the F3H has a high manoeuvrability, it is recommended to go after lower-ranked vehicles, like the F-86A, MiG-15, and the Hunter F.1. If the F3H gets into a uncomfortable situation against these planes, it can simply dive away to avoid getting caught. Getting used to the four 20 mm cannons will also assist, as their damage is high, allowing for swift attacks in intercepting manoeuvres. | ||
| + | |||
| + | In the event of a downtier without the AIM-7C, the aircraft will play quite similar to the [[F9F-8]], but with much better performance. | ||
| + | |||
| + | In ground battles, it can enjoy some leeway against defenseless helicopters. However, straying too close to the battlefield puts you at risk of the quite capable SAM/AAA systems at this BR, especially if one is uptiered where radar guided SAMs become a common issue. Although if you're lucky enough to have arrived at a battlefield with no deployed AA, the 3,000 lb bomb or large amount of FFARs can be useful in the AT role. Overall, the issues described in the above paragraphs make the F3H-2 a poor choice to bring in as a CAS aircraft (with much better options being available from both: previous BRs and its BR). | ||
===Radars=== | ===Radars=== | ||
<!--{{main|AN/APS-19}}--> | <!--{{main|AN/APS-19}}--> | ||
| − | The F3H-2 is equipped with an AN/APQ- | + | The F3H-2 is equipped with an AN/APQ-51 search and tracking radar. The radar is mounted in the nose of the aircraft and can be used to guide the AIM-7C. |
{| class="wikitable" style="text-align:center" | {| class="wikitable" style="text-align:center" | ||
| − | ! colspan="4" | AN/APQ- | + | ! colspan="4" | AN/APQ-51 - Target Detection Radar |
|- | |- | ||
| − | ! {{Annotation|Maximum<br | + | ! {{Annotation|Maximum<br>Detection<br>Range|The maximum possible range at which a target can be detected}} |
| − | ! {{Annotation|Guaranteed<br | + | ! {{Annotation|Guaranteed<br>Detection<br>Range|The range, below which, detection of a target is practically guaranteed}} |
| − | ! {{Annotation|Max Azimuth<br | + | ! {{Annotation|Max Azimuth<br>Scan Angle|How far to each side the radar can scan (widest search mode)}} |
| − | ! {{Annotation|Max Elevation<br | + | ! {{Annotation|Max Elevation<br>Scan Angle|How far up and down the radar can scan (widest search mode)}} |
|- | |- | ||
| − | | 370,000 m<br | + | | 370,000 m<br>(theoretical) || 46,000 m || ±50.0° || -8.15°/+4.15° |
|- | |- | ||
| − | ! colspan="4" | AN/APQ- | + | ! colspan="4" | AN/APQ-51 - Target Tracking Radar |
|- | |- | ||
| − | ! {{Annotation|Maximum<br | + | ! {{Annotation|Maximum<br>Tracking<br>Range|The maximum range at which a target can be tracked}} |
| − | ! {{Annotation|Minimum<br | + | ! {{Annotation|Minimum<br>Tracking<br>Range|The range below which targets cannot be tracked by the radar}} |
| − | ! {{Annotation|Azimuth Tracking<br | + | ! {{Annotation|Azimuth Tracking<br>Angle|How far to each side the radar can track a target}} |
| − | ! {{Annotation|Elevation Tracking<br | + | ! {{Annotation|Elevation Tracking<br>Angle|How far up and down the radar can track a target}} |
|- | |- | ||
| 92,500 m || 200 m || ±58.0° || ±58.0° | | 92,500 m || 200 m || ±58.0° || ±58.0° | ||
| Line 197: | Line 246: | ||
'''Pros:''' | '''Pros:''' | ||
| − | * | + | * Can carry maximum of four radar guided AIM-7C missiles, quite the advantage when downtiered to face aircraft with no RWR |
| − | * Can | + | * Wide variety of payloads for versatile playstyle |
| − | * | + | ** Can equip both Sidewinders and Sparrows for variety in attacking enemy aircraft |
| − | * Very good | + | ** Can equip both a pair of missiles or ground attack ordnance for dual-purpose role |
| − | * Good cockpit visibility | + | * Very good maneuverability compared to contemporary aircraft |
| + | * Good cockpit visibility and radar position | ||
| + | * Despite being a large aircraft, this plane can pull high AOA maneuvers with combat flaps | ||
'''Cons:''' | '''Cons:''' | ||
| − | * Loses | + | * Lack of both ballistic computer and guided air-to-ground weaponry make it a highly questionable CAS option despite having a wide variety of payload options |
| − | * | + | * AIM-7C missiles are unreliable |
| − | * Is | + | * Sluggish acceleration |
| + | * Loses loads of speed when manoeuvring | ||
| + | * Rarely reaches its top speed | ||
| + | * Is a relatively large target | ||
| + | * Is vastly outclassed in armament and performance by nearly all other aircraft at its BR, even more so when uptiered | ||
| + | * Has no countermeasures (no Flares/chaff or RWR) | ||
| + | * Is subsonic while it commonly faces supersonic aircraft | ||
== History == | == History == | ||
| Line 231: | Line 288: | ||
Development of the F3H began in 1949, with the McDonnell Aircraft Corporation starting work on developing a successor to their F2H Banshee. Although the initial design work was heavily based on the Banshee, the final design of the F3H would depart from its predecessor by most notably offering a single engine configuration and introducing a swept-wing design - a first for McDonnell. | Development of the F3H began in 1949, with the McDonnell Aircraft Corporation starting work on developing a successor to their F2H Banshee. Although the initial design work was heavily based on the Banshee, the final design of the F3H would depart from its predecessor by most notably offering a single engine configuration and introducing a swept-wing design - a first for McDonnell. | ||
| − | With the outbreak of the Korean War in the early 1950s and the | + | With the outbreak of the Korean War in the early 1950s and the Navy's first encounters with the Soviet MiG-15, the Navy found itself realizing that they lacked an aircraft which could match the MiG's performance. As a result, the F3H was hastily ordered into production before even the first test flights were held. In fact, the F3H would undertake its maiden flight in August 1951, but it would take several more years until the aircraft was fit for service, by which time the Korean War had already ended. |
The F3H Demon entered service with the USN in March 1956, by which time it had already gained an unfavorable reputation, mainly due to issues concerning its underpowered and unreliable Westinghouse J40 turbojet engine. As a result, the aircraft had to be redesigned in order to accept a more reliable alternative - namely, the Allison J71. | The F3H Demon entered service with the USN in March 1956, by which time it had already gained an unfavorable reputation, mainly due to issues concerning its underpowered and unreliable Westinghouse J40 turbojet engine. As a result, the aircraft had to be redesigned in order to accept a more reliable alternative - namely, the Allison J71. | ||
| − | Due to its various problems, the F3H had a relatively short service life with the USN, being decommissioned by 1964 and succeeded by the much more successful F-4 Phantom II. Despite this, well over 500 units of the F3H Demon were built, taking part in some conflicts during the late | + | Due to its various problems, the F3H had a relatively short service life with the USN, being decommissioned by 1964 and succeeded by the much more successful F-4 Phantom II. Despite this, well over 500 units of the F3H Demon were built, taking part in some conflicts during the late '50s, such as the Lebanon Crisis in 1958. In addition, it was one of the first U.S. aircraft to be fitted with missile armament. |
== Media == | == Media == | ||
| Line 242: | Line 299: | ||
;Skins | ;Skins | ||
| − | * [https://live.warthunder.com/feed/camouflages/? | + | * [https://live.warthunder.com/feed/camouflages/?vehicle=f3h-2 Skins and camouflages for the {{PAGENAME}} from live.warthunder.com.] |
;Images | ;Images | ||
| Line 269: | Line 326: | ||
<!-- ''Paste links to sources and external resources, such as:'' | <!-- ''Paste links to sources and external resources, such as:'' | ||
* ''topic on the official game forum;'' | * ''topic on the official game forum;'' | ||
| − | |||
* ''other literature.'' --> | * ''other literature.'' --> | ||
Revision as of 07:37, 9 November 2024
Contents
Description
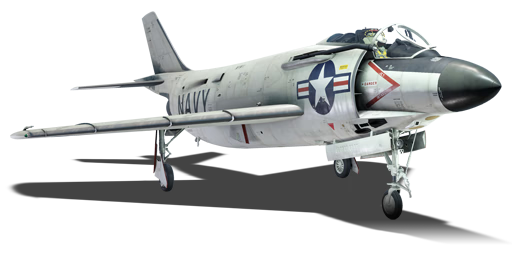
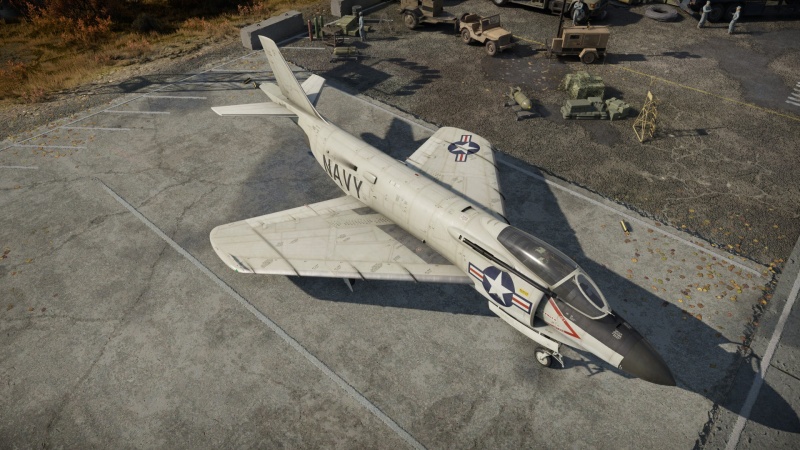
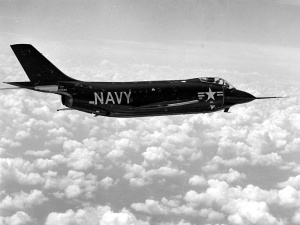
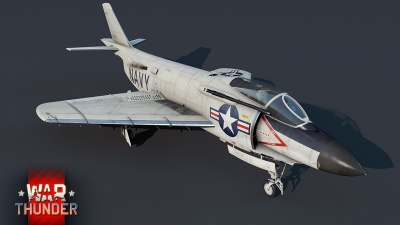
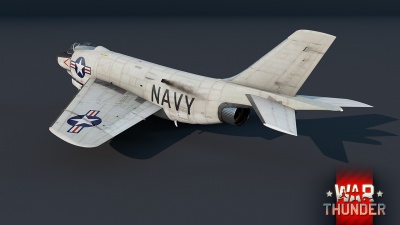
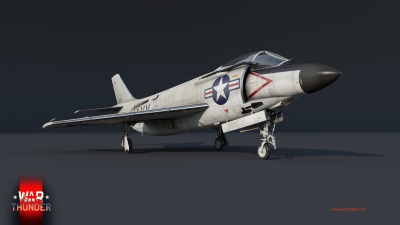
The F3H-2 Demon was a big improvement over the F3H-1N. Significant issues with the Westinghouse J40 almost killed the Demon project. As the J40 was being remedied, McDonnell inquired to the Navy about a new powerplant in case the J40 was deemed too far gone. After authorization, McDonnell chose the Allison J71 engine which was a vast improvement over the previous J40. Unlike previous versions of the Demon, the F3H-2 could launch the more advanced AIM-7C Sparrow. It could also carry AIM-9B Sidewinders and up to 6,000 lbs of ordnance. Although the F3H-2 was deemed somewhat favorable by its crews, newer and more advanced aircraft like the F-8 Crusader and F-4 Phantom numbered the Demon’s days. Finally, in 1964, the last naval squadron using Demons, VF-161, switched them out for the new Phantoms.
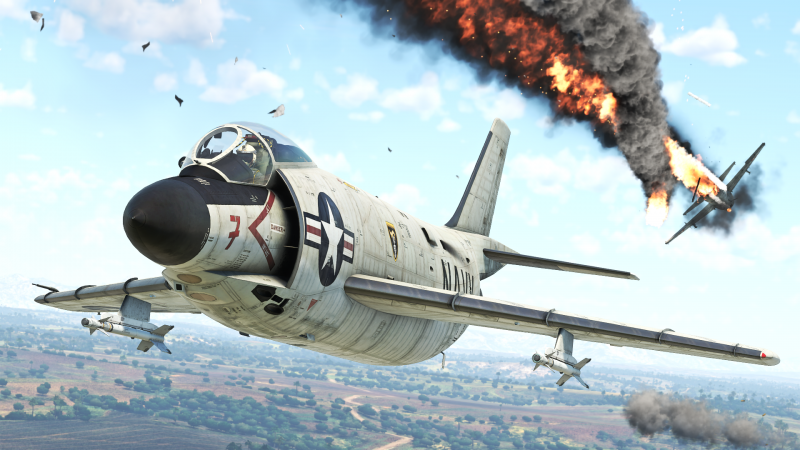
Introduced in Update "Starfighters", the F3H-2 Demon is a decent single-engine fighter. Although the engine issue was largely solved, the Demon was still quite heavy and underpowered. In-game players should not stick to lengthy dogfights due to the Demon’s weak energy retention and energy loss. With excess energy, the Demon can turn quite well however it’s only for a few turns before it becomes slow and an easy target. The AIM-7C Sparrows are very ineffective due to the weak motor, guidance delay time, and overall lacklustre performance. Players should opt for the AIM-9B Sidewinder instead of the AIM-7Cs. Overall, the F3H-2 Demon is a capable aircraft with some quirks that can be mitigated.
General info
Flight performance
On first glance the jet may look big and slow (and in many situations it is), but in comparison to the previous American naval aircraft it is an improvement.
You are no longer confined to the slow acceleration, slower turns of the F9F series, but instead are capable of going tip of the spear with full afterburner and charging the enemy, in the event your allies don't have supersonic aircraft. Note that the leading edge slats can be controlled manually by engaged combat flaps (pressing F by default for flaps) which takes your elevator control to a next level at low speeds.
When flying this jet against contemporaries you can really stretch your legs with different tactics, but are the safest in playing as a Close Air Patrol (CAP) aircraft. While you have average ordnance for ground attack, the Demon is much more oriented for using its radar guided missiles for an unparalleled air-to-air advantage.
Important things to remember:
- While you may be able to turn fight a MiG for a short period of time, it's important to employ vertical and hi yo-yo manoeuvres as at low speed your aircraft will feel very brick-like. This can be semi-negated by using the combat flaps to extend your leading edge slats.
- The aircraft is very fuel-hungry when using afterburner which drastically increases flight acceleration and overall performance so it is recommended to bring around 20-30 minutes of fuel.
- On take-off there is a tail strike guard, but the elevator may tap the ground if you're not using a full "stick back" takeoff.
| Characteristics | Max Speed (km/h at 0 m - sea level) |
Max altitude (metres) |
Turn time (seconds) |
Rate of climb (metres/second) |
Take-off run (metres) | |||
|---|---|---|---|---|---|---|---|---|
| AB | RB | AB | RB | AB | RB | |||
| Stock | 1,149 | 1,141 | 29.6 | 30.6 | 58.0 | 53.5 | 750 | |
| Upgraded | 1,177 | 1,163 | 26.6 | 28.0 | 87.5 | 72.0 | ||
Details
| Features | |||||
|---|---|---|---|---|---|
| Combat flaps | Take-off flaps | Landing flaps | Air brakes | Arrestor gear | Drogue chute |
| ✓ | ✓ | ✓ | ✓ | ✓ | X |
| Limits | ||||||
|---|---|---|---|---|---|---|
| Wings (km/h) | Gear (km/h) | Flaps (km/h) | Max Static G | |||
| Combat | Take-off | Landing | + | - | ||
| 833 | 786 | 370 | ~11 | ~5 | ||
| Optimal velocities (km/h) | |||
|---|---|---|---|
| Ailerons | Rudder | Elevators | Radiator |
| < 810 | < 750 | < 700 | N/A |
Engine performance
| Engine | Aircraft mass | |||||||
|---|---|---|---|---|---|---|---|---|
| Engine name | Number | Basic mass | Wing loading (full fuel) | |||||
| Allison J71-A-2 | 1 | 9,965 kg | 299 kg/m2 | |||||
| Engine characteristics | Mass with fuel (no weapons load) | Max Takeoff Weight | ||||||
| Weight (each) | Type | 17m fuel | 20m fuel | 30m fuel | 45m fuel | 59m fuel | ||
| 2,180 kg | Afterburning axial-flow turbojet | 11,296 kg | 11,465 kg | 12,216 kg | 13,341 kg | 14,405 kg | 18,000 kg | |
| Maximum engine thrust @ 0 m (RB/SB) | Thrust to weight ratio @ 0 m (WEP) | |||||||
| Condition | 100% | WEP | 17m fuel | 20m fuel | 30m fuel | 45m fuel | 59m fuel | MTOW |
| Stationary | 4,590 kgf | 6,334 kgf | 0.56 | 0.55 | 0.52 | 0.47 | 0.44 | 0.35 |
| Optimal | 4,774 kgf (1,200 km/h) |
8,169 kgf (1,200 km/h) |
0.72 | 0.71 | 0.67 | 0.61 | 0.57 | 0.45 |
Survivability and armour
- No armour protection
- Large aircraft compared to Sabres and MiGs
- The engine is quite large resulting in grazing bullets probably hitting your engine
- The wings are more than capable of taking high G forces so there is no need to worry about high speed turns
- Fuel tanks are located throughout the belly and shoulders of the wings so there is the chance of fires being started
Modifications and economy
Armaments
Offensive armament
The F3H-2 is armed with:
- 4 x 20 mm Browning-Colt Mk12 Mod 3 cannons, chin-mounted (190 rpg = 760 total).
These guns have good muzzle velocity, good rate of fire and deal decent damage. Combined with their large ammo pool, they are effective offensive armament. The only real downside is the very poor accuracy without the "New 20 mm cannons" modification, making longer range shots problematic despite the good velocity.
Suspended armament
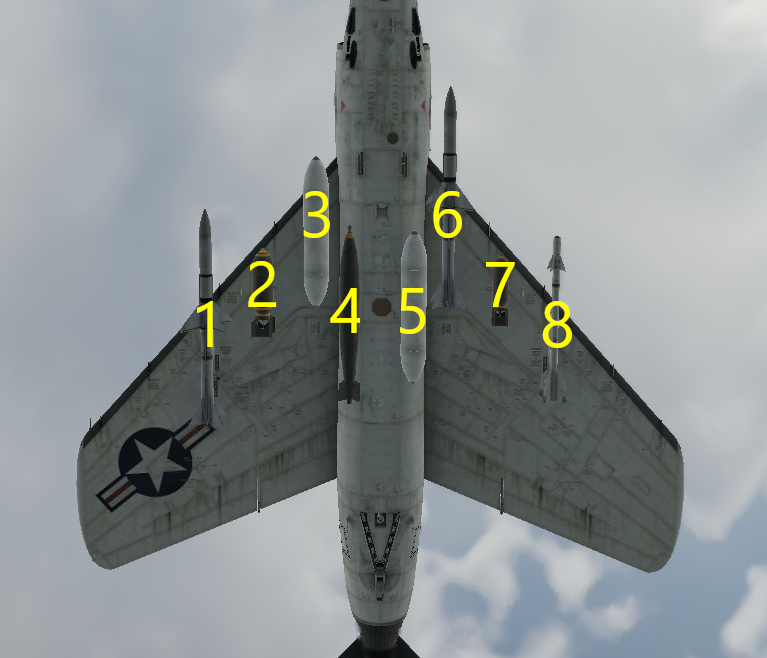
The F3H-2 can be outfitted with the following ordnance:
| 1 | 2 | 3 | 4 | 5 | 6 | 7 | 8 | ||
|---|---|---|---|---|---|---|---|---|---|
| 250 lb AN-M57 bombs | 1 | 1 | 1 | 1 | 1 | 1 | |||
| 250 lb LDGP Mk 81 bombs | 1 | 1 | 1 | 1 | 1 | 1 | |||
| 500 lb AN-M64A1 bombs | 1 | 1 | 1 | 1 | 1 | 1 | |||
| 500 lb LDGP Mk 82 bombs | 1 | 1 | 1 | 1 | |||||
| 1,000 lb LDGP Mk 83 bombs | 1 | 1 | |||||||
| 2,000 lb LDGP Mk 84 bombs | 1 | 1 | |||||||
| 3,000 lb M118 bombs | 1 | ||||||||
| FFAR Mighty Mouse rockets | 7, 19 | 7 | 7, 19 | 7, 19 | 7, 19 | 7, 19 | 7 | 7, 19 | |
| AIM-7C Sparrow missiles | 1 | 1 | 1 | 1 | |||||
| AIM-9B Sidewinder missiles | 1 | 1 | 1 | 1 | |||||
| Maximum permissible loadout weight: 1,850 kg | |||||||||
| Default weapon presets | |
|---|---|
| |
Usage in battles
Unfortunately for the F3H-2, its BR means that almost every battle will be an uphill battle: nearly every aircraft at this BR has either superior armament (better/more AA missiles, better/more cannons), or vastly superior performance (nearly all being supersonic, and the majority of non-supersonic aircraft being highly manoeuvrable VTOL jets), or radar warning receivers that nullify any surprise to using the Sparrow missiles, or most significantly, countermeasures. Quite often, opponents will have four of those advantages at once, meaning that F3H-2 pilots will have to resort to catching enemies off guard (a rarity due to the prevalence of radar and RWR systems at this BR) or get lucky in the classic head-on with your cannons. You can attempt to play as a CAS aircraft and hope you aren't shot down, but this can yield varying results due to its mediocre ground armament. If you choose to not outright purchase the AIM-7s with Golden Eagles, this should be the modification you focus on obtaining the moment you acquire the aircraft. In the event you find yourself on the defensive in a dogfight, the most you can do is slow down and constantly manoeuvre on the deck, hoping to get them in front of you and to help defeat AAMs. Note that this strategy is almost always suicide against VTOL aircraft like the Yak-38 or Harrier variants (as they will easily out manoevre you if they haven't already fired their AAMs).
To truly use this aircraft's potential you must be lucky enough to be downtiered in an Air Realistic battle where one has the AIM-7C unlocked. Here it is recommended to start a match with a fuel load of 20 minutes, gaining speed of around 950 km/h, and putting the plane at a 15 to 20 degree climb. The amount of climb is entirely dependent on the pilots playstyle, as more aggressive players will enjoy a lower altitude. AIM-7C sparrows are best used at the beginning of the battle, on enemies that are climbing. It may be best to use the radar in ACM mode to get better chances of locking onto targets for the AIM-7C. As most planes around this BR do not have Radar Warning Receivers, if the target did not notice the Sparrow launch, it's likely to get hit by it. If it did notice the missile, it won't have a very hard time dodging it, as the AIM-7C has a considerably weaker performance compared to the AIM-7D/E (worse seeker angles, much weaker rocket engine combined with the slower speed of the F3H-2 leading to much shorter range, worse proximity fuse etc.). Since the F3H has a high manoeuvrability, it is recommended to go after lower-ranked vehicles, like the F-86A, MiG-15, and the Hunter F.1. If the F3H gets into a uncomfortable situation against these planes, it can simply dive away to avoid getting caught. Getting used to the four 20 mm cannons will also assist, as their damage is high, allowing for swift attacks in intercepting manoeuvres.
In the event of a downtier without the AIM-7C, the aircraft will play quite similar to the F9F-8, but with much better performance.
In ground battles, it can enjoy some leeway against defenseless helicopters. However, straying too close to the battlefield puts you at risk of the quite capable SAM/AAA systems at this BR, especially if one is uptiered where radar guided SAMs become a common issue. Although if you're lucky enough to have arrived at a battlefield with no deployed AA, the 3,000 lb bomb or large amount of FFARs can be useful in the AT role. Overall, the issues described in the above paragraphs make the F3H-2 a poor choice to bring in as a CAS aircraft (with much better options being available from both: previous BRs and its BR).
Radars
The F3H-2 is equipped with an AN/APQ-51 search and tracking radar. The radar is mounted in the nose of the aircraft and can be used to guide the AIM-7C.
| AN/APQ-51 - Target Detection Radar | |||
|---|---|---|---|
| Maximum Detection Range |
Guaranteed Detection Range |
Max Azimuth Scan Angle |
Max Elevation Scan Angle |
| 370,000 m (theoretical) |
46,000 m | ±50.0° | -8.15°/+4.15° |
| AN/APQ-51 - Target Tracking Radar | |||
| Maximum Tracking Range |
Minimum Tracking Range |
Azimuth Tracking Angle |
Elevation Tracking Angle |
| 92,500 m | 200 m | ±58.0° | ±58.0° |
Pros and cons
Pros:
- Can carry maximum of four radar guided AIM-7C missiles, quite the advantage when downtiered to face aircraft with no RWR
- Wide variety of payloads for versatile playstyle
- Can equip both Sidewinders and Sparrows for variety in attacking enemy aircraft
- Can equip both a pair of missiles or ground attack ordnance for dual-purpose role
- Very good maneuverability compared to contemporary aircraft
- Good cockpit visibility and radar position
- Despite being a large aircraft, this plane can pull high AOA maneuvers with combat flaps
Cons:
- Lack of both ballistic computer and guided air-to-ground weaponry make it a highly questionable CAS option despite having a wide variety of payload options
- AIM-7C missiles are unreliable
- Sluggish acceleration
- Loses loads of speed when manoeuvring
- Rarely reaches its top speed
- Is a relatively large target
- Is vastly outclassed in armament and performance by nearly all other aircraft at its BR, even more so when uptiered
- Has no countermeasures (no Flares/chaff or RWR)
- Is subsonic while it commonly faces supersonic aircraft
History
The McDonnell F3H Demon was the product of a new swept-wing naval fighter to compete with the F4D Skyray. The aircraft was McDonell's first swept-wing fighter, and also one of the first American fighters to be armed with air-to-air missiles. Originally intended to fight MiG-15s over the Korean peninsula, the aircraft entered service too late to participate in that conflict but went on to become an important carrier-based fighter aircraft, serving until 1964. Along with the F11F Tiger and F8U Crusader, the aircraft was eventually replaced by the F-4 Phantom II - itself being an enlarged evolution of the Demon.
Design and developmentThe F3H Demon was a new swept-wing aircraft design built around the Westinghouse J40 engine, competing with the F4D Skyray. At that time, the Navy desperately needed a naval fighter to engage the swept-wing MiG-15s commonly encountered over the skies of Korea. As a result, the F3H-1N aircraft were ordered even before the test flight of the XF3H prototype. However, by that time, the Korean war was drawing to a close, meaning the aircraft would not see combat in the Korean theatre.
The aircraft was centred around the Westinghouse J40, an ambitious engine design intended to produce 50 kN of thrust. However, the engine was a failure, only producing half its required thrust. Even worse, the engine was unreliable and resulted in loss of eleven aircraft and four pilots out of the 35 F3H-1N aircraft. As a result the remaining 24 F3H-1N aircraft were permanently grounded, leading to a major fiasco. The J40 engine was cancelled in late 1955.
At that point, the aircraft required a new engine. It was subsequently redesigned around the Allison J71, a more powerful engine producing 64 kN of thrust with afterburner. This engine dramatically improved the aircraft's flying characteristics, though problems were still encountered with engine reliability and ejection seats. At this point, the redesigned aircraft became the F3H-2.
Operational history
Despite the remaining issues with the aircraft's airframe, the Navy ordered a total of 239 F3H-2 Demons. These aircraft began entering service in March 1956, and additional Demons were delivered until the end of production in late 1959. By that point, a total of 519 aircraft of various variants had been built. The aircraft gained praise from pilots for being a reliable aircraft, and relatively easy to take-off and land from carrier decks. The aircraft was also the first naval fighter to be fitted with a radar, giving it some night-fighter capabilities. The aircraft was capable of carrying the AIM-9B Sidewinder, and later F3H-2M variants introduced the first AIM-7 Sparrows.
Despite the aircraft's strong capabilities, it was still limited by fundamental issues with the aircraft's performance. The J71, though powerful, did not give the aircraft sufficient performance. As a result, the plane was limited to subsonic speeds, and had inferior acceleration to many of its Air Force counterparts. Despite that, the aircraft still served as the primary carrier-based fighter on American aircraft carriers, complemented by the F11F and F8U daylight dogfighters. During service, the aircraft was frequently nicknamed "The Chair" due to its excellent cockpit visibility, as well as "Lead sled" due to its lacking engine power. Pilots of the F3H were called "Demon Drivers" while ground personnel were nicknamed "Demon Doctors".
The F3H Demon started to get replaced by the larger and faster F4H (F-4) Phantom II beginning from 1961. The Phantom itself began as an advanced development of the Demon, known as the "Super Demon". The larger and faster Phantom went on to enjoy a long and distinguished service life serving with the air forces of many countries. The last Demon squadron, VF-161 "Chargers", flew their Demons until late 1964 when they traded them for the newer Phantom. Though the aircraft saw some action over the skies of the South China Sea, the aircraft never engaged in actual combat. Three F3H airframes remain intact today, held at various museums.
Devblog
Development of the F3H began in 1949, with the McDonnell Aircraft Corporation starting work on developing a successor to their F2H Banshee. Although the initial design work was heavily based on the Banshee, the final design of the F3H would depart from its predecessor by most notably offering a single engine configuration and introducing a swept-wing design - a first for McDonnell.
With the outbreak of the Korean War in the early 1950s and the Navy's first encounters with the Soviet MiG-15, the Navy found itself realizing that they lacked an aircraft which could match the MiG's performance. As a result, the F3H was hastily ordered into production before even the first test flights were held. In fact, the F3H would undertake its maiden flight in August 1951, but it would take several more years until the aircraft was fit for service, by which time the Korean War had already ended.
The F3H Demon entered service with the USN in March 1956, by which time it had already gained an unfavorable reputation, mainly due to issues concerning its underpowered and unreliable Westinghouse J40 turbojet engine. As a result, the aircraft had to be redesigned in order to accept a more reliable alternative - namely, the Allison J71.
Due to its various problems, the F3H had a relatively short service life with the USN, being decommissioned by 1964 and succeeded by the much more successful F-4 Phantom II. Despite this, well over 500 units of the F3H Demon were built, taking part in some conflicts during the late '50s, such as the Lebanon Crisis in 1958. In addition, it was one of the first U.S. aircraft to be fitted with missile armament.
Media
- Skins
- Images
- Videos
See also
Links to the articles on the War Thunder Wiki that you think will be useful for the reader, for example:
- reference to the series of the aircraft;
- links to approximate analogues of other nations and research trees.
External links
| McDonnell Aircraft Corporation | |
|---|---|
| Jet Fighters | F2H-2 · F3H-2 |
| F-4C Phantom II · F-4E Phantom II · F-4J Phantom II · F-4S Phantom II | |
| F-15A · F-15C MSIP II · F-15E | |
| Strike Aircraft | AV-8B Plus · AV-8B (NA) |
| Helicopters | AH-6M |
| Export/Licensed | |
| Aircraft | ◄F-4F Early · ◄F-4F · ◄F-4F KWS LV · Phantom FG.1 · Phantom FGR.2 · F-4J(UK) Phantom II · F-4EJ Phantom II · F-4EJ ADTW · Kurnass · Kurnass 2000 |
| F-15J · F-15J(M) · Baz · Baz Meshupar · F-15I Ra’am | |
| ▄AV-8B Plus | |
| Helicopters | Lahatut |
| The McDonnell Aircraft Corporation merged with Douglas Aircraft Company in 1967 to form McDonnell Douglas Corporation. Later it was merged with The Boeing Company in 1997. | |
| See Also | Mitsubishi Heavy Industries |
| USA jet aircraft | |
|---|---|
| Fighters | |
| F9F | F9F-2 · F9F-5 · F9F-8 |
| F-80 | F-80A-5 · F-80C-10 |
| F-84 | F-84B-26 · F-84F · F-84G-21-RE |
| F-86 | F-86A-5 · F-86F-25 · F-86F-2 · F-86F-35 |
| F-89 | F-89B · F-89D |
| F-100 | F-100D |
| F-104 | F-104A · F-104C |
| F-4 | F-4C Phantom II · F-4E Phantom II · F-4J Phantom II · F-4S Phantom II |
| F-5 | F-5A · F-5C · F-5E · F-20A |
| F-8 | F8U-2 · F-8E |
| F-14 | F-14A Early · ▄F-14A IRIAF · F-14B |
| F-15 | F-15A · F-15C MSIP II · F-15E |
| F-16 | F-16A · F-16A ADF · F-16C |
| Other | P-59A · F2H-2 · F3D-1 · F3H-2 · F4D-1 · F11F-1 |
| Strike Aircraft | |
| FJ-4 | FJ-4B · FJ-4B VMF-232 |
| A-4 | A-4B · A-4E Early |
| A-7 | A-7D · A-7E · A-7K |
| AV-8 | AV-8A · AV-8C · AV-8B Plus · AV-8B (NA) |
| A-10 | A-10A · A-10A Late · A-10C |
| F-111 | F-111A · F-111F |
| Other | A-6E TRAM · F-105D · F-117 |
| Bombers | |
| B-57 | B-57A · B-57B |


