F-105D
Contents
Description
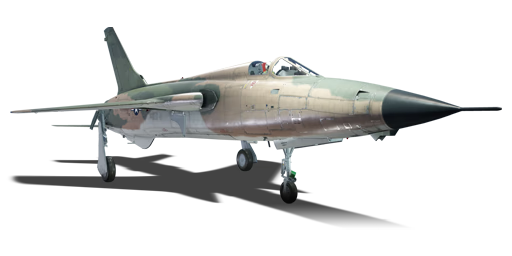
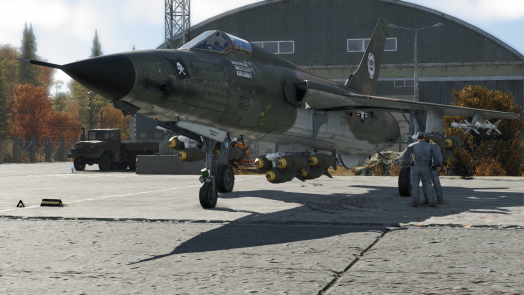
The F-105D Thunderchief is a rank American strike aircraft with a battle rating of (AB), (RB), and (SB). It was introduced in Update "Winged Lions". A nickname often associated with the F-105D was "Thud".
Like its contemporaries in the Su-7 family, the F-105D is a strike aircraft designed for ordnance delivery at high speeds and low altitude, and its design reflects this, with powerful acceleration, excellent control authority at high speeds, good roll rate, and plentiful choices in bomb options. The F-105D also has a full range of ballistic computer programming, including CCIP for rockets, bombs and cannons, plus a CCRP function that uses its surprisingly capable AN/ASG-19 radar. While it lacks a true "lock" function, the gun has a radar-ranging gunsight as well as a Search and IFF (Identify Friend or Foe) function that allows it to at least see targets in front and above it to a relatively high degree of efficiency at ranges of up to 15 km. This allows it to see enemies to some extent, and plan ahead to avoid them. The F-105 was designed with nuclear strike in mind, and it performs best roaring through valleys and over hills at low altitude, reaching speeds of almost Mach 1.2 when clean, and Mach 1.05 with a full load of sixteen 750-pound M117 bombs. Famous for its use during Operation Rolling Thunder in Vietnam as the United States Air Force's main strike aircraft, the F-105, like the P-47 and F-84 that preceded it, has a reputation for being an aircraft capable of taking heavy punishment. However, it had several fatal flaws, including the lack of any standoff air-to-ground ordnance, the positioning of the fuel tanks directly above control cables and the at-times temperamental engine, the low-altitude, low-speed passes that it was forced to fly, and the doctrines of the time.
This fighter has chaff in pods, but does not have flares. It is vulnerable to the IR-guided air-to-air missiles (AAMs) that are prevalent at the battle rating range that it fights at, as well as the radar-guided anti-aircraft guns and the IR or Beam-riding Surface-to-Air Missiles (SAMs) it faces at its BR. This is offset by the roll rate and control authority, meaning that it can easily outroll or outmanoeuvre any rear-aspect AAM in-game except the Matra R.550 Magic, which can only be outmanoeuvred with range and the assumption that the Magic's booster has shut off. Since it was designed to perform toss-bombing at high speeds on the deck, it also has the capability to pull surprisingly high Gs and turn/loop tighter than expected for an attack aircraft, managing turns of 12-13 Gs with empty bomb racks and 4 Sidewinders, or 13-14 G clean with 12 minutes of fuel left in the tank at around ~1,100 km/h, and still manages 10-11 G sustained turns above and below those speeds. Seeing as these speeds, fuel loads, and payloads are fairly standard conditions when turning away from a base to head home for more ordnance, or while tussling with MiGs over the battlefield, the F-105D makes for a capable dogfighter in its own right. Not many enemy pilots expect the F-105D to be capable of popping a 12 G sustained turn immediately after destroying a base, and even fewer expect it from an attacker glued onto their tail!
General info
Flight performance
| Characteristics | Max speed (km/h at 10,668 m) |
Max altitude (metres) |
Turn time (seconds) |
Rate of climb (metres/second) |
Take-off run (metres) | |||
|---|---|---|---|---|---|---|---|---|
| AB | RB | AB | RB | AB | RB | |||
| Stock | 2,129 | 2,102 | 28.5 | 29.5 | 149.3 | 141.5 | 1,050 | |
| Upgraded | 2,206 | 2,167 | 27.5 | 28.0 | 202.8 | 175.0 | ||
Details
| Features | |||||
|---|---|---|---|---|---|
| Combat flaps | Take-off flaps | Landing flaps | Air brakes | Arrestor gear | Drogue chute |
| ✓ | ✓ | ✓ | ✓ | X | ✓ |
| Limits | ||||||
|---|---|---|---|---|---|---|
| Wings (km/h) | Gear (km/h) | Flaps (km/h) | Max Static G | |||
| Combat | Take-off | Landing | + | - | ||
| 1,575 | 1,575 | 827 | 490 | ~12 | ~5 | |
| Optimal velocities (km/h) | |||
|---|---|---|---|
| Ailerons | Rudder | Elevators | Radiator |
| < 720 | < 950 | < 800 | - |
Engine performance
| Engine | Aircraft mass | |||||
|---|---|---|---|---|---|---|
| Engine name | Number | Basic mass | Wing loading (full fuel) | |||
| Pratt & Whitney J75-P-19W | 1 | 12,675 kg | 450 kg/m2 | |||
| Engine characteristics | Mass with fuel (no weapons load) | Max Takeoff Weight | ||||
| Weight (each) | Type | 8m fuel | 20m fuel | 27m fuel | ||
| 2,699 kg | Afterburning axial-flow turbojet | 13,701 kg | 15,195 kg | 16,095 kg | 22,911 kg | |
| Maximum engine thrust @ 0 m (RB/SB) | Thrust to weight ratio @ 0 m (WEP) | |||||
| Condition | 100% | WEP | 8m fuel | 20m fuel | 27m fuel | MTOW |
| Stationary | 6,953 kgf | 9,868 kgf | 0.72 | 0.65 | 0.61 | 0.43 |
| Optimal | 6,953 kgf (0 km/h) |
13,161 kgf (1,200 km/h) |
0.96 | 0.87 | 0.82 | 0.57 |
Survivability and armour
| IMPORTANT: This aircraft cannot carry flares. The countermeasure pods are AN/ALE-38/41 Chaff dispensers, which, unlike modern countermeasure pods or USN countermeasure systems, use neither a common calibre nor dispenser system as flares. The F-105D was never equipped with the AN/ALE-40 combined Chaff/Flare suite used on the F-4E, nor the AN/ALE-29 chaff/flare dispenser used on the A-4 Skyhawks and A-7 Corsairs. |
- 12.7 mm armour plate behind the pilot.
Since the aircraft is so big, and has a considerable amount of interior space, gunfire will often pass through the empty innards of the aircraft. Single hits from 20 mm or 23 mm cannons such as the Gryazev-Shipunov GSh-23L, Hispano Mk.V, and Browning-Colt Mk12 Mod 0 will likely cause no damage other than slight damage to the wings or fuselage. Longer bursts with more hits will cause more serious damage that is likely to require repair at the airfield as soon as possible. Often, cannon bursts from the rear will destroy the engine and disable the tail control, forcing the pilot to bail out, but the wings, fuselage, and tail assembly will all stay attached to the plane until the aircraft slams into the ground. Theoretically, it is possible to control the aircraft entirely with flap input and throttle control without the elevator, but this requires almost ideal conditions that almost never occur. The F-105D, however, lends itself better to this than most aircraft, thanks to flaps that are large, tough, and durable, with rip speeds in excess of 800 km/h. The F-105's landing gear are also extremely durable, and due to their high height, allow slightly sharper and harder landing approaches than other aircraft, which can come in handy after shepherding a damaged aircraft back to base.
The F-105D's tail control and elevators are particularly vulnerable to enemy fire, and even single hits that wouldn't even damage the fuselage or wings will likely cripple or seriously impair your tailplane. This is compounded by the fact that the F-105D has control cables for the tail in both the top and the bottom of the aircraft, and therefore is extremely vulnerable to enemy fire. Enemy missiles are almost guaranteed to destroy the tail control, wing control, or ignite the massive fuel tanks in the fuselage. F-105D pilots must take utmost care to dodge missiles or otherwise avoid confrontations where enemy missiles come into play, such as prolonged tail-chases in a target-rich environment.
Modifications and economy
Armaments
| Ballistic Computer | |||
|---|---|---|---|
| CCIP (Guns) | CCIP (Rockets) | CCIP (Bombs) | CCRP (Bombs) |
| |
|
|
|
Offensive armament
The F-105D is armed with:
- 1 x 20 mm M61A1 cannon, nose-mounted (1,028 rpg)
Suspended armament
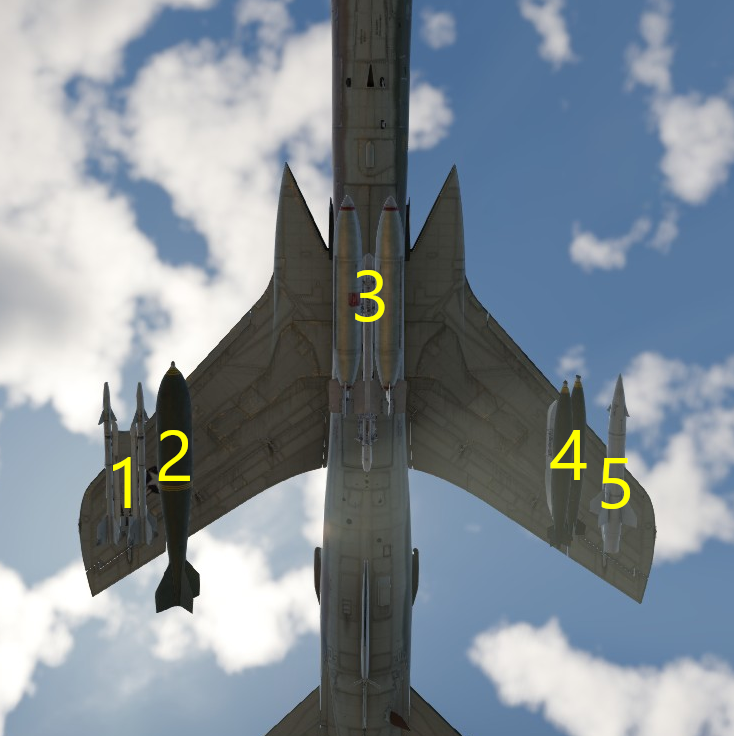
The F-105D can be outfitted with the following ordnance:
| 1 | 2 | 3 | 4 | 5 | ||
|---|---|---|---|---|---|---|
| 500 lb LDGP Mk 82 bombs | 1 | 4 | 6 | 4 | 1 | |
| 500 lb Mk 82 Snakeye bombs | 1 | 4 | 6 | 4 | 1 | |
| 750 lb M117 cone 45 bombs | 1 | 4 | 6 | 4 | 1 | |
| 1,000 lb LDGP Mk 83 bombs | 1 | 2 | 3 | 2 | 1 | |
| 2,000 lb LDGP Mk 84 bombs | 1 | 1 | 1 | |||
| 2,000 lb LDGP Mk 84 Air bombs | 1 | 1 | 1 | |||
| 3,000 lb M118 bombs | 1 | 1 | 1 | |||
| BLU-27/B incendiary bombs | 1 | 2 | 2 | 2 | 1 | |
| FFAR Mighty Mouse rockets | 19 | 19 | 19 | 19 | ||
| AGM-12B Bullpup missiles | 1 | 1 | 1 | 1 | ||
| AGM-12C Bullpup missiles | 1 | 1 | ||||
| AIM-9B Sidewinder missiles | 1, 2 | 1, 2 | ||||
| AIM-9E Sidewinder missiles | 2 | 2 | ||||
| Chaff | 192 | 192 | ||||
| Maximum permissible loadout weight: 5,800 kg | ||||||
| Default weapon presets | |
|---|---|
| |
- Summary & Recommendations
The F-105D carries a range of bombs, but the payloads an F-105D pilot will often use are:
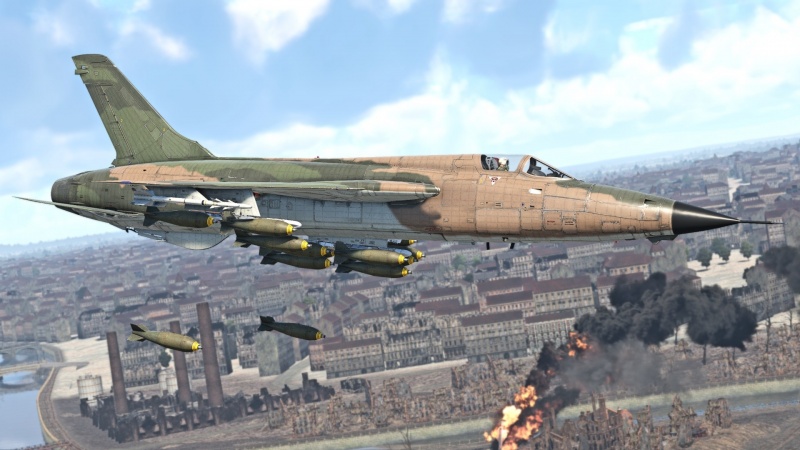
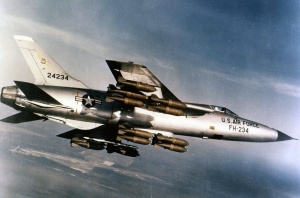
- 16 x 750 lb M117 cone 45 bombs (12,000 lb total)
- This payload is best for bombing bases. It takes seven M117 bombs to destroy a base at its BR, and with 16 bombs, dropping in 5 pairs of 2 and 6 individual drops, an F-105D can easily pickle off four pairs of bombs (8 total) before using the remaining ones to destroy another base, lighting the afterburner, and heading for home.
- 14 x 750 lb M117 cone 45 bombs + 4 x AIM-9E Sidewinder missiles (10,500 lb total)
- This payload is one of the best for bombing bases and then switching into an air-to-air role. The AIM-9E missiles are capable against aircraft that are slow, and useful for causing faster aircraft to manoeuvre to avoid them, forcing them to lose speed and giving you a chance to close the gap.
- 6 x 750 lb M117 cone 45 bombs + 2 x 3,000 lb M118 bombs + 4 x AIM-9E Sidewinder missiles (10,500 lb total)
- One of the single most effective payloads, this may be used as a substitute for the above payload if a pilot dislikes having to pickle off eight bombs individually, as now, with a single push of a button, two M118s come sliding off the rails. These two bombs combined are more than enough for a base, but are also effective in their own right as capture-point clearing bombs, or for destroying aircraft staying on the airfield near the end of a match. Campers beware!
- 6 x 750 lb M117 cone 45 bombs + 2 x AGM-12C Bullpup missiles + 4 x AIM-9E Sidewinder missiles (4,500 lb total)
- Two heavy-duty bullpups and four Sidewinders make for a powerful punch against both ground and air targets. The M117s are there merely as additional ordnance, and may be jettisoned where necessary for a cleaner aircraft, or used against enemy targets.
The LDGP Mark 82 500 lb bombs provided stock and the AGM-12B/Sidewinder combinations serve no purpose once spaded. The Mark 82 can quickly be replaced by the extremely effective M117, which bomb-for-bomb provides the most effective bombing option, since it carries the most TNT for its weight. In addition to this, the Thunderchief carries as many M117s as it does Mark 82s, and also has far more available ordnance options that pair M117s together with other weapons, such as Bullpups. The AGM-12B and Sidewinder/Chaff pod combinations allow for a maximum of two AGM-12Bs, a full rack of bombs on the centreline, and four AIM-9B/Es. Once the AGM-12C has been unlocked, carrying these combinations is useless, since the AGM-12C is superior in every metric, and given the limit on how many Bullpups can be carried with AIM-9s, it's more useful to carry the larger missile rather than the smaller one.
Something to consider is that more experienced players may find Mark 83 effectively redundant, as the M117s that precede them in the modifications menu carry nearly 210 kg of TNT equivalent, and the F-105 can carry more of them than Mark 83s. While at first, the Mk 83's additional 66 kg of TNT equivalent (for a total of 276 kg per thousand-pound bomb) may seem like an improvement, the M117 has nearly identical fragment dispersion/vehicle destruction radii, as well as only 7 mm less armour penetration. Coupled with the aircraft's ballistic computer for precision-bombing, experienced pilots shouldn't need the extra explosive mass to destroy a ground target, and since on a single hardpoint, the F-105 carries more M117s than Mark 83s (4-6 as opposed to 3 for the Mark 83), even novice pilots may find it easier to use the M117, since they have more M117s to drop. Pilots will also find it easier to acquire the M117 than the Mark 83 on this aircraft, as M117s are available as a Tier I modification, while Mark 83s are in Tier II, and the Thunderchief has far more Tier II modifications that should take a higher priority over the Mark 83, such as New Boosters or AIM-9Bs.
Chaff is not advisable for the F-105D. At this battle rating, the F-105D faces mostly IR missiles, and given its flight performance, pilots must rely on manoeuvring alone to defeat the AIM-9Bs, AIM-9Es, R-3Ss, and AIM-9Gs that are typical to planes around its BR, as well as the occasional R-60, AIM-9J/RB24J, and rare AIM-7C, AIM-7D and AIM-7E Sparrows that it can face from time to time. All of these missiles can be defeated with appropriate manoeuvring and avoidance of enemy aircraft, making chaff pods entirely redundant, and just something that takes up more space on a hard point that could be used by a bomb, missile, or rocket pod. However, in Ground RB, chaff may be useful in temporarily spoofing early missile and gun SPAA. That said, no SPAA at that BR is entirely radar-based, and most radar-based SPAAGs use their radar to determine only a target solution rather than guide any sort of weapon. For instance, the most common anti-aircraft missile systems in Ground RB — the Roland 1, Type 93, Ozelot, 2S6, and XM1069 — all use either IR guidance or a form of semi-active beam-riding guidance that completely ignores chaff.
Four AGM-12Bs is the maximum amount of guided ordnance that the F-105D can carry, if a pilot requires a lot of guided missiles to take out tanks in Ground RB. Due to the ballistic computer, it is often better to take bombs instead, since you can drop from higher up and on different flight profiles where enemy tanks and SPAAs do not expect air attack.
The Mighty Mouse FFARs that it receives are effective, but slightly underpowered compared to the Zunis, S-8s, S-24s, S-25s and 13.5 cm m/70 that other similar aircraft in and around its battle rating receive. The LAU-3s cannot be used with AIM-9Es, bombs, or any other payloads outside of either on their own or with chaff. This makes bringing FFARs a sub-par option compared to other ordnance options already available for the F-105D Thunderchief.
Usage in battles
The F-105 is an extremely versatile aircraft. Used in a bombing role, typically designated by either "A for Attack" or "B for Bomber", the F-105 in fact excels at both air-to-ground and air-to-air roles, though the aircraft is typically less successful in the latter than the former.
Against air targets
While the F-105 is classified as an attacker, the aircraft lends itself well to air-to-air work. The aircraft, however, requires basic knowledge on how to fly jets in energy-fighting manoeuvres. Its armament, size, and speed lend it well to destroying enemy targets by pressing its sheer advantage in speed — not many aircraft at its battle rating exceed Mach 1.1 in level flight, and even less while still having a sizeable payload onboard.
On the offensive
The F-105's best advantage is in its speed and considerably powerful engine. The aircraft has good energy retention and turning performance at speed, thanks to the nuclear toss-bombing flight profile that the aircraft was designed for. The F-105 does not have any issue with using this ability to loop rapidly at high speed in the vertical by turning quickly and at high Gs in the horizontal. Managing around 12Gs in a sustained turn beginning at Mach 1.0, the F-105 has performance entirely unexpected from a single-engined attacker of its size at its battle rating. F-105Ds also possess strengthened wing spars that earlier variants did not, and unlike said earlier variants, will not tear its wings in sustained manoeuvres very easily. Managing up to 13Gs, and up to fourteen Gs in rare cases, the F-105's large, strong wings grant it energy retention in addition to roll rate, and the swept-wing construction makes it one of the faster-accelerating aircraft at its battle rating- more than enough to match more nimble MiG-19s and MiG-21s at certain speeds.
The F-105 has the option to carry four AIM-9s of either the AIM-9B or AIM-9E type. While these missiles are unimpressive in terms of performance when compared to the R.550 or R-60 that this aircraft faces, they are nonetheless useful. The AIM-9E is a direct upgrade to the AIM-9B that includes a wider seeker FOV thanks to the seeker's ability to uncage and track a target slightly before launch, making it more useful than the AIM-9B in a dogfight. However, the most useful air-to-air asset by far is the gun, which has a generous supply of ammunition available to it. Most F-105 air-to-air victories in Vietnam were made with the gun, and the same holds true in-game. You'll find that many enemies don't expect fast opposition coming back at them from the direction that their airfield is in, which is where you'll be after letting off your bombloads and presumably evading detection by the enemy until that point. Since the aircraft can manage above average speed, pilots will find the F-105 attuned to the doctrine of energy fighting. However, they will also find that the F-105 can turn with its enemies where necessary, and accelerate to regain speed rapidly afterwards, meaning that using turns, loops and otherwise engaging in a dogfight may sometimes be more desirable than simple boom-and-zoom methods. However, F-105 pilots should remember that the aircraft is not designed to get into close-in dogfights. Making mistakes, such as bleeding too much energy, will only turn the F-105D into a slow, large target to be easily hit in a furball engagement.
On the defensive
The F-105D is extremely survivable. The size of the aircraft means that the aircraft can shrug off damage to its airframe and wings easily and keep flying, and it is easy to glide back to base when out of fuel or damaged. The Thud has a chance to put out fires in its spinal fuel tanks, but due to its position above the engine, if the rear fuel tank gets set on fire, the engine will likely burn down with it. However, the F-105D is good at gliding home and back to base even when the engine is down or after sustaining heavy damage. The pilot lacks protection from the front and sides, and the aircraft lacks any sort of protection for fuel tanks, engine, control cables and control surfaces, unlike its well-armoured stablemate, the A-7 Corsair II. The aircraft can lose a wingtip and a tail fin, but still make it home to base and glide in for a landing. The gears are extremely durable and lend themselves well to rough landing, and the high ground clearance allows the aircraft a better chance of avoiding a tail strike in a high-speed landing.
The size of the aircraft is a double-edged sword, as enemy missiles are almost guaranteed to go off when in proximity to the aircraft. Dodging high-G missiles can become a hassle as while rolling the aircraft and jinking are the most effective methods of taking missiles off your tail, they also increase the surface area that is presented to the proxy fuse. Smaller, more manoeuvrable missiles such as R-60s and SRAAMs have an extremely slim chance to detonate even after you appear to have "dodged" it since the proximity fuse is still live after the missile loses its lock.
All of these pale in comparison to its speed, roll rate, and acceleration. Few aircraft possess the F-105D's aptitude for speed. Only higher-BR aircraft it sees in full uptiers, such as the MiG-21SMT and the MiG-21MF, F-104 Starfighters and F-4F(e)s have the ability to keep up with it. Speed is a form of protection in and of itself, since the F-105D can simply jettison its ordnance and run away from whatever it doesn't want to face. However, loading heavy payloads like the bombs required to destroy bases leech away at its speed, and thus speed is only really an option when running the aircraft with AIM-9Es only, or completely clean.
Thanks to the roll rate, the F-105D is able to quickly roll to dodge enemy gunfire, and also enemy missiles. The latter is essential, given the fact that the F-105D never carried any flares, and will never receive flares due to never carrying any such countermeasures in real life. A basic manoeuvre to avoid air-to-air missiles is a snap roll, with or without afterburner, performed by pitching up and rolling/yawing into the same direction. This will cause the aircraft to begin a high-G barrel roll that can reach up to 14Gs, and is effective at losing even the trickiest of opponents. Less advanced air-to-air missiles can be dodged by just turning a little, and given that high-G barrel rolls bleed speed from the aircraft, it's important to know the range and performance envelopes of the enemy aircraft before picking your manoeuvre — turn, high-g barrel roll, or simply levelling off and out-speeding the missile.
Against ground targets
While the F-105D can carry up to four air-to-ground guided missiles, it can only do this with four AGM-12Bs. This load is hardly optimal, particularly since with the ballistic computer, bombs might be far more effective anyhow. The F-105D does get AGM-12Cs, but only two of them. Keep in mind that with this payload, you cannot carry AIM-9Es for self-defense, nor chaff for spoofing radar. While still able to destroy ground targets, this payload's effectiveness is sometimes questionable in the face of the other payloads this versatile aircraft is capable of carrying. When carrying AIM-9Es or chaff pods, the amount of air-to-ground missiles that the aircraft is able to carry drops to two. The aircraft can only carry two AGM-12s and AIM-9Es with bombs, meaning that using combined loads of AGM-12Bs and missiles/chaff is entirely moot once AGM-12Cs are unlocked and available to the player. The F-105D lacks any fire-and-forget air-to-ground ordnance, as well as any kind of good stand-off ordnance to use against SPAAs. This means that aircraft is vulnerable to enemy SPAA armaments since novice pilots will have to fly low in order to use the bombs, the AGM-12s require constant attention to hit moving targets, and the aircraft lacks any sort of standoff ordnance to use against AAA while staying at an appreciable distance away.
The F-105D is equipped with a full range of ballistic computer functionality. The Constantly Computed Impact Point (CCIP) function helps show the pilot where bombs and rockets will go when released. The Constantly Computed Release Point (CCRP) function that uses the powerful onboard radar system to paint a target on the ground, and it gives the pilot an alert when "release authority" is handed over at a point where if the bomb is dropped, the projectile will hit the target selected. The CCRP system is effective at any altitude, but requires the pilot to have good timing and knowledge of the system being used. The CCIP system is also useable from most altitudes, but is most effective in dives below 1,000 m altitude, meaning that the pilot will have to fly low, exposing themselves to enemy fire as a result. While this is not usually a problem in Air RB, in Ground RB, where ground-based Short-Range Air Defense (SHORAD) is present, the aircraft is particularly vulnerable to radar-assisted gun AAA, enemy IR/beam-riding SAMs, and main cannons. Despite this vulnerability, the aircraft is extremely tough and survivable. AI anti-aircraft fire will often only be a minor annoyance, and player-launched surface-to-air missiles can be either dodged or avoided with clever tactics and positioning. In addition to that, the aircraft's size means that sometimes, bullets and shells will only hit non-essential components, such as the large, empty bomb bay for nuclear bombs in the centre of the plane.
Pros and cons
Pros:
- Good acceleration
- High top speed
- Effective control authority at speeds in excess of ~700 km/h
- Takeoff flaps have a high rip speed (~823 km/h)
- Powerful M61 Vulcan cannon with large ammo pool
- Excellent range of ground attack payloads with a ballistic computer
- Can be equipped with 4 x AIM-9E air-to-air missiles
- Has a radar with IFF capabilities and a fast search rate
Cons:
- High stall speed makes manoeuvring and landing at slow speeds difficult
- Countermeasures only include chaff and will replace AAMs if equipped
- Extremely high fuel consumption on afterburner: requires careful management of fuel on minimum or 20 minutes fuel load
- Maneuverability and overall flight performance significantly suffers with a full bombload
- Has no flares, which make this plane very susceptible to IR guided missiles
- AGM-12 is very hard to control
History
The F-105 Thunderchief is an American supersonic fighter-bomber that served during the Vietnam war. Originally an advanced derivative of the RF-84F, the F-105 was a large attack aircraft designed for both nuclear and conventional strike. F-105s would see extensive service in Vietnam as the USAF's primary attack aircraft until high loss rates forced it to be retired from active service. A total of 833 aircraft were built.
The Thunderchief comes from an illustrious family of aircraft, all developed by Seversky, which later would become Republic Aviation. Starting from the early P-35, the aircraft later evolved into the P-43, an early propeller aircraft developed into the far larger and more powerful P-47 Thunderbolt. As the Jet Age approached, the P-47 was converted to Jet Propulson, and the F-84 (Family) was born out of that conversion, beginning with early models such as F-84Bs. These were found to be severely underpowered, and the later extended-fuselage F-84E and F-84G added a more powerful and more reliable J-35 turbojet. Soon afterwards, the F-84 would be given swept wings, and a much-improved engine, and this design work was laid out the basis for what would eventually become the F-105 Thunderchief.
- A Repurposed Thunderflash
- The F-105's Origins
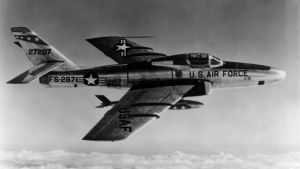
The F-105 originated as an internal project of the RF-84F Thunderflash photo-reconnaissance aircraft, featuring the same wing-mounted engine intake system. First begun in 1951, initial design work resembled an enlarged RF-84 with an integral bomb bay in the middle of the aircraft. F-84Gs in Tactical Air Command service had been the first fighter aircraft in the world able to carry nuclear bombs, and the first aircraft able to conduct in-flight refuelling- and one of the scant few aircraft designed to be able to refuel by both probe-and-drogue and boom systems. However, this aircraft had merely only been an interim while TAC waited for the F-84F to enter production, and as such, it was based on a previous variant- the F-84E, but also incorporated many of the technologies expected to be on the F-variant. While the E/G variants closely resembled the F-84B in general shape, the F-84F was a radical departure, incorporating a high sweepback and more hardpoints for increased weapons carriage. The RF-84F was an even more radical departure from the previously established F-84 formula, including wing root intakes and a rounded nose for the cameras that it was required to carry in its photoreconnaissance role. While the F-84G/F enjoyed success in Korea and in peacetime European service, Republic Aviation started a new project for a much-improved aircraft based on the RF-84F's design work. Incorporating the same nose shape but with a radar inside, an enlarged centre-section capable of internally carrying a nuclear bomb, and incorporating the same wing-root intakes, the aircraft design called "Advanced Project Nº 63" (AP-63) resembled a much-enlarged RF-84.
- Teething Problems & Shattering Expectations
- The F-105's Early Years
- Rolling into Combat
- Operation Rolling Thunder & Vietnam
The F-105 would soon see active combat in the Vietnam war, where it served as the USAF's primary attack aircraft. The F-105s would eventually fly over 20,000 combat missions in Vietnam, and despite its large and unwieldy airframe, shoot down 27 Vietnamese MiGs. 24 of these aircraft were shot down using the F-105's internal Vulcan cannon.
However, F-105s in Vietnam suffered from an extremely high loss rate. The F-105 had the unfortunate distinction of being the only American aircraft to have been removed from combat due to high loss rates, being replaced in its ground attack role by the F-4 Phantom II and F-111 Aardvark. Of 833 total F-105s produced, 382 aircraft were lost, 17 to enemy fighters, but mostly to ground anti-aircraft fire and maintenance issues. This loss rate, however, is less indicative of the aircraft's ability, but more a testament to doctrine and the aircraft's environment. The F-105 was the most-used aircraft during Operation Rolling Thunder- even more so than the F-4C that had only recently entered service. Given that the aircraft flew the most sorties, it was also the aircraft that would, naturally, take the most loss numbers. Due to the rate at which aircraft were being thrown into the Vietnamese Air Defenses, the aircraft suffered correspondingly high losses to the point that the US Air Force contemplated restarting the F-105 production line in Farmingdale, Long Island, but ultimately decided against it, as there were no export customers for the aircraft, and there were replacements just over the horizon- including the results of the TFX program, the soon-to-be-famous F-111.
Ground anti-aircraft fire was an inevitable part of flying into an air defence system. Designed to fly low and fast attack profiles, with not many provisions for high-altitude bombing, the F-105 needed to dive-bomb its targets with conventional bombs, with the pilot required to keep the target in sight of a depressible mil sight in the cockpit at all times. This resulted in pilots being forced into low, slow, and fatally predictable flight profiles when entering a bomb drop. The arc that the F-105s would fly in order to get close in to the target was an extremely easy target for Vietnamese anti-aircraft gunners. While the "Thunderstick-II" upgrade, developed in the late 60s, would allow the F-105 to bomb its targets from higher up using a set of new avionics that went in a spinal bulge (much like the MiG-21SMT's spine fuel tank), these aircraft, mostly older D-5 and D-10 models, would never see combat, and the upgrades were deemed too costly to roll out to the entire remaining number of F-105s available, which were all soon to retire.
The most common issues were related to the F-105's J75 engine, which simply had not been designed for missions in the envelopes that the F-105s were expected to fly, burning at full military for extended periods of time without overhaul. Since the F-105 had been designed with the Tactical Nuclear Strike role in mind, with its afterburners on full in what was essentially a one-way suicide mission, it had been designed to be the fastest thing flying with a nuclear bomb inside the ventral bomb bay. The J75 had not been designed with long operating hours in mind, since the expectation had been that it would be used a few times in combat prior to being either shot down, disposed of, or otherwise never used again. This resulted in many issues with the jet blade, including cracks in the compressor blades that turned the inside of the engine into a mess of hot metal where the fragmenting blades would shatter, spreading fragments backwards into the engine as they went, causing what appeared to the pilot as a mere engine fire, but was only the precursor to a violent explosion when the fragmenting blades set fire to the initially completely unprotected fuel tanks.
The fuel tanks had been another oversight in the F-105's design- the initial flight profile of low-altitude tactical nuclear strike did not have high projected survivability rates, and for the sake of speed and also the fact that the F-105 wasn't likely to return anyway, the aircraft's massive fuselage fuel tanks, arranged above the engine and bomb bay, were not self sealing. Many flak and SAM losses due to fires stemmed from the punctured fuel tanks leaking fuel all over the hot J75 engine, resulting in the aircraft burning down in flight. Upgrades to the fuel tank, including the addition of self-sealing liners, managed to somewhat rectify the issue, but never completely- no upgrade save for a complete redesign or an entirely new design would solve the issue that the F-105's entire internal fuel load was carried in tanks that were mounted in the top of the fuselage and above the engine.
Another issue encountered was that the sudden loss of hydraulic oil pressure resulted in the tailplane locking into a "pitch down" position, as well as losing the Stability Augmentation system, a vital component of such a large, heavy aircraft that allowed pilots to keep it under control. A switch was later added to mechanically lock the F-105's tailplane into a stable, "neutral" position, but again, this was only a partial fix- the hydraulics issue would never really be overcome throughout its service life.
- Sunset Service
Aircraft of the F-105G "Wild Weasel" suppression of enemy air defence (SEAD) variant remained in service until the end of the Vietnam war, after which they were replaced by the F-4G Wild Weasel IV. F-105s grew increasingly difficult to maintain in the 1970s, resulting in their accelerated retirement. The last F-105Ds in South-East Asia left by 1970, before Operation Linebacker began, and twin-seat F-105Fs and Gs would soldier on into the 80s before retiring. The final flight of any F-105 was by the Air Force Reserve 466th Tactical Fighter Squadron, in 1984, and afterwards, the F-105 slipped quietly into retirement. Most F-105s had their tails sliced off by guillotine to prevent their use elsewhere. 105 complete F-105 airframes are known to survive into this day, though none remain airworthy, and are mostly in the continental US, though a few remain in places like Nellis, McConnel, Kadena and Spangdahlem as monuments to when Thuds were deployed to those bases. The rest are in museums and other such places to live the rest of their lives out as retired warbirds.
Media
- Skins
- Videos
See also
Links to the articles on the War Thunder Wiki that you think will be useful for the reader, for example:
- reference to the series of the aircraft;
- links to approximate analogues of other nations and research trees.
External links
References
- National Air and Space Museum. (n.d.). "Republic F-105D Thunderchief". Smithsonian. Retrieved December 24, 2021, from https://www.si.edu/object/republic-f-105d-thunderchief%3Anasm_A19820064000
- Swopes, B. (2021, August 10). "10 August 1961". This Day in Aviation. Retrieved December 24, 2021, from https://www.thisdayinaviation.com/10-august-1961/
| Republic Aviation Corporation | |
|---|---|
| Fighters | P-43A-1 |
| P-47D-22-RE · P-47D-25 · P-47D-28 · P-47M-1-RE · ⋠P-47M-1-RE · P-47N-15 | |
| Jet Aircraft | F-84B-26 · F-84F · F-84G-21-RE |
| F-105D | |
| Export | J9 Early* |
| ␗P-43A-1 | |
| ▄Thunderbolt Mk.1 · ▄P-47D-22-RE · ␗P-47D-23-RA · ▂P-47D-27 · ␗P-47D-30 · ▄P-47D-30 · ␗F-47N-25-RE | |
| ◄F-84F · ▄F-84F (Italy) · ▄F-84F (France) · F-84F IAF · F-84F | |
| ␗F-84G-21-RE · ▄F-84G-21-RE · ▄F-84G-26-RE · ␗F-84G-31-RE | |
| Captured | ▀P-47D-16-RE · ▀P-47D |
| *The company was named "Seversky Aircraft Company" before being renamed in 1939 | |
| USA jet aircraft | |
|---|---|
| Fighters | |
| F9F | F9F-2 · F9F-5 · F9F-8 |
| F-80 | F-80A-5 · F-80C-10 |
| F-84 | F-84B-26 · F-84F · F-84G-21-RE |
| F-86 | F-86A-5 · F-86F-25 · F-86F-2 · F-86F-35 |
| F-89 | F-89B · F-89D |
| F-100 | F-100D |
| F-104 | F-104A · F-104C |
| F-4 | F-4C Phantom II · F-4E Phantom II · F-4J Phantom II · F-4S Phantom II |
| F-5 | F-5A · F-5C · F-5E · F-20A |
| F-8 | F8U-2 · F-8E |
| F-14 | F-14A Early · ▄F-14A IRIAF · F-14B |
| F-15 | F-15A · F-15C MSIP II · F-15E |
| F-16 | F-16A · F-16A ADF · F-16C |
| Other | P-59A · F2H-2 · F3D-1 · F3H-2 · F4D-1 · F11F-1 |
| Strike Aircraft | |
| FJ-4 | FJ-4B · FJ-4B VMF-232 |
| A-4 | A-4B · A-4E Early |
| A-7 | A-7D · A-7E · A-7K |
| AV-8 | AV-8A · AV-8C · AV-8B Plus · AV-8B (NA) |
| A-10 | A-10A · A-10A Late · A-10C |
| F-111 | F-111A · F-111F |
| Other | A-6E TRAM · F-105D · F-117 |
| Bombers | |
| B-57 | B-57A · B-57B |


