Difference between pages "Type 89" and "Challenger Mk.2"
m |
m |
||
| Line 1: | Line 1: | ||
{{About | {{About | ||
| − | | about = | + | | about = British medium tank '''{{PAGENAME}}''' |
| − | | usage = | + | | usage = other uses |
| − | | link = | + | | link = Challenger (Disambiguation) |
}} | }} | ||
{{Specs-Card | {{Specs-Card | ||
| − | |code= | + | |code=uk_challenger_1 |
| − | |images={{Specs-Card-Image|GarageImage_{{PAGENAME}}.jpg|ArtImage_{{PAGENAME}}.png}} | + | |images={{Specs-Card-Image|GarageImage_{{PAGENAME}}.jpg|GarageImage_{{PAGENAME}}_Dozer.jpg|ArtImage_{{PAGENAME}}.png|ArtImage2_{{PAGENAME}}.png}} |
}} | }} | ||
== Description == | == Description == | ||
<!-- ''In the description, the first part should be about the history of the creation and combat usage of the vehicle, as well as its key features. In the second part, tell the reader about the ground vehicle in the game. Insert a screenshot of the vehicle, so that if the novice player does not remember the vehicle by name, he will immediately understand what kind of vehicle the article is talking about.'' --> | <!-- ''In the description, the first part should be about the history of the creation and combat usage of the vehicle, as well as its key features. In the second part, tell the reader about the ground vehicle in the game. Insert a screenshot of the vehicle, so that if the novice player does not remember the vehicle by name, he will immediately understand what kind of vehicle the article is talking about.'' --> | ||
| − | The '''{{Specs|name}}''' is a rank {{Specs|rank}} | + | The '''{{Specs|name}}''', or just '''{{Specs|pseudonym}}''', is a rank {{Specs|rank}} British medium tank {{Battle-rating}}. It was introduced in [[Update 1.77 "Advancing Storm"]]. |
| − | |||
| − | |||
== General info == | == General info == | ||
| Line 20: | Line 18: | ||
<!-- ''Describe armour protection. Note the most well protected and key weak areas. Appreciate the layout of modules as well as the number and location of crew members. Is the level of armour protection sufficient, is the placement of modules helpful for survival in combat? If necessary use a visual template to indicate the most secure and weak zones of the armour.'' --> | <!-- ''Describe armour protection. Note the most well protected and key weak areas. Appreciate the layout of modules as well as the number and location of crew members. Is the level of armour protection sufficient, is the placement of modules helpful for survival in combat? If necessary use a visual template to indicate the most secure and weak zones of the armour.'' --> | ||
| − | + | Like the Chieftain Mk 10, the Challenger has a very strong turret front, with composite armour protecting the entire front and part of the sides. The turret front can resist up to 470 mm of rolled homogeneous armour equivalency (RHAe) against long-rod kinetic (~550 mm RHAe against rounds without the long-rod slope modifier) and up to 600 mm against chemical penetrators. This theoretically makes the strongest part of the turret frontally invulnerable to all but the top-rank kinetic ammunition in the game. In practice, however, there is a weak spot on the lower leading edge of the turret front, where the backing plate of the composite inside the turret flattens to a 90° angle. This reduces the effective thickness of the lower turret cheeks by approximately 100 mm, making it vulnerable to most long-rod APFSDS. A small portion of the turret front, the area just around the gun, is unprotected by composite armour and is 200 mm of CHA with a 50 mm RHA spall liner. This area extends above the gun and transitions to 60 mm CHA at 60°. While these areas are small and unlikely to lead to catastrophic damage when hit (the gun breech will tend to soak up shrapnel), they are important to be wary of. | |
| − | The | + | The Challenger's turret sides are similar to many top-rank MBTs - they can only resist enemy fire at relatively high angles of attack. Protection is 140 mm RHAe against kinetic and 300 mm RHAe against chemical shells, meaning that the armour can only resist autocannon fire and low-calibre HEAT when struck dead-on. |
| − | + | Compared its turret, the Challenger hull is significantly weaker against kinetic projectiles with only 220 mm of RHAe (~300 mm for projectiles without the long-rod slope modifier) on the UFP. Chemical protection in this area is similar to the turret at 600 mm RHAe. An exception to these numbers is the area directly above the driver's hatch, which is not covered by composite armour and is vulnerable to essentially any anti-tank ammunition. The lower frontal plate is also lacking composite and is comprised of a single 70 mm RHA plate at a slight angle, providing ~80-90 mm of effective thickness. Shots to the LFP will at least incapacitate the driver, or more likely catastrophically detonate the hull ammunition. British tankers should be quite used to this weak spot by this point, as the weak LFP is present on the entire Chieftain line. However, the upper third of the LFP shares some of the UFP's composite protection due to its design. This means that the upper third of the LFP has slightly more protection than the lower sections. | |
| − | + | Hull sides are generally very weak, as is typical of top-rank MBTs. The upper hull (above the tracks) is comprised of a 20 mm RHA + fuel tanks + 25 mm RHA array. The lower hull (around the tracks) is comprised of 19 mm aluminium side skirts and 34 mm RHA. | |
| − | + | '''Armour type:''' | |
| − | + | * Composite armour (hull UFP, turret front and sides) | |
| + | * Rolled homogeneous armour (hull) | ||
| + | * Cast homogeneous armour (gun "mantlet") | ||
| + | * Aluminium (side skirts) | ||
{| class="wikitable" | {| class="wikitable" | ||
| Line 36: | Line 37: | ||
! Armour !! Front (Slope angle) !! Sides !! Rear !! Roof | ! Armour !! Front (Slope angle) !! Sides !! Rear !! Roof | ||
|- | |- | ||
| − | | Hull || | + | | Hull || 38-50* mm (60-81°) ''Front glacis'' <br> 70 mm (30°) ''Lower glacis'' || 20 mm (0-3°), 25 mm (74°) ''Top'' <br> 34 + 19 mm ''Bottom'' || 20 mm (29°) ''Top'' <br> 25 mm (30°) || 20 mm <br> 8 mm ''Engine grille'' |
|- | |- | ||
| − | | Turret || | + | | Turret || 50* mm (51-54°) <br> 60 mm (55-56°), 200 mm ''Gun mantlet'' || 25* + 4 mm (1°) ''Front'' <br> 45 + 4 mm ''Rear'' || 44 + 4 mm (43-48°) <br> 20 mm (85°) ''Turret underside'' || 38 mm ''Front'' <br> 20 mm ''Rear'' |
|- | |- | ||
| − | | Cupola || | + | | Cupola || 60 mm || 60 mm || 60 mm || 60 mm |
| + | |- | ||
| + | |} | ||
| + | {| class="wikitable" | ||
| + | |- | ||
| + | ! Composite armour* !! Front !! Sides | ||
| + | |- | ||
| + | | Hull || '''Front glacis:'''<br>~220 mm @ 60° against ''Kinetic'' <br> ~600 mm @ 60° against ''Chemical'' | ||
| + | ! | ||
| + | |- | ||
| + | | Turret || '''Turret front:'''<br>~500 mm @ 60° against ''Kinetic'' <br> ~600 mm @ 60° against ''Chemical'' || '''25 mm sections:''' <br> ~ 140 mm @ 0° against ''Kinetic'' <br> ~ 300 mm @ 0° against ''Chemical'' | ||
|- | |- | ||
|} | |} | ||
'''Notes:''' | '''Notes:''' | ||
| − | * | + | * Suspension wheels, torsion bars, and tracks are 20 mm thick. |
| − | * Turret | + | * Turret ring is 60 mm thick. |
| − | * | + | * 20-25 mm RHA plates surround the fuel tanks on the hull sides. |
| − | * | + | * Hull composite armour configuration is 50 mm RHA + 200 mm NERA elements + 80 mm RHA. |
| − | * | + | * Front turret composite armour configuration is 50 mm RHA + 600 mm NERA elements + 110 mm RHA. |
| + | * Turret side composite armour configuration is 25 mm RHA + 300 mm NERA elements + 80 mm RHA. | ||
=== Mobility === | === Mobility === | ||
| Line 55: | Line 67: | ||
<!-- ''Write about the mobility of the ground vehicle. Estimate the specific power and manoeuvrability, as well as the maximum speed forwards and backwards.'' --> | <!-- ''Write about the mobility of the ground vehicle. Estimate the specific power and manoeuvrability, as well as the maximum speed forwards and backwards.'' --> | ||
| − | {{tankMobility|abMinHp= | + | {{tankMobility|abMinHp=1,886|rbMinHp=1,076}} |
| − | |||
| − | |||
| − | |||
| − | |||
| − | + | The {{PAGENAME}}'s speed sets it apart from the previous Chieftain tanks, as it is capable of reaching 56 km/h on roads and 46 km/h off-road. Reverse speed is also a noticeable improvement from the Chieftain line. Despite this, the 62 ton mass of this vehicle makes it the slowest of its high-rank contemporaries (e.g. Abrams, Leopard, and Type 90). | |
=== Modifications and economy === | === Modifications and economy === | ||
{{Specs-Economy}} | {{Specs-Economy}} | ||
| + | |||
| + | The FPE module should be a priority, since the fuel tanks are located all around the hull above the tracks, meaning that the tank will be set on fire often. This comes with added protection, however, as the fuel tanks will frequently absorb most shrapnel - protecting the crew and ammunition from the occasional side-shot - giving the player ample time to return fire and eliminate the threat. | ||
== Armaments == | == Armaments == | ||
{{Specs-Tank-Armaments}} | {{Specs-Tank-Armaments}} | ||
=== Main armament === | === Main armament === | ||
| − | {{Specs-Tank-Weapon| | + | {{Specs-Tank-Weapon|1}} |
<!-- ''Give the reader information about the characteristics of the main gun. Assess its effectiveness in a battle based on the reloading speed, ballistics and the power of shells. Do not forget about the flexibility of the fire, that is how quickly the cannon can be aimed at the target, open fire on it and aim at another enemy. Add a link to the main article on the gun: <code><nowiki>{{main|Name of the weapon}}</nowiki></code>. Describe in general terms the ammunition available for the main gun. Give advice on how to use them and how to fill the ammunition storage.'' --> | <!-- ''Give the reader information about the characteristics of the main gun. Assess its effectiveness in a battle based on the reloading speed, ballistics and the power of shells. Do not forget about the flexibility of the fire, that is how quickly the cannon can be aimed at the target, open fire on it and aim at another enemy. Add a link to the main article on the gun: <code><nowiki>{{main|Name of the weapon}}</nowiki></code>. Describe in general terms the ammunition available for the main gun. Give advice on how to use them and how to fill the ammunition storage.'' --> | ||
| − | {{main| | + | {{main|L11A5 (120 mm)}} |
| − | The | + | The Challenger bears the 120 mm L11A5, an updated but essentially identical version of the gun found on the Chieftains. It has access to the same rounds as the Chieftain Mk 10, with the notable addition of the L23A1 APFSDS ammunition. Despite having worse flat plate penetration (24 mm less than L23 at 1 km), L23A1 penetrates angled armor much more efficiently than its predecessor (29 mm more than L23 at 1 km at 60°), making it especially useful for dealing with Russian late T-series hulls. |
| − | |||
| − | |||
| − | |||
| − | |||
| − | |||
| − | |||
| − | |||
| − | |||
| − | |||
| − | |||
{| class="wikitable" style="text-align:center" width="100%" | {| class="wikitable" style="text-align:center" width="100%" | ||
|- | |- | ||
| − | ! colspan=" | + | ! colspan="5" | [[L11A5 (120 mm)|120 mm L11A5]] || colspan="5" | Turret rotation speed (°/s) || colspan="4" | Reloading rate (seconds) |
|- | |- | ||
| − | ! Mode !! Capacity | + | ! Mode !! Capacity !! Vertical !! Horizontal !! Stabilizer |
! Stock !! Upgraded !! Full !! Expert !! Aced | ! Stock !! Upgraded !! Full !! Expert !! Aced | ||
! Stock !! Full !! Expert !! Aced | ! Stock !! Full !! Expert !! Aced | ||
|- | |- | ||
! ''Arcade'' | ! ''Arcade'' | ||
| − | | rowspan="2" | | + | | rowspan="2" | 52 || rowspan="2" | -10°/+20° || rowspan="2" | ±180° || rowspan="2" | Two-plane || 29.5 || 40.8 || 49.6 || 54.8 || 58.4 || rowspan="2" | 6.50 || rowspan="2" | 5.75 || rowspan="2" | 5.30 || rowspan="2" | 5.00 |
|- | |- | ||
! ''Realistic'' | ! ''Realistic'' | ||
| − | | | + | | 18.4 || 21.7 || 26.4 || 29.1 || 31.0 |
|- | |- | ||
|} | |} | ||
==== Ammunition ==== | ==== Ammunition ==== | ||
| − | { | + | {{:L11A5 (120 mm)/Ammunition|Shot L23, Shell L31A7, Shot L23A1, L34}} |
| − | |||
| − | |||
| − | |||
| − | |||
| − | |||
| − | | | ||
| − | |||
| − | |||
| − | |||
| − | |||
| − | |||
| − | |||
| − | |||
| − | |||
| − | |||
| − | |||
| − | |||
| − | |||
| − | |||
| − | |||
| − | |||
| − | |||
| − | |||
| − | |||
| − | |||
| − | |||
| − | |||
| − | |||
| − | |||
| − | |||
| − | |||
| − | |||
==== [[Ammo racks]] ==== | ==== [[Ammo racks]] ==== | ||
| − | [[File:Ammoracks_{{PAGENAME}}.png|right|thumb| | + | [[File:Ammoracks_{{PAGENAME}}.png|right|thumb|x350px|[[Ammo racks]] of the {{PAGENAME}}]] |
| − | <!-- '''Last updated:''' --> | + | <!-- '''Last updated: 2.19.0.82''' --> |
{| class="wikitable" style="text-align:center" | {| class="wikitable" style="text-align:center" | ||
|- | |- | ||
! Full<br>ammo | ! Full<br>ammo | ||
| + | ! Ammo<br>part | ||
! 1st<br>rack empty | ! 1st<br>rack empty | ||
! 2nd<br>rack empty | ! 2nd<br>rack empty | ||
| Line 148: | Line 117: | ||
! 5th<br>rack empty | ! 5th<br>rack empty | ||
! 6th<br>rack empty | ! 6th<br>rack empty | ||
| + | |- | ||
| + | |'''52''' ||''Projectiles''<br>''Propellants'' || 50 ''(+2)''<br>''47 (+5)'' || 47 ''(+5)''<br> ''41 (+11)'' || 45 ''(+7)''<br>35 ''(+17)'' || 43 ''(+9)''<br>29 ''(+23)'' || 39 ''(+13)''<br>21 ''(+31)'' || 37 ''(+15)''<br>11 ''(+41)'' | ||
| + | |- | ||
! 7th<br>rack empty | ! 7th<br>rack empty | ||
! 8th<br>rack empty | ! 8th<br>rack empty | ||
| − | |||
| − | |||
| − | |||
! 9th<br>rack empty | ! 9th<br>rack empty | ||
! 10th<br>rack empty | ! 10th<br>rack empty | ||
| Line 158: | Line 127: | ||
! 12th<br>rack empty | ! 12th<br>rack empty | ||
! 13th<br>rack empty | ! 13th<br>rack empty | ||
| − | |||
| − | |||
! Visual<br>discrepancy | ! Visual<br>discrepancy | ||
| − | |||
|- | |- | ||
| − | | | + | | 34 ''(+18)''<br>4 ''(+48)'' || 27 ''(+25)''<br>1 ''(+51)'' || 22 ''(+30)''<br> || 21 ''(+31)''<br> || 7 ''(+45)''<br> || 4 ''(+38)''<br> || 1 ''(+51)''<br> || No |
| − | |||
|- | |- | ||
|} | |} | ||
| + | '''Notes''': | ||
| − | + | * Packing only 29 rounds will keep the front hull empty of charges. | |
| − | + | * All propellant charges are protected by a box of 5 mm of steel | |
| − | |||
| − | |||
| − | + | === Machine guns === | |
| + | {{Specs-Tank-Weapon|2}} | ||
| + | {{Specs-Tank-Weapon|3}} | ||
| + | <!-- ''Offensive and anti-aircraft machine guns not only allow you to fight some aircraft but also are effective against lightly armoured vehicles. Evaluate machine guns and give recommendations on its use.'' --> | ||
| + | {{main|L37A2 (7.62 mm)|L8A2 (7.62 mm)}} | ||
| − | + | {| class="wikitable" style="text-align:center" width="50%" | |
| − | |||
| − | |||
| − | |||
| − | |||
| − | |||
| − | {| class="wikitable" style="text-align:center" width=" | ||
|- | |- | ||
| − | ! colspan=" | + | ! colspan="5" | [[L37A2 (7.62 mm)|7.62 mm L37A2]] |
|- | |- | ||
| − | ! Capacity (Belt) !! Vertical !! Horizontal | + | ! Mount !! Capacity (Belt) !! Fire rate !! Vertical !! Horizontal |
| − | |||
|- | |- | ||
| − | | | + | | Pintle || 3,600 (100) || 650 || -10°/+50° || ±180° |
|- | |- | ||
|} | |} | ||
| − | |||
| − | |||
| − | |||
| − | |||
| − | |||
| − | |||
| − | |||
| − | |||
| − | |||
| − | |||
| − | |||
| − | |||
| − | |||
| − | |||
| − | |||
| − | |||
| − | |||
| − | |||
| − | |||
| − | |||
| − | |||
| − | |||
| − | |||
| − | |||
| − | |||
| − | |||
| − | |||
| − | |||
| − | |||
| − | |||
| − | |||
| − | |||
| − | |||
| − | |||
| − | |||
| − | |||
| − | |||
| − | |||
| − | |||
| − | |||
| − | |||
| − | |||
| − | |||
| − | |||
| − | |||
| − | |||
| − | |||
| − | |||
| − | |||
| − | |||
| − | |||
| − | |||
| − | |||
| − | |||
| − | |||
| − | |||
| − | |||
| − | |||
| − | |||
| − | |||
| − | |||
| − | |||
| − | |||
| − | |||
| − | |||
| − | |||
| − | |||
| − | |||
| − | |||
| − | |||
| − | |||
| − | |||
| − | |||
| − | |||
| − | |||
| − | |||
| − | |||
| − | |||
| − | |||
| − | |||
| − | |||
| − | |||
| − | |||
| − | |||
| − | |||
| − | |||
| − | |||
{| class="wikitable" style="text-align:center" width="50%" | {| class="wikitable" style="text-align:center" width="50%" | ||
|- | |- | ||
| − | ! colspan="5" | [[ | + | ! colspan="5" | [[L8A2 (7.62 mm)|7.62 mm L8A2]] |
|- | |- | ||
! Mount !! Capacity (Belt) !! Fire rate !! Vertical !! Horizontal | ! Mount !! Capacity (Belt) !! Fire rate !! Vertical !! Horizontal | ||
|- | |- | ||
| − | | Coaxial || | + | | Coaxial || 2,400 (200) || 600 || - || - |
|- | |- | ||
|} | |} | ||
| Line 290: | Line 164: | ||
== Usage in battles == | == Usage in battles == | ||
<!-- ''Describe the tactics of playing in the vehicle, the features of using vehicles in the team and advice on tactics. Refrain from creating a "guide" - do not impose a single point of view but instead give the reader food for thought. Describe the most dangerous enemies and give recommendations on fighting them. If necessary, note the specifics of the game in different modes (AB, RB, SB).'' --> | <!-- ''Describe the tactics of playing in the vehicle, the features of using vehicles in the team and advice on tactics. Refrain from creating a "guide" - do not impose a single point of view but instead give the reader food for thought. Describe the most dangerous enemies and give recommendations on fighting them. If necessary, note the specifics of the game in different modes (AB, RB, SB).'' --> | ||
| + | New drivers of the Challenger 1 will appreciate a similar playstyle to the earlier Chieftain tanks, particularly the [[Chieftain Mk 10]]. Most of the armour's weak points could be minimized by assuming a hull-down position on the incline of a hill, and using the Challenger's excellent -10° of gun depression to keep the gun on target. This will increase the angle of the turret and thus increase the effective thickness of the back-plate on the turret. | ||
| − | + | When encountering common enemies: | |
| − | |||
| − | |||
| − | |||
| − | |||
| − | |||
| − | |||
| − | + | * [[T-64B]]: L23A1 can theoretically penetrate the UFP, but it is very difficult. The drivers port weak spot is the recommended target from the front. If not possible, aim for the breech/cannon barrel to eliminate the threat of returning fire. | |
| + | * [[T-64A (1971)]]: L23 will go right through the hull even at 2 km, but the Challenger can still be immobilized and disarmed if even 3BK12M (stock HEATFS) is fired at the breech, which will break the turret ring, the breech and possibly the engine. | ||
| + | * [[Leopard 2K]]: Shoot anywhere honestly. Shooting its right cheek will knock out the gunner and TC. Shooting the UFP under its left cheek detonates the turret ammo storage. Shooting just left of the driver's port can even cause a total crew knock-out instantly, even with L23 at 1000 m. Just be aware that DM13 and DM23 will have no issues penetrating your hull either. | ||
| + | * [[Leopard A1A1]]: Its APFSDS poses a risk to the weak spot on the turret, but only if it gets the first shot off. Shoot anywhere near hull centre or low turret area. | ||
=== Pros and cons === | === Pros and cons === | ||
| Line 306: | Line 178: | ||
'''Pros:''' | '''Pros:''' | ||
| − | * | + | * Good composite armour for both kinetic and chemical protection on hull and turret |
| − | * | + | * Very accurate main gun with effective gun stabilizers, depression angles and decent stock APFSDS shell |
| − | * | + | * Decent mobility for its weight and size: a drastic increase and from all previous British MBTs |
| − | * | + | * Great hull down performance that multiplies armour efficiency, especially at long ranges |
| − | * | + | * No stock HEATFS shells unlike most counterparts at the rank, easing the module research |
| − | * | + | * One of the few MBTs that has access to a smoke shell for the main gun; with the auxiliary HESH against light armour |
| − | + | * Reload can get down to 5 seconds, fastest firing 120 mm along with [[Type 90]]/[[Type 90 (B)]] | |
| − | |||
| − | |||
'''Cons:''' | '''Cons:''' | ||
| − | * | + | * Only 4 rounds of first-stage ammunition, then it can take up to 8.7 seconds to reload the gun until ready rack replenishes again |
| − | * | + | * Large and tall target, with the accessible Driver's optics weak spot on the upper frontal plate and vulnerable hull armour |
| − | * | + | * No external composite or reactive armour |
| − | * | + | * HESH shell is generally useless against other MBTs |
| − | + | * Ammunition and charges takes a lot of space (easy to hit) | |
| − | + | * Firepower, mobility or armour characteristic are outmatched by tanks as [[Leopard 2 (Family)]], [[Ariete (Family)]] or [[T-80 (Family)]] | |
== History == | == History == | ||
<!-- ''Describe the history of the creation and combat usage of the vehicle in more detail than in the introduction. If the historical reference turns out to be too long, take it to a separate article, taking a link to the article about the vehicle and adding a block "/History" (example: <nowiki>https://wiki.warthunder.com/(Vehicle-name)/History</nowiki>) and add a link to it here using the <code>main</code> template. Be sure to reference text and sources by using <code><nowiki><ref></ref></nowiki></code>, as well as adding them at the end of the article with <code><nowiki><references /></nowiki></code>. This section may also include the vehicle's dev blog entry (if applicable) and the in-game encyclopedia description (under <code><nowiki>=== In-game description ===</nowiki></code>, also if applicable).'' --> | <!-- ''Describe the history of the creation and combat usage of the vehicle in more detail than in the introduction. If the historical reference turns out to be too long, take it to a separate article, taking a link to the article about the vehicle and adding a block "/History" (example: <nowiki>https://wiki.warthunder.com/(Vehicle-name)/History</nowiki>) and add a link to it here using the <code>main</code> template. Be sure to reference text and sources by using <code><nowiki><ref></ref></nowiki></code>, as well as adding them at the end of the article with <code><nowiki><references /></nowiki></code>. This section may also include the vehicle's dev blog entry (if applicable) and the in-game encyclopedia description (under <code><nowiki>=== In-game description ===</nowiki></code>, also if applicable).'' --> | ||
| − | + | In 1977, the Iranian government ordered an improved version of the Chieftain tank, which was arguably the best main battle tank (MBT) in service at its time. The Chieftain offered unparalleled protection and firepower; however, its mobility was lacklustre and something its successor needed to improve upon. In response, the engineers at the MVEE created the Chieftain Mk.5(P), from which three additional prototypes were created. It was one of these prototypes that would become the basis for the Challenger 1. Unfortunately, after the Iranian Revolution of 1979 and the fall of the Shah, Iran canceled its order for an improved Chieftain. In addition, a parallel British tank project (the MBT90) was also abandoned, and the British Army quickly became a new potential customer for a new MBT. | |
| − | |||
| − | |||
| − | |||
| − | |||
| − | + | The Challenger's design was based on the cancelled project called "Shir-2"" planned for export to Iran, and retained its deadly 120 mm gun and superb armour. The Challenger was also equipped with Chobham armour, a composite armour made from multiple layers of different materials. The additional materials gave the Challenger its distinctive, heavily-sloped armour on the front of the turret and upper glacis. The Challenger's mobility and off-road capabilities were significantly improved with the installation of a new 1,200 horsepower Rolls-Royce engine and hydropneumatic suspension. The Challenger 1 entered production and service in 1983. Production ended in 1990, having yielded a total of about 420 vehicles. It served primarily with British forces during the Gulf War. It was also used in peacekeeping missions in Bosnia-Herzegovina during the mid 1990s, and Jordan still operates a number of Challenger 1 tanks to this day. The Challenger 1 was withdrawn from active service by 2001 and later replaced by the Challenger 2. | |
| − | ''- From [[wt:en/news/ | + | ''- From [[wt:en/news/5323-development-challenger-1-a-worthy-heir-en|Devblog]]'' |
== Media == | == Media == | ||
| Line 342: | Line 208: | ||
;Skins | ;Skins | ||
| − | * [https://live.warthunder.com/feed/camouflages/?vehicle= | + | * [https://live.warthunder.com/feed/camouflages/?vehicle=uk_challenger_1 Skins and camouflages for the {{PAGENAME}} from live.warthunder.com.] |
| − | |||
| − | |||
| − | |||
;Videos | ;Videos | ||
| − | {{Youtube-gallery| | + | {{Youtube-gallery|dglE5EGyY0o|'''The Shooting Range #87''' - ''Metal Beasts'' section at 00:35 discusses the Challenger Mk.2.}} |
== See also == | == See also == | ||
| − | + | ''Links to the articles on the War Thunder Wiki that you think will be useful for the reader, for example:'' | |
| + | |||
* ''reference to the series of the vehicles;'' | * ''reference to the series of the vehicles;'' | ||
| − | * ''links to approximate analogues of other nations and research trees.'' | + | * ''links to approximate analogues of other nations and research trees.'' |
| − | |||
| − | |||
== External links == | == External links == | ||
| Line 362: | Line 224: | ||
* ''other literature.'' --> | * ''other literature.'' --> | ||
| − | * [[wt:en/news/ | + | * [[wt:en/news/5323-development-challenger-1-a-worthy-heir-en|[Devblog] Challenger 1: A Worthy Heir]] |
| − | {{TankManufacturer | + | {{TankManufacturer Department of Tank Design}} |
| − | {{ | + | {{Britain medium tanks}} |
| − | |||
Latest revision as of 23:08, 23 March 2024
| This page is about the British medium tank Challenger Mk.2. For other uses, see Challenger (Disambiguation). |


Contents
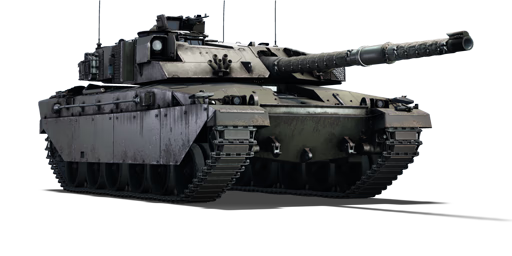
Description
The Tank, Combat, 120-mm Gun, Challenger Mk.2, or just Challenger Mk.2, is a rank British medium tank with a battle rating of (AB), (RB), and (SB). It was introduced in Update 1.77 "Advancing Storm".
General info
Survivability and armour
Like the Chieftain Mk 10, the Challenger has a very strong turret front, with composite armour protecting the entire front and part of the sides. The turret front can resist up to 470 mm of rolled homogeneous armour equivalency (RHAe) against long-rod kinetic (~550 mm RHAe against rounds without the long-rod slope modifier) and up to 600 mm against chemical penetrators. This theoretically makes the strongest part of the turret frontally invulnerable to all but the top-rank kinetic ammunition in the game. In practice, however, there is a weak spot on the lower leading edge of the turret front, where the backing plate of the composite inside the turret flattens to a 90° angle. This reduces the effective thickness of the lower turret cheeks by approximately 100 mm, making it vulnerable to most long-rod APFSDS. A small portion of the turret front, the area just around the gun, is unprotected by composite armour and is 200 mm of CHA with a 50 mm RHA spall liner. This area extends above the gun and transitions to 60 mm CHA at 60°. While these areas are small and unlikely to lead to catastrophic damage when hit (the gun breech will tend to soak up shrapnel), they are important to be wary of.
The Challenger's turret sides are similar to many top-rank MBTs - they can only resist enemy fire at relatively high angles of attack. Protection is 140 mm RHAe against kinetic and 300 mm RHAe against chemical shells, meaning that the armour can only resist autocannon fire and low-calibre HEAT when struck dead-on.
Compared its turret, the Challenger hull is significantly weaker against kinetic projectiles with only 220 mm of RHAe (~300 mm for projectiles without the long-rod slope modifier) on the UFP. Chemical protection in this area is similar to the turret at 600 mm RHAe. An exception to these numbers is the area directly above the driver's hatch, which is not covered by composite armour and is vulnerable to essentially any anti-tank ammunition. The lower frontal plate is also lacking composite and is comprised of a single 70 mm RHA plate at a slight angle, providing ~80-90 mm of effective thickness. Shots to the LFP will at least incapacitate the driver, or more likely catastrophically detonate the hull ammunition. British tankers should be quite used to this weak spot by this point, as the weak LFP is present on the entire Chieftain line. However, the upper third of the LFP shares some of the UFP's composite protection due to its design. This means that the upper third of the LFP has slightly more protection than the lower sections.
Hull sides are generally very weak, as is typical of top-rank MBTs. The upper hull (above the tracks) is comprised of a 20 mm RHA + fuel tanks + 25 mm RHA array. The lower hull (around the tracks) is comprised of 19 mm aluminium side skirts and 34 mm RHA.
Armour type:
- Composite armour (hull UFP, turret front and sides)
- Rolled homogeneous armour (hull)
- Cast homogeneous armour (gun "mantlet")
- Aluminium (side skirts)
| Armour | Front (Slope angle) | Sides | Rear | Roof |
|---|---|---|---|---|
| Hull | 38-50* mm (60-81°) Front glacis 70 mm (30°) Lower glacis |
20 mm (0-3°), 25 mm (74°) Top 34 + 19 mm Bottom |
20 mm (29°) Top 25 mm (30°) |
20 mm 8 mm Engine grille |
| Turret | 50* mm (51-54°) 60 mm (55-56°), 200 mm Gun mantlet |
25* + 4 mm (1°) Front 45 + 4 mm Rear |
44 + 4 mm (43-48°) 20 mm (85°) Turret underside |
38 mm Front 20 mm Rear |
| Cupola | 60 mm | 60 mm | 60 mm | 60 mm |
| Composite armour* | Front | Sides |
|---|---|---|
| Hull | Front glacis: ~220 mm @ 60° against Kinetic ~600 mm @ 60° against Chemical |
|
| Turret | Turret front: ~500 mm @ 60° against Kinetic ~600 mm @ 60° against Chemical |
25 mm sections: ~ 140 mm @ 0° against Kinetic ~ 300 mm @ 0° against Chemical |
Notes:
- Suspension wheels, torsion bars, and tracks are 20 mm thick.
- Turret ring is 60 mm thick.
- 20-25 mm RHA plates surround the fuel tanks on the hull sides.
- Hull composite armour configuration is 50 mm RHA + 200 mm NERA elements + 80 mm RHA.
- Front turret composite armour configuration is 50 mm RHA + 600 mm NERA elements + 110 mm RHA.
- Turret side composite armour configuration is 25 mm RHA + 300 mm NERA elements + 80 mm RHA.
Mobility
| Game Mode | Max Speed (km/h) | Weight (tons) | Engine power (horsepower) | Power-to-weight ratio (hp/ton) | |||
|---|---|---|---|---|---|---|---|
| Forward | Reverse | Stock | Upgraded | Stock | Upgraded | ||
| Arcade | Expression error: Unexpected * operator. | 1,886 | Expression error: Unexpected round operator. | __.__ | |||
| Realistic | 1,076 | Expression error: Unexpected round operator. | __.__ | ||||
The Challenger Mk.2's speed sets it apart from the previous Chieftain tanks, as it is capable of reaching 56 km/h on roads and 46 km/h off-road. Reverse speed is also a noticeable improvement from the Chieftain line. Despite this, the 62 ton mass of this vehicle makes it the slowest of its high-rank contemporaries (e.g. Abrams, Leopard, and Type 90).
Modifications and economy
The FPE module should be a priority, since the fuel tanks are located all around the hull above the tracks, meaning that the tank will be set on fire often. This comes with added protection, however, as the fuel tanks will frequently absorb most shrapnel - protecting the crew and ammunition from the occasional side-shot - giving the player ample time to return fire and eliminate the threat.
Armaments
Main armament
The Challenger bears the 120 mm L11A5, an updated but essentially identical version of the gun found on the Chieftains. It has access to the same rounds as the Chieftain Mk 10, with the notable addition of the L23A1 APFSDS ammunition. Despite having worse flat plate penetration (24 mm less than L23 at 1 km), L23A1 penetrates angled armor much more efficiently than its predecessor (29 mm more than L23 at 1 km at 60°), making it especially useful for dealing with Russian late T-series hulls.
| 120 mm L11A5 | Turret rotation speed (°/s) | Reloading rate (seconds) | |||||||||||
|---|---|---|---|---|---|---|---|---|---|---|---|---|---|
| Mode | Capacity | Vertical | Horizontal | Stabilizer | Stock | Upgraded | Full | Expert | Aced | Stock | Full | Expert | Aced |
| Arcade | 52 | -10°/+20° | ±180° | Two-plane | 29.5 | 40.8 | 49.6 | 54.8 | 58.4 | 6.50 | 5.75 | 5.30 | 5.00 |
| Realistic | 18.4 | 21.7 | 26.4 | 29.1 | 31.0 | ||||||||
Ammunition
| Penetration statistics | |||||||
|---|---|---|---|---|---|---|---|
| Ammunition | Type of warhead |
Penetration @ 0° Angle of Attack (mm) | |||||
| 10 m | 100 m | 500 m | 1,000 m | 1,500 m | 2,000 m | ||
| Shot L23 | APFSDS | 410 | 408 | 405 | 400 | 390 | 380 |
| Shell L31A7 | HESH | 152 | 152 | 152 | 152 | 152 | 152 |
| Shot L23A1 | APFSDS | 396 | 394 | 387 | 376 | 367 | 357 |
| Shell details | ||||||||||||
|---|---|---|---|---|---|---|---|---|---|---|---|---|
| Ammunition | Type of warhead |
Velocity (m/s) |
Projectile mass (kg) |
Fuse delay (m) |
Fuse sensitivity (mm) |
Explosive mass (TNT equivalent) (kg) |
Ricochet | |||||
| 0% | 50% | 100% | ||||||||||
| Shot L23 | APFSDS | 1,535 | 3.89 | - | - | - | 78° | 80° | 81° | |||
| Shell L31A7 | HESH | 670 | 17.34 | 0.1 | 4 | 6.53 | 73° | 77° | 80° | |||
| Shot L23A1 | APFSDS | 1,535 | 3.89 | - | - | - | 78° | 80° | 81° | |||
| Smoke shell characteristics | ||||||
|---|---|---|---|---|---|---|
| Ammunition | Velocity (m/s) |
Projectile mass (kg) |
Screen radius (m) |
Screen deploy time (s) |
Screen hold time (s) |
Explosive mass (TNT equivalent) (g) |
| L34 | 670 | 17.1 | 20 | 5 | 25 | 50 |
Ammo racks

| Full ammo |
Ammo part |
1st rack empty |
2nd rack empty |
3rd rack empty |
4th rack empty |
5th rack empty |
6th rack empty |
|---|---|---|---|---|---|---|---|
| 52 | Projectiles Propellants |
50 (+2) 47 (+5) |
47 (+5) 41 (+11) |
45 (+7) 35 (+17) |
43 (+9) 29 (+23) |
39 (+13) 21 (+31) |
37 (+15) 11 (+41) |
| 7th rack empty |
8th rack empty |
9th rack empty |
10th rack empty |
11th rack empty |
12th rack empty |
13th rack empty |
Visual discrepancy |
| 34 (+18) 4 (+48) |
27 (+25) 1 (+51) |
22 (+30) |
21 (+31) |
7 (+45) |
4 (+38) |
1 (+51) |
No |
Notes:
- Packing only 29 rounds will keep the front hull empty of charges.
- All propellant charges are protected by a box of 5 mm of steel
Machine guns
| 7.62 mm L37A2 | ||||
|---|---|---|---|---|
| Mount | Capacity (Belt) | Fire rate | Vertical | Horizontal |
| Pintle | 3,600 (100) | 650 | -10°/+50° | ±180° |
| 7.62 mm L8A2 | ||||
|---|---|---|---|---|
| Mount | Capacity (Belt) | Fire rate | Vertical | Horizontal |
| Coaxial | 2,400 (200) | 600 | - | - |
Usage in battles
New drivers of the Challenger 1 will appreciate a similar playstyle to the earlier Chieftain tanks, particularly the Chieftain Mk 10. Most of the armour's weak points could be minimized by assuming a hull-down position on the incline of a hill, and using the Challenger's excellent -10° of gun depression to keep the gun on target. This will increase the angle of the turret and thus increase the effective thickness of the back-plate on the turret.
When encountering common enemies:
- T-64B: L23A1 can theoretically penetrate the UFP, but it is very difficult. The drivers port weak spot is the recommended target from the front. If not possible, aim for the breech/cannon barrel to eliminate the threat of returning fire.
- T-64A (1971): L23 will go right through the hull even at 2 km, but the Challenger can still be immobilized and disarmed if even 3BK12M (stock HEATFS) is fired at the breech, which will break the turret ring, the breech and possibly the engine.
- Leopard 2K: Shoot anywhere honestly. Shooting its right cheek will knock out the gunner and TC. Shooting the UFP under its left cheek detonates the turret ammo storage. Shooting just left of the driver's port can even cause a total crew knock-out instantly, even with L23 at 1000 m. Just be aware that DM13 and DM23 will have no issues penetrating your hull either.
- Leopard A1A1: Its APFSDS poses a risk to the weak spot on the turret, but only if it gets the first shot off. Shoot anywhere near hull centre or low turret area.
Pros and cons
Pros:
- Good composite armour for both kinetic and chemical protection on hull and turret
- Very accurate main gun with effective gun stabilizers, depression angles and decent stock APFSDS shell
- Decent mobility for its weight and size: a drastic increase and from all previous British MBTs
- Great hull down performance that multiplies armour efficiency, especially at long ranges
- No stock HEATFS shells unlike most counterparts at the rank, easing the module research
- One of the few MBTs that has access to a smoke shell for the main gun; with the auxiliary HESH against light armour
- Reload can get down to 5 seconds, fastest firing 120 mm along with Type 90/Type 90 (B)
Cons:
- Only 4 rounds of first-stage ammunition, then it can take up to 8.7 seconds to reload the gun until ready rack replenishes again
- Large and tall target, with the accessible Driver's optics weak spot on the upper frontal plate and vulnerable hull armour
- No external composite or reactive armour
- HESH shell is generally useless against other MBTs
- Ammunition and charges takes a lot of space (easy to hit)
- Firepower, mobility or armour characteristic are outmatched by tanks as Leopard 2 (Family), Ariete (Family) or T-80 (Family)
History
In 1977, the Iranian government ordered an improved version of the Chieftain tank, which was arguably the best main battle tank (MBT) in service at its time. The Chieftain offered unparalleled protection and firepower; however, its mobility was lacklustre and something its successor needed to improve upon. In response, the engineers at the MVEE created the Chieftain Mk.5(P), from which three additional prototypes were created. It was one of these prototypes that would become the basis for the Challenger 1. Unfortunately, after the Iranian Revolution of 1979 and the fall of the Shah, Iran canceled its order for an improved Chieftain. In addition, a parallel British tank project (the MBT90) was also abandoned, and the British Army quickly became a new potential customer for a new MBT.
The Challenger's design was based on the cancelled project called "Shir-2"" planned for export to Iran, and retained its deadly 120 mm gun and superb armour. The Challenger was also equipped with Chobham armour, a composite armour made from multiple layers of different materials. The additional materials gave the Challenger its distinctive, heavily-sloped armour on the front of the turret and upper glacis. The Challenger's mobility and off-road capabilities were significantly improved with the installation of a new 1,200 horsepower Rolls-Royce engine and hydropneumatic suspension. The Challenger 1 entered production and service in 1983. Production ended in 1990, having yielded a total of about 420 vehicles. It served primarily with British forces during the Gulf War. It was also used in peacekeeping missions in Bosnia-Herzegovina during the mid 1990s, and Jordan still operates a number of Challenger 1 tanks to this day. The Challenger 1 was withdrawn from active service by 2001 and later replaced by the Challenger 2.
- From Devblog
Media
- Skins
- Videos
See also
Links to the articles on the War Thunder Wiki that you think will be useful for the reader, for example:
- reference to the series of the vehicles;
- links to approximate analogues of other nations and research trees.
External links
| Department of Tank Design | |
|---|---|
| Medium Tanks | |
| Sherman Firefly | Sherman Firefly · Sherman IC "Trzyniec" |
| MBTs | |
| Centurion | Centurion Mk 1 · Centurion Mk.2 · Centurion Mk 3 · Centurion Action X · Centurion Mk.5 AVRE · Centurion Mk 10 |
| Challenger* | Challenger Mk.2 · Challenger Mk.3 · Challenger DS |
| Tank Destroyers | |
| Achilles | Achilles · Achilles (65 Rg.) |
| Centurion-based | Conway · FV4005 |
| Export | |
| Sherman Firefly | Sherman Ic · ▄Sherman Vc |
| Centurion | Centurion Mk.5/1 · Strv 81 · Strv 81 (RB 52) · ▄Strv 81 (RB 52) · Strv 101 · Strv 104** · Strv 105** · Sho't |
| See also | US Ordnance Department · Israeli Ordnance Corps · Vickers-Armstrongs Limited |
| *By successor, the Military Vehicles and Engineering Establishment | |
| **Swedish modernizations incorporating innovations from the Israeli Sho't Kals. | |
| Britain medium tanks | |
|---|---|
| Valentine | Valentine I · Valentine IX · Valentine XI |
| Cromwell | Cromwell I · Cromwell V · Cromwell V (RP-3) |
| Cromwell derivatives | Challenger · Avenger · Comet I · Comet I "Iron Duke IV" · Charioteer Mk VII |
| Centurion | Centurion Mk 1 · Centurion Mk.2 · Centurion Mk 3 · Centurion Mk.5 AVRE · Centurion Mk 10 · Centurion Action X · FV4202 |
| Vickers MBT | Vickers Mk.1 · Vickers Mk.3 · Vickers Mk.7 |
| Chieftain | Chieftain Mk 3 · Chieftain Mk 5 · Chieftain Mk 10 |
| Challenger 1 | Challenger Mk.2 · Challenger Mk.3 · Challenger DS |
| Challenger 2 | Challenger 2 · Challenger 2 (2F) · Challenger 2 TES · Challenger 2 OES · Challenger 2E · Challenger 2 Black Night |
| Challenger 3 | Challenger 3 TD |
| Australia | A.C.I · A.C.IV · Centurion Mk.5/1 |
| South Africa | Olifant Mk.1A · Olifant Mk.2 · TTD |
| India | Vijayanta · Bhishma TWMP |
| Israel | ▄Sho't Kal Dalet |
| Jordan | Khalid |
| Sweden | ▄Strv 81 (RB 52) |
| USA | Grant I · Sherman II · Sherman Firefly · Sherman IC "Trzyniec" |
