Difference between pages "IJN Shimakaze" and "T-34-85"
(Tag: Visual edit) |
m (reeditting) (Tag: Visual edit) |
||
| Line 1: | Line 1: | ||
| + | {{About | ||
| + | | about = Soviet medium tank '''{{PAGENAME}}''' | ||
| + | | usage = other versions | ||
| + | | link = T-34 (Family) | ||
| + | }} | ||
{{Specs-Card | {{Specs-Card | ||
| − | |code= | + | |code=ussr_t_34_85_zis_53 |
| − | |images={{Specs-Card-Image|GarageImage_{{PAGENAME}}.jpg}} | + | |images={{Specs-Card-Image|GarageImage_{{PAGENAME}}.jpg|ArtImage_{{PAGENAME}}.png|ArtImage2_{{PAGENAME}}.png}} |
}} | }} | ||
== Description == | == Description == | ||
| − | <!-- ''In the first part | + | <!-- ''In the description, the first part should be about the history of the creation and combat usage of the vehicle, as well as its key features. In the second part, tell the reader about the ground vehicle in the game. Insert a screenshot of the vehicle, so that if the novice player does not remember the vehicle by name, he will immediately understand what kind of vehicle the article is talking about.'' --> |
| − | The '''{{Specs|name}}''' is a | + | The '''{{Specs|name}}''' is a rank {{Specs|rank}} Soviet medium tank {{Battle-rating}}. It was introduced during the Closed Beta Test for Ground Forces before [[Update 1.41]]. Though similar to the [[T-34-85 (D-5T)]], it has an improved gun and a full crew for combat efficiency. |
| + | |||
| + | The T-34-85 is an improvement over its predecessor, the T-34-85 (D-5T) with a better armament, a shorter reload time, APCR ammo, and an additional crew member. Aside from that, both tanks share the same technical specification. | ||
| + | |||
| + | The front hull armour is only 45 mm thick, even when sloped this is a pitiful amount of armour to fight with against the other vehicles at the same BR as every other tank gun can penetrate that armour. Thus if possible, do not prolong the exposure of the hull armour towards the enemy. | ||
== General info == | == General info == | ||
=== Survivability and armour === | === Survivability and armour === | ||
| − | {{Specs- | + | {{Specs-Tank-Armour}} |
| − | <!-- '' | + | <!-- ''Describe armour protection. Note the most well protected and key weak areas. Appreciate the layout of modules as well as the number and location of crew members. Is the level of armour protection sufficient, is the placement of modules helpful for survival in combat? If necessary use a visual template to indicate the most secure and weak zones of the armour.'' --> |
| − | + | Any enemy vehicle around the T-34-85's BR can destroy it if it can get a solid shot on the hull armour. Beware when exposing hull when coming out to take a shot on an enemy, someone is bound to be watching for the T-34-85 and they won't be afraid to plant a shell into the 45 mm hull armour. | |
| − | + | '''Armour type:''' | |
| − | + | * Rolled homogeneous armour (Hull, Turret roof, Mantlet face around the gun) | |
| − | + | * Cast homogeneous armour (Turret, Cupola, Driver's hatch, Machine gun port) | |
| − | |||
| − | |||
| − | + | {| class="wikitable" | |
| + | |- | ||
| + | ! Armour !! Front (Slope angle) !! Sides !! Rear !! Roof | ||
| + | |- | ||
| + | | Hull || 45 mm (60°) ''Front glacis'' <br> 45 mm (60°) ''Lower glacis'' <br> 75 mm (60°) ''Driver's hatch'' <br> 65 mm (30°) ''Machine gun port'' || 45 mm (39-40°) ''Top'' <br> 45 mm ''Bottom'' || 45 mm (47-49°) ''Top'' <br> 45 mm (46°) ''Bottom'' || 20 mm | ||
| + | |- | ||
| + | | Turret || 90 mm (1-69°) ''Turret front'' <br>90 + 40 mm (8-38°) ''Gun mantlet'' | ||
| + | 60 + mm (37-62°, 52°) | ||
| − | + | 200mm (0°) Mantlet face around the gun | |
| + | | 90 mm (1619°) ''Front 1/4th'' | ||
| + | 75 mm (19-22°) ''Middle 1/2'' <br> 52 mm (13-19°) ''Rear 1/4th'' | ||
| + | | 52 mm (9°) || 20 mm | ||
| + | |- | ||
| + | | Cupola || 90 mm || 90 mm || 90 mm || 20 mm | ||
| + | |} | ||
| + | '''Notes:''' | ||
| − | + | * The gun mantlet has 90 mm in front with additional small and thin 40 mm plates on the sides of the gun. | |
| − | + | * Suspensions wheels are 20 mm thick and tracks are 18 mm thick | |
| − | == | + | === Mobility === |
| − | + | {{Specs-Tank-Mobility}} | |
| − | + | <!-- ''Write about the mobility of the ground vehicle. Estimate the specific power and manoeuvrability, as well as the maximum speed forwards and backwards.'' --> | |
| − | {{Specs- | ||
| − | <!-- '' | ||
| − | |||
| − | |||
| − | + | {{tankMobility|abMinHp= 775|rbMinHp= 442|AoAweight= 0.2}} | |
| − | === | + | === Modifications and economy === |
| − | {{Specs- | + | {{Specs-Economy}} |
| − | |||
| − | |||
| − | + | == Armaments == | |
| + | {{Specs-Tank-Armaments}} | ||
| + | === Main armament === | ||
| + | {{Specs-Tank-Weapon|1}} | ||
| + | <!-- ''Give the reader information about the characteristics of the main gun. Assess its effectiveness in a battle based on the reloading speed, ballistics and the power of shells. Do not forget about the flexibility of the fire, that is how quickly the cannon can be aimed at the target, open fire on it and aim at another enemy. Add a link to the main article on the gun: <code><nowiki>{{main|Name of the weapon}}</nowiki></code>. Describe in general terms the ammunition available for the main gun. Give advice on how to use them and how to fill the ammunition storage.'' --> | ||
| + | {{main|ZIS-S-53 (85 mm)}} | ||
| − | + | The {{PAGENAME}} is equipped with the fantastic ZiS-S-53 cannon, with penetrates about 145 mm on the close range with the stock BR-365K round. This might not be enough to fight Tiger IIs frontally, but it works perfectly with other tanks, which are less armoured or you can engage them from the side. | |
| − | |||
| − | |||
| − | + | The gun depression is like on many other Soviet vehicles quite poor, with only 5° there are no hull-down manoeuvres possible. | |
| − | |||
| − | |||
| − | |||
| − | |||
| − | |||
| − | |||
| − | |||
| − | |||
| − | |||
| − | |||
| − | |||
| − | |||
| − | |||
| − | |||
| − | |||
{| class="wikitable" style="text-align:center" width="100%" | {| class="wikitable" style="text-align:center" width="100%" | ||
| − | |||
|- | |- | ||
| − | ! | + | ! colspan="5" | [[ZIS-S-53 (85 mm)|85 mm ZIS-S-53]] || colspan="5" | Turret rotation speed (°/s) || colspan="4" | Reloading rate (seconds) |
| + | |- | ||
| + | ! Mode !! Capacity !! Vertical !! Horizontal !! Stabilizer | ||
| + | ! Stock !! Upgraded !! Full !! Expert !! Aced | ||
| + | ! Stock !! Full !! Expert !! Aced | ||
| + | |- | ||
| + | ! ''Arcade'' | ||
| + | | rowspan="2" | 60 || rowspan="2" | -5°/+22° || rowspan="2" | ±180° || rowspan="2" | N/A || 23.80 || 32.94 || 40.00 || 44.24 || 47.06 || rowspan="2" | 9.62 || rowspan="2" | 8.51 || rowspan="2" | 7.84 || rowspan="2" | 7.40 | ||
| + | |- | ||
| + | ! ''Realistic'' | ||
| + | | 14.88 || 17.50 || 21.25 || 23.50 || 25.00 | ||
|- | |- | ||
| − | |||
|} | |} | ||
| − | + | ==== Ammunition ==== | |
| + | The stock round is the BR-365K APHE shell which has 148 mm of penetration at close range. It has a very good potential to take out enemies in a single shot with 48 g of A-IX-2 as explosive filler (74 g of TNT equivalent). | ||
| − | The | + | The second round, the BR-365A APHEBC shell, only has 135 mm penetration at close range. But instead of having 74 g TNT for explosive filler inside the shell, it has 164 g. This increases considerably the post-penetration damage. It also has a better penetration from 550 m and above than the BR-365K round. |
| − | + | The BR-365P APCR shot is also available, but keep in mind that it performs poorly against sloped armour and it has very poor post-penetration damage. It penetrates about 195 mm of RHA on close range. | |
| − | |||
| − | |||
| − | |||
| − | + | The HE shell is called O-365K. With 660 g of TNT inside it performs pretty well against trucks and halftracks. | |
| − | + | {{:ZIS-S-53 (85 mm)/Ammunition|BR-365K, BR-365A, BR-365P, O-365K}} | |
| − | + | ==== [[Ammo racks]] ==== | |
| + | [[File:Ammoracks_{{PAGENAME}}.png|right|thumb|x250px|[[Ammo racks]] of the {{PAGENAME}}]] | ||
| + | <!-- '''Last updated: 2.7.0.208''' --> | ||
| + | {| class="wikitable" style="text-align:center" | ||
| + | |- | ||
| + | ! Full<br>ammo | ||
| + | ! 1st<br>rack empty | ||
| + | ! 2nd<br>rack empty | ||
| + | ! 3rd<br>rack empty | ||
| + | ! 4th<br>rack empty | ||
| + | ! 5th<br>rack empty | ||
| + | ! 6th<br>rack empty | ||
| + | |- | ||
| + | | '''60''' || 57 ''(+3)'' || 55 ''(+5)'' || 54 ''(+6)'' || 48 ''(+12)'' || 43 ''(+17)'' || 37 ''(+23)'' | ||
| + | |- | ||
| + | ! 7th<br>rack empty | ||
| + | ! 8th<br>rack empty | ||
| + | ! 9th<br>rack empty | ||
| + | ! 10th<br>rack empty | ||
| + | ! 11th<br>rack empty | ||
| + | ! Visual<br>discrepancy | ||
| + | ! | ||
| + | |- | ||
| + | | 31 ''(+29)'' || 25 ''(+35)'' || 19 ''(+41)'' || 17 ''(+43)'' || 1 ''(+59)'' || No | ||
| + | ! | ||
| + | |- | ||
| + | |} | ||
| + | '''Notes''': | ||
| − | + | * Shells are modeled individually and disappear after having been shot or loaded. | |
| − | + | * Rack 11 is a first stage ammo rack. It totals 16 shells and gets filled first when loading up the tank. | |
| + | * This rack is also emptied early: the rack depletion order at full capacity is: 11 - 1 - 2 - etc. until 10. | ||
| + | * If you pack 17 ''(+43)'' shells, it will keep the hull empty of ammo. | ||
| + | * Simply not firing when the gun is loaded will move ammo from racks 1 to 10 into rack 11. Firing will interrupt the restocking of the ready racks. | ||
| − | '' | + | === Machine guns === |
| + | {{Specs-Tank-Weapon|2}} | ||
| + | <!-- ''Offensive and anti-aircraft machine guns not only allow you to fight some aircraft but also are effective against lightly armoured vehicles. Evaluate machine guns and give recommendations on its use.'' --> | ||
| + | {{main|DT (7.62 mm)}} | ||
| − | + | {| class="wikitable" style="text-align:center" width="50%" | |
| − | + | |- | |
| − | + | ! colspan="5" | [[DT (7.62 mm)|7.62 mm DT]] | |
| − | + | |- | |
| − | + | ! Mount !! Capacity (Belt) !! Fire rate !! Vertical !! Horizontal | |
| − | + | |- | |
| − | + | | Coaxial || 1,890 (63) || 600 || N/A || N/A | |
| − | + | |- | |
| + | |} | ||
| − | ''' | + | == Usage in battles == |
| + | <!-- ''Describe the tactics of playing in the vehicle, the features of using vehicles in the team and advice on tactics. Refrain from creating a "guide" - do not impose a single point of view but instead give the reader food for thought. Describe the most dangerous enemies and give recommendations on fighting them. If necessary, note the specifics of the game in different modes (AB, RB, SB).'' --> | ||
| + | The T-34-85's best playstyle is that of a flanker. Due to its high mobility, fast turret traverse, and a capable cannon with excellent post-penetration damage, the T-34-85 fills this role perfectly. Since the turret is so tall, it makes combat behind low obstacles difficult, as the turret segment above the main gun is visible. The T-34-85's other playstyle can be as a support tank, by keeping up with more protected vehicles like the [[IS-2]] and supplement firepower while their heavy armament reloads. | ||
| − | + | The T-34-85 would not make a very suitable short-range brawler though even with the 85 mm gun as the gun has a rather tedious reload for the specific playstyle and the [[T-34-57]]'s armour is very poor at its BR. With that, the T-34-85 would tend to be able to fire one shot at a close enemy before it gets taken out by other enemies nearby. However, it is understandable that the situation is unavoidable, so it is recommended to stay steady by firing one shot at an unsuspecting enemy at close range before retreating to reload, evading enemy shots. | |
| − | |||
| − | |||
| − | |||
| − | |||
| − | |||
| − | |||
| − | + | If one decides to use the T-34 as a main battle tank, it's advisable to hide the hull as well as possible which has the weakest armour. Unfortunately, most heavy tanks like the Tiger II are nearly invulnerable from the front, but many mediums and even Cold War MBTs can still be destroyed. At this rank bracket, however, its speed, turret location, and poor armour push it towards a flanking role, away from the 1940-43 main battle comfort zone. The gun is still very potent, and the ammunition often knocks out nearly the entire crew, but the increases in armour of enemy vehicles necessitate learning their weak spots. The gun is generally accurate and most shells retain their velocity even into far ranges. | |
| − | |||
| − | + | '''Enemies worth noting:''' | |
| − | |||
| − | |||
| − | + | [[Panther A]]/[[Panther D|D]], [[Tiger II (P)|Tiger II P]] - The Panthers are one of the most common tanks around BR 5.7, and they pose a great threat with their deadly long 75 mm cannon, thick frontal armour and adequate speed. You want to avoid engaging them at long range as the T-34 has only x3.5 scope magnification, making long range shooting super hard. Engage the Panthers within 500 m and avoid shooting their frontal hull. Their biggest weak spot is the gun mantlet, which is only 100 mm thick and has a flat part in the middle. That is where you want to aim at, the T-34's APHE has sufficient damage to instantly destroy the Panther even from its turret. The second weak spot is of course the sides, guaranteeing an instant kill. Generally APHE is enough to deal with the Panthers, and no APCR is needed. | |
| − | + | For the Tiger II P, aim at the vertical area of the frontal turret which is also 100 mm. The best tactic is still to flank it however. | |
| − | |||
| − | + | [[Tiger H1]]/[[Tiger E|E]] - The Tiger's weak spots are the opposite with the Panthers. Their hull are unsloped and rather thin, while the gun mantlet is weirdly shaped and can absorb quite some shells. The best engaging range remains the same, within 500 m. If the Tiger is angling, aim at the turret ring to disable the gunner and destroy the turret traverse, or aim at the hull side below the side skirt, which is only 60 mm. If it is not angling, aim between the driver's vision port and the MG for an instant kill. Avoid shooting at these two parts as they tend to bounce/absorb shells. For the Tiger E, don't shoot at the lower glacis as there will be add-on tracks installed there, making it harder to penetrate. | |
| − | + | [[Ho-Ri Production|Ho-Ri]] - In a frontal engagement, APCR is required as the APHE shells don't have enough penetration. With APCR loaded, aim at the further sides of the fighting compartment, away from the gun, because the further from the gun, the thinner the armour gets, with the thinnest part being around 160 mm unsloped. Penetrating there will knock out its loader, gunner or commander, or detonate the ammo. Of course, the best way is still side-shooting with APHE. | |
| − | |||
| − | |||
| − | + | [[Panzer IV/70(V)|Panzer IV/70]], [[Jagdpanzer 38(t)]] - These small tank destroyers with their well angled frontal armour can be quite a problem from a distance. With APHE, you can disable their transmission by shooting at their lower glacis. Now if you can, flank them. The 85 mm APHE does a great job at penetrating sloped, thin armour, so you don't have to get to their absolute sides. For the Pz IV/70, you can also aim at the downward part of the gun mantlet since the shell might ricochet downwards into the hull, knocking out every crew member. The Jagdpanzer 38(t) doesn't have this problem, so side-shooting is required to destroy it effectively. | |
| − | + | [[M4A3E2]] Jumbo - This is another common enemy. It is recommended to use the BR-365A, the one with less penetration but more explosive filler. The reason is that it is better at penetrating sloped armour, which the Jumbo has. With that shell you can easily destroy a M4A3E2 who's not angling. If it is, aim at the hull side just above the tracks, or load APCR and shoot straight at its gun mantlet. Against a 75 mm M4A3E2 you can relax a bit as it will struggle to penetrate your armour, but your cupola is a rather large weak spot and a shot through there can knock out the T-34. Be more careful with the M4A3E2 76 W, as they can easily pierce through your armour. | |
| − | === | + | === Pros and cons === |
| − | + | <!-- ''Summarise and briefly evaluate the vehicle in terms of its characteristics and combat effectiveness. Mark its pros and cons in a bulleted list. Try not to use more than 6 points for each of the characteristics. Avoid using categorical definitions such as "bad", "good" and the like - use substitutions with softer forms such as "inadequate" and "effective".'' --> | |
| − | '' | + | '''Pros:''' |
| − | + | * Excellent firepower: adequate penetration, destructive damage and good reload rate | |
| + | * Has two types of APHE for players to choose from: BR-365K with higher penetration but less TNT, and BR-365A with less penetration but plenty of TNT, either of which are enough to knock out most tanks with a single shot | ||
| + | * 56 km/h top speed and great manoeuvrability allows it to reposition or flank easily | ||
| + | * 5-man crew improves survivability against solid shells | ||
| + | * Similar playstyle with the previous T-34s which is beginner-friendly | ||
| + | * Fast turret traverse to easily deal with targets from multiple directions | ||
| + | * Sloped hull and round frontal turret might bounce low-penetrating guns like the 75 mm M3 on early [[M4]] Shermans | ||
| − | + | '''Cons:''' | |
| − | + | * Armour is extremely thin, providing very limited protection against common guns (American 76 mm, British 17-pdr, German 75 mm & 88 mm, etc) | |
| + | * Crew members are closely packed, a well-aimed shot tends to knock them all out | ||
| + | * 5 degrees gun depression is below average, limiting its capability in hilly maps | ||
| + | * Poor reverse speed | ||
| + | * Large turret profile makes it easier to get spotted and shot | ||
| + | * Awkward to place bushes on upper front hull due to the obstruction of MG port and driver's optics | ||
| − | '' | + | == History == |
| + | <!-- ''Describe the history of the creation and combat usage of the vehicle in more detail than in the introduction. If the historical reference turns out to be too long, take it to a separate article, taking a link to the article about the vehicle and adding a block "/History" (example: <nowiki>https://wiki.warthunder.com/(Vehicle-name)/History</nowiki>) and add a link to it here using the <code>main</code> template. Be sure to reference text and sources by using <code><nowiki><ref></ref></nowiki></code>, as well as adding them at the end of the article with <code><nowiki><references /></nowiki></code>. This section may also include the vehicle's dev blog entry (if applicable) and the in-game encyclopedia description (under <code><nowiki>=== In-game description ===</nowiki></code>, also if applicable).'' --> | ||
| + | ===Development=== | ||
| + | The T-34, in its introduction, was a huge shock to the German army when they invaded as they did not have the adequate anti-tank weaponry to defeat the T-34 and its heavier companion [[KV-1 (L-11)|KV-1]] tank. However, by 1943, the Germans began introducing newer tanks or upgrading their current tanks. They upgraded their [[Pz.IV G|Panzer IVs]] with the 75 mm KwK 40 gun, which could penetrate the T-34, and introduced the [[Tiger H1|Tiger I]] and [[Panther D|Panther]] tanks into their forces, which could not only destroy the T-34s easily, but can also take in the 76.2 mm shells the T-34 fires. The inferior firepower the T-34 forced the T-34 forces to close into a very close distance during the Battle of Kursk with the Tigers and Panthers in order to get to the sides and fire at the weaker armour. While the Soviets were victorious against the German offensive, the T-34s suffered high losses with this strategy. | ||
| − | = | + | The T-34's slow improvement from the [[T-34 (1941)|1941 model]] was due to the decision to keep changes to the model low to keep costs low and productivity high. This worked well in the first two years against the Germans, but the Battle of Kursk showed that the newer German tanks now outgun the T-34s. Soviet High Command, once conservative on the T-34's upgrades, now opted for an increase in the T-34 armament to be able to counter the German tanks. During the development, an interim solution for the problem was the equipping of the 57 mm ZiS-4M gun onto the T-34, which has better penetration capabilities compared to the 76.2 F-34 guns. This tank, the [[T-34-57]], performed as an adequate "tank-hunter", but the small HE shell on the 57 mm gun made it a poor tank armament so this was only an interim solution until a better design is made.<ref name="ZalogaM26vsT-34">Zaloga Steven. ''T-34-85 vs M26 Pershing: Korea 1950'' Great Britain: Osprey Publishing Ltd., 2010</ref> |
| − | |||
| − | + | Testings with various guns in Soviet inventory against captured German tanks showed that the most capable gun was the 85 mm 52-K anti-aircraft gun. With this discovery, the 52-K underwent development to make derivatives able to be mounted onto a tank. The cannon was able to penetrate the front of the Tiger from 500 m out, the turret side from 600 m away, and the hull side from 800 m away. The 85 mm was first mounted onto the [[SU-85]]s, but the need for an upgraded tank had the Soviets find a way to fit the gun in the T-34. The cannon was much larger than the F-34 gun and so a much larger turret was necessary to house the gun. The solution to this was to transfer the turret from the cancelled T-43 tank program onto the T-34, this increased the turret ring diameter from the original 1,425 mm into 1,600 mm, which required a retooling in the manufacturing plants. While this delayed T-34 production, the 85 mm was finally able to be mounted onto the T-34 as the '''T-34-85'''.<ref name="ZalogaM26vsT-34">Zaloga Steven. ''T-34-85 vs M26 Pershing: Korea 1950'' Great Britain: Osprey Publishing Ltd., 2010</ref> | |
| − | + | ===Design=== | |
| + | The T-34-85, aside from the enlarged turret ring for the new turret, uses the same T-34 hull design. Armour was still about 45 mm thick, sloped at 60 degrees for a 90 mm effective thickness. The Christie suspension was retained, as well as the diesel engine. However, the biggest difference in the tank design is the three-man turret, though a turret basket is still exempt from the design. Before, the two-man turret on the older [[T-34 (1942)|T-34]] had the commander forced to do his job and the gunner's, the three-man turret on the T-34-85 separated the commander's duty by having a separate gunner to fire the gun, leaving the commander to do his job commanding the tank as a whole. The larger turret also has space for a radio (previously in the hull by the assistant driver), allowing the commander to effectively communicate between tank units. Aside from the enlarged turret ring, new turret, and the 85 mm gun, the internal specifications of the T-34 and its pros and cons were nearly identical to the older variants. | ||
| − | + | The 85 mm gun on the T-34-85 was able to penetrate 125 mm of armour at 500 m away at a 90 degree meet angle with normal AP rounds. The 85 mm gun was derived from the 52-K anti-aircraft gun, which was developed from Vasilliy Grabin and Fyodor Petrov's design bureaus. Petrov's bureaus produced the 85 mm D-5T gun while Grabin's design, after being taken over by A. Savin, produced the 85 mm ZiS-53 gun. During trials in the Gorokhoviesky Proving Grounds, it was found that the ZiS-53 gun was much better than the D-5T and was much simpler, which was redesignated as the ZiS-S-53 after Savin's initials. However, as the new turret was optimized with the D-5T gun, the T-34-85 started with the D-5T as the [[T-34-85 (D-5T)|T-34-85 Model 1943]], which ran on from February to March 1944. After March 1944, the 85 mm ZiS-5 was used as the armament of the [[T-34-85|T-34-85 Model 1944]]. During its production life from 1943 to 1958, up to 48,950 T-34-85s were created (22,559 of which during World War II), consisting of more than half of the total 84,070 T-34 units created in its entire production life since 1940. | |
| − | '' | + | ===Combat usage=== |
| − | [[ | + | From its introduction in March 1944 and onwards, the T-34-85s were the main tank in Soviet service.<ref name="ZalogaM26vsT-34">Zaloga Steven. ''T-34-85 vs M26 Pershing: Korea 1950'' Great Britain: Osprey Publishing Ltd., 2010</ref> The older [[T-34 (1942)|T-34s]] were still being used in the theatre as they are lost from combat and retribution and replaced. The T-34-85's 85 mm gun armour penetration and front turret armour nearly doubled compared to the older T-34, yet retain the same speed, mobility, and hull armour. The T-34-85 was vastly superior to the German's [[Pz.IV H|Panzer IVs]] and [[StuG III G|StuG IIIs]], and though it was still inferior against the [[Panther A|Panther]] and the [[Tiger E|Tiger I]], it had a better chance than the older T-34 models. The T-34-85s maintain numerical superiority throughout the entire war due to the Soviet's industrial base and design concept of mass producing single designs, while the Germans focus on newer, better tanks such as the heavier [[Tiger II (H)|Tiger II]], which restricted productivity and made logistics a hard job to maintain. The T-34-85s were the main Soviet spearhead weapon during Operation Bagration and its future offensives up until the Battle of Berlin. After the fall of Nazi Germany, the Soviets use the T-34-85s again in their invasion of Manchuria to fulfil their promise to invade Japan after the fall of Germany. The combined-arms forces of their armoured units overran the Japanese positions in Manchuria and were pushed all the way to a distance from the Yalu River. The Japanese surrender order was given out by the emperor on August 14, which was not carried out as a cease-fire until August 17. |
| − | |||
| − | + | After the end of World War II, the T-34-85s were given out in massive quantities to Soviet-occupied territories and their allies. The next action the T-34-85s faced was in the Korean War, in the hands of the North Koreans. The North Korean armoured forces are able to assault deep into South Korea with these tanks as South Koreans were severely under-equipped in anti-tank weaponry, only armed with US-supplied [[M24|M24 Chaffees]] and regular bazookas, which were useless against the T-34s. It wasn't until the deployment of US troops into the Korean peninsula that the tide turned against the North Koreans and their tanks. The US sent their [[M4A3 (76) W|M4A3E8 Shermans]], [[M26|M26 Pershings]], and "Super Bazookas" to arm the troops there. All these weapons are able to destroy the T-34-85s, with the M26 Pershing being able to penetrate straight through the front and back of the T-34-85 armour with HVAP rounds. The Shermans are nearly equal to the T-34-85s, but the better optic quality and crew training gave them an edge against the T-34-85s. These anti-tank weapons supplied by the coalition caused the North Koreans to suffer major tank losses and after their supply lines were cut by the US landings at Inchon, the armoured vehicles were abandoned as the North Koreans retreated. Pure tank-to-tank battles between the two sides were scarce after 1950 due to a heavy decline in armoured forces in the North Korean side.<ref name="ZalogaM26vsT-34">Zaloga Steven. ''T-34-85 vs M26 Pershing: Korea 1950'' Great Britain: Osprey Publishing Ltd., 2010</ref> | |
| − | + | Past the Korean War, the T-34-85s were clearly obsolete with the development of newer tanks being developed worldwide. Despite that, many countries still use T-34-85s as their main tank or as reserves, even the Soviets and Finnish continue using them until the late 1960s. Warsaw Pact countries used them in large quantities and were involved in many conflicts within these countries, such as the East German uprising in June 1953, Hungarian revolution in 1956, Coup by Greek junta in July 1974, and the Turkish invasion in July-August 1974. The T-34-85s also saw conflicts in the Middle East in the hands of Syrians, Egyptians, Jordanians, and Iraq; Vietnam with the North Vietnamese, and in the Bosnian War in the Bosnian Serb Army. African countries such as Somalia and Angola still use T-34-85s in their armies, and they could even be seen in the recent conflicts in Yemen and in Ukraine. Despite their age, it seems that the T-34-85 was to become a tank that will persist in the hands of smaller countries for years to come. | |
| − | |||
| − | [[ | + | During late 1944, the Soviets were already searching for a successor to the T-34s that use most of the newest tank technology found in recent years. The result was the [[T-44]] medium tank, which did not enter service in time to see widespread usage and even combat during World War II. The T-44 underwent further development and redesigning to become a tank that would surpass the T-34 in the most produced tank in existence, the [[T-54 (1949)|T-54 tank]]. |
| − | |||
| − | + | {{break}} | |
| + | {{Navigation-Start|{{Annotation|Archive of the in-game description|An archive of the historical description of the vehicle that was presented in-game prior to Update 1.55 'Royal Armour'}}}} | ||
| + | {{Navigation-First-Simple-Line}} | ||
| + | This model of tanks received the new S-53 cannon with a 54.6 calibre barrel length mounted on a turret with an expanded traverse circle. Its armour-piercing 9.2 kg shell penetrated 111 mm and 102 mm thick armour at ranges of 500 and 1,000 metres respectively, while its subcalibre round penetrated 138 mm thick armour at a range of 500 metres. Tanks with this cannon used the improved TS-16 telescopic sight. To allow firing from cover, it had an elevation level and a turreted rangefinder. The turret's roof featured two MK-4 observation instruments which provided noticeably improved vision over the PTK-5 panoramic telescope. Another ventilator was also added and the command cupola was moved back. The turret's frontal armour was increased to 90 mm, and the sides to 60 mm. | ||
| − | The | + | The 9RC radio set was installed on all the vehicles, and late production tanks received electric drive for turning the turret and the means to set up smokescreens. Combined manual and electric drives meant that the turret could be fully turned in 12-15 seconds, and its turning motion became steadier. Although the tank's weight was somewhat increased by the installation of its more powerful cannon and stronger armour, thanks to its powerful diesel engine, its mobility did not suffer. |
| − | + | Tanks of this model went into mass production in February 1944. By the end of the Second World War, around 20,500 of them were made in total. The tank was widely used in all conflicts in the war's final stage. | |
| − | |||
| − | |||
| − | |||
| − | |||
| − | |||
| − | |||
| − | |||
| − | |||
| − | |||
| − | |||
| − | |||
| − | |||
| − | |||
| − | |||
| − | |||
| − | |||
| − | |||
| − | |||
| − | |||
| − | |||
| − | |||
| − | |||
| − | |||
| − | |||
| − | |||
| − | |||
| − | |||
| − | |||
| − | |||
| − | |||
| − | |||
| − | |||
| − | |||
| − | |||
| − | |||
| − | |||
| − | |||
| − | |||
| − | |||
| − | |||
| − | |||
| − | |||
| − | |||
| − | |||
| − | |||
| − | |||
| − | |||
| − | + | In spite of the very significant upgrades present on the T-34-85, its battle characteristics could not be considered entirely satisfactory for the second half of the war in the context of improved German tanks and anti-tank weapons. | |
| − | + | Captured tanks of this type were used by the Wehrmacht and Waffen SS until the end of the war. | |
| − | + | The tank underwent several modernisations after the war, the last of which took place in 1969. In the 50s, it was mass-produced in Poland and Czechoslovakia. | |
| + | {{Navigation-End}} | ||
| − | + | == Media == | |
| + | <!-- ''Excellent additions to the article would be video guides, screenshots from the game, and photos.'' --> | ||
| − | + | ;Skins | |
| − | + | * [https://live.warthunder.com/feed/camouflages/?vehicle=ussr_t_34_85_zis_53 Skins and camouflages for the {{PAGENAME}} from live.warthunder.com.] | |
| − | + | ;Videos | |
| − | + | {{Youtube-gallery|oa26g25qqP4|'''Best medium tanks''' discusses the {{PAGENAME}} at 5:46 - ''War Thunder Official Channel''|yHuUGzezChI|'''Best after-party picks''' discusses the {{PAGENAME}} at 6:43 - ''War Thunder Official Channel''}} | |
| − | |||
| − | |||
| − | |||
| − | |||
| − | ; | ||
| − | |||
| − | |||
| − | |||
| − | |||
| − | |||
| − | |||
| − | - | ||
| − | |||
| − | |||
| − | '' | ||
| − | |||
| − | |||
| − | |||
| − | |||
| − | |||
| − | |||
| − | |||
| − | |||
| − | |||
| − | |||
| − | |||
| − | |||
| − | |||
| − | |||
== See also == | == See also == | ||
| − | <!-- ''Links to articles on the War Thunder Wiki that you think will be useful for the reader, for example:'' | + | <!-- ''Links to the articles on the War Thunder Wiki that you think will be useful for the reader, for example:'' |
| − | * ''reference to the series of the | + | * ''reference to the series of the vehicles;'' |
* ''links to approximate analogues of other nations and research trees.'' --> | * ''links to approximate analogues of other nations and research trees.'' --> | ||
| − | ; | + | ;Other T-34-85 variants |
| − | |||
| − | |||
| − | |||
| − | |||
| − | |||
| − | *[[ | + | * [[T-34-85 (D-5T)]] |
| − | *[[ | + | * [[T-34-85 No.215]] |
| − | *[[ | + | * [[T-34-85E]] |
| − | *[[ | + | * [[Т-34-85 (S-53) (China)]] |
| − | *[[ | + | * [[Т-34-85 Gai]] |
| − | *[[ | + | * [[T-34-85 (Sweden)]] |
== External links == | == External links == | ||
<!-- ''Paste links to sources and external resources, such as:'' | <!-- ''Paste links to sources and external resources, such as:'' | ||
* ''topic on the official game forum;'' | * ''topic on the official game forum;'' | ||
| − | |||
* ''other literature.'' --> | * ''other literature.'' --> | ||
| − | *[[ | + | * [[wikipedia:T-34|[Wikipedia] T-34]] |
| − | + | * [https://tanks-encyclopedia.com/ww2/soviet/soviet_T34-85 <nowiki>[Tanks Encyclopedia]</nowiki> T-34-85] | |
| − | *[https:// | + | |
| + | ===References=== | ||
| + | <references /> | ||
| − | {{ | + | {{TankManufacturer Morozov}} |
| − | {{ | + | {{USSR medium tanks}} |
Latest revision as of 23:25, 27 October 2023
| This page is about the Soviet medium tank T-34-85. For other versions, see T-34 (Family). |


Contents
Description
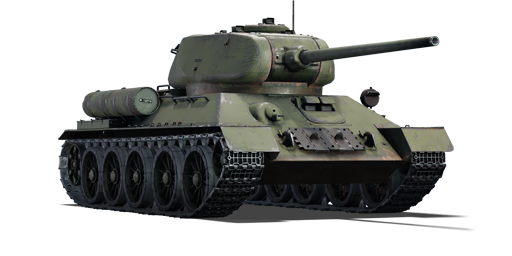
The T-34-85 is a rank Soviet medium tank with a battle rating of (AB), (RB), and (SB). It was introduced during the Closed Beta Test for Ground Forces before Update 1.41. Though similar to the T-34-85 (D-5T), it has an improved gun and a full crew for combat efficiency.
The T-34-85 is an improvement over its predecessor, the T-34-85 (D-5T) with a better armament, a shorter reload time, APCR ammo, and an additional crew member. Aside from that, both tanks share the same technical specification.
The front hull armour is only 45 mm thick, even when sloped this is a pitiful amount of armour to fight with against the other vehicles at the same BR as every other tank gun can penetrate that armour. Thus if possible, do not prolong the exposure of the hull armour towards the enemy.
General info
Survivability and armour
Any enemy vehicle around the T-34-85's BR can destroy it if it can get a solid shot on the hull armour. Beware when exposing hull when coming out to take a shot on an enemy, someone is bound to be watching for the T-34-85 and they won't be afraid to plant a shell into the 45 mm hull armour.
Armour type:
- Rolled homogeneous armour (Hull, Turret roof, Mantlet face around the gun)
- Cast homogeneous armour (Turret, Cupola, Driver's hatch, Machine gun port)
| Armour | Front (Slope angle) | Sides | Rear | Roof |
|---|---|---|---|---|
| Hull | 45 mm (60°) Front glacis 45 mm (60°) Lower glacis 75 mm (60°) Driver's hatch 65 mm (30°) Machine gun port |
45 mm (39-40°) Top 45 mm Bottom |
45 mm (47-49°) Top 45 mm (46°) Bottom |
20 mm |
| Turret | 90 mm (1-69°) Turret front 90 + 40 mm (8-38°) Gun mantlet 60 + mm (37-62°, 52°) 200mm (0°) Mantlet face around the gun |
90 mm (1619°) Front 1/4th
75 mm (19-22°) Middle 1/2 |
52 mm (9°) | 20 mm |
| Cupola | 90 mm | 90 mm | 90 mm | 20 mm |
Notes:
- The gun mantlet has 90 mm in front with additional small and thin 40 mm plates on the sides of the gun.
- Suspensions wheels are 20 mm thick and tracks are 18 mm thick
Mobility
| Game Mode | Max Speed (km/h) | Weight (tons) | Engine power (horsepower) | Power-to-weight ratio (hp/ton) | ||||
|---|---|---|---|---|---|---|---|---|
| Forward | Reverse | Stock | AoA | Stock | Upgraded | Stock | Upgraded | |
| Arcade | -0.2 | 0.2 | 775 | -3875 | __.__ | |||
| Realistic | 442 | -2210 | __.__ | |||||
Modifications and economy
Armaments
Main armament
The T-34-85 is equipped with the fantastic ZiS-S-53 cannon, with penetrates about 145 mm on the close range with the stock BR-365K round. This might not be enough to fight Tiger IIs frontally, but it works perfectly with other tanks, which are less armoured or you can engage them from the side.
The gun depression is like on many other Soviet vehicles quite poor, with only 5° there are no hull-down manoeuvres possible.
| 85 mm ZIS-S-53 | Turret rotation speed (°/s) | Reloading rate (seconds) | |||||||||||
|---|---|---|---|---|---|---|---|---|---|---|---|---|---|
| Mode | Capacity | Vertical | Horizontal | Stabilizer | Stock | Upgraded | Full | Expert | Aced | Stock | Full | Expert | Aced |
| Arcade | 60 | -5°/+22° | ±180° | N/A | 23.80 | 32.94 | 40.00 | 44.24 | 47.06 | 9.62 | 8.51 | 7.84 | 7.40 |
| Realistic | 14.88 | 17.50 | 21.25 | 23.50 | 25.00 | ||||||||
Ammunition
The stock round is the BR-365K APHE shell which has 148 mm of penetration at close range. It has a very good potential to take out enemies in a single shot with 48 g of A-IX-2 as explosive filler (74 g of TNT equivalent).
The second round, the BR-365A APHEBC shell, only has 135 mm penetration at close range. But instead of having 74 g TNT for explosive filler inside the shell, it has 164 g. This increases considerably the post-penetration damage. It also has a better penetration from 550 m and above than the BR-365K round.
The BR-365P APCR shot is also available, but keep in mind that it performs poorly against sloped armour and it has very poor post-penetration damage. It penetrates about 195 mm of RHA on close range.
The HE shell is called O-365K. With 660 g of TNT inside it performs pretty well against trucks and halftracks.
| Penetration statistics | |||||||
|---|---|---|---|---|---|---|---|
| Ammunition | Type of warhead |
Penetration @ 0° Angle of Attack (mm) | |||||
| 10 m | 100 m | 500 m | 1,000 m | 1,500 m | 2,000 m | ||
| BR-365K | APHE | 148 | 143 | 126 | 106 | 90 | 77 |
| BR-365A | APHEBC | 135 | 133 | 124 | 114 | 104 | 95 |
| BR-365P | APCR | 195 | 187 | 154 | 122 | 96 | 76 |
| O-365K | HE | 19 | 18 | 17 | 16 | 15 | 14 |
| Shell details | ||||||||||||
|---|---|---|---|---|---|---|---|---|---|---|---|---|
| Ammunition | Type of warhead |
Velocity (m/s) |
Projectile mass (kg) |
Fuse delay (m) |
Fuse sensitivity (mm) |
Explosive mass (TNT equivalent) (g) |
Ricochet | |||||
| 0% | 50% | 100% | ||||||||||
| BR-365K | APHE | 792 | 9.2 | 1.2 | 14 | 77 | 47° | 60° | 65° | |||
| BR-365A | APHEBC | 792 | 9.2 | 1.2 | 14 | 164 | 48° | 63° | 71° | |||
| BR-365P | APCR | 1,050 | 4.99 | - | - | - | 66° | 70° | 72° | |||
| O-365K | HE | 785 | 9.54 | 0.2 | 0.1 | 741 | 79° | 80° | 81° | |||
Ammo racks

| Full ammo |
1st rack empty |
2nd rack empty |
3rd rack empty |
4th rack empty |
5th rack empty |
6th rack empty |
|---|---|---|---|---|---|---|
| 60 | 57 (+3) | 55 (+5) | 54 (+6) | 48 (+12) | 43 (+17) | 37 (+23) |
| 7th rack empty |
8th rack empty |
9th rack empty |
10th rack empty |
11th rack empty |
Visual discrepancy |
|
| 31 (+29) | 25 (+35) | 19 (+41) | 17 (+43) | 1 (+59) | No |
Notes:
- Shells are modeled individually and disappear after having been shot or loaded.
- Rack 11 is a first stage ammo rack. It totals 16 shells and gets filled first when loading up the tank.
- This rack is also emptied early: the rack depletion order at full capacity is: 11 - 1 - 2 - etc. until 10.
- If you pack 17 (+43) shells, it will keep the hull empty of ammo.
- Simply not firing when the gun is loaded will move ammo from racks 1 to 10 into rack 11. Firing will interrupt the restocking of the ready racks.
Machine guns
| 7.62 mm DT | ||||
|---|---|---|---|---|
| Mount | Capacity (Belt) | Fire rate | Vertical | Horizontal |
| Coaxial | 1,890 (63) | 600 | N/A | N/A |
Usage in battles
The T-34-85's best playstyle is that of a flanker. Due to its high mobility, fast turret traverse, and a capable cannon with excellent post-penetration damage, the T-34-85 fills this role perfectly. Since the turret is so tall, it makes combat behind low obstacles difficult, as the turret segment above the main gun is visible. The T-34-85's other playstyle can be as a support tank, by keeping up with more protected vehicles like the IS-2 and supplement firepower while their heavy armament reloads.
The T-34-85 would not make a very suitable short-range brawler though even with the 85 mm gun as the gun has a rather tedious reload for the specific playstyle and the T-34-57's armour is very poor at its BR. With that, the T-34-85 would tend to be able to fire one shot at a close enemy before it gets taken out by other enemies nearby. However, it is understandable that the situation is unavoidable, so it is recommended to stay steady by firing one shot at an unsuspecting enemy at close range before retreating to reload, evading enemy shots.
If one decides to use the T-34 as a main battle tank, it's advisable to hide the hull as well as possible which has the weakest armour. Unfortunately, most heavy tanks like the Tiger II are nearly invulnerable from the front, but many mediums and even Cold War MBTs can still be destroyed. At this rank bracket, however, its speed, turret location, and poor armour push it towards a flanking role, away from the 1940-43 main battle comfort zone. The gun is still very potent, and the ammunition often knocks out nearly the entire crew, but the increases in armour of enemy vehicles necessitate learning their weak spots. The gun is generally accurate and most shells retain their velocity even into far ranges.
Enemies worth noting:
Panther A/D, Tiger II P - The Panthers are one of the most common tanks around BR 5.7, and they pose a great threat with their deadly long 75 mm cannon, thick frontal armour and adequate speed. You want to avoid engaging them at long range as the T-34 has only x3.5 scope magnification, making long range shooting super hard. Engage the Panthers within 500 m and avoid shooting their frontal hull. Their biggest weak spot is the gun mantlet, which is only 100 mm thick and has a flat part in the middle. That is where you want to aim at, the T-34's APHE has sufficient damage to instantly destroy the Panther even from its turret. The second weak spot is of course the sides, guaranteeing an instant kill. Generally APHE is enough to deal with the Panthers, and no APCR is needed.
For the Tiger II P, aim at the vertical area of the frontal turret which is also 100 mm. The best tactic is still to flank it however.
Tiger H1/E - The Tiger's weak spots are the opposite with the Panthers. Their hull are unsloped and rather thin, while the gun mantlet is weirdly shaped and can absorb quite some shells. The best engaging range remains the same, within 500 m. If the Tiger is angling, aim at the turret ring to disable the gunner and destroy the turret traverse, or aim at the hull side below the side skirt, which is only 60 mm. If it is not angling, aim between the driver's vision port and the MG for an instant kill. Avoid shooting at these two parts as they tend to bounce/absorb shells. For the Tiger E, don't shoot at the lower glacis as there will be add-on tracks installed there, making it harder to penetrate.
Ho-Ri - In a frontal engagement, APCR is required as the APHE shells don't have enough penetration. With APCR loaded, aim at the further sides of the fighting compartment, away from the gun, because the further from the gun, the thinner the armour gets, with the thinnest part being around 160 mm unsloped. Penetrating there will knock out its loader, gunner or commander, or detonate the ammo. Of course, the best way is still side-shooting with APHE.
Panzer IV/70, Jagdpanzer 38(t) - These small tank destroyers with their well angled frontal armour can be quite a problem from a distance. With APHE, you can disable their transmission by shooting at their lower glacis. Now if you can, flank them. The 85 mm APHE does a great job at penetrating sloped, thin armour, so you don't have to get to their absolute sides. For the Pz IV/70, you can also aim at the downward part of the gun mantlet since the shell might ricochet downwards into the hull, knocking out every crew member. The Jagdpanzer 38(t) doesn't have this problem, so side-shooting is required to destroy it effectively.
M4A3E2 Jumbo - This is another common enemy. It is recommended to use the BR-365A, the one with less penetration but more explosive filler. The reason is that it is better at penetrating sloped armour, which the Jumbo has. With that shell you can easily destroy a M4A3E2 who's not angling. If it is, aim at the hull side just above the tracks, or load APCR and shoot straight at its gun mantlet. Against a 75 mm M4A3E2 you can relax a bit as it will struggle to penetrate your armour, but your cupola is a rather large weak spot and a shot through there can knock out the T-34. Be more careful with the M4A3E2 76 W, as they can easily pierce through your armour.
Pros and cons
Pros:
- Excellent firepower: adequate penetration, destructive damage and good reload rate
- Has two types of APHE for players to choose from: BR-365K with higher penetration but less TNT, and BR-365A with less penetration but plenty of TNT, either of which are enough to knock out most tanks with a single shot
- 56 km/h top speed and great manoeuvrability allows it to reposition or flank easily
- 5-man crew improves survivability against solid shells
- Similar playstyle with the previous T-34s which is beginner-friendly
- Fast turret traverse to easily deal with targets from multiple directions
- Sloped hull and round frontal turret might bounce low-penetrating guns like the 75 mm M3 on early M4 Shermans
Cons:
- Armour is extremely thin, providing very limited protection against common guns (American 76 mm, British 17-pdr, German 75 mm & 88 mm, etc)
- Crew members are closely packed, a well-aimed shot tends to knock them all out
- 5 degrees gun depression is below average, limiting its capability in hilly maps
- Poor reverse speed
- Large turret profile makes it easier to get spotted and shot
- Awkward to place bushes on upper front hull due to the obstruction of MG port and driver's optics
History
Development
The T-34, in its introduction, was a huge shock to the German army when they invaded as they did not have the adequate anti-tank weaponry to defeat the T-34 and its heavier companion KV-1 tank. However, by 1943, the Germans began introducing newer tanks or upgrading their current tanks. They upgraded their Panzer IVs with the 75 mm KwK 40 gun, which could penetrate the T-34, and introduced the Tiger I and Panther tanks into their forces, which could not only destroy the T-34s easily, but can also take in the 76.2 mm shells the T-34 fires. The inferior firepower the T-34 forced the T-34 forces to close into a very close distance during the Battle of Kursk with the Tigers and Panthers in order to get to the sides and fire at the weaker armour. While the Soviets were victorious against the German offensive, the T-34s suffered high losses with this strategy.
The T-34's slow improvement from the 1941 model was due to the decision to keep changes to the model low to keep costs low and productivity high. This worked well in the first two years against the Germans, but the Battle of Kursk showed that the newer German tanks now outgun the T-34s. Soviet High Command, once conservative on the T-34's upgrades, now opted for an increase in the T-34 armament to be able to counter the German tanks. During the development, an interim solution for the problem was the equipping of the 57 mm ZiS-4M gun onto the T-34, which has better penetration capabilities compared to the 76.2 F-34 guns. This tank, the T-34-57, performed as an adequate "tank-hunter", but the small HE shell on the 57 mm gun made it a poor tank armament so this was only an interim solution until a better design is made.[1]
Testings with various guns in Soviet inventory against captured German tanks showed that the most capable gun was the 85 mm 52-K anti-aircraft gun. With this discovery, the 52-K underwent development to make derivatives able to be mounted onto a tank. The cannon was able to penetrate the front of the Tiger from 500 m out, the turret side from 600 m away, and the hull side from 800 m away. The 85 mm was first mounted onto the SU-85s, but the need for an upgraded tank had the Soviets find a way to fit the gun in the T-34. The cannon was much larger than the F-34 gun and so a much larger turret was necessary to house the gun. The solution to this was to transfer the turret from the cancelled T-43 tank program onto the T-34, this increased the turret ring diameter from the original 1,425 mm into 1,600 mm, which required a retooling in the manufacturing plants. While this delayed T-34 production, the 85 mm was finally able to be mounted onto the T-34 as the T-34-85.[1]
Design
The T-34-85, aside from the enlarged turret ring for the new turret, uses the same T-34 hull design. Armour was still about 45 mm thick, sloped at 60 degrees for a 90 mm effective thickness. The Christie suspension was retained, as well as the diesel engine. However, the biggest difference in the tank design is the three-man turret, though a turret basket is still exempt from the design. Before, the two-man turret on the older T-34 had the commander forced to do his job and the gunner's, the three-man turret on the T-34-85 separated the commander's duty by having a separate gunner to fire the gun, leaving the commander to do his job commanding the tank as a whole. The larger turret also has space for a radio (previously in the hull by the assistant driver), allowing the commander to effectively communicate between tank units. Aside from the enlarged turret ring, new turret, and the 85 mm gun, the internal specifications of the T-34 and its pros and cons were nearly identical to the older variants.
The 85 mm gun on the T-34-85 was able to penetrate 125 mm of armour at 500 m away at a 90 degree meet angle with normal AP rounds. The 85 mm gun was derived from the 52-K anti-aircraft gun, which was developed from Vasilliy Grabin and Fyodor Petrov's design bureaus. Petrov's bureaus produced the 85 mm D-5T gun while Grabin's design, after being taken over by A. Savin, produced the 85 mm ZiS-53 gun. During trials in the Gorokhoviesky Proving Grounds, it was found that the ZiS-53 gun was much better than the D-5T and was much simpler, which was redesignated as the ZiS-S-53 after Savin's initials. However, as the new turret was optimized with the D-5T gun, the T-34-85 started with the D-5T as the T-34-85 Model 1943, which ran on from February to March 1944. After March 1944, the 85 mm ZiS-5 was used as the armament of the T-34-85 Model 1944. During its production life from 1943 to 1958, up to 48,950 T-34-85s were created (22,559 of which during World War II), consisting of more than half of the total 84,070 T-34 units created in its entire production life since 1940.
Combat usage
From its introduction in March 1944 and onwards, the T-34-85s were the main tank in Soviet service.[1] The older T-34s were still being used in the theatre as they are lost from combat and retribution and replaced. The T-34-85's 85 mm gun armour penetration and front turret armour nearly doubled compared to the older T-34, yet retain the same speed, mobility, and hull armour. The T-34-85 was vastly superior to the German's Panzer IVs and StuG IIIs, and though it was still inferior against the Panther and the Tiger I, it had a better chance than the older T-34 models. The T-34-85s maintain numerical superiority throughout the entire war due to the Soviet's industrial base and design concept of mass producing single designs, while the Germans focus on newer, better tanks such as the heavier Tiger II, which restricted productivity and made logistics a hard job to maintain. The T-34-85s were the main Soviet spearhead weapon during Operation Bagration and its future offensives up until the Battle of Berlin. After the fall of Nazi Germany, the Soviets use the T-34-85s again in their invasion of Manchuria to fulfil their promise to invade Japan after the fall of Germany. The combined-arms forces of their armoured units overran the Japanese positions in Manchuria and were pushed all the way to a distance from the Yalu River. The Japanese surrender order was given out by the emperor on August 14, which was not carried out as a cease-fire until August 17.
After the end of World War II, the T-34-85s were given out in massive quantities to Soviet-occupied territories and their allies. The next action the T-34-85s faced was in the Korean War, in the hands of the North Koreans. The North Korean armoured forces are able to assault deep into South Korea with these tanks as South Koreans were severely under-equipped in anti-tank weaponry, only armed with US-supplied M24 Chaffees and regular bazookas, which were useless against the T-34s. It wasn't until the deployment of US troops into the Korean peninsula that the tide turned against the North Koreans and their tanks. The US sent their M4A3E8 Shermans, M26 Pershings, and "Super Bazookas" to arm the troops there. All these weapons are able to destroy the T-34-85s, with the M26 Pershing being able to penetrate straight through the front and back of the T-34-85 armour with HVAP rounds. The Shermans are nearly equal to the T-34-85s, but the better optic quality and crew training gave them an edge against the T-34-85s. These anti-tank weapons supplied by the coalition caused the North Koreans to suffer major tank losses and after their supply lines were cut by the US landings at Inchon, the armoured vehicles were abandoned as the North Koreans retreated. Pure tank-to-tank battles between the two sides were scarce after 1950 due to a heavy decline in armoured forces in the North Korean side.[1]
Past the Korean War, the T-34-85s were clearly obsolete with the development of newer tanks being developed worldwide. Despite that, many countries still use T-34-85s as their main tank or as reserves, even the Soviets and Finnish continue using them until the late 1960s. Warsaw Pact countries used them in large quantities and were involved in many conflicts within these countries, such as the East German uprising in June 1953, Hungarian revolution in 1956, Coup by Greek junta in July 1974, and the Turkish invasion in July-August 1974. The T-34-85s also saw conflicts in the Middle East in the hands of Syrians, Egyptians, Jordanians, and Iraq; Vietnam with the North Vietnamese, and in the Bosnian War in the Bosnian Serb Army. African countries such as Somalia and Angola still use T-34-85s in their armies, and they could even be seen in the recent conflicts in Yemen and in Ukraine. Despite their age, it seems that the T-34-85 was to become a tank that will persist in the hands of smaller countries for years to come.
During late 1944, the Soviets were already searching for a successor to the T-34s that use most of the newest tank technology found in recent years. The result was the T-44 medium tank, which did not enter service in time to see widespread usage and even combat during World War II. The T-44 underwent further development and redesigning to become a tank that would surpass the T-34 in the most produced tank in existence, the T-54 tank.
| Archive of the in-game description | |
|---|---|
|
This model of tanks received the new S-53 cannon with a 54.6 calibre barrel length mounted on a turret with an expanded traverse circle. Its armour-piercing 9.2 kg shell penetrated 111 mm and 102 mm thick armour at ranges of 500 and 1,000 metres respectively, while its subcalibre round penetrated 138 mm thick armour at a range of 500 metres. Tanks with this cannon used the improved TS-16 telescopic sight. To allow firing from cover, it had an elevation level and a turreted rangefinder. The turret's roof featured two MK-4 observation instruments which provided noticeably improved vision over the PTK-5 panoramic telescope. Another ventilator was also added and the command cupola was moved back. The turret's frontal armour was increased to 90 mm, and the sides to 60 mm. The 9RC radio set was installed on all the vehicles, and late production tanks received electric drive for turning the turret and the means to set up smokescreens. Combined manual and electric drives meant that the turret could be fully turned in 12-15 seconds, and its turning motion became steadier. Although the tank's weight was somewhat increased by the installation of its more powerful cannon and stronger armour, thanks to its powerful diesel engine, its mobility did not suffer. Tanks of this model went into mass production in February 1944. By the end of the Second World War, around 20,500 of them were made in total. The tank was widely used in all conflicts in the war's final stage. In spite of the very significant upgrades present on the T-34-85, its battle characteristics could not be considered entirely satisfactory for the second half of the war in the context of improved German tanks and anti-tank weapons. Captured tanks of this type were used by the Wehrmacht and Waffen SS until the end of the war. The tank underwent several modernisations after the war, the last of which took place in 1969. In the 50s, it was mass-produced in Poland and Czechoslovakia. | |
Media
- Skins
- Videos
See also
- Other T-34-85 variants
External links
References
| Kharkov Design Bureau for Mechanical Engineering named after A. A. Morozov | |
|---|---|
| Light Tanks | |
| BT-5 | BT-5 · RBT-5 |
| BT-7 | BT-7 · BT-7M · BT-7A (F-32) |
| Medium Tanks | |
| T-34-76 | T-34 (Prototype) · T-34 (1940) · T-34 (1941) · T-34 (1st Gv.T.Br.) · T-34 (1942) · T-34E STZ · T-34E |
| T-34-57 | T-34-57 · T-34-57 (1943) |
| T-34-85 | T-34-85 (D-5T) · T-34-85 · T-34-85E |
| T-34-100 | T-34-100 |
| T-44 | T-44 · T-44-100 · T-44-122 |
| Main Battle Tanks | |
| T-54 | T-54 (1947) · T-54 (1949) · T-54 (1951) |
| T-64 | T-64A (1971) · T-64B |
| Export/Captured | |
| T-34 | ▀T 34 747 (r) · ▄T-34 · ▄T-34-85 · ␗T-34 (1943) · ␗Т-34-85 (S-53) |
| T-54 | ▄T-54 |
| See Also | Uralmashzavod · Uralvagonzavod |
| USSR medium tanks | |
|---|---|
| T-28 | T-28 (1938) · T-28 · T-28E |
| T-34-76 | T-34 (Prototype) · T-34 (1940) · T-34 (1941) · T-34 (1st Gv.T.Br.) · T-34 (1942) · T-34E STZ · T-34E |
| T-34-57 | T-34-57 · T-34-57 (1943) |
| T-34-85 | T-34-85 (D-5T) · T-34-85 · T-34-85E |
| T-34-100 | T-34-100 |
| T-44 | T-44 · T-44-100 · T-44-122 |
| T-54 | T-54 (1947) · T-54 (1949) · T-54 (1951) |
| T-55 | TO-55 · T-55A · T-55AM-1 · T-55AMD-1 |
| T-62 | T-62 · T-62M-1 |
| T-64 | Object 435 · T-64A (1971) · T-64B |
| T-72 | T-72A · T-72AV (TURMS-T) · T-72B · T-72B (1989) · T-72B3 · T-72M2 Moderna |
| T-80 | T-80B · T-80U · T-80UD · T-80UK · T-80UM2 · Т-80U-Е1 · T-80BVM · Object 292 |
| T-90 | Т-90А · T-90M |
| Trophies/Lend-Lease | |
| Germany | ▂T-III · ▂T-V |
| Great Britain | ▂МК-IX "Valentine" |
| USA | ▂M3 Medium · ▂M4A2 |
