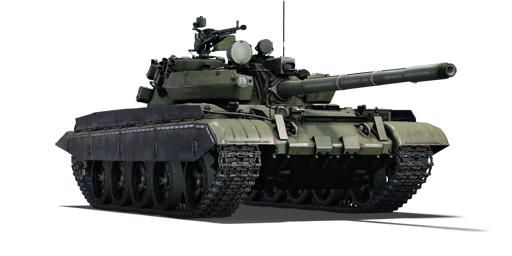
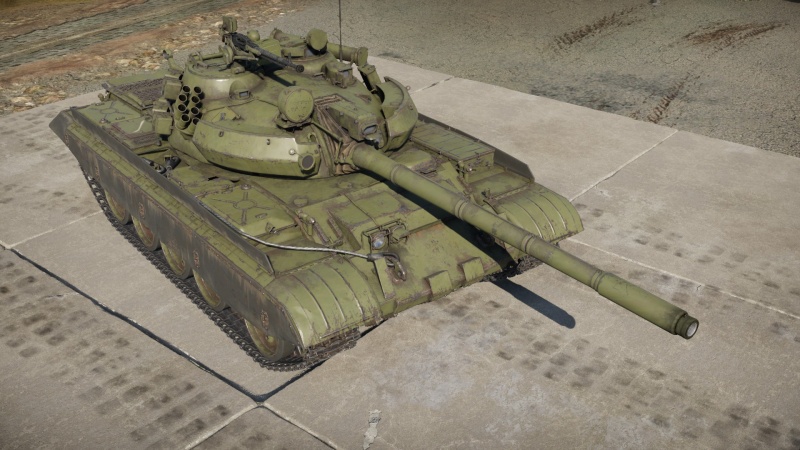
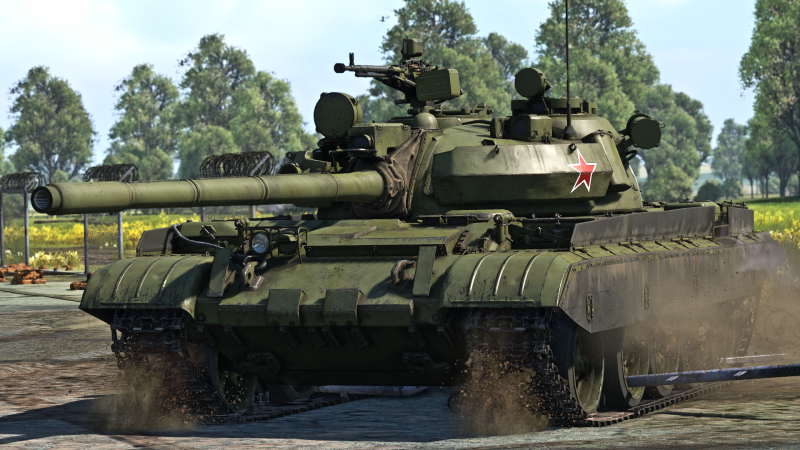
T-55AM-1
| This page is about the Soviet medium tank T-55AM-1. For other versions, see T-54/55 (Family). |
Contents
Description
The T-55AM was a project initiated by the Soviet Army in the 1970s to modernize the T-55A tank and keep it relevant on the battlefield. The T-55, which had been in service since the 1950s, was no longer capable of keeping up with changing technologies and modern tanks. The T-55AM project aimed to extend the service life of the T-55 and improve its combat capabilities. The modernization included a number of upgrades, such as the addition of passive applique armor, the Volna fire control upgrade, the optional fitting of the new Bastion guided projectile, automotive upgrades, and many small improvements. The upgraded T-55s and T-55As were given the designations T-55M and T-55AM, respectively. The suffix "-1" in the T-55AM-1's designation indicates that it was equipped with the newer and more powerful V-46-5M engine, which was based on the engine used in the T-72.
The T-55AM-1 was introduced as a premium pack in Update 1.81 "The Valkyries". With a combination of strong armor, firepower, mobility, and various styles of gameplay, it is one of the best all-around tanks at its battle rating. It is a very satisfactory upgrade over the T-55A model, providing improved performance in all aspects of combat.
General info
Survivability and armour
The T-55, which this tank was based upon, used exclusively rolled homogeneous armour, which proved to be useless against advanced chemical warheads. The Soviet Union, in an attempt to modernize and extend the service life of the T-55, conceived the AM-1 upgrade kit for the tank. The upgrade kit consists bolted-on blocks of metal-polymer plates, which are essentially plates of metal sandwiching polymer fillings. This solution was cheap and easy to implement, though its effectiveness was debatable. Compared to the original T-55A, the armour protection was greatly improved, but still prove to be insufficient against certain weapons.
The turret cheeks are fitted with the add-on metal-polymer blocks, which grants immunity to every HEAT warhead in-game except the HOT missiles. The Leopard's 120 mm HEATFS occasionally penetrates the cheeks, and in that case, very minimal damage is caused. The turret armour against APDS is highly effective, given that the projectile impacts the add-on armour. However, the armour is mostly useless against APFSDS, and in case of penetration, will cause extensive damage. The add-on armour on the upper front plate is somewhat effective as it can nullify HEAT warheads with less than 450 mm penetration. Most APFSDS will seamlessly penetrate the hull. Most APDS will bounce.
Do note that the gun breech area is very poorly protected by some 200 mm of cast homogeneous armour, making its protection useless against everything. So do try to angle your turret by facing your cheeks. When doing so, use the right side of your turret to "catch" rounds, as even if it penetrates, only your loader will be knocked out, so no big deal.
Also note that the add-on armour block can be blown off your tank. For example, HOT missiles will have very high chance of taking off armour, and direct hit from artillery shell (assuming it hits the armour and doesn't destroy you) will take off the armour.
In regards to ammo storage, your ready rack is stored within your fuel tank. This wet ammo storage will prevent ammo detonation from HEAT, but a well placed APFSDS will nonetheless cause ammo cook-off.
Armour type:
- Rolled homogeneous armour (Hull, Turret roof)
- Cast homogeneous armour (Turret, Gun mantlet)
| Armour | Front (Slope angle) | Sides | Rear | Roof |
|---|---|---|---|---|
| Hull | 100* mm (59°) Front glacis 100 mm (56°) Lower glacis |
80 mm | 45 mm (16°) Upper 20 mm (71°) Lower |
30 mm 20 mm Hatches 45 mm Engine grille |
| Turret | 130-200* mm (0-75°) | 90-160 mm (9-62°) | 66 mm (4-41°) | 30 mm |
| Cupola | 100 mm (conical) Base 30 mm (spherical) Hatch |
100 mm (conical) Base 30 mm (spherical) Hatch | ||
Notes:
- Suspensions wheels and tracks are 20 mm thick
- Front belly armour is 20 + 20 mm thick, with the rest of the belly armour being just 20 mm thick.
- * - Composite armour present
Mobility
| Game Mode | Max Speed (km/h) | Weight (tons) | Engine power (horsepower) | Power-to-weight ratio (hp/ton) | |||
|---|---|---|---|---|---|---|---|
| Forward | Reverse | Stock | Upgraded | Stock | Upgraded | ||
| Arcade | Expression error: Unexpected * operator. | 1,069 | Expression error: Unexpected round operator. | __.__ | |||
| Realistic | 610 | Expression error: Unexpected round operator. | __.__ | ||||
The mobility is only bested by the XM-1. It will out-run most, if not all, its friendlies and adversaries. Its pivoting capabilities are comparable to the very capable neutral steering system on the Leopard L/44. The tank will reach around 30-40 km/h off-road, and -10 km/h in reverse.
Modifications and economy
Armaments
Main armament
The 100 mm rifled gun seems like an oddity at this BR, not in its calibre or whatnot, but its unparalleled versatility. The gun can fire APDS, APFSDS, HEATFS, HE, APCBC, ATGM and smoke. In fact, it can fire every type of munition available in-game with the exception of HESH. Though very versatile, it is quite useless as the APDS, APFSDS and HEATFS are terribly under-performing compared to its adversaries. The few offensive munitions worth carrying are the APFSDS, APCBC and ATGM. The APCBC is extremely capable: it will destroy most enemy vehicles it faces with one shot, given proper shot placement and successful penetration. At this rank, most your opponents are poorly armoured, like the Leopard 1, MBT/KPz-70 and XM-1, so the 200 mm penetration on the APCBC will penetrate and will result in the instant destruction of your enemies.
| 100 mm D-10T2S | Turret rotation speed (°/s) | Reloading rate (seconds) | |||||||||||
|---|---|---|---|---|---|---|---|---|---|---|---|---|---|
| Mode | Capacity | Vertical | Horizontal | Stabilizer | Stock | Upgraded | Full | Expert | Aced | Stock | Full | Expert | Aced |
| Arcade | 42 | -5°/+16° | ±180° | Two-plane | 14.3 | 19.8 | 24.0 | 26.5 | 28.2 | 9.75 | 8.63 | 7.95 | 7.50 |
| Realistic | 8.9 | 10.5 | 12.8 | 14.1 | 15.0 | ||||||||
Ammunition
| Penetration statistics | |||||||
|---|---|---|---|---|---|---|---|
| Ammunition | Type of warhead |
Penetration @ 0° Angle of Attack (mm) | |||||
| 10 m | 100 m | 500 m | 1,000 m | 1,500 m | 2,000 m | ||
| 3BM-8 | APDS | 336 | 332 | 317 | 299 | 282 | 265 |
| BR-412D | APCBC | 239 | 236 | 220 | 202 | 185 | 170 |
| 3BM25 | APFSDS | 335 | 330 | 307 | 290 | 275 | 260 |
| 3BK17M | HEATFS | 390 | 390 | 390 | 390 | 390 | 390 |
| OF-412 | HE | 27 | 27 | 26 | 24 | 23 | 21 |
| 9M117 | ATGM | 600 | 600 | 600 | 600 | 600 | 600 |
| Shell details | ||||||||||||
|---|---|---|---|---|---|---|---|---|---|---|---|---|
| Ammunition | Type of warhead |
Velocity (m/s) |
Projectile mass (kg) |
Fuse delay (m) |
Fuse sensitivity (mm) |
Explosive mass (TNT equivalent) (g) |
Ricochet | |||||
| 0% | 50% | 100% | ||||||||||
| 3BM-8 | APDS | 1,415 | 4.13 | - | - | - | 75° | 78° | 80° | |||
| BR-412D | APCBC | 887 | 15.88 | 1.2 | 19 | 100.1 | 48° | 63° | 71° | |||
| 3BM25 | APFSDS | 1,430 | 3.4 | - | - | - | 76° | 77° | 80° | |||
| 3BK17M | HEATFS | 1,085 | 9.96 | 0.05 | 0.1 | 1,170 | 65° | 72° | 77° | |||
| OF-412 | HE | 900 | 15.6 | 0.2 | 0.1 | 1,460 | 79° | 80° | 81° | |||
| Missile details | ||||||||||||
|---|---|---|---|---|---|---|---|---|---|---|---|---|
| Ammunition | Type of warhead |
Velocity (m/s) |
Range (m) |
Projectile mass (kg) |
Fuse delay (m) |
Fuse sensitivity (mm) |
Explosive mass (TNT equivalent) (g) |
Ricochet | ||||
| 0% | 50% | 100% | ||||||||||
| 9M117 | ATGM | 370 | 4,000 | 18.8 | 0.05 | 0.1 | 4,770 | 80° | 82° | 90° | ||
| Smoke shell characteristics | ||||||
|---|---|---|---|---|---|---|
| Ammunition | Velocity (m/s) |
Projectile mass (kg) |
Screen radius (m) |
Screen deploy time (s) |
Screen hold time (s) |
Explosive mass (TNT equivalent) (g) |
| 3D3 | 880 | 15.6 | 16 | 5 | 25 | 50 |
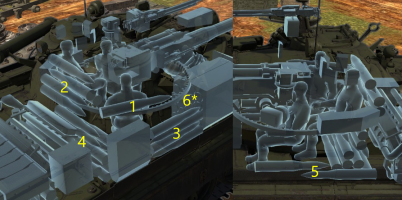
Ammo racks

| Full ammo |
1st rack empty |
2nd rack empty |
3rd rack empty |
4th rack empty |
5th rack empty |
6th rack empty |
Visual discrepancy |
|---|---|---|---|---|---|---|---|
| 42 | 41 (+1) | 37 (+5) | 33 (+9) | 21 (+21) | 19 (+23) | 1 (+41) | No |
Notes:
- Shells are modeled individually and disappear after having been shot or loaded.
- If you pack 19 (+24) shells, it will fill only the frontal wet stowage ready rack.
- Rack 6 is a first stage ammo rack. It totals 18 shells and gets filled first when loading up the tank.
- This rack is also emptied early: the depletion order at full capacity is: 6 - 1 - 2 - etc. until 5.
- Simply not firing when the gun is loaded will move ammo from racks 1-5 into rack 6. Firing will interrupt the restocking of the ready racks.
Machine guns
| 12.7 mm DShK | ||||
|---|---|---|---|---|
| Mount | Capacity (Belt) | Fire rate | Vertical | Horizontal |
| Pintle | 300 (50) | 600 | -10°/+60° | ±180° |
| 7.62 mm PKT | ||||
|---|---|---|---|---|
| Mount | Capacity (Belt) | Fire rate | Vertical | Horizontal |
| Coaxial | 3,000 (250) | 700 | - | - |
Usage in battles
The T-55AM-1 is a tank that T-55A users are familiar with, but now with extra features such as:
- The ammo option of a gun-launched 9M117 missile
- Composite armour added to the front of the hull and turret
- More powerful engine
- Smoke grenades availability
Aside from these differences, the usage of the T-55AM-1 will be quite similar to any T-54/55 tank models in the Soviet tech tree.
- Offensive
Using the T-55AM-1 in the offensive role is ideal given the technical characteristics of the tank. The relatively low profile construction of the tank, plus the added composite armour at the front, can make the T-55AM-1 more likely to survive a contested battlefield. The stabilised 100 mm gun also gives a nice, steady field of view at selected enemy target to engage while moving. However, one should take care not to be hit as despite the composite armour additions to the tank, they only have significant effect against chemical rounds (with an effective protection of around 450 mm), and its effect on kinetic rounds is negligible enough that even APDS rounds on certain tanks can pierce the hull at closer ranges.
When moving towards the enemy, try to utilise the terrain for cover to protect the vulnerable parts of the hull. Only the front have the added composite armour so make sure these are presented so to maximize survival should the T-55AM-1 be hit. Avoid traveling over hills when moving, as the -5 degree gun depression restricts the T-55AM-1's firing arc. Focus on going around obstacles in a manner that the gun can be brought to bear while eliminating any possible exposure of the side armour. The gun should always be pointed where the enemy is expected to be coming, as the traverse speed is slow and can be detrimental when reacting to a surprise encounter.
For the attack, the T-55AM-1 should try not to be in the lead due to the spotty armour design, but it should follow a squad where a lead tank attracts the enemy gun fire, and the T-55AM-1 supports the lead tank by firing at its opposition while repositioning to a good firing angle. The higher mobility of the T-55AM-1 also means the tank could also attempt a wide flanking manoeuvre around the battlefield and hit the enemy's sides.
- Defence
Defence can be done with the T-55AM-1, though the options are limited as it is difficult to take up ideal hull-down positions due to both the -5 degree gun depression and weaker turret armour even with the composite (although the gun mantlet may cause incoming shells to ricochet at the cost of the gun modules). The ideal way to use the T-55AM-1 in the defensive is to hide behind larger covers such as buildings and wait for the enemy to attempt to cross into the 100 mm gun's path. The variety of ammunition available allows the T-55AM-1 to deal with a variety of enemy threats, such as an APCBC round to penetrate and explode behind delicate side armour, and the 9M117 missile for longer-ranged targets.
No matter the case, the most important aspect to consider when choosing a cover position to fire from is how fast the T-55AM-1 can acquire and fire at targets, as the turret's slow traverse rate and the gun's rather slow reload rate can mean a significant amount of down time if shot is missed and the enemy continues speeding down the firing line. Also be wary of enemies that are aware of the T-55AM-1's position and attempt to root it out via flanking or aerial attacks, so keep an exit strategy to quickly egress from the area.
Pros and cons
Pros:
- Access to APFSDS ammunition and ATGM
- One of the few mid-high tier tanks with APCBC, great for single-shot knock-outs
- Favourable BR where tanks in a full uptier aren't too strong against the T-55AM-1
- Respectable mobility
- Laser rangefinder enables long range targeting
- Decent armour with even better protection against HEAT because of the composite turret armor
- Roof-mounted DShK 12.7 mm MG is great for taking out low flying helicopters
- Wet ammo storage in the front fuel tank may prevent ammo detonation
- Adequate back-up for its rank
Cons:
- Armour is completely ineffective against APFSDS and 120 mm APDS
- Below average reload time, many enemies will have a faster reload
- Poor reverse speed that won't help get out of dangerous situations
- The Rheinmetall 120 mm HEATFS and most high-penetration ATGMs will go clean through its armour
- Ammo stored all around the hull, a penetration will most likely result in an ammo detonation
- Rather weak APFSDS
- Doesn't have access to thermal optics
History
The T-54/55 went on a modernization program in the late 70s and mid 80s, featuring mainly an increase in combat capacity to fight against more modern tanks, and newer, more powerful ammunition. This resulted in the T-55AM, with major upgrades in all departments, mainly firepower and protection.
- Firepower
The T-55AM features the "Volna" Fire Control System, an upgrade to the Gunner Main Purpose Sight, ballistics computer, horizontal and vertical guidance mechanisms. The first modification made to the T-55AM regarding "Volna" was the addition of the TShSM-32PV GPS. The main difference of the TShSM-32PV with the TSh2B-32P (past sight of the T-55A) is its targeting capabilities. The T-55AM had the 1K13-2 sight, meaning it got missile firing capabilities. This sight was mounted on top of the main gun just above the first portion of the barrel, close to the turret mantlet. Inside, the 1K13-2 was mounted right next to the GPS. This also replaced the TPN-1-22-11 night vision GPS, the sight that was used in previous T-54 and 55 models, more specifically T-54B and T-55A. 1K13-2 was a slightly improvement over the TPN-1-22-11 sight as it had greater zooming in day and night mode and enhanced image quality on night mode but since it was not part of the "Volna" FCS, its capabilities were somewhat limited.
The T-55AM also got an improvement ballistics-wise, featuring a 100 mm D-10T2 rifled gun with thermal sleeve and bore extractor, the first cannon of this calibre with this technology fielded in Soviet service.
- Ammunition
The T-55AM kept the same firing capabilities of the ammunition fired by previous models, including HE, APCBC, APCR, APDS, HEATFS, shrapnel and a new steel core APFSDS-T. Steel core was the most rudimentary and unused core in dart ammunition, primarily due to the fact that it had less density, brittleness and hardness numbers were lower than tungsten carbide. This round is the 3UBM7 round which contained the 3BM19 dart. It is unclear as to why full steel alternatives were made at the time (T-62 also had steel core darts) despite the existence of fielded tungsten carbide core darts like the 3BM20. Strangely enough, the 3BM19 was not tagged as a practice round but a combat round. 3BM19 and 20 shared the same case, propellant, fins, cap, tracer and sabot but different core, for this reason, despite both travelling at the same speed, the penetration capabilities were different as the densities of tungsten and steel are significantly different.
- Protection
The T-55AM kept the same turret and hull design with its complex range of sloping angles that ensured that the height of the turret had an equal thickness in steel. The cause of this was to withstand full calibre rounds such as APCBC and APCR. The T-55AM features the BDD "Metal-Polymer Armour" (no official name was given). It had what is known as "Brows" (like eye brows) which covered the whole 140° frontal arc of turret and glacis and covered the turret critical components at 30° in a side angle, still less protected. The block had a thickness of 500 mm when measured from center (the thickest part of the block including the air gap). The armour package starts with a relatively thin armour layer at the bottom and gradually grows as it progresses upwards, this was to compensate the turret's round shape. At the bottom of the armour block is where the cast turret armour is the thickest but the block is the thinest and gradually increases and decreases in an equal ratio towards the top. The block itself was 280 mm thick with two different obliquities: at the top half, the armour is angled in a 30°. The bottom half is angled at 15°. This package is also seen in the T-62M although the geometry is different as turret shape varies as well as the air gap between the block and the turret. This air layer is a critical component when facing KE (kinetic energy penetrators, mainly subcalibre rounds like APFSDS) and CE (chemical energy penetrators also known as super plastic jets seen in HEAT warheads). When facing KE, this air layer helps fracture the rod. Due to the stress made on the rod while penetrating the BDD block, the rod acquires a "mushroom" tip shape since it erodes the armour (this does not happen with depleted uranium cores, only with steel and tungsten carbide cores). The rod expands and loses firmness, wobbling inside the armour. When it meets the air layer, it shatters and deforms (often acquiring a 'J' shape) reducing the penetration which will then be stopped by the inner cast armour of the turret. When facing CE, the air layer disrupts with the remaining jet which penetrated the block by making it expand and scatter as well as losing velocity, reducing the overall effectiveness of the jet which can then be stopped by the cast turret.
The hull was also improved with the same type of armour added on top of the standard T-55 frontal plate. It added a 150 mm add-on BDD plate angled at 60° following the same hull armour obliquity. Due to the increased weight, the T-55AM got multiple upgrades regarding suspension, more in concrete tracks and engine. The OMSh tracks were replaced by the RMSh tracks, shown in the first models of the T-55A which had an internat rubber plate sandwiched between steel plates to increase durability. This made the tracks capable of withstanding more weight and roughness in terrain without losing traction, sinking or flipping. It kept the same dimension of the past OMSh tracks. It also carried a 420 hp V-55U engine.
T-55AM-1
The suffix "-1" was added to later models which featured the 691 hp V-46-5M engine, a derivation of the T-72's 780 hp V-46-6 engine.
Media
- Skins
- Videos
See also
- Other vehicles of similar configuration and role
External links
Paste links to sources and external resources, such as:
- topic on the official game forum;
- other literature.
| USSR medium tanks | |
|---|---|
| T-28 | T-28 (1938) · T-28 · T-28E |
| T-34-76 | T-34 (Prototype) · T-34 (1940) · T-34 (1941) · T-34 (1st Gv.T.Br.) · T-34 (1942) · T-34E STZ · T-34E |
| T-34-57 | T-34-57 · T-34-57 (1943) |
| T-34-85 | T-34-85 (D-5T) · T-34-85 · T-34-85E |
| T-34-100 | T-34-100 |
| T-44 | T-44 · T-44-100 · T-44-122 |
| T-54 | T-54 (1947) · T-54 (1949) · T-54 (1951) |
| T-55 | TO-55 · T-55A · T-55AM-1 · T-55AMD-1 |
| T-62 | T-62 · T-62M-1 |
| T-64 | Object 435 · T-64A (1971) · T-64B |
| T-72 | T-72A · T-72AV (TURMS-T) · T-72B · T-72B (1989) · T-72B3 · T-72M2 Moderna |
| T-80 | T-80B · T-80U · T-80UD · T-80UK · T-80UM2 · Т-80U-Е1 · T-80BVM · Object 292 |
| T-90 | Т-90А · T-90M |
| Trophies/Lend-Lease | |
| Germany | ▂T-III · ▂T-V |
| Great Britain | ▂МК-IX "Valentine" |
| USA | ▂M3 Medium · ▂M4A2 |
| USSR premium ground vehicles | |
|---|---|
| Light tanks | BA-11 · RBT-5 · BT-7A (F-32) · T-26 (1st Gv.T.Br.) · T-26E · T-126 · PT-76-57 · 2S38 |
| Medium tanks | T-34 (Prototype) · T-34 (1st Gv.T.Br.) · T-34E · T-34-57 (1943) · T-34-85E · T-34-100 · T-44-122 · TO-55 · T-55AM-1 · T-72AV (TURMS-T) · T-80UD · Т-80U-Е1 |
| ▂M3 Medium · ▂M4A2 · ▂T-III · ▂T-V · ▂МК-IX "Valentine" | |
| Heavy tanks | SMK · T-35 · ▂MK-II "Matilda" · KV-1E · KV-2 (1940) · KV-2 (ZiS-6) · KV-122 · KV-220 · IS-2 "Revenge" · Object 248 · IS-6 · T-10A |
| Tank destroyers | BM-8-24 · BM-13N · BM-31-12 |
| SU-57 · SU-76D · SU-76M (5th Gv.Kav.Corps) · SU-85A · SU-100Y · SU-122P · Object 120 | |
| SPAA | ▂Phòng không T-34 · ZUT-37 |


