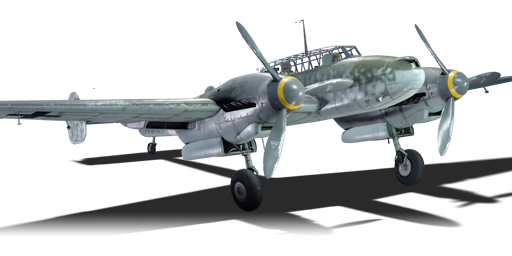
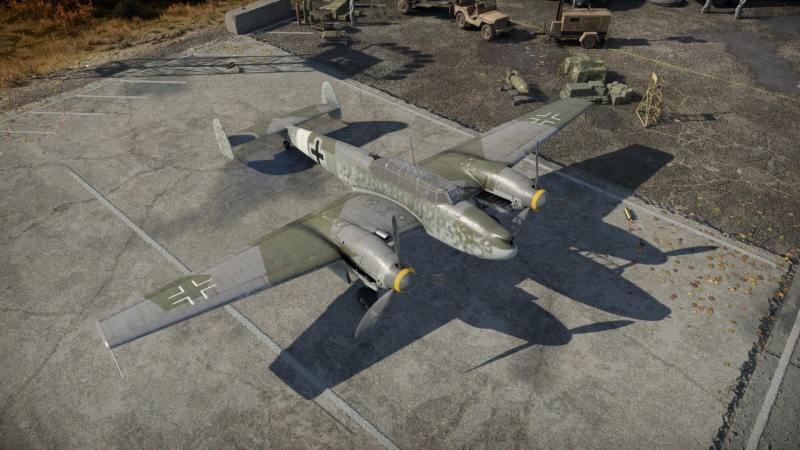
Bf 110 G-2
| This page is about the German strike aircraft Bf 110 G-2. For other versions, see Bf 110 (Family). |
Contents
Description
The Bf 110 G-2 is a rank German strike aircraft with a battle rating of (AB), (RB), and (SB). It was introduced in Update 1.79 "Project X".
General info
Flight performance
The Bf 110 G-2 is a textbook example of what classifies a twin-engined fighter. Positive capabilities of this aircraft include an outstanding turn time, menacing offensive armament, amazing acceleration and all-out straight-line speed. This aircraft is incredibly versatile due to the variety of offensive weapons which can be selected. Depending on the weapon loadout chosen, this strike aircraft can take on the roles of attacker, bomber and even bomber interceptor. Though the Bf 110 can take on fighters when the opportunity comes up or is necessary, caution must be taken as any single-engine fighter will likely out-turn the Bf 110 and manoeuvre into an attack position, effectively reversing roles.
When compared to its predecessors, the Bf 110 C-7 and the F-2, the G-2 is a noticeable upgrade in flight performance: with the addition of the more powerful DB-605B engines, the G-2 has more power and responsive performance than the earlier versions. However, the Bf 110 G-2 is a heavy plane with little manoeuvrability compared to other single-engine fighters: once suspended armament is equipped, its flight characteristics worsen even further. While it has a good climb rate, it tends to lose energy in turns and at high speed.
| Characteristics | Max Speed (km/h at 6,200 m) |
Max altitude (metres) |
Turn time (seconds) |
Rate of climb (metres/second) |
Take-off run (metres) | |||
|---|---|---|---|---|---|---|---|---|
| AB | RB | AB | RB | AB | RB | |||
| Stock | 573 | 558 | 25.1 | 26.0 | 9.9 | 9.9 | 444 | |
| Upgraded | 618 | 595 | 22.9 | 24.0 | 17.2 | 13.1 | ||
Details
| Features | ||||
|---|---|---|---|---|
| Combat flaps | Take-off flaps | Landing flaps | Air brakes | Arrestor gear |
| ✓ | ✓ | ✓ | X | X |
| Limits | ||||||
|---|---|---|---|---|---|---|
| Wings (km/h) | Gear (km/h) | Flaps (km/h) | Max Static G | |||
| Combat | Take-off | Landing | + | - | ||
| 467 | 438 | 290 | ~12 | ~5 | ||
| Optimal velocities (km/h) | |||
|---|---|---|---|
| Ailerons | Rudder | Elevators | Radiator |
| < 360 | < 350 | < 370 | > 715 |
Survivability and armour
- 58 mm Bulletproof glass in front of the pilot
- 5.5 mm Steel plate under the pilot
- 8.5-10.5 mm Steel plate behind the pilot
- 5.5-6 mm Steel plate in front and below the liquid cooling system
- 6 mm Steel plate around the liquid cooling system in wings
- 8.5-10.5 mm Steel plates around MK 108 guns
- 6 mm Steel plate under defensive gunner
- 8.5 mm Steel plate in front of the defensive gunner
Modifications and economy
Armaments
Offensive armament
The Bf 110 G-2 is armed with:
- 2 x 30 mm MK 108 cannons, nose-mounted (120 rpg left + 135 rpg right = 255 total)
When compared to its predecessors, the Bf 110 C-7 and the F-2, the G-2 is a noticeable upgrade in regards to armament. The G-2's offensive configuration consists of two 30 mm MK 108 cannons (found on the Me 262s) and can be supplemented by two suspended 20 mm MG 151 cannons (found on the Bf 109s) which come unlocked by default. This makes for a lethal combination and when compared to contemporaries such as the Beaufighter family of twin-engined aircraft, the G-2 clearly packs a more powerful punch.
Suspended armament
The Bf 110 G-2 can be outfitted with the following ordnance:
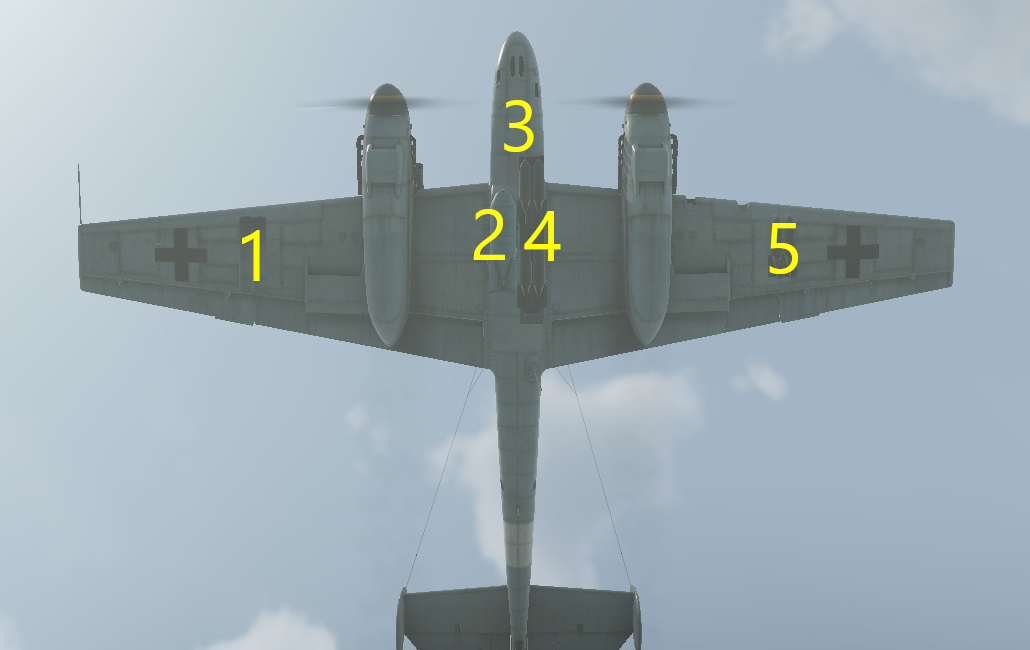
| 1 | 2 | 3 | 4 | 5 | ||
|---|---|---|---|---|---|---|
| 20 mm MG 151 cannons (400 rpg left + 350 rpg right) |
2 | |||||
| 20 mm MG 151 cannons (400 rpg + 350 rpg + 200 rpg + 200 rpg) |
4* | |||||
| 37 mm BK 3.7 cannons (66 rpg) | 1* | |||||
| 50 kg SC50JA bombs | 2 | 4*† | 4* | 2 | ||
| 250 kg SC250JA bombs | 1* | 1* | ||||
| 500 kg SC500K bombs | 1*† | 1* | ||||
| 500 kg PC500 bombs | 1* | 1* | ||||
| 1,000 kg SC1000L2 bombs | 1*† | |||||
| 1,000 kg PC1000 bombs | 1*† | |||||
| Flam C 250 incendiary bombs | 1* | 1* | ||||
| Flam C 500 incendiary bombs | 1*† | 1* | ||||
| Wfr.Gr.21 rockets | 2 | 2 | ||||
| Maximum permissible loadout weight: 1,700 kg | ||||||
| * Under-belly cannon pod cannot be equipped with ordnance in adjacent hardpoints † 1,000 kg bomb cannot be equipped with marked ordnance on hardpoint 2 | ||||||
| Default weapon presets | |
|---|---|
| |
The Bf 110 G-2 can effectively take on different roles, depending on the map played or the targets intended. Knowing the manoeuvrability challenges faced with selecting the various armament load-outs will help the G-2 pilot ensure to avoid areas of the map where they will be at a major disadvantage and ensure effective use of the ordnance on board.
Defensive armament
The Bf 110 G-2 is defended by:
- 2 x 7.92 mm MG 81 machine guns, dorsal turret (750 rpg = 1,500 total)
Usage in battles
- Ground Forces RB
In mixed ground battles, the Bf 110 G-2 is a fantastic multipurpose plane being able to carry various bombs, additional guns, rockets or nothing, allowing it to perform both ground attack and air superiority roles. For ground pounding, the most recommended setup is 2 x 500 kg bombs with at least 1.5 seconds fuse. They are loaded on the fuselage and drop one by one, meaning that with accurate aiming, you can consistently get around 2 enemy targets easily. Dive at a target at no more than 45° (the elevator cannot effectively pitch the plane up in time, resulting in a crash) and gather speed up around 500 km/h (if too fast, cut the throttle). Zoom in on the target and when it is twice as big as the mouse cursor, place the target between the cursor and the cockpit, and release the bomb. For the 1 x 250 kg + 1 x 1,000 kg setup, the aiming is similar, but place the target closer to the cursor for the 250 kg, and for the 1,000 kg, closer to the cockpit. Once all bombs are out, zoom climb towards your airfield to gain altitude advantage (the average air spawn altitude seems to be around 1,000 m) and keep and eye on the enemy air spawn. Once an enemy plane spawns, you must decide if it is single-engined or twin-engined as fast as possible. You can force it to engage in a head-on, as your nose-mounted cannons are effective at this. If the opponent is single-engined, avoid turning too much and maintain your speed. If necessary, use your tail gun and put a stray of 7.92 mm bullets into it, but remember to use the Armoured targets belt to compensate for the small calibre. You can also target ground units, especially lightly armoured ones: SPAA, light tanks, and open-topped SPGs.
- Air SB
In simulator battles, the Bf 110 is a very decent heavy fighter and interceptor. Thanks to the wing-mounted twin engines, its nose is emptied up to house a considerably powerful set of armaments, including the infamous MG 151/20, MK 108, etc. The nose-centred guns mean that little if not no convergence setting is needed, which makes it very easy to aim with. However those cannons all have very curved trajectories, making vertical targeting slightly challenging. The short stubby nose gives brilliant over-the-nose visibility, benefiting the pilot in various scenarios. Protection wise, the Bf 110 has armour protecting some of its critical spots, such as the crew, cooling systems, and windscreen, thereby protecting the player from small-calibre projectiles or shrapnel damage. It also comes with a rear gunner which can give a nasty bite to inexperienced enemy fighters. Lastly, it provides a range of additional weapons such as bombs and gunpods, fulfilling various roles. However, due to its heavy fighter nature, average simulator pilots may struggle to perform dogfights against fighters in the Bf 110 as it is clumsy at manoeuvring. This major limitation forces the player to look for bombers or attackers instead. Therefore, a Bf 110's potential can be dependent on the composition of the opposing team. This limited role may outweigh other cons of the Bf 110 such as the framy cockpit, insufficient engine cooling and poor roll rate.
If you want to target bombers, it is a good idea to bring gunpods, as these missions require heavy firepower over manoeuvrability. The additional gunpods will significantly boost your one-second burst mass which is lethal for common bombers like SB2M, B-25, Wellington, etc. The extra pair of 20 mm MG151 cannons is generally enough to cripple common bombers with a short burst, but if you want to go further into knocking down planes with a single shot, the 37 mm cannon is the best choice. It carries way more ammo than the Japanese 37 mm seen on the Ki-45 (66 vs. 15 rounds), boosting the potential for more kills. Against attackers, however, gunpods are not a must. These aircraft are generally not so well armoured that your original setup will be sufficient. Some are good turners too (e.g. SBD-3, Yak-2 KABB), so of course you do not want to get out-turned by them! You can bring the least amount of fuel as it is already enough for a long fight. When taking off, give right rudder input to counter the shift to the left side.
Rather than aimlessly roaming around the map, wasting your time to find a bomber, ambush around the following locations: friendly artillery positions, tank columns and friendly bases (especially the half-bombed ones). The former will help you to track down enemy ground-pounders, and the latter can lead you to enemy bombers, both of which are usually easy targets for the Bf 110. If you have an altitude advantage over the target aircraft, dive at them and perform deflection shooting to minimise the time where you are exposed to their gunners. The explosive-packed Minengeschoß rounds excel at destructing aircraft in a short shooting window. Usually 1-3 passes are more than enough to down an aircraft. If they have weak defensive guns, you can also sit behind them and comfortably tear off their parts as this deals damage faster than deflection shots. If you do not have altitude advantage, however, your tactic depends on the target. If it is weakly armed and/or protected, try sneaking directly under its belly and pulling straight up to fire a solid 1-3 seconds burst. If it is very robust and well protected by gunners, either climb to a higher altitude (if you are patient enough) before attacking, or abort the engagement. Although the Bf 110 is fairly well armoured, a good gunner can still put some bullets accurately into your critical parts like cooling systems. With an engine overheating, damaged or completely broken, it is quite hard to wrestle heavy bombers and get back home in one piece.
Missions like "destroy enemy surveillance aircraft/bombers/attackers" are also a great opportunity for you. The AIs usually show up around 2-3 km high. You can tail behind the AI formation and pick them off one by one. Common AI include A-36, Ju 87, He-111, and Do 217. Aim precisely and burst decisively, as you do not want to expose yourself to AI gunners for too long (they are quite accurate and usually shoot in crossfires). With careful aiming, a heavy fighter like Bf 110 can finish off an entire formation alone within minutes. But do watch out for the ammunition of the Mk 108, once it runs out it will be way harder to quickly destroy a target.
If you must engage a fighter, you have to keep your speed up. Force a head-on where possible and get the most out of this opportunity by aiming carefully (slightly upwards to compensate for shell drop). If the fighter is not killed, you can keep flying in a straight line rather than turning towards it, to avoid bleeding speed. Against a fast-flying target (you in this case), average Sim pilots cannot do much except sitting behind it and shoot. Utilise this to your advantage, switch to gunner view and fire prolonged bursts targeting the fuselage. The 7.92 mm AP bullets can deal quite some damage to a fragile single-engine fighter, warding it off. Veteran Sim pilots will have more ways of dealing with a heavy fighter, so you cannot do much. Accelerate towards a nearby friendly airfield, use your gunner and hope for the best. Still, avoid manoeuvring with fighters (unless they are distracted) since your turn rate is rather poor. If you do manoeuvre, pull the stick gently, do not pull much when the plane is flying slow, it will result in wobbles or spins. Fortunately the Bf 110 is able to recover easily from flat spins (by kicking the rudder to the opposite side of spin, and push the stick all the way back).
Landing the Bf 110 is somewhat similar to landing a single-engine fighter, but make sure that you align to the airstrip perfectly as you approach, since your unresponsive low-speed roll rate does not allow much adjustments when you are too close to the ground. Decelerate to about 230 km/h and fly at treetop level when your end of the airstrip becomes as wide as the windscreen, with landing flaps and gears down. Keep the speed up at 210 km/h right before the wheels contact the ground. Then you can break until full stop and not worry about a propeller strike.
- Enemies worth noting
- Yak-2 KABB - Do not think that the Bf 110 G-2 can confidently outmanoeuvre this plane just because it is twin-engined. The Yak-2 has an amazing turn rate for a heavy fighter, thus the Bf 110 G-2 must avoid turning with it, if not dogfighting with it in general. It bears a pair of ShVAK cannons that can easily damage vital parts like engine or cooling systems. It has green camouflage, greatly resembling an Me 410 but with an H-tail just like the Bf 110s.
- ZSD63 - Though it is hard to identify specific SPAA vehicles on the ground (especially when they are shooting tracers at the plane), if a ZSD63 is identified, avoid it at all costs and do not attempt head-ons with it. It can easily snap a wing off by casually putting a short burst in the Bf 110 G-2's flight path. Don't even get close to it unless the Bf 110 G-2 is equipped with a bomb it can use. Both the belts for the 30 mm Mk 108 and the shells in the add-on 37 mm BK3.7 cannot effectively damage it as its hull is overall quite empty, causing your shells to do little to no damage. Some identifying features of the ZSD63 is its rather boxy and tall hull with a geometric turret sitting at the back, slightly similar to a Wirbelwind's. The firing manner is also distinctive: the sound and green tracers are very rapid, much like a buzz saw, but then it will remain silent for half a minute reloading. Note that an experienced ZSD player will hold its fire or shoot in single salvoes with long halts between, making it look like that it's reloading.
- F6F - This is a commonly seen allied fighter which also excels at CAS roles, therefore it is not a surprise to see a few of these in a tank RB match. After an F6F drops its payload, it becomes very threatening to the Bf 110 since it is a single engine fighter with superior manoeuvrability and sufficient firepower. If you are out of bombs and see an F6F spawning in, gather altitude and BnZ it when it is diving at a ground target. If both of you spawned while carrying bombs, you can turn around and climb in the opposite direction (towards airfield, not frontline) to gain some altitude or to wait for friendly fighters. Pick on the F6F while it is dealing with your teammates. If, unfortunately, an F6F catches you while you are ground-pounding enemy ground targets, switch to gunner view and target carefully at its engine (still, you will not survive long in front of its 6 x 12.7 mm M2). Or if you have bombs left, drop to treetop altitude and release your bomb, the blast will hopefully damage or even destroy the chasing aircraft.
Manual Engine Control
| MEC elements | ||||||
|---|---|---|---|---|---|---|
| Mixer | Pitch | Radiator | Supercharger | Turbocharger | ||
| Oil | Water | Type | ||||
| Not controllable | Controllable Auto control available |
Controllable Auto control available |
Controllable Auto control available |
Separate | Not controllable 1 gear |
Not controllable |
Pros and cons
Pros:
- Twin 30 mm Mk 108 cannons as primary armament at all times in the nose of the aircraft
- Comes with a default twin 20 mm MG 151 secondary armament with a generous amount of ammo (375 RPG) mounted to the chin
- Replaces the single MG 15 rear gunner turret with a twin MG 81 mount
- Can mount an additional twin MG 151 on the belly of the aircraft for a total of 4 x MG 151's
- A wide variety of bombs and rocket options to carry in combination with gunpods
- Can mount a BK 3.7 cannon with either HEFI-T or HVAP-T shells (or both)
- Fastest Bf 110 variant with the highest rate of climb
- Like all Bf 110s, the G2 is very sturdy and can survive a lot of punishment
- Can suit a lot of different play styles like bomber hunting, CAS, tank destroying, or opportunistic support fighter
- Good armour and cannons mean that this Bf 110 variant is a beast when attacking head-on
- 4 210mm rockets make for additional anti-bomber or ground-pounding firepower
Cons:
- Mk 108 cannons require significant leading in order to secure a hit, making them unsuitable against fast-moving players
- Still significantly slower and bulkier than any single-engine fighter it flies against
- The second, extra 20 mm MG 151 gunpod only carries 200 rounds between them, compared to the first MG 151 gun pod with a total of 750 rounds
- A big target and very easy to hit in a turn
- Rear facing MG has no gun depression thus cannot aim at opponents below the Bf 110
- BK 3.7 installation necessitates the removal of all 20mm cannons, severely reducing the ammo count overall and is not recommended unless in arcade or highly skilled
History
Describe the history of the creation and combat usage of the aircraft in more detail than in the introduction. If the historical reference turns out to be too long, take it to a separate article, taking a link to the article about the vehicle and adding a block "/History" (example: https://wiki.warthunder.com/(Vehicle-name)/History) and add a link to it here using the main template. Be sure to reference text and sources by using <ref></ref>, as well as adding them at the end of the article with <references />. This section may also include the vehicle's dev blog entry (if applicable) and the in-game encyclopedia description (under === In-game description ===, also if applicable).
Media
- Skins
- videos
See also
External links
| Germany strike aircraft | |
|---|---|
| Messerschmitt | |
| Bf 110 | Bf 110 C-6 · Bf 110 C-7 · Bf 110 F-2 · Bf 110 G-2 · Bf 110 G-4 |
| Me 410 | Me 410 A-1 · Me 410 A-1/U4 · Me 410 B-1 · Me 410 B-2/U4 · Me 410 B-6/R3 |
| Dornier | |
| Do 335 | Do 335 A-0 · Do 335 A-1 · Do 335 B-2 |
| Focke-Wulf | |
| Fw 190 | Fw 190 F-8 |
| Heinkel | |
| He 219 | He 219 A-7 |
| Henschel | |
| Hs 129 | Hs 129 B-2 · Hs 129 B-2 (Romania) · Hs 129 B-3 |
| Junkers | |
| Ju 87 | Ju 87 G-1 · Ju 87 G-2 |
| Foreign: | |
| USSR | ▀IL-2 (1942) |


