T-62
| This page is about the Soviet medium tank T-62. For other versions, see T-62 (Family). |
Contents
Description
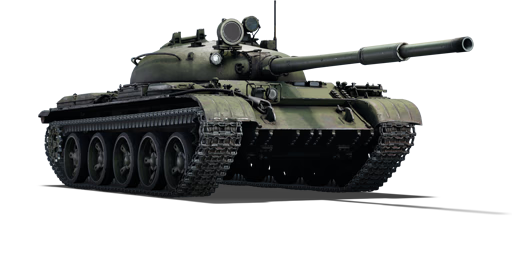
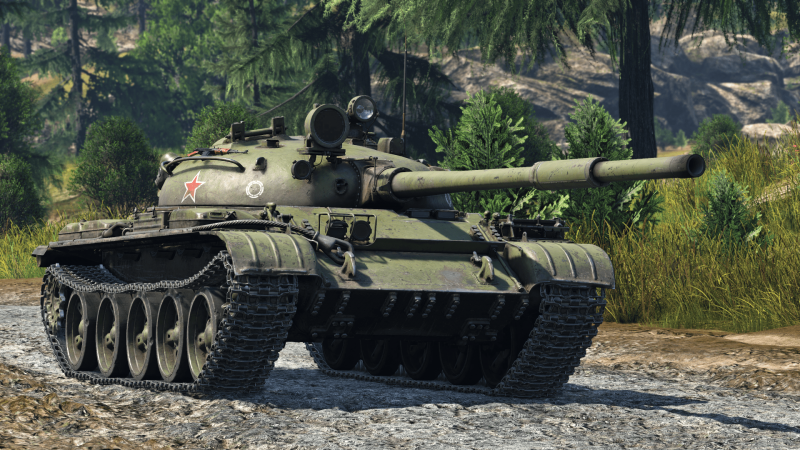
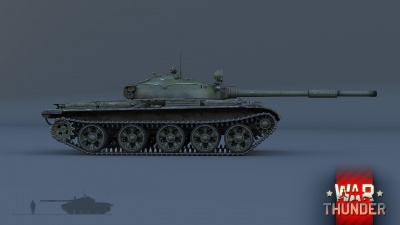
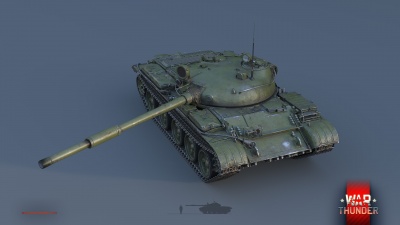
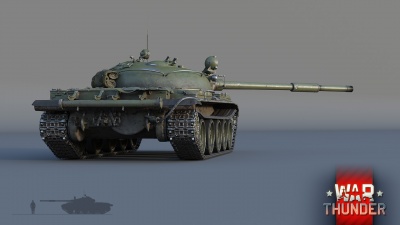
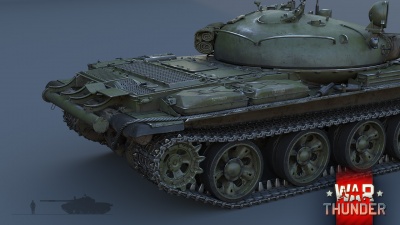
The T-62 is the first variant of the T-62 main battle tank family. The first T-62 variant, a further development of the T-55 main battle tank family, retained many design elements of its predecessor, including a low profile and thick turret armour. Unlike previous Soviet main battle tanks, which were armed with rifled tank guns, the T-62 was the first production tank to be armed with a smoothbore tank gun capable of firing armour-piercing fin-stabilised discarding sabot (APFSDS) rounds at much higher velocities. While the T-62 quickly became the Soviet Union's new standard armoured spearhead, it did not completely replace the T-55 in export markets due to higher manufacturing costs and maintenance requirements than its predecessor.
Introduced in Update 1.61 "Road to Glory", the T-62 has a similar armour configuration to the T-55 main battle tank family. It is the starting point for any players who want to participate in modern combat in the Soviet Army ground forces. Players will find it easy to engage even the most protected enemies with a powerful main armament and potent ammunition. However, the reload speed is slower than average, which becomes especially noticeable when engaging multiple enemies at once. As a result, staying behind the frontlines and adopting a slightly passive playstyle is preferable.
General info
Survivability and armour
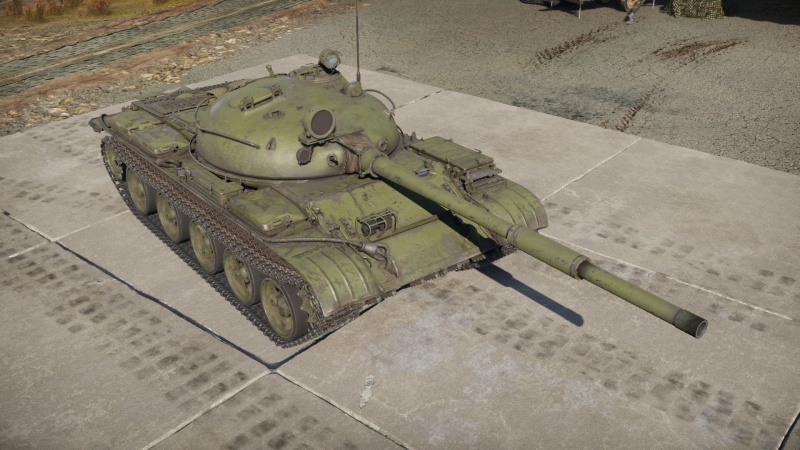
The armour protection of the T-62 is very similar to that of the T-54. Unfortunately, the T-62 tends to face more powerful guns at its BR, so its armour is not nearly as effective for its BR as the T-54's is. The well-rounded turret and sloped hull can ricochet poorly aimed rounds when angled, but should not be relied upon to protect the T-62.
Like most Soviet tanks, the T-62 has a very compact layout, meaning that a single penetrating hit is will most likely cripple or outright destroy the tank. Of particular note of concern is the front hull ammunition rack inside the fuel tank situated next to the driver. This rack is the ready rack of the T-62 and cannot be emptied by reducing the number of rounds carried. A penetrating hit there is likely to result in an ammunition cook-off that will instantly destroy the tank.
| Armour | Front (Slope angle) | Sides | Rear | Roof |
|---|---|---|---|---|
| Hull | 100 mm (59°) + 30 mm (59°) Upper glacis + add-on RHA 100 mm (50-51°) Lower glacis |
80 mm (0°) Middle to upper side 80 mm (20-61°) Turret ring extension 20 mm (0-28°) Lower hull side 8 mm (0°) Side Skirts |
45 mm (0-2°) All rear | 30 mm (87°) Hull roof incl. engine deck |
| Turret | 240-214 mm (14-60°) + 85-65 (7-33°) Turret cheeks + add-on RHA 40-50 mm (0-63°) Mantlet 40 mm Rear Mantlet Plate |
165-140 mm (16-57°) Turret side | 65 mm (3-26°) Turret rear | 60 mm (74-78°) Forehead Armour 30 mm (78-85°) Turret roof 60 mm (29-67°) Rear turret roof (incl. ejection port) |
Mobility
| Game Mode | Max Speed (km/h) | Weight (tons) | Engine power (horsepower) | Power-to-weight ratio (hp/ton) | |||
|---|---|---|---|---|---|---|---|
| Forward | Reverse | Stock | Upgraded | Stock | Upgraded | ||
| Arcade | Expression error: Unexpected * operator. | 899 | Expression error: Unexpected round operator. | __.__ | |||
| Realistic | 513 | Expression error: Unexpected round operator. | __.__ | ||||
The T-62's mobility is somewhat similar to that of the T-54 medium tank, although the heavier weight makes it a little bit more sluggish. It can reach a respectable 50 km/h forward, and the maximum reverse speed is -8 km/h. Because the T-62 is longer than the T-54 and does not have neutral steering, its turning performance is noticeably worse, especially on rough terrain.
Modifications and economy
Armaments
Main armament
| 115 mm U-5TS | Turret rotation speed (°/s) | Reloading rate (seconds) | |||||||||||
|---|---|---|---|---|---|---|---|---|---|---|---|---|---|
| Mode | Capacity | Vertical | Horizontal | Stabilizer | Stock | Upgraded | Full | Expert | Aced | Stock | Full | Expert | Aced |
| Arcade | 40 | -6°/+16° | ±180° | Two-plane | 15.2 | 21.1 | 25.6 | 28.3 | 30.1 | 10.40 | 9.20 | 8.48 | 8.00 |
| Realistic | 9.5 | 11.2 | 13.6 | 15.0 | 16.0 | ||||||||
The 115 mm 2A20 smooth-bore gun is a potent gun capable of firing APFSDS, HEATFS, and HE ammunition. It is stabilised, allowing for accurate firing on the move. The turret traverse is also significantly improved over that of the T-54, and the turret also provides more gun depression, allowing for some use of hull-down tactics. The gun has limited depression when the gun passes over the hull fuel tanks (at roughly 45 degrees to each side). Due to the large size of the 115 mm ammunition and cramped space of the T-62, the reload is much slower than that of comparable NATO tanks (~10–12 s depending on crew skill level and training).
Ammunition
While the APFSDS ammunition is not as lethal as the APHE ammunition used on previous Soviet medium tanks and requires some degree of careful aim, it is still capable of destroying tanks in one shot, especially with frontal penetrations.
- There are two types of APFSDS ammunition: 3BM3 and 3BM4. The stock 3BM4 round has a pure steel kinetic rod while the unlockable 3BM3 dart is a steel rod with a tungsten slug inside the penetrator. The latter has substantially more vertical penetration and somewhat better post-penetration lethality, but its performance against highly sloped armour is significantly worse. Both rounds have outstanding muzzle velocities of over 1,600 m/s, allowing long-range shots to be made without much lead.
- The 3BK4 fin-stabilised HEAT round has more penetration than either APFSDS round and retains its penetration at long ranges, but has a much slower muzzle velocity that makes aiming at long ranges significantly more difficult. It is more effective than APFSDS against lightly armoured targets since it can reliably knock them out with overpressure.
- The 3OF11 fin-stabilised HE round is rather unremarkable and is only really useful against soft targets.
| Penetration statistics | |||||||
|---|---|---|---|---|---|---|---|
| Ammunition | Type of warhead |
Penetration @ 0° Angle of Attack (mm) | |||||
| 10 m | 100 m | 500 m | 1,000 m | 1,500 m | 2,000 m | ||
| 3BM4 | APFSDS | 285 | 279 | 263 | 243 | 222 | 202 |
| 3BM3 | APFSDS | 350 | 347 | 322 | 300 | 283 | 270 |
| 3BK4 | HEATFS | 440 | 440 | 440 | 440 | 440 | 440 |
| 3OF11 | HE | 31 | 31 | 31 | 31 | 31 | 31 |
| Shell details | ||||||||||||
|---|---|---|---|---|---|---|---|---|---|---|---|---|
| Ammunition | Type of warhead |
Velocity (m/s) |
Projectile mass (kg) |
Fuse delay (m) |
Fuse sensitivity (mm) |
Explosive mass (TNT equivalent) (kg) |
Ricochet | |||||
| 0% | 50% | 100% | ||||||||||
| 3BM4 | APFSDS | 1,615 | 4 | - | - | - | 72° | 76° | 78° | |||
| 3BM3 | APFSDS | 1,615 | 4 | - | - | - | 76° | 77° | 80° | |||
| 3BK4 | HEATFS | 950 | 12.97 | 0.05 | 0.1 | 1.85 | 65° | 72° | 77° | |||
| 3OF11 | HE | 905 | 14.86 | 0.3 | 0.1 | 2.64 | 79° | 80° | 81° | |||
Ammo racks
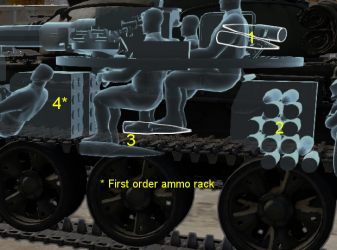
| Full ammo |
1st rack empty |
2nd rack empty |
3rd rack empty |
4th rack empty |
Visual discrepancy |
|---|---|---|---|---|---|
| 40 | 39 (+1) | 19 (+21) | 17 (+23) | 1 (+39) | No |
Notes:
- Shells are modeled individually and disappear after having been shot or loaded.
- Rack 4 is a first stage ammo rack. It totals 16 shells and gets filled first when loading up the tank.
- This rack is also emptied early: the rack depletion order at full capacity is: 4 - 1 - 2 - 3.
- Simply not firing when the gun is loaded will move ammo from racks 1-3 into rack 4. Firing will interrupt the restocking of the ready racks.
- If you pack 17 (+23) shells, it will fill only the frontal wet stowage ready rack.
Machine guns
| 7.62 mm PKT | ||||
|---|---|---|---|---|
| Mount | Capacity (Belt) | Fire rate | Vertical | Horizontal |
| Coaxial | 2,500 (250) | 700 | - | - |
The small calibre of the PKT machine gun makes it largely ineffective against all armoured vehicles but the ones with an open compartment. It still can be used to ping targets as a rangefinding help or to mow down minor obstacles blocking your line of sight.
Usage in battles
The T-62 is the first entry in the new stage of Soviet MBTs that most Soviet Tankers will research. As usual with soviet MBTs, only the turret has armour to speak of. Do not let this put you off as the T-62's 115 mm U-5TS is able to perform exceptionally even in an uptier. In fact, the U-5TS has more penetration than what comes after it, the T-55A, making a lot of players fall back to it (not to mention you lose the cool shell dump animation!). This comes at the cost of slightly slower reload time of 12.0s (9.2s if maxed crew), which is a little below average for its BR. All in all, the T-62 will give Soviet Tankers a general idea of how to play upcoming MBTs, as the playstyle doesn't change much.
It is best to find visual cover as soon as possible if an enemy plane was spotted since the tank does not have a top machine gun to protect itself from aircraft.
General Playstyle
It is recommended to play Arcade through the stock grind of the T-62, because your mobility is automatically improved, and the aiming reticle in Arcade will help you penetrate vehicles with the poorer stock round. However, this tank does excel in Realistic, because it can make use of its lower silhouette and very accurate gun (long-range encounters are much easier because there is very little bullet drop).
Arcade Battles
The T-62 performs rather well in Arcade, due to a very good gun and a mobile platform. Its armour does help you survive from time to time, especially when you are hidden behind bushes or buildings, and the enemies have to go off of your red silhouette to aim (ricochets are plenty in this scenario, because of the circular turret), however, you shouldn't rely on the armour. The biggest downside of playing Arcade is the fact that you have to face Soviet vehicles, which have the most armour around tier you will be fighting and can be annoying to fight.
In Arcade, it's advised to go to sniping positions at the beginning of the match, and later move closer to the objectives to aid your team with clean-up or with a counter-push to secure objectives. Now, due to the small sizes of maps in Arcade, it sometimes works to drive straight into the open and try to hit an enemy exiting their spawn (something that is easy to do with the stabilizer and is a great way to get the "First Blow!" award). If not possible, then it's advised to go to one side of the map and occupy a sniping position (e.g. the hills on the Middle East, South spawn; or the rocks overlooking the sands of El Alamein, either spawn; or rocks around Alaska, either spawn; etc.).
If more than half of your team is sniping, as often happens on disliked maps such as the Middle East, step up to the plate and go for the objectives. For details on city combat read-on.
The T-62 can fight in close quarters in Arcade very well. However, caution needs to be taken, because the reload is sub-par, and it generally doesn't allow you to push further than the objectives, because you get overrun with enemies just spawning in. So, if you find yourself in close quarters, decide if your team can cover you from the sides: if they look like they can, then focus forwards - take a strategic position where you overlook a passage to the objective and wait for enemies to pass through and shoot them; if your team can't cover you from the sides, then be very careful about your actions - it's best to find some cover in-front of your tank, and look around your sides, because when enemies don't encounter enemies, they will push up and show you their sides.
However, this doesn't mean that you should always rely on your team, or you should always stick to a single location. Arcade allows you to move around and to succeed, you must move around, because it is difficult for opponents to know where exactly you can shoot them from if you constantly change your angles. So you should find a piece of cover, snipe a couple of tanks, then move forwards or sideways across the map to another position and surprise other enemies.
Try to keep an eye on the minimap and have a general idea where large groups of enemies are - you don't want to run into 3 leopards in a city by accident. Keeping general enemy locations in mind will help you with your advancement plans - you shouldn't rush around the map only hoping that you won't get shot.
Realistic Battles
The T-62 enjoys Realistic Battles because its low silhouette can surprise enemies. It can hide behind a small bush, and hold an ambush position overlooking an open area around an objective (e.g. around the city in Alaska, or in the forests on European Province). The low silhouette and the amazing gun should be used together to ambush enemies at any range, knock them out and then change position so that any call-outs on the enemy team are wrong information by the time they are noticed. It can be rather annoying playing Realistic in this tank, however, due to German and Italian tanks being able to get half-way across the map and set-up ambushes before you are able to leave your spawn (this is negated in Arcade, because it's always mixed battles and faster tanks get killed first by faster enemy tanks).
In Realistic, long-range encounters are plenty, and they do favour the T-62, unless in a rather hilly environment, where the gun depression isn't enough. It is recommended to get into some sniping position at the start of the match, but after 3-5 shots to attempt to move forward, closer to the objectives. At that point, all of the Leopards and Centauros should be moving forward to your spawn, and while they are doing so, you can usually pick them off one-by-one (the is very effective if you've managed to move close to the objectives, because you will be in the enemy's rear as they move past the objectives).
If you see a teammate pushing in the same direction you are, then follow them, but stay some distance behind. Chances are if there are enemy ambushes, they are going to fire at your teammate and you will in turn be able to disable or destroy the ambushers.
There is less close quarters encounters in Realistic Battles, however many objectives are placed inside towns or cities. In those cases, when playing the T-62 it's important to surprise the enemy, so it's advised to go on a big flank. If you know where the enemies are, approximately, you may get away with simply rushing them, because they won't expect it, however, this poses a big risk and should only be done in dire situations. If you do find yourself in a stand-off with another tank, you can try baiting a shot by showing them your front plate while angling it (but not showing the side), by using a corner of a building as cover. You can also abandon the encounter, retreat, find an ambush and wait, although a smart enemy will be cautious, some might fall into your trap.
Soviet vehicles such as the Object 906 or the BMP-2 are better equipped for close-quarters, so if you're planning on fighting in cities, they are the better choice.
The Stock Grind
Through experience, it has been found best to complete the first part of the stock grind in Arcade Battles, notably researching Parts and FPE and perhaps Adjustment of Fire. Arcade is better due to the fact that the maps are smaller and you are almost guaranteed to get one kill. Moreover, you can activate 3-5 spare universal back-ups and spawn twice in the T-62 in the next 3-5 battles.
However you decide to complete the stock grind, these are some general tips:
- Stay further back and play passive - your reload will be your death as soon as you find yourself too far in front of your team.
- As a part of this strategy, you can bait teammates by letting them go first and see where they are shot from, then shooting those enemies.
- You can also just snipe, because your rounds are insanely fast from the beginning, and it's easy to hit long shots.
- Play the objectives, because it increases the chances of your team winning, and also gives you research points.
- Moreover, enemies converge on objectives, especially light tanks, which are easy to take out.
- It's always a good idea to stick close to your squadmate, or a light tank because they are able to repair you even if you can't.
Pros and cons
Pros:
- Good stock grind due to default shell being the 3BM4 which has enough flat pen and a great amount of angled pen to lay waste on any adversaries at this BR
- Better gun depression in comparison to most Soviet tanks before which allows it to utilize some hull down tactics in some situations
- Faster turret traverse than the T-54/T-55A
- Larger ammunition capacity than the T-54, with a generous hull ready rack
- Easy to learn and play
- ESS smoke system which can create a massive smokescreen for your team as well as allowing you to cover up your retreat
- Has a stabilizer which improves its fire-on-the move capabilities and aids in getting the first shot against enemies, especially against those without stabilizers
- Relatively low profile
Cons:
- No anti-aircraft heavy machine gun which makes dealing with aircraft as well as lightly armoured vehicles more difficult
- "Upgraded" 3BM3 round while having more flat penetration is worse than the stock 3BM4 round due to having significantly worse angled penetration.The increased flat penetration of the 3BM3 round is not really needed at this battle rating due most enemies having weak armour (such as Leopards) and many tanks relying more on sloped armour for protection (such as T95E1 and Chieftains)
- Turret traverse is still slower than other tanks
- Gun depression is still bad, can be easily exploited by experienced players
- Slow reload compared to NATO 105 mm L7-armed main battle tanks
- ESS is located on the left side of the tank
- Not as mobile as the T-54/55A
- No neutral steering
- Lack of APHE shells compared to earlier Soviet tanks can feel like a letdown for knocking out tanks with a single shot
- Cramped layout prone to vulnerable crippling hits or ammunition detonation when penetrated
History
The T-62 was a further development of the T-55 tank series, featuring the same hull and hull components but improving the turret and firepower. It was the first Soviet tank to utilize a smoothbore cannon. After the successful prototyping and service of the T-54 and T-55, the Soviet MoD looked forward to improve the tanks by the end of the '50s. The T-62 was born of the of Object 430, a prototype from the T-54 which was heavily modified, mainly turret armour shape and thickness, increasing armour from 185 mm to 240 mm proportional to the turret's shape. It featured an improved version of the T-55A's D-10TS, the D-54TS. This project was designated officially as T-54M but was abandoned after prototype stages. Later, on the late 1950s, Uralvagonzavod built the Object 140, featuring the exact same hull but with a 6 road wheel suspension, same turret and gun. Prototype stages shown the unreliability of said vehicle due to the maintenance and expensive systems. Forced to abandon it, in 1958, Uralvagonzavod opted on modernizing the turret of the Object 140 fitting it with a case ejector and mounting it on a T-55 chassis. Due to the increased weight and proportion of the turret, a suspension redesign was inevitable. This prototype was designated Object 165 which was later set on trials in November 1958. It was accepted and serviced in 1962 under the name of T-62A. Later on the year, Uralvagonzavod opted to recalibre the 100 mm D-45TS gun in order to become a greater threat. It featured an increase in calibre from 100 mm to 115 mm, removal of rifling, increase in length, removal of muzzle brake and adding of a bore evacuator at the middle of the gun and addition of an automatic case ejector. This gun was designated U-5TS.
Media
- Skins
- Images
- Videos
See also
- Vehicles equipped with the same chassis
- Other vehicles of similar configuration and role
External links
| USSR medium tanks | |
|---|---|
| T-28 | T-28 (1938) · T-28 · T-28E |
| T-34-76 | T-34 (Prototype) · T-34 (1940) · T-34 (1941) · T-34 (1st Gv.T.Br.) · T-34 (1942) · T-34E STZ · T-34E |
| T-34-57 | T-34-57 · T-34-57 (1943) |
| T-34-85 | T-34-85 (D-5T) · T-34-85 · T-34-85E |
| T-34-100 | T-34-100 |
| T-44 | T-44 · T-44-100 · T-44-122 |
| T-54 | T-54 (1947) · T-54 (1949) · T-54 (1951) |
| T-55 | TO-55 · T-55A · T-55AM-1 · T-55AMD-1 |
| T-62 | T-62 · T-62M-1 |
| T-64 | Object 435 · T-64A (1971) · T-64B |
| T-72 | T-72A · T-72AV (TURMS-T) · T-72B · T-72B (1989) · T-72B3 · T-72M2 Moderna |
| T-80 | T-80B · T-80U · T-80UD · T-80UK · T-80UM2 · Т-80U-Е1 · T-80BVM · Object 292 |
| T-90 | Т-90А · T-90M |
| Trophies/Lend-Lease | |
| Germany | ▂T-III · ▂T-V |
| Great Britain | ▂МК-IX "Valentine" |
| USA | ▂M3 Medium · ▂M4A2 |


