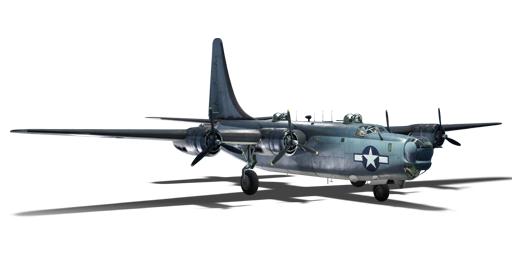
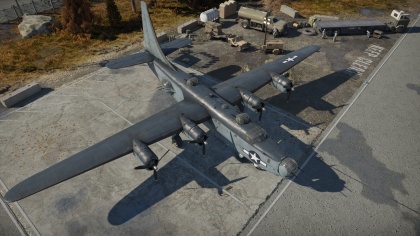
PB4Y-2
Contents
| This page is about the American bomber PB4Y-2. For other versions, see B-24/PB4Y (Family). |
Description
The PB4Y-2 Privateer is a rank American heavy bomber
with a battle rating of (AB), (RB), and (SB). It was introduced in Update 1.69 "Regia Aeronautica".
Historically a maritime patrol/reconnaissance aircraft derived from the B-24 Liberator, the Privateer in War Thunder is unfortunately not able to be used in this role. Instead, it performs the function of a heavy bomber, optimized for dumping large amounts of high explosive on enemy bases.
The Privateer carries the most potent payload (4 x 2,000 lb bombs) of any American bomber until the B-29 Superfortress. These will do more damage to a base than the equivalent weight in 1,000 lb bombs that the B-17 Flying Fortress or B-24 Liberator can carry.
It also features a large amount of .50 cal heavy machine guns as defensive armament. However, even when all of them can be brought to bear, it may not be sufficient to protect the bomber against determined and/or skilled fighter opposition. It is also very important to note that only the tail turret can engage enemies attacking directly behind the Privateer, as the vertical stabilizer blocks the dorsal turrets (gunner dead-zone).
The Privateer's manoeuvrability is unsurprisingly poor since it is a heavy four-engine bomber. Unfortunately, it is also very slow, at nearly 100 km/h slower than the B-17E Flying Fortress. Its maximum speed in a dive is 580 km/h, and it has absolutely no chance of evading any of the fighters it might face using its speed or diving away. As a maritime patrol aircraft, the engines are optimized for low-level performance, thus its performance will suffer noticeably above 6,000 m.
General info
Flight performance
| Characteristics | Max Speed (km/h at 7,620 m) |
Max altitude (metres) |
Turn time (seconds) |
Rate of climb (metres/second) |
Take-off run (metres) | |||
|---|---|---|---|---|---|---|---|---|
| AB | RB | AB | RB | AB | RB | |||
| Stock | 385 | 370 | 39.4 | 41.0 | 1.3 | 1.3 | 950 | |
| Upgraded | ___ | 404 | __._ | 38.0 | __._ | 3.5 | ||
Details
| Features | ||||
|---|---|---|---|---|
| Combat flaps | Take-off flaps | Landing flaps | Air brakes | Arrestor gear |
| X | ✓ | ✓ | X | X |
| Limits | ||||||
|---|---|---|---|---|---|---|
| Wings (km/h) | Gear (km/h) | Flaps (km/h) | Max Static G | |||
| Combat | Take-off | Landing | + | - | ||
| N/A | 390 | 260 | ~3 | ~1 | ||
| Optimal velocities (km/h) | |||
|---|---|---|---|
| Ailerons | Rudder | Elevators | Radiator |
| < 200 | < 180 | < 180 | > 300 |
| Compressor (RB/SB) | ||
|---|---|---|
| Setting 1 | ||
| Optimal altitude | 100% Engine power | WEP Engine power |
| 2,346 m | 1,100 hp | 1,331 hp |
| Setting 2 | ||
| Optimal altitude | 100% Engine power | WEP Engine power |
| 4,389 m | 1,000 hp | 1,133 hp |
Survivability and armour
- 38 mm Bulletproof glass in front of nose gunner
- 12.7 mm Steel plate in front of nose gunner
- 9.5 mm Steel plate underneath nose gunner
- 9.5 mm Steel plates behind pilots
- 9.5 mm Steel plates inside fuselage x 3
- 9.5 mm Steel plates behind and under radial engines
- 12.7 mm Steel plates behind dorsal gunners
- 38 mm Bulletproof glass in front of beam gunners
- 9.5 and 6.35 mm Steel plates in front of beam gunners
- 55 mm Bulletproof glass in front of the tail gunner
- 9.5 mm Steel plate in front of the tail gunner
Armaments
Suspended armament
The PB4Y-2 can be outfitted with the following ordnance:
- 20 x 100 lb AN-M30A1 bombs (2,000 lb total)
- 8 x 500 lb AN-M64A1 bombs (4,000 lb total)
- 4 x 1,000 lb AN-M65A1 bombs (4,000 lb total)
- 8 x 1,000 lb AN-M65A1 bombs (8,000 lb total)
- 4 x 2,000 lb AN-M66A2 bombs (8,000 lb total)
Defensive armament
The PB4Y-2 is defended by:
- 2 x 12.7 mm M2 Browning machine guns, nose turret (600 rpg = 1,200 total)
- 2 x 12.7 mm M2 Browning machine guns, 2 x dorsal turrets (380 rpg = 1,520 total)
- 2 x 12.7 mm M2 Browning machine guns, 2 x beam turrets (400 rpg = 1,600 total)
- 2 x 12.7 mm M2 Browning machine guns, tail turret (400 rpg = 800 total)
Usage in battles
There are two ways to play the Privateer. One of them is as a conventional heavy bomber, attempting to gain as much altitude as possible while utilizing cloud cover to evade enemy fighters. Unfortunately, the Privateer does not have very good high altitude performance, and it will struggle to climb to high altitude. This approach will also expose the aircraft to attacks from below, against which the Privateer has very little protection.
The other approach is to fly at very low altitude. This has two advantages: it makes it extremely difficult for enemies to attack from below, and the engines are optimized for this altitude. It will also tempt enemy fighters to dive on an "easy" target, which will, in turn, make them easy targets for your own fighters. Unfortunately, flying at low altitude will make the aircraft very vulnerable to anti-aircraft guns.
Shallow diving:
Diving is probably the most risky way of trying to bomb but it is the quickest if you do it right. Start by spawning in then dive at about -10 degrees. This will make sure you will not overspeed before reaching the bombing point. However enemy interceptors with air spawn can potentially catch you in a head on, which is an extremely dangerous situation.
Steep diving:
Upon spawning, dive at an angle of about -40 degrees. The PB4Y will gradually pick up speed to around 500 km/h. Once you reach 580 km/h, cut throttle to avoid over speeding. If you are close to the bomb base, turn into shallow diving or level out and prepare for the bombing. Once bombs are out, bank towards your airfield while keep diving, you should fly at no more than 100 m above the ground.
During an encounter with enemy aircraft, if you have time to adjust your position, try putting the enemy plane at your 10 / 2 o'clock. This way you can utilise up to 8 M2 Brownings scattered across your fuselage (2 x dorsal turrets, beam turret & nose turret) against the enemy, at the price of presenting a huge silhouette to it. This is a very dangerous tactic, but sometimes it is worth a try.
In general, when engaged by fighters, one should attempt to force them to attack from oblique angles from above. This will allow the largest amount of machine guns to engage the attacker. Only the rear turret can engage aircraft directly behind the Privateer; thus, one should turn the Privateer or use the rudder to "wag the tail" which will allow other gunner positions to engage tail-chasing fighters. Under no circumstances should the belly be exposed to enemy fire; it usually becomes quickly fatal for the bomber.
Enemies worth noting:
- Do 335: this interceptor posts a huge threat to the PB4Y due to its destructive firepower. An experienced Do 335 player might open fire from a far distance of 2.5 km away, at this range its MK108/MK103 shells still have adequate accuracy and damage to cripple the PB4Y, while the PB4Y's Browning M2 can barely do any damage. The PB4Y's tail is also prone to being blown off by a few HE cannon shells.
Manual Engine Control
| MEC elements | ||||||
|---|---|---|---|---|---|---|
| Mixer | Pitch | Radiator | Supercharger | Turbocharger | ||
| Oil | Water | Type | ||||
| Controllable | Controllable Auto control available |
Not controllable Not auto controlled |
Controllable Not auto controlled |
Combined | Controllable 2 gears |
Not controllable |
Modules
| Tier | Flight performance | Survivability | Weaponry | ||
|---|---|---|---|---|---|
| I | Fuselage repair | Radiator | Protective vest | SBC mk.I | |
| II | Compressor | Airframe | LBC-24 | ||
| III | Wings repair | Engine | Turret 12 mm | FLBC mk.1 | |
| IV | Engine injection | Cover | New 12 mm MGs (turret) | LBC-17 | |
Pros and cons
Pros:
- Best payload of any American bomber before the B-29
- Side turrets can fire down giving 360° coverage in all directions, meaning full coverage of the bomber, with no blindspots whatsoever
- Waist turrets can swivel nearly 180° vertically and horizontally
- Nose and tail turrets have excellent fields of fire
- Large amount of .50 cal machine guns, the same as the B-29
- No fuel tanks in the fuselage and fuel tanks are self-sealing
- All payload options are internal, barely affecting performance
- Has two pilots who are protected by multiple layers of armour behind, meaning it is hard to pilot snipe it from behind
- Tricycle landing gear allows continuous braking until full stop, without having to worry about flipping over
- Critical parts such as gunners/cooling systems are quite spread out, which helps to soak up damage
Cons:
- Extremely slow, even for a heavy bomber
- Near-useless stock payload
- No ventral turrets
- Very poor climb rate
- Easily damaged, a large vertical stabilizer which blocks (gunner dead zone) the dorsal turrets from firing directly to the rear
- Poor engine performance at high altitude (optimized for low altitude)
- Gear retraction and lowering is rather slow
History
The Consolidated PB4Y-2 Privateer is a variant of the Consolidated B-24 Liberator made for the US Navy. The Privateer was powered by four 1,200 HP Pratt & Whitney R-1830 engines. The aircraft also included a twin tail design and tricycle landing gear.
Media
Excellent additions to the article would be video guides, screenshots from the game, and photos.
See also
Links to the articles on the War Thunder Wiki that you think will be useful for the reader, for example:
- reference to the series of the aircraft;
- links to approximate analogues of other nations and research trees.
External links
| Consolidated Aircraft Corporation | |
|---|---|
| Bombers | PBY-5 Catalina · PBY-5A Catalina |
| PB4Y-2 | |
| B-24D-25-CO | |
| Export | ▄Catalina Mk IIIa · ▂PBY-5A Catalina · ▄PBY-5A Late · ␗PB4Y-2 · ▄PB4Y-2 |
| USA bombers | |
|---|---|
| Dive | SB2U-2 · SB2U-3 · SBD-3 · SB2C-1C · SB2C-4 |
| Torpedo | TBD-1 · PBY-5 Catalina · PBY-5A Catalina · TBF-1C · BTD-1 |
| Medium | B-10B · B-18A · B-34 · PV-2D · B-25J-1 · B-25J-20 · A-26C-45 · A-26C-45DT · B-26B |
| Heavy | B-17E · B-17E/L · B-17G-60-VE · PB4Y-2 · B-24D-25-CO · B-29A-BN |
| Hydroplanes | OS2U-1 · OS2U-3 · PBM-1 "Mariner" · PBM-3 "Mariner" · PBM-5A "Mariner" |


