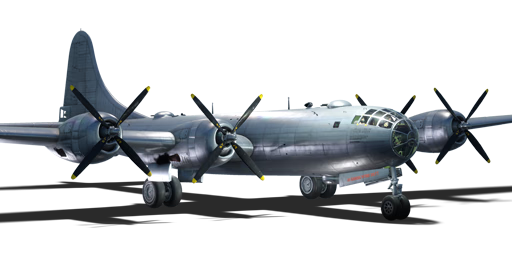
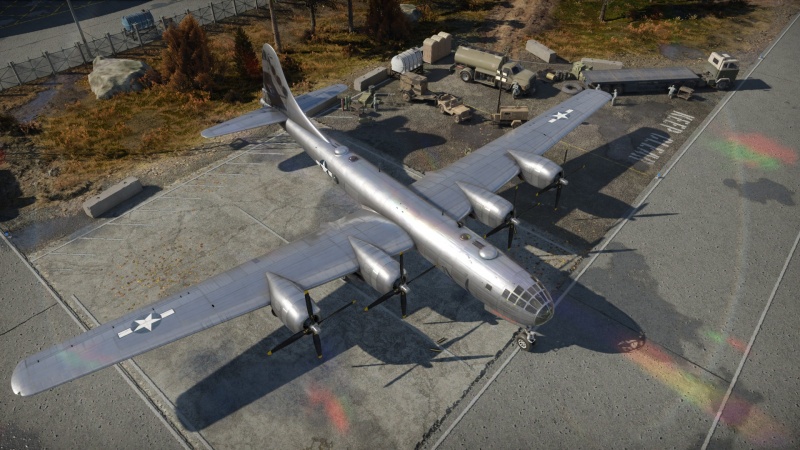
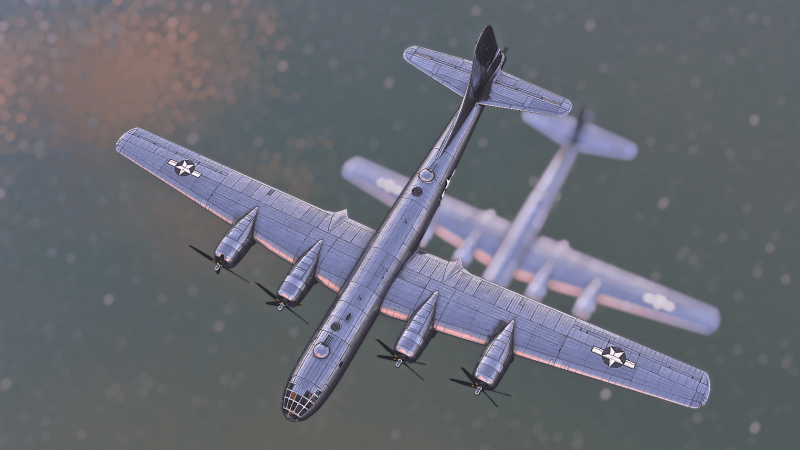
B-29A-BN
| This page is about the American heavy bomber B-29A-BN. For other versions, see B-29/Tu-4 (Family). |
Contents
Description
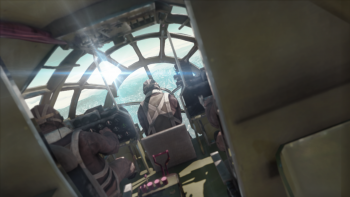
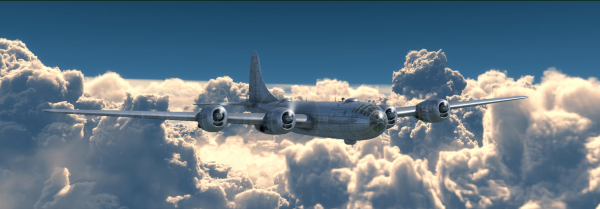
In the few years leading up to World War II, the United States Army Air Corps (USAAC) realized that its current primary heavy bomber, the B-17 would not have the range nor the payload to efficiently transit what would end up becoming the Pacific Theater. To compensate for this, Boeing began to develop a prototype which would incorporate a pressurized cabin to allow for higher altitude flying, which would help to protect the bomber from Japanese fighters which struggled to get to the higher altitudes.
The resulting XB-29 prototype and the later production series B-29 bomber had everything the USAAC was looking for: high-pressured cockpit, a maximum altitude of almost 9,750 m (32,000 ft), true airspeed around 600 km/h (372 mph), and the ability to carry a massive payload of bombs upwards of 9,000 kg (20,000 lbs) in total. Defensive positions on the B-29 were well-placed to ensure maximum coverage surrounding the bomber. This bomber was one of the first aircraft to be fitted with the General Electric Central Fire Control system which could be used to remotely control four of the remotely controlled turrets (two dorsal and two ventral), though in their early stages, this aircraft's turrets each also had a General Electric analogue computer linked to it allowing the weapons to be more accurate by automatically factoring in airspeed, gravity, temperature, and lead time for the inbound aircraft (This does not exist in-game). With this setup, these turrets could be controlled from the nose, tail or any of the three mid-fuselage positions and a single gunner could actually control more than one turret at a time increasing the effectiveness and lethality of the bomber's defences. Bristling with 12 x M2 Browning machine guns, the B-29A-BN was extremely difficult to approach, let alone make a successful pass and leave untouched.
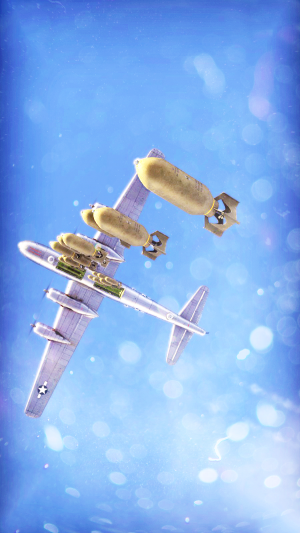
The B-29A-BN Superfortress was introduced in Update 1.47 "Big Guns". Unlike other bombers which can take on a secondary role as a pseudo-attacker, the B-29A-BN is a bomber, period. The sole purpose of the B-29 is to beat ground targets into submission either with upwards of 40 x 500 lb bombs, 18 x 1,000 lb bombs, 8 x 2,000 lb bombs or 4 x 4,000 lb bombs. The larger 1,000, 2,000 and 4000 lb bombs are perfect for base bombing while the relatively smaller 500 lb bombs make the perfect tool for carpet bombing where vehicles, pillboxes or anti-aircraft artillery may be clustered together. The B-29A-BN is an aerial beast which can rain an insane amount of explosive ordnance. While it is rivaled by few, enemy fighters can still cuase some major damage. Thus, altitude is this bomber's friend and when achieved can be a safe haven from which to drop explosives on enemy bases or vehicles. Any opponents that persist in intercepting the B-29 can be easily taken care of by the large complement of defensive .50 cal machine guns, with excellent rate of fire, ammunition capacity, and coverage.
General info
Flight performance
The B-29A-BN, much like its contemporaries the Messerschmitt Me 264, Blohm & Voss BV 238 and Tupolev Tu-4 was built for the sole purpose of flying high and dropping large amounts of bombs. To account for these characteristics, others such as manoeuvrability, climb rate and acceleration were compromised. The B-29 is a heavy aircraft which when adding 10,000 – 20,000 lbs of ordnance will only make the plane that much more difficult to get to altitude, but once there this aircraft does have a decent cruising speed. To help speed up gameplay for this aircraft, it is given an air-start at the beginning of matches and also after landing to reload and repair due to its sheer size and difficulty climbing to its bombing altitude.
The typical method of utilising this bomber is to climb. Depending on the enemy fighters, attackers and interceptors which appear in the match, you may be able to stay lower around 6,000 m (20,000 ft) or you may need to increase closer to 9,150 m (30,000 ft) to make it extremely difficult for the fighters to follow you up, their engines gasping for oxygen in the air-deficient environment.
One downside to flying at the higher altitudes in arcade battles is that if you bomb a base but don't completely destroy it, it is difficult to circle back around and bomb again when the bombs have reloaded. A wide circle is necessary to accomplish this and it may be better and more efficient instead to fly towards another base, bomb it and turn around and finish off the first base. Another option too is to leave the partially bombed bases for the smaller and slower bombers on your team to finish off or just catch the partially bombed bases on a return pass.
| Characteristics | Max Speed (km/h at 9,100 m) |
Max altitude (metres) |
Turn time (seconds) |
Rate of climb (metres/second) |
Take-off run (metres) | |||
|---|---|---|---|---|---|---|---|---|
| AB | RB | AB | RB | AB | RB | |||
| Stock | 615 | 603 | 33.2 | 34.4 | 4.1 | 4.1 | 1,500 | |
| Upgraded | 669 | 641 | 30.7 | 32.0 | 11.7 | 6.5 | ||
Details
| Features | ||||
|---|---|---|---|---|
| Combat flaps | Take-off flaps | Landing flaps | Air brakes | Arrestor gear |
| ✓ | ✓ | ✓ | X | X |
| Limits | ||||||
|---|---|---|---|---|---|---|
| Wings (km/h) | Gear (km/h) | Flaps (km/h) | Max Static G | |||
| Combat | Take-off | Landing | + | - | ||
| 609 | 332 | 322 | 270 | ~4 | ~2 | |
| Optimal velocities (km/h) | |||
|---|---|---|---|
| Ailerons | Rudder | Elevators | Radiator |
| < 340 | < 350 | < 290 | > 400 |
Engine performance
| Engine | |||||
|---|---|---|---|---|---|
| Engine Name | Number present | ||||
| Wright R-3350-57 18-cylinder | 4 | ||||
| Engine characteristics | |||||
| Weight (each) | Type | Cooling | |||
| 1,251 kg | Radial | Air | |||
| Engine power (Stock) | |||||
| Max | Take-off | ||||
| 1,975 hp | 2,276 hp | ||||
| Engine power (Upgraded) | |||||
| Max | Take-off | ||||
| 2,200 hp | 2,502 hp | ||||
Survivability and armour
- 60 mm Bulletproof glass in front of the pilots.
- 6.5 mm Steel plates in front of the pilots.
- 6.5 mm Steel plates behind the pilots.
- 6.5 mm Steel plates in front of tail control tractions.
- 6.5 mm Steel plates boxing around rear dorsal gunner and beam gunners.
- 6.5 mm Steel plate behind the rear ventral gunner.
- 60 mm Bulletproof glass in front of tail gunner.
- 6.5 mm Steel plate in front of tail gunner.
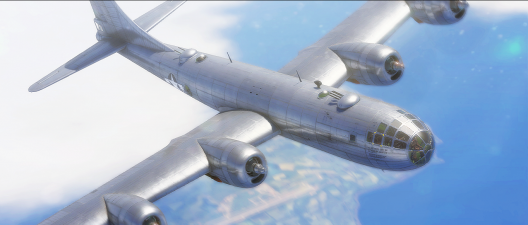
The B-29A-BN's designers had to be judicious when it came to providing protecting armor for the aircrew, as more protection would decrease the range and fuel efficiency of the aircraft. In fact, later models removed many of their defensive turrets in order to allow for more fuel and ordnance to be loaded. It is obvious that an aircraft this size will be a huge target for enemy fighters to attack with the nose section (cockpit) and the tail turret being the two most likely targets (head-on attack and tail approach attack) and thus both areas were outfitted with 60 mm bulletproof glass which helps against lower calibre weapons, however 20 mm and above make short work of the bulletproof glass. 6.5 mm steel plates are scattered around the aircraft to provide protection for both the crew members and some of the control surface linkages. Though not a stop-all invincible shield for the crew, it many instances it provided enough protection to allow crew members to survive and fight another day.
Modifications and economy
Armaments
Suspended armament
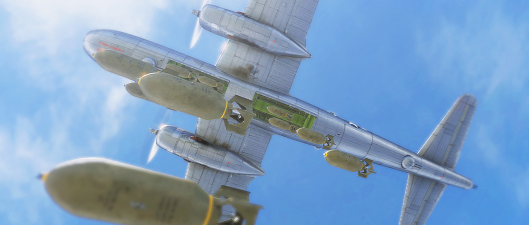
The B-29A-BN can be outfitted with the following ordnance:
- 20 x 500 lb AN-M64A1 bombs (10,000 lb total)
- 18 x 1,000 lb AN-M65A1 bombs (18,000 lb total)
- 40 x 500 lb AN-M64A1 bombs (20,000 lb total)
- 8 x 2,000 lb AN-M66A2 bombs (16,000 lb total)
- 4 x 4,000 lb AN-M56 bombs (16,000 lb total)
* Note: A nuclear payload becomes available for the B-29 in Ground Arcade battles of BR 6.0 and higher. It consists of 1 nuclear bomb and is attainable after reaching 15 kills in the match.
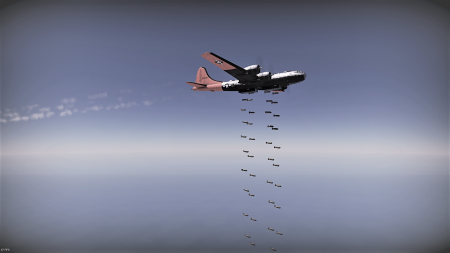
One might say the B-29A-BN is effectively a dump truck which can dump a ton of explosives, no make that upwards of 10 tons of explosives upon enemy targets. Utilising speed at higher altitudes, it is the purpose of the Superfortress to race to an enemy base or ground targets and just rain down TNT. With three choices of bomb weights to choose from and four different configurations, there is no shortage of ways to destroy ground targets. The 1,000 lb and 2,000 lb bombs come in most handy for base bombing as they do the most amount of damage for the least amount of effort in a concentrated area. Area of denial is the speciality of the 500 lb bombs when used in carpet bombing operations. Carpet bombing is effectively laying down many of the 500 lb bombs at one time over an area where vehicles such as trucks, tanks and anti-aircraft vehicles or hardened structures such as pillboxes or anti-aircraft artillery may be located at. Since vehicles are on the move, dropping multiple bombs at a time making it more difficult for them to move out of the way and avoid the inbound ordnance.
With the B-29A-BN, there is no real overkill with the bombs, which can make the Superfortress a prime target to be eliminated early as with upwards of 20,000 lbs in bombs, the B-29A-BN can make short work of enemy bases and end the match earlier than most will expect.
Defensive armament
The B-29A-BN is defended by:
- 4 x 12.7 mm M2 Browning machine guns, front dorsal turret (1,000 rpg = 4,000 total)
- 2 x 12.7 mm M2 Browning machine guns, front ventral turret (1,000 rpg = 2,000 total)
- 2 x 12.7 mm M2 Browning machine guns, rear dorsal turret (1,000 rpg = 2,000 total)
- 2 x 12.7 mm M2 Browning machine guns, rear ventral turret (1,000 rpg = 2,000 total)
- 2 x 12.7 mm M2 Browning machine guns, tail turret (1,000 rpg = 2,000 total)
The B-29A-BN is defended by an impressive 12 x .50 calibre Browning machine guns rivalled only by the Blohm & Voss BV 238, Tupolev Tu-4, Consolidated PB4Y-2 and B-24 and the Boeing B-17. Typically when bombers add more guns, they had to add more crew to operate them which increased the overall weight of the aircraft, though ensuring more protection, it also reduced the amount of fuel or bombs which could be carried.
As a historical note, the advent of early analogue computers which were outfitted on the B-29A-BN and the state-of-the-art General Electric Central Fire Control System allowed for remote operation of both dorsal and both ventral turrets along with the tail gun if needed. The turrets could be linked through the fire control system and allow one gunner to operate multiple guns at one time. Simplifying this process and allowing gunners from just about anywhere on the aircraft to control the turrets reduced the number of crew members needed to operate the aircraft. Though four times the size of a B-25, the B-29A-BN operated efficiently on the same amount of crew members, seven.
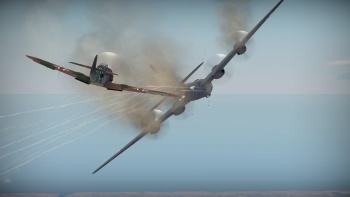
The computer-aided turrets allowed for more accuracy when firing and can train the guns in just about any direction needed to combat incoming fighters. The tail gunner position is especially deadly as a fighter perched on the tail will be flying into the oncoming bullets from the tail gun position, thereby taking more damage when hit and more likely to take on a critical hit or disabling blow. Though not totally invulnerable to the crafty fighter pilot, the B-29 in its own right is a porcupine with sharp quills pointing in all directions which will make it as difficult as possible for anyone to get past the defences.
Usage in battles
The ultimate strategic bomber for the USAF. Loaded up with eight metric tonnes of bombs and twelve good ol' Browning heavy machine guns, this is the Superfortress. A wonderful advertising name, but don't be fooled, it is bigger than a barn and thus impossible to miss. Keep a safe distance from any hot combat zones. Your defensive turrets will not keep you safe, they will shred any foe getting close, but the B-29's enemies do not need to. So concentrate on what this plane is good at; delivering payload, and lots of it.
Once your bombing run is complete, start descending towards your airfield; enemy fighters might be trying to find you so you should be even more alert now than before. The B-29 has one of the most powerful defensive systems installed on any bomber, so you should be able to defend yourself reasonably well unless it is a head-on attack where you will have very limited protection. You must also combine it with a defensive style of flying to utilise it to its full potential; the B-29 offers great handling for its size. Despite this, be very careful when you enter a dive. It is just as prone as any other aircraft to suffering structural damage if its limitations are exceeded.
Great defensive armament will destroy most enemies that do get close. Being able to point at least four fifty-calibre in every direction and about six to the rear position will deal with any fighter quickly. But do not forget the size of the Fortress. Most of the enemies shells will hit some mark.
Of course, bomb load is very good with the B-29, with its historic performance as one of the best American bomber in service. Up to 8 x 2,000 lb could be carried in the bomb bay
- "Hit-and-Run" tactic:
Another way the B-29 can be played is in a "hit and run" tactic. At its BR, the B-29A-BN will face mostly jets, so climbing to a very high altitude sometime wouldn't work because the jets will be able to catch up quickly. The "hit and run" tactic is very risky, but it can be very enjoyable, and if it works then you can end the game in 15 minutes. Since the match will start with the B-29 spawning in at about 4,500 m (15,000 ft), go into a shallow dive and maintain speed about 450 km/h (270 mph). Dive towards an altitude of around 3,000 m (9,800 ft) so that enemy anti-aircraft positions do not fire at the B-29, which may expose it to other enemy fighters. Do not head directly to an enemy base, instead go around 10-20 degrees off course towards the base direction so that the enemy can't easily find the B-29 from tracing a line between the friendly spawn point to their base. If present, use clouds to obscure the B-29's profile in the skies.
From here, the enemy jets' behavior will decide if this tactic will work or not. Typically, the enemy would be divided between the planes attacking ground targets at low altitude, far from a bomber's path to a base, or planes climbing to high altitudes for energy fighting and searching for high-altitude bombers. The intent of the dive to ~2,000 m and the 450 km/h speed is to squeeze in between the ground attackers and interceptors and pass by undetected. If everything goes right, the B-29 should be able to reach its first base unimpeded without any fighters in pursuit, which can allow a B-29 the opportunity to knock out three or four bases before enemy fighters become alerted toward the B-29 precise location. From that point, the B-29 can either attempt to use the rest of its payload against the enemy airfield (unadvised as the low-altitude run exposes the B-29 to the anti-aircraft guns at the airfield) or return back to base triumphantly awaiting a bomb reload.
Due to this tactic hinging only on the success of slipping through the enemies undetected, this tactic should not be relied if there are no clouds for concealment, the match is an uptier against more advanced jets, or if the player is not able to sustain the repair costs of a damaged B-29.
- Close Air Support:
The B-29 can be situationally good as a close air support bomber. It should not be spawned when there are more than one or two enemy planes up, and also when uptiered as radar-guided SPAA will often destroy you before reaching the battlefield. It is best either early in the match, where lots of players are close together and enemy planes have not spawned yet, or later in the match if your team has air superiority. To get the most enemies at once, load the 4,000 lb bombs instead of the smaller bombs as they have a very large blast radius (larger than the FAB-3000). Spawn in and immediatly cut throttle and point the nose down to lose altitude. Bombing from high altitude can work sometimes but won't net enemy targets reliably. Keep diving until at an altitude of 900-1,200 meters, and look for markers from teammates or cap points changing hands to drop a bomb on. If no markers are avalible, fly around the battlefield until one appears or try to spot targets yourself. To make small adjustments, use your yaw keys instead of turning. After doing a bombing run, keep flying for some time to give yourself plenty of room to turn. The B-29 in a CAS role is high risk, high reward, and there are times where the plane will get shot down before getting bombs off, but also times where the B-29 pilot can score multiple targets in one go.
Manual Engine Control
| MEC elements | ||||||
|---|---|---|---|---|---|---|
| Mixer | Pitch | Radiator | Supercharger | Turbocharger | ||
| Oil | Water | Type | ||||
| Controllable | Controllable Auto control available |
Not controllable Not auto controlled |
Controllable Not auto controlled |
Combined | Controllable 1 gear |
Auto controlled |
Pros and cons
Pros:
- Very heavy payload
- Stock bomb load is able to destroy bases with one payload in arcade and up to two bases in realistic/simulator battles
- Can be difficult for fighters to reach same cruising altitude, even for jets
- Effective defensive turrets which virtually have no blind spots
- Fast for its size
- Virtually immune to small arms machine gunfire
- Receives air start after repairing/rearming in an airfield
- All payload options are internal and have next to no effect on flight performance
- Gunners are located separately from the gun turret (remote-controlled turrets) with the exception of the tail turret
- Can easily win a match if allowed to reach optimal bombing altitude
Cons:
- Easily susceptible to damage from autocannons larger than 20 mm especially the 30 mm MK 108
- Unable to reliably defend itself from multiple opponents attacking at once from multiple directions
- Big size, can easily be spotted from long distances, especially with skilled crews
- Has a low dive top-speed
- As with all heavy bombers, it lacks the ability to manoeuvre well
- Takes a while to reach an optimal altitude
- Landing gear takes a long time to deploy and retract
- Wings are considered weak spots
- Will face jets most of the time
- Low flap deployment max speed
History
The B-29 was one of the largest aircraft used during World War II. It was exclusively used in the Pacific Theatre during the war and participated in bombing raids on multiple islands in the Pacific war. The B-29 became the world's first and only nuclear-capable bomber to deliver weapons during wartime when on August 6th, 1945 the B-29 Enola Gay dropped the atomic bomb known as "Little Boy" on Hiroshima, Japan. Three days later, the B-29 Bockscar dropped the second atomic bomb "Fat Man" on Nagasaki, Japan.
During the Second World War, its only area of operations was the Pacific Theater specifically targeting the Japanese mainland. It also saw combat service in the Korean War a small group of loaned aircraft were evaluated by the R.A.F during the early 1950's as well. In British service, they were known as the "Washington B Mk. 1".
During World War 2, the B-29 completed over 20,000 sorties with an estimated 180,000 tons of bombs dropped, as well as two atomic bombs. A total number of 3,970 were built and delivered to the USAAF. Perhaps the most famous "copy" of the war was the Tu-4. Although outwardly looking identical, this Soviet "B-29" was converted to metric making it unique. Other aircraft derived from the B-29 include the B-50, C-97, KC-97, 377 Stratocruiser, and NASA's own Guppy cargo carriers.[1]
The B-29 post-war also helped in the scientific, research, and development fields. They would play a key role in hurricane hunting and storm chasing which allowed it to collect key information about storm patterns, and helped to improve and to develop new radar systems such as the "sun tracker". It was also the aircraft that carried the supersonic test aircraft Bell X-1 into the air. The last American B-29 squadron was retired in the 1960s. Today one called "Fifi" still flies at air show circuits. It was joined by another named "Doc" in 2016.[1]
| Archive of the in-game description | |
|---|---|
|
An all-metal monoplane with a retractable landing gear system including a nosewheel. The crew consisted of 14 persons. Distinctive features of the Superfortress included a pressurized cockpit for the crew and a Central Fire Control system for the defensive armament. The B-29 (Model 345) was developed by the Boeing Aircraft design department in early 1940. The XB-29 prototype model performed its maiden flight on September 21, 1942. Full-scale production of the aircraft was started in June 1943. B-29s had Wright R-3350-23 eighteen-cylinder, radial air-cooled engines producing a maximum power of 2,200 hp, with four-bladed automatic propellers. The defensive armament of the Superfortress included four remotely controlled turrets: two below the fuselage and two above. Each turret housed two 12.7 mm Colt-Browning M2.5 machine guns with 500-1,000 rounds each. Some aircraft had an upper front turret equipped with four machine guns. All weapons were aimed at the target from three sighting stations located in blisters and from the bombardier's station. Three armament options were available for the rear mount, controlled by an independent air gunner: a 20 mm Hispano-Bendix AN-M2 cannon and two 12.7 mm Colt-Browning M2.5 machine guns, three 12.7 mm machine guns, or two 12.7 mm machine guns. A bomb load of up to 9,000 kg was housed in two bomb bays, where cluster racks were mounted. The B-29 was equipped with a large amount of radio equipment for various purposes. Its large bomb capacity, powerful and effective defensive armament, and state-of-the-art equipment would have turned the Superfortress into the best heavy bomber of World War II if not for engine breakdowns that continually plagued the aircraft. For one whole year, up to the middle of 1944, the bomber's performance was hampered by a high accident rate. It was only by the end of the summer of 1944 that efforts to improve the fire-prone engines were relatively successful, but the problem was never entirely eradicated. B-29s were used exclusively in the Pacific theater of the war. Superfortresses were used in combat for the first time on June 5, 1944 during the raid on Bangkok. On June 14, 1944, American bombers attacked the territory of Japan for the first time. Military and industrial facilities in Sasebo, Nagasaki, Omura and Yawata were regularly attacked. In August 1944, B-29s began to bomb oil refineries on the island of Sumatra. The B-29s were flown out of China until December 1944, when they were relocated to India. Their targets were docks in Singapore, ports in Indochina, and rail junctions in Burma. B-29s also mined rivers in China and the coastal waters of Vietnam and Malaya from the air. In October 1944, B-29s began carrying out massive attacks on Japan from the Mariana Islands. During the war, these aircraft dropped 54,917 tons of high-explosive bombs and 109,068 tons of incendiary bombs on Japan and delivered 12,000 naval mines. The B-29 became the world's first nuclear weapon carrier when it dropped nuclear bombs on Hiroshima and Nagasaki. From 1950-53, B-29 bombers took part in the Korean War. From 1950-55, the aircraft was operated by the RAF Bomber Command under the designation "Washington B.1". A total of 3,947 B-29s were manufactured, including all variants. The plane was withdrawn from service as a bomber with the USA in late 1954. | |
Media
- Skins
- Images
- Videos
See also
- Aircraft of comparable role, configuration and era
- Heinkel He 177 A-5
- Tupolev Tu-4
- Nakajima G8N1
External links
- [Profile] B-29 Superfortress
- [Wikipedia] B-29 Superfortress
- [Boeing.com] B-29 Superfortress History Page
- [Militaryfactory.com] Boeing B-29 Superfortress - Strategic High-Altitude Long-Range Heavy Bomber Aircraft
References
- ↑ 1.0 1.1 Excerpts from Profile B-29 Superfortress, no Author mentioned.
| Boeing Aircraft | |
|---|---|
| Aircraft | |
| Fighters | P-26A-33 · P-26A-34 M2 · P-26B-35 |
| Bombers | B-17E · B-17E/L · B-17G-60-VE |
| B-29A-BN | |
| Export | P-26A-34 · B-17G |
| Captured | ▅B-17E |
| Helicopters | |
| Attack | AH-64A · AH-64D |
| Export / Licensed | AH-64A (GR) · ▃AH-64A Peten · AH-64A Peten · ▅AH-64DJP · ▄AH Mk.1 · AHS |
| See Also | Tupolev Design Bureau · Westland Helicopters · Fuji Heavy Industries |
| For Boeing-built ships, see Boeing Marine Branch | |
| USA bombers | |
|---|---|
| Dive | SB2U-2 · SB2U-3 · SBD-3 · SB2C-1C · SB2C-4 |
| Torpedo | TBD-1 · PBY-5 Catalina · PBY-5A Catalina · TBF-1C · BTD-1 |
| Medium | B-10B · B-18A · B-34 · PV-2D · B-25J-1 · B-25J-20 · A-26C-45 · A-26C-45DT · B-26B |
| Heavy | B-17E · B-17E/L · B-17G-60-VE · PB4Y-2 · B-24D-25-CO · B-29A-BN |
| Hydroplanes | OS2U-1 · OS2U-3 · PBM-1 "Mariner" · PBM-3 "Mariner" · PBM-5A "Mariner" |


