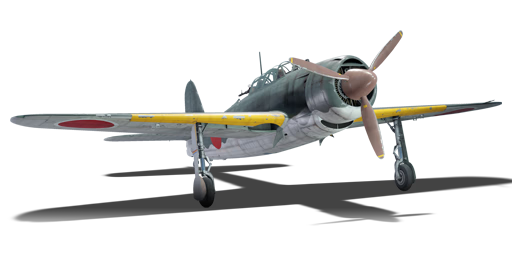
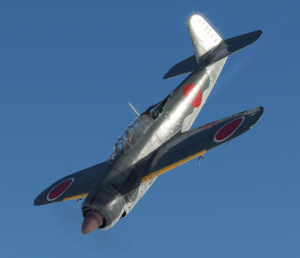
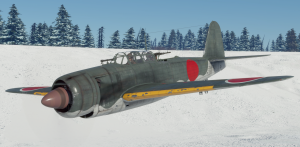
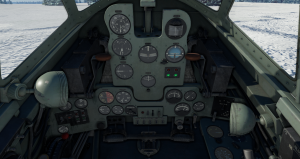
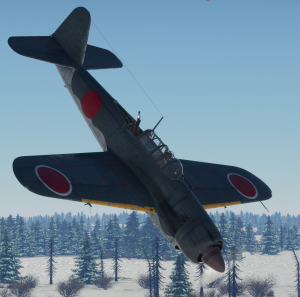
D4Y3 Ko
Contents
| This page is about the Japanese dive bomber D4Y3 Ko. For other uses, see D4Y (Family). |
Description
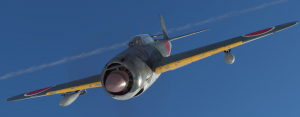
The D4Y3 Ko is a rank Japanese dive bomber
with a battle rating of (AB), (RB), and (SB). It was introduced in Update 1.71 "New E.R.A".
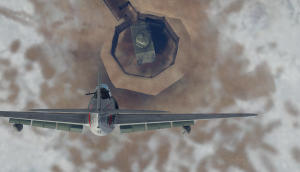
The D4Y3 is still a capable fighter despite these disadvantages, due to its high speed and turn time. It will find Spitfires excellent targets, as you can out turn spitfires and your guns will sooner or later knock out the pilot or rip off a wing, and sometimes damage the tail control. The D4Y3 is also strong in the ground attack role. Its three 250 kg (500 lb) bombs will have no trouble destroying light pillboxes, medium tanks, and bases. The machine guns can also destroy anti-aircraft artillery and light trucks.
General info
Flight Performance
The D4Y3 has superior performance to the first two D4Y aircraft, as it has a radial engine, which won't overheat in combat conditions. The radial engine also has a less pronounced radiator, resulting in less drag. The D4Y3 is a capable turner but bleeds energy easily. It is recommended to do hard turns in combat situations.
| Characteristics | Max Speed (km/h at 6,050 m) |
Max altitude (meters) |
Turn time (seconds) |
Rate of climb (meters/second) |
Take-off run (meters) | |||
|---|---|---|---|---|---|---|---|---|
| AB | RB | AB | RB | AB | RB | |||
| Stock | 541 | 529 | 22.8 | 23.4 | 5.7 | 5.7 | 350 | |
| Upgraded | 610 | 574 | 21.6 | 22.0 | 16.5 | 10.4 | ||
Details
| Features | ||||
|---|---|---|---|---|
| Combat flaps | Take-off flaps | Landing flaps | Air brakes | Arrestor gear |
| ✓ | ✓ | ✓ | ✓ | ✓ |
| Limits | ||||
|---|---|---|---|---|
| Wing-break speed (km/h) |
Gear limit (km/h) |
Combat flaps (km/h) |
Max Static G | |
| + | - | |||
| 480 | ~15 | ~11 | ||
| Optimal velocities | |||
|---|---|---|---|
| Ailerons (km/h) |
Rudder (km/h) |
Elevators (km/h) |
Radiator (km/h) |
| < 350 | < 400 | < 430 | > 335 |
| Compressor (RB/SB) | ||
|---|---|---|
| Setting 1 | ||
| Optimal altitude | 100% Engine power | WEP Engine power |
| 1,000 m | 1,280 hp | 1,684 hp |
| Setting 2 | ||
| Optimal altitude | 100% Engine power | WEP Engine power |
| 5,000 m | 1,185 hp | 1,559 hp |
Survivability and armour
The D4Y3 ditches self-sealing fuel tanks and armour for speed and agility. As such, the D4Y3 should be treated like any other Japanese aircraft, with the utmost caution.
Armaments
Offensive armament
The D4Y3 Ko is armed with:
- 2 x 7.7 mm Type 97 navy machine guns, nose-mounted (400 rpg = 800 total)
Suspended armament
The D4Y3 Ko can be outfitted with the following ordnance:
- Without load
- 1 x 250 kg Navy Type Number 25 Model 2 bomb + 2 x 60 kg Navy Type 97 Number 6 bombs (370 kg total)
- 3 x 250 kg Navy Type Number 25 Model 2 bombs (750 kg total)
- 1 x 500 kg Number Type 2 50 Model 1 GP(SAP) bomb (500 kg total)
- 1 x 500 kg Number Type 2 50 Model 1 GP(SAP) bomb + 2 x 60 kg Navy Type 97 Number 6 bombs (620 kg total)
Defensive armament
The D4Y3 Ko is defended by:
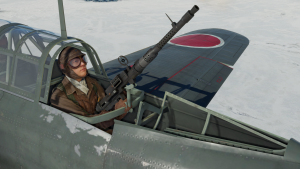
- 1 x 13 mm Type 2 navy machine gun, dorsal turret (250 rpg)
Usage in battles
The D4Y3 is an excellent example of a multirole aircraft, as it is an excellent ground attack aircraft, fighter, and bomber. Since you get a bomber air spawn, you can drop your bomb on a base and then start to engage the many fighters below you. You should have no problems engaging them, as long as you keep your speed up and your energy high. One key thing to note is that you don't need to use your defensive turret to shoo away enemy interceptors. You can easily out-turn any interceptor at that battle rating. Besides the fighter role, the ground attack is the D4Y3's natural method of play. The 500 kg bomb will be excellent for destroying Pillboxes, and you can use your rifle-calibre machine guns to destroy any soft target you please.
Manual Engine Control
| MEC elements | ||||||
|---|---|---|---|---|---|---|
| Mixer | Pitch | Radiator | Supercharger | Turbocharger | ||
| Oil | Water | Type | ||||
| Controllable | Controllable Not auto controlled |
Controllable Not auto controlled |
Controllable Not auto controlled |
Separate | Controllable 2 gears |
Not controllable |
The radiator can be kept at 0% in climbs, the D4Y3 will manage to keep cool. Open the oil radiator and radiator to 10% when levelling off, to avoid overheat after prolonged periods of time. Propeller pitch should be kept at 90-100%, and stage two of the supercharger should only be activated at 3,000 meters (10,000 feet).
Modules
| Tier | Flight performance | Survivability | Weaponry | ||
|---|---|---|---|---|---|
| I | Fuselage repair | Radiator | Offensive 7 mm | 9 in (mod35) | |
| II | Compressor | Airframe | New 7 mm MGs | ||
| III | Wings repair | Engine | Turret 13 mm | 13 in (mod35) | |
| IV | Engine injection | Cover | New 13 mm MGs (turret) | ||
The bomb load-outs should be a priority for this aircraft, and the frontal machine guns should also be a module of importance. The compressor, Engine, and Injection will prove useful. After researching the engine mods, rush the Suitability modules. Only then should you tackle the turrets. The Wings Repair and Fuselage repair should come last.
Pros and cons
Pros:
- Fast, can outrun early Corsairs, Wildcats, and Spitfires
- Agile, can turn extremely well
- Excellent defensive armament
- Great bomb load-outs, can equip three 250 kg bombs, for a total weight of 750 kg
- Bomber air spawn
- Improved radial engine which won't overheat, and is an improvement from the D4Y1 and D4Y2
- Small radiator drag
- Has extremely effective Airbrakes
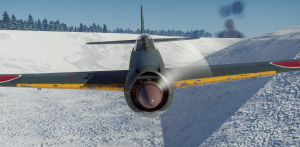
- Armament is nose-mounted
- Its speed forces the enemy to tail behind your gunner, giving you a chance to shoot at the approaching fighter with your turret
Cons:
- Bleeds energy quickly in turns
- Has decreased ammo counted compared with the D4Y1
- Poor guns for its battle rating, Type 97s don't fare well at battle rating 3.0
- No rocket payload, unlike the D4Y2
- Inability to carry torpedoes
- Limited ammo count for both 7.7 mm and 13.2 mm armaments
- Fragile, little armour, and no self-sealing fuel tanks
History
Nicknamed the "Judy" by allied pilots, the D4Y3 was feared by both troops on the ground and ships in the sea.
The D4Y3 was converted to be a land based Dive Bomber, while its predecessor the D4Y2 was a carrier based dive bomber. The removal of the tail hook and the addition of the Mitsubishi Kinsei 62 radial engine added 150 horse power while reducing weight. The D4Y3 would see 3 variants, D4Y3 model 33, D4Y3 model 33A, and D4Y3 model 33 night-fighter.
Differences between the Model 33 and the Model 33a was the A variant had the Type 1, 7.92mm rear firing machine gun replaced with an upgraded Type 2, 13mm rear firing machine gun. With the night-fighter variant being equipped with an upwards firing 20mm cannon. Only 3 night-fighters were built as the D4Y2 night fighters were being used with success with fighters already available and assembly lines already making them.
With a range of 1,400 miles the D4Y3 was perfect for the defense of the Japanese territories. Combined with its extreme accuracy in a dive it saw great success especially in the battles at the end of the war. Notably, crippling the USS Kalinin Bay and the USS Suwannee both escort carriers. Eventually they would convert the D4Y3 into a D4Y4, which was exactly the same as the D4Y3 except it carried an un-removable 800kg bomb for kamikaze attacks. Some D4Y4's were equipped with rockets to increase the speed at which the aircrafts would strike their targets increasing the damage they caused.
No D4Y3's survived the war, but a D4Y1 was reconstructed with a Pratt and Whitney R-1830 radial engine to represent a D4Y3. This plane can be seen at the Planes of Fame Air Museum in Chino, California.
Media
See also
- D4Y1, the first series of the D4Y
- D4Y2, a D4Y1 with the ability to carry rockets
- D4Y family
Aircraft of comparable role and era
External links
| Yokosuka Naval Air Technical Arsenal (海軍航空技術廠) | |
|---|---|
| Bombers | D4Y1 · D4Y2 · D4Y3 Ko |
| P1Y1 mod. 11 | |
| Jet fighters | R2Y2 Kai V1 · R2Y2 Kai V2 · R2Y2 Kai V3 |
| Captured | ␗P1Y1 mod. 11 |
| While the arsenal was simply known as the Naval Air Technical Arsenal and usually referred to as Kūgi-shō (Kaigun Kōkū Gijutsu-shō). | |
| The name Yokosuka prevailed however, even though it referred to the Arsenal's location. | |
| See also | Yokosuka Naval Arsenal (Shipyard) |
| Japan bombers | |
|---|---|
| Navy | |
| Carrier-based attack bomber | |
| B5N | B5N2 |
| B6N | B6N1 · B6N2 · B6N2a |
| B7A | B7A2 · B7A2 (Homare 23) |
| Carrier-based dive bomber | |
| D3A | D3A1 |
| D4Y | D4Y1 · D4Y2 · D4Y3 Ko |
| Shipboard Observation seaplane | |
| F1M | F1M2 |
| Land-based Attack bomber | |
| G4M | G4M1 |
| G5N | G5N1 |
| G8N | G8N1 |
| Flying boat | |
| H6K | H6K4 |
| H8K | H8K2 · H8K3 |
| Land-based Bomber | |
| P1Y | P1Y1 |
| Army | |
| Light | Ki-32 |
| Ki-48-II otsu | |
| Heavy | Ki-21-Ia · Ki-21-I hei |
| Ki-49-I · Ki-49-IIa · Ki-49-IIb · Ki-49-IIb/L | |
| Ki-67-I Ko · Ki-67-I otsu | |
| Other countries | ▅B-17E |


