Difference between revisions of "Gladiator Mk II"
(Added In-game description.) |
(Updated as of 1.87.2.19) |
||
| Line 1: | Line 1: | ||
{{Specs-Card|code=gladiator_mk2}} | {{Specs-Card|code=gladiator_mk2}} | ||
{{About | {{About | ||
| − | | about = British fighter '''{{ | + | | about = British fighter '''{{PAGENAME}}''' |
| usage = other uses | | usage = other uses | ||
| link = Gladiator (Family) | | link = Gladiator (Family) | ||
}} | }} | ||
| − | |||
== Description == | == Description == | ||
| − | <!--''In the description, the first part | + | <!-- ''In the description, the first part should be about the history of and the creation and combat usage of the aircraft, as well as its key features. In the second part, tell the reader about the aircraft in the game. Insert a screenshot of the vehicle, so that if the novice player does not remember the vehicle by name, he will immediately understand what kind of vehicle the article is talking about.'' --> |
| − | |||
[[File:GarageImage_{{PAGENAME}}.jpg|420px|thumb|left]] | [[File:GarageImage_{{PAGENAME}}.jpg|420px|thumb|left]] | ||
{{break}} | {{break}} | ||
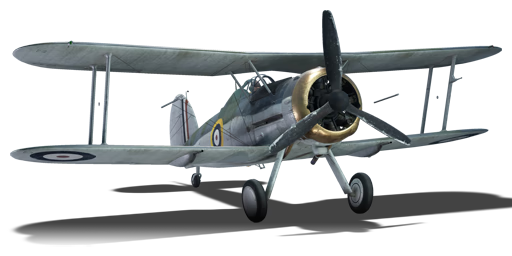
| − | The '''{{Specs|name}}''' is a rank {{Specs|rank}} British fighter {{Battle-rating}}. | + | The '''{{Specs|name}}''' is a rank {{Specs|rank}} British fighter {{Battle-rating}}. It has been in the game since the start of the Open Beta Test prior to Update 1.27. |
| − | The Gladiator Mk | + | The Gladiator Mk II is one of the first British tech tree fighters that can be researched (the other two being the [[Hurricane Mk I/L]] and the [[Sea Gladiator Mk I]]), and once researched leads into the famous [[Spitfire (Family)|Spitfire]] fighter line. |
| − | At | + | At rank I {{Battle-rating}}, this plane will typically be one of the first fighters a new player will research. However, the Gladiator, like its sea-based cousin, may be difficult to seek success in, especially in Realistic Battles mode. Within Realistic Battles, when up-tiering comes into play, it will have to deal with not only biplane adversaries such as the [[CR.42]], [[F3F-2|F3F]] and the very manoeuvrable [[Ki-10-I|Ki-10]], but also more advanced fighters such as the [[P-40E-1|P-40E]], [[Bf 109 E-1|Bf 109s]], [[I-16 type 10|I-16s]], and [[Ki-43-I|Ki-43s]]. All these plane types have several varying advantages against the Gladiator, which can make early grinding a bit unbearable for some players. |
| − | There are a couple of issues with the Gladiator, all of which can make it an easy target at times: | + | There are a couple of issues with the Gladiator, all of which can make it an easy target at times: |
| − | * Its power plant configuration, which includes | + | * Its power plant configuration, which includes a three-blade fixed-pitch propeller, can make the Gladiator a slug in acceleration and climb. In-flight testing the Gladiator can usually only sustain at most around 3,000 ft/min (roughly 15 m/s) in a climb at around 180 - 200 km/h (111 - 124 mph) indicated airspeed, and its top speed isn't great either (at sea level it can only manage around 335 km/h, and testing has yielded 396 km/h at 4,000 m altitude). |
| − | * The Gladiator manoeuvres well. However, it bleeds a lot of speed in sharp turns, and while its turn radius is good enough to shake off reserve planes, the loss of speed can make the plane a slower and henceforth a more vulnerable target to any other enemy planes in the area. Using flaps does help a bit with decreasing the amount of speed lost in a turn, but it is not beneficial enough to allow for minimal loss of speed. Like most early British fighters, it does not fare well in high-speed dives. | + | * The Gladiator manoeuvres well. However, it bleeds a lot of speed in sharp turns, and while its turn radius is good enough to shake off reserve planes, the loss of speed can make the plane a slower and henceforth a more vulnerable target to any other enemy planes in the area. Using flaps does help a bit with decreasing the amount of speed lost in a turn, but it is not beneficial enough to allow for minimal loss of speed. Like most early British fighters, it does not fare well in high-speed dives. |
The Gladiator has four 7.7 mm (.303) Browning machine guns with a total of 2,000 rounds on hand. As with most other 7.7 mm guns the default rounds for the Browning's can be a bit weak in stopping power, but when equipped with tracer belts the four guns on this plane can be a deadly force to be reckoned with, as they can trigger fires and do a considerable amount of damage as a result. | The Gladiator has four 7.7 mm (.303) Browning machine guns with a total of 2,000 rounds on hand. As with most other 7.7 mm guns the default rounds for the Browning's can be a bit weak in stopping power, but when equipped with tracer belts the four guns on this plane can be a deadly force to be reckoned with, as they can trigger fires and do a considerable amount of damage as a result. | ||
== General info == | == General info == | ||
| − | === Flight | + | === Flight performance === |
| − | + | ''Describe how the aircraft behaves in the air. Speed, manoeuvrability, acceleration and allowable loads - these are the most important characteristics of the vehicle.'' | |
| + | |||
{| class="wikitable" style="text-align:center" | {| class="wikitable" style="text-align:center" | ||
|- | |- | ||
| Line 37: | Line 36: | ||
! colspan="2" | Turn time<br>(seconds) | ! colspan="2" | Turn time<br>(seconds) | ||
! colspan="2" | Rate of climb<br>(meters/second) | ! colspan="2" | Rate of climb<br>(meters/second) | ||
| − | ! rowspan="2" |Take-off run<br>(meters) | + | ! rowspan="2" | Take-off run<br>(meters) |
|- | |- | ||
! AB | ! AB | ||
| Line 46: | Line 45: | ||
! RB | ! RB | ||
|- | |- | ||
| − | | | + | | 399 || 386 || {{Specs|ceiling}} || 16.7 || 17.7 || 13 || 13 || 232 |
|- | |- | ||
! colspan="8" | ''Upgraded'' | ! colspan="8" | ''Upgraded'' | ||
|- | |- | ||
! colspan="2" | Max Speed<br>(km/h at 4,420 m) | ! colspan="2" | Max Speed<br>(km/h at 4,420 m) | ||
| − | ! rowspan="2" |Max altitude (meters) | + | ! rowspan="2" | Max altitude<br>(meters) |
| − | ! colspan="2" | Turn time (seconds) | + | ! colspan="2" | Turn time<br>(seconds) |
! colspan="2" | Rate of climb<br>(meters/second) | ! colspan="2" | Rate of climb<br>(meters/second) | ||
| − | ! rowspan="2" |Take-off run (meters) | + | ! rowspan="2" | Take-off run<br>(meters) |
|- | |- | ||
! AB | ! AB | ||
| Line 63: | Line 62: | ||
! RB | ! RB | ||
|- | |- | ||
| − | | | + | | 431 || 414 || {{Specs|ceiling}} || 15.3 || 16.0 || 18.8 || 15.7 || 232 |
|- | |- | ||
|} | |} | ||
| − | ====Details==== | + | ==== Details ==== |
{| class="wikitable" style="text-align:center" | {| class="wikitable" style="text-align:center" | ||
|- | |- | ||
! colspan="5" | Features | ! colspan="5" | Features | ||
|- | |- | ||
| − | ! Combat | + | ! Combat flaps |
| − | ! Take-off | + | ! Take-off flaps |
| − | ! Landing | + | ! Landing flaps |
! Air brakes | ! Air brakes | ||
! Arrestor gear | ! Arrestor gear | ||
|- | |- | ||
| − | | X || ✓ || | + | | X || ✓ || ✓ || X || X <!-- ✓ --> |
|- | |- | ||
|} | |} | ||
| Line 88: | Line 87: | ||
! rowspan="2" | Wing-break speed<br>(km/h) | ! rowspan="2" | Wing-break speed<br>(km/h) | ||
! rowspan="2" | Gear limit<br>(km/h) | ! rowspan="2" | Gear limit<br>(km/h) | ||
| − | ! rowspan="2" | Combat | + | ! rowspan="2" | Combat flaps<br>(km/h) |
! colspan="2" | Max Static G | ! colspan="2" | Max Static G | ||
|- | |- | ||
| Line 94: | Line 93: | ||
! - | ! - | ||
|- | |- | ||
| − | | | + | | {{Specs|destruction|constructions}} || {{Specs|destruction|chassis}} || 520 || ~11 || ~5 |
|- | |- | ||
|} | |} | ||
| Line 107: | Line 106: | ||
! Radiator<br>(km/h) | ! Radiator<br>(km/h) | ||
|- | |- | ||
| − | | < | + | | < 240 || < 180 || < 330 || > 190 |
|- | |- | ||
|} | |} | ||
| Line 116: | Line 115: | ||
|- | |- | ||
! colspan="3" | Setting 1 | ! colspan="3" | Setting 1 | ||
| − | |||
| − | |||
| − | |||
| − | |||
| − | |||
| − | |||
| − | |||
| − | |||
|- | |- | ||
! Optimal altitude | ! Optimal altitude | ||
| Line 129: | Line 120: | ||
! WEP Engine power | ! WEP Engine power | ||
|- | |- | ||
| − | | | + | | 4,100 m || 810 hp || 850 hp |
| − | |||
| − | |||
| − | |||
| − | |||
| − | |||
| − | |||
|- | |- | ||
| − | |||
| − | |||
|} | |} | ||
=== Survivability and armour === | === Survivability and armour === | ||
| − | + | ''Examine the survivability of the aircraft. Note how vulnerable the structure is and how secure the pilot is, whether the fuel tanks are armoured, etc. Describe the armour, if there is any, and also mention the vulnerability of other critical aircraft systems.'' | |
| − | |||
| − | |||
| − | |||
| − | |||
== Armaments == | == Armaments == | ||
=== Offensive armament === | === Offensive armament === | ||
| − | <!--''Describe the offensive armament of the aircraft, if any. Describe how effective the cannons and machine guns are in a battle, and also what belts or drums are better to use. If there is no offensive weaponry, delete this subsection.''--> | + | <!-- ''Describe the offensive armament of the aircraft, if any. Describe how effective the cannons and machine guns are in a battle, and also what belts or drums are better to use. If there is no offensive weaponry, delete this subsection.'' --> |
{{main|Browning .303 (7.7 mm)}} | {{main|Browning .303 (7.7 mm)}} | ||
The '''''{{PAGENAME}}''''' is armed with: | The '''''{{PAGENAME}}''''' is armed with: | ||
| + | * 2 x 7.7 mm Browning .303 machine guns, nose-mounted (600 rpg = 1,200 total) | ||
| + | * 2 x 7.7 mm Browning .303 machine guns, wing-mounted (400 rpg = 800 total) | ||
| − | + | == Usage in battles == | |
| − | + | ''Describe the tactics of playing in an aircraft, the features of using vehicles in a team and advice on tactics. Refrain from creating a "guide" - do not impose a single point of view, but instead, give the reader food for thought. Examine the most dangerous enemies and give recommendations on fighting them. If necessary, note the specifics of the game in different modes (AB, RB, SB).'' | |
| − | |||
| − | |||
| − | |||
| − | |||
| − | |||
| − | |||
| − | |||
| − | |||
| − | == Usage in | ||
| − | |||
| − | ===Manual Engine Control=== | + | === Manual Engine Control === |
{| class="wikitable" style="text-align:center" | {| class="wikitable" style="text-align:center" | ||
|- | |- | ||
! colspan="7" | MEC elements | ! colspan="7" | MEC elements | ||
|- | |- | ||
| − | ! rowspan="2" |Mixer | + | ! rowspan="2" | Mixer |
| − | ! rowspan="2" |Pitch | + | ! rowspan="2" | Pitch |
| − | ! colspan="3" |Radiator | + | ! colspan="3" | Radiator |
| − | ! rowspan="2" |Supercharger | + | ! rowspan="2" | Supercharger |
| − | ! rowspan="2" |Turbocharger | + | ! rowspan="2" | Turbocharger |
|- | |- | ||
! Oil | ! Oil | ||
! Water | ! Water | ||
| − | ! Type | + | ! Type |
|- | |- | ||
| − | | Controllable || rowspan="2" | Not controllable || rowspan="2" | Not controllable || rowspan="2" | Not controllable || rowspan="2" | Separate || rowspan="2" | Not | + | | Controllable || rowspan="2" | Not controllable<br>Not auto controlled || rowspan="2" | Not controllable<br>Not auto controlled || rowspan="2" | Not controllable<br>Not auto controlled || rowspan="2" | Separate || rowspan="2" | Not controllable<br>1 gear || rowspan="2" | Not controllable |
|- | |- | ||
|} | |} | ||
| − | ===Modules=== | + | === Modules === |
{| class="wikitable" | {| class="wikitable" | ||
| − | !colspan = "1"| Tier | + | ! colspan="1" | Tier |
| − | !colspan = "2"| Flight performance | + | ! colspan="2" | Flight performance |
| − | !colspan = "1"| Survivability | + | ! colspan="1" | Survivability |
| − | !colspan = "1"| Weaponry | + | ! colspan="1" | Weaponry |
|- | |- | ||
| I | | I | ||
| − | | Fuselage | + | | Fuselage repair |
| Radiator | | Radiator | ||
| − | | | + | | |
| Offensive 7 mm | | Offensive 7 mm | ||
|- | |- | ||
| II | | II | ||
| − | | | + | | |
| Compressor | | Compressor | ||
| Airframe | | Airframe | ||
| Line 207: | Line 178: | ||
|- | |- | ||
| III | | III | ||
| − | | Wings | + | | Wings repair |
| Engine | | Engine | ||
| − | | | + | | |
| − | | | + | | |
|- | |- | ||
| IV | | IV | ||
| − | | | + | | |
| − | | | + | | Engine injection |
| Cover | | Cover | ||
| − | | | + | | |
|- | |- | ||
|} | |} | ||
=== Pros and cons === | === Pros and cons === | ||
| − | <!--'' | + | <!-- ''Summarise and briefly evaluate the vehicle in terms of its characteristics and combat effectiveness. Mark its pros and cons in the bulleted list. Try not to use more than 6 points for each of the characteristics. Avoid using categorical definitions such as "bad", "good" and the like - use substitutions with softer forms such as "inadequate" and "effective".'' --> |
'''Pros:''' | '''Pros:''' | ||
| − | * Armament is equal to or better than other fighters in its battle rating | + | * Armament is equal to or better than other fighters in its battle rating range |
* Good manoeuvrability in a turn | * Good manoeuvrability in a turn | ||
* Tracer belts, like all other planes fitted with Browning machine guns, can be deadly | * Tracer belts, like all other planes fitted with Browning machine guns, can be deadly | ||
| Line 230: | Line 201: | ||
'''Cons:''' | '''Cons:''' | ||
| − | * Sluggish in acceleration and top speed (fixed-pitch propeller | + | * Sluggish in acceleration and top speed (fixed-pitch propeller can exacerbate this problem) |
* Performance deficiencies can make it an easy target for experienced or more difficult adversaries | * Performance deficiencies can make it an easy target for experienced or more difficult adversaries | ||
* Not the best climber | * Not the best climber | ||
| Line 236: | Line 207: | ||
== History == | == History == | ||
| − | <!--''Describe the history of the creation and combat usage of the aircraft in more detail than in the introduction. If the historical reference turns out to be too | + | <!-- ''Describe the history of the creation and combat usage of the aircraft in more detail than in the introduction. If the historical reference turns out to be too long, take it to a separate article, taking a link to the article about the vehicle and adding a block "/ History" (example: <nowiki>https://wiki.warthunder.com/(Vehicle-name)/History</nowiki>) and add a link to it here using the <code>main</code> template. Be sure to reference text and sources by using <code><nowiki><ref></ref></nowiki></code>, as well as adding them at the end of the article with <code><nowiki><references /></nowiki></code>. This section may also include the vehicle's dev blog entry (if applicable) and the in-game encyclopedia description (under <code><nowiki>=== In-game description ===</nowiki></code>, also if applicable).'' --> |
| − | One of the greatest claims to fame of the Gloster Gladiator was the Siege of Malta, which was, at the time, controlled by Great Britain. Because of the high value of Malta (it is only about 400 miles south of Italy, and on the map, it is an island in the middle of the Mediterranean), the IAF (Italian Air Force) | + | One of the greatest claims to fame of the Gloster Gladiator was the Siege of Malta, which was, at the time, controlled by Great Britain. Because of the high value of Malta (it is only about 400 miles south of Italy, and on the map, it is an island in the middle of the Mediterranean), the IAF (Italian Air Force) using mainly SM.79 Sparviero bombers began bombing Malta into submission starting June 11, 1940. Due to the remote location of Malta and the fact that the British forces had to cover the Suez Canal, there were very few fighters available to defend against the IAF - so few that, as legend has it, there were only 3 Gloster Gladiators available: Faith, Hope, and Charity. In reality, there were at least 6 Gladiators, and after the first few weeks of the Siege, 4 [[Hurricane Mk I/L|Hurricanes]] en route to North Africa were pressed into service. Amazingly, against 40 - 50 bombers in the initial raids, the resistance was fierce enough to force the Italians to send a fighter escort of [[C.200 serie 3|MC.200 Saetta]] fighters. By the end of 1940, Malta was nowhere near defeated, and quite, on the contrary, the RAF claimed an impressive 45 kills. However, the antiquated Gladiators were retired, being replaced by more effective Hurricane IIAs and [[Spitfire (Family)|Spitfires]]. |
=== In-game description === | === In-game description === | ||
| − | + | The Gloster Gladiator was a single engine, single seat fighter which entered service in 1937 as the Royal Air Force’s last biplane fighter. Often overshadowed by more modern monoplanes, it still remained arguably the greatest biplane fighter of all time. | |
Biplane design was already considered outdated by the time production of the Gladiator started, but it was feared that Britain might not have time to develop more modern monoplanes in sufficient quantities before full scale war began. | Biplane design was already considered outdated by the time production of the Gladiator started, but it was feared that Britain might not have time to develop more modern monoplanes in sufficient quantities before full scale war began. | ||
| Line 248: | Line 219: | ||
The Mk II model had the more reliable Bristol Mercury VIIIA / AS engine with an output of 830 horsepower in place of the Mk I’s Mercury IX; this was also fitted with an electrical starter motor, automatic mixture control, Vokes air filter and a metal three bladed propeller to replace the earlier wooden two bladed variant. 38 Gladiator Mk IIs were also fitted with arrestor hooks to serve in the Fleet Air Arm as Sea Gladiators until 60 fully navalised variants were also delivered, the latter being fitted with catapult points and a dinghy stowage. | The Mk II model had the more reliable Bristol Mercury VIIIA / AS engine with an output of 830 horsepower in place of the Mk I’s Mercury IX; this was also fitted with an electrical starter motor, automatic mixture control, Vokes air filter and a metal three bladed propeller to replace the earlier wooden two bladed variant. 38 Gladiator Mk IIs were also fitted with arrestor hooks to serve in the Fleet Air Arm as Sea Gladiators until 60 fully navalised variants were also delivered, the latter being fitted with catapult points and a dinghy stowage. | ||
| − | A total of 746 Gladiator aircraft were produced, and served with distinction in the opening phases of the war, notably during the Norwegian Campaign and in the defence of Malta. Pilots who achieved success in the Gladiator included the RAF’s top scorer, Squadron Leader ‘Pat’ Pattle, who scored 15 ½ confirmed kills in Gladiators, and Royal Navy Commander Charles Keighly-Peach, who trained several of his Swordfish pilots in fighter tactics to operate from HMS Eagle in the Mediterranean. | + | A total of 746 Gladiator aircraft were produced, and served with distinction in the opening phases of the war, notably during the Norwegian Campaign and in the defence of Malta. Pilots who achieved success in the Gladiator included the RAF’s top scorer, Squadron Leader ‘Pat’ Pattle, who scored 15 ½ confirmed kills in Gladiators, and Royal Navy Commander Charles Keighly-Peach, who trained several of his Swordfish pilots in fighter tactics to operate from HMS Eagle in the Mediterranean. |
== Media == | == Media == | ||
| − | '' | + | ''Excellent additions to the article would be video guides, screenshots from the game, and photos.'' |
| − | == | + | == See also == |
| − | ''Links to the articles on the War Thunder Wiki that you think will be useful for the reader, for example | + | ''Links to the articles on the War Thunder Wiki that you think will be useful for the reader, for example:'' |
* ''reference to the series of the aircraft;'' | * ''reference to the series of the aircraft;'' | ||
* ''links to approximate analogues of other nations and research trees.'' | * ''links to approximate analogues of other nations and research trees.'' | ||
| − | |||
| − | == | + | == External links == |
''Paste links to sources and external resources, such as:'' | ''Paste links to sources and external resources, such as:'' | ||
* ''topic on the official game forum;'' | * ''topic on the official game forum;'' | ||
| − | * ''page on aircraft | + | * ''encyclopedia page on the aircraft;'' |
* ''other literature.'' | * ''other literature.'' | ||
{{Britain fighters}} | {{Britain fighters}} | ||
Revision as of 13:15, 28 May 2019
Contents
| This page is about the British fighter Gladiator Mk II. For other uses, see Gladiator (Family). |
Description

The Gladiator Mk II is a rank British fighter
with a battle rating of (AB), (RB), and (SB). It has been in the game since the start of the Open Beta Test prior to Update 1.27.
The Gladiator Mk II is one of the first British tech tree fighters that can be researched (the other two being the Hurricane Mk I/L and the Sea Gladiator Mk I), and once researched leads into the famous Spitfire fighter line.
At rank I with a battle rating of (AB), (RB), and (SB), this plane will typically be one of the first fighters a new player will research. However, the Gladiator, like its sea-based cousin, may be difficult to seek success in, especially in Realistic Battles mode. Within Realistic Battles, when up-tiering comes into play, it will have to deal with not only biplane adversaries such as the CR.42, F3F and the very manoeuvrable Ki-10, but also more advanced fighters such as the P-40E, Bf 109s, I-16s, and Ki-43s. All these plane types have several varying advantages against the Gladiator, which can make early grinding a bit unbearable for some players.
There are a couple of issues with the Gladiator, all of which can make it an easy target at times:
- Its power plant configuration, which includes a three-blade fixed-pitch propeller, can make the Gladiator a slug in acceleration and climb. In-flight testing the Gladiator can usually only sustain at most around 3,000 ft/min (roughly 15 m/s) in a climb at around 180 - 200 km/h (111 - 124 mph) indicated airspeed, and its top speed isn't great either (at sea level it can only manage around 335 km/h, and testing has yielded 396 km/h at 4,000 m altitude).
- The Gladiator manoeuvres well. However, it bleeds a lot of speed in sharp turns, and while its turn radius is good enough to shake off reserve planes, the loss of speed can make the plane a slower and henceforth a more vulnerable target to any other enemy planes in the area. Using flaps does help a bit with decreasing the amount of speed lost in a turn, but it is not beneficial enough to allow for minimal loss of speed. Like most early British fighters, it does not fare well in high-speed dives.
The Gladiator has four 7.7 mm (.303) Browning machine guns with a total of 2,000 rounds on hand. As with most other 7.7 mm guns the default rounds for the Browning's can be a bit weak in stopping power, but when equipped with tracer belts the four guns on this plane can be a deadly force to be reckoned with, as they can trigger fires and do a considerable amount of damage as a result.
General info
Flight performance
Describe how the aircraft behaves in the air. Speed, manoeuvrability, acceleration and allowable loads - these are the most important characteristics of the vehicle.
| Characteristics | |||||||
|---|---|---|---|---|---|---|---|
| Stock | |||||||
| Max Speed (km/h at 4,420 m) |
Max altitude (meters) |
Turn time (seconds) |
Rate of climb (meters/second) |
Take-off run (meters) | |||
| AB | RB | AB | RB | AB | RB | ||
| 399 | 386 | 16.7 | 17.7 | 13 | 13 | 232 | |
| Upgraded | |||||||
| Max Speed (km/h at 4,420 m) |
Max altitude (meters) |
Turn time (seconds) |
Rate of climb (meters/second) |
Take-off run (meters) | |||
| AB | RB | AB | RB | AB | RB | ||
| 431 | 414 | 15.3 | 16.0 | 18.8 | 15.7 | 232 | |
Details
| Features | ||||
|---|---|---|---|---|
| Combat flaps | Take-off flaps | Landing flaps | Air brakes | Arrestor gear |
| X | ✓ | ✓ | X | X |
| Limits | ||||
|---|---|---|---|---|
| Wing-break speed (km/h) |
Gear limit (km/h) |
Combat flaps (km/h) |
Max Static G | |
| + | - | |||
| 520 | ~11 | ~5 | ||
| Optimal velocities | |||
|---|---|---|---|
| Ailerons (km/h) |
Rudder (km/h) |
Elevators (km/h) |
Radiator (km/h) |
| < 240 | < 180 | < 330 | > 190 |
| Compressor (RB/SB) | ||
|---|---|---|
| Setting 1 | ||
| Optimal altitude | 100% Engine power | WEP Engine power |
| 4,100 m | 810 hp | 850 hp |
Survivability and armour
Examine the survivability of the aircraft. Note how vulnerable the structure is and how secure the pilot is, whether the fuel tanks are armoured, etc. Describe the armour, if there is any, and also mention the vulnerability of other critical aircraft systems.
Armaments
Offensive armament
The Gladiator Mk II is armed with:
- 2 x 7.7 mm Browning .303 machine guns, nose-mounted (600 rpg = 1,200 total)
- 2 x 7.7 mm Browning .303 machine guns, wing-mounted (400 rpg = 800 total)
Usage in battles
Describe the tactics of playing in an aircraft, the features of using vehicles in a team and advice on tactics. Refrain from creating a "guide" - do not impose a single point of view, but instead, give the reader food for thought. Examine the most dangerous enemies and give recommendations on fighting them. If necessary, note the specifics of the game in different modes (AB, RB, SB).
Manual Engine Control
| MEC elements | ||||||
|---|---|---|---|---|---|---|
| Mixer | Pitch | Radiator | Supercharger | Turbocharger | ||
| Oil | Water | Type | ||||
| Controllable | Not controllable Not auto controlled |
Not controllable Not auto controlled |
Not controllable Not auto controlled |
Separate | Not controllable 1 gear |
Not controllable |
Modules
| Tier | Flight performance | Survivability | Weaponry | |
|---|---|---|---|---|
| I | Fuselage repair | Radiator | Offensive 7 mm | |
| II | Compressor | Airframe | New 7 mm MGs | |
| III | Wings repair | Engine | ||
| IV | Engine injection | Cover | ||
Pros and cons
Pros:
- Armament is equal to or better than other fighters in its battle rating range
- Good manoeuvrability in a turn
- Tracer belts, like all other planes fitted with Browning machine guns, can be deadly
- Has flaps, unlike most other biplane fighters
Cons:
- Sluggish in acceleration and top speed (fixed-pitch propeller can exacerbate this problem)
- Performance deficiencies can make it an easy target for experienced or more difficult adversaries
- Not the best climber
- Bleeds speed in turns, even when using flaps
History
One of the greatest claims to fame of the Gloster Gladiator was the Siege of Malta, which was, at the time, controlled by Great Britain. Because of the high value of Malta (it is only about 400 miles south of Italy, and on the map, it is an island in the middle of the Mediterranean), the IAF (Italian Air Force) using mainly SM.79 Sparviero bombers began bombing Malta into submission starting June 11, 1940. Due to the remote location of Malta and the fact that the British forces had to cover the Suez Canal, there were very few fighters available to defend against the IAF - so few that, as legend has it, there were only 3 Gloster Gladiators available: Faith, Hope, and Charity. In reality, there were at least 6 Gladiators, and after the first few weeks of the Siege, 4 Hurricanes en route to North Africa were pressed into service. Amazingly, against 40 - 50 bombers in the initial raids, the resistance was fierce enough to force the Italians to send a fighter escort of MC.200 Saetta fighters. By the end of 1940, Malta was nowhere near defeated, and quite, on the contrary, the RAF claimed an impressive 45 kills. However, the antiquated Gladiators were retired, being replaced by more effective Hurricane IIAs and Spitfires.
In-game description
The Gloster Gladiator was a single engine, single seat fighter which entered service in 1937 as the Royal Air Force’s last biplane fighter. Often overshadowed by more modern monoplanes, it still remained arguably the greatest biplane fighter of all time.
Biplane design was already considered outdated by the time production of the Gladiator started, but it was feared that Britain might not have time to develop more modern monoplanes in sufficient quantities before full scale war began.
Building on the success of the earlier Gauntlet fighter, the Gladiator was developed to replace the aging Bristol Bulldog. Featuring an enclosed cockpit, new wings and a more streamlined fixed undercarriage, the armament was also increased to four 0.303 inch machine guns. Initially, 231 Gladiator Mk Is were delivered to the RAF.
The Mk II model had the more reliable Bristol Mercury VIIIA / AS engine with an output of 830 horsepower in place of the Mk I’s Mercury IX; this was also fitted with an electrical starter motor, automatic mixture control, Vokes air filter and a metal three bladed propeller to replace the earlier wooden two bladed variant. 38 Gladiator Mk IIs were also fitted with arrestor hooks to serve in the Fleet Air Arm as Sea Gladiators until 60 fully navalised variants were also delivered, the latter being fitted with catapult points and a dinghy stowage.
A total of 746 Gladiator aircraft were produced, and served with distinction in the opening phases of the war, notably during the Norwegian Campaign and in the defence of Malta. Pilots who achieved success in the Gladiator included the RAF’s top scorer, Squadron Leader ‘Pat’ Pattle, who scored 15 ½ confirmed kills in Gladiators, and Royal Navy Commander Charles Keighly-Peach, who trained several of his Swordfish pilots in fighter tactics to operate from HMS Eagle in the Mediterranean.
Media
Excellent additions to the article would be video guides, screenshots from the game, and photos.
See also
Links to the articles on the War Thunder Wiki that you think will be useful for the reader, for example:
- reference to the series of the aircraft;
- links to approximate analogues of other nations and research trees.
External links
Paste links to sources and external resources, such as:
- topic on the official game forum;
- encyclopedia page on the aircraft;
- other literature.
