Difference between revisions of "AMX-13 (Israel)"
(Please do not copy gameplay text even if identical, kept armor details) |
(Add usage details (This feels a bit long, but at the same time I do believe it is necessary, as the AMX-13's round requires you to aim differently depending on the tanks you're facing)) |
||
| Line 43: | Line 43: | ||
{{Specs-Tank-Mobility}} | {{Specs-Tank-Mobility}} | ||
<!-- ''Write about the mobility of the ground vehicle. Estimate the specific power and manoeuvrability, as well as the maximum speed forwards and backwards.'' --> | <!-- ''Write about the mobility of the ground vehicle. Estimate the specific power and manoeuvrability, as well as the maximum speed forwards and backwards.'' --> | ||
| − | + | The AMX-13 is not the fastest for the BR, mostly losing to wheeled vehicles, but in contrast, the AMX-13 keeps a consistent speed regardless of the terrain, making it able to reach off-road positions much faster; On top of that, the excellent power-to-weight ratio also helps when trying to reach elevated positions. | |
| + | |||
| + | The main drawback to remember is the sub-optimal reverse speed. The AMX-13 can only partially expose itself, a fully exposed AMX-13 will not be able to reverse back into cover in time. | ||
{{tankMobility|abMinHp=418|rbMinHp=239}} | {{tankMobility|abMinHp=418|rbMinHp=239}} | ||
| Line 157: | Line 159: | ||
== Usage in battles == | == Usage in battles == | ||
<!-- ''Describe the tactics of playing in the vehicle, the features of using vehicles in the team and advice on tactics. Refrain from creating a "guide" - do not impose a single point of view but instead give the reader food for thought. Describe the most dangerous enemies and give recommendations on fighting them. If necessary, note the specifics of the game in different modes (AB, RB, SB).'' --> | <!-- ''Describe the tactics of playing in the vehicle, the features of using vehicles in the team and advice on tactics. Refrain from creating a "guide" - do not impose a single point of view but instead give the reader food for thought. Describe the most dangerous enemies and give recommendations on fighting them. If necessary, note the specifics of the game in different modes (AB, RB, SB).'' --> | ||
| − | + | How the AMX-13 can be used largely depends on what BR and nations it is facing. At a full down-tier, against 5.3/5.7 (AB/RB), the AMX-13 can be used at medium to long range as a travelling sniper. The main threats at that BR are heavies such as the American [[T34]], the German [[Tiger II (H)]] and the Russian [[IS-2 (1944)]]. These can all be penetrated in their respective weak spots at 500m, however the further you are, the narrower the weak spots get, and there is no guarantee to disable them in a single shot. | |
| + | |||
| + | In an up-tier, against up to 7.7, the AMX-13's long-range capabilities are greatly diminished. Most medium tanks become tough to deal with. Heavies like the [[IS-3]], [[T32]], [[M103]] and [[Maus]] are a no-go, [[T-54]]s are particularly tough as well, the only mediums still easy to deal with at long range are the [[Leopard 1]] and [[AMX-50]]. In this situation, the AMX-13 can still shine as a flanker, where you can use your rounds on the less-armoured sides and at a closer range. | ||
| + | |||
| + | It is important to remember however that the AMX-13's round is a 75mm APCBC with no explosive filler to speak of. The round struggles against any form of angled armour, and the post-penetration damage is not always sufficient, most notably, even destroying light vehicles from the side may prove difficult (The [[BMP-1]] and [[Marder A1-]] being the toughest to deal with). The 5 seconds autoloader can alleviate that, but you will still need to aim strategically. When facing a medium or heavy tank frontally, the best option is sometimes to shoot the barrel and disengage (or, provided they are alone and close enough, get on their side to finish them off). It will usually take more than one round to destroy an enemy vehicle (against large vehicles, even a direct shot to the ammo may not detonate it due to poor post-penetration damage), so disabling them with the first shot should always be your first priority. | ||
| + | |||
| + | Particularly when getting on the side of multiple enemies at once, focus on disabling all the enemies before attempting to finish them off. A shot to the side turret to destroy their cannon breech is usually the most optimal. This is particularly true for the American [[T34]]s and [[T32]]s. As for the [[IS-3]], due to the angled turret, the easiest is a shot to the rear turret, otherwise, a shot in between the hull and the turret is the only place that can be penetrated. On the side, it is possible to kill a [[Maus]], however it is a lengthy and dangerous process, and it is usually better to simply destroy its guns and let your team finish it off. | ||
| + | |||
| + | Finally, remember to pro-actively use the scouting ability, it can often save you in a pinch. | ||
=== Pros and cons === | === Pros and cons === | ||
Revision as of 08:09, 27 April 2022
| This page is about the Israeli light tank AMX-13 (Israel). For other versions, see AMX-13 (Family). |
Contents
Description
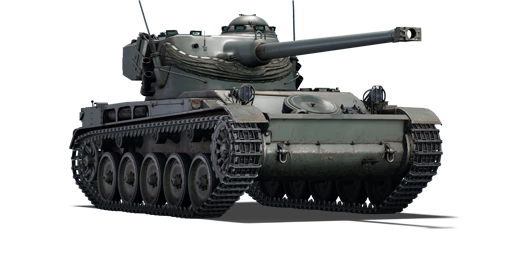
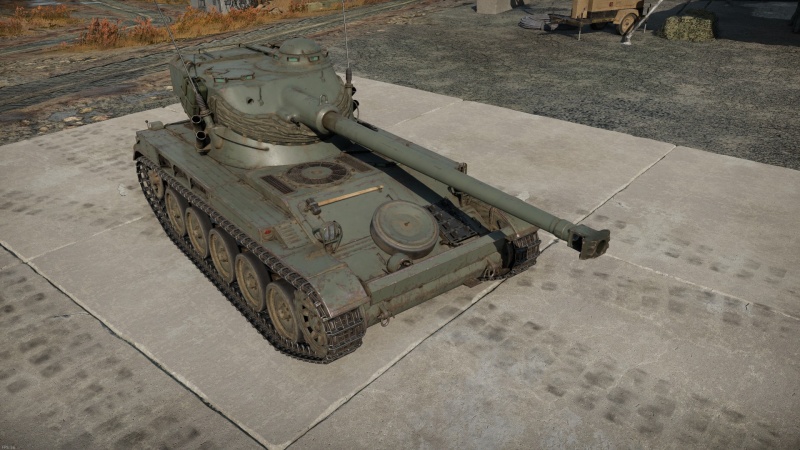
The AMX-13 is a rank Israeli light tank with a battle rating of (AB), (RB), and (SB). It was introduced in Update "Wind of Change".
General info
Survivability and armour
Armour type:
- Rolled homogeneous armour (hull, turret roof, side and rear)
- Cast homogeneous armour (turret base, turret front, gun mantlet, cupola)
| Armour | Front (Slope angle) | Sides | Rear | Roof |
|---|---|---|---|---|
| Hull | 40 mm (38-40°) Turret base 20 mm (66°) Upper glacis 40 mm (cylindrical) Transmission carter 20 mm (51°) Lower glacis |
20 mm (14°) Turret base 20 mm Sides |
20 mm (32-34°) Turret base 15 mm (1°) Top 15 mm (44°) Bottom |
20 mm (24°) Front glacis 10 mm Centre 10 mm (5°) Rear 5 mm Vents |
| Turret | 40 mm (32-47°) Turret front 60 mm (conical) Gun mantlet 40 mm (15-75°) Barrel shroud |
20 mm (0-30°) Turret | 20 mm Turret bustle 20 mm (17-22°) Pivot ball 10 mm (77-90°) Turret underside |
10 mm |
| Cupola | 20 mm (conical) Base 10 mm (spherical) Dome |
20 mm (conical) Outer ring 10 mm (spherical) Centre | ||
Notes:
- Suspension wheels and tracks are 15 mm thick.
- Belly armour is 10 mm thick.
- Storage boxes and mudguards are 4 mm thick.
Mobility
The AMX-13 is not the fastest for the BR, mostly losing to wheeled vehicles, but in contrast, the AMX-13 keeps a consistent speed regardless of the terrain, making it able to reach off-road positions much faster; On top of that, the excellent power-to-weight ratio also helps when trying to reach elevated positions.
The main drawback to remember is the sub-optimal reverse speed. The AMX-13 can only partially expose itself, a fully exposed AMX-13 will not be able to reverse back into cover in time.
| Game Mode | Max Speed (km/h) | Weight (tons) | Engine power (horsepower) | Power-to-weight ratio (hp/ton) | |||
|---|---|---|---|---|---|---|---|
| Forward | Reverse | Stock | Upgraded | Stock | Upgraded | ||
| Arcade | Expression error: Unexpected * operator. | 418 | Expression error: Unexpected round operator. | __.__ | |||
| Realistic | 239 | Expression error: Unexpected round operator. | __.__ | ||||
Modifications and economy
Armaments
Main armament
| 75 mm SA50 L/57 | Turret rotation speed (°/s) | Reloading rate (seconds) | |||||||||||
|---|---|---|---|---|---|---|---|---|---|---|---|---|---|
| Mode | Capacity | Vertical | Horizontal | Stabilizer | Stock | Upgraded | Full | Expert | Aced | Stock | Full | Expert | Aced |
| Arcade | 36 | -6°/+13° | ±180° | N/A | 28.6 | 39.5 | 48.0 | 53.1 | 56.5 | 5.00 | 5.00 | 5.00 | 5.00 |
| Realistic | 17.9 | 21.0 | 25.5 | 28.2 | 30.0 | ||||||||
Ammunition
| Penetration statistics | |||||||
|---|---|---|---|---|---|---|---|
| Ammunition | Type of warhead |
Penetration @ 0° Angle of Attack (mm) | |||||
| 10 m | 100 m | 500 m | 1,000 m | 1,500 m | 2,000 m | ||
| POT-51A | APC | 182 | 178 | 162 | 143 | 127 | 113 |
| 75 mm HE | HE | 10 | 10 | 10 | 10 | 10 | 10 |
| PCOT-51P | APCBC | 202 | 198 | 180 | 159 | 141 | 125 |
| Shell details | |||||||||
|---|---|---|---|---|---|---|---|---|---|
| Ammunition | Type of warhead |
Velocity (m/s) |
Projectile Mass (kg) |
Fuse delay (m) |
Fuse sensitivity (mm) |
Explosive Mass (TNT equivalent) (g) |
Ricochet | ||
| 0% | 50% | 100% | |||||||
| POT-51A | APC | 1,000 | 6.4 | N/A | N/A | N/A | 48° | 63° | 71° |
| 75 mm HE | HE | 753 | 6.2 | 0 | 0.1 | 675 | 79° | 80° | 81° |
| PCOT-51P | APCBC | 1,000 | 6.4 | N/A | N/A | N/A | 48° | 63° | 71° |
Ammo racks

| Full ammo |
1st rack empty |
2nd rack empty |
3rd rack empty |
4th rack empty |
5th rack empty |
6th rack empty |
7th rack empty |
Visual discrepancy |
|---|---|---|---|---|---|---|---|---|
| 36 | 32 (+4) | 28 (+8) | 23 (+13) | 18 (+18) | 13 (+23) | 7 (+29) | 1 (+35) | No |
Notes:
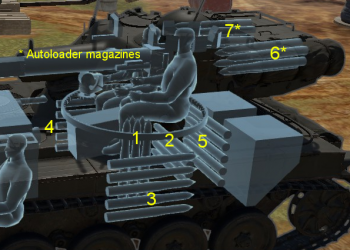
- Shells are modeled individually and disappear after having been shot or loaded.
- Racks 6* and 7* (autoloader magazines) are first stage ammo racks. They total 12 shells.
- These racks get filled first when loading up the tank and are also emptied first.
- As the AMX-13 (Israel) is equipped with an autoloader, manual reloading of the gun is not possible.
- Once the autoloader magazines have been depleted, you can't shoot until the loader has restocked the autoloader with at least 1 shell.
- The restocking time is longer than the normal reload time of the gun (about 15 seconds). Take this into account when playing.
- Simply not firing when the gun is loaded will move ammo from racks 1 to 5 into rack 7* then 6*. Firing will interrupt the restocking of the ready racks.
Machine guns
| 7.5 mm MAC 31 | ||||
|---|---|---|---|---|
| Mount | Capacity (Belt) | Fire rate | Vertical | Horizontal |
| Coaxial | 4,950 (150) | 551 | N/A | N/A |
Usage in battles
How the AMX-13 can be used largely depends on what BR and nations it is facing. At a full down-tier, against 5.3/5.7 (AB/RB), the AMX-13 can be used at medium to long range as a travelling sniper. The main threats at that BR are heavies such as the American T34, the German Tiger II (H) and the Russian IS-2 (1944). These can all be penetrated in their respective weak spots at 500m, however the further you are, the narrower the weak spots get, and there is no guarantee to disable them in a single shot.
In an up-tier, against up to 7.7, the AMX-13's long-range capabilities are greatly diminished. Most medium tanks become tough to deal with. Heavies like the IS-3, T32, M103 and Maus are a no-go, T-54s are particularly tough as well, the only mediums still easy to deal with at long range are the Leopard 1 and AMX-50. In this situation, the AMX-13 can still shine as a flanker, where you can use your rounds on the less-armoured sides and at a closer range.
It is important to remember however that the AMX-13's round is a 75mm APCBC with no explosive filler to speak of. The round struggles against any form of angled armour, and the post-penetration damage is not always sufficient, most notably, even destroying light vehicles from the side may prove difficult (The BMP-1 and Marder A1- being the toughest to deal with). The 5 seconds autoloader can alleviate that, but you will still need to aim strategically. When facing a medium or heavy tank frontally, the best option is sometimes to shoot the barrel and disengage (or, provided they are alone and close enough, get on their side to finish them off). It will usually take more than one round to destroy an enemy vehicle (against large vehicles, even a direct shot to the ammo may not detonate it due to poor post-penetration damage), so disabling them with the first shot should always be your first priority.
Particularly when getting on the side of multiple enemies at once, focus on disabling all the enemies before attempting to finish them off. A shot to the side turret to destroy their cannon breech is usually the most optimal. This is particularly true for the American T34s and T32s. As for the IS-3, due to the angled turret, the easiest is a shot to the rear turret, otherwise, a shot in between the hull and the turret is the only place that can be penetrated. On the side, it is possible to kill a Maus, however it is a lengthy and dangerous process, and it is usually better to simply destroy its guns and let your team finish it off.
Finally, remember to pro-actively use the scouting ability, it can often save you in a pinch.
Pros and cons
Pros:
- 75mm APCBC has high penetration and high velocity, can penetrate even heavy tanks' weakspots (eg. Tiger II (H))
- Autoloader reloads the cannon at an impressive speed
- Fast on most terrains, can effectively perform flanking
- Small profile, easy to conceal the tank and ambush others
- Autoloader means that injured crew or fire-extinguishing will not impact the reload time which can be a life-saver
Cons:
- Poor survivability, thin armour can be penetrated by any gun including that of any SPAA like Falcon
- Narrow tracks negatively affect its start-up agility on loose surface
- Autoloader holds 12 shells, reload time significantly lengthens after those
- APCBC isn't explosive, requiring accurate shots on crew or other components
- -7 km/h reverse is very low, severely limiting its tactical agility
History
Describe the history of the creation and combat usage of the vehicle in more detail than in the introduction. If the historical reference turns out to be too long, take it to a separate article, taking a link to the article about the vehicle and adding a block "/History" (example: https://wiki.warthunder.com/(Vehicle-name)/History) and add a link to it here using the main template. Be sure to reference text and sources by using <ref></ref>, as well as adding them at the end of the article with <references />. This section may also include the vehicle's dev blog entry (if applicable) and the in-game encyclopedia description (under === In-game description ===, also if applicable).
Media
Excellent additions to the article would be video guides, screenshots from the game, and photos.
See also
Links to the articles on the War Thunder Wiki that you think will be useful for the reader, for example:
- reference to the series of the vehicles;
- links to approximate analogues of other nations and research trees.
External links
Paste links to sources and external resources, such as:
- topic on the official game forum;
- other literature.
| Israel light tanks | |
|---|---|
| Tracked | AMX-13 · Namer 30 |
| Wheeled | AML-90 |


