Difference between revisions of "I-225"
(→Pros and cons) (Tag: Visual edit) |
(→Pros and cons: Massive edits. Added massive emphasis to stiffening at high speeds, pointed out the bad defensive flight characteristics, and that it loses pitch authority at lower fuel loads.) (Tag: Visual edit) |
||
| Line 181: | Line 181: | ||
* Great low speed control and stall characteristics | * Great low speed control and stall characteristics | ||
| − | * Great energy retention, both in the vertical and while | + | * Great energy retention, both in the vertical and while maneuvering |
| + | * MASSIVE engine that features a Turbosupercharger | ||
* Excellent high altitude performance | * Excellent high altitude performance | ||
* Great climb rate | * Great climb rate | ||
* Decent firepower | * Decent firepower | ||
| + | * Cannons all mounted in the nose | ||
| + | * Cannons have good rate of fire | ||
* Powerful flaps | * Powerful flaps | ||
| − | * Great rudder effect | + | * Great rudder effect (at low speeds) |
'''Cons:''' | '''Cons:''' | ||
| − | * | + | * EXTREMELY Severe control stiffening past ~650 km/h (IAS), almost NO CONTROL at 700 km/h (IAS)! |
| − | + | * Extremely "stiff" aircraft at speed, a nightmare for defensive flight at speeds above 600km/h | |
| − | * | + | * Below average maneuverability without using the flaps |
| + | * Suffers from the "OLD FW 190 Elevator Syndrome", meaning that the elevator authority worsens at lower fuel loads | ||
| + | * The "OLD FW 190 Elevator Syndrome" means you have to chose between either climb/acceleration or maneuverability | ||
| + | * Lacks combat flaps, usage of takeoff flaps will bleed speed rapidly | ||
| + | * Rudder effect can be too great at times, prone to excessive input | ||
| + | * Aircraft weaknesses can be easy to exploit by a capable opponent | ||
| + | * Rather fragile airframe that is susceptible to fires | ||
| + | * Engine overheats after using WEP for too long, can be mitigated with use of MEC (or lowering to 100%) | ||
| + | * Engine takes a while to cool down in automatic engine control mode | ||
| + | * Engine consumes a LOT of fuel in WEP | ||
* Can face early jets (SB), which pose a huge challenge because of their high speeds | * Can face early jets (SB), which pose a huge challenge because of their high speeds | ||
| − | * | + | * Armament can feel inadequate against sturdy targets like bombers, mediocre ammo count per gun |
| − | |||
| − | |||
| − | |||
== History == | == History == | ||
Revision as of 22:02, 3 February 2022
Contents
Description
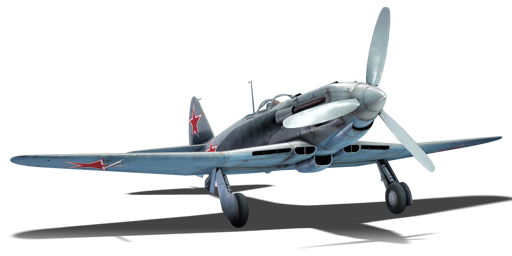
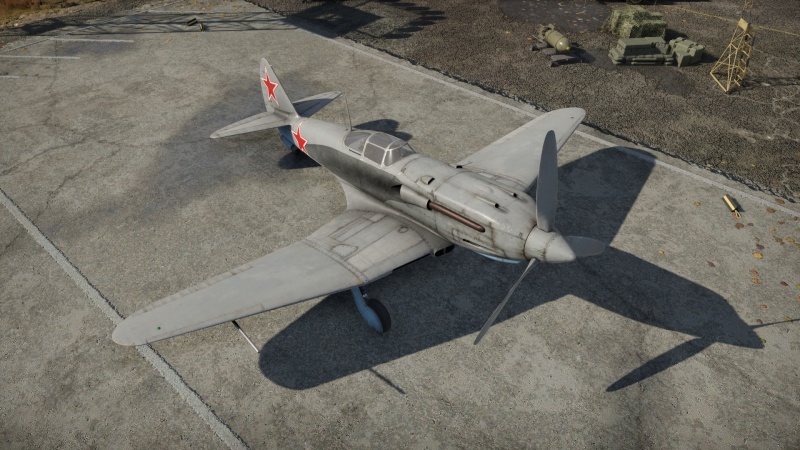
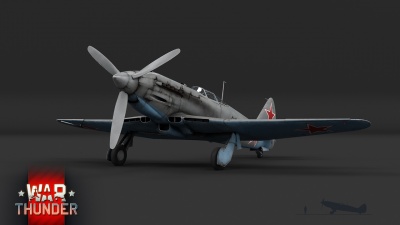
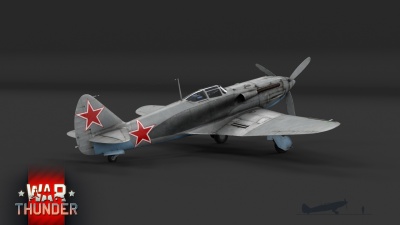
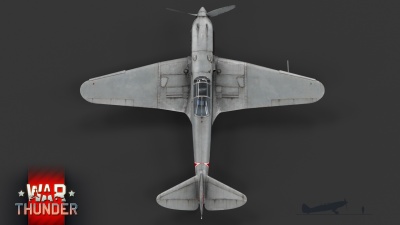
The I-225 is a rank Soviet fighter with a battle rating of (AB), (RB), and (SB). It was introduced in Update 1.81 "The Valkyries". As of Update 1.89 "Imperial Navy", it is the last prop plane in the MiG/Polikarpov line and is one of the best prop fighters the Soviet Union has to offer.
General info
Flight performance
The I-225 is the latest claim to the throne of Soviet prop-fighters. With its high speed at high altitudes, decent armament, good turning capabilities and insane climb rate, this Super-MiG is the best all-around dog-fighter Russia has to offer. Although relatively useless as an interceptor in real life, the I-225 is quite potent in War Thunder, being one of four Soviet props that are good at altitude, which is very unique for the Soviet tech tree that is mostly comprised of low-altitude prop planes. From take-off and into the fight, this MiG is an overall smooth operator and can be very competitive even when facing early jets.
| Characteristics | Max Speed (km/h at 10,000 m) |
Max altitude (metres) |
Turn time (seconds) |
Rate of climb (metres/second) |
Take-off run (metres) | |||
|---|---|---|---|---|---|---|---|---|
| AB | RB | AB | RB | AB | RB | |||
| Stock | 702 | 682 | 19.9 | 20.4 | 16.7 | 16.6 | 257 | |
| Upgraded | 751 | 726 | 18.5 | 19.0 | 25.8 | 20.8 | ||
Details
| Features | ||||
|---|---|---|---|---|
| Combat flaps | Take-off flaps | Landing flaps | Air brakes | Arrestor gear |
| X | ✓ | ✓ | X | X |
| Limits | ||||||
|---|---|---|---|---|---|---|
| Wings (km/h) | Gear (km/h) | Flaps (km/h) | Max Static G | |||
| Combat | Take-off | Landing | + | - | ||
| N/A | 354 | 280 | ~12 | ~5 | ||
| Optimal velocities (km/h) | |||
|---|---|---|---|
| Ailerons | Rudder | Elevators | Radiator |
| < 350 | < 280 | < 400 | > 370 |
| Compressor (RB/SB) | ||
|---|---|---|
| Setting 1 | ||
| Optimal altitude | 100% Engine power | WEP Engine power |
| 8,800 m | 1,500 hp | 1,610 hp |
Survivability and armour
Armour plates:
- 9 mm steel behind the pilot
Critical components
- Fuel tank in the fuselage behind the pilot
- Fuel tank in front of the guns and behind the engine
- Liquid cooling systems in front of the spars near the slats
- Oil Cooling systems underneath the nose
Modifications and economy
The default belts of the ShVAK's are quite efficient and the cannons themselves are very accurate, so you should focus on performance upgrades. The most important upgrades are the engine, engine injection and then the survivability modules to help remedy the weak airframe of the I-225.
Your module research should look something like this:
- Fuselage repair
- Radiator
- Compressor
- Airframe
- Wings repair
- Engine
- Engine injection
- Cover
- Offensive 20 mm
- New 20 mm cannons
Armaments
Offensive armament
The I-225 is armed with:
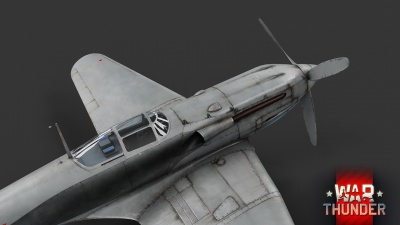
- 4 x 20 mm ShVAK cannons, nose-mounted (100 rpg = 400 total)
The 20 mm ShVAK cannons are very accurate and are extremely powerful in controlled, well-aimed bursts to enemy wings and critical components. Your default belts are quite powerful and the cannons themselves are highly accurate due to the nose mountings. While most players recommend the "Ground Targets" belt, this is not necessarily the best choice when it comes to the I-225 thanks to the poor ballistics and damage output of the Soviet HEF and FI-T shell. The "Armoured Targets" belt contains three AP-I shell and one HEF shell, and this combination provides the best option as to start fires and damaging modules.
Usage in battles
The I-225 can be used to climb to bomber altitude (4-6 km) and act as an interceptor, and it can perform this role amicably with its good climb rate, high speed and fast-firing quad ShVAK 20 mm cannons that can start fires. Be wary that the I-225 has no bulletproof glass in the front to protect this pilot, so you should never tail any bomber and approach from oblique angles or force head-ons. Also its armament of four 20 mm can be lacking against large aircraft, so I-225 players will likely have to expend all of their ammo in a bomber if they want to bring it down.
If one either destroys all the bombers or there are no bombers to be found, you are free to fly as a fighter versus other fighters. When engaging fighters, primarily try to employ a Boom-&-Zoom or energy fighting tactics which are exceptionally great when performed at high altitudes. Versus less manoeuvrable planes such as the F8F-1B, you can potentially turn-fight but be careful to not lose too much energy, as you may struggle to regain it. Also avoid tunnel visioning, as the I-225's weakness is anything extended due to an increased chance that multiple enemies will engage you.
Offensive flying:
When offensively engaging an enemy, the pilot should use the amazing performance and superb dive speed to their advantage, as the I-225 is the most vulnerable when it is unable to use these traits. Your go-to flying style should be energy fighting or Boom-&-Zoom, as both of these rely on top speed, energy retention, diving speed, climb rate, and these areas are where the I-225 excels the most. Always make sure to be above your enemy so you maintain an energy advantage. Your ideal altitude is 6 km, as this is where you can make the most out of the powerful turbocharged AM-42 engine and abuse your insane dive speed to its potential.
Do not tail any bombers Due to the lack of bulletproof glass and the frail airframe, tailing a bomber is an invitation for a pilot snipe or destroyed engine of the attacker. Depending on the bomber, attacking from above or below from oblique angles is your best bet. Aim for the engines and the wings if you can't force a head-on.
Defensive flying:
If an enemy manages to get on your tail or has you in their gunsights, you should enter a slight dive in order to make use of your amazing dive speed and excellent acceleration. Being an energy fighter, you can make use of energy-wasting manoeuvres such as spiral climbing, displacement rolls, Immelmann turns or vertical spirals. Vertical spirals are particularly effective thanks to your excellent energy retention.
Specific enemies worth noting
- Spitfire F Mk 22 and Mk 24. The extremely powerful Griffon engined Spitfires are some of the most dangerous enemies you will encounter at this BR. They possess an amazing climb rate, amazing roll rate, brutal acceleration, high speed, solid manoeuvrability and excellent high altitude performance. Their quad Hispano Mk II's can load a very potent "Air targets" belt which is filled with HEF-I and HEF-SAPI rounds that will shred your airframe to bits with a quick burst. Try to keep a higher altitude than it and dive on it if it's unaware of your presence. When one is engaging you, try to bleed its energy with vertical manoeuvres or if you're confident enough, you can turn fight it.
- Bf 109 K-4. The last of the legendary Bf 109's can also be encountered. You can outspeed it by a large margin and have superior acceleration and dive speed. Avoid employing an energy fighting playstyle as the K-4 has amazing energy retention and a solid climb rate, although the I-225 can take advantage of its strange refusal to stall when using WEP in order to beat the 109 in the vertical, although it is not recommended to use it in this way. Always remain on its tail and steer clear of its gunsights, as its powerful array of armaments (1 x 30 mm cannon or 3 x 20 mm cannons, both of which are loaded with the brutal Minengeschoß round) will down you quickly if they land a few good hits. Employ a Boom-&-Zoom play style to take advantage of your superior speed and high diving speed.
- F8F-1B. The feared Bearcat is one of the best prop planes in the game and is the worst enemy for the I-225 to face, as the Bearcat outclasses it in practically every way aside from performance above 6 km. The Bearcat out-turns you, out-rolls you, out-climbs you, and has an extremely devastating set of AN/M3 cannons which are effectively Hispano Mk V's. Avoid them at all costs unless they are unaware of your presence, and if one forces an engagement on you, seek assistance from teammates.
- Ta 152 H-1. While not a major enemy, it is possible to encounter the Ta 152 at higher altitudes where its engine performs the best. The outcome of the fight comes down to the more skilled pilot, as the two planes are fairly even performance-wise. Never let a Ta 152 get you in its gunsights, as it sports an incredibly powerful array of armaments that can shred through you like paper. You have a superior turning rate and energy retention but the 152 beats you in a dive, so focus on vertical manoeuvres.
- F-80A-5/F-84B-26. These two are the most common jets you will encounter, and are lumped together due to the similarity of their play styles and the way one should approach them. Your best bet is to dive on one when it's busy with another target or try to bait them into a turn-fight, as both of them have very poor turn rates that allow you to literally turn circles around them. Never try to outspeed them, they have brutal acceleration even without WEP, maintain their energy better than every prop plane and are a good 100 mph/200 kph faster than you.
Manual Engine Control
| MEC elements | ||||||
|---|---|---|---|---|---|---|
| Mixer | Pitch | Radiator | Supercharger | Turbocharger | ||
| Oil | Water | Type | ||||
| Controllable | Controllable Not auto controlled |
Controllable Not auto controlled |
Controllable Auto control available |
Separate | Not controllable 1 gear |
Not controllable |
Manual engine controls can be used to counter the rapid overheating caused by using WEP. Following these instructions will allow you to use WEP indefinitely unless on a warm map.
- Set the propeller pitch to 75%. Don't set it any lower as it will cause significant performance drop.
- Set the oil radiator to 100% and the water radiator to 65%. While these values can be lowered at higher altitudes and colder maps, try to keep the oil temperature below 85°C and water temperature below 120°C.
- On takeoff, set the mixture to 35% and keep it there until you reach an altitude of 4,000 m. Between 4,000 and 6,500 m set it to 25%. Between 6,500 and 8,500 m set it to 20%. Above 8,500 m switch back to auto engine control, as overheating is no longer an issue at extreme altitudes.
- The supercharger and turbocharger are automatically controlled and require no player input.
Pros and cons
Pros:
- Great low speed control and stall characteristics
- Great energy retention, both in the vertical and while maneuvering
- MASSIVE engine that features a Turbosupercharger
- Excellent high altitude performance
- Great climb rate
- Decent firepower
- Cannons all mounted in the nose
- Cannons have good rate of fire
- Powerful flaps
- Great rudder effect (at low speeds)
Cons:
- EXTREMELY Severe control stiffening past ~650 km/h (IAS), almost NO CONTROL at 700 km/h (IAS)!
- Extremely "stiff" aircraft at speed, a nightmare for defensive flight at speeds above 600km/h
- Below average maneuverability without using the flaps
- Suffers from the "OLD FW 190 Elevator Syndrome", meaning that the elevator authority worsens at lower fuel loads
- The "OLD FW 190 Elevator Syndrome" means you have to chose between either climb/acceleration or maneuverability
- Lacks combat flaps, usage of takeoff flaps will bleed speed rapidly
- Rudder effect can be too great at times, prone to excessive input
- Aircraft weaknesses can be easy to exploit by a capable opponent
- Rather fragile airframe that is susceptible to fires
- Engine overheats after using WEP for too long, can be mitigated with use of MEC (or lowering to 100%)
- Engine takes a while to cool down in automatic engine control mode
- Engine consumes a LOT of fuel in WEP
- Can face early jets (SB), which pose a huge challenge because of their high speeds
- Armament can feel inadequate against sturdy targets like bombers, mediocre ammo count per gun
History
The experimental high-altitude fighter/interceptor I-225 was created in the Mikoyan design bureau as part of work to develop new prototypes of fighter aircraft with new engines. The first experimental prototype was finished by May 9, 1944. The aircraft was designed to carry a powertrain consisting of a 2000 horsepower aircraft engine and a turbocharger. Its armament in comparison with previous prototypes was strengthened and consisted of four 20mm ShVAK cannons. In testing (primarily tests of the fighter's speed and altitude options) the aircraft showed impressive results: it could reach a speed of almost 560 km/h near the ground and 720 km/h at high altitude. Just two I-225s were built for testing purposes. For various reasons, both aircraft crashed in testing. After a range of improvements and upgrades, in March 1947 work on this project was stopped.
- From Devblog
"During the early stages of the war on the Eastern Front, the German Ju-86P high altitude reconnaissance plane saw the Soviets lacking in a capable high altitude interceptor. Deeming it necessary to deal with these high altitude recon planes, an order went out for the creation of an interceptor that could fly high and fast enough to dispose of any intruders. The Mikoyan-Gurevich aircraft company, already successful with the high altitude MiG-3, took on the challenge to develop the fighter. The prototypes began development in 1942 as the I-220 series.
The I-225 the last of this series of aircraft. The I-225 was an improvement on the earlier I-220; compared to its predecessor the 225 featured a pressurized cockpit, a cut down rear fuselage, and 4 synchronized 20mm cannons firing through the propeller. The 225 was powered by "a Mikulin AM-42B 12-cylinder liquid-cooled Vee engine equipped with a TK-300B turbo-supercharger on its starboard side and affording 2000hp for take-off and 1750hp at 7500m."
The all metal aircraft flew for the first time on the 21st of July, 1944. On August 2nd of the same year, the plane hit 707kmh at an altitude of 8,500 m. During the 15th flight, the aircraft's engine seized at an altitude of 15 m and was deemed irreparable.
The second prototype and its tests were delayed until March 14th, 1945. The second I-225 was fitted with the AM-42-FB, an improvement on the first prototype's engine. This second prototype reached a speed of 726 km/h, one of the fastest speeds reached by any Soviet aircraft.
By the time of the I-225 the Germans had ceased high altitude operations rendering the existence of the plane largely unnecessary. However, development on high altitude aircraft continued thanks to the possibility of the Soviets going to war with the Western powers, who possessed heavy bombers that could operate well outside the effective operational altitudes of Soviet piston-engined planes.
Development on the I-225 and its brethren was ended in March 1947, when nobody saw a need for a high altitude interceptor and native Soviet jet designs were coming into service."
- Written by War Thunder user Bobertman From War Thunder Forum
Media
- Skins
- Images
- Videos
See also
- MiG-3 (Family) - the family the I-225 is based on
External links
| Mikoyan-Gurevich Design Bureau (Микоя́н и Гуре́вич Опытное конструкторское бюро) | |
|---|---|
| Fighters | MiG-3-15 · MiG-3-15 (BK) · MiG-3-34 |
| I-225 | |
| Jet fighters | MiG-9 · MiG-9 (l) |
| MiG-15 · MiG-15bis · MiG-15bis ISh | |
| MiG-17 | |
| MiG-19PT | |
| MiG-21F-13 · MiG-21PFM · MiG-21S (R-13-300) · MiG-21SMT · MiG-21bis | |
| MiG-23M · MiG-23ML · MiG-23MLD | |
| MiG-27M · MiG-27K | |
| MiG-29 · MiG-29SMT | |
| Export/Licensed | ␗MiG-9 · ␗MiG-9 (l) |
| ◊MiG-15bis · ◔MiG-15bis · J-2* | |
| MiG-17AS · ◔MiG-17PF · J-4* · Shenyang F-5* | |
| ◊MiG-19S · J-6A* | |
| ◄MiG-21 SPS-K · ◊MiG-21MF · ◔MiG-21MF · ▄MiG-21bis · ◔MiG-21bis-SAU · ◊MiG-21bis-SAU · ◊MiG-21 "Lazur-M" · ▄MiG-21 Bison · J-7II** | |
| ◊MiG-23BN · ◊MiG-23MF · ◔MiG-23MF · ◊MiG-23MLA | |
| ◔MiG-29 · ◊MiG-29 · ◄MiG-29G | |
| *Licensed and domesticated with Chinese designations. | |
| **Unlicensed, reverse-engineered and domesticated with Chinese designations. | |
| See Also | Shenyang · Chengdu |
| USSR fighters | |
|---|---|
| I-15 | I-15 WR · I-15 M-22 · I-15 M-25 · I-15bis · Krasnolutsky's I-15bis |
| I-153 M-62 · Zhukovsky's I-153-M62 · I-153P | |
| I-16 | I-16 type 5 · I-16 type 10 · I-16 type 18 · I-16 type 24 · I-16 type 27 · I-16 type 28 · I-180S |
| I-29 | I-29 |
| I-185 | I-185 (M-71) · I-185 (M-82) |
| I-225 | I-225 |
| ITP | ITP (M-1) |
| MiG-3 | MiG-3-15 · MiG-3-15 (BK) · MiG-3-34 |
| LaGG | I-301 · LaGG-3-4 · LaGG-3-8 · LaGG-3-11 · LaGG-3-23 · LaGG-3-34 · LaGG-3-35 · LaGG-3-66 |
| La | La-5 · La-5F · La-5FN · La-7 · Dolgushin's La-7 · La-7B-20 · La-9 · La-11 |
| Yak-1/7 | Yak-1 · Yak-1B · Yak-7B |
| Yak-3 | Yak-3 · Eremin's Yak-3(e) · Yak-3P · Yak-3T · Yak-3U · Yak-3 (VK-107) |
| Yak-9 | Yak-9 · Yak-9B · Golovachev's Yak-9M · Yak-9T · Yak-9K · Yak-9U · Yak-9UT · Yak-9P |
| Other countries | ▂P-40E-1 · ▂P-47D-27 · ▂Hurricane Mk IIB · ▂Fw 190 D-9 · ▂Spitfire Mk IXc |
| P-39 | ▂P-39K-1 · ▂Pokryshkin's P-39N-0 · ▂P-39Q-15 |
| P-63 | ▂P-63A-5 · ▂P-63A-10 · ▂P-63C-5 |


