Difference between revisions of "G8N1"
m (added wing rip speed) (Tag: Visual edit) |
(Edits) |
||
| Line 57: | Line 57: | ||
! Combat !! Take-off !! Landing !! + !! - | ! Combat !! Take-off !! Landing !! + !! - | ||
|- | |- | ||
| − | | 750 || {{Specs|destruction|gear}} || 332 || 322 || 270 || ~3 || ~2 | + | | 750 <!--{{Specs|destruction|body}}--> || {{Specs|destruction|gear}} || 332 || 322 || 270 || ~3 || ~2 |
|- | |- | ||
|} | |} | ||
| Line 130: | Line 130: | ||
In all game modes, the G8N1 excels at the traditional heavy bomber role of bombing strategic targets like air bases or factories. Maps like New Guinea and Midway feature enemy airfields. If destroyed, they will net your team an auto-win. Unfortunately, it takes multiple Renzans equipped with the full bomb load to destroy an airfield on the first attack run. Other maps such as Saipan do not have airfields. Instead, an array of carriers serve as the enemy's bases. It is possible to destroy all of the carriers and win the round, but again requires multiple Renzans or multiple landings. If the "14 in (mod35)" module is not researched, most maps the Renzan is placed on feature smaller targets like tanks, pillboxes, or destroyers. These can be dispatched with the other bomb load outs the G8N1 possesses. In Arcade battles, the strategy is exactly the same. One may also consider climbing high or flanking to avoid enemy fighters. | In all game modes, the G8N1 excels at the traditional heavy bomber role of bombing strategic targets like air bases or factories. Maps like New Guinea and Midway feature enemy airfields. If destroyed, they will net your team an auto-win. Unfortunately, it takes multiple Renzans equipped with the full bomb load to destroy an airfield on the first attack run. Other maps such as Saipan do not have airfields. Instead, an array of carriers serve as the enemy's bases. It is possible to destroy all of the carriers and win the round, but again requires multiple Renzans or multiple landings. If the "14 in (mod35)" module is not researched, most maps the Renzan is placed on feature smaller targets like tanks, pillboxes, or destroyers. These can be dispatched with the other bomb load outs the G8N1 possesses. In Arcade battles, the strategy is exactly the same. One may also consider climbing high or flanking to avoid enemy fighters. | ||
| − | If attacked, the G8N1 can more than easily defend itself. It is recommended to "line up" an enemy aircraft by | + | If attacked, the G8N1 can more than easily defend itself. It is recommended to "line up" an enemy aircraft by manoeuvring so that all of your tail turrets are facing it. Then, start firing at distances of around 1 km away. Make sure to lead properly and if the shells aren't hitting watch the tracers and adjust accordingly. Unfortunately, even minor wing damage can result in a so-called "death spin" in which the plane becomes unbalanced and spirals slowly towards the ground. It is nearly impossible to recover from a situation such as this, and it happens in all game modes. Apart from that issue, the Renzan can be more of a fortress than the B-17 "Flying Fortress". |
=== Manual Engine Control === | === Manual Engine Control === | ||
| Line 158: | Line 158: | ||
* Good armour in the rear | * Good armour in the rear | ||
* Pilot snipes are unlikely to be fatal, as one of the two pilots will usually survive and continue flying | * Pilot snipes are unlikely to be fatal, as one of the two pilots will usually survive and continue flying | ||
| − | * Generally | + | * Generally manoeuvrable for its size |
* Armoured and equipped with self-sealing fuel tanks | * Armoured and equipped with self-sealing fuel tanks | ||
* Able to defend itself from multiple directions | * Able to defend itself from multiple directions | ||
| Line 199: | Line 199: | ||
== Media == | == Media == | ||
<!-- ''Excellent additions to the article would be video guides, screenshots from the game, and photos.'' --> | <!-- ''Excellent additions to the article would be video guides, screenshots from the game, and photos.'' --> | ||
| − | [ | + | |
| − | {{ | + | ;Skins |
| + | * [https://live.warthunder.com/feed/camouflages/?vehicle=g8n1 Skins and camouflages for the {{PAGENAME}} from live.warthunder.com.] | ||
| + | |||
| + | ;Images | ||
| + | <gallery mode="packed-hover" heights="150"> | ||
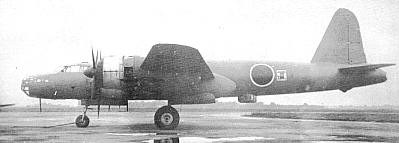
| + | File:BomberImage_G8N1_historical.jpg|<small>An early G8N example</small> | ||
| + | </gallery> | ||
| + | |||
| + | ;Videos | ||
| + | {{Youtube-gallery|3SqwUvbradc|'''Nippon Deathstar! G8N1 - Japan - Sub's Choice #43!''' - ''Jengar''}} | ||
== See also == | == See also == | ||
''Links to the articles on the War Thunder Wiki that you think will be useful for the reader, for example:'' | ''Links to the articles on the War Thunder Wiki that you think will be useful for the reader, for example:'' | ||
| − | |||
* ''reference to the series of the aircraft;'' | * ''reference to the series of the aircraft;'' | ||
* ''links to approximate analogues of other nations and research trees.'' | * ''links to approximate analogues of other nations and research trees.'' | ||
| Line 210: | Line 218: | ||
== External links == | == External links == | ||
<!--''Paste links to sources and external resources, such as:'' | <!--''Paste links to sources and external resources, such as:'' | ||
| − | |||
* ''topic on the official game forum;'' | * ''topic on the official game forum;'' | ||
| − | |||
* ''other literature.''--> | * ''other literature.''--> | ||
Revision as of 06:38, 12 September 2021
Contents
Description
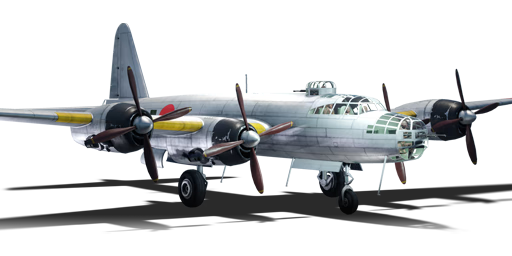
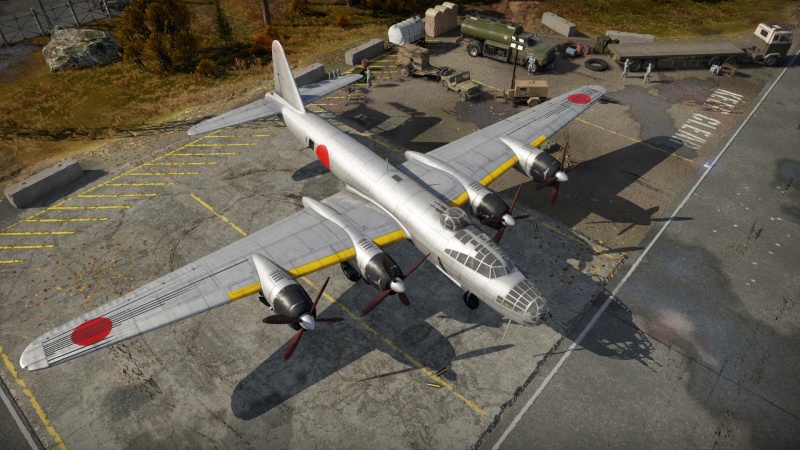
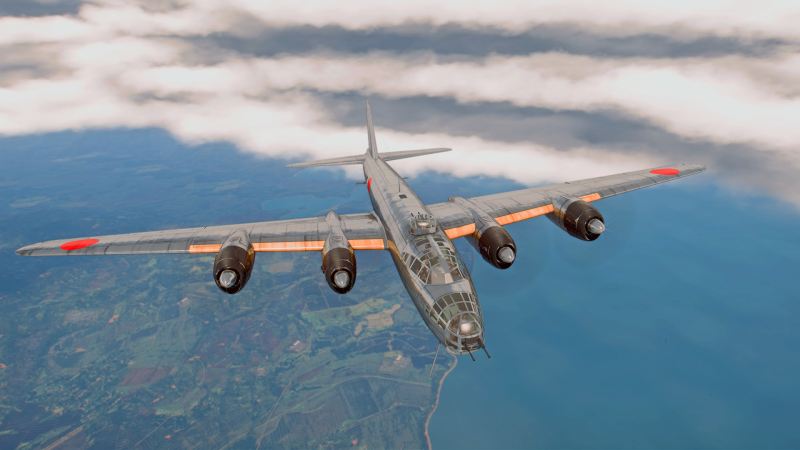
The G8N1 Renzan is a rank Japanese bomber with a battle rating of (AB), (RB), and (SB). It was introduced in Update 1.29.
Nicknamed "The Death Star" by the War Thunder community, this beast is a machine to be reckoned with. It is armed with an astounding 6 x 20 mm Type 99 Mk. 1 cannons - enemy planes dare not come close to the Renzan. It has a high chance of surviving multiple enemy attacks thanks to this overwhelming defensive armament, high ammunition count, and good armour (for a Japanese aircraft). This comes at a price - its maximum payload is only 2,400 kg, making it the heavy bomber with the smallest total bomb load in-game. Although the Renzan isn't the most capable bomber as far as ground attack goes, it is still very dangerous when in formation or with teammates at its side. Unlike other heavy bombers such as the Lancaster B Mk I, the Renzan is able to defend itself without fighter escort, to some extent. Another unique feature of the Renzan is its four-engine design. It is the only Japanese plane apart from the G5N1 and the premium B-17E Flying Fortress with four engines. This increases the Renzan's chances of surviving attacks and making it back to base.
The G8N1 utilizes 6 x 20 mm cannons placed in 3 turrets on the dorsal, ventral, and tail positions along with 4 x 13.2 mm machine guns placed in the nose and waist positions. The Renzan is able to defend itself from all sides and angles, with the most firepower towards the rear of the aircraft. This is where the Renzan is most effective at eliminating potential attackers. The 20 mm cannons require a good amount of lead, make sure to take care when firing. Unlocking the "New 20 mm cannons" and "New 13.2 mm MGs" modules will help the turrets fire for longer periods of time. Upgrading certain crew statistics such as gunner vitality and accuracy will also improve survivability and damage potential.
General info
Flight performance
| Characteristics | Max Speed (km/h at 7,620 m) |
Max altitude (metres) |
Turn time (seconds) |
Rate of climb (metres/second) |
Take-off run (metres) | |||
|---|---|---|---|---|---|---|---|---|
| AB | RB | AB | RB | AB | RB | |||
| Stock | 493 | 475 | 25.6 | 26.3 | 4.9 | 4.9 | 489 | |
| Upgraded | 534 | 512 | 23.7 | 24.4 | 9.9 | 7.2 | ||
Details
| Features | ||||
|---|---|---|---|---|
| Combat flaps | Take-off flaps | Landing flaps | Air brakes | Arrestor gear |
| ✓ | ✓ | ✓ | X | X |
| Limits | ||||||
|---|---|---|---|---|---|---|
| Wings (km/h) | Gear (km/h) | Flaps (km/h) | Max Static G | |||
| Combat | Take-off | Landing | + | - | ||
| 750 | 332 | 322 | 270 | ~3 | ~2 | |
| Optimal velocities (km/h) | |||
|---|---|---|---|
| Ailerons | Rudder | Elevators | Radiator |
| < 340 | < 350 | < 410 | > 280 |
| Compressor (RB/SB) | ||
|---|---|---|
| Setting 1 | ||
| Optimal altitude | 100% Engine power | WEP Engine power |
| 7,000 m | 7,400 hp | 7,992 hp |
Survivability and armour
- 13 mm Steel plates behind the nose gunner
- 13 mm Steel plates behind the pilots
- 13 mm Steel plates behind the dorsal gunner
- 13 mm Steel plates in front of beam turret gunners
- 13 mm Steel plate in the tail gunner's seat
Modifications and economy
As with any propeller-driven bomber, speed is not necessarily important. Start off by researching all of the payload and turret modules, as these are more worthwhile than upgrading the aircraft's speed or turn time. Upgrading crew skills such as reload speed and ground repair time are also beneficial. Upgrading the gunners also gives you a massive defensive boost but costs a lot of crew points. Gunner vitality should be number one on the list of crew upgrades. Unlocking the turret belts modules also allows one to fill the turret belts with more armour piercing or high explosive rounds, furthering the G8N1's survivability.
Armaments
Suspended armament
The G8N1 can be outfitted with the following ordnance:
- 18 x 60 kg Navy Type 97 Number 6 bombs (1,080 kg total)
- 8 x 250 kg Navy Type Number 25 Model 2 bombs (2,000 kg total)
- 3 x 800 kg Navy Type Number 80 Model 1 bombs (2,400 kg total)
Defensive armament
The G8N1 is defended by:
- 2 x 20 mm Type 99 Model 2 cannons, dorsal turret (300 rpg = 600 total)
- 2 x 20 mm Type 99 Model 2 cannons, ventral turret (200 rpg = 400 total)
- 2 x 20 mm Type 99 Model 2 cannons, tail turret (300 rpg = 600 total)
- 2 x 13 mm Type 2 machine guns, nose turret (200 rpg = 400 total)
- 1 x 13 mm Type 2 machine gun, 2 x beam turrets (300 rpg)
Usage in battles
In all game modes, the G8N1 excels at the traditional heavy bomber role of bombing strategic targets like air bases or factories. Maps like New Guinea and Midway feature enemy airfields. If destroyed, they will net your team an auto-win. Unfortunately, it takes multiple Renzans equipped with the full bomb load to destroy an airfield on the first attack run. Other maps such as Saipan do not have airfields. Instead, an array of carriers serve as the enemy's bases. It is possible to destroy all of the carriers and win the round, but again requires multiple Renzans or multiple landings. If the "14 in (mod35)" module is not researched, most maps the Renzan is placed on feature smaller targets like tanks, pillboxes, or destroyers. These can be dispatched with the other bomb load outs the G8N1 possesses. In Arcade battles, the strategy is exactly the same. One may also consider climbing high or flanking to avoid enemy fighters.
If attacked, the G8N1 can more than easily defend itself. It is recommended to "line up" an enemy aircraft by manoeuvring so that all of your tail turrets are facing it. Then, start firing at distances of around 1 km away. Make sure to lead properly and if the shells aren't hitting watch the tracers and adjust accordingly. Unfortunately, even minor wing damage can result in a so-called "death spin" in which the plane becomes unbalanced and spirals slowly towards the ground. It is nearly impossible to recover from a situation such as this, and it happens in all game modes. Apart from that issue, the Renzan can be more of a fortress than the B-17 "Flying Fortress".
Manual Engine Control
| MEC elements | ||||||
|---|---|---|---|---|---|---|
| Mixer | Pitch | Radiator | Supercharger | Turbocharger | ||
| Oil | Water | Type | ||||
| Not controllable | Controllable Not auto controlled |
Not controllable Not auto controlled |
Controllable Not auto controlled |
Combined | Not controllable 1 gear |
Auto controlled |
Pros and cons
Pros:
- Second most powerful defensive armament next to the Tu-4
- Fear factor: the Renzan is known for its defensive capabilities
- Good armour in the rear
- Pilot snipes are unlikely to be fatal, as one of the two pilots will usually survive and continue flying
- Generally manoeuvrable for its size
- Armoured and equipped with self-sealing fuel tanks
- Able to defend itself from multiple directions
- Several vibrant in-game camouflages able to be unlocked
Cons:
- Turrets jam quickly
- Low ammo count for turrets, make sure to reload after any engagement
- Most opponents will have cannons capable of penetrating the armour
- Low total payload capacity
- Landing gear takes a long time to deploy and retract
- Very hard to brake when landing
- Mediocre climb rate
- Allied fighters can easily reach you
History
The G8N1 Renzan was designed to fit an earlier Japanese military specification of a long-range land-based attack plane. The earlier attempt, the G5N1 failed. The initial prototype was completed in October of 1944 and delivered to the Imperial Navy for testing. A total of four prototypes were produced before production stopped as a result of the cease in hostilities. The Allies allocated the name "Rita" to the G8N.
In-game description
Nakajima G8N1 "Renzan" experimental four-engine, long-range, land-based bomber (Allied reporting name: Rita), Navy 18-Shi specification
An all-metal, seven-seat cantilever monoplane with retractable nose landing gear.
After the creation of the G5N bomber failed, the Nakajima Aircraft Company's designers were forced to radically reconsider their methods for designing heavy multi-engine machines, now that they had some experience.
In late 1942, leaders of the Imperial Japanese Navy issued new requirements for a land-based bomber that would replace the obsolescent G4M in the very near future.
In February 1943, the Nakajima Company was offered to develop such a bomber, after preliminary 18-Shi requirements were issued for a maritime experimental aircraft. An official specification for it was formulated by September of the same year. The specification called for a well-protected machine with powerful defensive armament, which would reach a maximum speed of 592 km/h and have a full bomb capacity of 4,000 kg.
The first prototype of the G8N1 bomber was ready by October 1944, and it got off the ground for the first time on October 23.
The aircraft came to have four Nakajima NK9K-L Homare 24 eighteen-cylinder air-cooled engines with Hitachi 92 turbocompressors, which could produce a maximum takeoff power of 2,000 hp.
The G8N1 bomber had unprecedented power in its defensive armament. The nose turret housed twin 13 mm Type 2 (Rheinmetall-Borsig MG 131) machine guns with 200 rounds each. Each of two fuselage blister gun mounts housed one 13 mm Type 2 machine gun with 300 rounds each. The lower electric turret, capable of 360-degree fire, housed two 20 mm Type 99 Model 1 (Oerlikon FF) cannons with 200 rounds each. The upper electrically driven turret, capable of 360-degree fire, was equipped with two 20 mm Type 99 Model 1 cannons with 300 rounds each. The rear power-driven turret had two 20 mm Type 99 Model 1 cannons with 300 rounds each.
The G8N1 bomber's combat load was carried only internally. Bombs ranging from 60 kg to 2,000 kg, in various combinations, could be suspended in the bomb bay. The standard payload was 2,000 kg within maximum mission flight range. The maximum bomb capacity was 4,000 kg.
Media
- Skins
- Images
- Videos
See also
Links to the articles on the War Thunder Wiki that you think will be useful for the reader, for example:
- reference to the series of the aircraft;
- links to approximate analogues of other nations and research trees.
External links
| Nakajima Aircraft Company (中島飛行機株式会社 ) | |
|---|---|
| Fighters | Ki-27 otsu · Ki-27 otsu Tachiarai |
| Ki-43-I · Ki-43-II · Ki-43-III otsu | |
| Ki-44-I · Ki-44-I 34 · Ki-44-II otsu · Ki-44-II hei | |
| Ki-84 ko · Ki-84 otsu · Ki-84 hei | |
| Ki-87 | |
| Hydroplanes | A6M2-N* |
| Interceptors | J1N1 · J5N1 |
| Bombers | B5N2 |
| B6N1 Model 11 · B6N2 Model 12 · B6N2a Model 12Ko | |
| G5N1 · G8N1 | |
| Ki-49-I · Ki-49-IIa · Ki-49-IIb · Ki-49-IIb/L | |
| Recon | E8N2 |
| Jet Fighters | Kikka |
| Captured | ␗Ki-27 otsu · ▃Ki-43-II · ␗Ki-43-III ko · ␗Ki-44-II hei · ␗Ki-84 ko |
| *Refit of the Mitsubishi A6M2 mod. 11 | |
| See also | Fuji Heavy Industries (1957-2017) |
| Japan bombers | |
|---|---|
| Navy | |
| Carrier-based attack bomber | |
| B5N | B5N2 |
| B6N | B6N1 · B6N2 · B6N2a |
| B7A | B7A2 · B7A2 (Homare 23) |
| Carrier-based dive bomber | |
| D3A | D3A1 |
| D4Y | D4Y1 · D4Y2 · D4Y3 Ko |
| Shipboard Observation seaplane | |
| F1M | F1M2 |
| Land-based Attack bomber | |
| G4M | G4M1 |
| G5N | G5N1 |
| G8N | G8N1 |
| Flying boat | |
| H6K | H6K4 |
| H8K | H8K2 · H8K3 |
| Land-based Bomber | |
| P1Y | P1Y1 |
| Army | |
| Light | Ki-32 |
| Ki-48-II otsu | |
| Heavy | Ki-21-Ia · Ki-21-I hei |
| Ki-49-I · Ki-49-IIa · Ki-49-IIb · Ki-49-IIb/L | |
| Ki-67-I Ko · Ki-67-I otsu | |
| Other countries | ▅B-17E |


