Difference between revisions of "T-80BVM"
(fixed info) (Tag: Visual edit) |
(Edits) |
||
| Line 25: | Line 25: | ||
'''Armour type:''' | '''Armour type:''' | ||
| − | * Cast | + | * Cast homogeneous armor |
| − | |||
| − | |||
{| class="wikitable" | {| class="wikitable" | ||
| Line 33: | Line 31: | ||
! Armour !! Front (Slope angle) !! Sides !! Rear !! Roof | ! Armour !! Front (Slope angle) !! Sides !! Rear !! Roof | ||
|- | |- | ||
| − | | Hull || 50 mm (68°) || 80 mm ''Top'' <br> 20 mm ''Bottom'' || 50 mm || 20 - 30 mm | + | | Hull || 50 mm (68°) || 80 mm ''Top'' <br> 20 mm ''Bottom'' || 50 mm || 20-30 mm |
|- | |- | ||
| − | | Turret || Variable thickness ''Turret front'' <br> Variable thickness ''Gun mantlet'' || Variable Thickness || Variable Thickness || 30 - 45 mm | + | | Turret || Variable thickness ''Turret front'' <br> Variable thickness ''Gun mantlet'' || Variable Thickness || Variable Thickness || 30-45 mm |
|- | |- | ||
| Cupola || 80 mm || 80 mm || 80 mm || 45 mm | | Cupola || 80 mm || 80 mm || 80 mm || 45 mm | ||
|- | |- | ||
|} | |} | ||
| − | |||
'''Notes:''' | '''Notes:''' | ||
* Relict: 20 mm High Hardness Rolled Armour | * Relict: 20 mm High Hardness Rolled Armour | ||
| − | * Tracks: 20 mm | + | * Tracks: 20 mm |
| − | |||
=== Mobility === | === Mobility === | ||
| Line 63: | Line 59: | ||
<!-- ''Give the reader information about the characteristics of the main gun. Assess its effectiveness in a battle based on the reloading speed, ballistics and the power of shells. Do not forget about the flexibility of the fire, that is how quickly the cannon can be aimed at the target, open fire on it and aim at another enemy. Add a link to the main article on the gun: <code><nowiki>{{main|Name of the weapon}}</nowiki></code>. Describe in general terms the ammunition available for the main gun. Give advice on how to use them and how to fill the ammunition storage.'' --> | <!-- ''Give the reader information about the characteristics of the main gun. Assess its effectiveness in a battle based on the reloading speed, ballistics and the power of shells. Do not forget about the flexibility of the fire, that is how quickly the cannon can be aimed at the target, open fire on it and aim at another enemy. Add a link to the main article on the gun: <code><nowiki>{{main|Name of the weapon}}</nowiki></code>. Describe in general terms the ammunition available for the main gun. Give advice on how to use them and how to fill the ammunition storage.'' --> | ||
{{main|2A46M-1 (125 mm)}} | {{main|2A46M-1 (125 mm)}} | ||
| − | The T-80BVM has access to the 2A46M-1 125 mm smoothbore main gun. This gun | + | The T-80BVM has access to the 2A46M-1 125 mm smoothbore main gun. This gun fires the same ammunition as previous T-64 and T-80 models. The projectiles include the 3BM60 (modern round for the T-90BVM), the 9M119 ATGM and the 9M119M1, a modernized 9M119 with a tandem charge and a slightly reduced speed. |
{| class="wikitable" style="text-align:center" width="100%" | {| class="wikitable" style="text-align:center" width="100%" | ||
| Line 82: | Line 78: | ||
==== Ammunition ==== | ==== Ammunition ==== | ||
| − | The T-80BVM has access to | + | The T-80BVM has access to capable rounds, able to destroy any enemy tank or vehicle it faces at the battle rating. The T-80BVM gets the powerful 3BM60 Svinets APFSDS. |
''HEAT-FS:'' | ''HEAT-FS:'' | ||
| − | The 3BK18M is the first round the T-80BVM has access to, it can be considered a mediocre round as most of the enemies which will be faced will be able to withstand it due to composite armour. However, it is | + | The 3BK18M is the first round the T-80BVM has access to, it can be considered a mediocre round as most of the enemies which will be faced will be able to withstand it due to composite armour. However, it is particulary useful when facing light armoured vehicles which are prompt to hull break (SPAA, light tanks, etc) and useful when facing enemy helicopters as it has enough explosive mass and flight speed to be competitive as last resort. As a hollow charge, it is prompt to detonate mid air due to trees, bushes and fences. This makes the round difficult to use when in long range engagements as some field elements may not be rendered. |
''APFSDS:'' | ''APFSDS:'' | ||
| − | The T-80BVM has access to 2 types of APFSDS: the 3BM42 and 3BM60. The 3BM42 is a decent round with decent penetration and stopping power. While it lacks penetration to penetrate Leopard 2 tanks, Leclercs or M1A1/2 turret plates, it has enough penetration to hit and cause critical damage in | + | The T-80BVM has access to 2 types of APFSDS: the 3BM42 and 3BM60. The 3BM42 is a decent round with decent penetration and stopping power. While it lacks penetration to penetrate Leopard 2 tanks, Leclercs or M1A1/2 turret plates, it has enough penetration to hit and cause critical damage in weak spots and side shots. 3BM60 however, different from the 3BM42, has much more penetration which can penetrate all tanks from all sides (be aware of Leopard 2 turret wedges and firing at M1A2 turret with an obliquity greater than 45°). |
''ATGM:'' | ''ATGM:'' | ||
| − | The 9M119M1is a tandem version of the previously seen 9M119 SACLOS ATGM | + | The 9M119M1is a tandem version of the previously seen 9M119 SACLOS ATGM. The main upgrade is the tandem charge, everything else remains practically the same with exception of reduction of flight speed. |
| + | |||
{| class="wikitable sortable" style="text-align:center" width="100%" | {| class="wikitable sortable" style="text-align:center" width="100%" | ||
! colspan="8" | Penetration statistics | ! colspan="8" | Penetration statistics | ||
| Line 175: | Line 172: | ||
|- | |- | ||
|} | |} | ||
| − | The coaxial 7.62 mm PKT | + | The coaxial 7.62 mm PKT machine gun however is lacking against enemy vehicles, it still can mow down some small bushes and fences to provide better view or use it to help pin enemies. |
{| class="wikitable" style="text-align:center" width="50%" | {| class="wikitable" style="text-align:center" width="50%" | ||
|- | |- | ||
| Line 188: | Line 185: | ||
== Usage in battles == | == Usage in battles == | ||
<!-- ''Describe the tactics of playing in the vehicle, the features of using vehicles in the team and advice on tactics. Refrain from creating a "guide" - do not impose a single point of view but instead give the reader food for thought. Describe the most dangerous enemies and give recommendations on fighting them. If necessary, note the specifics of the game in different modes (AB, RB, SB).'' --> | <!-- ''Describe the tactics of playing in the vehicle, the features of using vehicles in the team and advice on tactics. Refrain from creating a "guide" - do not impose a single point of view but instead give the reader food for thought. Describe the most dangerous enemies and give recommendations on fighting them. If necessary, note the specifics of the game in different modes (AB, RB, SB).'' --> | ||
| − | The T-80BVM has | + | The T-80BVM has a higher survivability and better ammunition than the T-80U, meaning it is able to hold much more fire and deal more damage with the Svinets APFSDS than with the Mango APFSDS. The most dangerous enemy to the T-80BVM is helicopters, although the Relikt will usually protect against one or two missiles. However, it is still ERA, and will be blown off after it is detonated. Since the interior of the tank is so compact, this makes it easy for good pilots to knock you out in 2-3 rapid missile shots. To avoid helicopters, stay close to buildings or hide next to trees/large bushes and wait for an anti-air vehicle or a plane to take it out. Another option is to use the ATGM or range finder to shoot down the enemy yourself. |
=== Pros and cons === | === Pros and cons === | ||
| Line 220: | Line 217: | ||
;Skins | ;Skins | ||
| − | |||
* [https://live.warthunder.com/feed/camouflages/?vehicle=ussr_t_80bvm Skins and camouflages for the {{PAGENAME}} from live.warthunder.com.] | * [https://live.warthunder.com/feed/camouflages/?vehicle=ussr_t_80bvm Skins and camouflages for the {{PAGENAME}} from live.warthunder.com.] | ||
Revision as of 20:10, 25 July 2021
| This page is about the Russian medium tank T-80BVM. For other versions, see T-80 (Family). |

Contents
Description
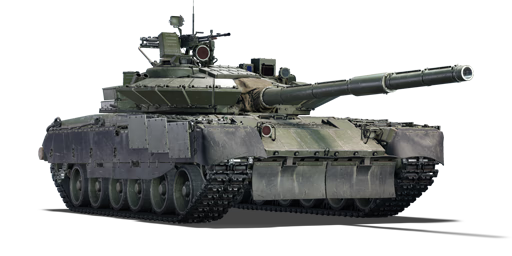
The T-80BVM is a rank Soviet medium tank with a battle rating of (AB), (RB), and (SB). It was introduced in Update "Red Skies".
General info
Survivability and armour
The armour protection of the T-80BVM is one of the best, especially if the incoming round hits one of the Relikt ERA plates which are twice as effective as CONTACT-5 ERA against kinetic projectiles (meaning that the Leopard 2A6, one of the most dangerous opponents, cannot penetrate the UFP). The strongest parts of the tank are the turret front and a majority of the upper front plate. It does, however, have some weaker areas, the most important being the driver's hatch, the immediate areas of the turret surrounding the gun and its breech, and its lower frontal plate. These weak spots are however pretty small targets at range, and thus by hiding them properly, the risk of being hit can be minimized. Owing to its very low profile, a hull-down T-80BVM is a small target in itself; the weaker parts of its armour are even smaller.
Fuel tanks on either side of the driver can soak up some shrapnel and add to the overall survivability. However, as with all Russian auto-loaded MBTs, there are only three crew members so a well-placed shot is capable of causing a crew knock-out. It's also worth noting that the placement of the ammo rack, below the turret in a carousel-style setup, leaves the T-80BVM particularly vulnerable to side shots causing ammunition detonation. The protection of the T-80BVM is very similar to the T-80U in terms of the size and placement of the weak areas. The sides of your tank should always be protected, and when engaging an enemy, your front armour should always be aligned directly towards him to reduce the risks of a shot penetrating your weaker side. The tank does, however, have some Relikt ERA plates on its upper front skirts, meaning that you have some extra protection against kinetic penetrators, and a lot against chemical shells, until the ERA bricks are detonated (leaving the area vulnerable for another hit).
As mentioned above, the T-80BVM also benefits from the typical low silhouette Russian tankers will be accustomed to, with the vehicle being significantly smaller than its competitors. This allows the T-80BVM to be hidden behind small terrain deformities which other MBTs would otherwise be visible. It's also harder for an enemy tank commander to immediately tell which area is the most vulnerable.
Armour type:
- Cast homogeneous armor
| Armour | Front (Slope angle) | Sides | Rear | Roof |
|---|---|---|---|---|
| Hull | 50 mm (68°) | 80 mm Top 20 mm Bottom |
50 mm | 20-30 mm |
| Turret | Variable thickness Turret front Variable thickness Gun mantlet |
Variable Thickness | Variable Thickness | 30-45 mm |
| Cupola | 80 mm | 80 mm | 80 mm | 45 mm |
Notes:
- Relict: 20 mm High Hardness Rolled Armour
- Tracks: 20 mm
Mobility
Overall mobility is exactly the same as the T-80U, meaning it can easily keep up with most top-tier MBTs.
| Game Mode | Max Speed (km/h) | Weight (tons) | Engine power (horsepower) | Power-to-weight ratio (hp/ton) | |||
|---|---|---|---|---|---|---|---|
| Forward | Reverse | Stock | Upgraded | Stock | Upgraded | ||
| Arcade | Expression error: Unexpected * operator. | 1937 | Expression error: Unexpected round operator. | __.__ | |||
| Realistic | 1106 | Expression error: Unexpected round operator. | __.__ | ||||
Modifications and economy
Armaments
Main armament
The T-80BVM has access to the 2A46M-1 125 mm smoothbore main gun. This gun fires the same ammunition as previous T-64 and T-80 models. The projectiles include the 3BM60 (modern round for the T-90BVM), the 9M119 ATGM and the 9M119M1, a modernized 9M119 with a tandem charge and a slightly reduced speed.
| 125 mm 2A46M-1 | Turret rotation speed (°/s) | Reloading rate (seconds) | |||||||||||
|---|---|---|---|---|---|---|---|---|---|---|---|---|---|
| Mode | Capacity | Vertical | Horizontal | Stabilizer | Stock | Upgraded | Full | Expert | Aced | Stock | Full | Expert | Aced |
| Arcade | 38 | -5°/+15° | ±180° | Two-plane | 38.1 | 52.7 | 64.0 | 70.8 | 75.3 | 6.50 | 6.50 | 6.50 | 6.50 |
| Realistic | 23.8 | 28.0 | 34.0 | 37.6 | 40.0 | ||||||||
Ammunition
The T-80BVM has access to capable rounds, able to destroy any enemy tank or vehicle it faces at the battle rating. The T-80BVM gets the powerful 3BM60 Svinets APFSDS.
HEAT-FS:
The 3BK18M is the first round the T-80BVM has access to, it can be considered a mediocre round as most of the enemies which will be faced will be able to withstand it due to composite armour. However, it is particulary useful when facing light armoured vehicles which are prompt to hull break (SPAA, light tanks, etc) and useful when facing enemy helicopters as it has enough explosive mass and flight speed to be competitive as last resort. As a hollow charge, it is prompt to detonate mid air due to trees, bushes and fences. This makes the round difficult to use when in long range engagements as some field elements may not be rendered.
APFSDS:
The T-80BVM has access to 2 types of APFSDS: the 3BM42 and 3BM60. The 3BM42 is a decent round with decent penetration and stopping power. While it lacks penetration to penetrate Leopard 2 tanks, Leclercs or M1A1/2 turret plates, it has enough penetration to hit and cause critical damage in weak spots and side shots. 3BM60 however, different from the 3BM42, has much more penetration which can penetrate all tanks from all sides (be aware of Leopard 2 turret wedges and firing at M1A2 turret with an obliquity greater than 45°).
ATGM:
The 9M119M1is a tandem version of the previously seen 9M119 SACLOS ATGM. The main upgrade is the tandem charge, everything else remains practically the same with exception of reduction of flight speed.
| Penetration statistics | |||||||
|---|---|---|---|---|---|---|---|
| Ammunition | Type of warhead |
Penetration @ 0° Angle of Attack (mm) | |||||
| 10 m | 100 m | 500 m | 1,000 m | 1,500 m | 2,000 m | ||
| 3BK18M | HEATFS | 550 | 550 | 550 | 550 | 550 | 550 |
| 3OF26 | HE | 42 | 42 | 42 | 42 | 42 | 42 |
| 3BM42 | APFSDS | 479 | 477 | 470 | 462 | 453 | 445 |
| 9M119M1 | ATGM (tandem) | 850 | 850 | 850 | 850 | 850 | 850 |
| 3BM60 | APFSDS | 580 | 576 | 567 | 555 | 543 | 532 |
| Shell details | |||||||||
|---|---|---|---|---|---|---|---|---|---|
| Ammunition | Type of warhead |
Velocity (m/s) |
Projectile Mass (kg) |
Fuse delay (m) |
Fuse sensitivity (mm) |
Explosive Mass (TNT equivalent) (g) |
Ricochet | ||
| 0% | 50% | 100% | |||||||
| 3BK18M | HEATFS | 905 | 19 | 0.05 | 0.1 | 2,790 | 65° | 72° | 77° |
| 3OF26 | HE | 850 | 23 | 0 | 0.1 | 5,240 | 79° | 80° | 81° |
| 3BM42 | APFSDS | 1,700 | 4.85 | N/A | N/A | N/A | 78° | 80° | 81° |
| 9M119M1 | ATGM (tandem) | 350 | 17.2 | 0.4 | 0.01 | 4,720 | 80° | 82° | 90° |
| 3BM60 | APFSDS | 1,660 | 4.85 | N/A | N/A | N/A | 78° | 80° | 81° |
Ammo racks
| Full ammo |
1st rack empty |
2nd rack empty |
3rd rack empty |
4th rack empty |
5th rack empty |
6th rack empty |
Visual discrepancy |
|---|---|---|---|---|---|---|---|
| 38 | __ (+__) | __ (+__) | __ (+__) | __ (+__) | __ (+__) | __ (+__) | __ |
Machine guns
The 12.7 mm NSVT machinegun, seen on all previous soviet MBTs, can help take out some lightly armoured vehicles from the side as well as to destroy low-flying aircraft and helicopters. The roof-mounted MG allows it to spin a full 180 degrees to the left and right the tank.
| 12.7 mm NSVT | ||||
|---|---|---|---|---|
| Mount | Capacity (Belt) | Fire rate | Vertical | Horizontal |
| Pintle | 300 (150) | 700 | -5°/+60° | ±180° |
The coaxial 7.62 mm PKT machine gun however is lacking against enemy vehicles, it still can mow down some small bushes and fences to provide better view or use it to help pin enemies.
| 7.62 mm PKT | ||||
|---|---|---|---|---|
| Mount | Capacity (Belt) | Fire rate | Vertical | Horizontal |
| Coaxial | 1,250 (250) | 700 | N/A | N/A |
Usage in battles
The T-80BVM has a higher survivability and better ammunition than the T-80U, meaning it is able to hold much more fire and deal more damage with the Svinets APFSDS than with the Mango APFSDS. The most dangerous enemy to the T-80BVM is helicopters, although the Relikt will usually protect against one or two missiles. However, it is still ERA, and will be blown off after it is detonated. Since the interior of the tank is so compact, this makes it easy for good pilots to knock you out in 2-3 rapid missile shots. To avoid helicopters, stay close to buildings or hide next to trees/large bushes and wait for an anti-air vehicle or a plane to take it out. Another option is to use the ATGM or range finder to shoot down the enemy yourself.
Pros and cons
Pros:
- Armour is superb, most of the hull and turret is immune to all shells in the game, including the dreaded DM53 APFSDS shell utilized by the Leopard 2A6
- Access to the unlockable 3BM60 APFSDS shell with 580 mm of penetration
- Autoloader grants a short and constant reload time
Cons:
- Relatively low reverse speed, hard to retreat from a threatening situation
- The cramped interior, with the crew placed tightly together, means that the tank is easily disabled if a shot penetrates
- Poor survivability from side shots due to the massive ammunition carousel mounted in the centre of the hull
- Spare ammunition not carried in the autoloader is distributed around the hull and turret - meaning a penetrating shot might ignite a round carried as a spare, setting off the carousel
- Poor gun depression of -5° due to the low turret height. This makes it difficult to shoot over hills and other obstacles, especially on maps with rough terrain
- While the front is covered with ERA, the gaps between ERA plates are weak spots
History
The T-80BVM is a current program for the Russian army in the modernization of Soviet T-80BV tanks to the level of the T-72B3 and T-90M main battle tanks, as well as unification with them. The modernization includes an up-to-date fire control system with a duplicate sight for the commander, and the ability to operate the 9M119 tandem ATGMs, as well as the "Relikt" ERA pack instead of outdated "Kontakt-1". Thanks to the latter, the protection of the vehicle from HEAT and AP projectiles was significantly increased.
The modernization of the T-80BVM takes place at the facilities of the Omsk heavy machinery plant (Omsktransmash) and enter service with units of the marines and motorized infantry of the Armed Forces of the Russian Federation.
- Taken from Devblog.
Media
- Skins
- Videos
See also
Links to the articles on the War Thunder Wiki that you think will be useful for the reader, for example:
- reference to the series of the vehicles;
- links to approximate analogues of other nations and research trees.
External links
Paste links to sources and external resources, such as:
- topic on the official game forum;
- other literature.
| USSR medium tanks | |
|---|---|
| T-28 | T-28 (1938) · T-28 · T-28E |
| T-34-76 | T-34 (Prototype) · T-34 (1940) · T-34 (1941) · T-34 (1st Gv.T.Br.) · T-34 (1942) · T-34E STZ · T-34E |
| T-34-57 | T-34-57 · T-34-57 (1943) |
| T-34-85 | T-34-85 (D-5T) · T-34-85 · T-34-85E |
| T-34-100 | T-34-100 |
| T-44 | T-44 · T-44-100 · T-44-122 |
| T-54 | T-54 (1947) · T-54 (1949) · T-54 (1951) |
| T-55 | TO-55 · T-55A · T-55AM-1 · T-55AMD-1 |
| T-62 | T-62 · T-62M-1 |
| T-64 | Object 435 · T-64A (1971) · T-64B |
| T-72 | T-72A · T-72AV (TURMS-T) · T-72B · T-72B (1989) · T-72B3 · T-72M2 Moderna |
| T-80 | T-80B · T-80U · T-80UD · T-80UK · T-80UM2 · Т-80U-Е1 · T-80BVM · Object 292 |
| T-90 | Т-90А · T-90M |
| Trophies/Lend-Lease | |
| Germany | ▂T-III · ▂T-V |
| Great Britain | ▂МК-IX "Valentine" |
| USA | ▂M3 Medium · ▂M4A2 |
