Difference between revisions of "SB2C-4"
U100542309 (talk | contribs) m (→Pros and cons) (Tag: Visual edit) |
(Undo revision 177421 by U117037672 (talk)) |
||
| (4 intermediate revisions by 3 users not shown) | |||
| Line 1: | Line 1: | ||
{{About | {{About | ||
|about = American naval bomber '''{{PAGENAME}}''' | |about = American naval bomber '''{{PAGENAME}}''' | ||
| − | |usage = other | + | |usage = other versions |
| − | |link = | + | |link = SB2C (Family) |
}} | }} | ||
{{Specs-Card | {{Specs-Card | ||
| Line 102: | Line 102: | ||
{{Specs-Avia-Suspended}} | {{Specs-Avia-Suspended}} | ||
<!-- ''Describe the aircraft's suspended armament: additional cannons under the wings, bombs, rockets and torpedoes. This section is especially important for bombers and attackers. If there is no suspended weaponry remove this subsection.'' --> | <!-- ''Describe the aircraft's suspended armament: additional cannons under the wings, bombs, rockets and torpedoes. This section is especially important for bombers and attackers. If there is no suspended weaponry remove this subsection.'' --> | ||
| − | |||
| − | |||
The '''''{{PAGENAME}}''''' can be outfitted with the following ordnance: | The '''''{{PAGENAME}}''''' can be outfitted with the following ordnance: | ||
| − | * 2 | + | {| class="wikitable" style="text-align:center" width="100%" |
| − | + | |- | |
| − | + | ! !! width="8%" | 1 !! width="8%" | 2 !! width="8%" | 3 !! width="8%" | 4 !! width="8%" | 5 | |
| − | * | + | | rowspan="11" width="30%" | <div class="ttx-image">[[File:Hardpoints_{{PAGENAME}}.png]]</div> |
| + | |- | ||
| + | ! [[M2 Browning (12.7 mm)|12.7 mm M2 Browning]] machine guns (340 rpg) | ||
| + | | || 2* || || 2* || | ||
| + | |- | ||
| + | ! [[AN-M57 (250 lb)|250 lb AN-M57]] bombs | ||
| + | | || 1 || 2 || 1 || | ||
| + | |- | ||
| + | ! [[AN-M64A1 (500 lb)|500 lb AN-M64A1]] bombs | ||
| + | | || 1 || 2 || 1 || | ||
| + | |- | ||
| + | ! [[AN-M65A1 (1,000 lb)|1,000 lb AN-M65A1]] bombs | ||
| + | | || || 1 || || | ||
| + | |- | ||
| + | ! [[AN-Mk 1 (1,600 lb)|1,600 lb AN-Mk 1]] bombs | ||
| + | | || || 1 || || | ||
| + | |- | ||
| + | ! [[HVAR]] rockets | ||
| + | | 4* || || || || 4* | ||
| + | |- | ||
| + | ! [[Mk.13-6 Case (2,216 lb)|2,216 lb Mk.13-6 Case]] torpedoes | ||
| + | | || || 1 || || | ||
| + | |- | ||
| + | ! [[Mk.13-6 (2,216 lb)|2,216 lb Mk.13-6]] torpedoes | ||
| + | | || || 1 || || | ||
| + | |- | ||
| + | ! [[Type A Mark I mine|Type A Mark I]] mines | ||
| + | | || || 1 || || | ||
| + | |- | ||
| + | | colspan="6" | Maximum permissible loadout weight: 1,040 kg<br>Maximum permissible weight imbalance: 420 kg | ||
| + | |- | ||
| + | | colspan="7" | * M2 Browning pods cannot be equipped with HVAR rockets in the adjacent hardpoint | ||
| + | |- | ||
| + | |} | ||
| + | |||
| + | {{Navigation-Start|Default weapon presets}} | ||
| + | {{Navigation-First-Simple-Line}} | ||
| + | * 8 x HVAR rockets | ||
| + | * 4 x 250 lb AN-M57 bombs (1,000 lb total) | ||
* 4 x 500 lb AN-M64A1 bombs (2,000 lb total) | * 4 x 500 lb AN-M64A1 bombs (2,000 lb total) | ||
* 1 x 1,000 lb AN-M65A1 bomb (1,000 lb total) | * 1 x 1,000 lb AN-M65A1 bomb (1,000 lb total) | ||
| + | * 1 x 1,600 lb AN-Mk 1 bomb (1,600 lb total) | ||
| + | * 1 x 2,216 lb Mk.13-6 torpedo | ||
| + | * 1 x 2,216 lb Mk.13-6 Case torpedo | ||
* 1 x Type A Mark I mine | * 1 x Type A Mark I mine | ||
| − | |||
| − | |||
* 4 x 12.7 mm M2 Browning machine guns (340 rpg = 1,360 total) | * 4 x 12.7 mm M2 Browning machine guns (340 rpg = 1,360 total) | ||
| + | {{Navigation-End}} | ||
=== Defensive armament === | === Defensive armament === | ||
| Line 200: | Line 238: | ||
== Media == | == Media == | ||
<!-- ''Excellent additions to the article would be video guides, screenshots from the game, and photos.'' --> | <!-- ''Excellent additions to the article would be video guides, screenshots from the game, and photos.'' --> | ||
| + | |||
| + | ;Skins | ||
| + | * [https://live.warthunder.com/feed/camouflages/?vehicle=sb2c_4 Skins and camouflages for the {{PAGENAME}} from live.warthunder.com.] | ||
| + | |||
| + | ;Videos | ||
{{Youtube-gallery|uJziizNMYj8|'''The Shooting Range #164''' - ''Pages of History'' section at 04:12 discusses the SB2C Helldiver.}} | {{Youtube-gallery|uJziizNMYj8|'''The Shooting Range #164''' - ''Pages of History'' section at 04:12 discusses the SB2C Helldiver.}} | ||
| Line 211: | Line 254: | ||
<!-- ''Paste links to sources and external resources, such as:'' | <!-- ''Paste links to sources and external resources, such as:'' | ||
* ''topic on the official game forum;'' | * ''topic on the official game forum;'' | ||
| − | |||
* ''other literature.'' --> | * ''other literature.'' --> | ||
Latest revision as of 15:56, 24 November 2023
| This page is about the American naval bomber SB2C-4. For other versions, see SB2C (Family). |
Contents
Description
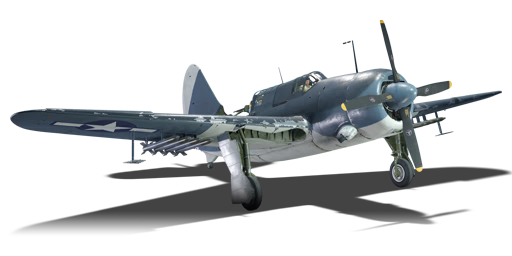
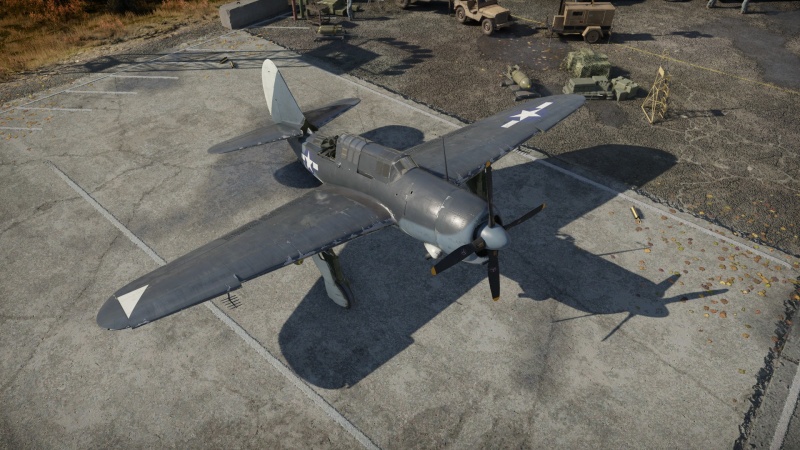
The SB2C-4 Helldiver is a rank American dive bomber with a battle rating of (AB), (RB), and (SB). It was introduced in Update 1.53 "Firestorm".
The SB2C-4 is an upgrade from the earlier SB2C-1c dive bomber at Rank II, having a more powerful engine and the ability to mount more payloads, including HVAR rockets. However, this version faces tougher and more deadly aircraft due to a higher Battle Rating.
General info
Flight performance
| Characteristics | Max Speed (km/h at 4,998 m) |
Max altitude (metres) |
Turn time (seconds) |
Rate of climb (metres/second) |
Take-off run (metres) | |||
|---|---|---|---|---|---|---|---|---|
| AB | RB | AB | RB | AB | RB | |||
| Stock | 440 | 422 | 24.0 | 24.8 | 3.7 | 3.6 | 300 | |
| Upgraded | 482 | 459 | 22.1 | 23.0 | 9.0 | 6.1 | ||
Details
| Features | ||||
|---|---|---|---|---|
| Combat flaps | Take-off flaps | Landing flaps | Air brakes | Arrestor gear |
| ✓ | ✓ | ✓ | ✓ | ✓ |
| Limits | ||||||
|---|---|---|---|---|---|---|
| Wings (km/h) | Gear (km/h) | Flaps (km/h) | Max Static G | |||
| Combat | Take-off | Landing | + | - | ||
| 503 | 481 | 250 | ~11 | ~5 | ||
| Optimal velocities (km/h) | |||
|---|---|---|---|
| Ailerons | Rudder | Elevators | Radiator |
| < 257 | < 350 | < 380 | > 325 |
Survivability and armour
- 8.5 mm Steel - Armour plate, the underside of the engine cowling
- 6.35 mm Steel - Cockpit/Instrument panel protection plate
- 11.11 mm Steel - Behind pilot's seat
- 6.35 mm Steel - Dorsal gunner protection plate
- 38 mm Bulletproof glass - Front windscreen
Modifications and economy
Armaments
Offensive armament
The SB2C-4 is armed with:
- 2 x 20 mm AN/M2 cannons, wing-mounted (200 rpg = 400 total)
Suspended armament
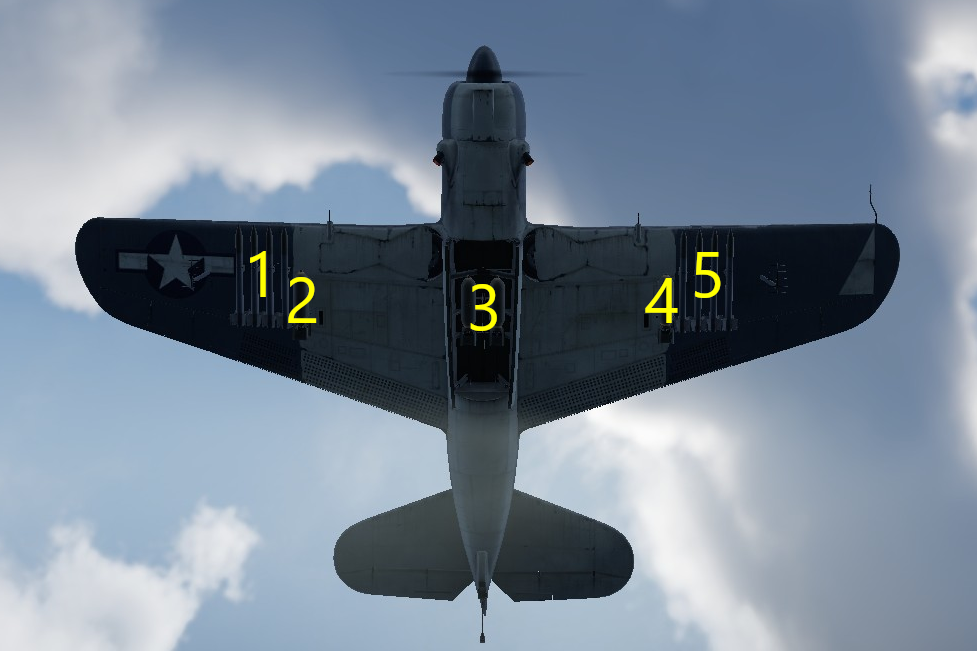
The SB2C-4 can be outfitted with the following ordnance:
| 1 | 2 | 3 | 4 | 5 | ||
|---|---|---|---|---|---|---|
| 12.7 mm M2 Browning machine guns (340 rpg) | 2* | 2* | ||||
| 250 lb AN-M57 bombs | 1 | 2 | 1 | |||
| 500 lb AN-M64A1 bombs | 1 | 2 | 1 | |||
| 1,000 lb AN-M65A1 bombs | 1 | |||||
| 1,600 lb AN-Mk 1 bombs | 1 | |||||
| HVAR rockets | 4* | 4* | ||||
| 2,216 lb Mk.13-6 Case torpedoes | 1 | |||||
| 2,216 lb Mk.13-6 torpedoes | 1 | |||||
| Type A Mark I mines | 1 | |||||
| Maximum permissible loadout weight: 1,040 kg Maximum permissible weight imbalance: 420 kg | ||||||
| * M2 Browning pods cannot be equipped with HVAR rockets in the adjacent hardpoint | ||||||
| Default weapon presets | |
|---|---|
| |
Defensive armament
The SB2C-4 is defended by:
- 2 x 7.62 mm Browning machine guns, dorsal turret (1,000 rpg = 2,000 total)
Usage in battles
- Arcade Battles
The SB2C-4 is very much like it's older sibling model in-game, which is a dive bomber/attacker capable of wreaking havoc to both soft and hard ground targets and enemy bases. Despite its capability to carry rockets and under-wing bombs and be used as an attacker, do not attempt to do so, unless you are sure a nearby enemy fighter does not immediately single you out as a target. This aircraft has fairly good manoeuvrability but does not fly nearly as well as any of the fighters you may encounter. However, this does not mean you cannot defend yourself in dire times. A distinct advantage of this aircraft is its firepower is more than enough to bring down any attacking enemy pilot with some skill, however, it's instability in coming out of rough turns can cause problems on getting guns on target difficult. Most pilots don't expect you to carry so much firepower with the extra machine guns so taking head-ons with some planes can work in your favour because most pilots do not expect you to have that much firepower. Moreover, due to it's firepower and airspawn, being a bomber hunter is no problem either. It is important to remember to use this plane's main niche to your advantage as you will be vulnerable to enemy gunners. This plane's niche as fast bomber is further reinforced compared to the SB2C-1c as it carries double the bomb load (2,000 lb/ 907 kg) and if you survive long enough with your firepower to defend yourself you can be a considerable drain to the enemy's ticket counter. Overall, this aircraft is a solid performer in Arcade battles which is a delightful blend of defensive/offensive firepower, speed (not fighter-like though), manoeuvrability and bombing capability specifically for a dive bomber. A recommended aircraft to take out in tier 3 battles and as a silver lions factory!
- Realistic Battles
In Realistic Battles, the SB2C-4 excels at the ground attack role. Use the bombs and rockets against hard targets (such as heavy pillboxes and tanks), and the 20 mm cannons for taking out soft targets and light pillboxes. Even the universal ammo belt with 50/50 HEF and AP can take out light pillboxes when aiming for the roof, but belts with more AP will make it easier. However, its use doesn't end there. The SB2C is surprisingly manoeuvrable for a dive bomber, which combined with its high bomber spawn, effective armament, and dive brakes mean it can be used to dive on enemy fighters and bombers, and can even hold its own in a dogfight, especially if the enemy underestimates the plane's manoeuvrability. These characteristics are also good tactics for defending yourself, markedly since the tail gunner is lacklustre. Unfortunately, this does not apply well when at a low energy state (ex: ground attacking at a low level). The SB2C has poor climb rate and acceleration, and experienced pilots will boom and zoom you and leave you few options to defend yourself (trying to get guns on target after an overshoot, forcing a head-on, etc). Instead, try to stay above the battle and go for enemy aircraft, and once your team has a numerical advantage, go to ground level and ground attack, preferably under cover of fighters.
- Fighting a SB2C-4
If you come across a SB2C-4, attack from its unprotected bottom which is easy to hit due to planes low speed and pilots rarely looking below their planes. Avoid attacking it when it is in a dive
Manual Engine Control
| MEC elements | ||||||
|---|---|---|---|---|---|---|
| Mixer | Pitch | Radiator | Supercharger | Turbocharger | ||
| Oil | Water | Type | ||||
| Controllable | Controllable Auto control available |
Not controllable Not auto controlled |
Controllable Auto control available |
Combined | Controllable 2 gears |
Not controllable |
Pros and cons
Pros:
- Very effective cannon armament
- Very agile for a dive bomber
- Good ground attack payload options
- Has air brakes
- Gets a bomber spawn
- Can attach gun pods; enemies will not expect you have that much firepower
- Great for bomber hunting
- Good at head-on attacks
Cons:
- No belly gunner
- Catches fire relatively easily
- Poor climb rate
- Fairly slow
- Tail gunner is ineffective at long range
- Any asymmetrical wing damage makes it very difficult to turn
- Extreme negatively static longitudinal stability for joystick at low speeds (e.g. the aircraft doesn't want to take off, but a slight bump makes the aircraft want to stall and harsh nose-down is required)
- 20 mm shells can almost instantly down your plane
- Elevators may jam in a dive
History
The SB2C-4 Helldiver was an improved model of the SB2C-3, which was in turn based on the SB2C-1c.
The SB2C-3 had added the R-2600-20 engine, which was rated at 1,900 hp. This helped to solve the power to weight issues of the earlier models. The SB2C-4 added eight wing racks for carrying 5 in (127 mm) HVAR unguided rockets, with four on each wing. Additionally, mountings for one 500 lb bomb on each wing were added - a total of two 500 lb bombs; these could be carried when not carrying rockets. These armament options were in addition to the centerline bomb bay in the fuselage, which could carry up to 2,000 lbs of ordnance. 2,045 SB2C-4 aircraft were produced, making it the most produced variant of the SB2C Helldiver.
The SB2C Helldiver was used during the Battle of the Philippine Sea, where 45 were lost after running out of fuel while returning to the carriers. The SB2C took part in combat over the Marianas, Philippines, Taiwan, Iwo Jima, and Okinawa. In the Battle of Leyte Gulf, during the Philippines Campaign, SB2C Helldivers took part in the sinking of the IJN Musashi; they scored a number of bomb hits to the ship. At Okinawa, Helldivers participated in the sinking of the IJN Yamato during the Japanese Operation Ten-Go, scoring hits on the Yamato and her escorts.
In 1945, Helldivers were used in attacks on the Ryukyu Islands and the Japanese island of Honshū. In those strikes they were used to attack airfields, communication centers, and shipping. After the two atomic bombs were dropped, the Helldiver was used in patrols until the official Japanese surrender and the subsequent occupation of Japan.
After the war, the SB2C remained in active-duty service with the US Navy until 1947, and with the Naval Reserve until 1950.
Media
- Skins
- Videos
See also
Links to the articles on the War Thunder Wiki that you think will be useful for the reader, for example:
- reference to the series of the aircraft;
- links to approximate analogues of other nations and research trees.
External links
| Curtiss-Wright Corporation | |
|---|---|
| Fighters | BF2C-1 |
| P-36A · Rasmussen's P-36A · P-36C · P-36G | |
| P-40C · P-40E-1 · P-40F-10 | |
| Bombers | SB2C-1C · SB2C-4 |
| Floatplanes | SOC-1 |
| Experimental | XP-55 |
| Export | H-75A-1 · H-75A-4 · H-81A-2 · ▂P-40E-1 · ␗P-40E-1 · ▄P-40F-5 Lafayette · CW-21 · Hawk III |
| ▄SB2C-5 | |
| Captured | ▀Hawk H-75A-2 |
| USA bombers | |
|---|---|
| Dive | SB2U-2 · SB2U-3 · SBD-3 · SB2C-1C · SB2C-4 |
| Torpedo | TBD-1 · PBY-5 Catalina · PBY-5A Catalina · TBF-1C · BTD-1 |
| Medium | B-10B · B-18A · B-34 · PV-2D · B-25J-1 · B-25J-20 · A-26C-45 · A-26C-45DT · B-26B |
| Heavy | B-17E · B-17E/L · B-17G-60-VE · PB4Y-2 · B-24D-25-CO · B-29A-BN |
| Hydroplanes | OS2U-1 · OS2U-3 · PBM-1 "Mariner" · PBM-3 "Mariner" · PBM-5A "Mariner" |


