Difference between revisions of "SBD-3"
(→Suspended armament: Edits) |
(summarized the flight performance, explained fighter tactics, and revised pros and cons) (Tag: Visual edit) |
||
| (48 intermediate revisions by 21 users not shown) | |||
| Line 1: | Line 1: | ||
{{Specs-Card | {{Specs-Card | ||
|code=sbd-3 | |code=sbd-3 | ||
| − | + | |cockpit=333654/1107915 | |
| − | |cockpit= | ||
}} | }} | ||
== Description == | == Description == | ||
| − | <!-- ''In the description, the first part should be about the history of and the creation and combat usage of the aircraft, as well as its key features. In the second part, tell the reader about the aircraft in the game. Insert a screenshot of the vehicle, so that if the novice player does not remember the vehicle by name, he will immediately understand what kind of vehicle the article is talking about.'' --> | + | <!--''In the description, the first part should be about the history of and the creation and combat usage of the aircraft, as well as its key features. In the second part, tell the reader about the aircraft in the game. Insert a screenshot of the vehicle, so that if the novice player does not remember the vehicle by name, he will immediately understand what kind of vehicle the article is talking about.''--> |
| − | + | [[File:GarageImage_SBD-3.jpg|450px|thumbnail|left]] | |
| − | + | {{break}} | |
| − | + | The '''{{Specs|name}}''' is a rank {{Specs|rank}} American dive bomber {{Battle-rating}}. This dive bomber has been in the game since the start of the Open Beta Test prior to Update 1.29. | |
== General info == | == General info == | ||
| − | === Flight | + | === Flight Performance === |
| − | + | As a dive bomber, it have very good dive characteristics. Manouvers decently at most speeds. Although the engine is pretty weak, it could be WEP-ed for a pretty long time before overheating. Bad at high altitudes. Capable dive bomber | |
| − | |||
| − | + | ====Stat card==== | |
| − | + | {| class="wikitable" style="text-align:center" | |
| − | {| class="wikitable" style="text-align:center" | + | |- |
| − | ! | + | ! colspan="8" | Characteristics |
| + | |- | ||
| + | ! colspan="8" | ''Stock'' | ||
| + | |- | ||
! colspan="2" | Max Speed<br>(km/h at 4,500 m) | ! colspan="2" | Max Speed<br>(km/h at 4,500 m) | ||
| − | ! rowspan="2" | Max altitude<br>( | + | ! rowspan="2" | Max altitude<br>(meters) |
! colspan="2" | Turn time<br>(seconds) | ! colspan="2" | Turn time<br>(seconds) | ||
| − | ! colspan="2" | Rate of climb<br>( | + | ! colspan="2" | Rate of climb<br>(meters/second) |
| − | ! rowspan="2" | Take-off run<br>( | + | ! rowspan="2" |Take-off run<br>(meters) |
|- | |- | ||
| − | ! AB | + | ! AB |
| + | ! RB | ||
| + | ! AB | ||
| + | ! RB | ||
| + | ! AB | ||
| + | ! RB | ||
|- | |- | ||
| − | + | | 418 || 407 || 5,700 || 26.8 || 27.4 || 6.6 || 7.7 || 291 | |
| − | | | ||
|- | |- | ||
| − | ! Upgraded | + | ! colspan="8" | ''Upgraded'' |
| − | | 456 || 439 || 24.3 || 25.5 || 14.3 || 9.8 | + | |- |
| + | ! colspan="2" | Max Speed<br>(km/h at 4,500 m) | ||
| + | ! rowspan="2" |Max altitude (meters) | ||
| + | ! colspan="2" | Turn time (seconds) | ||
| + | ! colspan="2" | Rate of climb<br>(meters/second) | ||
| + | ! rowspan="2" |Take-off run (meters) | ||
| + | |- | ||
| + | ! AB | ||
| + | ! RB | ||
| + | ! AB | ||
| + | ! RB | ||
| + | ! AB | ||
| + | ! RB | ||
| + | |- | ||
| + | | 456 || 439 || 5,700 || 24.3 || 25.5 || 14.3 || 9.8 || 291 | ||
|- | |- | ||
|} | |} | ||
| Line 38: | Line 57: | ||
[[File:Kette of SBD.jpg|thumbnail|right|A trio of Dauntlesses in formation.]] | [[File:Kette of SBD.jpg|thumbnail|right|A trio of Dauntlesses in formation.]] | ||
| − | ==== Details ==== | + | ====Details==== |
| − | {| class="wikitable" style="text-align:center | + | {| class="wikitable" style="text-align:center" |
|- | |- | ||
! colspan="5" | Features | ! colspan="5" | Features | ||
|- | |- | ||
| − | ! Combat | + | ! Combat flap |
| + | ! Take-off flap | ||
| + | ! Landing flap | ||
| + | ! Air brakes | ||
| + | ! Arrestor gear | ||
|- | |- | ||
| − | | ✓ || ✓ || ✓ || ✓ || ✓ | + | | ✓ || ✓ || ✓ || ✓ || ✓ |
|- | |- | ||
|} | |} | ||
| − | {| class="wikitable" style="text-align:center | + | {| class="wikitable" style="text-align:center" |
|- | |- | ||
| − | ! colspan=" | + | ! colspan="5" | Limits |
|- | |- | ||
| − | ! rowspan="2" | | + | ! rowspan="2" | Wing-break speed<br>(km/h) |
| − | ! rowspan="2" | Gear (km/h) | + | ! rowspan="2" | Gear limit<br>(km/h) |
| − | ! | + | ! rowspan="2" | Combat flap<br> (km/h) |
! colspan="2" | Max Static G | ! colspan="2" | Max Static G | ||
|- | |- | ||
| − | ! | + | ! + |
| + | ! - | ||
| + | |- | ||
| + | | 700 || 450 || 520 || ~11 || ~11 | ||
| + | |- | ||
| + | |} | ||
| + | |||
| + | {| class="wikitable" style="text-align:center" | ||
| + | |- | ||
| + | ! colspan="4" | Optimal velocities | ||
| + | |- | ||
| + | ! Ailerons<br>(km/h) | ||
| + | ! Rudder<br>(km/h) | ||
| + | ! Elevators<br>(km/h) | ||
| + | ! Radiator<br>(km/h) | ||
|- | |- | ||
| − | | | + | | < 350 || < 350 || < 380 || > 250 |
|- | |- | ||
|} | |} | ||
| Line 66: | Line 103: | ||
{| class="wikitable" style="text-align:center" | {| class="wikitable" style="text-align:center" | ||
|- | |- | ||
| − | ! colspan=" | + | ! colspan="3" | Compressor (RB/SB) |
| + | |- | ||
| + | ! colspan="3" | Setting 1 | ||
| + | |- | ||
| + | ! Optimal altitude | ||
| + | ! 100% Engine power | ||
| + | ! WEP Engine power | ||
|- | |- | ||
| − | + | | 1,324 m || 950 hp || 1,000 hp | |
|- | |- | ||
| − | | | + | ! colspan="3" | Setting 2 |
| + | |- | ||
| + | ! Optimal altitude | ||
| + | ! 100% Engine power | ||
| + | ! WEP Engine power | ||
| + | |- | ||
| + | | 4,777 m || 800 hp || 842 hp | ||
|- | |- | ||
|} | |} | ||
| Line 126: | Line 175: | ||
=== Survivability and armour === | === Survivability and armour === | ||
| − | + | <!--''Examine the survivability of the aircraft. Note how vulnerable the structure is and how secure the pilot is, whether the fuel tanks are armoured, etc. Describe the armour, if there is any, and also mention the vulnerability of other critical aircraft systems.''--> | |
| − | <!-- ''Examine the survivability of the aircraft. Note how vulnerable the structure is and how secure the pilot is, whether the fuel tanks are armoured, etc. Describe the armour, if there is any, and also mention the vulnerability of other critical aircraft systems.'' --> | ||
* 38 mm bulletproof glass in the windshield | * 38 mm bulletproof glass in the windshield | ||
* 12.7 mm steel pilot seat | * 12.7 mm steel pilot seat | ||
* 12.7 mm steel protecting the gunner | * 12.7 mm steel protecting the gunner | ||
| − | * | + | * Fuel tanks in the wings |
| − | |||
| − | |||
| − | |||
== Armaments == | == Armaments == | ||
| − | |||
=== Offensive armament === | === Offensive armament === | ||
| − | + | <!--''Describe the offensive armament of the aircraft, if any. Describe how effective the cannons and machine guns are in a battle, and also what belts or drums are better to use. If there is no offensive weaponry, delete this subsection.''--> | |
| − | <!-- ''Describe the offensive armament of the aircraft, if any. Describe how effective the cannons and machine guns are in a battle, and also what belts or drums are better to use. If there is no offensive weaponry, delete this subsection.'' --> | + | {{main|Browning M2 (12.7 mm)}} |
| − | {{main|M2 | ||
The '''''{{PAGENAME}}''''' is armed with: | The '''''{{PAGENAME}}''''' is armed with: | ||
| − | * 2 x 12.7 mm M2 Browning machine | + | * 2 x 12.7 mm [[Browning M2 (12.7 mm)|M2 Browning]] machine gun, nose-mounted (180 rpg = 360 total) |
=== Suspended armament === | === Suspended armament === | ||
| − | + | <!--''Describe the aircraft's suspended armament: additional cannons under the wings, bombs, rockets and torpedoes. This section is especially important for bombers and attackers. If there is no suspended weaponry remove this subsection.''--> | |
| − | <!-- ''Describe the aircraft's suspended armament: additional cannons under the wings, bombs, rockets and torpedoes. This section is especially important for bombers and attackers. If there is no suspended weaponry remove this subsection.'' --> | + | {{main|AN-M30A1 (100 lb)|AN-M65A1 (1,000 lb)|Browning M2 (12.7 mm)}} |
| − | The '''''{{PAGENAME}}''''' | + | The options available for the '''''{{PAGENAME}}''''' are: |
| − | + | * 2 x 100 lb AN-M30A1 bombs + 1 x 1,000 lb AN-M65A1 bomb | |
| − | + | * 4 x 12.7 mm M2 Browning machine gun, wing-mounted (340 rpg = 1360 total) | |
| − | |||
| − | |||
| − | |||
| − | |||
| − | |||
| − | |||
| − | |||
| − | |||
| − | |||
| − | |||
| − | |||
| − | |||
| − | |||
| − | |||
| − | |||
| − | |||
| − | |||
| − | |||
| − | |||
| − | |||
| − | |||
| − | |||
| − | |||
| − | |||
| − | |||
| − | |||
| − | |||
| − | |||
| − | |||
| − | |||
| − | |||
| − | * 2 x 100 lb AN-M30A1 | ||
| − | |||
| − | |||
| − | |||
| − | |||
| − | |||
| − | |||
| − | * 4 x 12.7 mm M2 Browning machine | ||
| − | |||
| − | |||
| − | |||
| − | |||
=== Defensive armament === | === Defensive armament === | ||
| − | + | <!--''Defensive armament with turret machine guns or cannons, crewed by gunners. Examine the number of gunners and what belts or drums are better to use. If defensive weaponry is not available remove this subsection.''--> | |
| − | <!-- ''Defensive armament with turret machine guns or cannons, crewed by gunners. Examine the number of gunners and what belts or drums are better to use. If defensive weaponry is not available | ||
{{main|Browning (7.62 mm)}} | {{main|Browning (7.62 mm)}} | ||
| − | The '''''{{PAGENAME}}''''' | + | The '''''{{PAGENAME}}''''' has a defensive armament with: |
| − | * 2 x 7.62 mm Browning machine | + | * 2 x 7.62 mm Browning machine gun, dorsal turret (1,000 rpg = 2,000 total) |
== Usage in battles == | == Usage in battles == | ||
| − | <!-- ''Describe the tactics of playing in | + | <!--''Describe the tactics of playing in an aircraft, the features of using vehicles in a team and advice on tactics. Refrain from creating a "guide" - do not impose a single point of view, but instead, give the reader food for thought. Examine the most dangerous enemies and give recommendations on fighting them. If necessary, note the specifics of the game in different modes (AB, RB, SB).''--> |
| − | + | The Dauntless is an underrated aircraft, as it is viewed as a weak, and sluggish bomber by most tier 1 players. Use this to your advantage by catching unsuspecting bombers and fighters. Its manouverability is good enough to energy fight the enemy. You should try to keep your speed higher than 200km/h and stay at altitudes lower than 2km. | |
| − | The Dauntless is an underrated aircraft, as it is viewed as a weak and sluggish bomber by | ||
| − | |||
| − | |||
| − | |||
| − | |||
| − | + | This plane is good at what it was designed for Dive Bombing. Start at a high altitude at around 4-5,000 feet, fly directly above the target, invert the plane, cut the throttle and deploy airbrakes (h key by default), dive, at 1,000-700 feet release bombs, pull the nose up, retract air brakes, push the throttle to full, then pitch up in a climb. | |
| − | + | The small bomb load requires you pick your targets carefully and make your bombs count, choose to attack artillery positions or bases, where you have a higher chance of hitting due to their stationary position. Ships are also prime targets (it is what it was designed for), as the 1000lb bomb is plenty to sink a small ship. | |
| − | + | Do not rely fighter support when focusing on ground targets. After you drop your bombs, the plane should be manouverable enough to dogfight enemies. You should stay on deck and manouver wisely to not expose your weak underbelly. If you are caught at high altitude, go into a steep dive until you are at the deck, there is a good chance you may out dive them. If you cannot lose the enemy, try to quickly turn to your enemy's direction. your high G tolerance are equal, if not better than most enemies so you could lose them if they cant follow your turn. | |
| − | ''' | + | '''''Realistic Mode Procedures''''' |
| − | + | With the gun pods attached, you could act as a menacing fighter support. with high altitude spawn, try to hunt bombers first before you consider killing fighters. climb up to 4500 meters to get your max speed so you can dive down to the bombers. after killing a bomber or two, you should find that your allies are starting to engage the enemy. You could help them by catching enemies that are turning, have low speed, or attacking an ally. It should be easy to do all of this because of your energy advantage. You are still marked as a bomber, so enemies will surely consider you as an easy kill. You cant outrun them, but you can turn very well at almost every speed except stall. If theyre coming from behind, a sudden reverse would be a good manouver to throw them off. After that, you could either carry with the head-on or fly under the enemy to avoid them. Avoid rushing upwards to mantain speed. Combine all of that with good trigger discipline, it is possible to achieve a 5 kill game. | |
| − | ''' | + | '''''Simulator mode procedures'''''<br> |
| + | Hands-off carrier take-off (Auto engine control): Start engine, flaps: raised, elevator trim: 15%, aileron trim: 11%, rudder trim: 6%, WEP throttle, hands off controls until you lift off the carrier. | ||
| − | + | ===Manual Engine Control=== | |
| − | |||
| − | |||
| − | |||
| − | |||
| − | |||
| − | === Manual Engine Control === | ||
{| class="wikitable" style="text-align:center" | {| class="wikitable" style="text-align:center" | ||
|- | |- | ||
! colspan="7" | MEC elements | ! colspan="7" | MEC elements | ||
|- | |- | ||
| − | ! rowspan="2" | Mixer | + | ! rowspan="2" |Mixer |
| − | ! rowspan="2" | Pitch | + | ! rowspan="2" |Pitch |
! colspan="3" | Radiator | ! colspan="3" | Radiator | ||
| − | ! rowspan="2" | Supercharger | + | ! rowspan="2" |Supercharger |
| − | ! rowspan="2" | Turbocharger | + | ! rowspan="2" |Turbocharger |
|- | |- | ||
| − | ! Oil | + | ! Oil |
| + | ! Water | ||
| + | ! Type | ||
|- | |- | ||
| − | | Controllable || Controllable<br> | + | | Controllable || rowspan="2" | Controllable<br>Automatic pitch || rowspan="2" | Controllable || rowspan="2" | Not controllable || rowspan="2" | Combined || rowspan="2" | Controllable || rowspan="2" | Not controllable |
|- | |- | ||
|} | |} | ||
=== Pros and cons === | === Pros and cons === | ||
| − | <!-- '' | + | <!--''Summarize and briefly evaluate the vehicle in terms of its characteristics and combat effectiveness. Mark its pros and cons in the bulleted list. Try not to use more than 6 points for each of the characteristics. Avoid using categorical definitions such as "bad", "good" and the like - use substitutions with softer forms such as "inadequate" and "effective".''--> |
| − | |||
'''Pros:''' | '''Pros:''' | ||
| Line 267: | Line 257: | ||
* Tail gun also has plenty of ammunition | * Tail gun also has plenty of ammunition | ||
* Can be used as a fighter when needed | * Can be used as a fighter when needed | ||
| − | * Can increase the total firepower to 6 .50 cals, one of the earliest plane that | + | * Can increase the total firepower to 6 .50 cals, one of the earliest plane that have 6 M2 Brownings |
| − | * Good firepower, enough to make quick kills on planes and ground targets alike. Extremely useful for attacking | + | * Good firepower, enough to make quick kills on planes and ground targets alike. Extremely useful for attacking weak armoured tanks |
* Decent dive characteristics | * Decent dive characteristics | ||
| − | * | + | * Wont break its wing on high G turns up to 600 km/h |
'''Cons:''' | '''Cons:''' | ||
| Line 276: | Line 266: | ||
* It is still a dive bomber, so its manoeuvrability is limited by its poor energy retention | * It is still a dive bomber, so its manoeuvrability is limited by its poor energy retention | ||
* Low ammo capacity for the nose-mounted machine guns | * Low ammo capacity for the nose-mounted machine guns | ||
| − | * The tail gunner won't do so much, because he is too exposed and the | + | * The tail gunner won't do so much, because he is too exposed and the 2x7.62 aren't powerful enough to destroy planes of its tier |
* Limited selection of bombs, only one payload is available to choose from | * Limited selection of bombs, only one payload is available to choose from | ||
* Slow acceleration | * Slow acceleration | ||
| Line 283: | Line 273: | ||
* Slow speed | * Slow speed | ||
* WEP only works on low altitude | * WEP only works on low altitude | ||
| − | |||
== History == | == History == | ||
| − | + | ''Describe the history of the creation and combat usage of the aircraft in more detail than in the introduction. If the historical reference turns out to be too big, take it to a separate article, taking a link to the article about the vehicle and adding a block "/ History" (example: <nowiki>https://wiki.warthunder.com/(Vehicle-name)/History</nowiki>) and add a link to it here using the <code>main</code> template. Be sure to reference text and sources by using <code><nowiki><ref></nowiki></code>, as well as adding them at the end of the article. This section may also include the vehicle's dev blog entry (if applicable) and the in-game encyclopedia description (under <code><nowiki>=== Encyclopedia Info ===</nowiki></code>, also if applicable).'' | |
| − | |||
| − | In | + | === In-game description === |
| + | "A carrier-based dive-bomber/reconnaissance aircraft. | ||
| − | + | The most well-known U.S. Navy bomber, and perhaps the most significant dive-bomber of the war. Despite the fact that the decision to write off the SBD as outdated was made before the war, the bomber was still actively involved in combat, and in 1942 it sunk more enemy ships than all other Navy aircraft combined. | |
| − | The | ||
| − | |||
| − | |||
| − | |||
| − | |||
| − | |||
| − | |||
| − | |||
| − | |||
| − | |||
| − | |||
| − | |||
| − | |||
| − | |||
| − | |||
| − | |||
| − | |||
| − | |||
| − | |||
| − | |||
Originally, the series was called the XBT, and showed as many innovations as it did drawbacks. This aircraft had a revolutionary honeycomb wing structure and a reasonably small fuselage. But its wings could not be folded, and occasionally it would spontaneously go into a barrel roll, which caused a series of catastrophic accidents. After intensive research in conjunction with NACA, the dive-bomber was radically redesigned, most of its shortcomings were removed, and it was named the Scout Bomber. | Originally, the series was called the XBT, and showed as many innovations as it did drawbacks. This aircraft had a revolutionary honeycomb wing structure and a reasonably small fuselage. But its wings could not be folded, and occasionally it would spontaneously go into a barrel roll, which caused a series of catastrophic accidents. After intensive research in conjunction with NACA, the dive-bomber was radically redesigned, most of its shortcomings were removed, and it was named the Scout Bomber. | ||
| − | The SBD-3 variant was a Scout Bomber which was finally fit for combat. It had self-sealing fuel tanks, | + | The SBD-3 variant was a Scout Bomber which was finally fit for combat. It had self-sealing fuel tanks, armor, and bulletproof cockpit glass. To keep its performance characteristics, the aircraft’s weight was reduced by replacing its duralumin sheeting with a much lighter material. Also, all the equipment designed to keep the plane afloat in the event of a water landing was removed. |
| − | Soldiers dubbed the SBD the | + | Soldiers dubbed the SBD the “Slow But Deadly.” This aircraft destroyed the pride of the Japanese carrier force at the Battle of Midway, inflicting damage from which the Japanese Imperial Navy was never able to recover." |
| − | |||
== Media == | == Media == | ||
| − | <!-- ''Excellent additions to the article would be video guides, screenshots from the game, and photos.'' --> | + | <!--''Excellent additions to the article would be video guides, screenshots from the game, and photos.''--> |
| + | [http://live.warthunder.com/feed/camouflages/?q=#23SBD '''Skins''' for the Douglas SBD-3 Dauntless from live.warthunder.com.]<br> | ||
| + | [http://live.warthunder.com/feed/images/?q=#23SBD '''Images''' of the Douglas SBD-3 Dauntless from live.warthunder.com.] | ||
| − | + | == See also == | |
| − | + | ''Links to the articles on the War Thunder Wiki that you think will be useful for the reader, for example:'' | |
| − | |||
| − | |||
| − | |||
| − | |||
| − | |||
| − | |||
* ''reference to the series of the aircraft;'' | * ''reference to the series of the aircraft;'' | ||
| − | * ''links to approximate analogues of other nations and research trees.'' | + | * ''links to approximate analogues of other nations and research trees.'' |
| − | |||
| − | |||
| − | |||
| − | |||
== External links == | == External links == | ||
| − | <!-- ''Paste links to sources and external resources, such as:'' | + | <!--''Paste links to sources and external resources, such as:'' |
* ''topic on the official game forum;'' | * ''topic on the official game forum;'' | ||
| − | * ''other literature.'' --> | + | * ''encyclopedia page on the aircraft;'' |
| − | + | * ''other literature.''--> | |
| − | + | [http://warthunder.com/en/news/4442-profile-sbd-3-dauntless-slow-but-deadly-en/ [Profile<nowiki>]</nowiki> SBD-3 Dauntless - Slow But Deadly] | |
| − | |||
{{AirManufacturer Douglas}} | {{AirManufacturer Douglas}} | ||
{{USA bombers}} | {{USA bombers}} | ||
Revision as of 16:01, 18 April 2020
Contents
Description

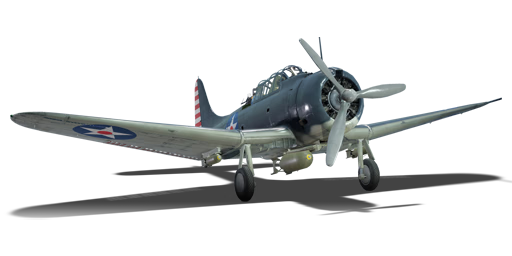
The SBD-3 Dauntless is a rank American dive bomber
with a battle rating of (AB), (RB), and (SB). This dive bomber has been in the game since the start of the Open Beta Test prior to Update 1.29.
General info
Flight Performance
As a dive bomber, it have very good dive characteristics. Manouvers decently at most speeds. Although the engine is pretty weak, it could be WEP-ed for a pretty long time before overheating. Bad at high altitudes. Capable dive bomber
Stat card
| Characteristics | |||||||
|---|---|---|---|---|---|---|---|
| Stock | |||||||
| Max Speed (km/h at 4,500 m) |
Max altitude (meters) |
Turn time (seconds) |
Rate of climb (meters/second) |
Take-off run (meters) | |||
| AB | RB | AB | RB | AB | RB | ||
| 418 | 407 | 5,700 | 26.8 | 27.4 | 6.6 | 7.7 | 291 |
| Upgraded | |||||||
| Max Speed (km/h at 4,500 m) |
Max altitude (meters) | Turn time (seconds) | Rate of climb (meters/second) |
Take-off run (meters) | |||
| AB | RB | AB | RB | AB | RB | ||
| 456 | 439 | 5,700 | 24.3 | 25.5 | 14.3 | 9.8 | 291 |

Details
| Features | ||||
|---|---|---|---|---|
| Combat flap | Take-off flap | Landing flap | Air brakes | Arrestor gear |
| ✓ | ✓ | ✓ | ✓ | ✓ |
| Limits | ||||
|---|---|---|---|---|
| Wing-break speed (km/h) |
Gear limit (km/h) |
Combat flap (km/h) |
Max Static G | |
| + | - | |||
| 700 | 450 | 520 | ~11 | ~11 |
| Optimal velocities | |||
|---|---|---|---|
| Ailerons (km/h) |
Rudder (km/h) |
Elevators (km/h) |
Radiator (km/h) |
| < 350 | < 350 | < 380 | > 250 |
| Compressor (RB/SB) | ||
|---|---|---|
| Setting 1 | ||
| Optimal altitude | 100% Engine power | WEP Engine power |
| 1,324 m | 950 hp | 1,000 hp |
| Setting 2 | ||
| Optimal altitude | 100% Engine power | WEP Engine power |
| 4,777 m | 800 hp | 842 hp |
Engine performance
| Engine | |||||
|---|---|---|---|---|---|
| Engine Name | Number present | ||||
| Wright Cyclone R-1820-52 9-cylinder | 1 | ||||
| Engine characteristics | |||||
| Weight (each) | Type | Cooling | |||
| 907 kg | Radial | Air | |||
| Engine power (Stock) | |||||
| Mode | Max | Take-off | |||
| Arcade | 889 hp | 939 hp | |||
| Realistic/Simulator | 879 hp | 930 hp | |||
| Engine power (Upgraded) | |||||
| Mode | Max | Take-off | |||
| Arcade | 1,023 hp | 1,074 hp | |||
| Realistic/Simulator | 950 hp | 1,000 hp | |||
| WEP Duration | |||
|---|---|---|---|
| Arcade | Realistic/Simulator | ||
| 25 seconds | Infinite | ||
Survivability and armour
- 38 mm bulletproof glass in the windshield
- 12.7 mm steel pilot seat
- 12.7 mm steel protecting the gunner
- Fuel tanks in the wings
Armaments
Offensive armament
The SBD-3 is armed with:
- 2 x 12.7 mm M2 Browning machine gun, nose-mounted (180 rpg = 360 total)
Suspended armament
The options available for the SBD-3 are:
- 2 x 100 lb AN-M30A1 bombs + 1 x 1,000 lb AN-M65A1 bomb
- 4 x 12.7 mm M2 Browning machine gun, wing-mounted (340 rpg = 1360 total)
Defensive armament
The SBD-3 has a defensive armament with:
- 2 x 7.62 mm Browning machine gun, dorsal turret (1,000 rpg = 2,000 total)
Usage in battles
The Dauntless is an underrated aircraft, as it is viewed as a weak, and sluggish bomber by most tier 1 players. Use this to your advantage by catching unsuspecting bombers and fighters. Its manouverability is good enough to energy fight the enemy. You should try to keep your speed higher than 200km/h and stay at altitudes lower than 2km.
This plane is good at what it was designed for Dive Bombing. Start at a high altitude at around 4-5,000 feet, fly directly above the target, invert the plane, cut the throttle and deploy airbrakes (h key by default), dive, at 1,000-700 feet release bombs, pull the nose up, retract air brakes, push the throttle to full, then pitch up in a climb.
The small bomb load requires you pick your targets carefully and make your bombs count, choose to attack artillery positions or bases, where you have a higher chance of hitting due to their stationary position. Ships are also prime targets (it is what it was designed for), as the 1000lb bomb is plenty to sink a small ship.
Do not rely fighter support when focusing on ground targets. After you drop your bombs, the plane should be manouverable enough to dogfight enemies. You should stay on deck and manouver wisely to not expose your weak underbelly. If you are caught at high altitude, go into a steep dive until you are at the deck, there is a good chance you may out dive them. If you cannot lose the enemy, try to quickly turn to your enemy's direction. your high G tolerance are equal, if not better than most enemies so you could lose them if they cant follow your turn.
Realistic Mode Procedures
With the gun pods attached, you could act as a menacing fighter support. with high altitude spawn, try to hunt bombers first before you consider killing fighters. climb up to 4500 meters to get your max speed so you can dive down to the bombers. after killing a bomber or two, you should find that your allies are starting to engage the enemy. You could help them by catching enemies that are turning, have low speed, or attacking an ally. It should be easy to do all of this because of your energy advantage. You are still marked as a bomber, so enemies will surely consider you as an easy kill. You cant outrun them, but you can turn very well at almost every speed except stall. If theyre coming from behind, a sudden reverse would be a good manouver to throw them off. After that, you could either carry with the head-on or fly under the enemy to avoid them. Avoid rushing upwards to mantain speed. Combine all of that with good trigger discipline, it is possible to achieve a 5 kill game.
Simulator mode procedures
Hands-off carrier take-off (Auto engine control): Start engine, flaps: raised, elevator trim: 15%, aileron trim: 11%, rudder trim: 6%, WEP throttle, hands off controls until you lift off the carrier.
Manual Engine Control
| MEC elements | ||||||
|---|---|---|---|---|---|---|
| Mixer | Pitch | Radiator | Supercharger | Turbocharger | ||
| Oil | Water | Type | ||||
| Controllable | Controllable Automatic pitch |
Controllable | Not controllable | Combined | Controllable | Not controllable |
Pros and cons
Pros:
- Gets a bomber spawn which really makes up for its performance
- Can turn with most enemy fighters on its rank
- It has two powerful machine guns that are centrally mounted, meaning you can effectively hunt down low-tier bombers and in most situations, be a quasi-fighter aircraft
- Its bombs are powerful enough to destroy packed enemy ground vehicles
- Its manoeuvrability is good enough to attack enemy bombers and support friendly fighters
- Tail gunner has excellent coverage, almost a perfect 180 degrees on a horizontal plane
- Can "pullout" from a 60-degree dive quite effectively
- Tail gun also has plenty of ammunition
- Can be used as a fighter when needed
- Can increase the total firepower to 6 .50 cals, one of the earliest plane that have 6 M2 Brownings
- Good firepower, enough to make quick kills on planes and ground targets alike. Extremely useful for attacking weak armoured tanks
- Decent dive characteristics
- Wont break its wing on high G turns up to 600 km/h
Cons:
- It is still a dive bomber, so its manoeuvrability is limited by its poor energy retention
- Low ammo capacity for the nose-mounted machine guns
- The tail gunner won't do so much, because he is too exposed and the 2x7.62 aren't powerful enough to destroy planes of its tier
- Limited selection of bombs, only one payload is available to choose from
- Slow acceleration
- Poor climb rate
- Poor energy retention
- Slow speed
- WEP only works on low altitude
History
Describe the history of the creation and combat usage of the aircraft in more detail than in the introduction. If the historical reference turns out to be too big, take it to a separate article, taking a link to the article about the vehicle and adding a block "/ History" (example: https://wiki.warthunder.com/(Vehicle-name)/History) and add a link to it here using the main template. Be sure to reference text and sources by using <ref>, as well as adding them at the end of the article. This section may also include the vehicle's dev blog entry (if applicable) and the in-game encyclopedia description (under === Encyclopedia Info ===, also if applicable).
In-game description
"A carrier-based dive-bomber/reconnaissance aircraft.
The most well-known U.S. Navy bomber, and perhaps the most significant dive-bomber of the war. Despite the fact that the decision to write off the SBD as outdated was made before the war, the bomber was still actively involved in combat, and in 1942 it sunk more enemy ships than all other Navy aircraft combined.
Originally, the series was called the XBT, and showed as many innovations as it did drawbacks. This aircraft had a revolutionary honeycomb wing structure and a reasonably small fuselage. But its wings could not be folded, and occasionally it would spontaneously go into a barrel roll, which caused a series of catastrophic accidents. After intensive research in conjunction with NACA, the dive-bomber was radically redesigned, most of its shortcomings were removed, and it was named the Scout Bomber.
The SBD-3 variant was a Scout Bomber which was finally fit for combat. It had self-sealing fuel tanks, armor, and bulletproof cockpit glass. To keep its performance characteristics, the aircraft’s weight was reduced by replacing its duralumin sheeting with a much lighter material. Also, all the equipment designed to keep the plane afloat in the event of a water landing was removed.
Soldiers dubbed the SBD the “Slow But Deadly.” This aircraft destroyed the pride of the Japanese carrier force at the Battle of Midway, inflicting damage from which the Japanese Imperial Navy was never able to recover."
Media
Skins for the Douglas SBD-3 Dauntless from live.warthunder.com.
Images of the Douglas SBD-3 Dauntless from live.warthunder.com.
See also
Links to the articles on the War Thunder Wiki that you think will be useful for the reader, for example:
- reference to the series of the aircraft;
- links to approximate analogues of other nations and research trees.
External links
[Profile] SBD-3 Dauntless - Slow But Deadly
| Douglas Aircraft Company | |
|---|---|
| Strike Aircraft | A-20G-25 · A-26B-10 · A-26B-50 · AD-2 · AD-4 · A-1H |
| Bombers | TBD-1 · B-18A · SBD-3 · BTD-1 · A-26C-45 · A-26C-45DT |
| Turboprops | A2D-1 |
| Jet Aircraft | F3D-1 · F4D-1 |
| A-4 Skyhawk | A-4B · A-4E Early |
| Export | ▄Havoc Mk I · ▄Boston Mk I · ▄DB-7 · ▂A-20G-30 · ▄AD-4 · ▄AD-4NA |
| A-4 Skyhawk | A-4H · A-4E Early (M) · Ayit · A-4E |
| The Douglas Aircraft Company merged with McDonnell Aircraft Corporation in 1967 to form McDonnell Douglas. | |
| USA bombers | |
|---|---|
| Dive | SB2U-2 · SB2U-3 · SBD-3 · SB2C-1C · SB2C-4 |
| Torpedo | TBD-1 · PBY-5 Catalina · PBY-5A Catalina · TBF-1C · BTD-1 |
| Medium | B-10B · B-18A · B-34 · PV-2D · B-25J-1 · B-25J-20 · A-26C-45 · A-26C-45DT · B-26B |
| Heavy | B-17E · B-17E/L · B-17G-60-VE · PB4Y-2 · B-24D-25-CO · B-29A-BN |
| Hydroplanes | OS2U-1 · OS2U-3 · PBM-1 "Mariner" · PBM-3 "Mariner" · PBM-5A "Mariner" |
