Difference between revisions of "F2H-2"
(was outdated, current air targets belts have 3/4 high explosives, making the upgrade useful) (Tag: Visual edit) |
m (→Description) (Tag: Visual edit) |
||
| (49 intermediate revisions by 19 users not shown) | |||
| Line 1: | Line 1: | ||
{{Specs-Card | {{Specs-Card | ||
|code=f2h-2 | |code=f2h-2 | ||
| − | + | |cockpit=380015/1304867 | |
| − | |cockpit= | ||
}} | }} | ||
== Description == | == Description == | ||
<!-- ''In the description, the first part should be about the history of and the creation and combat usage of the aircraft, as well as its key features. In the second part, tell the reader about the aircraft in the game. Insert a screenshot of the vehicle, so that if the novice player does not remember the vehicle by name, he will immediately understand what kind of vehicle the article is talking about.'' --> | <!-- ''In the description, the first part should be about the history of and the creation and combat usage of the aircraft, as well as its key features. In the second part, tell the reader about the aircraft in the game. Insert a screenshot of the vehicle, so that if the novice player does not remember the vehicle by name, he will immediately understand what kind of vehicle the article is talking about.'' --> | ||
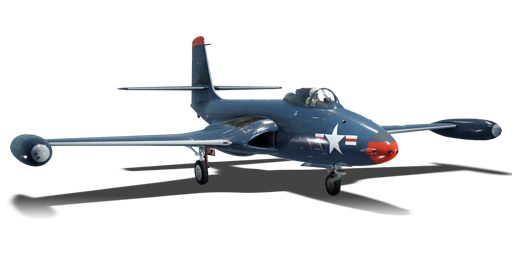
| − | + | [[File:GarageImage_{{PAGENAME}}.jpg|420px|thumb|left]] | |
| + | {{break}} | ||
| + | The '''{{Specs|name}}''' is a Rank {{Specs|rank}} American naval jet fighter {{Battle-rating}}. It was introduced in [[Update 1.45 "Steel Generals"]]. The F2H-2 Banshee is a fantastic jet-fighter with great overall speed and good maneuverability. It is most recognized for its ability to remain stable even past its speed limit break (933 kph) and also for its fantastic high-altitude performance. | ||
| − | + | The Banshee is a very stable platform at HIGH speeds. Warning appears at 940 kph; but it can reach over a 1,000 kph and still not rip apart, if flown carefully and kept it in a straight line. | |
| + | Two engines for redundancy. If one is taken out, the machine can still return to base safely. A good advantage to have, due the fragility of jet engines when struck. | ||
== General info == | == General info == | ||
| − | === Flight | + | === Flight Performance === |
| − | |||
<!-- ''Describe how the aircraft behaves in the air. Speed, manoeuvrability, acceleration and allowable loads - these are the most important characteristics of the vehicle.'' --> | <!-- ''Describe how the aircraft behaves in the air. Speed, manoeuvrability, acceleration and allowable loads - these are the most important characteristics of the vehicle.'' --> | ||
| − | + | {| class="wikitable" style="text-align:center" | |
| − | + | |- | |
| − | + | ! colspan="8" | Characteristics | |
| − | + | |- | |
| − | + | ! colspan="8" | ''Stock'' | |
| − | + | |- | |
| − | |||
| − | {| class="wikitable" style="text-align:center" | ||
| − | ! | ||
! colspan="2" | Max Speed<br>(km/h at 0 m - sea level) | ! colspan="2" | Max Speed<br>(km/h at 0 m - sea level) | ||
| − | ! rowspan="2" | Max altitude<br>( | + | ! rowspan="2" | Max altitude<br>(meters) |
! colspan="2" | Turn time<br>(seconds) | ! colspan="2" | Turn time<br>(seconds) | ||
| − | ! colspan="2" | Rate of climb<br>( | + | ! colspan="2" | Rate of climb<br>(meters/second) |
| − | ! rowspan="2" | Take-off run<br>( | + | ! rowspan="2" | Take-off run<br>(meters) |
|- | |- | ||
| − | ! AB | + | ! AB |
| + | ! RB | ||
| + | ! AB | ||
| + | ! RB | ||
| + | ! AB | ||
| + | ! RB | ||
|- | |- | ||
| − | + | | 910 || 884 || 14,965 || 26.8 || 27.8 || 21.6 || 20.2 || 670 | |
| − | | 910 || 884 || | ||
|- | |- | ||
| − | ! Upgraded | + | ! colspan="8" | ''Upgraded'' |
| − | | 947 || 933 || 25.8 || 26.0 || 33.9 || 27.4 | + | |- |
| + | ! colspan="2" | Max Speed<br>(km/h at 0 m - sea level) | ||
| + | ! rowspan="2" | Max altitude (meters) | ||
| + | ! colspan="2" | Turn time (seconds) | ||
| + | ! colspan="2" | Rate of climb<br>(meters/second) | ||
| + | ! rowspan="2" | Take-off run (meters) | ||
| + | |- | ||
| + | ! AB | ||
| + | ! RB | ||
| + | ! AB | ||
| + | ! RB | ||
| + | ! AB | ||
| + | ! RB | ||
| + | |- | ||
| + | | 947 || 933 || 14,965 || 25.8 || 26.0 || 33.9 || 27.4 || 670 | ||
|- | |- | ||
|} | |} | ||
| − | ==== Details ==== | + | ====Details==== |
| − | {| class="wikitable" style="text-align:center | + | {| class="wikitable" style="text-align:center" |
|- | |- | ||
| − | ! colspan=" | + | ! colspan="5" | Features |
|- | |- | ||
| − | ! Combat | + | ! Combat flap |
| + | ! Take-off flap | ||
| + | ! Landing flap | ||
| + | ! Air brakes | ||
| + | ! Arrestor gear | ||
|- | |- | ||
| − | | ✓ || ✓ || ✓ || ✓ || ✓ | + | | ✓ || ✓ || ✓ || ✓ || ✓ <!-- ✓ --> |
|- | |- | ||
|} | |} | ||
| − | {| class="wikitable" style="text-align:center | + | {| class="wikitable" style="text-align:center" |
|- | |- | ||
| − | ! colspan=" | + | ! colspan="5" | Limits |
|- | |- | ||
| − | ! rowspan="2" | | + | ! rowspan="2" | Wing-break speed<br>(km/h) |
| − | ! rowspan="2" | Gear (km/h) | + | ! rowspan="2" | Gear limit<br>(km/h) |
| − | ! | + | ! rowspan="2" | Combat flap<br> (km/h) |
! colspan="2" | Max Static G | ! colspan="2" | Max Static G | ||
|- | |- | ||
| − | + | ! + | |
| + | ! - | ||
|- | |- | ||
| − | | | + | | 994 || 342 || 525 || ~12 || ~5 |
|- | |- | ||
|} | |} | ||
| Line 69: | Line 90: | ||
{| class="wikitable" style="text-align:center" | {| class="wikitable" style="text-align:center" | ||
|- | |- | ||
| − | ! colspan="4" | Optimal velocities | + | ! colspan="4" | Optimal velocities |
|- | |- | ||
| − | ! Ailerons | + | ! Ailerons<br>(km/h) |
| + | ! Rudder<br>(km/h) | ||
| + | ! Elevators<br>(km/h) | ||
| + | ! Radiator<br>(km/h) | ||
|- | |- | ||
| − | | < 620 || < 650 || < 700 || | + | | < 620 || < 650 || < 700 || > 550 |
|- | |- | ||
|} | |} | ||
| − | |||
{| class="wikitable" style="text-align:center" | {| class="wikitable" style="text-align:center" | ||
|- | |- | ||
| − | ! colspan="3" | | + | ! colspan="3" | Compressor (RB/SB) |
| − | |||
|- | |- | ||
| − | ! | + | ! colspan="3" | Setting 1 |
| − | |||
|- | |- | ||
| − | + | ! Optimal altitude | |
| − | + | ! 100% Engine power | |
| + | ! WEP Engine power | ||
|- | |- | ||
| − | + | | 0 m || 1470 kgf || No WEP | |
| − | |||
|- | |- | ||
| − | ! | + | <!--! colspan="3" | Setting 2 |
| − | |||
|- | |- | ||
| − | + | ! Optimal altitude | |
| − | + | ! 100% Engine power | |
| + | ! WEP Engine power | ||
|- | |- | ||
| − | + | | ?,??? m || ?,??? hp || ?,??? hp | |
| − | |||
|- | |- | ||
| − | ! | + | ! colspan="3" | Setting 3 |
| − | |||
|- | |- | ||
| − | + | ! Optimal altitude | |
| − | + | ! 100% Engine power | |
| − | + | ! WEP Engine power | |
| − | |||
| − | |||
|- | |- | ||
| + | | ?,??? m || ?,??? hp || ?,??? hp | ||
| + | |- --> | ||
|} | |} | ||
=== Survivability and armour === | === Survivability and armour === | ||
| − | |||
| − | |||
''Examine the survivability of the aircraft. Note how vulnerable the structure is and how secure the pilot is, whether the fuel tanks are armoured, etc. Describe the armour, if there is any, and also mention the vulnerability of other critical aircraft systems.'' | ''Examine the survivability of the aircraft. Note how vulnerable the structure is and how secure the pilot is, whether the fuel tanks are armoured, etc. Describe the armour, if there is any, and also mention the vulnerability of other critical aircraft systems.'' | ||
| − | |||
| − | |||
| − | |||
| − | |||
| − | |||
== Armaments == | == Armaments == | ||
| − | |||
=== Offensive armament === | === Offensive armament === | ||
| − | |||
<!-- ''Describe the offensive armament of the aircraft, if any. Describe how effective the cannons and machine guns are in a battle, and also what belts or drums are better to use. If there is no offensive weaponry, delete this subsection.'' --> | <!-- ''Describe the offensive armament of the aircraft, if any. Describe how effective the cannons and machine guns are in a battle, and also what belts or drums are better to use. If there is no offensive weaponry, delete this subsection.'' --> | ||
| − | {{main|M3 (20 mm)}} | + | {{main|AN/M3 (20 mm)}} |
The '''''{{PAGENAME}}''''' is armed with: | The '''''{{PAGENAME}}''''' is armed with: | ||
| − | * 4 x 20 mm M3 | + | * 4 x 20 mm AN/M3 cannon, nose-mounted (150 rpg = 600 total) |
=== Suspended armament === | === Suspended armament === | ||
| − | |||
<!-- ''Describe the aircraft's suspended armament: additional cannons under the wings, bombs, rockets and torpedoes. This section is especially important for bombers and attackers. If there is no suspended weaponry remove this subsection.'' --> | <!-- ''Describe the aircraft's suspended armament: additional cannons under the wings, bombs, rockets and torpedoes. This section is especially important for bombers and attackers. If there is no suspended weaponry remove this subsection.'' --> | ||
| + | {{main|HVAR|AN-M57 (250 lb)|AN-M64A1 (500 lb)}} | ||
The '''''{{PAGENAME}}''''' can be outfitted with the following ordnance: | The '''''{{PAGENAME}}''''' can be outfitted with the following ordnance: | ||
| − | + | * Without load | |
| − | + | * 8 x 127 mm HVAR rockets | |
| − | |||
| − | |||
| − | |||
| − | |||
| − | |||
| − | |||
| − | |||
| − | |||
| − | |||
| − | |||
| − | |||
| − | |||
| − | |||
| − | |||
| − | |||
| − | |||
| − | |||
| − | |||
| − | |||
| − | |||
| − | |||
| − | |||
| − | |||
| − | |||
| − | |||
| − | * 8 x HVAR rockets | ||
* 4 x 250 lb AN-M57 bombs (1,000 lb total) | * 4 x 250 lb AN-M57 bombs (1,000 lb total) | ||
* 2 x 500 lb AN-M64A1 bombs (1,000 lb total) | * 2 x 500 lb AN-M64A1 bombs (1,000 lb total) | ||
| − | |||
== Usage in battles == | == Usage in battles == | ||
| − | <!-- ''Describe the tactics of playing in | + | <!-- ''Describe the tactics of playing in an aircraft, the features of using vehicles in a team and advice on tactics. Refrain from creating a "guide" - do not impose a single point of view, but instead, give the reader food for thought. Examine the most dangerous enemies and give recommendations on fighting them. If necessary, note the specifics of the game in different modes (AB, RB, SB).'' --> |
| − | The Banshee is first in the US naval jet lineup and possesses many characteristics that make it a fantastic start for jet players. | + | The Banshee is first in the US naval jet lineup, and possesses many traits and characteristics that make it a fantastic start for jet players. Some tips to use it effectively are: |
| − | |||
| − | Some tips to use it effectively are: | ||
*Staying at a high altitude (side-climbing) | *Staying at a high altitude (side-climbing) | ||
| − | *Avoiding/evading higher-flying prop and jet planes ( | + | *Avoiding/evading higher-flying prop and jet planes (use "C" (default) to pan around you; this is extremely useful) |
| − | *Using Boom & Zoom or | + | *Using Boom & Zoom or Boom & Run |
| + | *Upgrading your plane | ||
| − | In AB, the F2H is actually quite mediocre. Its high BR makes it liable to be put with superior jets such as the Me-262 (which has unlimited fuel, as is characteristic of AB) or the F-86 Sabre. | + | In AB, the F2H is actually quite mediocre. Its high BR makes it liable to be put with superior jets such as the Me-262 (which has unlimited fuel, as is characteristic of AB) or the F-86 Sabre. However, an AB player can use the Banshee effectively by: |
| − | AB will initially be frustrating | + | AB will initially be frustrating. The un-upgraded Banshee is a very poor performer. Its cannons jam, it has a relatively poor climb rate, and acceleration is poor as well. |
| − | Once upgraded, however, the Banshee | + | Once upgraded, however, the Banshee is a very effective and useful plane. |
| − | The F2H-2 is most effectively used as an energy fighter. It has great energy retention, turns well, and accelerates quite well once fully researched. However, the stock Banshee is terrible compared to super-props such as the [[Tempest Mk II]], [[F8F-1B]], [[La-9]], and others. Therefore, it is recommended to climb at the beginning of a match to at least 4-6 km | + | The F2H-2 is most effectively used as an energy fighter. It has great energy retention, turns well, and accelerates quite well once fully researched. However, the stock Banshee is terrible compared to super-props such as the [[Tempest Mk II|Tempest Mk.II]], [[F8F-1B|F8F-1B]], [[La-9]], and others. Therefore, it is recommended to climb at the beginning of a match to at least 4-6 km. The Banshee performs extremely well at these altitudes. However, keep in mind that evasion of superior planes such as the F8F-1B or the [[MiG-15]] is key. Once there, Boom & Zoom can be employed. Make sure your level speed is at least 300 mph due to the fact that the F2H-2 is extremely sluggish below that. However, low-speed stability coupled with an airbrake make the Banshee an extremely good prop-killer. SPEED IS YOUR FRIEND, as you can outrun most jets at your [[Battle ratings|Battle Rating]]. It is also extremely hard to tear the Banshee's wings. |
| − | If you are unlucky, you will face the [[F-86A-5|F-86A]] and [[MiG-15]] in some battles | + | If you are unlucky, you will face the [[F-86A-5|F-86A]] and [[MiG-15]] in some battles. Avoid them at all costs as they climb far better than the Banshee and have superior top speed. |
| − | Unfortunately, like most other jets, modifications take a long while to grind. Go for anything that increases the Banshee's climb rate. | + | Unfortunately, like most other jets, modifications take a long while to grind. Go for anything that increases the Banshee's climb rate. Leave the cannon ammo belts alone because default has the most HE shells (besides Stealth), and research the ''New Cannons'' modification. It will markedly improve the terrible spread of the cannon. |
| − | The cockpit of the F2H-2 is fantastic- the bubble canopy provides good visibility | + | The cockpit of the F2H-2 is fantastic- the bubble canopy provides good visibility, rearward and forward. |
| − | Even with good advantages as a starting jet fighter (if you went with the Naval Line of USA Fighters), it has some disadvantages going up against MiG-15's and MiG-17's. It can certainly outrun La-174's and La-15's with splendid ease, but it will never be able to outrun a MiG once it's on your tail. As for MiG-9's, they can't outrun the Banshee but can probably out-turn it if the MiG-9 pilot is properly trained and experienced. | + | Even with good advantages as a starting jet fighter (if you went with the Naval Line of USA Fighters), it has some disadvantages going up against MiG-15's and MiG-17's. It can certainly outrun La-174's and La-15's with splendid ease, but it will never be able to outrun a MiG once it's on your tail. As for MiG-9's, they can't outrun the Banshee (if fully spaded, careful here) but can probably out-turn it if the MiG-9 pilot is properly trained and experienced. |
| − | + | Its '''main usage''' will be basically acting as a support fighter in EVERY situation, unless you are down-tiered and you are put against Ho-229's and Me-262's. In such a case, you can become an aggressive fighter and easily get three or more kills. Although, if you are put up against MiG-17's, MiG-15's and La-15's, best prepare yourself to side-climb and be behind your allies. Get some altitude, get some patience and get ready to take out baited MiG's that are either chasing Hunter's or Sabers, or an unfortunate bomber. | |
| − | A good recommendation is that you should never go for [[IL-28|IL- | + | A good recommendation is that you should never go for [[IL-28|IL-28's]] alone. Other recommendations is that you should never strap in rockets to this thing or bombs, unless you're in a squad and you all have the purpose of bombing points together. It is NOT recommended, either way. Another tip is to always try to hold your speed and REMEMBER to use your airbrakes when being tailed by a MiG. |
| − | + | ===Modules=== | |
| − | === | + | {| class="wikitable" |
| − | + | ! colspan="1" | Tier | |
| − | + | ! colspan="2" | Flight performance | |
| − | + | ! colspan="1" | Survivability | |
| − | + | ! colspan="2" | Weaponry | |
| − | + | |- | |
| − | ! colspan=" | + | | I |
| + | | Fuselage Repair | ||
| + | | Compressor | ||
| + | | | ||
| + | | | ||
| + | | FSBC mk.5 | ||
| + | |- | ||
| + | | II | ||
| + | | New Boosters | ||
| + | | | ||
| + | | Airframe | ||
| + | | Offensive 20 mm | ||
| + | | | ||
|- | |- | ||
| − | + | | III | |
| − | + | | Wings Repair | |
| − | + | | Engine | |
| − | + | | | |
| + | | | ||
| + | | FRC mk.2 | ||
|- | |- | ||
| − | | | + | | IV |
| + | | G-Suit | ||
| + | | | ||
| + | | Cover | ||
| + | | New 20 mm Cannons | ||
| + | | FMBC mk.1 | ||
|- | |- | ||
|} | |} | ||
| + | |||
| + | *''Compressor'' and ''Engine'' are always useful upgrades and all acceleration unlocks are top priority. Given the ''uniqueness'' of the AN/M3 armament ''New 20 mm cannons'' and ''[[G-Suit]]'' should be preferable tier 4 goals. The stock belts are better than any other type of ammo, due to more two times more HEFI-T inside of them, but for the improved cannons, they need to be researched, albeit that can wait past the G-Suit. To help with the maneuverability issues, boosters should be considered a priority as well. | ||
=== Pros and cons === | === Pros and cons === | ||
| − | <!-- '' | + | <!-- ''Summarize and briefly evaluate the vehicle in terms of its characteristics and combat effectiveness. Mark its pros and cons in the bulleted list. Try not to use more than 6 points for each of the characteristics. Avoid using categorical definitions such as "bad", "good" and the like - use substitutions with softer forms such as "inadequate" and "effective".'' --> |
'''Pros:''' | '''Pros:''' | ||
| − | * | + | * Heavy Armament |
* Very good energy retention | * Very good energy retention | ||
| − | * Good | + | * Good acceleration, dive acceleration |
| + | * Good climb rate | ||
| + | * Good low speed stability and turn time | ||
| + | * Good performance at high altitudes (10,000 m) | ||
| + | * G-Suit module | ||
| + | * Cheap Repairs | ||
| + | * Durability | ||
| + | * Stable Gun Platform | ||
| + | * Decent Roll Rate | ||
* Landing hook for carriers | * Landing hook for carriers | ||
| − | '''Cons | + | '''Cons''' |
| − | * Cannon jams quickly and are very inaccurate | + | * Cannon jams quickly and are very inaccurate unless "new cannons" mod is activated |
| − | * | + | * Long takeoff run |
| − | * | + | * Slow roll rate |
| − | * | + | * Extremely poor stock model |
| + | * Not fast enough to effectively tail fast fighters | ||
| + | * Big wings, easy target for Soviet 37 mm cannon | ||
| + | * Due to battle rating of 8.0, it has a high tendency to get pitted against 9.0 jets that can outrun, outgun, and out climb it, making it a sitting duck unless an enemy pilot makes a grievous mistake | ||
== History == | == History == | ||
| − | <!-- ''Describe the history of the creation and combat usage of the aircraft in more detail than in the introduction. If the historical reference turns out to be too | + | <!-- ''Describe the history of the creation and combat usage of the aircraft in more detail than in the introduction. If the historical reference turns out to be too big, take it to a separate article, taking a link to the article about the vehicle and adding a block "/ History" (example: <nowiki>https://wiki.warthunder.com/(Vehicle-name)/History</nowiki>) and add a link to it here using the <code>main</code> template. Be sure to reference text and sources by using <code><nowiki><ref></nowiki></code>, as well as adding them at the end of the article. This section may also include the vehicle's dev blog entry (if applicable) and the in-game encyclopedia description (under <code><nowiki>=== Encyclopedia Info ===</nowiki></code>, also if applicable).'' --> |
| − | The | + | The Twin Engine F2H Banshee was a follow up to McDonnell's successful FH-1 Phantom. The two aircraft appear very similar. Primary differences include larger airframe, armament, and power-plants. The F2H Banshee was designed to become the Navy's next carrier born aircraft. Nearly 800 Banshees were built. The aircraft was quickly passed over by newer designs. |
| − | + | A majority of the F2H's service took place in the Atlantic and Mediterranean oceans. A few Banshees found their way to Korea with the Navy and Marines. VF 172 was deployed to Korea in August of 1951 and immediately saw action escorting B-29s. the Banshee saw limited fighter/bomber duty. The greatest role the F2H played was photo recon. Several aircraft were refurbished and sent to Canada were they saw limited service until the 1960's. | |
== Media == | == Media == | ||
<!-- ''Excellent additions to the article would be video guides, screenshots from the game, and photos.'' --> | <!-- ''Excellent additions to the article would be video guides, screenshots from the game, and photos.'' --> | ||
| − | + | [http://live.warthunder.com/feed/camouflages/?q=%23f2h '''Skins''' and camouflages for the F2H-2 Banshee from live.warthunder.com.] | |
| − | + | <gallery> | |
| − | |||
| − | |||
| − | |||
| − | |||
| − | <gallery | ||
File:FighterImage_Banshee2.jpg|The Banshee in flight with other identical aircraft. | File:FighterImage_Banshee2.jpg|The Banshee in flight with other identical aircraft. | ||
File:FighterImage_Banshee1.jpg|F2H attacking swarm of Me 262s in test flight mode. | File:FighterImage_Banshee1.jpg|F2H attacking swarm of Me 262s in test flight mode. | ||
| Line 261: | Line 270: | ||
== External links == | == External links == | ||
| − | + | ''Paste links to sources and external resources, such as:'' | |
| + | |||
* ''topic on the official game forum;'' | * ''topic on the official game forum;'' | ||
| − | * ''other literature.'' | + | * ''encyclopedia page on the aircraft;'' |
| − | + | * ''other literature.'' | |
| − | |||
| − | + | {{USA jet aircrafts}} | |
| − | {{USA jet | ||
Revision as of 21:04, 18 October 2019
Contents
Description

The F2H-2 Banshee is a Rank American naval jet fighter
with a battle rating of (AB), (RB), and (SB). It was introduced in Update 1.45 "Steel Generals". The F2H-2 Banshee is a fantastic jet-fighter with great overall speed and good maneuverability. It is most recognized for its ability to remain stable even past its speed limit break (933 kph) and also for its fantastic high-altitude performance.
The Banshee is a very stable platform at HIGH speeds. Warning appears at 940 kph; but it can reach over a 1,000 kph and still not rip apart, if flown carefully and kept it in a straight line.
Two engines for redundancy. If one is taken out, the machine can still return to base safely. A good advantage to have, due the fragility of jet engines when struck.
General info
Flight Performance
| Characteristics | |||||||
|---|---|---|---|---|---|---|---|
| Stock | |||||||
| Max Speed (km/h at 0 m - sea level) |
Max altitude (meters) |
Turn time (seconds) |
Rate of climb (meters/second) |
Take-off run (meters) | |||
| AB | RB | AB | RB | AB | RB | ||
| 910 | 884 | 14,965 | 26.8 | 27.8 | 21.6 | 20.2 | 670 |
| Upgraded | |||||||
| Max Speed (km/h at 0 m - sea level) |
Max altitude (meters) | Turn time (seconds) | Rate of climb (meters/second) |
Take-off run (meters) | |||
| AB | RB | AB | RB | AB | RB | ||
| 947 | 933 | 14,965 | 25.8 | 26.0 | 33.9 | 27.4 | 670 |
Details
| Features | ||||
|---|---|---|---|---|
| Combat flap | Take-off flap | Landing flap | Air brakes | Arrestor gear |
| ✓ | ✓ | ✓ | ✓ | ✓ |
| Limits | ||||
|---|---|---|---|---|
| Wing-break speed (km/h) |
Gear limit (km/h) |
Combat flap (km/h) |
Max Static G | |
| + | - | |||
| 994 | 342 | 525 | ~12 | ~5 |
| Optimal velocities | |||
|---|---|---|---|
| Ailerons (km/h) |
Rudder (km/h) |
Elevators (km/h) |
Radiator (km/h) |
| < 620 | < 650 | < 700 | > 550 |
| Compressor (RB/SB) | ||
|---|---|---|
| Setting 1 | ||
| Optimal altitude | 100% Engine power | WEP Engine power |
| 0 m | 1470 kgf | No WEP |
Survivability and armour
Examine the survivability of the aircraft. Note how vulnerable the structure is and how secure the pilot is, whether the fuel tanks are armoured, etc. Describe the armour, if there is any, and also mention the vulnerability of other critical aircraft systems.
Armaments
Offensive armament
The F2H-2 is armed with:
- 4 x 20 mm AN/M3 cannon, nose-mounted (150 rpg = 600 total)
Suspended armament
The F2H-2 can be outfitted with the following ordnance:
- Without load
- 8 x 127 mm HVAR rockets
- 4 x 250 lb AN-M57 bombs (1,000 lb total)
- 2 x 500 lb AN-M64A1 bombs (1,000 lb total)
Usage in battles
The Banshee is first in the US naval jet lineup, and possesses many traits and characteristics that make it a fantastic start for jet players. Some tips to use it effectively are:
- Staying at a high altitude (side-climbing)
- Avoiding/evading higher-flying prop and jet planes (use "C" (default) to pan around you; this is extremely useful)
- Using Boom & Zoom or Boom & Run
- Upgrading your plane
In AB, the F2H is actually quite mediocre. Its high BR makes it liable to be put with superior jets such as the Me-262 (which has unlimited fuel, as is characteristic of AB) or the F-86 Sabre. However, an AB player can use the Banshee effectively by:
AB will initially be frustrating. The un-upgraded Banshee is a very poor performer. Its cannons jam, it has a relatively poor climb rate, and acceleration is poor as well.
Once upgraded, however, the Banshee is a very effective and useful plane.
The F2H-2 is most effectively used as an energy fighter. It has great energy retention, turns well, and accelerates quite well once fully researched. However, the stock Banshee is terrible compared to super-props such as the Tempest Mk.II, F8F-1B, La-9, and others. Therefore, it is recommended to climb at the beginning of a match to at least 4-6 km. The Banshee performs extremely well at these altitudes. However, keep in mind that evasion of superior planes such as the F8F-1B or the MiG-15 is key. Once there, Boom & Zoom can be employed. Make sure your level speed is at least 300 mph due to the fact that the F2H-2 is extremely sluggish below that. However, low-speed stability coupled with an airbrake make the Banshee an extremely good prop-killer. SPEED IS YOUR FRIEND, as you can outrun most jets at your Battle Rating. It is also extremely hard to tear the Banshee's wings.
If you are unlucky, you will face the F-86A and MiG-15 in some battles. Avoid them at all costs as they climb far better than the Banshee and have superior top speed.
Unfortunately, like most other jets, modifications take a long while to grind. Go for anything that increases the Banshee's climb rate. Leave the cannon ammo belts alone because default has the most HE shells (besides Stealth), and research the New Cannons modification. It will markedly improve the terrible spread of the cannon.
The cockpit of the F2H-2 is fantastic- the bubble canopy provides good visibility, rearward and forward.
Even with good advantages as a starting jet fighter (if you went with the Naval Line of USA Fighters), it has some disadvantages going up against MiG-15's and MiG-17's. It can certainly outrun La-174's and La-15's with splendid ease, but it will never be able to outrun a MiG once it's on your tail. As for MiG-9's, they can't outrun the Banshee (if fully spaded, careful here) but can probably out-turn it if the MiG-9 pilot is properly trained and experienced.
Its main usage will be basically acting as a support fighter in EVERY situation, unless you are down-tiered and you are put against Ho-229's and Me-262's. In such a case, you can become an aggressive fighter and easily get three or more kills. Although, if you are put up against MiG-17's, MiG-15's and La-15's, best prepare yourself to side-climb and be behind your allies. Get some altitude, get some patience and get ready to take out baited MiG's that are either chasing Hunter's or Sabers, or an unfortunate bomber.
A good recommendation is that you should never go for IL-28's alone. Other recommendations is that you should never strap in rockets to this thing or bombs, unless you're in a squad and you all have the purpose of bombing points together. It is NOT recommended, either way. Another tip is to always try to hold your speed and REMEMBER to use your airbrakes when being tailed by a MiG.
Modules
| Tier | Flight performance | Survivability | Weaponry | ||
|---|---|---|---|---|---|
| I | Fuselage Repair | Compressor | FSBC mk.5 | ||
| II | New Boosters | Airframe | Offensive 20 mm | ||
| III | Wings Repair | Engine | FRC mk.2 | ||
| IV | G-Suit | Cover | New 20 mm Cannons | FMBC mk.1 | |
- Compressor and Engine are always useful upgrades and all acceleration unlocks are top priority. Given the uniqueness of the AN/M3 armament New 20 mm cannons and G-Suit should be preferable tier 4 goals. The stock belts are better than any other type of ammo, due to more two times more HEFI-T inside of them, but for the improved cannons, they need to be researched, albeit that can wait past the G-Suit. To help with the maneuverability issues, boosters should be considered a priority as well.
Pros and cons
Pros:
- Heavy Armament
- Very good energy retention
- Good acceleration, dive acceleration
- Good climb rate
- Good low speed stability and turn time
- Good performance at high altitudes (10,000 m)
- G-Suit module
- Cheap Repairs
- Durability
- Stable Gun Platform
- Decent Roll Rate
- Landing hook for carriers
Cons
- Cannon jams quickly and are very inaccurate unless "new cannons" mod is activated
- Long takeoff run
- Slow roll rate
- Extremely poor stock model
- Not fast enough to effectively tail fast fighters
- Big wings, easy target for Soviet 37 mm cannon
- Due to battle rating of 8.0, it has a high tendency to get pitted against 9.0 jets that can outrun, outgun, and out climb it, making it a sitting duck unless an enemy pilot makes a grievous mistake
History
The Twin Engine F2H Banshee was a follow up to McDonnell's successful FH-1 Phantom. The two aircraft appear very similar. Primary differences include larger airframe, armament, and power-plants. The F2H Banshee was designed to become the Navy's next carrier born aircraft. Nearly 800 Banshees were built. The aircraft was quickly passed over by newer designs.
A majority of the F2H's service took place in the Atlantic and Mediterranean oceans. A few Banshees found their way to Korea with the Navy and Marines. VF 172 was deployed to Korea in August of 1951 and immediately saw action escorting B-29s. the Banshee saw limited fighter/bomber duty. The greatest role the F2H played was photo recon. Several aircraft were refurbished and sent to Canada were they saw limited service until the 1960's.
Media
Skins and camouflages for the F2H-2 Banshee from live.warthunder.com.

The Banshee in flight with other identical aircraft.

F2H attacking swarm of Me 262s in test flight mode.


See also
Links to the articles on the War Thunder Wiki that you think will be useful for the reader, for example:
- reference to the series of the aircraft;
- links to approximate analogues of other nations and research trees.
External links
Paste links to sources and external resources, such as:
- topic on the official game forum;
- encyclopedia page on the aircraft;
- other literature.
| USA jet aircraft | |
|---|---|
| Fighters | |
| F9F | F9F-2 · F9F-5 · F9F-8 |
| F-80 | F-80A-5 · F-80C-10 |
| F-84 | F-84B-26 · F-84F · F-84G-21-RE |
| F-86 | F-86A-5 · F-86F-25 · F-86F-2 · F-86F-35 |
| F-89 | F-89B · F-89D |
| F-100 | F-100D |
| F-104 | F-104A · F-104C |
| F-4 | F-4C Phantom II · F-4E Phantom II · F-4J Phantom II · F-4S Phantom II |
| F-5 | F-5A · F-5C · F-5E · F-20A |
| F-8 | F8U-2 · F-8E |
| F-14 | F-14A Early · ▄F-14A IRIAF · F-14B |
| F-15 | F-15A · F-15C MSIP II · F-15E |
| F-16 | F-16A · F-16A ADF · F-16C |
| Other | P-59A · F2H-2 · F3D-1 · F3H-2 · F4D-1 · F11F-1 |
| Strike Aircraft | |
| FJ-4 | FJ-4B · FJ-4B VMF-232 |
| A-4 | A-4B · A-4E Early |
| A-7 | A-7D · A-7E · A-7K |
| AV-8 | AV-8A · AV-8C · AV-8B Plus · AV-8B (NA) |
| A-10 | A-10A · A-10A Late · A-10C |
| F-111 | F-111A · F-111F |
| Other | A-6E TRAM · F-105D · F-117 |
| Bombers | |
| B-57 | B-57A · B-57B |
