Difference between pages "M56" and "P-400"
(→General info: Simplified terms, corrected typo and added precisions.) |
(→Flight performance) |
||
| Line 1: | Line 1: | ||
| − | {{Specs-Card|code= | + | {{About |
| + | | about = American fighter '''{{PAGENAME}}''' | ||
| + | | usage = other versions | ||
| + | | link = P-39 (Family) | ||
| + | }} | ||
| + | {{Specs-Card | ||
| + | |code=p-400 | ||
| + | |images={{Specs-Card-Image|GarageImage_{{PAGENAME}}.jpg|ArtImage_{{PAGENAME}}.png}} | ||
| + | |cockpit=cockpit_p-400.jpg | ||
| + | }} | ||
== Description == | == Description == | ||
| − | <!-- ''In the description, the first part should be about the history of the creation and combat usage of the | + | <!-- ''In the description, the first part should be about the history of and the creation and combat usage of the aircraft, as well as its key features. In the second part, tell the reader about the aircraft in the game. Insert a screenshot of the vehicle, so that if the novice player does not remember the vehicle by name, he will immediately understand what kind of vehicle the article is talking about.'' --> |
| − | + | The '''P-400''' was the American redesignation for the export model of the [[P-39 (Family)|P-39 Airacobra]], intended to be sent to Britain and other Allies. It was equipped with a 20 mm Hispano cannon in the nose, rather than the typical 37 mm of other models. Britain ordered 675 P-39s (redesignated as the "Airacobra Mk I") starting in September 1940; however, once they began to arrive in September 1941, it was quickly found that they had inadequate climb rate and high-altitude performance, and only 80 were operated. 200 were later sent from Britain to the Soviet Union. After the attack on Pearl Harbor, the US requisitioned another 200 of the units intended to be sent to Britain (redesignating them "P-400"), some of which were later sent on for use in the RAAF. | |
| − | |||
| − | The ''' | ||
| − | + | It was introduced in [[Update 1.37]]. The P-400 is the "little brother" of the [[P-39 (Family)|P-39]] and [[P-63 (Family)|P-63]]. Reaching maximum speed at an altitude of 2,400 m (7,900 ft) means you will have to look for enemies below you, or sacrifice speed to meet the opposition higher up. At medium and low altitudes it can be considered quite a fast plane for its BR range. It handles turning at higher speed rather well but can become unstable at lower speeds. Watch out when engaging in stall fighting (hammerheads & yo-yos). The P-400 can survive at high speeds while diving, but suffers from compression. The plane is suitable for high speeds attacks where you work more with horizontal rather than vertical movements. The P-400 has good weapons consisting of one 20 mm cannon with 60 rounds and two .50 cals and four .30 cals. If you have a good aim, you can destroy enemies in seconds, but if you don't the limited cannon ammo will run out in about 10-15 seconds. The .50 cals will still destroy foes reasonably quick, though the .30 cals require the right amount of accuracy, consistency and concentrated fire. | |
== General info == | == General info == | ||
| − | === | + | === Flight performance === |
| − | <!-- ''Describe | + | {{Specs-Avia-Flight}} |
| − | + | <!-- ''Describe how the aircraft behaves in the air. Speed, manoeuvrability, acceleration and allowable loads - these are the most important characteristics of the vehicle.'' --> | |
| − | + | {| class="wikitable" style="text-align:center" width="70%" | |
| − | + | ! rowspan="2" | Characteristics | |
| − | + | ! colspan="2" | Max Speed<br>(km/h at 2,400 m) | |
| − | + | ! rowspan="2" | Max altitude<br>(metres) | |
| − | + | ! colspan="2" | Turn time<br>(seconds) | |
| − | + | ! colspan="2" | Rate of climb<br>(metres/second) | |
| − | + | ! rowspan="2" | Take-off run<br>(metres) | |
| − | + | |- | |
| − | + | ! AB !! RB !! AB !! RB !! AB !! RB | |
| + | |- | ||
| + | ! Stock | ||
| + | | 553 || 534 || rowspan="2" | {{Specs|ceiling}} || 23.2 || 24.2 || 6.9 || 6.9 || rowspan="2" | 320 | ||
| + | |- | ||
| + | ! Upgraded | ||
| + | | 602 || 576 || 20.9 || 22.0 || 13.2 || 9.7 | ||
| + | |- | ||
| + | |} | ||
| − | {| class="wikitable" | + | ==== Details ==== |
| + | {| class="wikitable" style="text-align:center" width="50%" | ||
|- | |- | ||
| − | ! | + | ! colspan="5" | Features |
|- | |- | ||
| − | + | ! Combat flaps !! Take-off flaps !! Landing flaps !! Air brakes !! Arrestor gear | |
|- | |- | ||
| − | | | + | | ✓ || ✓ || ✓ || X || X <!-- ✓ --> |
|- | |- | ||
|} | |} | ||
| − | |||
| − | |||
| − | |||
| − | + | {| class="wikitable" style="text-align:center" width="50%" | |
| − | |||
| − | |||
| − | |||
| − | |||
| − | |||
| − | |||
| − | |||
| − | |||
| − | |||
| − | |||
| − | |||
| − | {| class="wikitable" style="text-align:center" width=" | ||
|- | |- | ||
| − | ! colspan=" | + | ! colspan="7" | Limits |
|- | |- | ||
| − | ! | + | ! rowspan="2" | Wings (km/h) |
| − | ! | + | ! rowspan="2" | Gear (km/h) |
| − | ! | + | ! colspan="3" | Flaps (km/h) |
| + | ! colspan="2" | Max Static G | ||
|- | |- | ||
| − | ! | + | ! Combat !! Take-off !! Landing !! + !! - |
| − | |||
|- | |- | ||
| − | ! | + | | 886 <!-- {{Specs|destruction|body}} --> || {{Specs|destruction|gear}} || 400 || 374 || 233 || ~12 || ~9 |
| − | | | ||
|- | |- | ||
|} | |} | ||
| − | + | {| class="wikitable" style="text-align:center" | |
| − | + | |- | |
| + | ! colspan="4" | Optimal velocities (km/h) | ||
| + | |- | ||
| + | ! Ailerons !! Rudder !! Elevators !! Radiator | ||
| + | |- | ||
| + | | < 360 || < 380 || < 450 || > 312 | ||
| + | |- | ||
| + | |} | ||
| − | + | === Survivability and armour === | |
| + | {{Specs-Avia-Armour}} | ||
| + | <!-- ''Examine the survivability of the aircraft. Note how vulnerable the structure is and how secure the pilot is, whether the fuel tanks are armoured, etc. Describe the armour, if there is any, and also mention the vulnerability of other critical aircraft systems.'' --> | ||
| + | '''Armour plates:''' | ||
| − | + | * 15.87 mm Steel - Ring Behind propeller | |
| + | * 15.87 mm Steel - 2 on the left and right sides of the nose | ||
| + | * 7 mm Steel - Fore-cockpit plate | ||
| + | * 7 mm Steel - Cockpit front | ||
| + | * 38 mm Bulletproof Glass - Cockpit front | ||
| + | * 64 mm Bulletproof Glass - Behind Pilot | ||
| + | * 7 mm steel - Cockpit Rear | ||
| + | * 6 mm steel - Behind cooling systems and engine | ||
| + | * Self-sealing fuel tanks (1 in each wing) | ||
| − | + | '''Critical components:''' | |
| − | + | * Cooling and Engine are in the middle of the plane | |
| − | + | * Propeller shaft spans nearly the entire length of the aircraft | |
| − | + | === Modifications and economy === | |
| + | {{Specs-Economy}} | ||
| − | + | == Armaments == | |
| + | {{Specs-Avia-Armaments}} | ||
| + | === Offensive armament === | ||
| + | {{Specs-Avia-Offensive}} | ||
| + | <!-- ''Describe the offensive armament of the aircraft, if any. Describe how effective the cannons and machine guns are in a battle, and also what belts or drums are better to use. If there is no offensive weaponry, delete this subsection.'' --> | ||
| + | {{main|Hispano 404 (20 mm)|M2 Browning (12.7 mm)|Browning (7.62 mm)}} | ||
| − | The ''' | + | The '''''{{PAGENAME}}''''' is armed with: |
| − | + | * 1 x 20 mm Hispano 404 cannon, nose-mounted (60 rpg) | |
| + | * 2 x 12.7 mm M2 Browning machine guns, nose-mounted (270 rpg = 540 total) | ||
| + | * 4 x 7.62 mm Browning machine guns, wing-mounted (1,000 rpg = 4,000 total) | ||
| − | + | === Suspended armament === | |
| + | {{Specs-Avia-Suspended}} | ||
| + | <!-- ''Describe the aircraft's suspended armament: additional cannons under the wings, bombs, rockets and torpedoes. This section is especially important for bombers and attackers. If there is no suspended weaponry remove this subsection.'' --> | ||
| + | {{main|AN-M64A1 (500 lb)}} | ||
| − | + | The '''''{{PAGENAME}}''''' can be outfitted with the following ordnance: | |
| − | + | * Without load | |
| − | + | * 1 x 500 lb AN-M64A1 bomb (500 lb total) | |
| − | |||
| − | |||
| − | |||
| − | |||
| − | |||
| − | |||
| − | |||
| − | |||
| − | |||
| − | |||
| − | |||
| − | |||
| − | |||
| − | |||
| − | |||
| − | |||
| − | |||
| − | |||
| − | |||
| − | |||
| − | |||
| − | |||
| − | |||
| − | |||
| − | |||
| − | |||
| − | |||
| − | |||
| − | |||
| − | |||
| − | |||
| − | |||
| − | |||
| − | |||
| − | |||
| − | |||
| − | |||
| − | |||
| − | |||
| − | |||
| − | |||
| − | |||
| − | |||
| − | |||
| − | |||
| − | |||
| − | |||
| − | |||
| − | |||
| − | |||
| − | |||
| − | |||
| − | |||
| − | |||
| − | |||
| − | |||
| − | |||
| − | |||
| − | |||
| − | |||
| − | |||
| − | |||
| − | |||
| − | |||
| − | |||
| − | |||
| − | |||
| − | |||
| − | |||
| − | |||
| − | |||
| − | |||
| − | |||
| − | |||
| − | |||
| − | |||
| − | |||
| − | |||
| − | |||
| − | |||
== Usage in battles == | == Usage in battles == | ||
| − | <!-- ''Describe the tactics of playing in the | + | <!-- ''Describe the tactics of playing in the aircraft, the features of using aircraft in a team and advice on tactics. Refrain from creating a "guide" - do not impose a single point of view, but instead, give the reader food for thought. Examine the most dangerous enemies and give recommendations on fighting them. If necessary, note the specifics of the game in different modes (AB, RB, SB).'' --> |
| − | + | Use energy tactics at low altitude and Boom & Zoom to dispatch targets if you are at high altitude. In Domination matches, this plane comes into its environment with dogfight furballs occurring in which the P-400 can intervene. Use the excellent energy retention to your advantage and avoid any type of turn fighting, as even a [[F6F-5|F6F Hellcat]] would be able to out-turn your aircraft. | |
| − | + | Never contest a bomber at altitude when the plane is fully stock - it lacks the engine power to compete above 4,000 m, and even as a spaded aircraft, it doesn't perform as well as the [[Spitfire Mk Ia|Spitfires]] and [[Bf 109 E-3|Bf 109s]] at similar battle ratings. If you're ever forced to dogfight, use the rudder and elevator to pull yourself into a sort of climbing spiral, which the P-400 is exceptionally good at thanks to its powerful engine. | |
| − | + | The [[Hispano 404 (20 mm)|Hispano cannon]], once on target, will easily take out fighters and most bombers with a short burst, or at the very least, cripple it. However, if there is a good fighter pilot on the enemy team, they will climb to secure high altitude. When you see them in more agile aircraft, your only option is to dive away and begin to strafe the furball down low. Beware that many planes in this battle rating range, including the [[I-16 type 27|cannon-equipped Ishak]], outperform this plane in at least one, if not more categories, but this plane usually has more than one advantage over every plane it will face (i.e. it is faster than the [[Spitfire_Mk_Ia|Spitfire Mk 1a]] and out rolls it). | |
| − | + | Use the advantages of this plane - its high speed, great rudder, powerful engine, superior armament, and terrific initial turn at high speeds. However, don't use it in a way that exposes its weaknesses - bad low-speed handling, weak turning, and poor climb rate - in combat, like when you are getting Rope-a-Doped, just flip over with an Immelmann and Turn & Burn. | |
| − | |||
| − | + | ;CAS | |
| − | + | Thanks to the 20 mm canon combined with the 500 lb bomb, this plane can be great for CAS. While attacking ground targets, use "boom and zoom" tactics that allow high energy retention. While giving air support, fly low at high speed. Once you've found an opponent, get some shots on it and/or drop your ordnance. Once the engagement is over, maintain some speed while continuing with a slight climb to position for another attack run on an opponent. | |
| − | + | === Manual Engine Control === | |
| − | + | {| class="wikitable" style="text-align:center" | |
| − | === | ||
| − | {| class="wikitable" | ||
| − | |||
| − | |||
| − | |||
| − | |||
|- | |- | ||
| − | | | + | ! colspan="7" | MEC elements |
| − | |||
| − | |||
| − | |||
| − | |||
| − | |||
| − | |||
|- | |- | ||
| − | | | + | ! rowspan="2" | Mixer |
| − | | | + | ! rowspan="2" | Pitch |
| − | | | + | ! colspan="3" | Radiator |
| − | | | + | ! rowspan="2" | Supercharger |
| − | | | + | ! rowspan="2" | Turbocharger |
| − | |||
| − | |||
|- | |- | ||
| − | + | ! Oil !! Water !! Type | |
| − | |||
| − | |||
| − | |||
| − | |||
| − | |||
| − | |||
|- | |- | ||
| − | | | + | | Controllable || Controllable<br>Not auto controlled || Controllable<br>Not auto controlled || Controllable<br>Not auto controlled || Separate || Not controllable<br>1 gear || Not controllable |
| − | | | ||
| − | | | ||
| − | | | ||
| − | | | ||
| − | | | ||
| − | | | ||
|- | |- | ||
|} | |} | ||
=== Pros and cons === | === Pros and cons === | ||
| − | <!-- ''Summarise and briefly evaluate the vehicle in terms of its characteristics and combat effectiveness. Mark its pros and cons in | + | <!-- ''Summarise and briefly evaluate the vehicle in terms of its characteristics and combat effectiveness. Mark its pros and cons in the bulleted list. Try not to use more than 6 points for each of the characteristics. Avoid using categorical definitions such as "bad", "good" and the like - use substitutions with softer forms such as "inadequate" and "effective".'' --> |
'''Pros:''' | '''Pros:''' | ||
| − | * | + | |
| − | * | + | * Fast plane up to ~3,000 m (12,000 ft) |
| − | * | + | * .30 and .50 cal machine guns have separate trigger |
| − | * | + | * Good pool of machine gun ammunition |
| − | * | + | * Good stopping power with all weapons active |
| − | + | * Nose-mounted 20 mm cannon (centre line mounted weaponry equals good accuracy) | |
| − | + | * Well armoured | |
| − | * | + | * Cockpit has good visibility |
| − | * | + | * Carries a total of 7 guns with three slightly different trajectories, resulting in a high hit probability with at least one of them |
| − | * | + | * Hispano cannon is more accurate and reliable than the 37 mm cannon |
| + | * Excellent rudder control even at high speeds | ||
| + | * Powerful engine | ||
'''Cons:''' | '''Cons:''' | ||
| − | + | ||
| − | * | + | * Low ammunition count for 20 mm cannon |
| − | * | + | * Ammo counter represents the total amount of machine gun ammo, not the particular calibre |
| − | * | + | * Gets pilot-sniped easily due to the bubble canopy design |
| − | * | + | * Suffers a lot from compression |
| − | * | + | * Becomes quite unstable at low speeds |
| − | + | * Fuel cells are stretched across the wings, resulting in fairly common fires | |
| − | * | + | * The engine is centrally mounted, taking engine damage while being chased is common |
| − | + | * Terrible turning at high speeds | |
| − | + | * Horrible responsiveness & roll rate | |
| − | * | ||
| − | * | ||
== History == | == History == | ||
| − | <!-- ''Describe the history of the creation and combat usage of the | + | <!-- ''Describe the history of the creation and combat usage of the aircraft in more detail than in the introduction. If the historical reference turns out to be too long, take it to a separate article, taking a link to the article about the vehicle and adding a block "/History" (example: <nowiki>https://wiki.warthunder.com/(Vehicle-name)/History</nowiki>) and add a link to it here using the <code>main</code> template. Be sure to reference text and sources by using <code><nowiki><ref></ref></nowiki></code>, as well as adding them at the end of the article with <code><nowiki><references /></nowiki></code>. This section may also include the vehicle's dev blog entry (if applicable) and the in-game encyclopedia description (under <code><nowiki>=== In-game description ===</nowiki></code>, also if applicable).'' --> |
| − | |||
| − | |||
| − | + | {{break}} | |
| + | {{Navigation-Start|{{Annotation|Archive of the in-game description|An archive of the historical description of the vehicle that was presented in-game prior to Update 1.55 'Royal Armour'}}|expand=true}} | ||
| + | {{Navigation-First-Simple-Line}} | ||
| − | + | A single-engine all-metal monoplane fighter with a closed cockpit and retractable tricycle landing gear with a nose leg. The aircraft had an unusual layout, with the engine placed behind the cockpit. | |
| − | |||
| − | The | + | The aircraft was designed by the Bell Aircraft design office under the direction of R. Woods and H. Poyer. The experimental model XP-39 took its maiden flight on 6 April 1938. |
| − | === | + | The first overseas order came from France in October 1939. The French were in urgent need of rearming their fighter forces, and bought as many fighters as they could from overseas. However, the order was not fulfilled before France's capitulation in the summer of 1940. After the capitulation, all outstanding French orders for military vehicles were redirected to Britain. |
| − | + | ||
| + | The high flight characteristics of the experimental XP-39 also drew attention from the British buying committee in the USA. Seduced by its tricycle undercarriage, powerful armament, high climbing rate and promises of high speeds of up to 640 km/h, the British ordered 675 airplanes, including the 200 from the French order. | ||
| + | |||
| + | The fighters produced for Britain had the designation model 14A and were powered by the 12-cylinder air-cooled Allison V-1710-E4 engine with a maximum output of 1,150 hp. | ||
| + | |||
| + | The model 14A's armament consisted of a 20 mm British-Hispano M1 cannon with 60 shells, two large-calibre synchronized Colt Browning M2 .50 cal machine guns on the fuselage with 200 rounds each and four British 7.7 mm Colt-Browning Mk.II .303 machine guns on the wing surfaces with 350 rounds each. | ||
| + | |||
| + | In the RAF, the model 14A fighters received the designation Airacobra Mk.I. However, when the British received the first Airacobra Mk.Is in the summer of 1941, tests revealed that rather than the high-altitude interceptor they had expected, they had actually received an unexceptional medium-altitude fighter, albeit with a powerful engine. At the same time, the fighter's manoeuvrability and responsiveness received good ratings. | ||
| + | |||
| + | In December 1941, the British Air Ministry decided to remove the Airacobra Mk.I from service. By this time, 164 of the fighters had been sent to Britain. | ||
| + | |||
| + | After Japan's attack on Pearl Harbor, the US requisitioned the fighters which had not yet been shipped to the British or were still in various stages of assembly. | ||
| + | |||
| + | In December 1941, 179 of the aircraft went into service in the USAAF with the designation P-400. They kept their British camouflage and organizational numbering. The majority of these planes served within US territory as training vehicles, but a number of P-400s took part in combat operations in New Guinea and North Africa. | ||
| + | {{Navigation-End}} | ||
| + | |||
| + | === Joke === | ||
| + | A joke which may (or may not) have been used by the British in WW2:<ref group="note">Copied from [http://forum.warthunder.com/index.php?/topic/291882-schlechte-witze-mit-war-thunder-bezug/?p=5693741#entry5693741 War Thunder Forum "Schlechte Witze mit War Thunder Bezug" - 'Bad jokes with War Thunder related content'], no source was given by the forum user. Topic is named/about "Bad jokes".</ref><br /> | ||
| + | |||
| + | :''Why is the P-400 called the P-400?'' | ||
| + | :''Because it's a P-40 with a Zero on its tail!'' | ||
== Media == | == Media == | ||
<!-- ''Excellent additions to the article would be video guides, screenshots from the game, and photos.'' --> | <!-- ''Excellent additions to the article would be video guides, screenshots from the game, and photos.'' --> | ||
| − | {{Youtube-gallery| | + | |
| + | ;Skins | ||
| + | |||
| + | * [https://live.warthunder.com/feed/camouflages/?vehicle=p-400 Skins and camouflages for the {{PAGENAME}} from live.warthunder.com.] | ||
| + | |||
| + | ;Videos | ||
| + | {{Youtube-gallery|ux3UJ8qg8Go|'''The Shooting Range #268''' - ''Metal Beasts'' section at 00:30 discusses the {{PAGENAME}}.|Mz0EZAlPJus|'''Sub Request, {{PAGENAME}}. Where's my team?''' - ''Joseph 2000''|a4uM2z2hKRk|'''{{PAGENAME}}- All bite and no bark''' - ''Oxy''|JzG7qFayv-8|'''{{PAGENAME}} - US - 2.7 BR - Realistic Battle Review''' - ''Virus''}} | ||
== See also == | == See also == | ||
''Links to the articles on the War Thunder Wiki that you think will be useful for the reader, for example:'' | ''Links to the articles on the War Thunder Wiki that you think will be useful for the reader, for example:'' | ||
| − | * ''reference to the series of the | + | |
| + | * ''reference to the series of the aircraft;'' | ||
* ''links to approximate analogues of other nations and research trees.'' | * ''links to approximate analogues of other nations and research trees.'' | ||
| − | |||
| − | |||
| − | |||
== External links == | == External links == | ||
| − | <!--Paste links to sources and external resources, such as: | + | <!-- ''Paste links to sources and external resources, such as:'' |
* ''topic on the official game forum;'' | * ''topic on the official game forum;'' | ||
| − | + | * ''other literature.'' --> | |
| − | * ''other literature.''--> | + | |
| + | * [https://forum.warthunder.com/index.php?/topic/86385-bell-p-400/ Official data sheet - more details about the performance] | ||
| − | + | === References === | |
| − | + | <references group="note" /> | |
| − | {{USA | + | {{AirManufacturer Bell}} |
| + | {{USA fighters}} | ||
Latest revision as of 07:41, 1 September 2024
| This page is about the American fighter P-400. For other versions, see P-39 (Family). |


Contents
Description
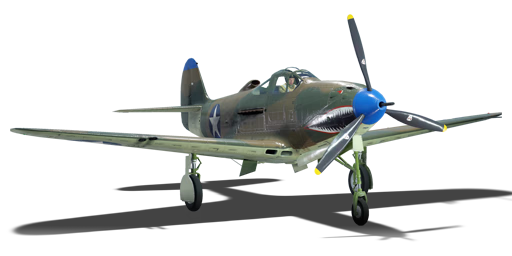
The P-400 was the American redesignation for the export model of the P-39 Airacobra, intended to be sent to Britain and other Allies. It was equipped with a 20 mm Hispano cannon in the nose, rather than the typical 37 mm of other models. Britain ordered 675 P-39s (redesignated as the "Airacobra Mk I") starting in September 1940; however, once they began to arrive in September 1941, it was quickly found that they had inadequate climb rate and high-altitude performance, and only 80 were operated. 200 were later sent from Britain to the Soviet Union. After the attack on Pearl Harbor, the US requisitioned another 200 of the units intended to be sent to Britain (redesignating them "P-400"), some of which were later sent on for use in the RAAF.
It was introduced in Update 1.37. The P-400 is the "little brother" of the P-39 and P-63. Reaching maximum speed at an altitude of 2,400 m (7,900 ft) means you will have to look for enemies below you, or sacrifice speed to meet the opposition higher up. At medium and low altitudes it can be considered quite a fast plane for its BR range. It handles turning at higher speed rather well but can become unstable at lower speeds. Watch out when engaging in stall fighting (hammerheads & yo-yos). The P-400 can survive at high speeds while diving, but suffers from compression. The plane is suitable for high speeds attacks where you work more with horizontal rather than vertical movements. The P-400 has good weapons consisting of one 20 mm cannon with 60 rounds and two .50 cals and four .30 cals. If you have a good aim, you can destroy enemies in seconds, but if you don't the limited cannon ammo will run out in about 10-15 seconds. The .50 cals will still destroy foes reasonably quick, though the .30 cals require the right amount of accuracy, consistency and concentrated fire.
General info
Flight performance
| Characteristics | Max Speed (km/h at 2,400 m) |
Max altitude (metres) |
Turn time (seconds) |
Rate of climb (metres/second) |
Take-off run (metres) | |||
|---|---|---|---|---|---|---|---|---|
| AB | RB | AB | RB | AB | RB | |||
| Stock | 553 | 534 | 23.2 | 24.2 | 6.9 | 6.9 | 320 | |
| Upgraded | 602 | 576 | 20.9 | 22.0 | 13.2 | 9.7 | ||
Details
| Features | ||||
|---|---|---|---|---|
| Combat flaps | Take-off flaps | Landing flaps | Air brakes | Arrestor gear |
| ✓ | ✓ | ✓ | X | X |
| Limits | ||||||
|---|---|---|---|---|---|---|
| Wings (km/h) | Gear (km/h) | Flaps (km/h) | Max Static G | |||
| Combat | Take-off | Landing | + | - | ||
| 886 | 400 | 374 | 233 | ~12 | ~9 | |
| Optimal velocities (km/h) | |||
|---|---|---|---|
| Ailerons | Rudder | Elevators | Radiator |
| < 360 | < 380 | < 450 | > 312 |
Survivability and armour
Armour plates:
- 15.87 mm Steel - Ring Behind propeller
- 15.87 mm Steel - 2 on the left and right sides of the nose
- 7 mm Steel - Fore-cockpit plate
- 7 mm Steel - Cockpit front
- 38 mm Bulletproof Glass - Cockpit front
- 64 mm Bulletproof Glass - Behind Pilot
- 7 mm steel - Cockpit Rear
- 6 mm steel - Behind cooling systems and engine
- Self-sealing fuel tanks (1 in each wing)
Critical components:
- Cooling and Engine are in the middle of the plane
- Propeller shaft spans nearly the entire length of the aircraft
Modifications and economy
Armaments
Offensive armament
The P-400 is armed with:
- 1 x 20 mm Hispano 404 cannon, nose-mounted (60 rpg)
- 2 x 12.7 mm M2 Browning machine guns, nose-mounted (270 rpg = 540 total)
- 4 x 7.62 mm Browning machine guns, wing-mounted (1,000 rpg = 4,000 total)
Suspended armament
The P-400 can be outfitted with the following ordnance:
- Without load
- 1 x 500 lb AN-M64A1 bomb (500 lb total)
Usage in battles
Use energy tactics at low altitude and Boom & Zoom to dispatch targets if you are at high altitude. In Domination matches, this plane comes into its environment with dogfight furballs occurring in which the P-400 can intervene. Use the excellent energy retention to your advantage and avoid any type of turn fighting, as even a F6F Hellcat would be able to out-turn your aircraft.
Never contest a bomber at altitude when the plane is fully stock - it lacks the engine power to compete above 4,000 m, and even as a spaded aircraft, it doesn't perform as well as the Spitfires and Bf 109s at similar battle ratings. If you're ever forced to dogfight, use the rudder and elevator to pull yourself into a sort of climbing spiral, which the P-400 is exceptionally good at thanks to its powerful engine.
The Hispano cannon, once on target, will easily take out fighters and most bombers with a short burst, or at the very least, cripple it. However, if there is a good fighter pilot on the enemy team, they will climb to secure high altitude. When you see them in more agile aircraft, your only option is to dive away and begin to strafe the furball down low. Beware that many planes in this battle rating range, including the cannon-equipped Ishak, outperform this plane in at least one, if not more categories, but this plane usually has more than one advantage over every plane it will face (i.e. it is faster than the Spitfire Mk 1a and out rolls it).
Use the advantages of this plane - its high speed, great rudder, powerful engine, superior armament, and terrific initial turn at high speeds. However, don't use it in a way that exposes its weaknesses - bad low-speed handling, weak turning, and poor climb rate - in combat, like when you are getting Rope-a-Doped, just flip over with an Immelmann and Turn & Burn.
- CAS
Thanks to the 20 mm canon combined with the 500 lb bomb, this plane can be great for CAS. While attacking ground targets, use "boom and zoom" tactics that allow high energy retention. While giving air support, fly low at high speed. Once you've found an opponent, get some shots on it and/or drop your ordnance. Once the engagement is over, maintain some speed while continuing with a slight climb to position for another attack run on an opponent.
Manual Engine Control
| MEC elements | ||||||
|---|---|---|---|---|---|---|
| Mixer | Pitch | Radiator | Supercharger | Turbocharger | ||
| Oil | Water | Type | ||||
| Controllable | Controllable Not auto controlled |
Controllable Not auto controlled |
Controllable Not auto controlled |
Separate | Not controllable 1 gear |
Not controllable |
Pros and cons
Pros:
- Fast plane up to ~3,000 m (12,000 ft)
- .30 and .50 cal machine guns have separate trigger
- Good pool of machine gun ammunition
- Good stopping power with all weapons active
- Nose-mounted 20 mm cannon (centre line mounted weaponry equals good accuracy)
- Well armoured
- Cockpit has good visibility
- Carries a total of 7 guns with three slightly different trajectories, resulting in a high hit probability with at least one of them
- Hispano cannon is more accurate and reliable than the 37 mm cannon
- Excellent rudder control even at high speeds
- Powerful engine
Cons:
- Low ammunition count for 20 mm cannon
- Ammo counter represents the total amount of machine gun ammo, not the particular calibre
- Gets pilot-sniped easily due to the bubble canopy design
- Suffers a lot from compression
- Becomes quite unstable at low speeds
- Fuel cells are stretched across the wings, resulting in fairly common fires
- The engine is centrally mounted, taking engine damage while being chased is common
- Terrible turning at high speeds
- Horrible responsiveness & roll rate
History
| Archive of the in-game description | |
|---|---|
|
A single-engine all-metal monoplane fighter with a closed cockpit and retractable tricycle landing gear with a nose leg. The aircraft had an unusual layout, with the engine placed behind the cockpit. The aircraft was designed by the Bell Aircraft design office under the direction of R. Woods and H. Poyer. The experimental model XP-39 took its maiden flight on 6 April 1938. The first overseas order came from France in October 1939. The French were in urgent need of rearming their fighter forces, and bought as many fighters as they could from overseas. However, the order was not fulfilled before France's capitulation in the summer of 1940. After the capitulation, all outstanding French orders for military vehicles were redirected to Britain. The high flight characteristics of the experimental XP-39 also drew attention from the British buying committee in the USA. Seduced by its tricycle undercarriage, powerful armament, high climbing rate and promises of high speeds of up to 640 km/h, the British ordered 675 airplanes, including the 200 from the French order. The fighters produced for Britain had the designation model 14A and were powered by the 12-cylinder air-cooled Allison V-1710-E4 engine with a maximum output of 1,150 hp. The model 14A's armament consisted of a 20 mm British-Hispano M1 cannon with 60 shells, two large-calibre synchronized Colt Browning M2 .50 cal machine guns on the fuselage with 200 rounds each and four British 7.7 mm Colt-Browning Mk.II .303 machine guns on the wing surfaces with 350 rounds each. In the RAF, the model 14A fighters received the designation Airacobra Mk.I. However, when the British received the first Airacobra Mk.Is in the summer of 1941, tests revealed that rather than the high-altitude interceptor they had expected, they had actually received an unexceptional medium-altitude fighter, albeit with a powerful engine. At the same time, the fighter's manoeuvrability and responsiveness received good ratings. In December 1941, the British Air Ministry decided to remove the Airacobra Mk.I from service. By this time, 164 of the fighters had been sent to Britain. After Japan's attack on Pearl Harbor, the US requisitioned the fighters which had not yet been shipped to the British or were still in various stages of assembly. In December 1941, 179 of the aircraft went into service in the USAAF with the designation P-400. They kept their British camouflage and organizational numbering. The majority of these planes served within US territory as training vehicles, but a number of P-400s took part in combat operations in New Guinea and North Africa. | |
Joke
A joke which may (or may not) have been used by the British in WW2:[note 1]
- Why is the P-400 called the P-400?
- Because it's a P-40 with a Zero on its tail!
Media
- Skins
- Videos
See also
Links to the articles on the War Thunder Wiki that you think will be useful for the reader, for example:
- reference to the series of the aircraft;
- links to approximate analogues of other nations and research trees.
External links
References
- ↑ Copied from War Thunder Forum "Schlechte Witze mit War Thunder Bezug" - 'Bad jokes with War Thunder related content', no source was given by the forum user. Topic is named/about "Bad jokes".
| Bell Aircraft Corporation | |
|---|---|
| Aircraft | |
| Fighters | P-39N-0 · P-39Q-5 |
| P-400 | |
| P-63A-10 · P-63A-5 · P-63C-5 · ␠Kingcobra | |
| Jet Fighters | P-59A |
| Export | ▂P-39K-1 · ▂Pokryshkin's P-39N-0 · ▂P-39Q-15 · ▄P-39Q-25 |
| ▂P-63A-5 · ▂P-63A-10 · ▂P-63C-5 · ▄P-63C-5 | |
| Helicopters | |
| Attack | AH-1F · AH-1G · AH-1Z · AH-1W |
| OH-58D | |
| Utility | UH-1B · UH-1C · UH-1C XM-30 |
| Export/Licensed | ▅UH-1B · ◄UH-1D |
| Tzefa A · Tzefa B · Tzefa D/E · ▅AH-1S early · ▅AH-1S · ▅AH-1S Kisarazu · ␗AH-1W | |
| ␗OH-58D | |
| See Also | Fuji Heavy Industries · Agusta |
| USA fighters | |
|---|---|
| P-26 Peashooter | P-26A-33 · P-26A-34 · P-26A-34 M2 · P-26B-35 |
| P-36 Hawk | P-36A · Rasmussen's P-36A · P-36C · ○P-36C · P-36G |
| P-39 Airacobra | P-400 · P-39N-0 · P-39Q-5 |
| P-40 | P-40C · P-40E-1 · P-40E-1 TD · P-40F-10 |
| P-43 Lancer | P-43A-1 |
| P-47 Thunderbolt | P-47D-22-RE · P-47D-25 · P-47D-28 · P-47M-1-RE · ⋠P-47M-1-RE · P-47N-15 |
| P-51 Mustang | P-51 · P-51A (Thunder League) · P-51C-10 · P-51D-5 · P-51D-10 · P-51D-20-NA · P-51D-30 · P-51H-5-NA |
| P-63 Kingcobra | P-63A-5 · P-63A-10 · P-63C-5 · ␠Kingcobra |
| Prototypes | XP-55 |
| F2A Buffalo | F2A-1 · Thach's F2A-1 · F2A-3 |
| BF2C | BF2C-1 |
| F3F | F3F-2 · Galer's F3F-2 |
| F4F Wildcat | F4F-3 · F4F-4 |
| F4U Corsair | F4U-1A · F4U-1A (USMC) · F4U-1D · F4U-1C · F4U-4 · F4U-4B · F4U-4B VMF-214 · F2G-1 |
| F6F Hellcat | F6F-5 · F6F-5N |
| F8F Bearcat | F8F-1 · F8F-1B |
| Other countries | ▃Ki-43-II · ▃Ki-61-Ib · ▃A6M2 · ▃Bf 109 F-4 · ▃Fw 190 A-8 · ▃Spitfire LF Mk IXc |
