Difference between pages "ZTZ99-II" and "Yak-3T"
(→Media: Added Shooting Range episode) |
(Edits) |
||
| Line 1: | Line 1: | ||
| + | {{About | ||
| + | | about = Soviet fighter '''{{PAGENAME}}''' | ||
| + | | usage = other versions | ||
| + | | link = Yak-3 (Family) | ||
| + | }} | ||
{{Specs-Card | {{Specs-Card | ||
| − | |code= | + | |code=yak-3t |
|images={{Specs-Card-Image|GarageImage_{{PAGENAME}}.jpg}} | |images={{Specs-Card-Image|GarageImage_{{PAGENAME}}.jpg}} | ||
}} | }} | ||
== Description == | == Description == | ||
| − | <!-- ''In the description, the first part should be about the history of the creation and combat usage of the | + | <!-- ''In the description, the first part should be about the history of and the creation and combat usage of the aircraft, as well as its key features. In the second part, tell the reader about the aircraft in the game. Insert a screenshot of the vehicle, so that if the novice player does not remember the vehicle by name, he will immediately understand what kind of vehicle the article is talking about.'' --> |
| − | The '''{{Specs|name}}''' is a rank {{Specs|rank}} | + | The '''{{Specs|name}}''' is a premium gift rank {{Specs|rank}} Soviet fighter {{Battle-rating}}. It was introduced during [[Update 1.67 "Assault"]] as a reward for the 2017 [[wt:en/news/4648-special-war-thunder-chronicles-en|War Thunder Chronicles]] event. |
| − | |||
| − | |||
== General info == | == General info == | ||
| − | === | + | === Flight performance === |
| − | {{Specs- | + | {{Specs-Avia-Flight}} |
| − | <!-- ''Describe | + | <!-- ''Describe how the aircraft behaves in the air. Speed, manoeuvrability, acceleration and allowable loads - these are the most important characteristics of the vehicle.'' --> |
| − | |||
| − | |||
| − | |||
| − | |||
| − | |||
| − | |||
| − | |||
| − | |||
| − | |||
| − | |||
| − | |||
| − | |||
| − | |||
| − | |||
| − | |||
| − | {| class="wikitable" | + | {| class="wikitable" style="text-align:center" width="70%" |
| − | | | + | ! rowspan="2" | Characteristics |
| − | ! | + | ! colspan="2" | Max Speed<br>(km/h at 4,200 m) |
| + | ! rowspan="2" | Max altitude<br>(metres) | ||
| + | ! colspan="2" | Turn time<br>(seconds) | ||
| + | ! colspan="2" | Rate of climb<br>(metres/second) | ||
| + | ! rowspan="2" | Take-off run<br>(metres) | ||
|- | |- | ||
| − | + | ! AB !! RB !! AB !! RB !! AB !! RB | |
|- | |- | ||
| − | | | + | ! Stock |
| + | | 625 || 606 || rowspan="2" | {{Specs|ceiling}} || 19.8 || 20.5 || 17.8 || 17.8 || rowspan="2" | 360 | ||
|- | |- | ||
| − | | | + | ! Upgraded |
| + | | 666 || 646 || 18.4 || 18.9 || 23.9 || 21.1 | ||
|- | |- | ||
|} | |} | ||
| − | + | ==== Details ==== | |
| − | + | {| class="wikitable" style="text-align:center" width="50%" | |
| − | |||
| − | === | ||
| − | |||
| − | |||
| − | |||
| − | |||
| − | |||
| − | |||
| − | |||
| − | |||
| − | |||
| − | |||
| − | |||
| − | |||
| − | |||
| − | |||
| − | |||
| − | |||
| − | |||
| − | {| class="wikitable" style="text-align:center" width=" | ||
| − | |||
| − | |||
|- | |- | ||
| − | ! | + | ! colspan="5" | Features |
| − | |||
| − | |||
|- | |- | ||
| − | ! | + | ! Combat flaps !! Take-off flaps !! Landing flaps !! Air brakes !! Arrestor gear |
| − | |||
|- | |- | ||
| − | + | | X || X || ✓ || X || X <!-- ✓ --> | |
| − | | | ||
|- | |- | ||
|} | |} | ||
| − | + | {| class="wikitable" style="text-align:center" width="50%" | |
| − | {| class="wikitable | ||
| − | |||
| − | |||
| − | |||
| − | |||
| − | |||
| − | |||
| − | |||
|- | |- | ||
| − | | | + | ! colspan="7" | Limits |
|- | |- | ||
| − | | | + | ! rowspan="2" | Wings (km/h) |
| + | ! rowspan="2" | Gear (km/h) | ||
| + | ! colspan="3" | Flaps (km/h) | ||
| + | ! colspan="2" | Max Static G | ||
|- | |- | ||
| − | + | ! Combat !! Take-off !! Landing !! + !! - | |
|- | |- | ||
| − | | | + | | 685 <!-- {{Specs|destruction|body}} --> || {{Specs|destruction|gear}} || N/A || N/A || 320 || ~12 || ~9 |
|- | |- | ||
|} | |} | ||
| − | {| class="wikitable | + | |
| − | + | {| class="wikitable" style="text-align:center" | |
| − | |||
| − | |||
| − | |||
| − | |||
| − | |||
| − | |||
| − | |||
| − | |||
| − | |||
| − | |||
| − | |||
| − | |||
| − | |||
|- | |- | ||
| − | | | + | ! colspan="4" | Optimal velocities (km/h) |
|- | |- | ||
| − | + | ! Ailerons !! Rudder !! Elevators !! Radiator | |
|- | |- | ||
| − | | | + | | < 380 || < 420 || < 490 || > 340 |
|- | |- | ||
|} | |} | ||
| − | + | === Survivability and armour === | |
| + | {{Specs-Avia-Armour}} | ||
| + | <!-- ''Examine the survivability of the aircraft. Note how vulnerable the structure is and how secure the pilot is, whether the fuel tanks are armoured, etc. Describe the armour, if there is any, and also mention the vulnerability of other critical aircraft systems.'' --> | ||
| − | + | * 64 mm bulletproof glass - Behind pilot | |
| − | + | === Modifications and economy === | |
| + | {{Specs-Economy}} | ||
| − | The | + | == Armaments == |
| + | {{Specs-Avia-Armaments}} | ||
| + | === Offensive armament === | ||
| + | {{Specs-Avia-Offensive}} | ||
| + | <!-- ''Describe the offensive armament of the aircraft, if any. Describe how effective the cannons and machine guns are in a battle, and also what belts or drums are better to use. If there is no offensive weaponry, delete this subsection.'' --> | ||
| + | {{main|N-37 (37 mm)|B-20S (20 mm)}} | ||
| + | |||
| + | The '''''{{PAGENAME}}''''' is armed with: | ||
| + | |||
| + | * 1 x 37 mm N-37 cannon, nose-mounted (25 rpg) | ||
| + | * 2 x 20 mm B-20S cannons, nose-mounted (100 rpg = 200 total) | ||
| + | |||
| + | The Yak-3T's armament is similar to that of the [[Yak-9P]], but is unable to change out the N-37 for a B-20M or NS-23 and has a lower rpg than the Yak-9P. The B-20S has a faster fire rate than other Soviet 20 mm cannons, so it requires a bit more patience and less trigger time, but are devastating when they hit. However, players will soon realize that the velocity of these guns leave much to be desired, so engaging aircraft in distances at or closer to 600 m is recommended, given their poor ballistics. | ||
| + | |||
| + | The best belt for the B-20S is the Tracers belt, which is fully FI-T. These belts are able to destroy enemy aircraft with ease, but are able to be seen fairly easily, as they are tracer belts. The N-37 belts are a bit more difficult, the Default and Armored Target belts have full tracers on their belts, whereas the Air Targets belt has one tracer every three rounds. If you want the best of both worlds, go with Default, as it has HEFI-T, HEFI-T, API-T, which is best for all round usage. | ||
| + | |||
| + | == Usage in battles == | ||
| + | <!-- ''Describe the tactics of playing in the aircraft, the features of using aircraft in a team and advice on tactics. Refrain from creating a "guide" - do not impose a single point of view, but instead, give the reader food for thought. Examine the most dangerous enemies and give recommendations on fighting them. If necessary, note the specifics of the game in different modes (AB, RB, SB).'' --> | ||
| + | The Yak-3T has the performance of the Yak-3P and the weapons of the Yak-9P but with a slightly smaller ammunition pool. As such, it should be flown as a Yak-3P, prioritizing engagements below 3,000 m with enemies at similar or lower energy states. Engagements with unoccupied A6M/A7Ms and Spitfires is inadvisable, as they have a better climb rate, better turn radius, and great performance at the same altitudes you do. | ||
| + | |||
| + | If Manual Engine Controls (MEC) are enabled, placing the Water and Oil Radiators at 10-15% (5% on winter maps) and Propeller Pitch at 90% is advisable, given the Yak-3 series are less prone to overheating. From takeoff, gain airspeed to roughly 350kph IAS and climb at 20° until around 2,500 m, then change to Supercharger 2, levelling off at 3,000 to 3,500 m. German, Japanese, and some American interceptors (P-38/XP-50) will have climbed at or higher than you, so keep an eye out for contrails. | ||
| + | |||
| + | The Yak-3Ts fantastic armament of the 2 x 20 mm B-20S and 1 x 37 mm N-37 are able to destroy enemy fighter aircraft with ease, but also allow the Yak-3T have the ability of bomber hunting, though inadvisable given the Yak-3T's inadequate performance above 4,000 m. | ||
| + | |||
| + | '''Engaging fighters''' | ||
| + | |||
| + | If an enemy aircraft is higher than you, be prepared to dive as to get the best of the Yak-3s maneuverability, which is at around 550-600 km/h IAS. The Yak-3T has a great roll rate, which allows it to quickly move out of the way of where the enemy fighter would be aiming. With most American aircraft, a simple roll is enough to get them to overshoot, after which a few well placed shots can destroy or critically damage their aircraft. If your shots do not hit, level off and wait for them to finish their climb and reset for another pass. | ||
| + | |||
| + | If at a similar altitude with another aircraft, emphasize on horizontal turning engagements, as the Yak-3T does poorly in vertical engagements except with few exceptions. If engaging a Japanese or British aircraft, such as the A6M, A7M, or Spitfire, do not try to turn fight with these aircraft, instead extend out and keep your airspeed up. If engaging German or American aircraft, such as the Bf 109, Fw 190, P-51, or P-47, it's recommended to prioritize horizontal engagements and not to let them get onto your rear. | ||
| + | |||
| + | '''Bombing hunting''' | ||
| − | + | As before said, the Yak-3T boasts an armament that is great for engaging bombers. Flying to the bomber's altitude is possible, but is time consuming and has a negative effect on the Yak-3Ts engine power. Instead, fly so that you're around 1.5 km below the bomber in level flight, where the gunners are weakest and have the hardest time aiming. The velocity of your guns is poor, so it is necessary to lead a bit farther than to be expected. Aim for the bomber's more vital or fragile areas, such as their wings, engines, tail, or cockpit if at all possible. | |
| − | ==== | + | === Manual Engine Control === |
| − | |||
| − | |||
{| class="wikitable" style="text-align:center" | {| class="wikitable" style="text-align:center" | ||
|- | |- | ||
| − | ! | + | ! colspan="7" | MEC elements |
| − | |||
| − | |||
| − | |||
| − | |||
| − | |||
| − | |||
| − | |||
|- | |- | ||
| − | | | + | ! rowspan="2" | Mixer |
| + | ! rowspan="2" | Pitch | ||
| + | ! colspan="3" | Radiator | ||
| + | ! rowspan="2" | Supercharger | ||
| + | ! rowspan="2" | Turbocharger | ||
|- | |- | ||
| − | + | ! Oil !! Water !! Type | |
| − | |||
| − | |||
| − | |||
| − | |||
| − | |||
| − | |||
| − | |||
|- | |- | ||
| − | + | | Controllable || Controllable<br>Not auto controlled || Controllable<br>Auto control available || Controllable<br>Auto control available || Separate || Controllable<br>2 gears || Not controllable | |
| − | | | ||
| − | |||
| − | | | ||
| − | | | ||
| − | |||
| − | |||
| − | |||
| − | |||
| − | |||
| − | |||
| − | |||
| − | |||
| − | |||
|- | |- | ||
|} | |} | ||
| − | |||
| − | |||
| − | |||
| − | |||
| − | |||
| − | |||
| − | |||
| − | |||
| − | |||
=== Pros and cons === | === Pros and cons === | ||
| − | <!-- ''Summarise and briefly evaluate the vehicle in terms of its characteristics and combat effectiveness. Mark its pros and cons in | + | <!-- ''Summarise and briefly evaluate the vehicle in terms of its characteristics and combat effectiveness. Mark its pros and cons in the bulleted list. Try not to use more than 6 points for each of the characteristics. Avoid using categorical definitions such as "bad", "good" and the like - use substitutions with softer forms such as "inadequate" and "effective".'' --> |
| − | |||
'''Pros:''' | '''Pros:''' | ||
| − | * | + | * Great armament of 2 x 20 mm and 1 x 37 mm cannons |
| − | + | * Great engine performance below 3,000 m | |
| − | * | + | * Light airframe - good for dogfighting most aircraft |
| − | * | + | * Low stall speed compared to most aircraft that will be found in the BR |
| − | * Low | + | * Good acceleration |
| − | * | + | * One of the faster aircraft in the BR bracket |
| − | * | + | * Fantastic roll rate |
| − | + | * Good energy retention | |
| − | |||
| − | * | ||
| − | * | ||
'''Cons:''' | '''Cons:''' | ||
| − | * | + | * Low ammo count for all three weapons, 25 rpg for the N-37 and 100 rpg for the B-20S |
| − | + | * Poor performance above 3,500 m, inadvisable to dogfight above or at altitude | |
| − | * | + | * Prone to catching on fire |
| − | * | + | * No WEP |
| − | * | + | * Low top speed (685 km/h) |
| − | + | * The N-37 and B-20S have low velocities compared to other Soviet 20 mm cannons, making aiming difficult to inexperienced pilots | |
| − | |||
| − | |||
| − | |||
== History == | == History == | ||
| + | <!-- ''Describe the history of the creation and combat usage of the aircraft in more detail than in the introduction. If the historical reference turns out to be too long, take it to a separate article, taking a link to the article about the vehicle and adding a block "/History" (example: <nowiki>https://wiki.warthunder.com/(Vehicle-name)/History</nowiki>) and add a link to it here using the <code>main</code> template. Be sure to reference text and sources by using <code><nowiki><ref></ref></nowiki></code>, as well as adding them at the end of the article with <code><nowiki><references /></nowiki></code>. This section may also include the vehicle's dev blog entry (if applicable) and the in-game encyclopedia description (under <code><nowiki>=== In-game description ===</nowiki></code>, also if applicable).'' --> | ||
| − | + | The idea to produce a new fighter for the Red Army Air Force went as far back as 1941. It was then that the Yakovlev Design Bureau presented the I-30 prototype, intended an alternative to the earlier Yak-1 design. However, the German invasion of the USSR, as well as aluminium shortages, meant that the project had to be put on hold. Yakovlev resumed the development in 1943 while working on an upgraded version of the Yak-1 fighter. This time, it was decided that a new aircraft should be produced to completely replace the Yak-1 and Yak-7 models. | |
| − | |||
| − | By | + | By September 1943, yet another improved variant was ready, designated Yak-1M Dubler, on which the canvas skin on the tail section was replaced with 2mm plywood, and oil and water radiators were improved. The Dubler also had a new mastless antenna, a ring sight instead of a reflector sight, improved armour and a new propeller. Test pilots were impressed by the new prototype. Their report stated in part: "''Yak-1M possessed excellent horizontal, and especially vertical, manoeuvrability. Top speed greatly improved compared to earlier serial-production Yaks. Despite the improved performance, the aircraft remains easy to fly and does not require extensive pilot training''." |
| − | The | + | The new machine was dubbed as the Yak-3 and entered service with the Red Army Air Force in 1944. The Yak-3 was a further modification of the Yak-1, produced in 1944 and 1945, with a total of 4,848 built, and considered one of the best fighters of the war. |
| − | + | The new fighter quickly became very popular with Soviet pilots. They highly praised its solid armament of two Berezin UBS 12.7 mm machine guns and one ShVAK 20 mm cannon as well as ease of piloting and superb low-altitude performance. Marcel Albert, the top scoring French ace of World War II, cited the Yak-3 as one of the best fighters of the war, along with the P-51 Mustang and the Supermarine Spitfire. After the war, the Yak-3 was also used by the Air Forces of Socialist Yugoslavia and Poland.<ref name="forum">[https://warthunder.com/en/news/2693--en <nowiki>[Aircraft Profile] Yak-3</nowiki>]</ref> | |
| − | The | + | The Yak-3P was produced from April 1945 until mid-1946, armed with 3 x 20 mm Berezin B-20 cannon with 120 rounds for the middle cannon and 130 RPG for the side weapons. The three-cannon armament with full ammunition load was actually 11 kg (24 lb) lighter than that of a standard Yak-3, and the one-second burst mass of 3.52 kg (7.74 lb) was greater than that of most contemporary fighters. Starting in August 1945, all Yak-3 were produced in the Yak-3P configuration with a total of 596 built. |
== Media == | == Media == | ||
| Line 229: | Line 171: | ||
;Skins | ;Skins | ||
| − | |||
| − | + | * [https://live.warthunder.com/feed/camouflages/?vehicle=yak-3t Skins and camouflages for the {{PAGENAME}} from live.warthunder.com.] | |
| − | |||
| − | |||
| − | |||
| − | |||
| − | |||
| − | |||
| − | |||
| − | |||
| − | |||
;Videos | ;Videos | ||
| − | {{Youtube-gallery| | + | {{Youtube-gallery|UMCGzhRFKzc|'''The Shooting Range #42''' - ''Pages of History'' section at 07:04 discusses the Yak-3T.}} |
== See also == | == See also == | ||
| − | |||
| − | |||
| − | |||
''Links to the articles on the War Thunder Wiki that you think will be useful for the reader, for example:'' | ''Links to the articles on the War Thunder Wiki that you think will be useful for the reader, for example:'' | ||
| − | * ''reference to the series of the | + | * ''reference to the series of the aircraft;'' |
* ''links to approximate analogues of other nations and research trees.'' | * ''links to approximate analogues of other nations and research trees.'' | ||
| Line 259: | Line 188: | ||
* ''other literature.'' --> | * ''other literature.'' --> | ||
| − | * [[wt:en/news/ | + | * [[wt:en/news/4673-development-ww2-chronicles-vehicles-yak-3t-ussr-en|[Devblog] WW2 Chronicles vehicles: Yak-3T (USSR)]] |
| + | * [https://forum.warthunder.com/index.php?/topic/361708-yak-3t/ Official data sheet - more details about the performance] | ||
| + | |||
| + | === References === | ||
| + | <references /> | ||
| − | {{ | + | {{AirManufacturer Yakovlev}} |
| + | {{USSR fighters}} | ||
| + | {{USSR premium aircraft}} | ||
Latest revision as of 03:16, 6 August 2024
| This page is about the Soviet fighter Yak-3T. For other versions, see Yak-3 (Family). |

Contents
Description
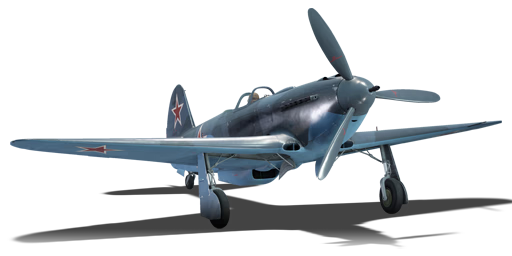
The Yak-3T is a premium gift rank Soviet fighter with a battle rating of (AB), (RB), and (SB). It was introduced during Update 1.67 "Assault" as a reward for the 2017 War Thunder Chronicles event.
General info
Flight performance
| Characteristics | Max Speed (km/h at 4,200 m) |
Max altitude (metres) |
Turn time (seconds) |
Rate of climb (metres/second) |
Take-off run (metres) | |||
|---|---|---|---|---|---|---|---|---|
| AB | RB | AB | RB | AB | RB | |||
| Stock | 625 | 606 | 19.8 | 20.5 | 17.8 | 17.8 | 360 | |
| Upgraded | 666 | 646 | 18.4 | 18.9 | 23.9 | 21.1 | ||
Details
| Features | ||||
|---|---|---|---|---|
| Combat flaps | Take-off flaps | Landing flaps | Air brakes | Arrestor gear |
| X | X | ✓ | X | X |
| Limits | ||||||
|---|---|---|---|---|---|---|
| Wings (km/h) | Gear (km/h) | Flaps (km/h) | Max Static G | |||
| Combat | Take-off | Landing | + | - | ||
| 685 | N/A | N/A | 320 | ~12 | ~9 | |
| Optimal velocities (km/h) | |||
|---|---|---|---|
| Ailerons | Rudder | Elevators | Radiator |
| < 380 | < 420 | < 490 | > 340 |
Survivability and armour
- 64 mm bulletproof glass - Behind pilot
Modifications and economy
Armaments
Offensive armament
The Yak-3T is armed with:
- 1 x 37 mm N-37 cannon, nose-mounted (25 rpg)
- 2 x 20 mm B-20S cannons, nose-mounted (100 rpg = 200 total)
The Yak-3T's armament is similar to that of the Yak-9P, but is unable to change out the N-37 for a B-20M or NS-23 and has a lower rpg than the Yak-9P. The B-20S has a faster fire rate than other Soviet 20 mm cannons, so it requires a bit more patience and less trigger time, but are devastating when they hit. However, players will soon realize that the velocity of these guns leave much to be desired, so engaging aircraft in distances at or closer to 600 m is recommended, given their poor ballistics.
The best belt for the B-20S is the Tracers belt, which is fully FI-T. These belts are able to destroy enemy aircraft with ease, but are able to be seen fairly easily, as they are tracer belts. The N-37 belts are a bit more difficult, the Default and Armored Target belts have full tracers on their belts, whereas the Air Targets belt has one tracer every three rounds. If you want the best of both worlds, go with Default, as it has HEFI-T, HEFI-T, API-T, which is best for all round usage.
Usage in battles
The Yak-3T has the performance of the Yak-3P and the weapons of the Yak-9P but with a slightly smaller ammunition pool. As such, it should be flown as a Yak-3P, prioritizing engagements below 3,000 m with enemies at similar or lower energy states. Engagements with unoccupied A6M/A7Ms and Spitfires is inadvisable, as they have a better climb rate, better turn radius, and great performance at the same altitudes you do.
If Manual Engine Controls (MEC) are enabled, placing the Water and Oil Radiators at 10-15% (5% on winter maps) and Propeller Pitch at 90% is advisable, given the Yak-3 series are less prone to overheating. From takeoff, gain airspeed to roughly 350kph IAS and climb at 20° until around 2,500 m, then change to Supercharger 2, levelling off at 3,000 to 3,500 m. German, Japanese, and some American interceptors (P-38/XP-50) will have climbed at or higher than you, so keep an eye out for contrails.
The Yak-3Ts fantastic armament of the 2 x 20 mm B-20S and 1 x 37 mm N-37 are able to destroy enemy fighter aircraft with ease, but also allow the Yak-3T have the ability of bomber hunting, though inadvisable given the Yak-3T's inadequate performance above 4,000 m.
Engaging fighters
If an enemy aircraft is higher than you, be prepared to dive as to get the best of the Yak-3s maneuverability, which is at around 550-600 km/h IAS. The Yak-3T has a great roll rate, which allows it to quickly move out of the way of where the enemy fighter would be aiming. With most American aircraft, a simple roll is enough to get them to overshoot, after which a few well placed shots can destroy or critically damage their aircraft. If your shots do not hit, level off and wait for them to finish their climb and reset for another pass.
If at a similar altitude with another aircraft, emphasize on horizontal turning engagements, as the Yak-3T does poorly in vertical engagements except with few exceptions. If engaging a Japanese or British aircraft, such as the A6M, A7M, or Spitfire, do not try to turn fight with these aircraft, instead extend out and keep your airspeed up. If engaging German or American aircraft, such as the Bf 109, Fw 190, P-51, or P-47, it's recommended to prioritize horizontal engagements and not to let them get onto your rear.
Bombing hunting
As before said, the Yak-3T boasts an armament that is great for engaging bombers. Flying to the bomber's altitude is possible, but is time consuming and has a negative effect on the Yak-3Ts engine power. Instead, fly so that you're around 1.5 km below the bomber in level flight, where the gunners are weakest and have the hardest time aiming. The velocity of your guns is poor, so it is necessary to lead a bit farther than to be expected. Aim for the bomber's more vital or fragile areas, such as their wings, engines, tail, or cockpit if at all possible.
Manual Engine Control
| MEC elements | ||||||
|---|---|---|---|---|---|---|
| Mixer | Pitch | Radiator | Supercharger | Turbocharger | ||
| Oil | Water | Type | ||||
| Controllable | Controllable Not auto controlled |
Controllable Auto control available |
Controllable Auto control available |
Separate | Controllable 2 gears |
Not controllable |
Pros and cons
Pros:
- Great armament of 2 x 20 mm and 1 x 37 mm cannons
- Great engine performance below 3,000 m
- Light airframe - good for dogfighting most aircraft
- Low stall speed compared to most aircraft that will be found in the BR
- Good acceleration
- One of the faster aircraft in the BR bracket
- Fantastic roll rate
- Good energy retention
Cons:
- Low ammo count for all three weapons, 25 rpg for the N-37 and 100 rpg for the B-20S
- Poor performance above 3,500 m, inadvisable to dogfight above or at altitude
- Prone to catching on fire
- No WEP
- Low top speed (685 km/h)
- The N-37 and B-20S have low velocities compared to other Soviet 20 mm cannons, making aiming difficult to inexperienced pilots
History
The idea to produce a new fighter for the Red Army Air Force went as far back as 1941. It was then that the Yakovlev Design Bureau presented the I-30 prototype, intended an alternative to the earlier Yak-1 design. However, the German invasion of the USSR, as well as aluminium shortages, meant that the project had to be put on hold. Yakovlev resumed the development in 1943 while working on an upgraded version of the Yak-1 fighter. This time, it was decided that a new aircraft should be produced to completely replace the Yak-1 and Yak-7 models.
By September 1943, yet another improved variant was ready, designated Yak-1M Dubler, on which the canvas skin on the tail section was replaced with 2mm plywood, and oil and water radiators were improved. The Dubler also had a new mastless antenna, a ring sight instead of a reflector sight, improved armour and a new propeller. Test pilots were impressed by the new prototype. Their report stated in part: "Yak-1M possessed excellent horizontal, and especially vertical, manoeuvrability. Top speed greatly improved compared to earlier serial-production Yaks. Despite the improved performance, the aircraft remains easy to fly and does not require extensive pilot training."
The new machine was dubbed as the Yak-3 and entered service with the Red Army Air Force in 1944. The Yak-3 was a further modification of the Yak-1, produced in 1944 and 1945, with a total of 4,848 built, and considered one of the best fighters of the war.
The new fighter quickly became very popular with Soviet pilots. They highly praised its solid armament of two Berezin UBS 12.7 mm machine guns and one ShVAK 20 mm cannon as well as ease of piloting and superb low-altitude performance. Marcel Albert, the top scoring French ace of World War II, cited the Yak-3 as one of the best fighters of the war, along with the P-51 Mustang and the Supermarine Spitfire. After the war, the Yak-3 was also used by the Air Forces of Socialist Yugoslavia and Poland.[1]
The Yak-3P was produced from April 1945 until mid-1946, armed with 3 x 20 mm Berezin B-20 cannon with 120 rounds for the middle cannon and 130 RPG for the side weapons. The three-cannon armament with full ammunition load was actually 11 kg (24 lb) lighter than that of a standard Yak-3, and the one-second burst mass of 3.52 kg (7.74 lb) was greater than that of most contemporary fighters. Starting in August 1945, all Yak-3 were produced in the Yak-3P configuration with a total of 596 built.
Media
- Skins
- Videos
See also
Links to the articles on the War Thunder Wiki that you think will be useful for the reader, for example:
- reference to the series of the aircraft;
- links to approximate analogues of other nations and research trees.
External links
- [Devblog] WW2 Chronicles vehicles: Yak-3T (USSR)
- Official data sheet - more details about the performance
References
| A.S. Yakovlev Design Bureau (Яковлев Опытное конструкторское бюро) | |
|---|---|
| Fighters | |
| Yak-1 | Yak-1 · Yak-1B |
| Yak-3 | Yak-3 · Eremin's Yak-3(e) · Yak-3 (VK-107) · Yak-3P · Yak-3T · Yak-3U |
| Yak-7 | Yak-7B |
| Yak-9 | Yak-9 · Yak-9B · Yak-9K · Golovachev's Yak-9M · Yak-9P · Yak-9T · Yak-9U · Yak-9UT |
| Twin-engine fighters | I-29 |
| Jet fighters | |
| Yak-15 | Yak-15P · Yak-15 |
| Yak-17 | Yak-17 |
| Yak-23 | Yak-23 |
| Yak-30 | Yak-30D |
| Yak-141 | Yak-141 |
| Strike aircraft | |
| Yak-2 | Yak-2 KABB |
| Yak-38 | Yak-38 · Yak-38M |
| Bombers | Yak-4 |
| Jet bombers | Yak-28B |
| Foreign use | ▄Yak-3 · Challe's ▄Yak-9T · ◔Yak-9P |
| Captured | ▀Yak-1B |
| USSR fighters | |
|---|---|
| I-15 | I-15 WR · I-15 M-22 · I-15 M-25 · I-15bis · Krasnolutsky's I-15bis |
| I-153 M-62 · Zhukovsky's I-153-M62 · I-153P | |
| I-16 | I-16 type 5 · I-16 type 10 · I-16 type 18 · I-16 type 24 · I-16 type 27 · I-16 type 28 · I-180S |
| I-29 | I-29 |
| I-185 | I-185 (M-71) · I-185 (M-82) |
| I-225 | I-225 |
| ITP | ITP (M-1) |
| MiG-3 | MiG-3-15 · MiG-3-15 (BK) · MiG-3-34 |
| LaGG | I-301 · LaGG-3-4 · LaGG-3-8 · LaGG-3-11 · LaGG-3-23 · LaGG-3-34 · LaGG-3-35 · LaGG-3-66 |
| La | La-5 · La-5F · La-5FN · La-7 · Dolgushin's La-7 · La-7B-20 · La-9 · La-11 |
| Yak-1/7 | Yak-1 · Yak-1B · Yak-7B |
| Yak-3 | Yak-3 · Eremin's Yak-3(e) · Yak-3P · Yak-3T · Yak-3U · Yak-3 (VK-107) |
| Yak-9 | Yak-9 · Yak-9B · Golovachev's Yak-9M · Yak-9T · Yak-9K · Yak-9U · Yak-9UT · Yak-9P |
| Other countries | ▂P-40E-1 · ▂P-47D-27 · ▂Hurricane Mk IIB · ▂Fw 190 D-9 · ▂Spitfire Mk IXc |
| P-39 | ▂P-39K-1 · ▂Pokryshkin's P-39N-0 · ▂P-39Q-15 |
| P-63 | ▂P-63A-5 · ▂P-63A-10 · ▂P-63C-5 |
| USSR premium aircraft | |
|---|---|
| Fighters | Krasnolutsky's I-15bis · I-16 type 28 · Zhukovsky's I-153-M62 · I-153P · I-180S · I-301 · ITP (M-1) |
| LaGG-3-4 · LaGG-3-23 · LaGG-3-34 · Dolgushin's La-7 · La-11 | |
| Eremin's Yak-3(e) · Yak-3 (VK-107) · Yak-3T · Golovachev's Yak-9M | |
| ▂P-39K-1 · ▂Pokryshkin's P-39N-0 · ▂P-39Q-15 · ▂P-40E-1 · ▂P-47D-27 · ▂P-63A-5 · ▂P-63A-10 · ▂P-63C-5 | |
| ▂Hurricane Mk IIB · ▂Spitfire Mk IXc · ▂Fw 190 D-9 | |
| Twin-engine fighters | I-29 |
| Jet fighters | Su-11 · MiG-15bis ISh · MiG-17AS · MiG-21S (R-13-300) · MiG-23ML |
| Strike aircraft | IL-2M "Avenger" · IL-2 M-82 · IL-8 (1944) · Su-6 · Tandem MAI · TIS MA · Su-8 · Tu-1 |
| Yak-38 · Su-7BMK · Su-25K · Su-39 | |
| Bombers | Po-2M · Be-6 · MBR-2-M-34 · Pe-2-205 · TB-3M-17-32 |
| ▂PBY-5A Catalina · ▂Hampden TB Mk I · ▂A-20G-30 · ▂B-25J-30 | |
