Difference between pages "Thunderbolt Mk.1 (Great Britain)" and "Hs 123 A-1"
m (→Usage in battles) |
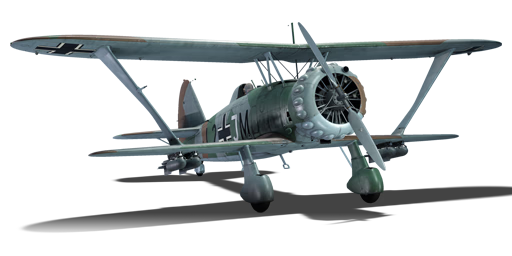
(New Specs-Card Artimage. Old picture moved to Media: Images) |
||
| Line 1: | Line 1: | ||
| − | {{Specs-Card|code= | + | {{About |
| + | | about = German bomber '''{{PAGENAME}}''' | ||
| + | | usage = the Chinese version | ||
| + | | link = Hs 123 A-1 (China) | ||
| + | }} | ||
| + | {{Specs-Card | ||
| + | |code=hs-123a-1 | ||
| + | |images={{Specs-Card-Image|GarageImage_{{PAGENAME}}.jpg|ArtImage2_{{PAGENAME}}.png}} | ||
| + | }} | ||
== Description == | == Description == | ||
<!-- ''In the description, the first part should be about the history of and the creation and combat usage of the aircraft, as well as its key features. In the second part, tell the reader about the aircraft in the game. Insert a screenshot of the vehicle, so that if the novice player does not remember the vehicle by name, he will immediately understand what kind of vehicle the article is talking about.'' --> | <!-- ''In the description, the first part should be about the history of and the creation and combat usage of the aircraft, as well as its key features. In the second part, tell the reader about the aircraft in the game. Insert a screenshot of the vehicle, so that if the novice player does not remember the vehicle by name, he will immediately understand what kind of vehicle the article is talking about.'' --> | ||
| − | + | Designed in the early 1930s, the Hs 123 was a single-seat dive bomber that served with the Luftwaffe from the Spanish Civil War all the way to 1944. In 1933, the Luftwaffe set out a requirement for a dive bomber. Henschel, who was mainly a train manufacturer, began designing and developing planes. The Hs 123 was developed for the Luftwaffe requirement and won the contract over the Fieseler Fi 98. The Hs 123 had its first public flight in 1935 and featured all-metal construction and a sesquiplane design. The prototype was fitted with a 650 hp engine, but the production version utilized an almost 900 hp engine. Almost 1,000 Hs 123s were produced, with them serving in the bomber role as well as reconnaissance duties. It served for just under 10 years and was only brought out of service due to the lack of spare parts. | |
| − | |||
| − | The | ||
| + | Introduced in [[Update 1.59 "Flaming Arrows"]], the '''{{Specs|name}}''' is an excellent biplane bomber. It features two loadouts: four 50 kg bombs or a loadout consisting of a single 250 kg bomb. The Hs 123 also comes armed with two 7.92 mm machine guns mounted in the nose, with 500 rounds per gun. Since it's classified as a bomber, the Hs 123 has a bomber air spawn, which provides a significant advantage against enemy fighters. The all-metal construction also gives the Hs 123 a very respectable structural speed limit of 577 km/h (358 mph). | ||
== General info == | == General info == | ||
=== Flight performance === | === Flight performance === | ||
| + | {{Specs-Avia-Flight}} | ||
<!-- ''Describe how the aircraft behaves in the air. Speed, manoeuvrability, acceleration and allowable loads - these are the most important characteristics of the vehicle.'' --> | <!-- ''Describe how the aircraft behaves in the air. Speed, manoeuvrability, acceleration and allowable loads - these are the most important characteristics of the vehicle.'' --> | ||
| − | + | The Hs 123 behaves very similarly to other Interwar period designed fighter biplanes, relatively slow but highly manoeuvrable aircraft, this in particular being somewhat slower and with a lower climb rate because of its payload. | |
{| class="wikitable" style="text-align:center" width="70%" | {| class="wikitable" style="text-align:center" width="70%" | ||
! rowspan="2" | Characteristics | ! rowspan="2" | Characteristics | ||
| − | ! colspan="2" | Max Speed<br>(km/h at | + | ! colspan="2" | Max Speed<br>(km/h at 4,000 m) |
! rowspan="2" | Max altitude<br>(metres) | ! rowspan="2" | Max altitude<br>(metres) | ||
! colspan="2" | Turn time<br>(seconds) | ! colspan="2" | Turn time<br>(seconds) | ||
| Line 23: | Line 31: | ||
|- | |- | ||
! Stock | ! Stock | ||
| − | | | + | | 293 || 289 || rowspan="2" | {{Specs|ceiling}} || 15.8 || 16.5 || 8.2 || 8.2 || rowspan="2" | 294 |
|- | |- | ||
! Upgraded | ! Upgraded | ||
| − | | | + | | 325 || 310 || 14.4 || 15.0 || 16.8 || 12.0 |
|- | |- | ||
|} | |} | ||
| Line 52: | Line 60: | ||
! Combat !! Take-off !! Landing !! + !! - | ! Combat !! Take-off !! Landing !! + !! - | ||
|- | |- | ||
| − | | {{Specs|destruction|body}} || {{Specs|destruction|gear}} || | + | | {{Specs|destruction|body}} || {{Specs|destruction|gear}} || 300 || 274 || 190 || ~13 || ~8 |
|- | |- | ||
|} | |} | ||
| Line 62: | Line 70: | ||
! Ailerons !! Rudder !! Elevators !! Radiator | ! Ailerons !! Rudder !! Elevators !! Radiator | ||
|- | |- | ||
| − | | < | + | | < 220 || < 220 || < 380 || > 270 |
| + | |- | ||
| + | |} | ||
| + | |||
| + | {| class="wikitable" style="text-align:center" | ||
| + | |- | ||
| + | ! colspan="3" | Compressor (RB/SB) | ||
| + | |- | ||
| + | ! colspan="3" | Setting 1 | ||
| + | |- | ||
| + | ! Optimal altitude | ||
| + | ! 100% Engine power | ||
| + | ! WEP Engine power | ||
| + | |- | ||
| + | | 850 m || 660 hp || 747 hp | ||
|- | |- | ||
|} | |} | ||
=== Survivability and armour === | === Survivability and armour === | ||
| + | {{Specs-Avia-Armour}} | ||
<!-- ''Examine the survivability of the aircraft. Note how vulnerable the structure is and how secure the pilot is, whether the fuel tanks are armoured, etc. Describe the armour, if there is any, and also mention the vulnerability of other critical aircraft systems.'' --> | <!-- ''Examine the survivability of the aircraft. Note how vulnerable the structure is and how secure the pilot is, whether the fuel tanks are armoured, etc. Describe the armour, if there is any, and also mention the vulnerability of other critical aircraft systems.'' --> | ||
| − | ' | + | |
| + | * 5 mm steel - pilot's headrest | ||
| + | |||
| + | As with most Interwar-period designed biplanes, the Hs 123 A-1 has no armour and offers no protection to its pilot nor its critical components (engine, not self-sealing fuel tanks, oil-cooling systems), so the survivability depends on the pilot's skills. Being a metallic-frame, cloth-covered construction and not having self-sealing fuel tanks, regular Ball and AP rounds won't damage it a lot (unless they directly hit the pilot), but it's especially susceptible to Incendiary and Tracer rounds, which can ignite it if they hit the fuel tanks, or the cloth cover itself. | ||
| + | |||
| + | === Modifications and economy === | ||
| + | {{Specs-Economy}} | ||
== Armaments == | == Armaments == | ||
| + | {{Specs-Avia-Armaments}} | ||
=== Offensive armament === | === Offensive armament === | ||
| + | {{Specs-Avia-Offensive}} | ||
<!-- ''Describe the offensive armament of the aircraft, if any. Describe how effective the cannons and machine guns are in a battle, and also what belts or drums are better to use. If there is no offensive weaponry, delete this subsection.'' --> | <!-- ''Describe the offensive armament of the aircraft, if any. Describe how effective the cannons and machine guns are in a battle, and also what belts or drums are better to use. If there is no offensive weaponry, delete this subsection.'' --> | ||
| − | {{main| | + | {{main|MG 17 (7.92 mm)}} |
The '''''{{PAGENAME}}''''' is armed with: | The '''''{{PAGENAME}}''''' is armed with: | ||
| − | * | + | * 2 x 7.92 mm MG 17 machine guns, nose-mounted (500 rpg = 1,000 total) |
=== Suspended armament === | === Suspended armament === | ||
| + | {{Specs-Avia-Suspended}} | ||
<!-- ''Describe the aircraft's suspended armament: additional cannons under the wings, bombs, rockets and torpedoes. This section is especially important for bombers and attackers. If there is no suspended weaponry remove this subsection.'' --> | <!-- ''Describe the aircraft's suspended armament: additional cannons under the wings, bombs, rockets and torpedoes. This section is especially important for bombers and attackers. If there is no suspended weaponry remove this subsection.'' --> | ||
| − | {{main| | + | {{main|SC50JA (50 kg)|SC250JA (250 kg)}} |
The '''''{{PAGENAME}}''''' can be outfitted with the following ordnance: | The '''''{{PAGENAME}}''''' can be outfitted with the following ordnance: | ||
| − | * | + | * 4 x 50 kg SC50JA bombs (200 kg total) |
| − | + | * 1 x 250 kg SC250JA bomb + 4 x 50 kg SC50JA bombs (450 kg total) | |
| − | |||
| − | * | ||
| − | |||
| − | |||
== Usage in battles == | == Usage in battles == | ||
<!-- ''Describe the tactics of playing in the aircraft, the features of using aircraft in a team and advice on tactics. Refrain from creating a "guide" - do not impose a single point of view, but instead, give the reader food for thought. Examine the most dangerous enemies and give recommendations on fighting them. If necessary, note the specifics of the game in different modes (AB, RB, SB).'' --> | <!-- ''Describe the tactics of playing in the aircraft, the features of using aircraft in a team and advice on tactics. Refrain from creating a "guide" - do not impose a single point of view, but instead, give the reader food for thought. Examine the most dangerous enemies and give recommendations on fighting them. If necessary, note the specifics of the game in different modes (AB, RB, SB).'' --> | ||
| + | Being a dive-bomber, its main role is rather self-explanatory. However, its frontal armament makes it feasible to be used in a fighter role, especially after dropping its bombs, which leaves a lighter and in consequence faster and more manoeuvrable plane. | ||
| − | + | In AB, the Hs 123 is a ground attacker/emergency fighter. Use your bomb load and guns to dispatch as many ground targets as possible, while making sure to keep the enemy off of your six. If someone does get on your six, pull a snap turn and keep him from getting a good shot on you for as long as possible. If you can't get onto his six you'll have to hope help arrives soon. | |
| − | |||
| − | In | ||
| − | + | In air RB, the tactics change massively. Use your bomber spawn to stay above the enemy team, and dive only after the enemy fighters have passed below you. Hit their tanks and other targets with your bombs through either dive bombing or low level bombing (set a 2 second fuse then fly as low as you can, dropping just before you lose sight of the target). After your bomb load is exhausted, engage soft targets for a while. If there are none it's time that you kill some of the enemy team, begin to climb and look for damaged fighters/attackers returning to their airfield, then pounce on them. Your 7.92 mm machine guns are good, but be sure to aim for wings, as most aircraft you'll face will likely be able to absorb most of the MG bullets you put into their fuselage. | |
| − | + | The ''Stealth'' belt is recommended for ground attack, being made up of Armour-Piercing and Incendiary rounds, while ''Tracers'' are better suited for air targets (being Armour-Piercing and Incendiary thanks to its Tracer component). | |
| − | + | In tank RB, the Hs 123 has huge potentials but often depends on the pilot's bomb-dropping skills and the enemy vehicles. Your bombload is fantastic for a plane at this BR, making you a great ground attacker in tank RB. The 4 x 50 kg bombs drop first in groups of 2, so use them for light vehicles or SPAAs. If the target tank has no armour (e.g. GAZ-AA, FlakPz I, etc), only drop one group of 50 kg bombs, whereas if they are armoured tanks, drop the two groups together. Then the single 250 kg can destroy anything and will be much easier to aim thanks to its larger fragment range. Note that you need to lead more for both 50 kg & 250 kg bombs, as the Hs 123 is quite slow, resulting in a lower momentum for the bombs comparing to later planes. Also, if tracer shells start to come near you as you dive, immediately pull off or dodge. The Hs 123 is very fragile, with its wing easily ripped off by a few bullets and the pilot easily sniped. The large radial engine is also prone to taking damage. After all the bombs are gone, you can start looking for incoming enemy planes. You have a good chance of out turning most planes with your combat / takeoff flaps down, so lure them into turn fights when possible. | |
| − | + | In simulator, the Hs 123 is quite a decent multi-role plane to fly. It has great visibility towards the lower sides meaning it is easy to search for ground targets, its over-the-nose visibility is also decent. The upper front view is obstructed by the upper wing, and the rear view is blocked by the razorback design, as a result you cannot see what is on your tail. Its control handling is great at all speeds, making it a rather stable platform for ground pounding and an easy plane to take off and land in. It can perform base bombing, ground pounding and dogfighting. Bring the least fuel if you know that your targets are not far away, otherwise bring at least 30 minutes of fuel for prolonged patrolling and fighting. Note that you want to use 85-90% throttle as the oil easily overheats with either WEP or 100% throttle, so save the WEP for emergency manoeuvres. | |
| − | + | For base bombing, it is recommended to fly at treetop level to get to the base as soon as possible since the Hs 123 is quite slow. When approaching the base, make sure that you are flying to its side so it can be seen from your side window and not get blocked by the nose. Once you see it, dive at it at a shallow angle. When the gunsight slices past the furthest edge of the base, release all the bombs, bank towards a nearby airfield and head back. | |
| − | + | For ground pounding with bombs, look for tanks and pillboxes. First you need some separation between you and the target so you have enough time to smooth the aim. Dive at the target at a rather shallow angle, and release the 50 kg bombs when you are very close with gunsight above the target. Release the 250 kg when the gunsight is well above the target. Note: don't forget to set a fuse for at least 2 seconds since you are dropping bombs very low. If you only use the MGs, your targets are trucks, AAA and howitzers. Dive at it and stabilise the plane so the gunsight stays overall still at the target. Then, once the target fills out around 1/6 of the gunsight, open fire. If your aim is accurate you can destroy one target in a single pass. However, each MG only has 500 rounds and their rate of fire is pretty fast, so control the trigger to save some ammo for any unexpected dogfights. | |
| − | + | For dogfighting, it is better to engage with an altitude advantage. Track the opponent using lead or pure pursuit, as with lag pursuit you will end up at the 6 of the target aircraft whose fuselage will soak up most of your bullets. With a reflector sight and decent visibility over the nose, the aim should be easy. Target their wings or the nose and avoid the back half of the fuselage as there is usually nothing in there. You can turn with most planes, even with the infamous I-15, with your combat / takeoff flaps deployed. However, if you see a plane with an I-15's short and fat fuselage, a flat radial engine and triangular stabilisers located right after the low-mounted mono wings, consider disengaging. The I-16 is faster than you, turns equally well and can cripple your fragile Hs 123 even with 2 x MGs. If an I-16 is on your tail, a tactic to counter it is to utilise your stableness. Deflect both your ailerons and elevators for around 70% to get into a barrel roll. If the I-16 is to follow and cut inside your roll, it is super likely to enter a flatspin due to its unstableness in manoeuvres. Perform the barrel roll tighter and tighter until the I-16 loses control and spins, then turn around and shoot. Or, simple do flat turns but turn tightly, a tight-turning I-16 is also prone to enter flatspins, however this is at risk of getting shot before it loses control. | |
| − | + | Landing is easy thanks to the low stall speed and lovely handling. Line up and approach the airstrip at treetop, decrease speed to at most 210 km/h and deploy combat, takeoff and landing flaps in order. The touchdown speed should be no more than 140 km/h to avoid bouncing up. Release brakes immediately as soon as the nose starts dipping down to avoid propeller strike. | |
=== Manual Engine Control === | === Manual Engine Control === | ||
| Line 128: | Line 155: | ||
! Oil !! Water !! Type | ! Oil !! Water !! Type | ||
|- | |- | ||
| − | | Controllable || | + | | Controllable || Not controllable<br>Not auto controlled || Not controllable<br>Not auto controlled || Not controllable<br>Not auto controlled || Combined || Not controllable<br>1 gear || Not controllable |
| − | |||
| − | |||
| − | |||
| − | |||
| − | |||
| − | |||
| − | |||
| − | |||
| − | |||
| − | |||
| − | |||
| − | |||
| − | |||
| − | |||
| − | |||
| − | |||
| − | |||
| − | |||
| − | |||
| − | |||
| − | |||
| − | |||
| − | |||
| − | |||
| − | |||
| − | |||
| − | |||
| − | |||
| − | |||
| − | |||
| − | |||
| − | |||
| − | |||
| − | |||
| − | |||
| − | |||
| − | |||
| − | |||
| − | |||
| − | |||
| − | |||
| − | |||
| − | |||
|- | |- | ||
|} | |} | ||
| Line 177: | Line 161: | ||
=== Pros and cons === | === Pros and cons === | ||
<!-- ''Summarise and briefly evaluate the vehicle in terms of its characteristics and combat effectiveness. Mark its pros and cons in the bulleted list. Try not to use more than 6 points for each of the characteristics. Avoid using categorical definitions such as "bad", "good" and the like - use substitutions with softer forms such as "inadequate" and "effective".'' --> | <!-- ''Summarise and briefly evaluate the vehicle in terms of its characteristics and combat effectiveness. Mark its pros and cons in the bulleted list. Try not to use more than 6 points for each of the characteristics. Avoid using categorical definitions such as "bad", "good" and the like - use substitutions with softer forms such as "inadequate" and "effective".'' --> | ||
| − | |||
'''Pros:''' | '''Pros:''' | ||
| − | * | + | * Extremely sharp control input allows it to turn sharply |
| + | * Good manoeuvrability and nimble, can turn-fight other attackers / bombers like the [[SB2 (Disambiguation)|SB]] series | ||
| + | * Powerful selection of bombs, up to 450 kg | ||
| + | * Fast BMW-132 radial engine | ||
| + | * Can be used as a fighter-bomber after dropping payload. Very useful in tank RB | ||
| + | * Although not effective, the MG-17 machine guns can decimate ground targets with a few bursts of fire | ||
| + | * Bomber spawn in RB gives it altitude advantage over enemy fighters | ||
'''Cons:''' | '''Cons:''' | ||
| − | * | + | * Easy to rip your wings off when diving past 450 km/h |
| + | * No gunner makes it defenceless when being chased | ||
| + | * Lack of self-sealing tanks makes it easily to burn down | ||
| + | * Less manoeuvrable than proper biplane fighters like the [[I-15 (Family)|I-15]] | ||
| + | * Bad climb rate means gaining altitude after diving is hard | ||
== History == | == History == | ||
<!-- ''Describe the history of the creation and combat usage of the aircraft in more detail than in the introduction. If the historical reference turns out to be too long, take it to a separate article, taking a link to the article about the vehicle and adding a block "/History" (example: <nowiki>https://wiki.warthunder.com/(Vehicle-name)/History</nowiki>) and add a link to it here using the <code>main</code> template. Be sure to reference text and sources by using <code><nowiki><ref></ref></nowiki></code>, as well as adding them at the end of the article with <code><nowiki><references /></nowiki></code>. This section may also include the vehicle's dev blog entry (if applicable) and the in-game encyclopedia description (under <code><nowiki>=== In-game description ===</nowiki></code>, also if applicable).'' --> | <!-- ''Describe the history of the creation and combat usage of the aircraft in more detail than in the introduction. If the historical reference turns out to be too long, take it to a separate article, taking a link to the article about the vehicle and adding a block "/History" (example: <nowiki>https://wiki.warthunder.com/(Vehicle-name)/History</nowiki>) and add a link to it here using the <code>main</code> template. Be sure to reference text and sources by using <code><nowiki><ref></ref></nowiki></code>, as well as adding them at the end of the article with <code><nowiki><references /></nowiki></code>. This section may also include the vehicle's dev blog entry (if applicable) and the in-game encyclopedia description (under <code><nowiki>=== In-game description ===</nowiki></code>, also if applicable).'' --> | ||
| − | ' | + | First flying in 1935, the Hs 123 was Henschel's response to the 1933 Reich Ministry requirement for a dive bomber. After the successful delivery of 250 aircraft its christening of fire began. In 1936 the Hs-123 was sent to Spain where its usefulness as a close air support aircraft was well known. Being able to accurately place its powerful bombload and reliability outweighed its short range and it saw extensive service in that role. After the beginning of World War 2, The Hs 123 saw service on the front-line airfields, where its quick turn time and ability to take heavy damage was appreciated by pilots and ground crews alike. Despite this, the Luftwaffe considered them obsolete, and most squadrons re-equipped to Stukas or Bf 109 E's (Jabo variant). |
| + | |||
| + | At the beginning of Operation Barbarossa, the Hs-123 saw its rebirth, where its ability to survive heavy damage and its reliability shone through. Even in the winter, where more modern aircraft would fail to even start, Hs 123s could be counted upon to provide close air support through the bleakest of weather. It was used for night time raids on Soviet convoys, proving to be very reliable in battle, some examples even taking hits from 75 mm shells yet flying on. In 1943, Generaloberst Wolfram von Richthofen asked if production of the aircraft could be restarted, however the jigs had been taken down in the Henschel plant all the way back in 1940. The aircraft was only formally retired at the end of the war. Despite its fearsome reputation, none are known to survive. | ||
== Media == | == Media == | ||
<!-- ''Excellent additions to the article would be video guides, screenshots from the game, and photos.'' --> | <!-- ''Excellent additions to the article would be video guides, screenshots from the game, and photos.'' --> | ||
| − | + | ||
| + | ;Images | ||
| + | <gallery mode="packed-hover" heights="200"> | ||
| + | File:ArtImage Hs 123 A-1.png| | ||
| + | </gallery> | ||
| + | |||
| + | ;Skins | ||
| + | * [https://live.warthunder.com/feed/camouflages/?vehicle=hs-123a-1 Skins and camouflages for the {{PAGENAME}} from live.warthunder.com.] | ||
== See also == | == See also == | ||
| − | |||
| − | |||
| − | |||
''Links to the articles on the War Thunder Wiki that you think will be useful for the reader, for example:'' | ''Links to the articles on the War Thunder Wiki that you think will be useful for the reader, for example:'' | ||
| Line 207: | Line 206: | ||
<!-- ''Paste links to sources and external resources, such as:'' | <!-- ''Paste links to sources and external resources, such as:'' | ||
* ''topic on the official game forum;'' | * ''topic on the official game forum;'' | ||
| − | |||
* ''other literature.'' --> | * ''other literature.'' --> | ||
| − | * [ | + | * [https://forum.warthunder.com/index.php?/topic/315602-henschel-hs-123-a-1/ Official data sheet - more details about the performance] |
| − | {{AirManufacturer | + | {{AirManufacturer Henschel}} |
| − | {{ | + | {{Germany bombers}} |
| − | |||
Latest revision as of 16:49, 22 June 2024
| This page is about the German bomber Hs 123 A-1. For the Chinese version, see Hs 123 A-1 (China). |


Contents
Description
Designed in the early 1930s, the Hs 123 was a single-seat dive bomber that served with the Luftwaffe from the Spanish Civil War all the way to 1944. In 1933, the Luftwaffe set out a requirement for a dive bomber. Henschel, who was mainly a train manufacturer, began designing and developing planes. The Hs 123 was developed for the Luftwaffe requirement and won the contract over the Fieseler Fi 98. The Hs 123 had its first public flight in 1935 and featured all-metal construction and a sesquiplane design. The prototype was fitted with a 650 hp engine, but the production version utilized an almost 900 hp engine. Almost 1,000 Hs 123s were produced, with them serving in the bomber role as well as reconnaissance duties. It served for just under 10 years and was only brought out of service due to the lack of spare parts.
Introduced in Update 1.59 "Flaming Arrows", the Hs 123 A-1 is an excellent biplane bomber. It features two loadouts: four 50 kg bombs or a loadout consisting of a single 250 kg bomb. The Hs 123 also comes armed with two 7.92 mm machine guns mounted in the nose, with 500 rounds per gun. Since it's classified as a bomber, the Hs 123 has a bomber air spawn, which provides a significant advantage against enemy fighters. The all-metal construction also gives the Hs 123 a very respectable structural speed limit of 577 km/h (358 mph).
General info
Flight performance
The Hs 123 behaves very similarly to other Interwar period designed fighter biplanes, relatively slow but highly manoeuvrable aircraft, this in particular being somewhat slower and with a lower climb rate because of its payload.
| Characteristics | Max Speed (km/h at 4,000 m) |
Max altitude (metres) |
Turn time (seconds) |
Rate of climb (metres/second) |
Take-off run (metres) | |||
|---|---|---|---|---|---|---|---|---|
| AB | RB | AB | RB | AB | RB | |||
| Stock | 293 | 289 | 15.8 | 16.5 | 8.2 | 8.2 | 294 | |
| Upgraded | 325 | 310 | 14.4 | 15.0 | 16.8 | 12.0 | ||
Details
| Features | ||||
|---|---|---|---|---|
| Combat flaps | Take-off flaps | Landing flaps | Air brakes | Arrestor gear |
| ✓ | ✓ | ✓ | X | X |
| Limits | ||||||
|---|---|---|---|---|---|---|
| Wings (km/h) | Gear (km/h) | Flaps (km/h) | Max Static G | |||
| Combat | Take-off | Landing | + | - | ||
| 300 | 274 | 190 | ~13 | ~8 | ||
| Optimal velocities (km/h) | |||
|---|---|---|---|
| Ailerons | Rudder | Elevators | Radiator |
| < 220 | < 220 | < 380 | > 270 |
| Compressor (RB/SB) | ||
|---|---|---|
| Setting 1 | ||
| Optimal altitude | 100% Engine power | WEP Engine power |
| 850 m | 660 hp | 747 hp |
Survivability and armour
- 5 mm steel - pilot's headrest
As with most Interwar-period designed biplanes, the Hs 123 A-1 has no armour and offers no protection to its pilot nor its critical components (engine, not self-sealing fuel tanks, oil-cooling systems), so the survivability depends on the pilot's skills. Being a metallic-frame, cloth-covered construction and not having self-sealing fuel tanks, regular Ball and AP rounds won't damage it a lot (unless they directly hit the pilot), but it's especially susceptible to Incendiary and Tracer rounds, which can ignite it if they hit the fuel tanks, or the cloth cover itself.
Modifications and economy
Armaments
Offensive armament
The Hs 123 A-1 is armed with:
- 2 x 7.92 mm MG 17 machine guns, nose-mounted (500 rpg = 1,000 total)
Suspended armament
The Hs 123 A-1 can be outfitted with the following ordnance:
- 4 x 50 kg SC50JA bombs (200 kg total)
- 1 x 250 kg SC250JA bomb + 4 x 50 kg SC50JA bombs (450 kg total)
Usage in battles
Being a dive-bomber, its main role is rather self-explanatory. However, its frontal armament makes it feasible to be used in a fighter role, especially after dropping its bombs, which leaves a lighter and in consequence faster and more manoeuvrable plane.
In AB, the Hs 123 is a ground attacker/emergency fighter. Use your bomb load and guns to dispatch as many ground targets as possible, while making sure to keep the enemy off of your six. If someone does get on your six, pull a snap turn and keep him from getting a good shot on you for as long as possible. If you can't get onto his six you'll have to hope help arrives soon.
In air RB, the tactics change massively. Use your bomber spawn to stay above the enemy team, and dive only after the enemy fighters have passed below you. Hit their tanks and other targets with your bombs through either dive bombing or low level bombing (set a 2 second fuse then fly as low as you can, dropping just before you lose sight of the target). After your bomb load is exhausted, engage soft targets for a while. If there are none it's time that you kill some of the enemy team, begin to climb and look for damaged fighters/attackers returning to their airfield, then pounce on them. Your 7.92 mm machine guns are good, but be sure to aim for wings, as most aircraft you'll face will likely be able to absorb most of the MG bullets you put into their fuselage.
The Stealth belt is recommended for ground attack, being made up of Armour-Piercing and Incendiary rounds, while Tracers are better suited for air targets (being Armour-Piercing and Incendiary thanks to its Tracer component).
In tank RB, the Hs 123 has huge potentials but often depends on the pilot's bomb-dropping skills and the enemy vehicles. Your bombload is fantastic for a plane at this BR, making you a great ground attacker in tank RB. The 4 x 50 kg bombs drop first in groups of 2, so use them for light vehicles or SPAAs. If the target tank has no armour (e.g. GAZ-AA, FlakPz I, etc), only drop one group of 50 kg bombs, whereas if they are armoured tanks, drop the two groups together. Then the single 250 kg can destroy anything and will be much easier to aim thanks to its larger fragment range. Note that you need to lead more for both 50 kg & 250 kg bombs, as the Hs 123 is quite slow, resulting in a lower momentum for the bombs comparing to later planes. Also, if tracer shells start to come near you as you dive, immediately pull off or dodge. The Hs 123 is very fragile, with its wing easily ripped off by a few bullets and the pilot easily sniped. The large radial engine is also prone to taking damage. After all the bombs are gone, you can start looking for incoming enemy planes. You have a good chance of out turning most planes with your combat / takeoff flaps down, so lure them into turn fights when possible.
In simulator, the Hs 123 is quite a decent multi-role plane to fly. It has great visibility towards the lower sides meaning it is easy to search for ground targets, its over-the-nose visibility is also decent. The upper front view is obstructed by the upper wing, and the rear view is blocked by the razorback design, as a result you cannot see what is on your tail. Its control handling is great at all speeds, making it a rather stable platform for ground pounding and an easy plane to take off and land in. It can perform base bombing, ground pounding and dogfighting. Bring the least fuel if you know that your targets are not far away, otherwise bring at least 30 minutes of fuel for prolonged patrolling and fighting. Note that you want to use 85-90% throttle as the oil easily overheats with either WEP or 100% throttle, so save the WEP for emergency manoeuvres.
For base bombing, it is recommended to fly at treetop level to get to the base as soon as possible since the Hs 123 is quite slow. When approaching the base, make sure that you are flying to its side so it can be seen from your side window and not get blocked by the nose. Once you see it, dive at it at a shallow angle. When the gunsight slices past the furthest edge of the base, release all the bombs, bank towards a nearby airfield and head back.
For ground pounding with bombs, look for tanks and pillboxes. First you need some separation between you and the target so you have enough time to smooth the aim. Dive at the target at a rather shallow angle, and release the 50 kg bombs when you are very close with gunsight above the target. Release the 250 kg when the gunsight is well above the target. Note: don't forget to set a fuse for at least 2 seconds since you are dropping bombs very low. If you only use the MGs, your targets are trucks, AAA and howitzers. Dive at it and stabilise the plane so the gunsight stays overall still at the target. Then, once the target fills out around 1/6 of the gunsight, open fire. If your aim is accurate you can destroy one target in a single pass. However, each MG only has 500 rounds and their rate of fire is pretty fast, so control the trigger to save some ammo for any unexpected dogfights.
For dogfighting, it is better to engage with an altitude advantage. Track the opponent using lead or pure pursuit, as with lag pursuit you will end up at the 6 of the target aircraft whose fuselage will soak up most of your bullets. With a reflector sight and decent visibility over the nose, the aim should be easy. Target their wings or the nose and avoid the back half of the fuselage as there is usually nothing in there. You can turn with most planes, even with the infamous I-15, with your combat / takeoff flaps deployed. However, if you see a plane with an I-15's short and fat fuselage, a flat radial engine and triangular stabilisers located right after the low-mounted mono wings, consider disengaging. The I-16 is faster than you, turns equally well and can cripple your fragile Hs 123 even with 2 x MGs. If an I-16 is on your tail, a tactic to counter it is to utilise your stableness. Deflect both your ailerons and elevators for around 70% to get into a barrel roll. If the I-16 is to follow and cut inside your roll, it is super likely to enter a flatspin due to its unstableness in manoeuvres. Perform the barrel roll tighter and tighter until the I-16 loses control and spins, then turn around and shoot. Or, simple do flat turns but turn tightly, a tight-turning I-16 is also prone to enter flatspins, however this is at risk of getting shot before it loses control.
Landing is easy thanks to the low stall speed and lovely handling. Line up and approach the airstrip at treetop, decrease speed to at most 210 km/h and deploy combat, takeoff and landing flaps in order. The touchdown speed should be no more than 140 km/h to avoid bouncing up. Release brakes immediately as soon as the nose starts dipping down to avoid propeller strike.
Manual Engine Control
| MEC elements | ||||||
|---|---|---|---|---|---|---|
| Mixer | Pitch | Radiator | Supercharger | Turbocharger | ||
| Oil | Water | Type | ||||
| Controllable | Not controllable Not auto controlled |
Not controllable Not auto controlled |
Not controllable Not auto controlled |
Combined | Not controllable 1 gear |
Not controllable |
Pros and cons
Pros:
- Extremely sharp control input allows it to turn sharply
- Good manoeuvrability and nimble, can turn-fight other attackers / bombers like the SB series
- Powerful selection of bombs, up to 450 kg
- Fast BMW-132 radial engine
- Can be used as a fighter-bomber after dropping payload. Very useful in tank RB
- Although not effective, the MG-17 machine guns can decimate ground targets with a few bursts of fire
- Bomber spawn in RB gives it altitude advantage over enemy fighters
Cons:
- Easy to rip your wings off when diving past 450 km/h
- No gunner makes it defenceless when being chased
- Lack of self-sealing tanks makes it easily to burn down
- Less manoeuvrable than proper biplane fighters like the I-15
- Bad climb rate means gaining altitude after diving is hard
History
First flying in 1935, the Hs 123 was Henschel's response to the 1933 Reich Ministry requirement for a dive bomber. After the successful delivery of 250 aircraft its christening of fire began. In 1936 the Hs-123 was sent to Spain where its usefulness as a close air support aircraft was well known. Being able to accurately place its powerful bombload and reliability outweighed its short range and it saw extensive service in that role. After the beginning of World War 2, The Hs 123 saw service on the front-line airfields, where its quick turn time and ability to take heavy damage was appreciated by pilots and ground crews alike. Despite this, the Luftwaffe considered them obsolete, and most squadrons re-equipped to Stukas or Bf 109 E's (Jabo variant).
At the beginning of Operation Barbarossa, the Hs-123 saw its rebirth, where its ability to survive heavy damage and its reliability shone through. Even in the winter, where more modern aircraft would fail to even start, Hs 123s could be counted upon to provide close air support through the bleakest of weather. It was used for night time raids on Soviet convoys, proving to be very reliable in battle, some examples even taking hits from 75 mm shells yet flying on. In 1943, Generaloberst Wolfram von Richthofen asked if production of the aircraft could be restarted, however the jigs had been taken down in the Henschel plant all the way back in 1940. The aircraft was only formally retired at the end of the war. Despite its fearsome reputation, none are known to survive.
Media
- Images

- Skins
See also
Links to the articles on the War Thunder Wiki that you think will be useful for the reader, for example:
- reference to the series of the aircraft;
- links to approximate analogues of other nations and research trees.
External links
| Henschel & Son Corporation (Henschel und Sohn Aktiengesellschaft) | |
|---|---|
| Attackers | Hs 129 B-2 · Hs 129 B-3 |
| Bombers | Hs 123 A-1 |
| Export | ␗Hs 123 A-1 |
| Hs 129 B-2 (Romania) · Hs 129 B-2 (Romania) | |
| Germany bombers | |
|---|---|
| Arado | Ar 196 A-3 |
| Blohm & Voss | BV 138 C-1 · BV 238 |
| Dornier | Do 17 E-1 · Do 17 Z-2 · Do 217 E-2 · Do 217 E-4 · Do 217 K-1 · Do 217 M-1 |
| Focke-Wulf | Fw 189 A-1 · Fw 200 C-1 |
| Henschel | Hs 123 A-1 |
| Heinkel | He 111 H-3 · He 111 H-6 · He 111 H-16 · He 115 C-1 · He 177 A-3 · He 177 A-5 |
| Junkers | Ju 87 B-2 · Ju 87 R-2 · Ju 87 R-2 Libya · Ju 87 D-3 · Ju 87 D-5 · Ju 88 A-1 · Ju 88 A-4 · Ju 188 A-2 · Ju 288 C |
| Messerschmitt | Me 264 |
| Savoia-Marchetti | ▀S.M.79 serie 1 · ▀S.M.79 B · ▀S.M.79 serie 4 · ▀S.M.79 serie 8 |
| ▀S.M.79 AS · ▀S.M.79 bis/N · ▀S.M.79 bis/T.M | |
| Trophies | ▀Wellington Mk Ic |
