Difference between revisions of "MARS 15"
m (spelling) (Tag: Visual edit) |
(Edits) |
||
| Line 19: | Line 19: | ||
As mentioned above, holding more than 14 rounds might be a problem for some. But due to the overall low survivability of the tank itself, taking 19 rounds might be an optimal way to play. Taking more than 19 rounds will result in the rounds being placed on the racks on both sides of the tank, which might make the user very susceptible to side shots, but the rounds will also start storing inside of the bottom and the back of the turret (not counting the first stage ammo rack which is on the left side of the turret). | As mentioned above, holding more than 14 rounds might be a problem for some. But due to the overall low survivability of the tank itself, taking 19 rounds might be an optimal way to play. Taking more than 19 rounds will result in the rounds being placed on the racks on both sides of the tank, which might make the user very susceptible to side shots, but the rounds will also start storing inside of the bottom and the back of the turret (not counting the first stage ammo rack which is on the left side of the turret). | ||
| − | While you might stop a | + | While you might stop a HEATFS round that has been flung your way, or you might shrug some 20 mm autocannon rounds, aircraft will be the bane of your existence. Due to the thin roof, pretty much any aircraft can quickly wipe you out by just using its guns. Sadly, the only reliable protection is to try to find some cover, either indoors or hide behind a sufficiently high object. If none of these options are available, the only option left is to pray that your team has an AA or a friendly jet roaming around that just might save you. |
'''Armour type:''' | '''Armour type:''' | ||
| Line 155: | Line 155: | ||
{{main|A-A-F1N (7.62 mm)}} | {{main|A-A-F1N (7.62 mm)}} | ||
| − | The A-A-F1N is largely ineffective at taking out any | + | The A-A-F1N is largely ineffective at taking out any armoured target and its only real use comes to play against vehicles with exposed crew members. Thanks to the large fire rate, one can dispatch such tank with relative ease. It can also be used to "ping" enemy targets for your teammates or to destroy environmental objects such as fences. |
{| class="wikitable" style="text-align:center" width="50%" | {| class="wikitable" style="text-align:center" width="50%" | ||
| Line 170: | Line 170: | ||
<!-- ''Describe the tactics of playing in the vehicle, the features of using vehicles in the team and advice on tactics. Refrain from creating a "guide" - do not impose a single point of view but instead give the reader food for thought. Describe the most dangerous enemies and give recommendations on fighting them. If necessary, note the specifics of the game in different modes (AB, RB, SB).'' --> | <!-- ''Describe the tactics of playing in the vehicle, the features of using vehicles in the team and advice on tactics. Refrain from creating a "guide" - do not impose a single point of view but instead give the reader food for thought. Describe the most dangerous enemies and give recommendations on fighting them. If necessary, note the specifics of the game in different modes (AB, RB, SB).'' --> | ||
| − | The MARS 15 is effective as a scout vehicle. Because of the good mobility and low profile, it is easy to flank the enemy and scout them for your team. Engaging in brawls is not recommended as the mediocre | + | The MARS 15 is effective as a scout vehicle. Because of the good mobility and low profile, it is easy to flank the enemy and scout them for your team. Engaging in brawls is not recommended as the mediocre armour does not provide adequate protection against other vehicles that the MARS will face. Focusing on flanking the enemy and/or engaging the enemy from vantage points from the sides is an adequate way of playing the MARS. If for some reason the user finds themselves in a tough spot, the MARS has 4 smoke grenades that can provide a reliable way of escaping danger and repositioning. |
| − | Although the user has access to an APFSDS round, using it is rather questionable and situational. The power of it is rather average at best, but on the flipside, it provides quite a boost to the round velocity. A good tactic is to take both | + | Although the user has access to an APFSDS round, using it is rather questionable and situational. The power of it is rather average at best, but on the flipside, it provides quite a boost to the round velocity. A good tactic is to take both HEATFS and APFSDS if the user plans on sniping but also flanking. The APFSDS should be used at longer ranges where the target might be moving too fast for the HEATFS to be reliable, or in case environmental objects such as bushes are in front of the user as hitting these with HEAT rounds will most likely detonate them, giving away the user's position. |
| − | If the user prefers to snipe crew members or the enemy tank's ammo racks, the APFSDS is good enough to fulfill that role, but spare | + | If the user prefers to snipe crew members or the enemy tank's ammo racks, the APFSDS is good enough to fulfill that role, but spare HEATFS rounds should always be carried in case the user needs some extra penetration power. |
=== Pros and cons === | === Pros and cons === | ||
| Line 208: | Line 208: | ||
;Skins | ;Skins | ||
| − | * [https://live.warthunder.com/feed/camouflages/? | + | * [https://live.warthunder.com/feed/camouflages/?vehicle=fr_mars_15 Skins and camouflages for the {{PAGENAME}} from live.warthunder.com.] |
;Images | ;Images | ||
Revision as of 07:45, 22 June 2022

Contents
Description
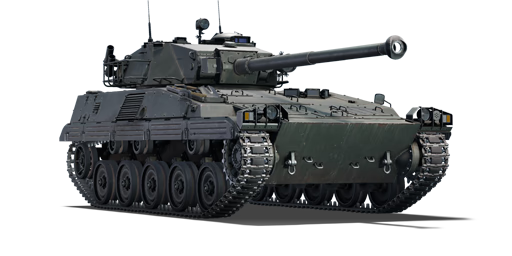
The MARS 15 is a rank French light tank with a battle rating of (AB), (RB), and (SB). It was introduced in Update "Ixwa Strike".
General info
Survivability and armour

At first sight, the MARS 15 might look like it lacks any real armour, with its pitiful 11 mm thick top glacis armour. However, these 11 mm are quite adequate at stopping rounds from autocannons and small-calibre rounds, thanks to the glacis' steep angle of 80°. This is overall boosted by the internal plate that separates the crew compartment and the front of the tank. As an added protection, the transmission, engine block and the radiator are placed in front of the tank, which help with stopping HEAT rounds.
However, all of this added protection won't help the tank survive an APFSDS round as most of the time it will have no problems penetrating the front of the tank and due to the crew placement and because only 3 crew members are inside of the vehicle, most APFSDS rounds will destroy the tank with a single hit. A major weak spot is the left part of the driver's optics. A shot trough these optics will result in the incapacitation of the driver and most of the time either the gunner or the loader. If the user survives a shot like this, another problem would be the 5-round rack back left part of the tank, however the user can bypass this issue by loading only 14 rounds. This way, only the ammo rack on the right side of the tank will have rounds stored inside, boosting the chance of survival slightly.
As mentioned above, holding more than 14 rounds might be a problem for some. But due to the overall low survivability of the tank itself, taking 19 rounds might be an optimal way to play. Taking more than 19 rounds will result in the rounds being placed on the racks on both sides of the tank, which might make the user very susceptible to side shots, but the rounds will also start storing inside of the bottom and the back of the turret (not counting the first stage ammo rack which is on the left side of the turret).
While you might stop a HEATFS round that has been flung your way, or you might shrug some 20 mm autocannon rounds, aircraft will be the bane of your existence. Due to the thin roof, pretty much any aircraft can quickly wipe you out by just using its guns. Sadly, the only reliable protection is to try to find some cover, either indoors or hide behind a sufficiently high object. If none of these options are available, the only option left is to pray that your team has an AA or a friendly jet roaming around that just might save you.
Armour type:
- Rolled homogeneous armour (Hull, Turret, Internal plate)
| Armour | Front (Slope angle) | Sides | Rear | Roof |
|---|---|---|---|---|
| Hull | 11 mm (80°) Top Glacis 15 mm (40°) Bottom Glacis |
5 mm (20°) Top 10 mm Bottom |
10 mm (10°) | 8-11 mm (80-90°) |
| Turret | 10-15 mm Turret front 10 mm Gun mantlet |
8-12 mm (0-30°) | 8-10 mm | 10-12 mm |
| Cupola | 10 mm (5-90°) | 10 mm (12-75°) | 10 mm (61°) | 10 mm (58-85°) |
Notes:
- The torsion bars, suspension wheels and the tracks are 15 mm thick.
- The internal plate protecting the crew compartment is 10 mm thick.
Mobility
| Game Mode | Max Speed (km/h) | Weight (tons) | Engine power (horsepower) | Power-to-weight ratio (hp/ton) | |||
|---|---|---|---|---|---|---|---|
| Forward | Reverse | Stock | Upgraded | Stock | Upgraded | ||
| Arcade | Expression error: Unexpected * operator. | 651 | Expression error: Unexpected round operator. | __.__ | |||
| Realistic | 371 | Expression error: Unexpected round operator. | __.__ | ||||
The MARS 15 is a very mobile and nimble tank, with a pretty small profile. The user should expect around 48 km/h on off-road terrain and roughly -24 km/h reverse speed. It takes roughly 13 seconds for the tank to fully do a 360° rotation with neutral steering, however if the user gets some speed before turning, it will do the 360° rotation roughly 50% faster. It is powered by a Baudouin GF12SRY diesel engine, with the power of 420 hp for a top speed of roughly 75 km/h.
Modifications and economy
Armaments
Main armament
| 90 mm CN90 F4 | Turret rotation speed (°/s) | Reloading rate (seconds) | |||||||||||
|---|---|---|---|---|---|---|---|---|---|---|---|---|---|
| Mode | Capacity | Vertical | Horizontal | Stabilizer | Stock | Upgraded | Full | Expert | Aced | Stock | Full | Expert | Aced |
| Arcade | 30 | -8°/+15° | ±180° | N/A | 22.8 | 31.6 | 38.4 | 42.5 | 45.2 | 6.50 | 5.75 | 5.30 | 5.00 |
| Realistic | 14.3 | 16.8 | 20.4 | 22.6 | 24.0 | ||||||||
Ammunition
| Penetration statistics | |||||||
|---|---|---|---|---|---|---|---|
| Ammunition | Type of warhead |
Penetration @ 0° Angle of Attack (mm) | |||||
| 10 m | 100 m | 500 m | 1,000 m | 1,500 m | 2,000 m | ||
| OCC 90 F2 | HEATFS | 320 | 320 | 320 | 320 | 320 | 320 |
| OE 90 F1 | HE | 13 | 13 | 13 | 13 | 13 | 13 |
| OFL 90 F1 | APFSDS | 271 | 267 | 253 | 235 | 218 | 201 |
| Shell details | |||||||||
|---|---|---|---|---|---|---|---|---|---|
| Ammunition | Type of warhead |
Velocity (m/s) |
Projectile Mass (kg) |
Fuse delay (m) |
Fuse sensitivity (mm) |
Explosive Mass (TNT equivalent) (g) |
Ricochet | ||
| 0% | 50% | 100% | |||||||
| OCC 90 F2 | HEATFS | 950 | 8.95 | 0.05 | 0.1 | 877.7 | 65° | 72° | 77° |
| OE 90 F1 | HE | 750 | 10.45 | 0 | 0.1 | 945 | 79° | 80° | 81° |
| OFL 90 F1 | APFSDS | 1,275 | 2.33 | N/A | N/A | N/A | 78° | 80° | 81° |
| Smoke shell characteristics | ||||||
|---|---|---|---|---|---|---|
| Ammunition | Velocity (m/s) |
Projectile Mass (kg) |
Screen radius (m) |
Screen deploy time (s) |
Screen hold time (s) |
Explosive Mass (TNT equivalent) (g) |
| OFUM 90 F1 | 750 | 10.2 | 13 | 5 | 20 | 50 |
Ammo racks

| Full ammo |
1st rack empty |
2nd rack empty |
3rd rack empty |
4th rack empty |
5th rack empty |
6th rack empty |
Visual discrepancy |
|---|---|---|---|---|---|---|---|
| 30 | 29 (+1) | 21 (+9) | 19 (+11) | 14 (+16) | 9 (+21) | 1 (+29) | No |
Notes:
- Shells are modeled individually and disappear after having been shot or loaded.
- Rack 6 is a first stage ammo rack. It totals 8 shells and gets filled first when loading up the tank.
Machine guns
The A-A-F1N is largely ineffective at taking out any armoured target and its only real use comes to play against vehicles with exposed crew members. Thanks to the large fire rate, one can dispatch such tank with relative ease. It can also be used to "ping" enemy targets for your teammates or to destroy environmental objects such as fences.
| 7.62 mm A-A-F1N | ||||
|---|---|---|---|---|
| Mount | Capacity (Belt) | Fire rate | Vertical | Horizontal |
| Coaxial | 2,000 (100) | 900 | N/A | N/A |
Usage in battles
The MARS 15 is effective as a scout vehicle. Because of the good mobility and low profile, it is easy to flank the enemy and scout them for your team. Engaging in brawls is not recommended as the mediocre armour does not provide adequate protection against other vehicles that the MARS will face. Focusing on flanking the enemy and/or engaging the enemy from vantage points from the sides is an adequate way of playing the MARS. If for some reason the user finds themselves in a tough spot, the MARS has 4 smoke grenades that can provide a reliable way of escaping danger and repositioning.
Although the user has access to an APFSDS round, using it is rather questionable and situational. The power of it is rather average at best, but on the flipside, it provides quite a boost to the round velocity. A good tactic is to take both HEATFS and APFSDS if the user plans on sniping but also flanking. The APFSDS should be used at longer ranges where the target might be moving too fast for the HEATFS to be reliable, or in case environmental objects such as bushes are in front of the user as hitting these with HEAT rounds will most likely detonate them, giving away the user's position.
If the user prefers to snipe crew members or the enemy tank's ammo racks, the APFSDS is good enough to fulfill that role, but spare HEATFS rounds should always be carried in case the user needs some extra penetration power.
Pros and cons
Pros:
- Low profile
- Good mobility
- Access to a laser rangefinder
Cons:
- No gun stabilization
- Very light protection
- No night vision devices
- Because of the OFL 90 F1, rather weak penetration power and below average spalling, one-hit kills are unreliable
History
Devblog
In the early 1980s, the French Creusot-Loire Industrie company began work on developing a new family of tracked combat vehicles which share a common chassis. Initiating work under a private venture, Creusot-Loire Industrie aimed to produce the vehicles for customers on the export market who already used the widely used AMX-13 light tank.
Full-scale development only began in 1988 and several variants of the vehicle were developed, ranging from light tank modifications over APCs and IFVs to SPAAs and SPHs as well as a number of other variants. However, many of these planned variants never passed the drawing board stage. Of the few that did, the light tank modification stood out as it aimed to build upon the popular characteristics of the AMX-13 and expand upon them by incorporating modern technologies.
This light tank modification featured a small and extremely nimble chassis while being armed with a 90 mm cannon and promising low maintenance efforts. The first and only prototype of this variant was shown off in 1990, along with the IFV modification. After its reveal, the vehicle received the designation MARS 15.
In 1991, another prototype armed with a 105 mm cannon was shown off which would also become the last of the series. In fact, the expected response from potential foreign customers never materialized as the end of the Cold War in the early 1990s diminished the demand for new tanks while simultaneously surplus MBTs were being taken out of storage and sold. As a result of this development, the MARS vehicles never left the prototype stage and were ultimately abandoned.
Media
- Skins
- Images


See also
- Object 906 - A similar Soviet light tank
External links
| France light tanks | |
|---|---|
| AMC.34/35 | AMC.34 YR · AMC.35 (ACG.1) |
| H.35/39 | H.35 · H.39 · H.39 "Cambronne" |
| AMX-13 | AMX-13 (FL11) · AMX-13-M24 · AMX-13 · AMX-13 (SS.11) · AMX-13-90 · AMX-13 (HOT) |
| Wheeled | AML-90 · AMX-10RC · Vextra 105 |
| AMD.35 | AMD.35 · AMD.35 (SA35) |
| E.B.R. | E.B.R. (1951) · E.B.R. (1954) · E.B.R. (1963) |
| Other | FCM.36 · R.35 (SA38) · Char 25t · MARS 15 · VBCI-2 (MCT30) |
| Austria | SK-105A2 |
| Great Britain | ▄Crusader Mk.II |
| Netherlands | CV 9035NL |
| USA | LVT-4/40 · ▄M3A3 Stuart |
