Difference between revisions of "M6A2E1"
(Added About template) |
U109310820 (talk | contribs) (Added two more pro's) (Tag: Visual edit) |
||
| (24 intermediate revisions by 9 users not shown) | |||
| Line 1: | Line 1: | ||
| − | |||
| − | |||
| − | |||
| − | |||
| − | |||
{{Specs-Card | {{Specs-Card | ||
|code=us_m6a2e1 | |code=us_m6a2e1 | ||
| − | |images={{Specs-Card-Image|GarageImage_{{PAGENAME}}.jpg | + | |images={{Specs-Card-Image|GarageImage_{{PAGENAME}}.jpg}} |
| − | |||
}} | }} | ||
== Description == | == Description == | ||
<!-- ''In the description, the first part should be about the history of the creation and combat usage of the vehicle, as well as its key features. In the second part, tell the reader about the ground vehicle in the game. Insert a screenshot of the vehicle, so that if the novice player does not remember the vehicle by name, he will immediately understand what kind of vehicle the article is talking about.'' --> | <!-- ''In the description, the first part should be about the history of the creation and combat usage of the vehicle, as well as its key features. In the second part, tell the reader about the ground vehicle in the game. Insert a screenshot of the vehicle, so that if the novice player does not remember the vehicle by name, he will immediately understand what kind of vehicle the article is talking about.'' --> | ||
| − | + | The '''{{Specs|name}}''' is a premium gift rank {{Specs|rank}} American heavy tank {{Battle-rating}}. It was introduced during [[Update "Ixwa Strike"]] as a reward for [[Battle Pass: Season III, "Strength athletics"]]. | |
| − | |||
| − | The '''{{Specs|name}}''' | ||
| − | |||
| − | |||
== General info == | == General info == | ||
| Line 22: | Line 12: | ||
{{Specs-Tank-Armour}} | {{Specs-Tank-Armour}} | ||
<!-- ''Describe armour protection. Note the most well protected and key weak areas. Appreciate the layout of modules as well as the number and location of crew members. Is the level of armour protection sufficient, is the placement of modules helpful for survival in combat? If necessary use a visual template to indicate the most secure and weak zones of the armour.'' --> | <!-- ''Describe armour protection. Note the most well protected and key weak areas. Appreciate the layout of modules as well as the number and location of crew members. Is the level of armour protection sufficient, is the placement of modules helpful for survival in combat? If necessary use a visual template to indicate the most secure and weak zones of the armour.'' --> | ||
| − | |||
| − | |||
| − | |||
| − | |||
| − | |||
| − | |||
| − | |||
| − | |||
| − | |||
'''Armour type:''' | '''Armour type:''' | ||
| Line 59: | Line 40: | ||
{{tankMobility|abMinHp=1,033|rbMinHp=708}} | {{tankMobility|abMinHp=1,033|rbMinHp=708}} | ||
| − | |||
=== Modifications and economy === | === Modifications and economy === | ||
{{Specs-Economy}} | {{Specs-Economy}} | ||
| Line 87: | Line 67: | ||
==== Ammunition ==== | ==== Ammunition ==== | ||
| − | {{: | + | {| class="wikitable sortable" style="text-align:center" width="100%" |
| + | ! colspan="8" | Penetration statistics | ||
| + | |- | ||
| + | ! rowspan="2" data-sort-type="text" | Ammunition | ||
| + | ! rowspan="2" | Type of<br>warhead | ||
| + | ! colspan="6" | Penetration @ 0° Angle of Attack (mm) | ||
| + | |- | ||
| + | ! 10 m !! 100 m !! 500 m !! 1,000 m !! 1,500 m !! 2,000 m | ||
| + | |- | ||
| + | | T32 || APCBC || 256 || 253 || 238 || 221 || 205 || 190 | ||
| + | |- | ||
| + | | T13 || APCBC || 253 || 250 || 236 || 219 || 204 || 190 | ||
| + | |- | ||
| + | | T29E3 || APCR || 292 || 287 || 266 || 242 || 220 || 200 | ||
| + | |- | ||
| + | | T30E1 || HE || 20 || 20 || 20 || 20 || 20 || 20 | ||
| + | |- | ||
| + | |} | ||
| + | {| class="wikitable sortable" style="text-align:center" width="100%" | ||
| + | ! colspan="10" | Shell details | ||
| + | |- | ||
| + | ! rowspan="2" data-sort-type="text" | Ammunition | ||
| + | ! rowspan="2" | Type of<br>warhead | ||
| + | ! rowspan="2" | Velocity<br>(m/s) | ||
| + | ! rowspan="2" | Projectile<br>Mass (kg) | ||
| + | ! rowspan="2" | Fuse delay<br>(m) | ||
| + | ! rowspan="2" | Fuse sensitivity<br>(mm) | ||
| + | ! rowspan="2" | Explosive Mass<br>(TNT equivalent) (g) | ||
| + | ! colspan="3" | Ricochet | ||
| + | |- | ||
| + | ! 0% !! 50% !! 100% | ||
| + | |- | ||
| + | | T32 || APCBC || 914 || 17.7 || N/A || N/A || N/A || 48° || 63° || 71° | ||
| + | |- | ||
| + | | T13 || APCBC || 899 || 18.59 || 1.2 || 19 || 177.38 || 48° || 63° || 71° | ||
| + | |- | ||
| + | | T29E3 || APCR || 1,128 || 11.2 || N/A || N/A || N/A || 66° || 70° || 72° | ||
| + | |- | ||
| + | | T30E1 || HE || 945 || 15.2 || 0 || 0.1 || 1,550 || 79° || 80° || 81° | ||
| + | |- | ||
| + | |} | ||
==== [[Ammo racks]] ==== | ==== [[Ammo racks]] ==== | ||
| Line 103: | Line 123: | ||
! Visual<br>discrepancy | ! Visual<br>discrepancy | ||
|- | |- | ||
| − | | '''60''' || ''Projectiles''<br>''Propellants'' || 49 ''(+11)'' <br> 37 ''(+23)'' || 37 ''(+23)'' <br> 25 ''(+35)'' || 25 ''(+35)'' <br> 13 ''(+47)'' || 13 ''(+47)'' <br> 1 ''(+59)'' || 1 ''(+59)'' <br> N/A || No | + | | '''60''' || ''Projectiles''<br>''Propellants'' || 49 ''(+11)'' <br> 37 ''(+23)'' || 37 ''(+23)'' <br> 25 ''(+35)'' || 25 ''(+35)'' <br> 13 ''(+47)'' || 13 ''(+47)'' <br> 1 ''(+59)'' || 1 ''(+59)'' <br> N/A || No |
|- | |- | ||
|} | |} | ||
| Line 151: | Line 171: | ||
The M6A2E1 can do reasonably well in not extremely uneven terrain thanks to the depression angle of -10° and the tank's height can also be beneficial for shooting over cover that other vehicles wouldn't be able to, sometimes taking enemies by surprise. | The M6A2E1 can do reasonably well in not extremely uneven terrain thanks to the depression angle of -10° and the tank's height can also be beneficial for shooting over cover that other vehicles wouldn't be able to, sometimes taking enemies by surprise. | ||
| − | With this tank, one of the most suitable strategies is to snipe. You have two ammunition options, APCBC with extra penetration or APCBC with explosive filler, both being devastating (105 mm shells create a lot of spalling). Find a suitable spot, try to expose only the turret, and deal with enemies coming at you. Most enemies will hopelessly shoot at your mantlet, some players will exploit your weak spots on the turret or may have high penetration HEATFS or APDS (uptiers are very dangerous for this tank and should play much more defensively). Your reload time is considerably long, so staying behind cover is the best thing possible when reloading. Your reverse speed thankfully lets you get away from a lot of dangerous situations faster than other tanks | + | With this tank, one of the most suitable strategies is to snipe. You have two ammunition options, APCBC with extra penetration or APCBC with explosive filler, both being devastating (105 mm shells create a lot of spalling). Find a suitable spot, try to expose only the turret, and deal with enemies coming at you. Most enemies will hopelessly shoot at your mantlet, some players will exploit your weak spots on the turret or may have high penetration HEATFS or APDS (uptiers are very dangerous for this tank and should play much more defensively). Your reload time is considerably long, so staying behind cover is the best thing possible when reloading. Your reverse speed thankfully lets you get away from a lot of dangerous situations faster than other tanks. |
| − | Despite having imperfect armour and notable weak spots, a lot of enemies in a downtier won't know how to penetrate with such a big target (only | + | Despite having imperfect armour and notable weak spots, a lot of enemies in a downtier won't know how to penetrate with such a big target (only 3 weak spots presented, both hull cheeks and turret upper front, with the trap shot being a matter of luck) and planes won't have an easy time damaging the M6A2E1 with their cannons. Use that to your advantage should it come to close quarters combat, aim the gun at them, facing your hull towards them, and whatever you do, don't stay still, wiggle your hull left and right to increase chances of ricochet to ensure survival. |
| − | |||
| − | |||
| − | |||
| − | |||
It could be said that the M6A2E1's role is similar to that of its younger brother the [[M6A1]], with the exception that the turret is stronger, is slightly slower and, although with fewer guns, it has a really hard hitting one on the turret, it can take a few lucky hits and punish those who cross its path from long ranges. | It could be said that the M6A2E1's role is similar to that of its younger brother the [[M6A1]], with the exception that the turret is stronger, is slightly slower and, although with fewer guns, it has a really hard hitting one on the turret, it can take a few lucky hits and punish those who cross its path from long ranges. | ||
| − | |||
| − | |||
| − | |||
| − | |||
=== Pros and cons === | === Pros and cons === | ||
| Line 171: | Line 183: | ||
* Powerful 105 mm gun with access to APCBC, both with and without explosive filler, and APCR shells | * Powerful 105 mm gun with access to APCBC, both with and without explosive filler, and APCR shells | ||
| − | * Extremely thick | + | * Extremely thick turret, stops shells, only APDS and HEATFS rounds pose a threat |
| − | |||
* Has a reverse gearbox, can go same speed backwards as forwards | * Has a reverse gearbox, can go same speed backwards as forwards | ||
| + | * Decently spaced crew, HEATFS hit to the hull will usually mean only losing one crew member | ||
| + | * Despite the weak spots, front hull armour stands a chance to bounce one or two shots | ||
* Good gun depression allows for hull down tactics | * Good gun depression allows for hull down tactics | ||
| − | * .50 cal | + | * .50 cal on the roof allows fending off planes and soft targets |
| − | * | + | * Can shoot from positions other tanks would never be able to thanks to its height |
'''Cons:''' | '''Cons:''' | ||
| − | * | + | * Frontal hull armour is extremely weak in some spots which even low tier tank destroyers can go through |
| + | * Hull cheeks are a weak spot and prevent effective angling | ||
| + | * Upper turret front is a weak spot | ||
* Poor top speed of 31/29 km/h (AB/RB) | * Poor top speed of 31/29 km/h (AB/RB) | ||
* Mediocre acceleration | * Mediocre acceleration | ||
| Line 189: | Line 204: | ||
== History == | == History == | ||
<!-- ''Describe the history of the creation and combat usage of the vehicle in more detail than in the introduction. If the historical reference turns out to be too long, take it to a separate article, taking a link to the article about the vehicle and adding a block "/History" (example: <nowiki>https://wiki.warthunder.com/(Vehicle-name)/History</nowiki>) and add a link to it here using the <code>main</code> template. Be sure to reference text and sources by using <code><nowiki><ref></ref></nowiki></code>, as well as adding them at the end of the article with <code><nowiki><references /></nowiki></code>. This section may also include the vehicle's dev blog entry (if applicable) and the in-game encyclopedia description (under <code><nowiki>=== In-game description ===</nowiki></code>, also if applicable).'' --> | <!-- ''Describe the history of the creation and combat usage of the vehicle in more detail than in the introduction. If the historical reference turns out to be too long, take it to a separate article, taking a link to the article about the vehicle and adding a block "/History" (example: <nowiki>https://wiki.warthunder.com/(Vehicle-name)/History</nowiki>) and add a link to it here using the <code>main</code> template. Be sure to reference text and sources by using <code><nowiki><ref></ref></nowiki></code>, as well as adding them at the end of the article with <code><nowiki><references /></nowiki></code>. This section may also include the vehicle's dev blog entry (if applicable) and the in-game encyclopedia description (under <code><nowiki>=== In-game description ===</nowiki></code>, also if applicable).'' --> | ||
| − | + | ''Describe the history of the creation and combat usage of the vehicle in more detail than in the introduction. If the historical reference turns out to be too long, take it to a separate article, taking a link to the article about the vehicle and adding a block "/History" (example: <nowiki>https://wiki.warthunder.com/(Vehicle-name)/History</nowiki>) and add a link to it here using the <code>main</code> template. Be sure to reference text and sources by using <code><nowiki><ref></ref></nowiki></code>, as well as adding them at the end of the article with <code><nowiki><references /></nowiki></code>. This section may also include the vehicle's dev blog entry (if applicable) and the in-game encyclopedia description (under <code><nowiki>=== In-game description ===</nowiki></code>, also if applicable).'' | |
| − | |||
| − | |||
| − | |||
== Media == | == Media == | ||
| Line 214: | Line 226: | ||
* ''links to approximate analogues of other nations and research trees.'' --> | * ''links to approximate analogues of other nations and research trees.'' --> | ||
| − | + | * [[M6A1]] - Heavy tank that was the basis of the {{PAGENAME}}. | |
| − | |||
| − | * [[ | ||
| − | |||
== External links == | == External links == | ||
| Line 223: | Line 232: | ||
* ''topic on the official game forum;'' | * ''topic on the official game forum;'' | ||
* ''other literature.'' --> | * ''other literature.'' --> | ||
| + | ''Paste links to sources and external resources, such as:'' | ||
| − | * | + | * ''topic on the official game forum;'' |
| + | * ''other literature.'' | ||
{{USA heavy tanks}} | {{USA heavy tanks}} | ||
{{USA premium ground vehicles}} | {{USA premium ground vehicles}} | ||
Revision as of 06:03, 15 July 2021

Contents
Description
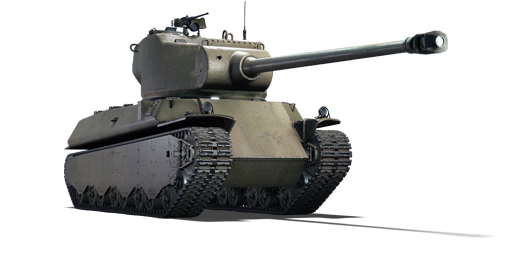
The Heavy Tank M6A2E1 is a premium gift rank American heavy tank with a battle rating of (AB), (RB), and (SB). It was introduced during Update "Ixwa Strike" as a reward for Battle Pass: Season III, "Strength athletics".
General info
Survivability and armour
Armour type:
- Rolled homogeneous armour (sideskirts, hull front - appliqué armour , hull roof - engine compartment, cupola roof)
- Cast homogeneous armour (hull, turret, gun mantlet, cupola)
| Armour | Front (Slope angle) | Sides | Rear | Roof |
|---|---|---|---|---|
| Hull | 50.4 mm (44°) + 112 mm (29°) Upper glacis 50.4 mm (46°) + 133 mm (cylindrical) Lower glacis 70 mm (26°) Corners |
58 mm (30°) Top 51 + 25.4 mm Bottom |
42 mm (16°) Top 22-105 mm Bottom |
16 - 22 mm 25.4 mm Engine compartment 5 mm Engine vents |
| Turret | 230-275 mm Turret front 133-235 mm Gun mantlet 84 mm Upper turret front |
65-89 mm | 210-230 mm Top 125-220 mm Bottom |
25-32 mm 27-31 mm Front |
| Cupola | 76.2 mm | 76.2 mm | 76.2 mm | 25.4 mm |
Notes:
- Suspension wheels are 15 mm thick, tracks are 30 mm thick, and bogies are 10 mm thick.
Mobility
| Game Mode | Max Speed (km/h) | Weight (tons) | Engine power (horsepower) | Power-to-weight ratio (hp/ton) | |||
|---|---|---|---|---|---|---|---|
| Forward | Reverse | Stock | Upgraded | Stock | Upgraded | ||
| Arcade | Expression error: Unexpected * operator. | 1,033 | Expression error: Unexpected round operator. | __.__ | |||
| Realistic | 708 | Expression error: Unexpected round operator. | __.__ | ||||
Modifications and economy
Armaments
Main armament
| 105 mm T5E1 | Turret rotation speed (°/s) | Reloading rate (seconds) | |||||||||||
|---|---|---|---|---|---|---|---|---|---|---|---|---|---|
| Mode | Capacity | Vertical | Horizontal | Stabilizer | Stock | Upgraded | Full | Expert | Aced | Stock | Full | Expert | Aced |
| Arcade | 60 | -10°/+15° | ±180° | N/A | 14.6 | 20.2 | 24.5 | 27.1 | 28.8 | 20.02 | 17.71 | 16.32 | 15.40 |
| Realistic | 10.7 | 12.6 | 15.3 | 16.9 | 18.0 | ||||||||
Ammunition
| Penetration statistics | |||||||
|---|---|---|---|---|---|---|---|
| Ammunition | Type of warhead |
Penetration @ 0° Angle of Attack (mm) | |||||
| 10 m | 100 m | 500 m | 1,000 m | 1,500 m | 2,000 m | ||
| T32 | APCBC | 256 | 253 | 238 | 221 | 205 | 190 |
| T13 | APCBC | 253 | 250 | 236 | 219 | 204 | 190 |
| T29E3 | APCR | 292 | 287 | 266 | 242 | 220 | 200 |
| T30E1 | HE | 20 | 20 | 20 | 20 | 20 | 20 |
| Shell details | |||||||||
|---|---|---|---|---|---|---|---|---|---|
| Ammunition | Type of warhead |
Velocity (m/s) |
Projectile Mass (kg) |
Fuse delay (m) |
Fuse sensitivity (mm) |
Explosive Mass (TNT equivalent) (g) |
Ricochet | ||
| 0% | 50% | 100% | |||||||
| T32 | APCBC | 914 | 17.7 | N/A | N/A | N/A | 48° | 63° | 71° |
| T13 | APCBC | 899 | 18.59 | 1.2 | 19 | 177.38 | 48° | 63° | 71° |
| T29E3 | APCR | 1,128 | 11.2 | N/A | N/A | N/A | 66° | 70° | 72° |
| T30E1 | HE | 945 | 15.2 | 0 | 0.1 | 1,550 | 79° | 80° | 81° |
Ammo racks

| Full ammo |
Ammo type |
1st rack empty |
2nd rack empty |
3rd rack empty |
4th rack empty |
5th rack empty |
Visual discrepancy |
|---|---|---|---|---|---|---|---|
| 60 | Projectiles Propellants |
49 (+11) 37 (+23) |
37 (+23) 25 (+35) |
25 (+35) 13 (+47) |
13 (+47) 1 (+59) |
1 (+59) N/A |
No |
Notes:
- The M6A2E1 uses two-piece ammunition, composed of projectiles (yellow) and propellant bags (orange). Both have separate racks.
- As they are modeled by sets of 2, projectiles and propellant bags disappear from the rack only after you fire both shells in the set.
- To keep the hull empty of ammo, pack 13 (+47) shells.
- For projectiles:
- Rack 5 is a first stage ammo rack. It totals 12 projectiles and gets filled first when loading up the tank.
- This racks is also emptied early: the rack depletion order at full capacity is: 5 - 1 - 2 - 3 - 4.
- Simply not firing when the gun is loaded will move ammo from racks 1-4 into racks 5. Firing will interrupt the restocking of the ready racks.
- For propellants:
- Rack 4 is a first stage ammo rack. It totals 12 propellant charges and gets filled first when loading up the tank.
- This racks is also emptied early: the rack depletion order at full capacity is: 4 - 1 - 2 - 3.
- Simply not firing when the gun is loaded will move ammo from racks 1-3 into racks 4. Firing will interrupt the restocking of the ready racks.
Machine guns
| 12.7 mm M2HB | ||||
|---|---|---|---|---|
| Mount | Capacity (Belt) | Fire rate | Vertical | Horizontal |
| Pintle | 600 (200) | 577 | -10°/+50° | ±120° |
| 7.62 mm M1919A4 | ||||
|---|---|---|---|---|
| Mount | Capacity (Belt) | Fire rate | Vertical | Horizontal |
| Coaxial | 4,000 (250) | 500 | N/A | N/A |
Usage in battles
When driving the M6A2E1, one will easily notice the tank's turret is near indestructible: it can resist many shots as long as they aren't aimed at a trap shot or to the upper turret. The hull, however, isn't as indestructible: it may bounce a shot or two but it's not really reliable, especially with weak hull cheeks that any shot with explosive filler will instantly penetrate.
The M6A2E1 can do reasonably well in not extremely uneven terrain thanks to the depression angle of -10° and the tank's height can also be beneficial for shooting over cover that other vehicles wouldn't be able to, sometimes taking enemies by surprise.
With this tank, one of the most suitable strategies is to snipe. You have two ammunition options, APCBC with extra penetration or APCBC with explosive filler, both being devastating (105 mm shells create a lot of spalling). Find a suitable spot, try to expose only the turret, and deal with enemies coming at you. Most enemies will hopelessly shoot at your mantlet, some players will exploit your weak spots on the turret or may have high penetration HEATFS or APDS (uptiers are very dangerous for this tank and should play much more defensively). Your reload time is considerably long, so staying behind cover is the best thing possible when reloading. Your reverse speed thankfully lets you get away from a lot of dangerous situations faster than other tanks.
Despite having imperfect armour and notable weak spots, a lot of enemies in a downtier won't know how to penetrate with such a big target (only 3 weak spots presented, both hull cheeks and turret upper front, with the trap shot being a matter of luck) and planes won't have an easy time damaging the M6A2E1 with their cannons. Use that to your advantage should it come to close quarters combat, aim the gun at them, facing your hull towards them, and whatever you do, don't stay still, wiggle your hull left and right to increase chances of ricochet to ensure survival.
It could be said that the M6A2E1's role is similar to that of its younger brother the M6A1, with the exception that the turret is stronger, is slightly slower and, although with fewer guns, it has a really hard hitting one on the turret, it can take a few lucky hits and punish those who cross its path from long ranges.
Pros and cons
Pros:
- Powerful 105 mm gun with access to APCBC, both with and without explosive filler, and APCR shells
- Extremely thick turret, stops shells, only APDS and HEATFS rounds pose a threat
- Has a reverse gearbox, can go same speed backwards as forwards
- Decently spaced crew, HEATFS hit to the hull will usually mean only losing one crew member
- Despite the weak spots, front hull armour stands a chance to bounce one or two shots
- Good gun depression allows for hull down tactics
- .50 cal on the roof allows fending off planes and soft targets
- Can shoot from positions other tanks would never be able to thanks to its height
Cons:
- Frontal hull armour is extremely weak in some spots which even low tier tank destroyers can go through
- Hull cheeks are a weak spot and prevent effective angling
- Upper turret front is a weak spot
- Poor top speed of 31/29 km/h (AB/RB)
- Mediocre acceleration
- Tall profile, huge target
- Long reload time
- Trap shot on the turret that can easily take out the entire crew in a single hit
History
Describe the history of the creation and combat usage of the vehicle in more detail than in the introduction. If the historical reference turns out to be too long, take it to a separate article, taking a link to the article about the vehicle and adding a block "/History" (example: https://wiki.warthunder.com/(Vehicle-name)/History) and add a link to it here using the main template. Be sure to reference text and sources by using <ref></ref>, as well as adding them at the end of the article with <references />. This section may also include the vehicle's dev blog entry (if applicable) and the in-game encyclopedia description (under === In-game description ===, also if applicable).
Media
- Skins
- Images
.jpg)
- Videos
See also
- M6A1 - Heavy tank that was the basis of the M6A2E1.
External links
Paste links to sources and external resources, such as:
- topic on the official game forum;
- other literature.
| USA heavy tanks | |
|---|---|
| M4 Jumbo | M4A3E2 · Cobra King · M4A3E2 (76) W |
| M6 | M6A1 · T1E1 · T1E1 (90) · M6A2E1 |
| T26 | T26E1-1 · T26E5 |
| T29/30/34 | T29 · T30 · T34 |
| T32 | T32 · T32E1 |
| M103 | M103 |
| Others | T14 |
| USA premium ground vehicles | |
|---|---|
| Light tanks | LVT(A)(4) · M2A4 (1st Arm.Div.) · M3A1 (USMC) · ▃Stuart VI (5th CAD) · M8 LAC · M8A1 GMC |
| M18 "Black Cat" · Super Hellcat · T18E2 · M551(76) · T114 · M1128 Wolfpack | |
| Medium tanks | ▃Grant I · M4A5 · Calliope · T20 · M26 T99 · M26E1 · M46 "Tiger" · T54E1 · T54E2 · ▃Magach 3 (ERA) · M728 CEV |
| XM1 (GM) · XM1 (Chrysler) · M1 KVT · M1A1 Click-Bait | |
| Heavy tanks | T14 · Cobra King · M6A2E1 · T29 · T30 |
| Tank destroyers | T28 · T55E1 |
