SU-85M
| This page is about the Soviet tank destroyer SU-85M. For the other version, see SU-85. For the open-topped SPG, see SU-85A. |
Contents
Description
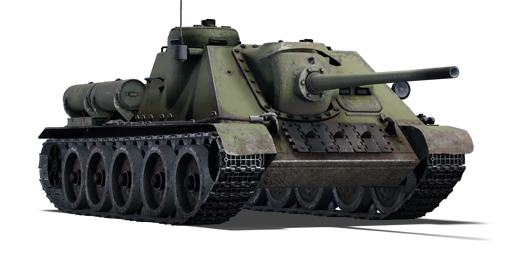
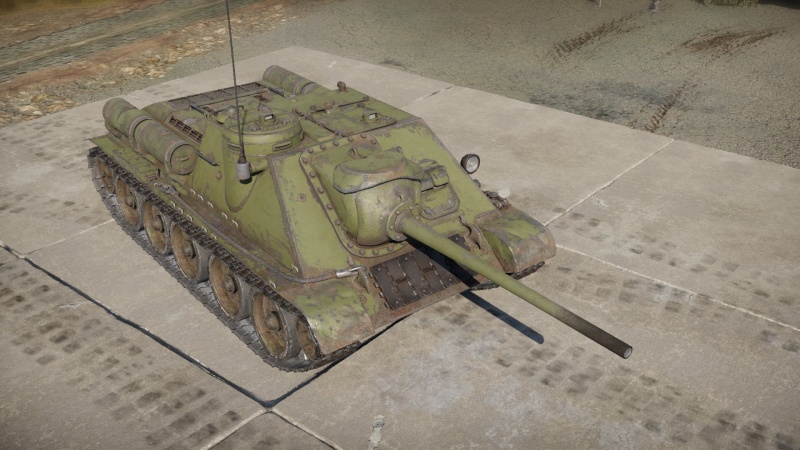
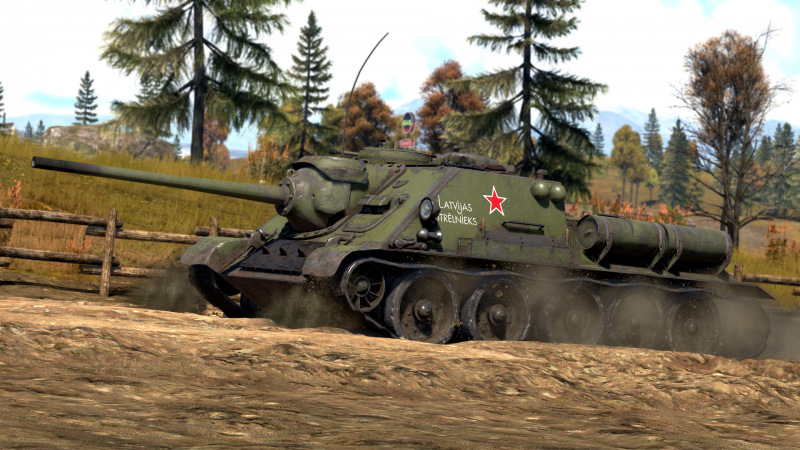
The SU-85M was an improved design (rather than a separate variant) of the SU-85 self-propelled gun used by the Soviets during World War II. It has slightly thicker frontal armour and a better commander cupola. There were 315 units built in total.
Introduced in the Closed Beta Test for Ground Forces before Update 1.41, the SU-85M should be played as a long-range sniper due to its powerful gun. Its lack of a turret makes it unsuitable for close-quarters combat, even with the thickness of its frontal armour increased compared to SU-85. Moreover, the protection gain is negligible due to the advent of more advanced enemies. It is therefore not a good idea to be close to the front lines. To increase the effectiveness of armour, players should stay behind the main fighting zone and eliminate enemy targets from far away, making the best use of long-distance and low silhouettes to enhance survivability.
General info
Survivability and armour
The SU-85M sees a great improvement on the upper front plate than the preceding SU-85, from 45 mm to 75 mm. Thanks to this the SU-85M can now frontally resist medium-penetrating tanks such as the Jagdpanzer 38(t), M24, and even the long 76 mm M4A2 or M4A3, significantly boosting its survivability. However larger cannons can still go through it easily, like the Sturer Emil, the M36, the Tiger II (P), etc. Also, the SU-85M has several frontal weak spots that can be penetrated by most tanks, such as the driver optics and hatch, some parts of the gun mantlet, and of course, the commander's cupola which is only 45 mm thick, unsloped.
As before, the SU-85M can be angled to the left to increase chance of a bounce and give it a chance against shells of tanks like the Tiger H1 or even ignore many tanks of lower BR at point blank range. Unfortunately, tall tanks like the Panther A have enough of an edge over the SU-85M to penetrate upper part of the hull regardless and even at extreme range and high ground there still is a possibility of being hit directly into commander cupola which has poor armour. Still, angling sometimes makes them flinch and fail the shot and may make them damage gun breech or take out the commander and/or the loader instead of the gunner and the driver, allowing SU-85M to fire back at them again, retreat or ram them to allow teammates to finish them off. For the same reason it is better to keep distance from intense firefights, as there is no telling when your luck will run out.
The post-penetration survivability is very poor due to the cramped interior, an explosive AP shell is likely to knock out 2 to 4 crew members. Against solid AP shells the SU-85M can survive a few penetrations, but explosive shells are still more common. A penetration on the left side is generally fatal regardless of a mode, since all 3 crucial crew members are sitting in a straight line, which is why angling is a reasonable strategy even if it does little more than inconvenience SU-85M opponents.
Armour type:
- Rolled homogeneous armour (Hull, superstructure)
- Cast homogeneous armour (Gun mantlet, driver's hatch)
| Armour | Front (Slope angle) | Sides | Rear | Roof |
|---|---|---|---|---|
| Hull | 75 mm (52°) Front glacis 45 mm (60°) Lower glacis |
45 mm Bottom 45 mm (41°) Engine compartment |
45 mm (49°) Upper glacis 45 mm (49°) Lower glacis |
20 mm 20 + 10 mm Engine vents |
| Superstructure | 75 mm (52°) Front glacis 70 mm (52°) Driver's hatch 75 + 75 mm (spherical) Gun mantlet |
75 mm Gun mantlet 45 mm (19°) 45 mm (cylindrical) Cupola well |
45 mm 20 mm Rear hatch |
20 mm |
| Cupola | 45 mm (cylindrical) | 20 mm | ||
Notes:
- Suspension wheels and tracks are 20 mm thick.
- Mudguards and fuel barrels are not modeled as armour.
Mobility
| Game Mode | Max Speed (km/h) | Weight (tons) | Engine power (horsepower) | Power-to-weight ratio (hp/ton) | |||
|---|---|---|---|---|---|---|---|
| Forward | Reverse | Stock | Upgraded | Stock | Upgraded | ||
| Arcade | Expression error: Unexpected * operator. | 710 | Expression error: Unexpected round operator. | __.__ | |||
| Realistic | 442 | Expression error: Unexpected round operator. | __.__ | ||||
Being based on a T-34 chassis, the mobility of the SU-85M also feels similar to the T-34-85. The top speed of 55 km/h and a powerful 500 hp engine allow it to manoeuvre around the battlefield quite easily, though it might sometimes feel sluggish when accelerating, especially with stock engine modifications. Its wide tracks greatly improve the handling on muddy or soft terrains, giving it great off-road mobility. The hull traverse speed is adequate for quick turns in an urban environment or keeping up with a flanker, but often a forward acceleration is needed to turn the hull quicker. The reverse speed, however, is only -8 km/h on average which can get the player killed as it prevents the SU-85M from retreating back to safety quickly.
Modifications and economy
Armaments
Main armament
The SU-85M is armed with the 85 mm D-5S cannon, similar to the one used by the famous T-34-85. Just like the T-34's cannon, the D-5S comes with a variety of shells for different scenarios, including APHE, APCR and HE. These shells are all very capable of penetrating common opponents (e.g. Tiger H1, Chi-Ri, Pz.IV 70) at an appropriate distance, and the damage of the APHE shells are one of the best.
However, the SU-85M's firepower is greatly limited by the traverse angles. The insufficient gun depression of only -3 degrees is very restricting, it is even worse than the SU-85 and T-34-85, preventing the SU-85M from combating in a hilly battlefield. The aiming speed of the gun is also not fast, meaning it can be vulnerable to flankers and fast targets. Lastly, just like most tanks at this stage, the SU-85M is aimed by a gunsight whose magnification tops at 3.5x which is not helpful for long range engagements.
| 85 mm D-5S | Turret rotation speed (°/s) | Reloading rate (seconds) | |||||||||||
|---|---|---|---|---|---|---|---|---|---|---|---|---|---|
| Mode | Capacity | Vertical | Horizontal | Stabilizer | Stock | Upgraded | Full | Expert | Aced | Stock | Full | Expert | Aced |
| Arcade | 60 | -3°/+20° | ±8° | N/A | 7.0 | 9.8 | 11.8 | 13.1 | 13.9 | 9.62 | 8.51 | 7.84 | 7.40 |
| Realistic | 4.8 | 5.6 | 6.8 | 7.5 | 8.0 | ||||||||
Ammunition
| Penetration statistics | |||||||
|---|---|---|---|---|---|---|---|
| Ammunition | Type of warhead |
Penetration @ 0° Angle of Attack (mm) | |||||
| 10 m | 100 m | 500 m | 1,000 m | 1,500 m | 2,000 m | ||
| BR-365K | APHE | 148 | 143 | 126 | 106 | 90 | 77 |
| BR-365A | APHEBC | 135 | 133 | 124 | 114 | 104 | 95 |
| BR-365P | APCR | 195 | 187 | 154 | 122 | 96 | 76 |
| O-365K | HE | 19 | 18 | 17 | 16 | 15 | 14 |
| Shell details | ||||||||||||
|---|---|---|---|---|---|---|---|---|---|---|---|---|
| Ammunition | Type of warhead |
Velocity (m/s) |
Projectile mass (kg) |
Fuse delay (m) |
Fuse sensitivity (mm) |
Explosive mass (TNT equivalent) (g) |
Ricochet | |||||
| 0% | 50% | 100% | ||||||||||
| BR-365K | APHE | 792 | 9.2 | 1.2 | 14 | 77 | 47° | 60° | 65° | |||
| BR-365A | APHEBC | 792 | 9.2 | 1.2 | 14 | 164 | 48° | 63° | 71° | |||
| BR-365P | APCR | 1,050 | 4.99 | - | - | - | 66° | 70° | 72° | |||
| O-365K | HE | 785 | 9.54 | 0.2 | 0.1 | 741 | 79° | 80° | 81° | |||
Ammo racks

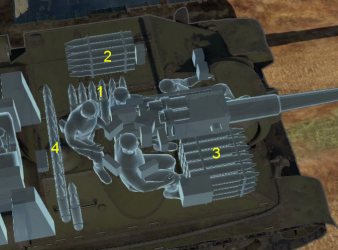
| Full ammo |
1st rack empty |
2nd rack empty |
3rd rack empty |
4th rack empty |
Visual discrepancy |
|---|---|---|---|---|---|
| 60 | 46 (+14) | 31 (+29) | 12 (+48) | 1 (+59) | No |
Notes:
- Racks disappear after you've fired all shells in the rack.
- Flanks and front hull empty: 13 (+47) shells.
Usage in battles
As a tank destroyer, the SU-85M's job is to hunt down and ambush tanks and destroy them. When aiming at a tank, prioritize the area the enemy gunner sits at as if the first shot does not completely destroy the enemy vehicle, the downed gunner forces the enemy to fallback as the SU-85M goes through the lengthy reload time.
Do not attempt to brawl with this vehicle as it is unsuited for mobile, frontal assaults due to the fixed gun traverse and height differences. Keep calm and wait for the enemy to roll into the gun sights instead so while the enemy panics upon the sight of the tank destroyer, the SU-85M can use this time to aim for a good hit.
Heavy tanks and medium tanks should be engaged with caution due to their lethality against the SU-85M's armour. Heavy tanks are a concern as some have enough armour and/or angling to prevent a reliable penetration by the 85 mm, like the M4A3E2 (76) W Jumbo, IS-1, IS-2, and Tiger I. Have them distracted against teammates first and attack them when they lose focus, as otherwise they will immediately take defensive stance against you. While they are engaged against teammates or otherwise distracted, aim the 85 mm onto weak points on their front armour, or flank around and attack them on their side armour. Though most medium tanks will be able to be destroyed by an 85 mm shot, some medium tanks with angled armour could resist the 85 mm shot by a high degree such as Panthers.
Enemies worth noting:
Panther A/D - The Panthers are one of the most common tanks around BR 5.7, and they pose a great threat with their deadly long 75 mm cannon, tall profile, thick sloped frontal armour and adequate speed. You want to avoid engaging them at long range as the SU-85M has only x3.5 scope magnification, making long-range shooting super hard. Engage the Panthers within 500 m and avoid shooting their frontal hull, unless you have high ground. Their biggest weak spot is the gun mantlet, which is only 100 mm thick and has a flat part in the middle. That is where you want to aim at, the SU-85's APHE has sufficient damage to destroy half of the Panther crew even from its turret. The second weak spot is the sides, which more often than not instantly destroys the vehicle. Generally, APHE is enough to deal with the Panthers, and no APCR is needed. The APHE shell loves to chew through the Panther's thin side armour, even if it's a bit angled.
Tiger H1/E - The Tiger's weak spots are the opposite with the Panthers. Their hull is flat and rather thin, while the gun mantlet is weirdly shaped and can absorb quite some shells. The best engaging range remains the same, within 500 m. If the Tiger is angling, aim at the turret ring to disable the gunner and destroy the turret traverse, or aim at the hull side below the side skirt, which is only 60 mm. If it is not angling, aim between the driver's vision port and the MG for an instant kill. Avoid shooting at these two parts as they will bounce/absorb shells every time. For the Tiger E, don't shoot at the lower glacis as there will be add-on tracks installed there, making it harder to penetrate. Its transmission will also absorb all damage. when the situation demands you to get hit, angle or wiggle your tank as the SU-85M surprisingly can block the short 88.
Panzer IV/70, Jagdpanzer 38(t) - These small tank destroyers with their well-angled frontal armour can be quite a problem from a distance. With APHE, you can disable their transmission by shooting at their lower glacis. Now if you can, flank them. The 85 mm APHE does a great job at penetrating sloped, thin armour, so you don't have to get to their absolute sides. For the Pz IV/70, you can also aim at the downward part of the gun mantlet since the shell might ricochet downwards into the hull, knocking out every crew member. The Jagdpanzer 38(t) doesn't have this problem, so side-shooting is required to destroy it effectively.
M4A3E2 (76) W - Engage with caution. The 76 mm could penetrate through the front hull with ease at average combat ranges. The front hull armour is impervious to APCR in most cases and will block APHE shots if angled correctly. Focus on weak spots such as the lower side armour and the turret ring, or even the shot trap on the lower sections of the gun mantlet. Attack from high ground to negate its angled armour or destroy the cannon and rush it down, if you must.
Sturer Emil - Picking a long-range fight with a Sturer Emil from the front is suicide, the Emil's 128 mm will reach and penetrate the SU-85M before it is in position to fire back. Only engage if certain the Emil is unaware of the SU-85M's presence on its flanks, or point it out to allies for more mobile friendlies to engage and destroy it. Allies could also divert its attention from the SU-85M to allow for an 85 mm shot into the thin armour on it. If you have to attack it head-on, load HE and pray to fire first, as the Sturer Emil can destroy the SU-85M in one hit. If a hit was successful, it will lose most of its crew (which should be enough for it to count as dead in RB), after this attempt to move out of its gun range and finish it off if it's still alive.
Nashorn: Same as the Sturer Emil, but this tank does not have a chance to survive an HE shell and it moves much faster.
M10, M18 and M36 - If you can, load HE before engaging them to obliterate them in one hit anywhere, as they a tendency to survive APHE shots and are way too dangerous to SU-85M to be left alive. If you have APHE loaded, aim for the turret or the middle of the tank. Watch out for a flanking M18, always have a teammate around to deal with it. Do not try to tank a hit from M36, the SU-85M cannot survive its potent 90 mm.
Pros and cons
Pros:
- Modest upper frontal plate protection can sustain shots from short tanks, even at closer ranges if angled
- 85 mm gun is effective against most vehicles with its adequate penetration and destructive damage
- Access to BR-365P APCR to penetrate tougher tanks
- Upgraded APHE offers higher knock-out potential
- Good speed of 40 km/h with great manoeuvrability on most angles and surfaces
- Low silhouette
Cons:
- Vulnerable to tall tanks like the Panther A and needs high ground and long range or high user skill to beat them on equal elevation, as they often also can deflect its shells at random
- Driver hatch and area around cupola are weak spots that often can be penetrated by German and Japanese tanks even when angling
- Penetration on the left side is always fatal, very vulnerable to HEAT and other special shells for this reason
- -3 degrees gun depression is painful, cannot aim down even on a gentle slope, the SPG will have to unangle and expose itself to attack downwards at close to medium range
- Cannon turns slowly enough for an enemy to jump out from the opposite direction, aim and do a close range shot (from 250 m) before the SU-85M can return fire accurately
- Comes without a turret, making it vulnerable in certain situations (but also less visible)
- Very average reverse speed of -9 km/h
- Reload can be too long for what the SU-85M must face, so fights should be picked carefully
History
Development
The development for this vehicle began in 1943 to supplement the firepower the T-34 and KV-1 has. Before then, the T-34 and KV-1 tanks are more than adequate to deal with the German Panzer forces, but by the end of 1942, the appearance of the Tiger I revealed that the German armoured forces were becoming more developed and more armoured. This reveal showed the Red Army that needed better guns in order to deal with the rising threat of these new German vehicles.
The search for a better gun led to the development of the D-5 85 mm gun, which was a modified anti-aircraft gun made by design bureaus of Vasiliy Grabin and Fyodor Petrov. It was found that the new gun was unable to be mounted on the current T-34 or KV-1, so it was to be mounted as a self-propelled gun like the SU-122, which is a self-propelled gun made on a T-34 chassis. The vehicle to be produced was designated the SU-85 and was similar to the SU-122, just replacing the 122 mm gun with an 85 mm one. The gun that was to be mounted in the self-propelled configuration was designated the D-5S (S for self-propelled) and the vehicle was produced at the Uralmash factory. Modifications were made overtime during its production such as a telescopic sight and a new ball gun mantlet, these modified vehicles were designated the "SU-85-II". Up to 2,050 units were produced from mid-1943 to late 1944.
Combat usage
The SU-85 saw service in August 1943 in Soviet service, which coincides the time the Soviets engage in a counteroffensive against the Battle of Kursk. It was praised for its low profile to be able to conceal itself and its excellent mobility. The initial production batch had low visibility due to lack of optics, with only four periscopes in the design, but this was improved on the SU-85M with a commander's cupola seen on the later variants of the T-34. The 85 mm gun was able to destroy a Tiger tank from 1,000 m out, proving much capable against the newer German tank designs. Though capable, its firepower was still seen as lacking considering the Tiger could still destroy it and T-34s from up to 2,000 m away. The lack of range on the SU-85, plus the up-arming of T-34s from the 76.2 mm F-34 gun to the same 85 mm gun as well in the T-34-85 caused the production of the SU-85 to be cancelled in late 1944 as it no longer provided any beneficial firepower over the standard tank unit.
Even after it was retired from Soviet service, replaced by the more powerful SU-100, it was exported to Soviet allies in the Warsaw Pact after World War II. The SU-85s were either kept as tank destroyers or converted into armour recovery or command vehicles. These vehicles saw service in North Korea, Vietnam, and may still be in service today by Central European countries like Albania, Bulgaria, Yugoslavia, and Romania.
| Archive of the in-game description | |
|---|---|
|
The increasing armour thickness of the enemy's new heavy tanks necessitated a more powerful SPG. A newly planned 100 mm weapon was being reworked. So in July 1944, the 85 mm D-5-S85 cannon was installed in a newly designed SPG cabin with thicker 75 mm frontal armour, a spacious fighting compartment and a command cupola. This SPG was designated SU-85M and was produced until December 1944. The vehicle, equipped with a new gun mantlet, fired at a rate of 6-8 shots per minute. Its elevation angle was -5° to +25°, and its traversing angle was 20° (up to 10° to each side). In contrast to the SU-85, the vehicle's ammunition capacity was increased to 60 shells. The SPG's crew used PPSh submachine guns and F-1 hand grenades for self-defence. In 1944, 315 SU-85M SPGs were manufactured in total. The SPGs were used as cover for medium tanks and to offer them fire support when necessary. They were able to quickly move around the front both defensively and offensively. In defence, SU-85s often made use of ambush tactics. The vehicles hid at convenient distances along the enemy tanks' path and, letting them approach to within 300-600 m, opened precision fire. Before T-34-85 tanks went into mass production, this SPG was the primary means of effective battle against German tanks and played the important role of a mobile tank destroyer in the Red Army. Captured SPGs of this type were used by the Wehrmacht. There were entire regiments of tank destroyers consisting of these vehicles - the 23rd Tank Division, for example. SU-85 and SU-85M SPGs were put into service in the Polish Army. In spite of all the SPG's advantages, its firepower was insufficient to combat enemy heavy tanks at long ranges. | |
Media
- Skins
- Videos
See also
- Vehicles equipped with the same chassis
- Other vehicles of similar configuration and role
External links
| USSR tank destroyers | |
|---|---|
| SU-76M | SU-76M · SU-76M (5th Gv.Kav.Corps) · SU-85A |
| SU-57B | SU-57B · SU-76D |
| T-34 Derivatives | SU-122 · SU-85 · SU-85M · SU-100 · SU-122P |
| Heavy Tank Derivatives | SU-100Y · ISU-122 · ISU-122S · SU-152 · ISU-152 · Object 268 |
| SU-100P and Derivatives | SU-100P · Object 120 |
| Wheeled | YaG-10 (29-K) |
| Airborne | ASU-57 · ASU-85 |
| Rocket | BM-8-24 · BM-13N · BM-31-12 |
| ATGM | IT-1 · Shturm-S · Object 775 · Khrizantema-S |
| Artillery | 2S1 · 2S3M |
| Other | SU-5-1 · ZiS-30 · SU-122-54 |
| USA | SU-57 |


