Campania
| Game Modes | ||||
|---|---|---|---|---|
Contents
Overview
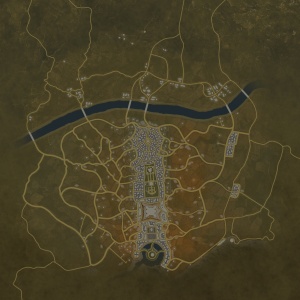
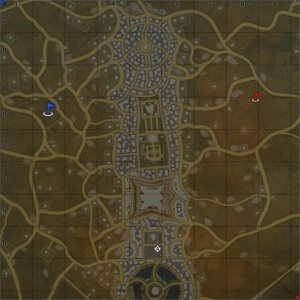
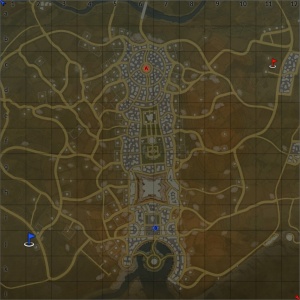
Campania is a ground forces map available in all modes. It was originally added in Update 1.79 "Project X" under the name Italy, but was revised and reintroduced in Update "Starfighters" under its present name. The map is set in the mountains of southern Italy. The map has four distinct areas, the areas to the east-west of the town, the main town itself, and the area to the north of the town. Outside of the main town, most buildings are destructible.
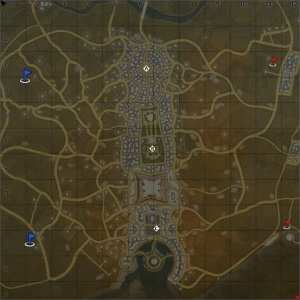
The predominant feature of the map is the large rectangular town. It stretches from near the map's southern border, up the centre of the map, until just over halfway from the bottom of the map. The town itself is made up of several different areas and consists of traditional Italian styled buildings. The roads are fairly wide and the area between buildings often forms courtyard like areas, with tables and stall set up within them; players can use these areas to work their way around the town while avoiding the roads. Houses and building flank both sides if the town, while there are often open areas and other buildings in the middle of the two sides.
In the south of the town, there is an island with a shrine-like structure, surrounded by statues, on it. The island is at a significantly lower elevation than the surrounding town and is accessed by three roads, curving down towards the island, one from the east, one from the west, and one from the north. The south of the town forms an arc around the island. To the north of the island is an open area, with a few small parks, and a fairly large church. North of that area there is a large fort, sat atop a rocky hill, overlooking the entire town, players cannot climb this hill, or access the fort. There is a noticeable drop in the elevation of the terrain, between the south and north faces of the fort. North of the fort, there is an ornate garden area, with a large villa to the north of it, the terrain in the garden is lower than that in the surrounding town. North of the villa there is another garden area and then a small castle. North of the castle there is a statue, atop a tall column; a wide avenue leads from the statue north, into a market area. In the north of the town, the buildings are denser; they are laid out in a circle around a market area, with a fountain at its centre.
The area to the west of the town is fairly barren, with sparsely placed houses. The terrain is uneven with gentle hills and dips in the terrain. Coupled with patches of rock, this helps stop people in the town from dominating the spawn areas. The area to the east of the town is similarly sparse, with uneven terrain. There are however a couple of small towns in the east, away from the main town.
A river runs across the map, north of the main town. There is a single bridge and another of crossing points which can be used to cross the river. Terrain north of the river drops away sharply; this area is lacking detail compared to the rest of the map, and there are many visual glitches. Despite this area being included in the full minimap, it is not playable in normal battles. This suggests it is ever not finished or was never intended to be played on.
The full tank battles map (including the unplayable north) is 4km x 4km, see the table below for the restricted size available in each game mode. The air battles map is 65km x 65km.
| Game Mode | AB | RB | SB |
|---|---|---|---|
| Domination | 1.9 km x 1.9 km | 2.4 km x 2.4 km | 2.4 km x 2.4 km |
| Conquest #1 | 1.9 km x 1.9 km | 1.9 km x 1.9 km | 1.9 km x 1.9 km |
| Conquest #2 | 1.9 km x 1.9 km | 2.4 km x 2.4 km | 2.4 km x 2.4 km |
| Conquest #3 | 1.9 km x 1.9 km | 1.9 km x 1.9 km | 1.9 km x 1.9 km |
| Battle | 1.9 km x 1.9 km | 2.4 km x 2.4 km | 2.4 km x 2.4 km |
Historical Background
The map location for Ground Battles is inspired by the city of Lazzaro, that is located near Reggio Calabria, but the map itself is located in another place. Not in the Calabria region, but in the Campania region. At the moment, the Ground Forces map is located on Cava de'Tirreni, a city very near to Salerno, that is 70 km away more or less from Naples, where the Operation Avalanche took place.
After Operation Husky and Operation Baytown, General Dwight D. Eisenhower decided, at Québec, with Mark Clark, the chief of the Fifth Army, the approval of the landing at Salerno, on September 9th, 1943. The plan was to establish a bridgehead at Salerno, with the main purpose of conquering the very important port of Naples, a city near the Mount Vesuvius (which erupted in 1944). On the other side, the Germans were under heavy pressure. Albert Kesselring thought that the landing could take place at Salerno, where German troops were well placed. However, Kesselring was in need of reinforcements, but they were denied by Jodl's 10th Army and by the Heeresgruppe B. Even if there weren't reinforcements, Kesselring was well placed at Salerno, and with the help of Vietinghoff, he organized improvement of the defences of Salerno and surroundings.
On September 9th, 1943, the landing began, 170.000 troops (British and American troops divided into 7 divisions) conquered Montecorvino Airfield, Salerno and Cava de'Tirreni (in this last case with the help of the Rangers) in less than 3 days. The heavy German reaction arrived on September 12th 1943, when Vietinghoff got the opportunity to attack Allied Forces. 5th Army suffered heavy losses, and Mark Clark considered the re-embark. But on September 14th 1943 Harold Alexander, the chief of the British 15th Army Group ordered to Montgomery (that was in Calabria), to advance immediately towards Salerno. On September 15th reinforcements arrived and on September 16th there was the last German attack with the "Hermann Göring" Division, but it failed and Kesselring ordered the general retreat, direction Gustav Line. On September 18th 1943, the fighting ended.
Salerno was conquered, but not Naples. On September 21st, Harold Alexander decided with Mark Clark the plane to advance towards the Volturno river. 5th Army had to conquer Naples and its port, but the advancing was very difficult: rain and mud slowed the operation, and Kesselring used his delaying strategies to slow down the Allied. But at the end, on October 1st 1943, 5th Army entered in Naples, a city devastated by air raids, but with no German soldiers. In fact, between September 27th→30th 1943, Neapolitan rebelled to the German in the famous "Four Days of Naples". Naples was the first European city to rebel against German occupations, and for this, the city and the population were rewarded with the Gold Medal for Military Valor(similar to the American Medal of Honor).
Map configuration
Domination
There are three capture points. The battle area is restricted to the area of the map south of the river. Point A is in the market area in the north of the town, B is in the centre of the town, and C is just south of the church in the south of the main town.
Conquest
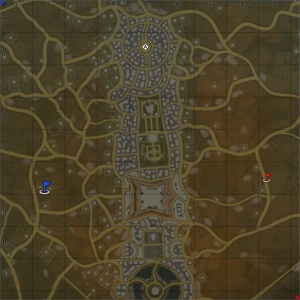
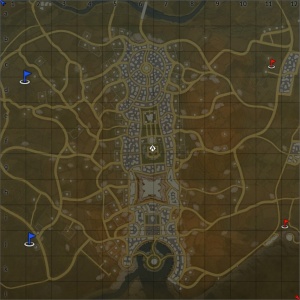
There are three configurations of the conquest mode, each with one capture point. The Conquest #1 battle area is in the south of the map, with the capture point in the market area, in the north of the town. In Conquest #2 the battle area is in the south of the map, with the capture zone, in the centre of the town. Finally, in the Conquest #3 configuration, the battle area is in the south of the map, with the capture point just south of the church in the south of the main town.
Battle
There are two capture points, each owned by one of the teams. The battle area is in the south of the map. The capture points are located just south of the church in the south of the main town, and in the open market area in the north of the main town.
Strategy
When you spawn in the southern spawn point, go to the C point. C is easily defendable with only a few streets leading into it and very few people will go there. When you have some teammates, guard the roads leading into the cap and watch out for the north flank, as some enemies will come from B.
Media
Excellent additions to the article would be video guides, screenshots from the game, and photos.
See also
Links to the articles on the War Thunder Wiki that you think will be useful for the reader, for example:
- reference to related locations;


