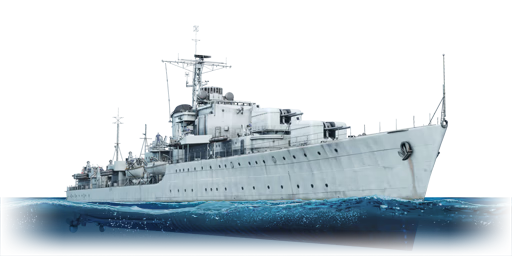
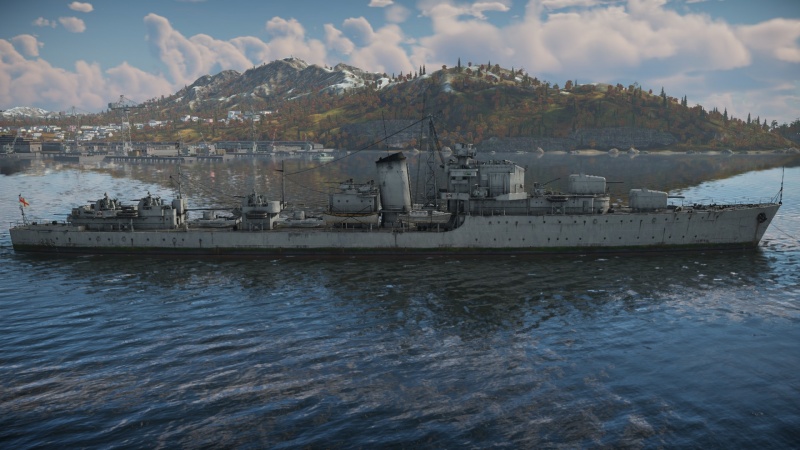
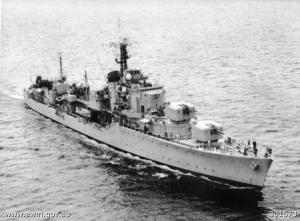
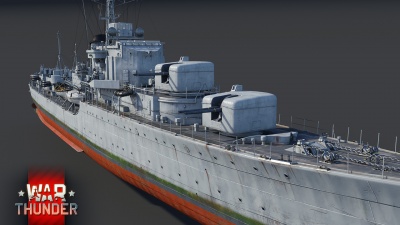
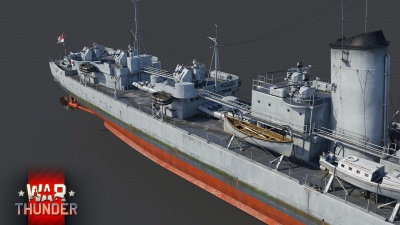
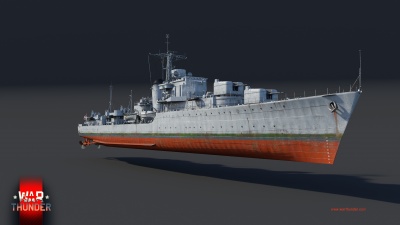
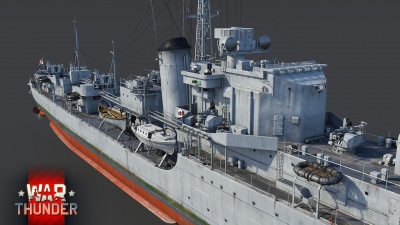
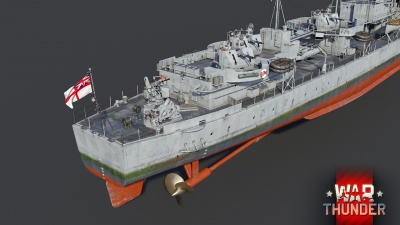
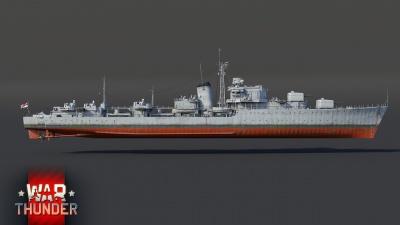
HMAS Tobruk
Contents
Description
The Battle-class, HMAS Tobruk (D37), 1950 is a rank British destroyer with a battle rating of (AB), (RB), and (SB). It was introduced in Update 1.95 "Northern Wind".
General info
Survivability and armour
HMAS Tobruk possesses light plating around her primary and anti-air magazines and thin layers of anti-fragmentation protection guard the rangefinder, bridge, 4.5 in and 40 mm turrets, as well as barbettes. This armour will resist destroyer calibre HE rounds and falter against anything heavier. In addition, Tobruk's magazines are not fully situated under the waterline, and are thus vulnerable to direct fire from enemy ships.
Mobility
Write about the ship's mobility. Evaluate its power and manoeuvrability, rudder rerouting speed, stopping speed at full tilt, with its maximum forward and reverse speed.
| Mobility Characteristics | |||
|---|---|---|---|
| Game Mode | Upgrade Status | Maximum Speed (km/h) | |
| Forward | Reverse | ||
| AB | |||
| Upgraded | |||
| RB/SB | |||
| Upgraded | |||
Modifications and economy
Armament
Primary armament
Provide information about the characteristics of the primary armament. Evaluate their efficacy in battle based on their reload speed, ballistics and the capacity of their shells. Add a link to the main article about the weapon: {{main|Weapon name (calibre)}}. Broadly describe the ammunition available for the primary armament, and provide recommendations on how to use it and which ammunition to choose.
| Penetration statistics | |||||||
|---|---|---|---|---|---|---|---|
| Ammunition | Type of warhead |
Penetration @ 0° Angle of Attack (mm) | |||||
| 1,000 m | 2,500 m | 5,000 m | 7,500 m | 10,000 m | 15,000 m | ||
| 4.5 inch HE | HE | 28 | 28 | 28 | 28 | 28 | 28 |
| 4.5 inch SAP | SAP | 117 | 100 | 77 | 61 | 50 | 41 |
| 4.5 inch HE-TF | HE-TF | 28 | 28 | 28 | 28 | 28 | 28 |
| 4.5 inch HE-VT | HE-VT | 28 | 28 | 28 | 28 | 28 | 28 |
| Shell details | ||||||||||||
|---|---|---|---|---|---|---|---|---|---|---|---|---|
| Ammunition | Type of warhead |
Velocity (m/s) |
Projectile mass (kg) |
Fuse delay (s) |
Fuse sensitivity (mm) |
Explosive mass (TNT equivalent) (g) |
Ricochet | |||||
| 0% | 50% | 100% | ||||||||||
| 4.5 inch HE | HE | 746 | 24.95 | 0 | 0.1 | 2,320 | 79° | 80° | 81° | |||
| 4.5 inch SAP | SAP | 746 | 23 | 0.015 | 5 | 910 | 47° | 60° | 65° | |||
| 4.5 inch HE-TF | HE-TF | 746 | 24.95 | 0 | 0.1 | 2,320 | 79° | 80° | 81° | |||
| Proximity-fused shell details | ||||||||||||
|---|---|---|---|---|---|---|---|---|---|---|---|---|
| Ammunition | Type of warhead |
Velocity (m/s) |
Projectile mass (kg) |
Fuse delay (m) |
Fuse sensitivity (mm) |
Arming distance (m) |
Trigger radius (m) |
Explosive mass (TNT equivalent) (g) |
Ricochet | |||
| 0% | 50% | 100% | ||||||||||
| 4.5 inch HE-VT | HE-VT | 746 | 24.95 | 0 | 0.1 | 244 | 23 | 2,320 | 79° | 80° | 81° | |
Secondary armament
Some ships are fitted with weapons of various calibres. Secondary armaments are defined as weapons chosen with the control Select secondary weapon. Evaluate the secondary armaments and give advice on how to use them. Describe the ammunition available for the secondary armament. Provide recommendations on how to use them and which ammunition to choose. Remember that any anti-air armament, even heavy calibre weapons, belong in the next section. If there is no secondary armament, remove this section.
- Universal: AP-T · HEFI-T
- 40 mm HE clips: HEFI-T · HEFI-T · HEFI-T · AP-T
- 40 mm AP clips: AP-T · AP-T · AP-T · HEFI-T
| Penetration statistics | |||||||
|---|---|---|---|---|---|---|---|
| Ammunition | Penetration @ 0° Angle of Attack (mm) | ||||||
| 10 m | 100 m | 500 m | 1,000 m | 1,500 m | 2,000 m | ||
| HEFI-T | 3 | 3 | 3 | 3 | 3 | 3 | |
| AP-T | 81 | 78 | 68 | 58 | 49 | 41 | |
| Shell details | ||||||||||||
|---|---|---|---|---|---|---|---|---|---|---|---|---|
| Ammunition | Velocity (m/s) |
Projectile mass (kg) |
Fuse delay (m) |
Fuse sensitivity (mm) |
Explosive mass (TNT equivalent) (g) |
Ricochet | ||||||
| 0% | 50% | 100% | ||||||||||
| HEFI-T | 874 | 0.9 | 0 | 0.1 | 67.13 | 79° | 80° | 81° | ||||
| AP-T | 874 | 0.89 | - | - | - | 47° | 60° | 65° | ||||
Additional armament
Describe the available additional armaments of the ship: depth charges, mines, torpedoes. Talk about their positions, available ammunition and launch features such as dead zones of torpedoes. If there is no additional armament, remove this section.
Usage in battles
HMAS Tobruk is similar to her sister ship in the British tech tree, HMS Armada. While the Tobruk has a slower top speed and loses a main battery gun it gains better turret traverse and an even more impressive secondary 40 mm battery. The Tobruk is a fantastic fast assault ship thanks to its forward-mounted main battery. Use the excellent rate of fire and turret traverse to push the enemy constantly while keeping a small profile to reduce any incoming damage. Don't be afraid to bully patrol boats with the Tobruk's excellent turret traverse and the colossal number of 40 mm guns. At close ranges the torpedoes can be very effective thanks to their good damage. With a large crew size for a destroyer and decent armour protection where it matters don't be afraid to weather some fire before retreating. Use the opportunity of cover from islands to hide the bulk of your ship. Keep your front turrets pointed outwards to harass oncoming ships.
The Tobruk is a great destroyer but not a cruiser and shouldn't be used to fight them. The small calibre of the shells means even the SAP rounds are pretty hopeless against cruisers. Cruiser guns will happily negate the armour that the Tobruk does boast so avoid them at all costs in a solo encounter. If you have teammates to back you up, the Tobruk is a great complement to a mixed team when bringing its large quantity of torpedoes to bear on larger targets. The Tobruk gets good torpedoes of significant quantity. This is offset by launchers that turn slowly and have a poor firing arc, especially the forward-most launcher. Only use the torpedoes if you can avoid enemy fire or if the enemy is already in your firing arc. Turning your ship in order to make use of the torpedoes negates your narrow profile advantage and makes you an easy target. From the side the Tobruk is a big ship.
Pros and cons
Pros:
- High rate of fire with the main battery guns, 20 rounds per minute sustained with no second-stage ammo system
- Efficient AA/auxiliary armament of multiple 40 mm guns, which can make short work of both aircraft and patrol boats, as well as damaging destroyers at close range
- Decent armour protection over ammo storage and the main guns, more than many destroyers get
- Very fast turret traverse can be a nasty surprise for enemy ships that try to flank you, and make the guns very effective against aircraft if used in that role
- Plenty of torpedoes
Cons:
- Small calibre of main shells makes fighting cruisers completely futile
- Torpedo launchers have poor traverse and firing arcs, making them difficult to use safely or effectively
- Turrets are big, flat targets, meaning they get knocked out easily by direct hits
History
The Battle Class, HMAS Tobruk was a destroyer of the Battle class commissioned for the Australian navy. As one of the two-ship "Australian Battle" class, she featured an improved main armament and more advanced gunnery equipment. She was commissioned too late to see service in the Second World War, but served in the Korean war and Malayan Emergency. She was severely damaged in a gunnery accident in 1960, and was written off and sold for scrap.
Design and development
The Battle class, the predominant late-war British destroyer design before the emergence of the Daring class, was designed to be built in several flotillas. The 1943 "Battles" were thus known as the "Early Battle Class". The United Kingdom intended to build the later Battle class ships with the new QF 4.5 inch Mark VI turret, but these ships were cancelled in early 1945 due to the end of hostilities in the western theatre. However, two ships had been laid down by the Australian navy, which were built and completed nevertheless, to be known as the "Australian Battle" Class ships. Construction was very slow, and Tobruk wasn't commissioned until the early 1950s.
HMAS Tobruk displaced 3400 tons full, making her very large for a WWII-era destroyer. She carried a main armament of four 4.5 inch QF Mark VI guns in two twin turrets - these advanced turrets were capable of firing at 20 rounds per minute (RPM). Tobruk carried an anti-aircraft armament of twelve 40 mm Bofors guns in three dual and six single mounts, as well as two quintuple torpedo tubes. Fitted with steam turbines developing 50 000 shaft horsepower, she was able to make 31.5 knots (58 km/h).
Operational history
After her commissioning in 1951, Tobruk was deployed to the Korean Theatre to assist naval operations there, primarily serving as a shore bombarder and carrier escort. She returned to Australia in late 1952 for a refit, then deployed to Korea again, this time staying until 1954. After she returned home, Tobruk underwent a refit, and was deployed as part of an Australian naval squadron to southeast Asia (the Far East Strategic Reserve). She later served during the Malayan Emergency, and received a second battle star (her first in Korea) for it. In September of 1960, Tobruk was conducting exercises with her sister ship Anzac when a targeting error caused a shell from Anzac to hit her; the damage was severe, and two of Anzac's crew members were charged for the accident. It was deemed that the damage was uneconomical to repair, and as a result, Tobruk was placed in reserve and later scrapped.
Devblog
HMAS Tobruk was one of two late Battle-class destroyers of the so-called "Australian Battle-class" design. These were based on a cancelled third and final batch of Battle-class destroyers ordered for the Royal Navy in the late stages of WWII. Nonetheless, the Australian government proceeded with ordering the construction of two ships of this subclass, thus earning it its name.
HMAS Tobruk was the second of the two ships to be ordered and was laid down on 5 August 1946 in Sydney. Being built in the immediate postwar years meant that construction progressed slowly, resulting in the ship being only commissioned into RAN service in May 1950.
From there, HMAS Tobruk took part in several conflicts of the 1950s, such as the Korean War and the Malayan Emergency, earning the ship two battle honours. In the late 1950s, HMAS Tobruk was subjected to its first of two friendly fire incidents, which caused light structural damage and the loss of one crew member.
The second incident, which also sealed HMAS Tobruk's fate, occurred in September 1960. Namely, the ship was once again hit by friendly fire, this time coming from her sistership HMAS Anzac during a gunnery exercise off Jervis Bay. However, the damage was severe enough to be considered uneconomical to perform repairs, resulting in the ship being decommissioned in late 1960.
HMAS Tobruk undertook its final sea voyage under tow to Japan where the ship was ultimately broken up for scrap in 1972.
In War Thunder, HMAS Tobruk will be a new destroyer coming to rank III of the British naval forces tree as part of the upcoming update 1.95 "Northern wind". Compared to the existing Battle-class destroyer in game - HMS Armada - HMAS Tobruk offers its aspiring captains improved anti-air firepower and survivability, coming at the cost of slightly reduced mobility and a cut down primary armament suit.
Media
- Skins
- Images
See also
Links to articles on the War Thunder Wiki that you think will be useful for the reader, for example:
- reference to the series of the ship;
- links to approximate analogues of other nations and research trees.
External links
References
- Royal Australian Navy. (2020, August 05). HMAS Tobruk (I). Retrieved January 04, 2021, from https://www.navy.gov.au/hmas-tobruk-i
| Cockatoo Docks & Engineering Company | |
|---|---|
| Destroyers | |
| Australian Battle-class | HMAS Tobruk |
| Britain destroyers | |
|---|---|
| Town-class | HMS Churchill · HMS Montgomery |
| V-class | HMS Valhalla · HMS Vega · HMS Verdun |
| G-class | HMS Grafton · ORP Garland |
| Hunt-class | HMS Calpe · HMS Brissenden |
| Tribal-class | HMCS Haida · HMS Eskimo · HMS Mohawk |
| J-class | HMS Jervis |
| K-class | HMS Kelvin |
| N-class | HMAS Nepal |
| Battle-class | HMS Armada · HMS Cadiz · HMAS Tobruk |
| Daring-class | HMS Daring · HMS Diamond · HMS Diana |


