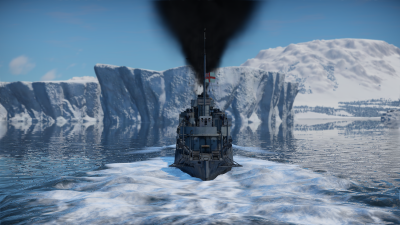
HMS Churchill
| This page is about the British destroyer HMS Churchill. For other vessels of the class, see Clemson-class. |
Contents
Description
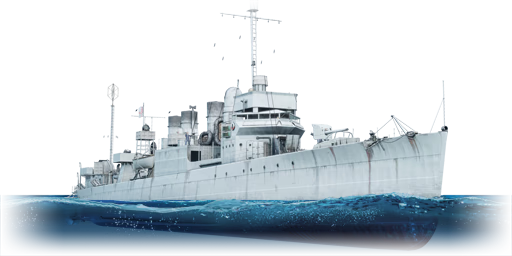
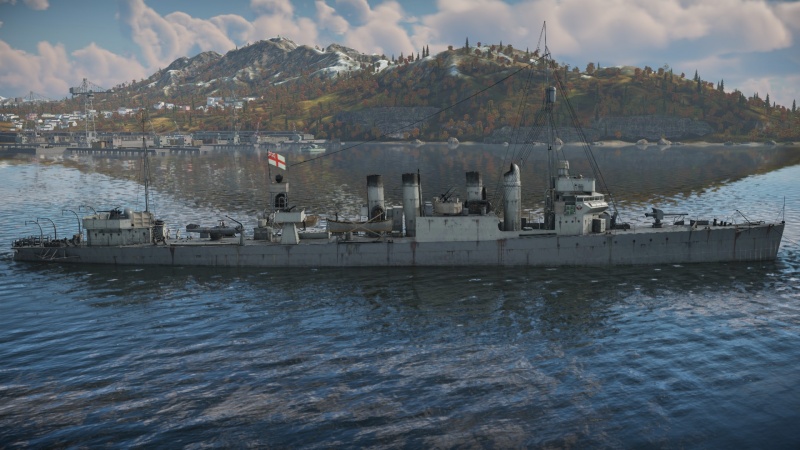
The Town-class, HMS Churchill (I45), 1942 is a gift rank British destroyer with a battle rating of (AB), (RB), and (SB). It was introduced in Update 1.83 "Masters of the Sea" as part of the British fleet closed beta test as the first destroyer in the British Bluewater fleet. It was later replaced by HMS Vega in Update "Direct Hit" and became a hidden vehicle for players who do not have it unlocked.
The HMS Churchill, part of the Town-class, is a destroyer provided to the Royal Navy by the United States Navy during the early stages of World War II. Not really envisaged and fitted for destroyer versus destroyers engagements, but as escort destroyer. The Town class served primarily on this role over the Atlantic, fighting against the Luftwaffe and the soundless but seemingly omnipresent Wolfpacks of the German U-boats (U-Boots).
In the game, this vessel performs best defensively, as it lacks sufficient armament to stand against better-armed reserve destroyers. It turns into an unstoppable mammoth capable to win games among low-rank fast boats but it is a trifling and soft prey among high-rank destroyers.
Fundamentally, HMS Churchill has trouble facing anything bigger than her, so British aspiring captains must be patient and play smartly if they want to achieve success in this ship.
General info
The HMS Churchill can be recognised as light or auxiliary destroyer; this is because is not armed with many significative main armaments. Instead is armed with smaller automatic cannons which become useful against aircraft or small boats. The speed and armour are very limited and often, won't be the defining factor for its survival.
When compared with other reserve destroyers, it does not performs similarly.
Survivability and armour
HMS Churchill's survivability is below average because of the crew complement being only of 143. With the average destroyer crew size among all nation's rank I being 183. This means Captains should not rely on crew durability to win duels with other destroyers; Churchill is likely to lose them.
The armour present on the ship is limited to the gun turrets' shielding. This is effective to shield the rate of fire since the guns will be more protected against shrapnel and HE shells. Yet, is ineffective against armour piercing rounds (AP), HE with base fuse[1] (present on most German destroyers) and even aircraft fire. Small patrol boats with Heavy machine guns (12.7 mm) or automatic cannons are also able to knock out the turrets with the facility.
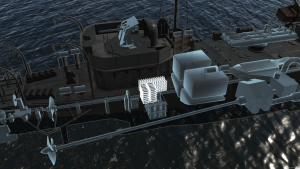
The position of the sole main gun in the bow of the ship, allows the HMS Churchill to remain in the fight with the relatively concealed secondary machine guns in a superstructure behind the bridge. This is where the concentration of Churchill's firepower is placed.
Armour
The armour plates available on the Churchill are made of antifragmentation armour. 4.97 mm armour plates cover the main and secondary/auxiliary guns located at the bow and stern. The most armed area of the Churchill is protected by individual plates of 12.7 mm of anti-fragmentation armour covering each anti-air turret.
The HMS Churchill's hull is made of 16 mm of steel while the superstructure is protected by only 4 mm steel.
This armour won't provide significant protection against most of the destroyer's main calibre shells (100 mm +). The hull armour is only practical against 12.7 mm or less.
Ammo racks
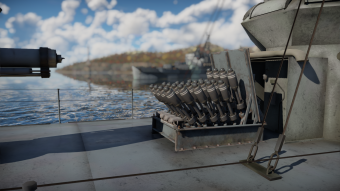
The bow[2] is one of the most dangerous zones of the ship. Here the ready ammo racks are enclosed by a steel box and located next to the Hedgehog mortar charges just behind where the main turret is placed. Enemy ships might attempt to knock the single main gun but end up hitting the ready ammo, causing the fatal detonation of these. Unfortunately, just below the ready ammo racks, is located a huge stash of ammo. This storage might detonate by the direct hit or the close impact of a powerful enough HE shell with a base fuse.
On the positive side, this ammo rack is hidden below the waterline and between big fuel tanks. Those fuel tanks offer adequate protection against hits from the bow. So an ammo rack detonation is rare.
The second most dangerous zone being the stern [3]of the ship. Here the majority of the explosives is settled. Depth charges are scattered everywhere; just below them, an ammo rack is located with even more depth charges. This ammo rack is poorly protected when compared with the main ammo rack, so captains should conceal it properly. Near there is also the torpedoes which only are protected by torpedo tubes.
Because of the big length and not so great mobility of the ship, this rear area is often hit by torpedoes which results in a fatal blow for the HMS Churchill.
Mobility
The mobility of the HMS Churchill is in recap, insufficient.
It won't be able to keep up against most destroyers nor will be able to outrun or outturn many patrol boats. The poor low speed of 50 km/h becomes a concern when attempting to escape enemy salvo or evading some aircraft.
The wide turn radius does not help her at all, which leads to exposing the Churchill longer than it should. Curiously this trait was despised by its real-life captains which noted how the turn radius was similar to the Royal Navy's battleships; misfortunate indeed.
When torpedo attacked, captains must manoeuvre skillfully and in anticipation; keeping in mind the torpedo will always go faster than the Churchill, and the plane is also more agile and faster than the Churchill.
| Mobility Characteristics | |||
|---|---|---|---|
| Game Mode | Upgrade Status | Maximum Speed (km/h) | |
| Forward | Reverse | ||
| AB | |||
| Upgraded | |||
| RB/SB | |||
| Upgraded | |||
Modifications and economy
Armament
Primary armament
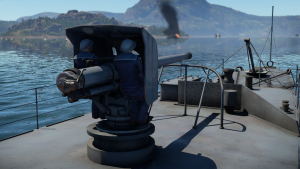
The ship is armed with a single BL Mark IX (102 mm) medium-velocity breech-loading gun. This gun is the biggest aboard the destroyer, however, is not the most lethal. The gun is located at the bow of the ship, just ahead of the bridge.
This gun was meant to engage light targets like submarines and motor gunboats like the German E-boats (S-204 Lang, S-100, S-100 (1944)). It performs okay against armoured boats and small corvettes, but it struggles to cause meaningful damage to many destroyers or fast small boats. This is because of the poor explosive filler and just being one gun.
Because of that low explosive amount, the shell won't trigger any hull break on small boats. This is really critical and inefficient since several consecutive shots will be needed for a single small boat that will not be destroyed, no matter how small it is. The helpful aspect of this gun is the great reload rate of 12 rounds/min and once the ready ammo rack has been spent, the fire rate remains on 10 rounds/min. The gun maintains decent ballistics[4] because of an appropriate muzzle velocity of 805 m/s. This facilitates the leading of the targets as well as the short-medium distances shooting (500-4,000m); quite easy to get used to it since at short ranges it's almost a completely flat trajectory.
The anti-air purpose of this gun is very limited, because of the poor gun elevation and slow turret traverse. The advised shell for anti-air is the shrapnel, but the offensive use as anti-air of this gun should be avoided and in a dangerous situation, limited to very low flying aircraft.
The BL Mark IX (102 mm) can use 3 types of ammunition:
- 4 inch HE Shell (High Explosive): Captains should use this as main ammo, it carries the most explosive mass and offers the best damage input for unarmoured ships.
- 4 inch SAP (Semi-armour piercing): Must be equipped to deal with heavy armour, notably some Soviet boats. Not recommended to general-purpose due to overpenetration.
- 4 inch Shrapnel: Lethal decimating crew, conical pinpoint damage to modules; it can generate an airburst of shrapnel. Effective for small boats but less damage input than HE.
| Penetration statistics | |||||||
|---|---|---|---|---|---|---|---|
| Ammunition | Type of warhead |
Penetration @ 0° Angle of Attack (mm) | |||||
| 1,000 m | 2,500 m | 5,000 m | 7,500 m | 10,000 m | 15,000 m | ||
| 4 inch HE | HE | 11 | 11 | 11 | 11 | 11 | 11 |
| 4 inch SAP | SAP | 90 | 72 | 51 | 37 | 28 | 24 |
| 102 mm shrapnel | Shrapnel | 5 | 5 | 5 | 5 | 5 | 5 |
| Shell details | ||||||||||||
|---|---|---|---|---|---|---|---|---|---|---|---|---|
| Ammunition | Type of warhead |
Velocity (m/s) |
Projectile mass (kg) |
Fuse delay (s) |
Fuse sensitivity (mm) |
Explosive mass (TNT equivalent) (g) |
Ricochet | |||||
| 0% | 50% | 100% | ||||||||||
| 4 inch HE | HE | 805 | 14.06 | 0 | 0.1 | 721 | 79° | 80° | 81° | |||
| 4 inch SAP | SAP | 805 | 15.2 | 0.015 | 5 | 520 | 47° | 60° | 65° | |||
| 102 mm shrapnel | Shrapnel | 805 | 17.7 | 0 | 0.1 | 218 | 62° | 69° | 73° | |||
| Don't forget training the gunners' skills for faster reload in the main gun |
Secondary armament
The auxiliary armament of the HMS Churchill consists of a sole 3 inch naval AA Mk.V (76 mm) gun. The only shell available is the HE.
This gun is intended to act as anti-air fire, however, it is fairly ineffective. It requires a direct hit to any plane. A big plane that must fly slow and in a straight line. So the use of this gun as anti-air is situational and not under regular circumstances. The best way to get the anti-air capacity out of this gun is to remain stationary somewhere on the map while having a highly trained crew to increase the effectiveness.
This gun does perform greatly in an auxiliary role against small boats or even destroyers. This gun is faster in targeting and reload compared to the main gun. Hence it can serve as a backup heavy-hitting gun filled with modest explosive mass if the main gun gets knocked out.
| Penetration statistics | |||||||
|---|---|---|---|---|---|---|---|
| Ammunition | Type of warhead |
Penetration @ 0° Angle of Attack (mm) | |||||
| 100 m | 1,000 m | 2,000 m | 3,000 m | 4,000 m | 5,000 m | ||
| HC Mk.27 | HE | 8 | 8 | 8 | 8 | 8 | 8 |
| Shell details | ||||||||||||
|---|---|---|---|---|---|---|---|---|---|---|---|---|
| Ammunition | Type of warhead |
Velocity (m/s) |
Projectile mass (kg) |
Fuse delay (s) |
Fuse sensitivity (mm) |
Explosive mass (TNT equivalent) (g) |
Ricochet | |||||
| 0% | 50% | 100% | ||||||||||
| HC Mk.27 | HE | 823 | 5.9 | 0 | 0.1 | 500 | 79° | 80° | 81° | |||
Anti-aircraft armament
HMS Churchill anti-air armament consists of:
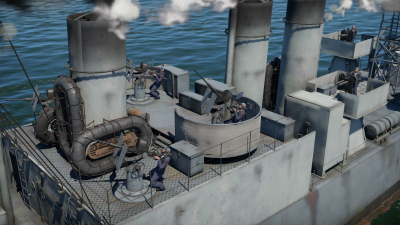
- 4 x 20 mm/70 Oerlikon Mk.II turrets
- 2 x Dual AN-M2 (12.7 mm) turrets
These machine guns and cannons should be recognised as the main defensive armament of the Churchill. They are way more effective; they offer a better rate of fire, targeting speeds, and a greater number of turrets which translate into continued close-ranged firepower (-2,000m). Thus show to be superior to the single main gun or the single auxiliary gun
Aircraft are a significant danger to the HMS Churchill, because of this close-ranged firepower. Players must notice planes before they get closer to the cannons' range. Often the enemy aircraft will get really close to the Churchill for bombing or torpedoing and the only significative defence are these cannons and machine guns.
Captains are advised to resort to the cannons and machine guns to deal with most of the small boat hazards. Leaving the main gun only to fight the heavily armoured boats or some faraway target- Players will feel more capable and battle-ready using them.
They can also be used against destroyers but the effectiveness is minimal.
Additional armament
The HMS Churchill carries:
- 3 x Mk.VIII (533 mm) torpedoes
They are properly placed near the stern of the ship, inside a triple torpedo-tube mounting. The torpedoes are a powerful mean to sink other destroyers, but because of them only being 3, eliminations with torpedoes are not as common as desired. Torpedoes will become a useful weapon not only for destroyers but also for cargo ships and small slow targets.
The torpedoes are actually very valuable. They possess a lot of explosive mass and are quite fast!
Since the main drawback is the small numbers of these, players are advised to save them for an obvious encounter or location instead of randomly releasing them. On the other hand, players are free to install the torpedo mode modification and release them carelessly once they spawned. The benefit of this being the chance of destroying something even if the HMS Churchill has been sunk.
Depending on personal playstyle, players can activate the torpedo mode for keeping a safe launching distance. If players like to get close to the action they can uninstall this modification which increases the torpedo speed but reduces the range of the torpedo.
Another thing to consider is the need for steering to either port or starboard to release the torpedoes. Fortunately, the torpedo tubes got really small death zones, so minimal steering is needed.
- 1 m of torpedo depth is recommended for most of the destroyers (torpedo mode is the ability to increase the depth of most vessel-launched torpedoes. It is mainly useful with battleships, otherwise invulnerable to torpedoes; since it aims to hit below their heavy-armoured side).
One of the most exceptional aspects of the HMS Churchill is the abundance of special armaments:
- 48 x Mk.10 Hedgehog mortar
- 24 x Mk.6 mortar depth charge
This hugely increases the explosive capacities of the destroyer. However, these weapons were intended to be used against submarines. A vehicle yet to be in the game.
Therefore the use of the Hedgehog and depth charges remains situational and defensive. Limited to small boats getting really close to the destroyer or vessels hiding behind portions of land.
A way to use these depth charges and mortars is in lower-tier battles, in which the HMS Churchill acts as a giant. Is likely many small boats will sneak near, so there the destroyer must act defensively and release all the explosive ordnance.
Usage in battles
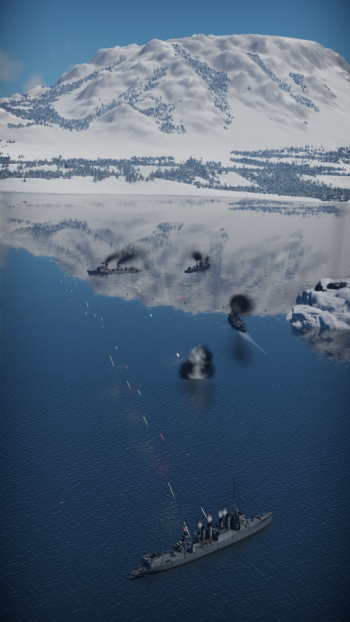
As described above, the HMS Churchill should not be faced against other destroyers. Is likely it won't be able to withstand combat against them and will be sunk. Sailors must play this vessel in a predominantly defensive and support role. Using the natural cover of small lands and islands to conceal it while firing with either the main cannon or the secondary. Placing in a good location is key since the mobility won't provide major advantages if repositioning is needed. A good location is one that allows firing without being seen and protects the bow or the stern of the ship. As soon as the HMS Churchill spawns, it should retreat to a safer position considering the following roles:
Auxiliary Destroyer
When playing as an auxiliary destroyer, the work is to remain near and behind the rest of the main allied offensive or convoy, usually in the more open areas of the map. The duty of the HMS Churchill is to provide cover against anti-air attacks, small boats, at last, the destroyers. The superior anti-air firepower will be highly valuable among these battlegroups. This role is beneficial on Arcade battles. The best defence here is the smoke cover and anticipated manoeuvres to avoid enemy firing at your location. Let the more combat-ready ships deal with the damage, while the Churchill relocates behind them.
This playstyle works well when coordinated with a group of other destroyers. If coordination and teamwork are lost, the HMS Churchill will find itself defenceless and alone to enemy fire in the open sea.
- Launching the torpedoes in this destroyer spawn area might grant a reward, but the torpedo mode is needed.
Anti-air emplacement
In this role, the HMS Churchill will seek a covered position behind landmass or near capture zones. Using most of the guns to target planes or small boats. The planes being the priority target. This role is beneficial on Realistic battles.
This role is crucial when there's enemy air superiority at sea. Often from early in the battles, players will bring planes to attack ships, to capture zones on boat planes or fighters to destroy allied planes. Is here when the HMS Churchill provides its value to the team as an influential anti-air platform. Keep in mind to reposition at some point. HMS Churchill will become infamous on the enemy team and will be hunted by enemy bombers.
- Is recommended to manually order when the gunners open fire to increase the furtiveness. A visible trail of tracer bullets will only make HMS Churchill a target.
| Remember, the port side (left) allows more anti-air turrets to fire; place the ship accordingly. |
Sea brawler
For more daring captains, The HMS Churchill can be used in offensive against small vessels inside the small boats' area. In this playstyle, players will rely on the highly effective 20 mm cannons and 12.7 mm heavy machine-guns as the main armament to sink small boats quickly. Releasing torpedoes and dropping hedgehog charges to any frontally approaching boat.
The purpose is to create an advance with allied ships to capture a point or to exterminate remaining enemy ships. Players can leave the main gun only for heavily armoured boats or they can attempt to fire with both the main and secondary gun; changing intermittently between when needed.
The less favourable aspect of doing this is the rather slow speed of the Churchill.
Pros and cons
Pros:
- Great amount of anti-air guns; perform well against boats and planes
- High amount of additional armaments: Torpedoes, depth charges and Hedgehog mortars
- Narrow hull allows for an incursion in small boat's area
- Useful penetration of the main gun's SAP round; useful for heavily armoured ships as the K2 or MBK-161 early
- Reliable reload rate of the main gun
- Is amongst the finest anti-air capable reserve destroyers, second only to Turbine
Cons:
- Quite slow; it lags behind most other Rank I destroyers
- A single main gun is ineffective; it also lacks HE filler to do any major damage
- Secondary gun is futile against destroyers; even less explosive damage input
- Only 3 torpedoes
- Below average crew size
- Complicate playstyle due to vital insufficiencies (speed, firepower and crew count)
History
The HMS Churchill begins its story as the USS Herndon Clemson class (DD-198) being laid down in 1918.
The ship served in the US Navy and US coast guards as a training ship and patrol ship during the rum patrols. Her journeys went from being launched on Norfolk, Virginia in 1920 to anti-submarine exercises on the Panama Canal zone in 1940.
After this, the Herndon was decommissioned and handed over to the Royal Navy in Halifax, Nova Scotia on 9 September 1940, under the Destroyers for Bases Agreement.
British service
Once in service of the British empire, the destroyer was renamed HMS Churchill under the Town class. The town class were comprised of US-made destroyers including the Clemson class, the Wickes class and the Caldwell class; all very similar.
The Town class were fitted to render anti-submarine protection to the vital cargo ships arriving to the British isles. The HMS Churchill's torpedoes tubes and main cannons, the 4-inch (102 mm)/50 were almost fully replaced with 20 mm cannons and anti-submarine equipment, the depth charges and Hedgehog mortar; fitting her for trade and convoy escort service.
The menace of the U-boats required constant protection and overseeing for the hundreds of convoys travelling many miles in the sea. Without the escort of ships like the HMS Churchill, the cargo was easy prey for the German submarines lurking in the dark and cold waters.
One of her first actions was the search for survivors of the armed merchant ship Jervis Bay which was sunk by the German pocket battleship Admiral Scheer during November 1940. During 1941 to 1943 she continued to work along with the US Navy & Canadian corvettes, frigates and destroyers receiving the arriving convoys in the Mid-Atlantic gap; an area where Allied air cover was unable to reach. Also known as the "Black pit" because of the exorbitant numbers of cargo ships lost to the U-boats in the gap. She was assigned to a Mid-Ocean Escort Force (MOEF), in which she was attacked several times by the Falke group of U-boats that managed to sink several cargo ships in the convoy.
After surviving those missions, she participated in convoys escort to Algeria and later served as an escort during the execution of Operation torch in May 1943. At the end of 1943, after convoy escort missions, repairs, rescues and exercises, she was withdrawn from operational service because of increasing defects and the arrival of new escorts.
She was placed in reserve and later refitted to be loaned to the USSR.
Deyatelnyi
Now in USSR service in May 1944, her crew departed along with other ex-US navy destroyers and ex-Royal Navy ships such as the HMS Royal Sovereign. L45 was now, Deyatelnyi.
On their departure, they escorted convoy JW59 headed to North Russia. She later joined the Northern Fleet and served in convoy escort duties in the artic. At December 1944, she succeeded in damaging the German U-387 with 20 mm fire. The submarine was later sunk.
On 16th January 1945, she was sunk while defending a convoy over the treacherous stormy route from Kola Inlet to the White Sea, 40 miles east of Cape Tereberski, Kara Sea.
The only 7 survivors from the 124 Deyatelnyi complement were rescued by the Derzkij (Ex-HMCS Chelsea, another Town-class destroyer), they commented on how a detonation felt on the stern of the ship after the Deyatelnyi attempted to ram and drop depth charges to a U-boat.
The causes of the sinking remain unknown, either she was sunk by U-956, U-997, a mine or she suffered an accidental detonation while preparing the depth charges for the next attack run.
The Deyatelnyi remains the only Town class destroyer to be lost in Soviet service during World War II and the ultimate loss of the Town class; from Virginia to the Kola Bay.
Media
- Skins
- Images
- Videos
See also
Shared operational history
Related development
Analogues of other nations
External links
- [Wikipedia] Town-class destroyer
- [Wikipedia] HMS Churchill
- [Forum] HMS Churchill
- Operational chronology of the HMS Churchill
- Allied warships, L45, Uboat.net
- Ships hit by U-boats, Deyatelnyi, U-boat.net
References
- Citations
- ↑ Base fuse is a type of HE shell that won't detonate upon impact like the regular HE. Because of an increased fuse sensibility, it penetrates a volume of armour then detonates.
- ↑ Bow is the naval term to the frontal or most forward section of a ship's hull; Is comprised also by the prow and the stem.
- ↑ Stern is a naval term referring to the back end section of a naval vessel which is most opposite from the bow. Is comprised also by the transom.
- ↑ Ballistics refers mainly to the ability of the gun to fire a shell towards greater distances (Range), keeping a preferable flat and not parabolic trajectory, a small-time of flight of the shell and keeping adequate penetration values at long distances.
- Bibliography
- Chronology of the War at Sea, 1939-1945: The Naval History of World War Two, Rohwer & Hummelchen (1992) pp.135 & 139
- British & dominion: Warships of World War II, Lenton & Colledge (1968) pp.92–94
- British Destroyers and Frigates: The Second World War and After, Norman Friedman
- Destroyers of World War Two: An International Encyclopedia, M. J. Whitley, (2000)
| Newport News Shipbuilding & Drydock Co. | |
|---|---|
| Gun Destroyers (DD) | |
| Clemson-class | USS Welborn C. Wood · HMS Churchill* |
| Heavy Cruisers (CA) | |
| Des Moines-class | USS Newport News |
| Battleships (BB) | |
| New York-class | USS Texas |
| New Mexico-class | USS Mississippi |
| *USS Herndon in UK service | |
| Britain destroyers | |
|---|---|
| Town-class | HMS Churchill · HMS Montgomery |
| V-class | HMS Valhalla · HMS Vega · HMS Verdun |
| G-class | HMS Grafton · ORP Garland |
| Hunt-class | HMS Calpe · HMS Brissenden |
| Tribal-class | HMCS Haida · HMS Eskimo · HMS Mohawk |
| J-class | HMS Jervis |
| K-class | HMS Kelvin |
| N-class | HMAS Nepal |
| Battle-class | HMS Armada · HMS Cadiz · HMAS Tobruk |
| Daring-class | HMS Daring · HMS Diamond · HMS Diana |


