Beaufort Mk VIII
Contents
Description
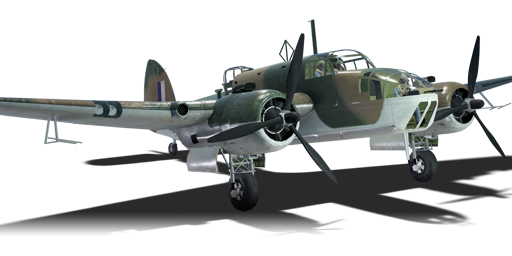
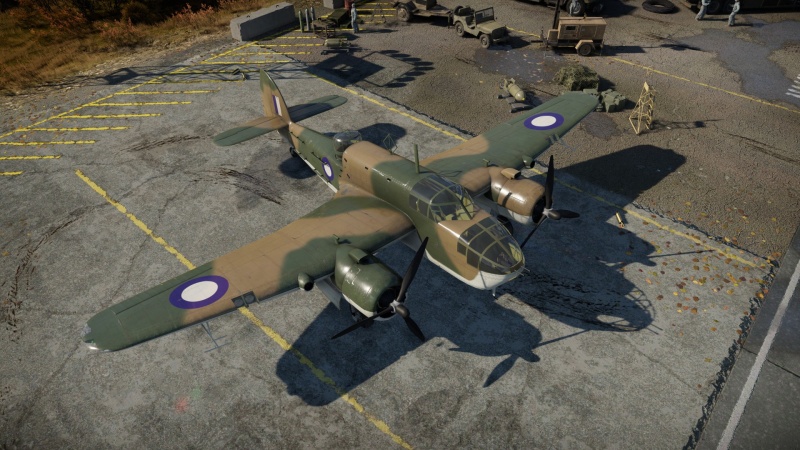
The Beaufort Mk VIII is a rank British bomber with a battle rating of (AB), (RB), and (SB). It has been in the game since the start of the Open Beta Test prior to Update 1.27. Though the plane is in the British tech tree, it is painted with Australian markings.
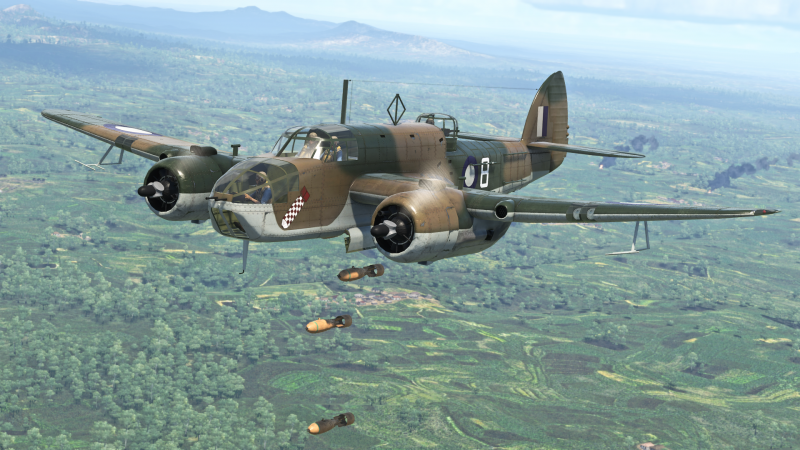
The Beaufort Mk VIII is a superb low-level bomber. For a bomber, it's fast and agile and it has a great rear armament for its rank (twin rear .50 cals). It is able to do very good low-level bombing runs. With its 4 x 250 lb or 2 x 500 lb bombs, it is easily able to destroy light, medium and heavy tanks. The Beaufort is also able to take a few hits, making it a great bomber to start the British line.
The best thing to do with this bomber is to put it in a shallow dive after you spawn in and head for where you want to bomb (be careful when diving, the plane locks up at high speed). Get low to the ground, as your rear turret does not provide cover below the plane. Once you have dropped your bombs, you have a decision to make. You can re-arm and go for another bombing run (or just wait if you are playing in Arcade Battles), or go fighter hunting with your tail gunner.
Overall, this is a great low-rank bomber and easily able to turn the tide of any battle.
General info
Flight performance
| Characteristics | Max Speed (km/h at 1,981 m) |
Max altitude (metres) |
Turn time (seconds) |
Rate of climb (metres/second) |
Take-off run (metres) | |||
|---|---|---|---|---|---|---|---|---|
| AB | RB | AB | RB | AB | RB | |||
| Stock | 420 | 405 | 40.8 | 41.8 | 3.8 | 3.8 | 414 | |
| Upgraded | 460 | 437 | 38.6 | 39.6 | 8.9 | 6.1 | ||
Details
| Features | ||||
|---|---|---|---|---|
| Combat flaps | Take-off flaps | Landing flaps | Air brakes | Arrestor gear |
| ✓ | ✓ | ✓ | X | X |
| Limits | ||||||
|---|---|---|---|---|---|---|
| Wings (km/h) | Gear (km/h) | Flaps (km/h) | Max Static G | |||
| Combat | Take-off | Landing | + | - | ||
| 523 | 415 | 383 | 216 | ~7 | ~3 | |
| Optimal velocities (km/h) | |||
|---|---|---|---|
| Ailerons | Rudder | Elevators | Radiator |
| < 330 | < 330 | < 360 | > 290 |
Survivability and armour
- 12.7 mm Steel - Armour plate behind the pilot
- 6.35 mm Steel - Armour plate behind the gunner
Modifications and economy
Researching all the belts and turrets is helpful in this very aggressively played bomber. Further enhancements should be in the plane's performance. Compressor, Engine and Engine Injection for the quickest gain in top speed. As bomber Airframe and Cover are also useful but to a lesser extent. They improve the maximum possible damage received.
Armaments
Suspended armament
The Beaufort Mk VIII can be outfitted with the following ordnance:
- 4 x 250 lb G.P. Mk.IV bombs (1,000 lb total)
- 1 x 450 mm 18 inch Mark XII torpedo
- 2 x 500 lb G.P. Mk.IV bombs (1,000 lb total)
- 2 x 500 lb S.A.P. Mk.II bombs (1,000 lb total)
Defensive armament
The Beaufort Mk VIII is defended by:
- 2 x 12.7 mm M2 Browning machine guns, dorsal turret (600 rpg = 1,200 total)
- 2 x 7.7 mm Browning machine guns, nose turret (1,150 rpg = 2,300 total)
Usage in battles
When engaging fighters (Yak-7s, Bf 109 Es, Spitfires, P-36s, A5M4 etc...) try to force them onto your tail. The Beaufort's twin rear .50 calibre machine guns tear everything up at this rank. Try to avoid head-ons, as your pilots are prone to be wounded behind that large glass window. If you get an enemy fighter to stay on your tail at wing level, your gunner will show no mercy!
When engaging bombers, try to come below them and pepper them with your tail gunner. Flying in front of them and aiming for the enemy bombers pilot is also effective.
Be mindful of these things too; watch out for players diving on you, as they can easily knock out your tail gunner from above. Also watch out for rockets, even a B-17 can't take a rocket hit! Plus some of the American planes (F2A, F4F) are armed with four or more .50s, try to avoid these as their ammunition count is very large and they are easily able to critically damage a Beaufort.
Manual Engine Control
| MEC elements | ||||||
|---|---|---|---|---|---|---|
| Mixer | Pitch | Radiator | Supercharger | Turbocharger | ||
| Oil | Water | Type | ||||
| Not controllable | Controllable Not auto controlled |
Not controllable Not auto controlled |
Controllable Not auto controlled |
Combined | Controllable 2 gears |
Not controllable |
Pros and cons
Pros:
- Very strong rear 12.7 mm machine guns
- Fast and agile for a bomber
- If one pilot is knocked out, the copilot can still fly
- Universal ammo belt for the 12.7 mm machine guns contains a large amount of API ammo
- 12.7 mm machine guns can engage enemy aircraft effectively over 1,500 m away
Cons:
- Low endurance
- Below average payload
- Does not have a ventral gunner
- Dorsal turret cannot turn 360 degrees, cannot fire forward
- Loses the single offensive machine gun of the Blenheim. Doesn't seem like much, but it comes in useful sometimes
- Arguably has less effective defensive armament than the Blenheim. Experienced players will be able to take advantage of your limited coverage
- Has no offensive control of the front-facing gun
History
| Archive of the in-game description | |
|---|---|
|
The Bristol Beaufort was a twin-engine torpedo-bomber used in large numbers by RAF Coastal Command and the Royal Australian Air Force. The Beaufort design process began in 1935, when Great Britain's Air Ministry formulated the M.15/35 and G.24/35 specifications for the development of a torpedo bomber and a general reconnaissance aircraft/bomber, respectively. While working on these aircraft designs Bristol proposed one aircraft, manufactured in two different variants, for both of these specifications. After submitting two separate designs to the Air Ministry, the favoured design was selected and named the Beaufort. The Beaufort was based on the Blenheim light bomber, from which were borrowed the designs of the wing, tail unit, and landing gear. To increase the bomb bay's size to carry a torpedo, the cockpit's floor was raised. Nevertheless, the torpedo did not fully fit in the bomb bay and had to be partially suspended. Bristol was commissioned in August 1936 to produce 78 Beauforts, before the first prototype had even flown. Teething problems with the prototype resulted in a number of design modifications, and the first aircraft did not enter service until January 1940. In 1940, production of the Beaufort began in Australia. But due to the fact that the Australian government was not confident in an uninterrupted supply of Taurus engines, it was decided that the Twin Wasp engine would be used instead. In addition, the Australians expanded the fin to increase stability. The last Australian modification, the Beaufort Mk VIII, used 1,200 hp engines and had an ASV Mk II radar. It also had additional wing-mounted fuel tanks. This modification made up 520 of the 700 Beauforts built in Australia in addition to the 1,180 aircraft built in Britain until production ceased in November 1944. | |
Media
- Skins
- Videos
See also
Links to the articles on the War Thunder Wiki that you think will be useful for the reader, for example:
- reference to the series of the aircraft;
- links to approximate analogues of other nations and research trees.
External links
| Bristol Aeroplane Company | |
|---|---|
| Strike Aircraft | Beaufighter Mk I (40-mm) · Beaufighter Mk VIc · Beaufighter Mk X · Beaufighter Mk 21* |
| Bombers | Blenheim Mk IV · Beaufort Mk VIII* · Brigand B 1 |
| * License-produced in Australia by Department of Aircraft Production. | |
| Britain bombers | |
|---|---|
| Torpedo | Swordfish Mk I · Swordfish Mk II · ▄Avenger Mk II |
| Dive | V-156-B1 |
| Hydroplanes | ▄Catalina Mk IIIa · Sunderland Mk IIIa · Sunderland Mk V |
| Light | Blenheim Mk IV · Beaufort Mk VIII · ▄Hudson Mk V · Brigand B 1 |
| Based on A20 | ▄Havoc Mk I · ▄Boston Mk I · ▄DB-7 |
| Hampden | Hampden Mk I · Hampden TB Mk I |
| Wellington | Wellington Mk Ic · Wellington Mk Ic/L · Wellington Mk III · Wellington Mk X |
| Halifax | Halifax B Mk IIIa |
| Stirling | Stirling B Mk I · Stirling B Mk III |
| Lancaster | Lancaster B Mk I · Lancaster B Mk III |
| Lincoln | Lincoln B Mk II |
| Shackleton | Shackleton MR.Mk.2 |


