File list
This special page shows all uploaded files.
| Date | Name | Thumbnail | Size | Description | Versions |
|---|---|---|---|---|---|
| 16:54, 3 February 2024 | FIAT rushes mountain top next to enemy spawn.jpg (file) |  |
507 KB | Since FIAT is extremely fast it can reach positions that are untargetable by enemies, such as this mountain above their tunnel to B. Needless to say it is extremely unfunny for enemy team, as FIAT can bombard them from above. [[Category:In-game screens... | 1 |
| 16:52, 3 February 2024 | FIAT attacks enemy spawn while camping A point.jpg (file) |  |
570 KB | Japan map. Due to the absurdly high speed FIAT can arrive to A sniping point before enemy tanks can even leave spawn tunnel. This leads enemy artillery to dying instantly and tanks on A being widely exposed to fire. Artillery on B can stop FIAT, but i... | 1 |
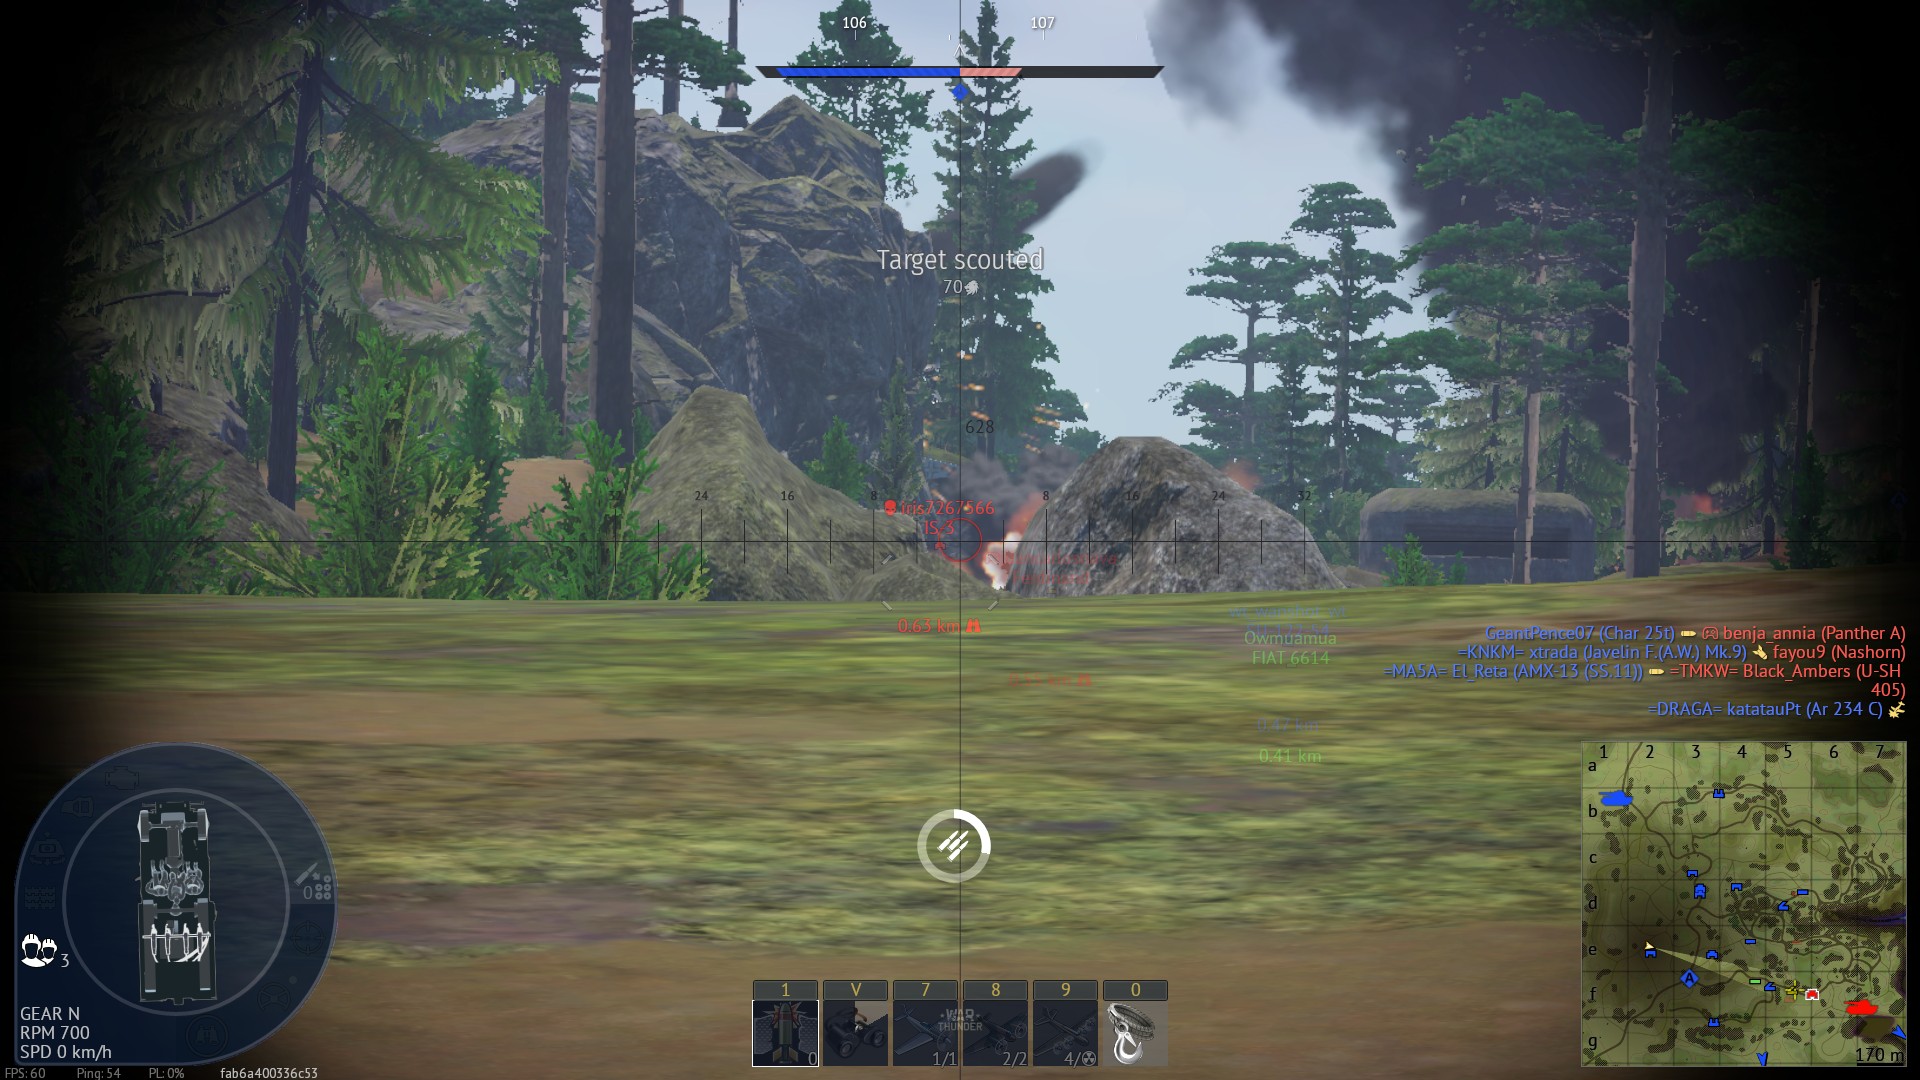
| 16:50, 3 February 2024 | FIAT uses terrain elevation to camp infront of the enemy.jpg (file) |  |
425 KB | Self-explanatory. To be safe, only enemy turrets should be visible. Category:In-game screenshots | 1 |
| 16:48, 3 February 2024 | FIAT uses shallow hill to protect a point.jpg (file) |  |
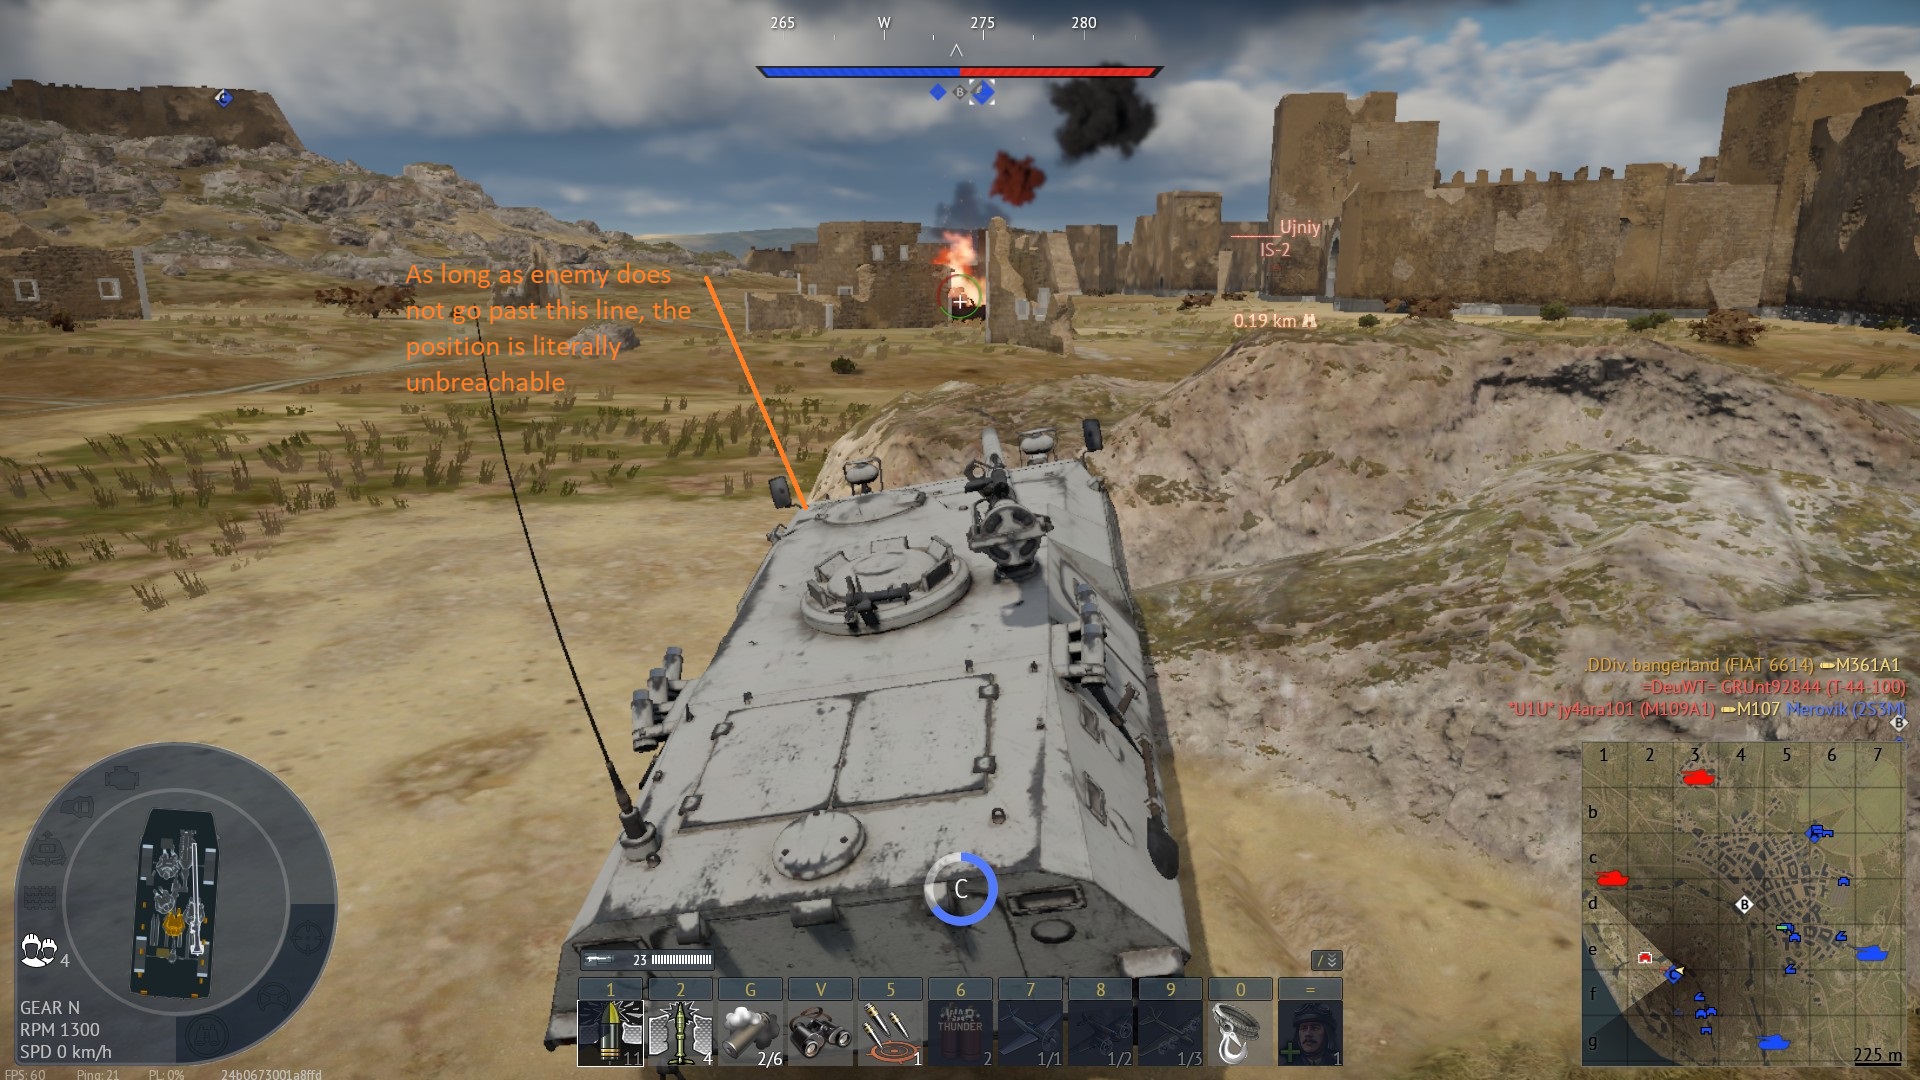
523 KB | Self-explanatory. The spot is impossible to breach unless enemy comes through the broken bridge on the right, though FIAT can still escape and retaliate with minimal effort. Category:In-game screenshots | 1 |
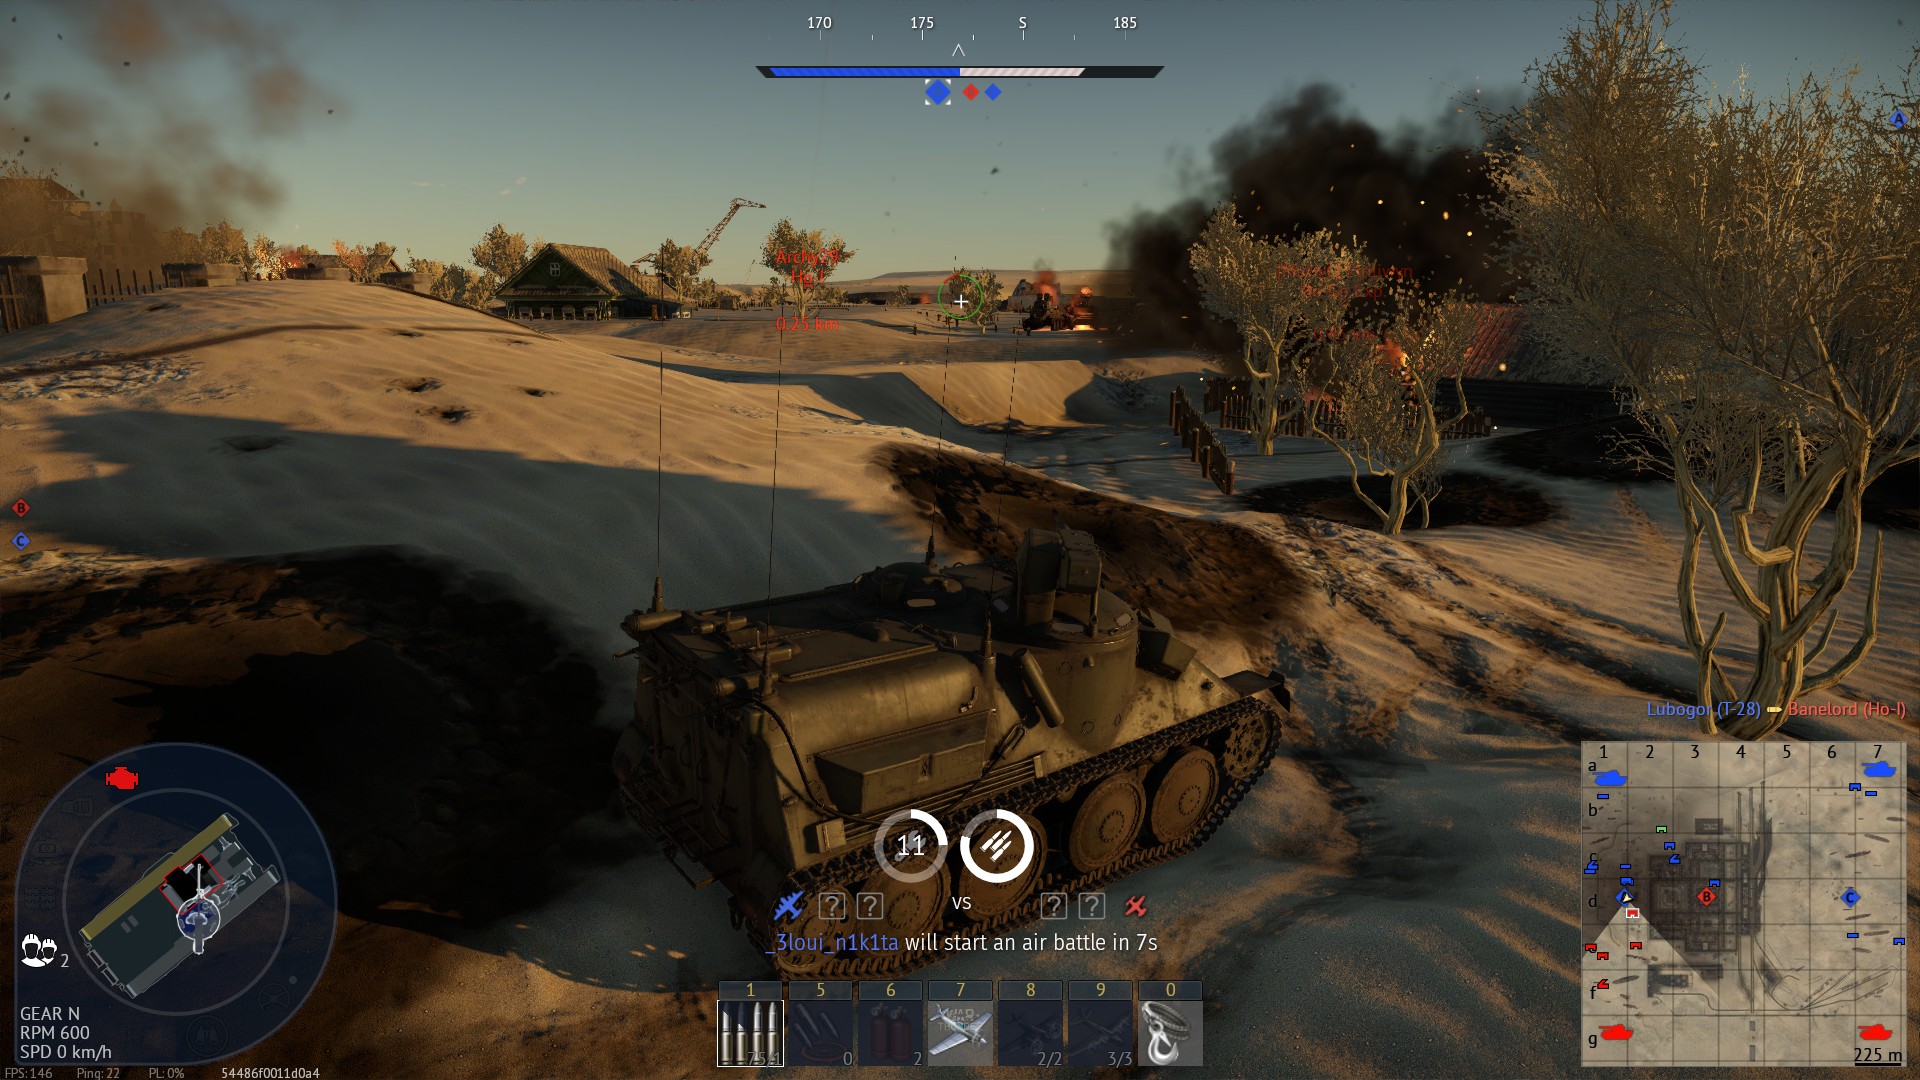
| 16:44, 3 February 2024 | FIAT parking on a rock on a capture point.jpg (file) |  |
598 KB | Self explanatory. Extremely safe position involving a rock. Category:In-game screenshots | 1 |
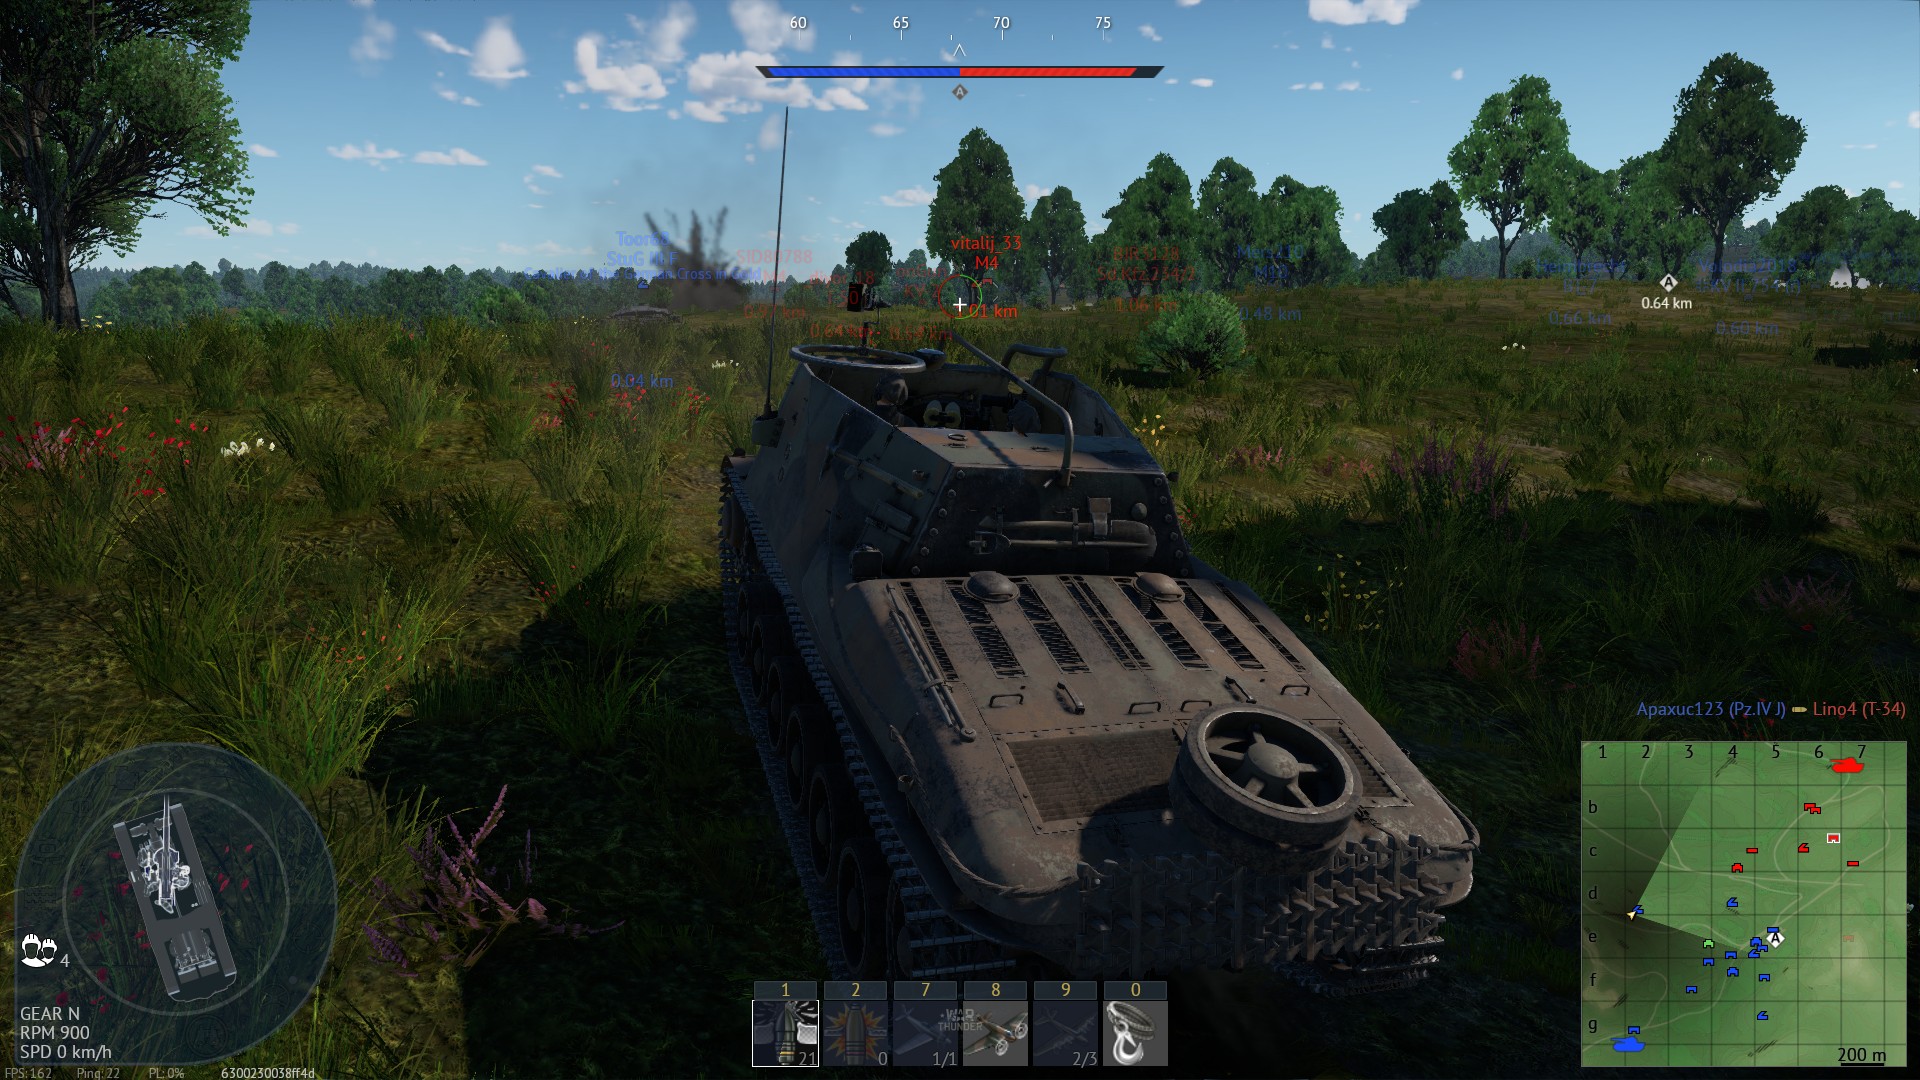
| 16:41, 3 February 2024 | FIAT hiding in a bomb hole.jpg (file) |  |
609 KB | Self explanatory. Position is used to intercept light tanks trying to capture B point, while exposed, it is effective. Category:In-game screenshots | 1 |
| 12:01, 17 December 2023 | Example of bmp-2 leaning to fire over a wall 3PV.jpg (file) |  |
496 KB | Demonstration of BMP-2 leaning to see over wall for ATGM attack. Category:In-game screenshots | 1 |
| 12:00, 17 December 2023 | BMP-2 firing atgm over a wall atgm scope.jpg (file) |  |
301 KB | By leaning on a decoration, using atgm scope directly and aiming at where the tank presumably is, BMP-2 can achieve a hit with ATGM at short range even over a wall that technically shouldn't be an attack vector for it. Category:In-game screenshots | 1 |
| 11:06, 17 December 2023 | Warrior looking at church window ATGM sight.jpg (file) |  |
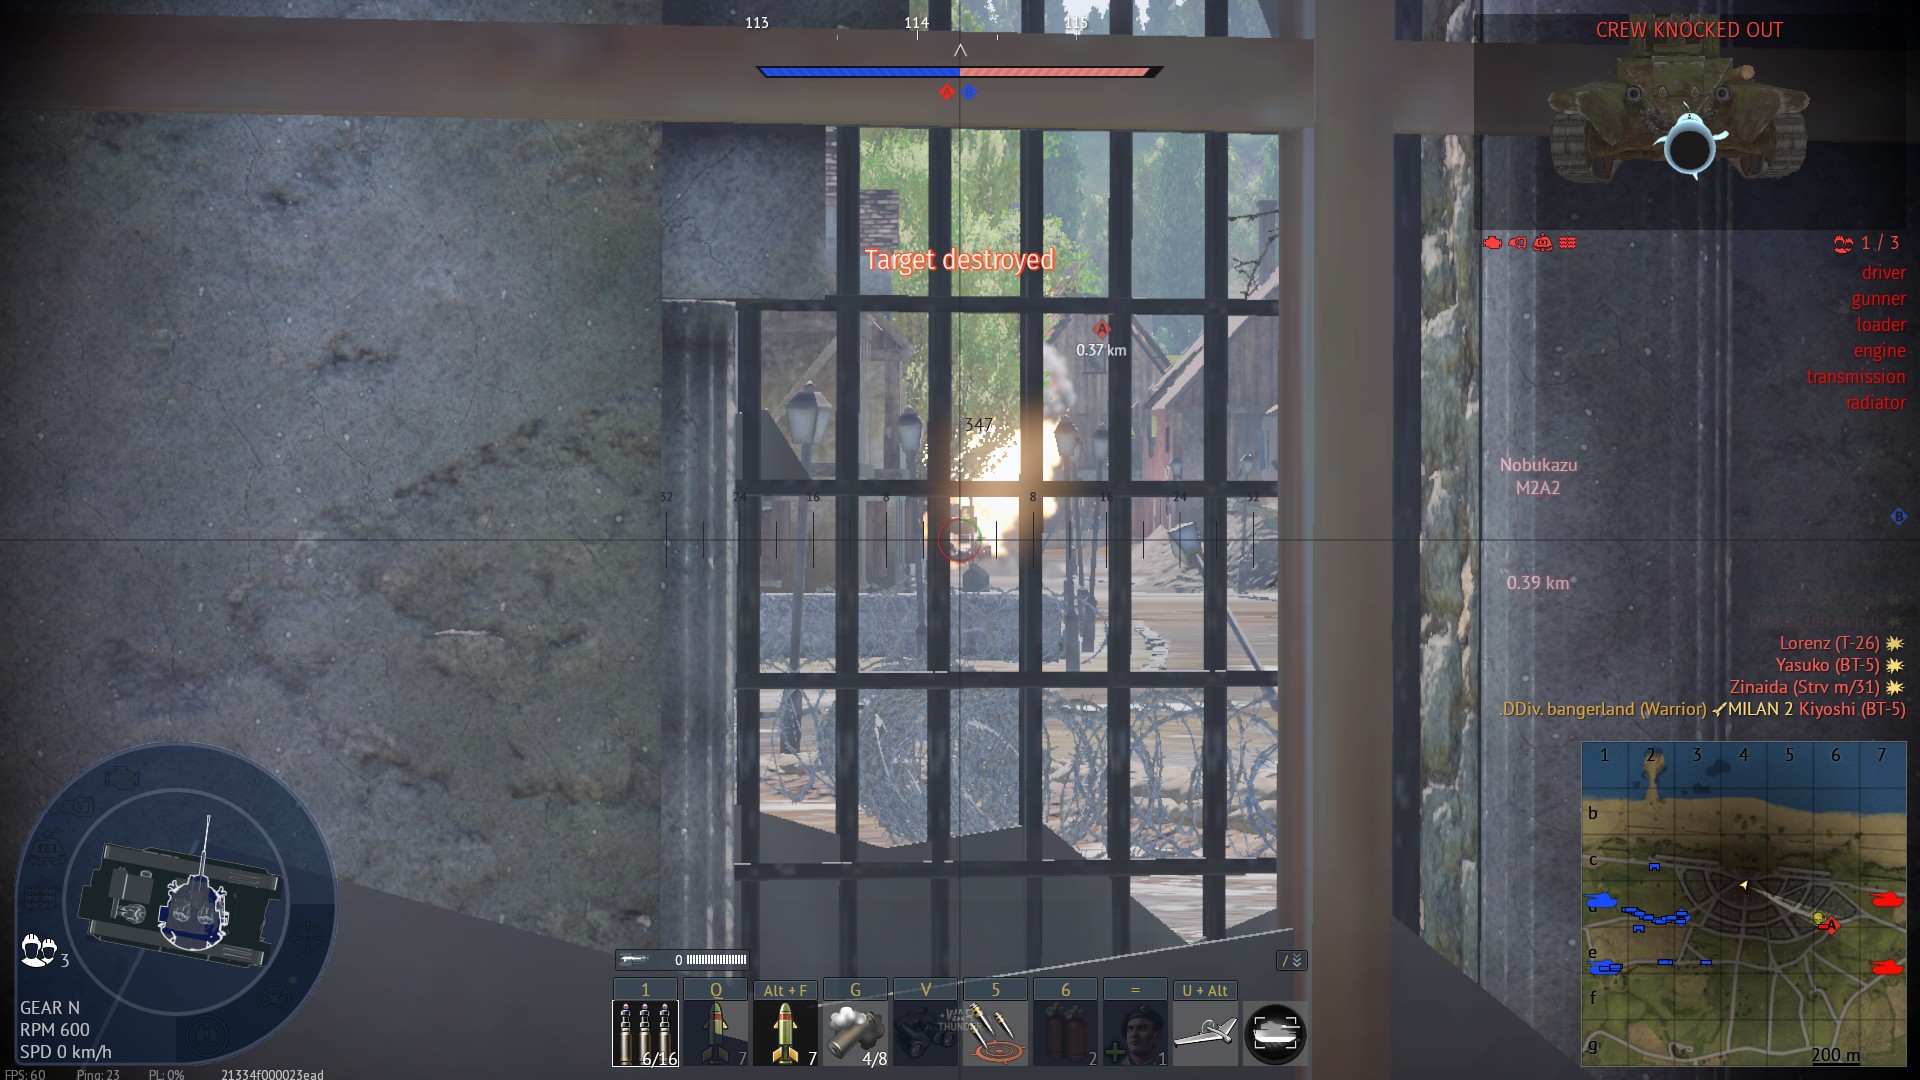
398 KB | The ATGM sight is super tall and can look over containers and super tall windows and can ensure that player doesn't hit a wall when launching ATGM. Very good. To not receive "LOS LOST", player must ensure that the commander scope still sees at least so... | 1 |
| 11:05, 17 December 2023 | Warrior looking at church window commander sight.jpg (file) |  |
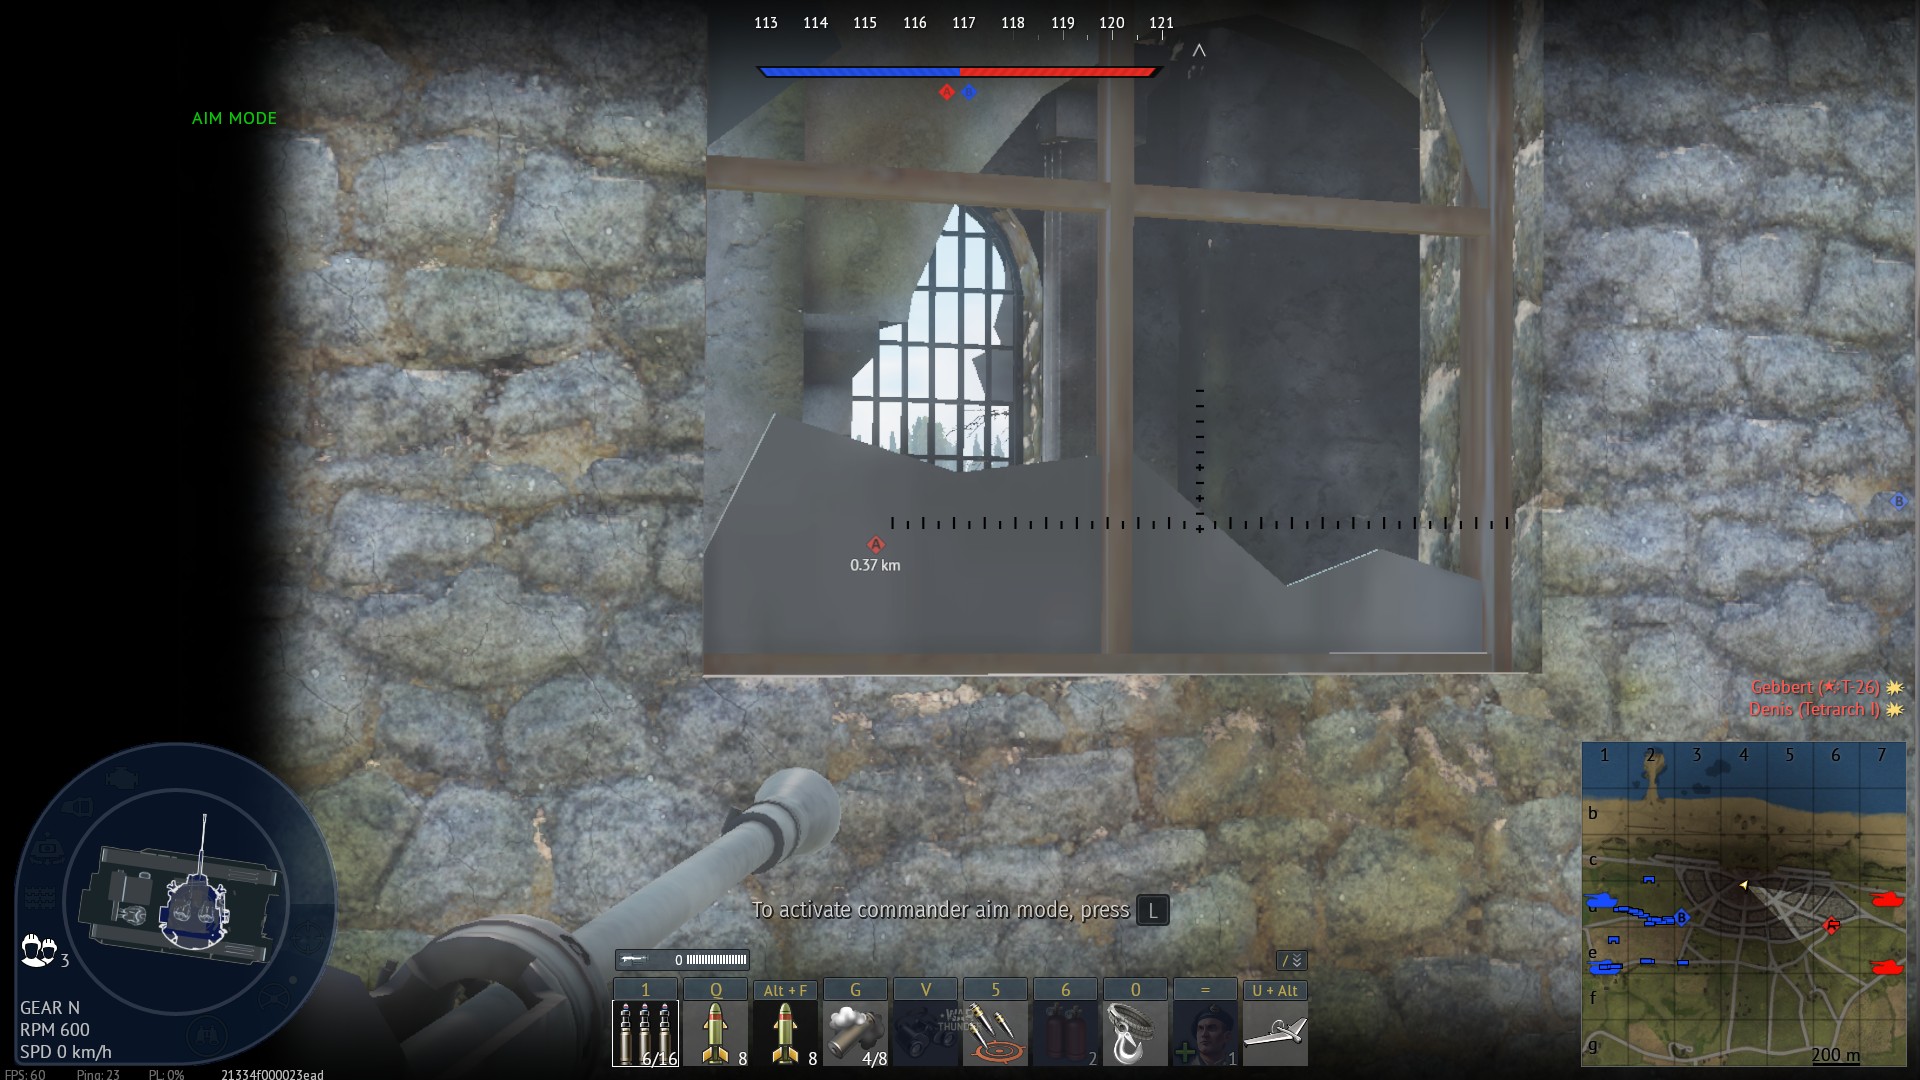
382 KB | Warrior commander sight is tall enough to aim through the window, but it would be quite impossible to do in RB due to the "glass" blocking the actual view, even though The Glass is merely a suggesion and can't stop anything as it doesn't exist. An ATGM... | 1 |
| 11:02, 17 December 2023 | Warrior looking at church window gunner sight.jpg (file) |  |
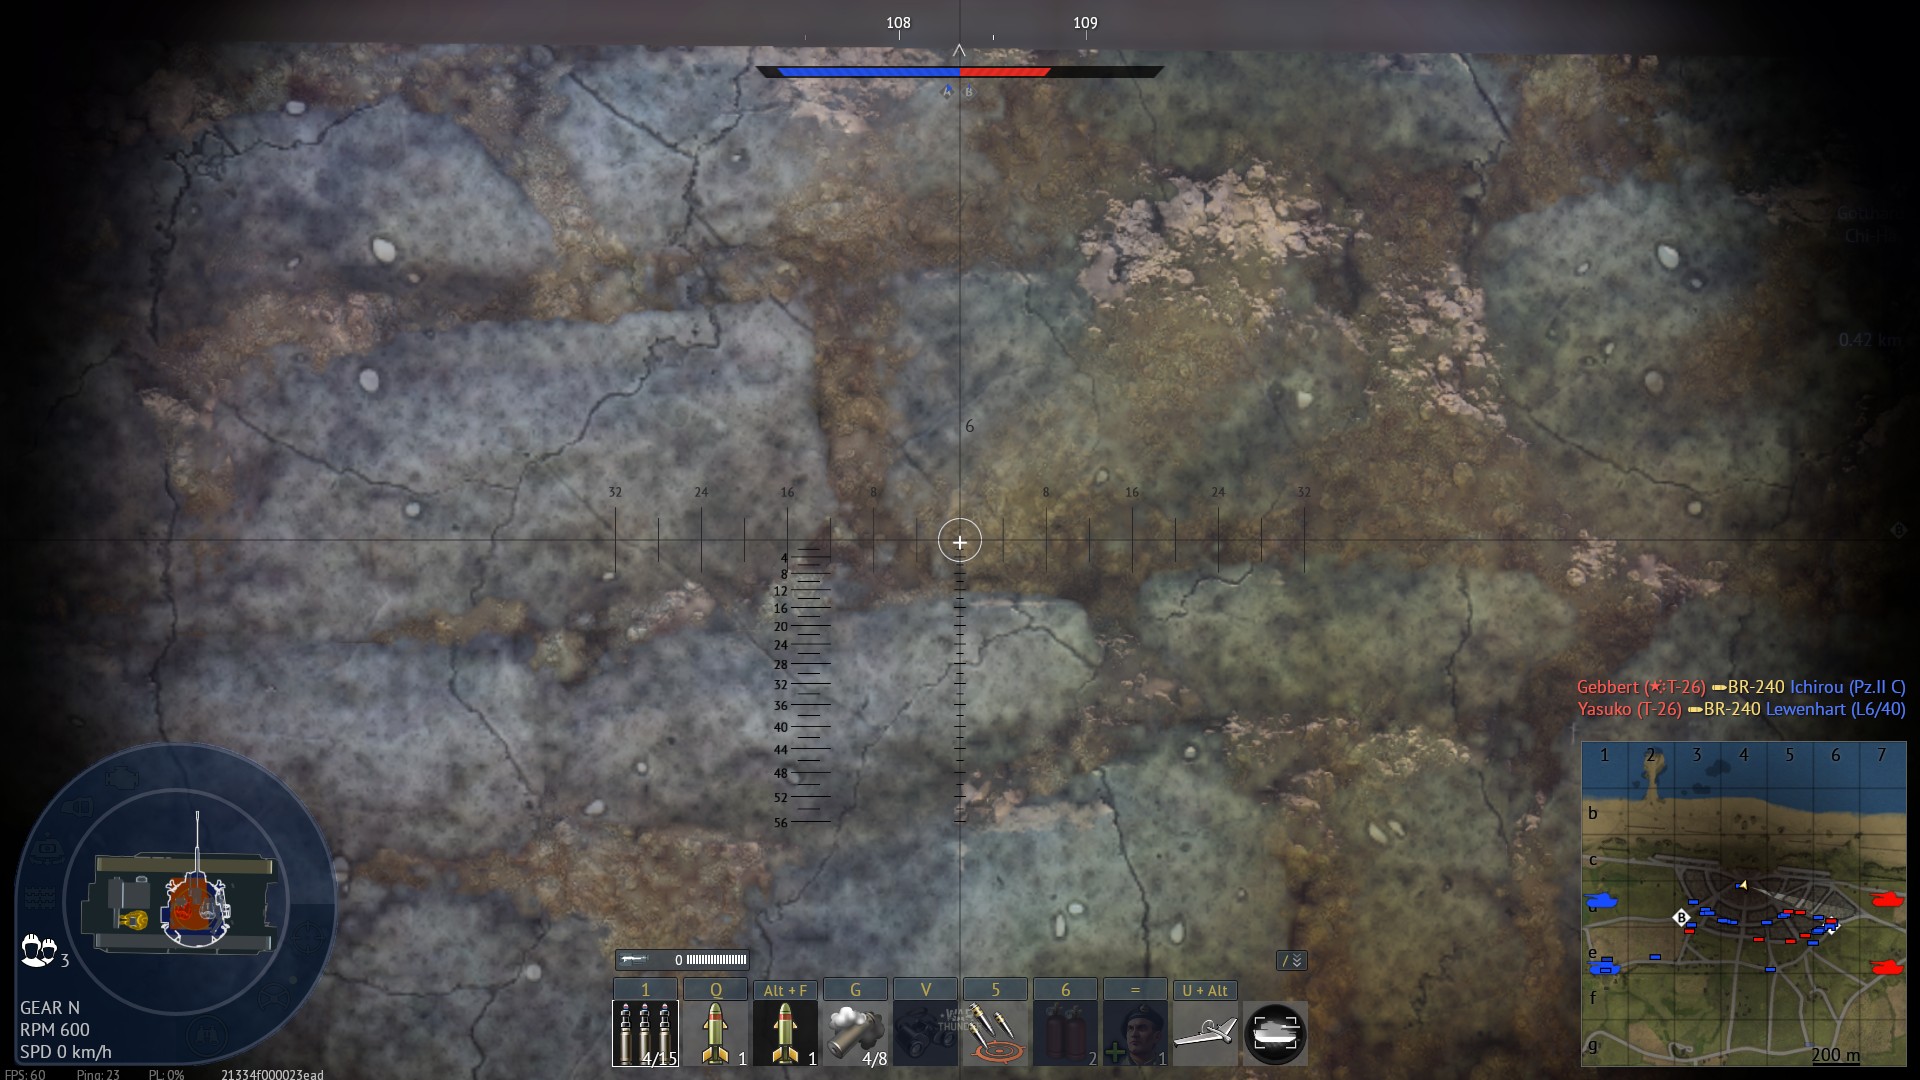
372 KB | The Warrior gunner sight is located too low to look into windows, requiring user to use other sights to do anything. Used with other two screenshots in series to explain. Category:In-game screenshots | 1 |
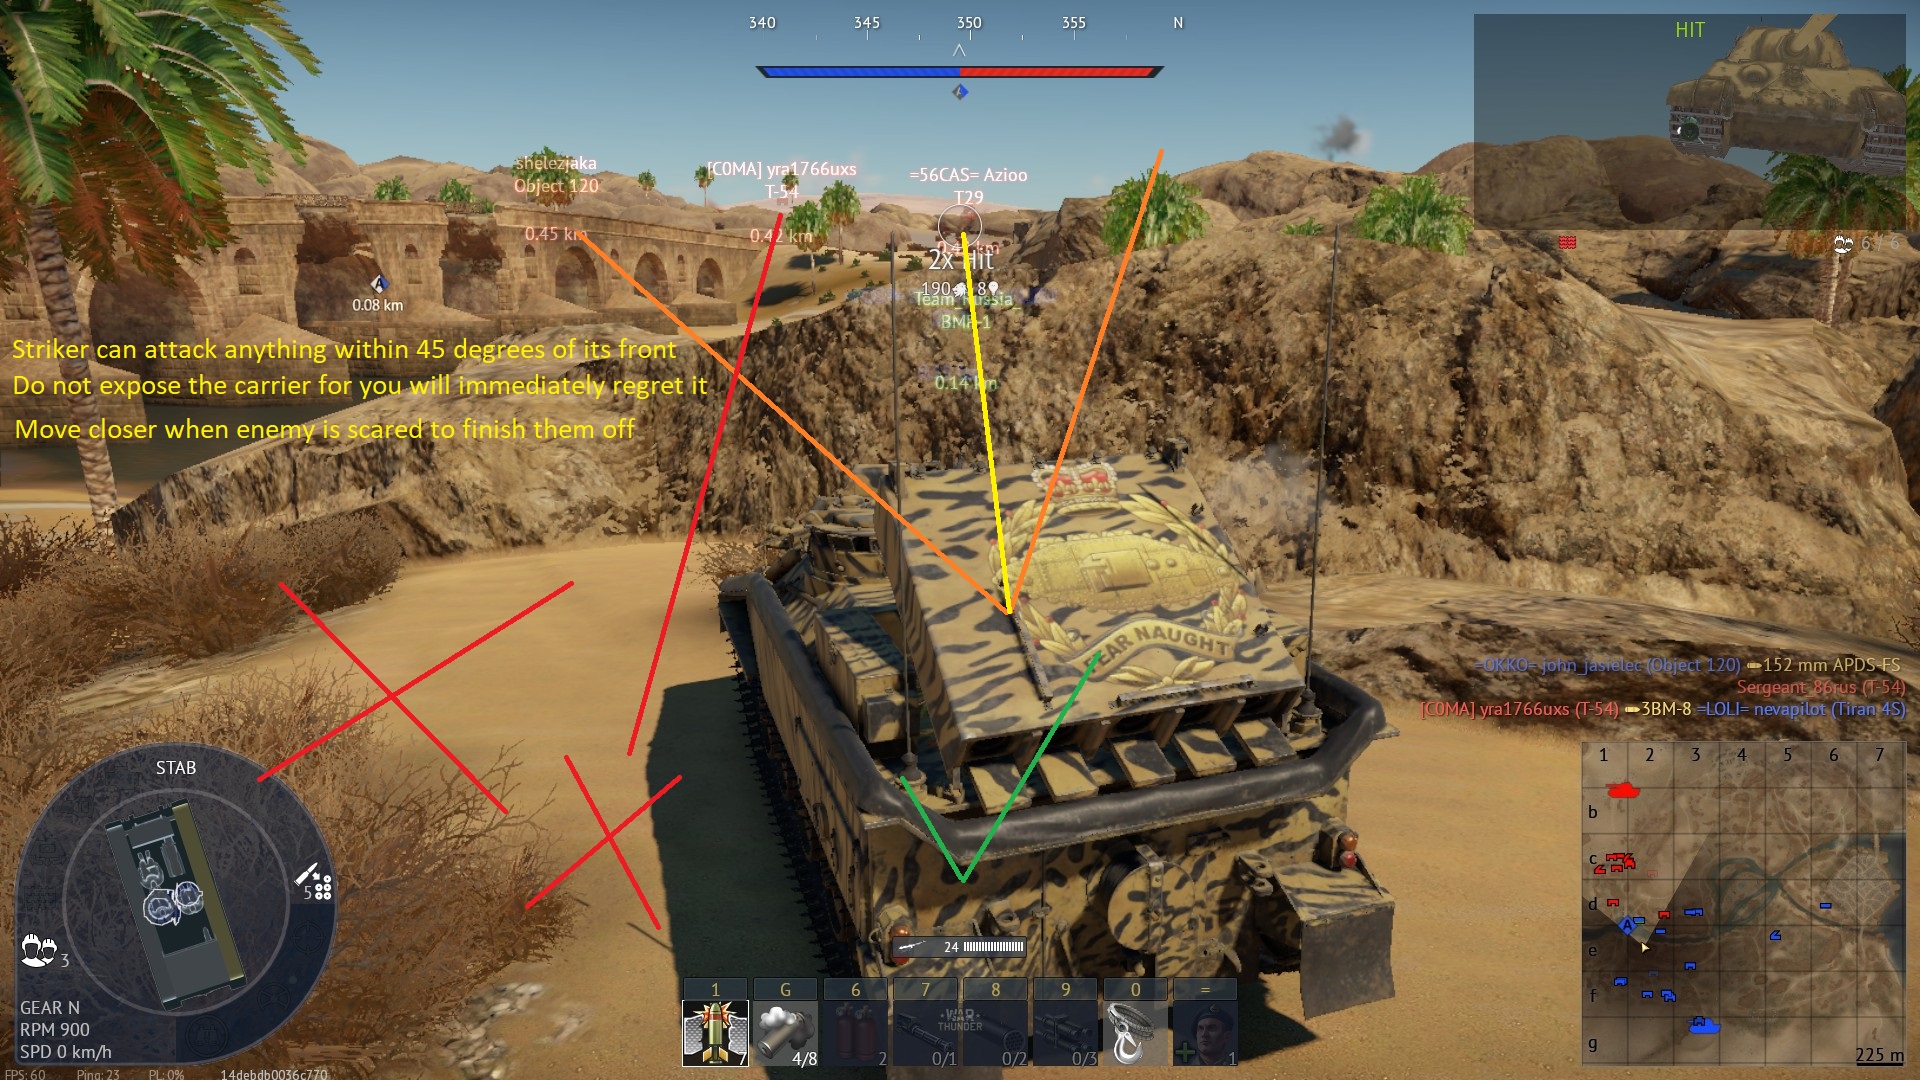
| 20:05, 20 July 2023 | Striker 250 m indirect shot.jpg (file) |  |
610 KB | When there is only one complete cover between Striker and enemy tank, the fight is already decided. Category:In-game screenshots | 1 |
| 20:03, 20 July 2023 | Striker 450 m indirect shot.jpg (file) |  |
750 KB | Striker can fire indirectly at snipers from complete safety, but it's mostly done to scare people. Category:In-game screenshots | 1 |
| 19:47, 20 July 2023 | Striker 50 m shot.jpg (file) |  |
640 KB | As enemy tank is too close, Striker must aim in between them and target to hit. Category:In-game screenshots | 1 |
| 15:03, 10 December 2022 | Khrizanetma-s firing over cover.jpg (file) |  |
382 KB | Demonstration of superiority of radar aim over default aim on Khrizantema-S. Category:In-game screenshots | 1 |
| 18:34, 17 November 2022 | Pbv 302 bill overhill shot example.jpg (file) |  |
463 KB | Demonstration of ATGM overhill attack. This works because ATGM launcher counts as a primary weapon by default (basically unique to this vehicle since machine gun nerf). Only the launcher must be exposed and that is not a must. [[Category:In-game screen... | 1 |
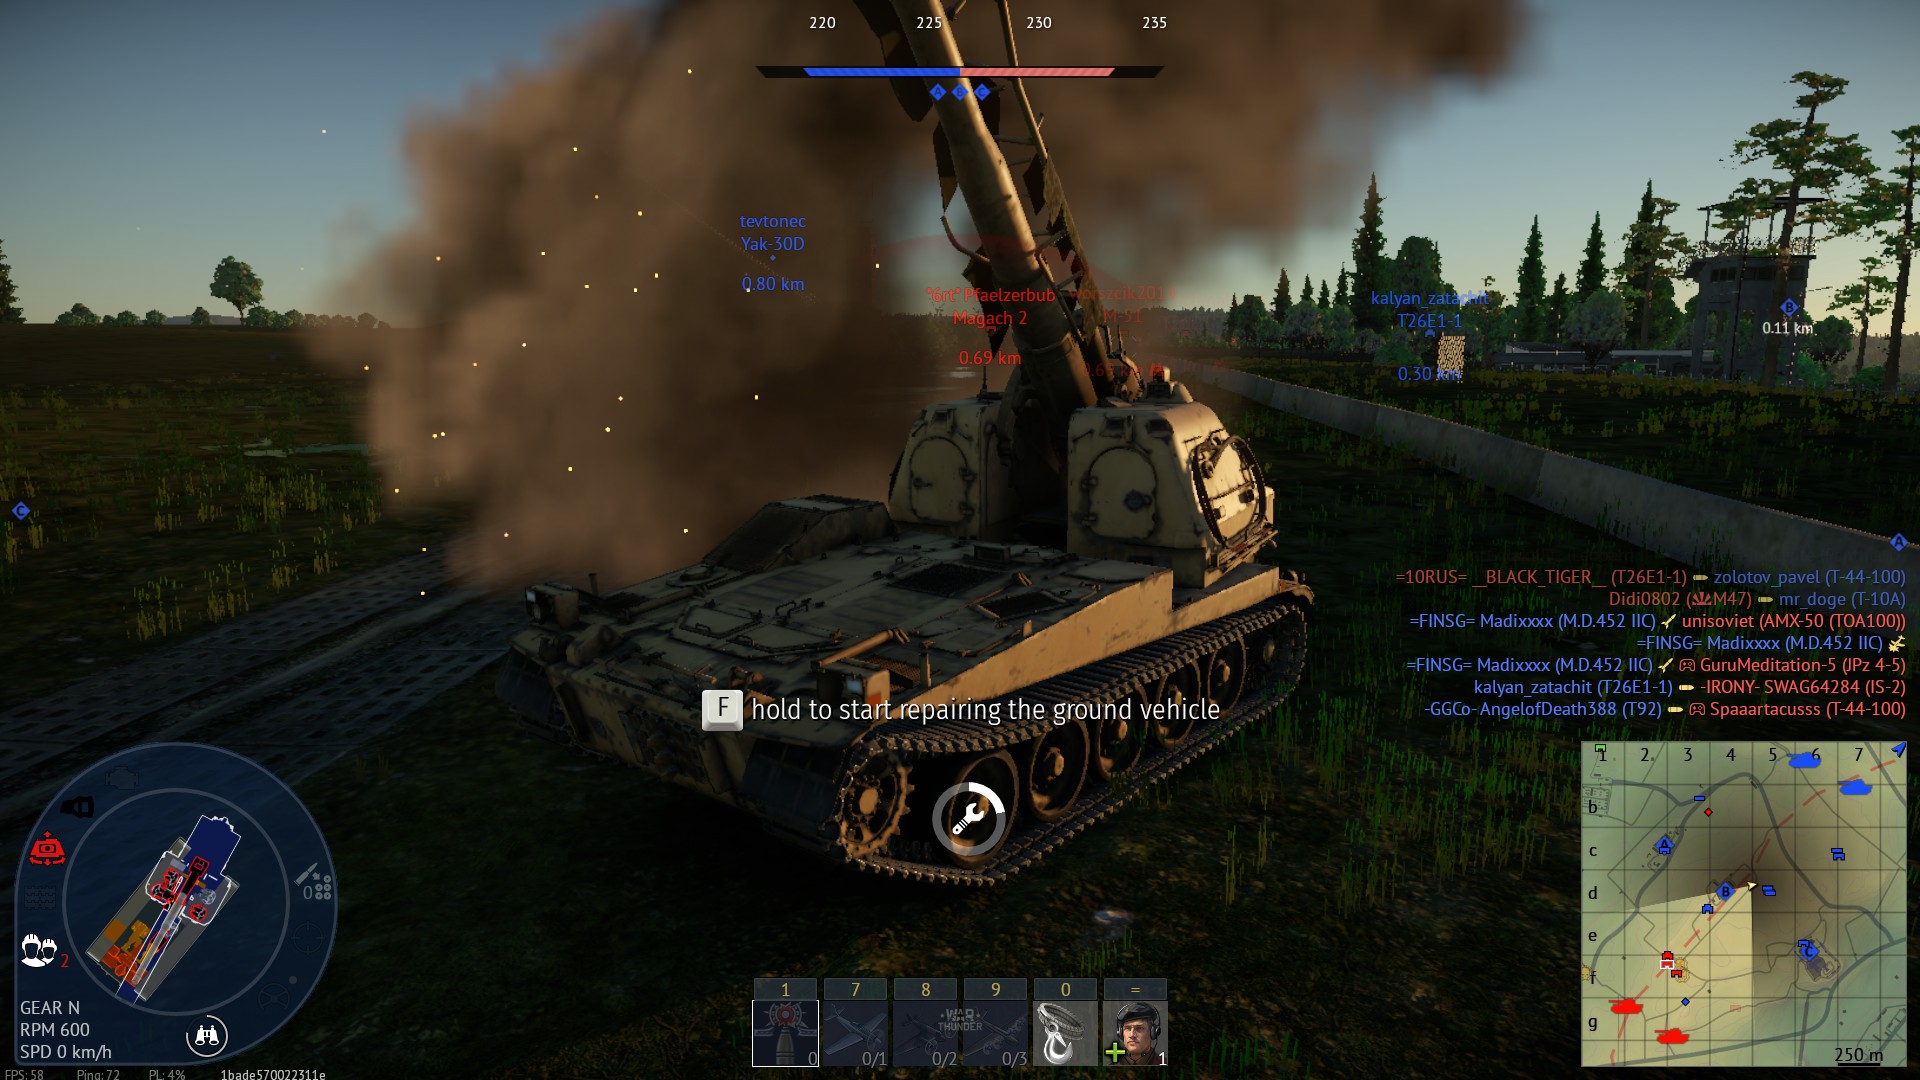
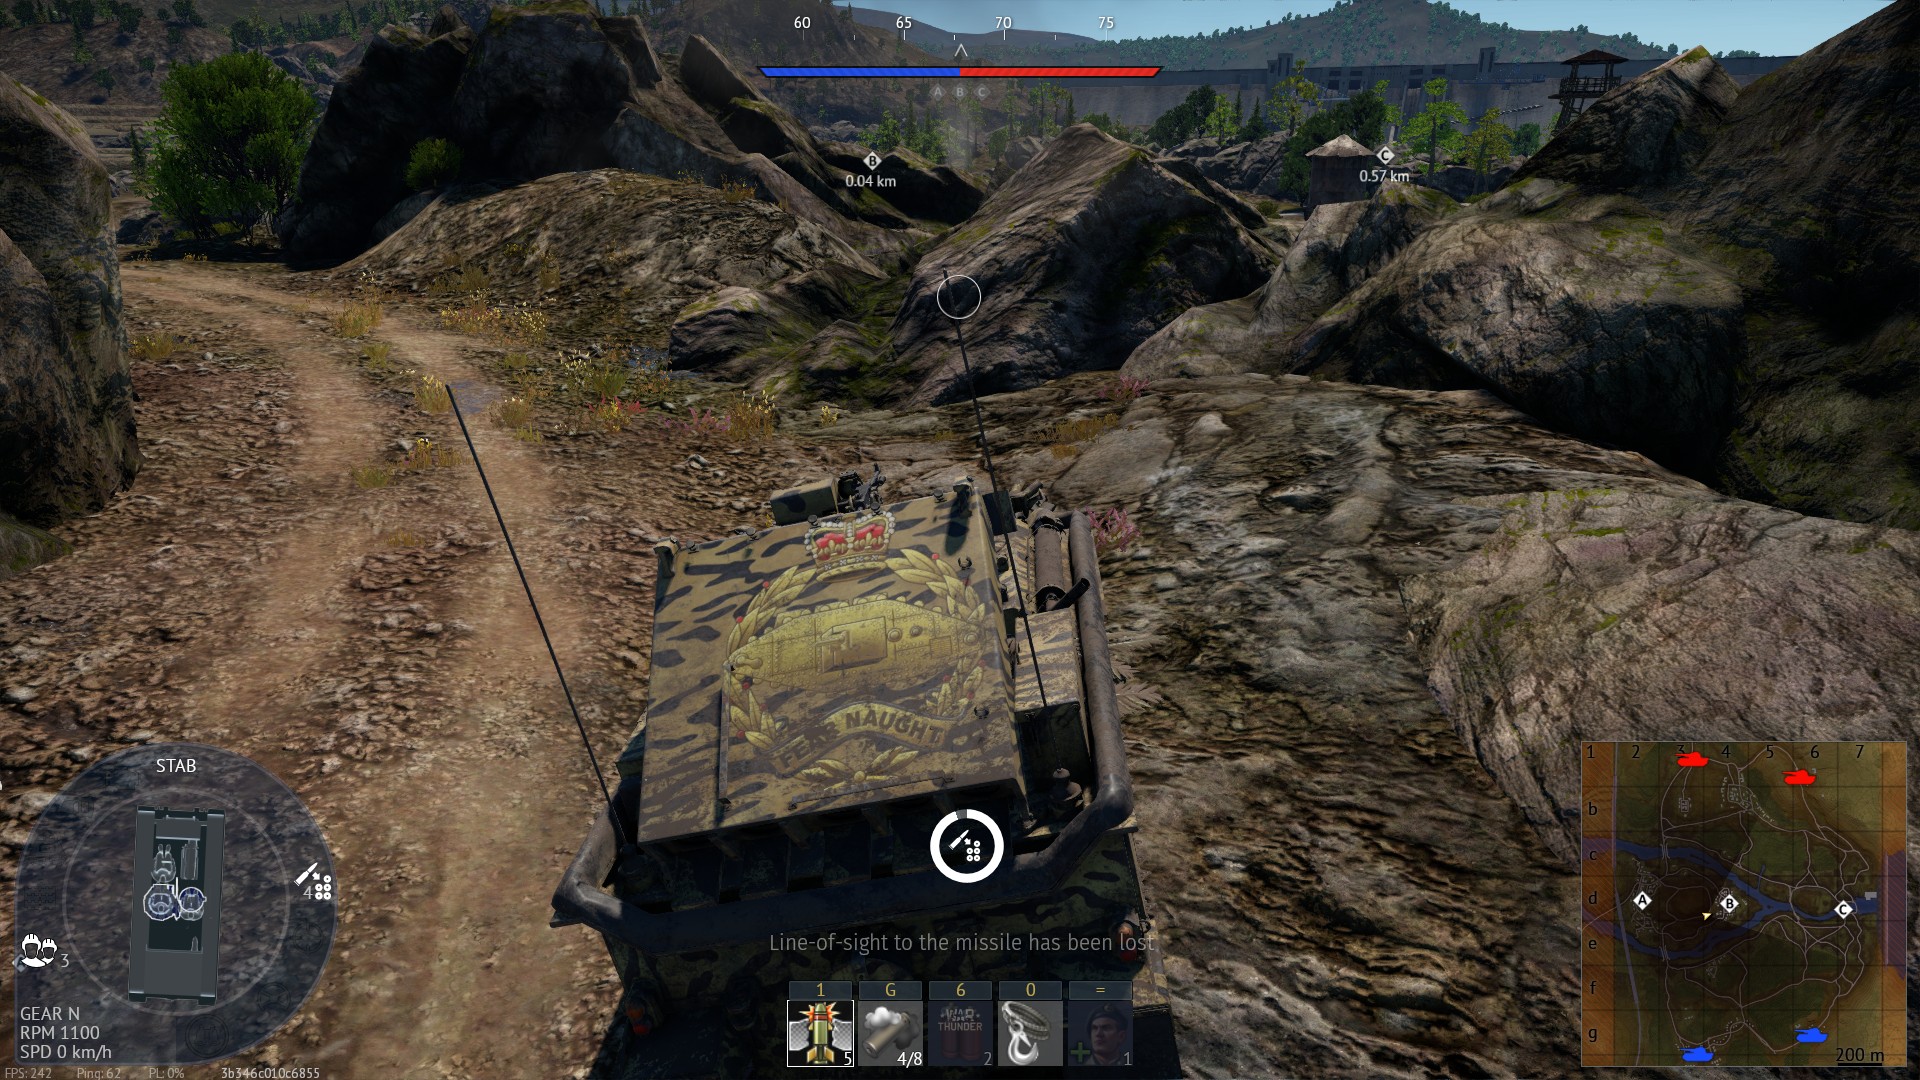
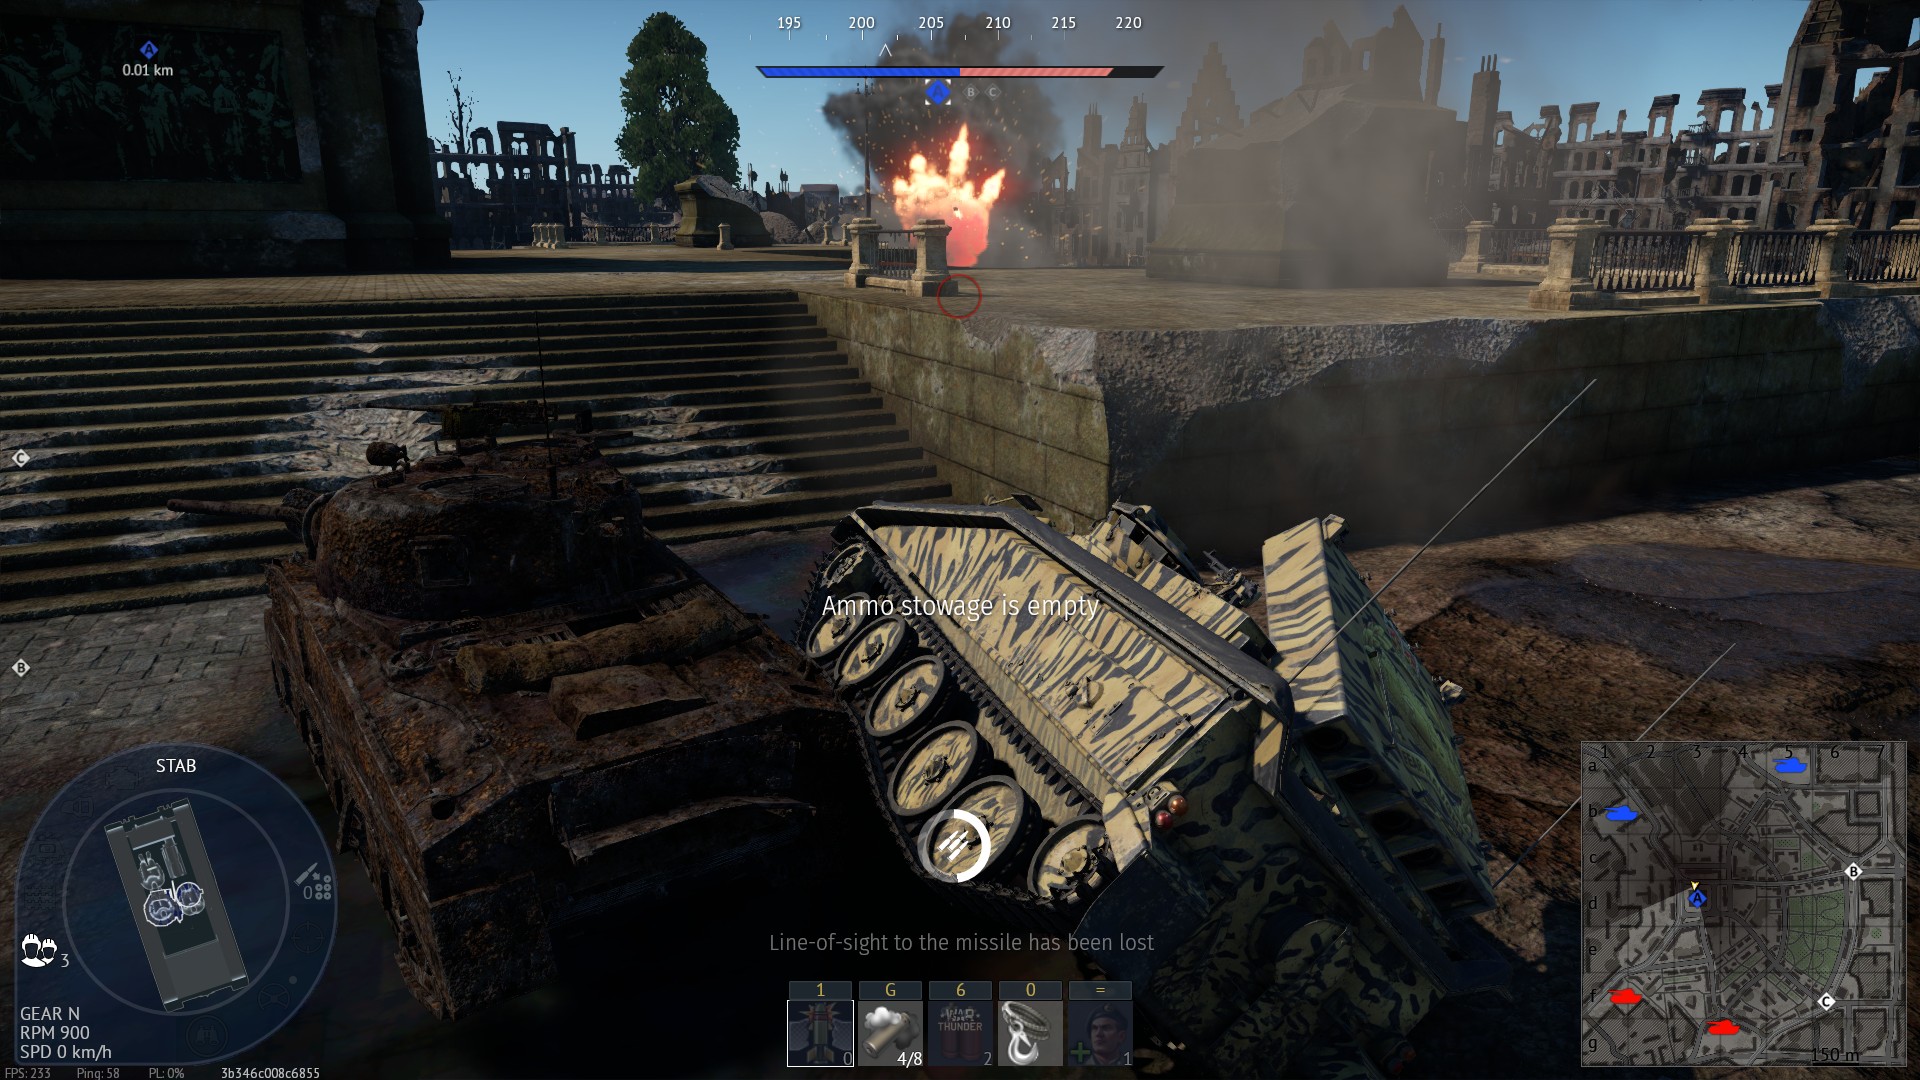
| 18:58, 3 October 2022 | Bkan works as a bait.jpg (file) |  |
408 KB | Empty Bkan wastes enemy time by being a martyr. by assuming this stance when the autoloader is empty, the SPG makes it very difficult to hit the gunner tower, and the enemies very rarely bothers firing at the driver (which could also be hidden behind t... | 1 |
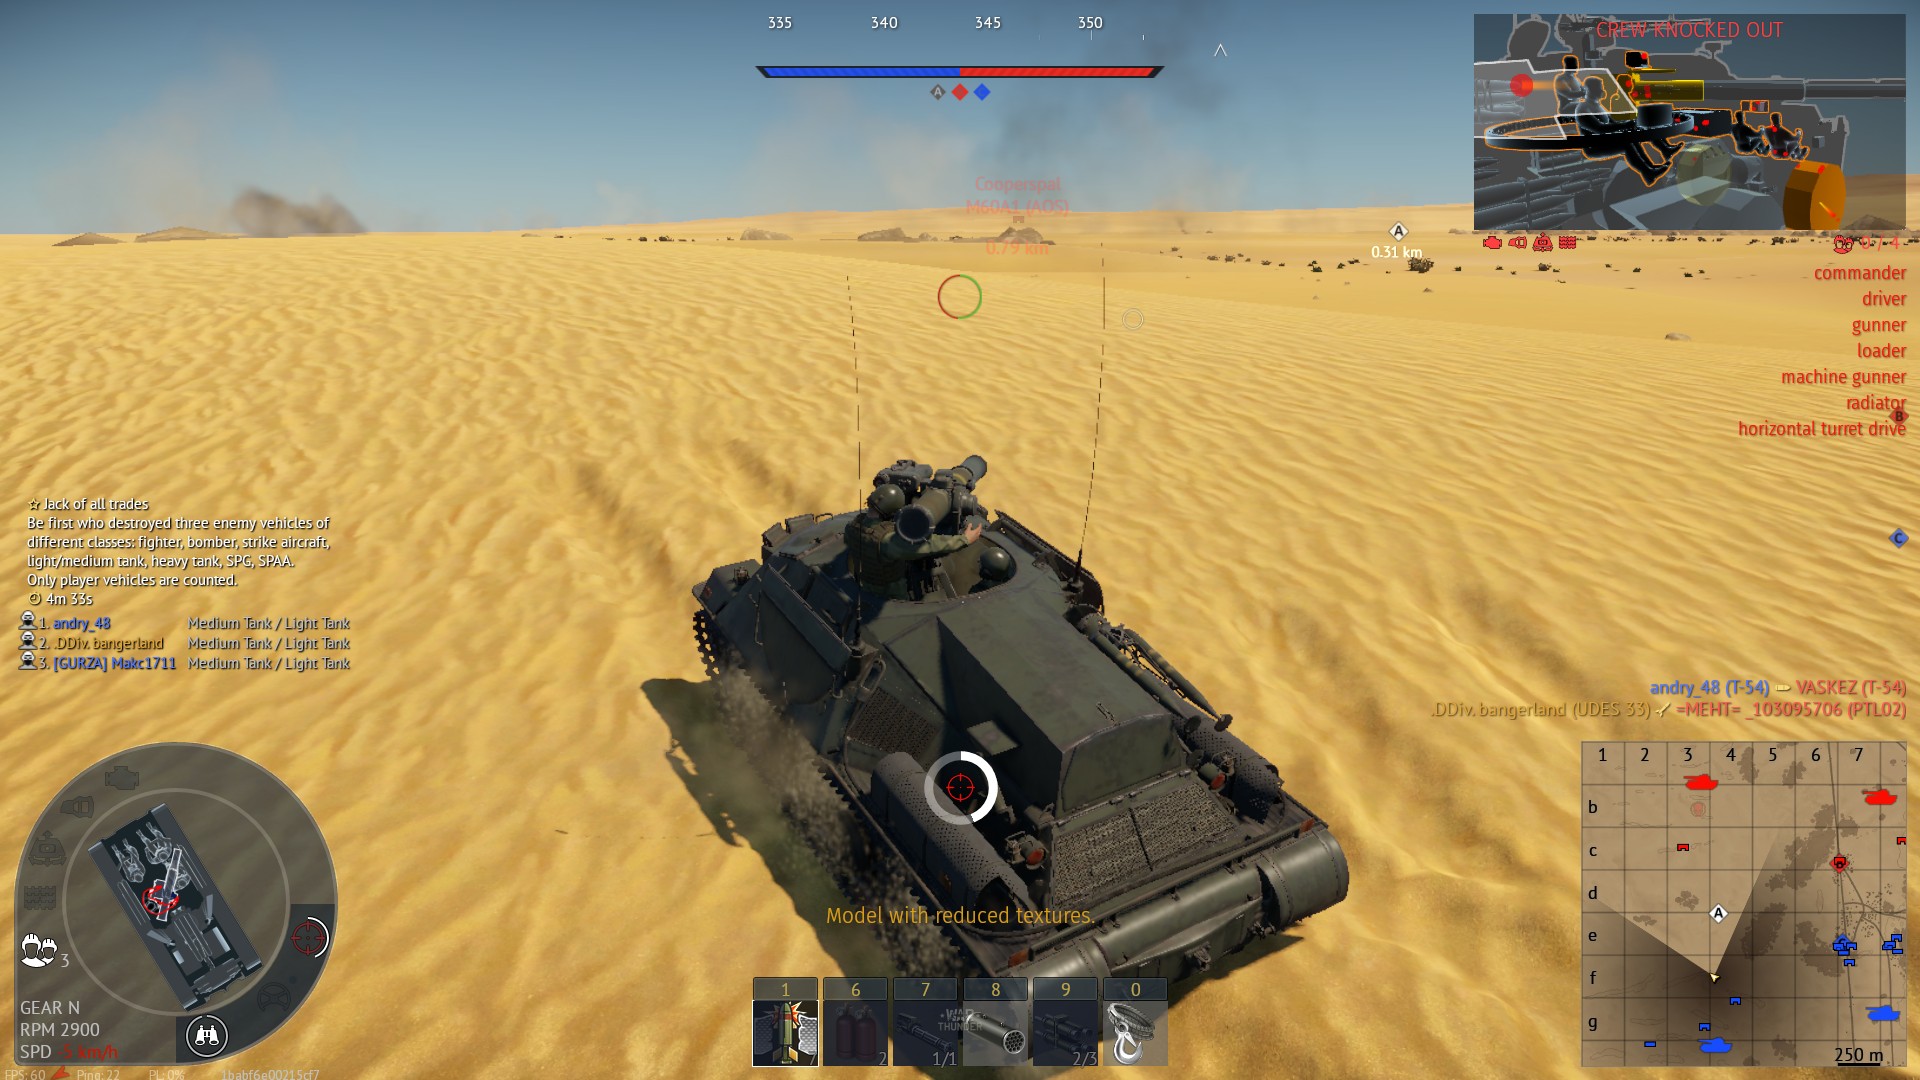
| 18:32, 3 October 2022 | UDES trades shot with light tank.jpg (file) |  |
397 KB | AB mode. UDES trades shot with a light tank, but because that tank used APFSDS, UDES lives only losing a gunner and light tank suffers fatal overpressure. The trade is possible because in AB missiles can still be guided even without a gunner. [[Categor... | 1 |
| 18:30, 3 October 2022 | UDES fires over wall.jpg (file) |  |
425 KB | AB mode, self explanatory. The launcher does not really allow to fire directly, so the carrier is parked a bit away from wall. Enemy tank is hit in the roof so overpressure destroys them. Category:In-game screenshots | 1 |
| 14:43, 29 September 2022 | UDES 33 stuck in a draw.jpg (file) |  |
478 KB | UDES 33 was laying in ambush, but failed upon attacking and now the Leopard 1 is staring it down. Not good for ATGM, obviously. Category:In-game screenshots | 1 |
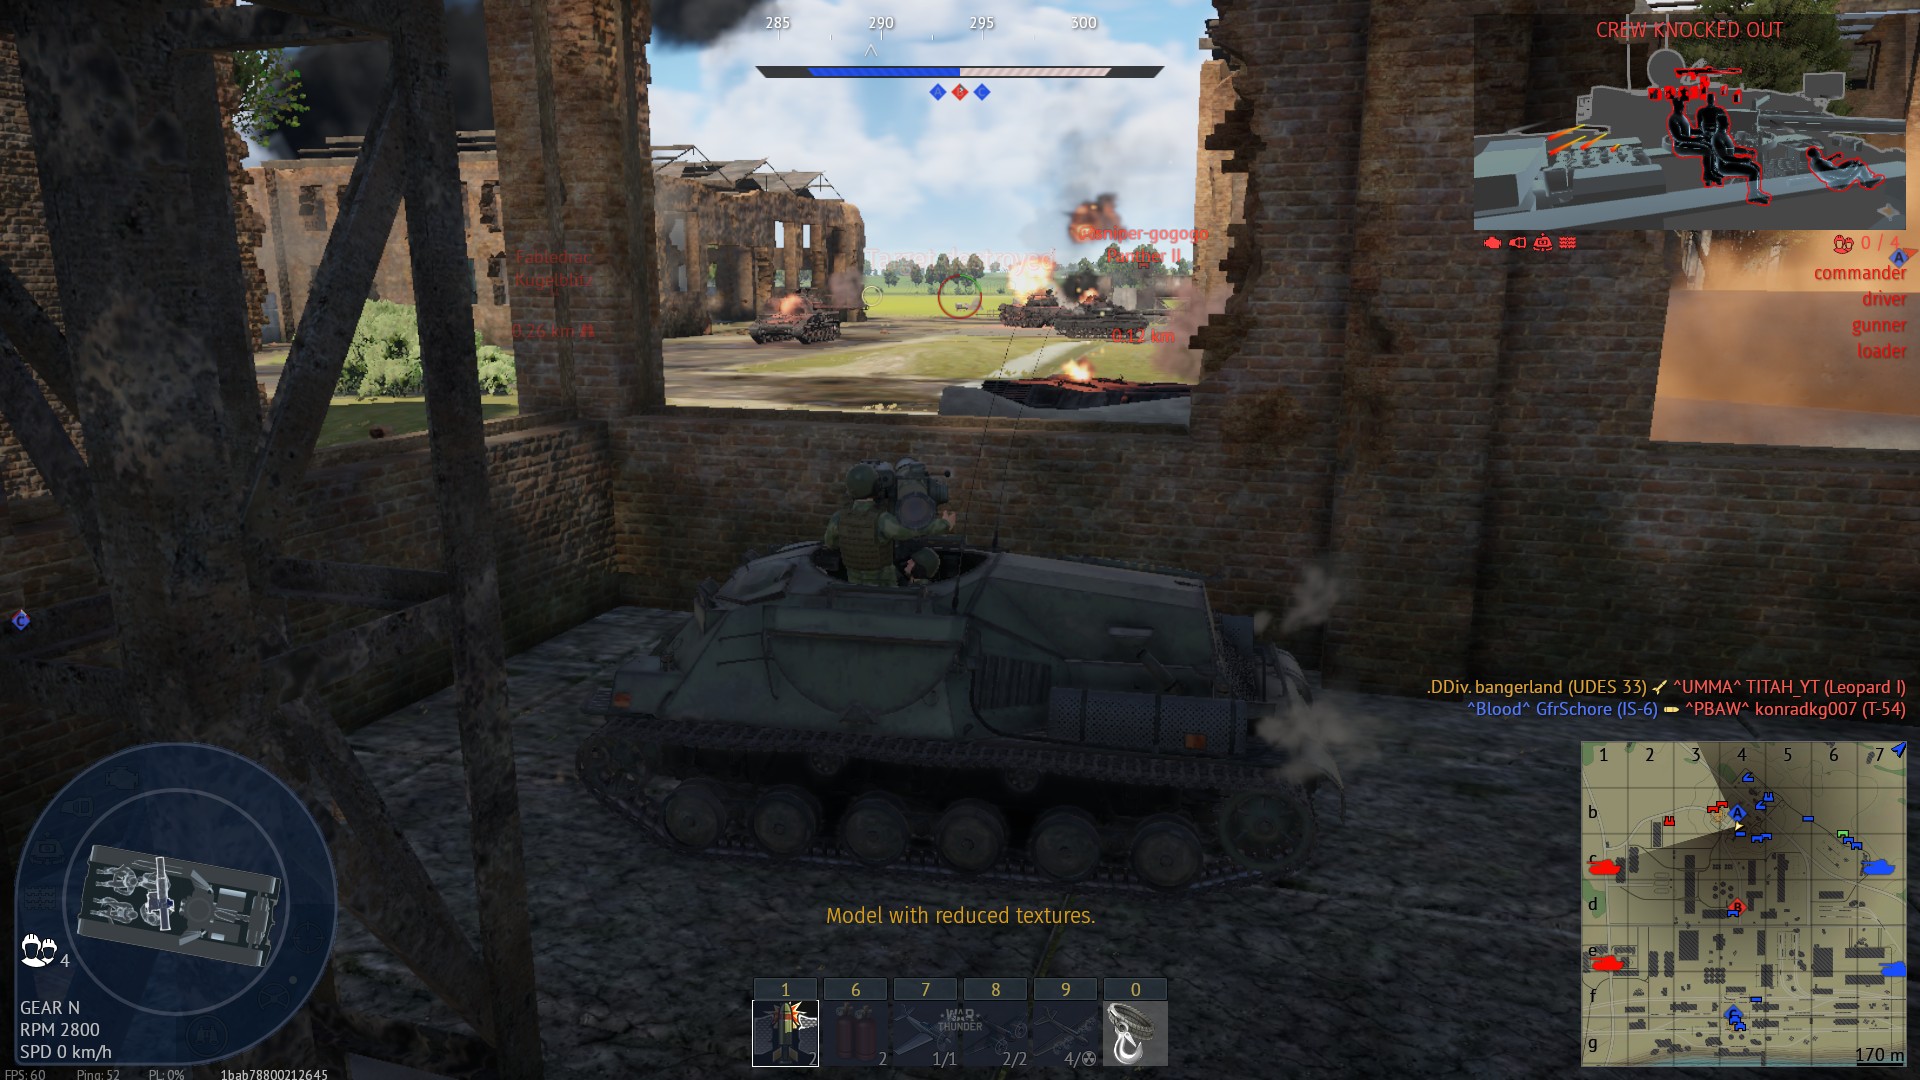
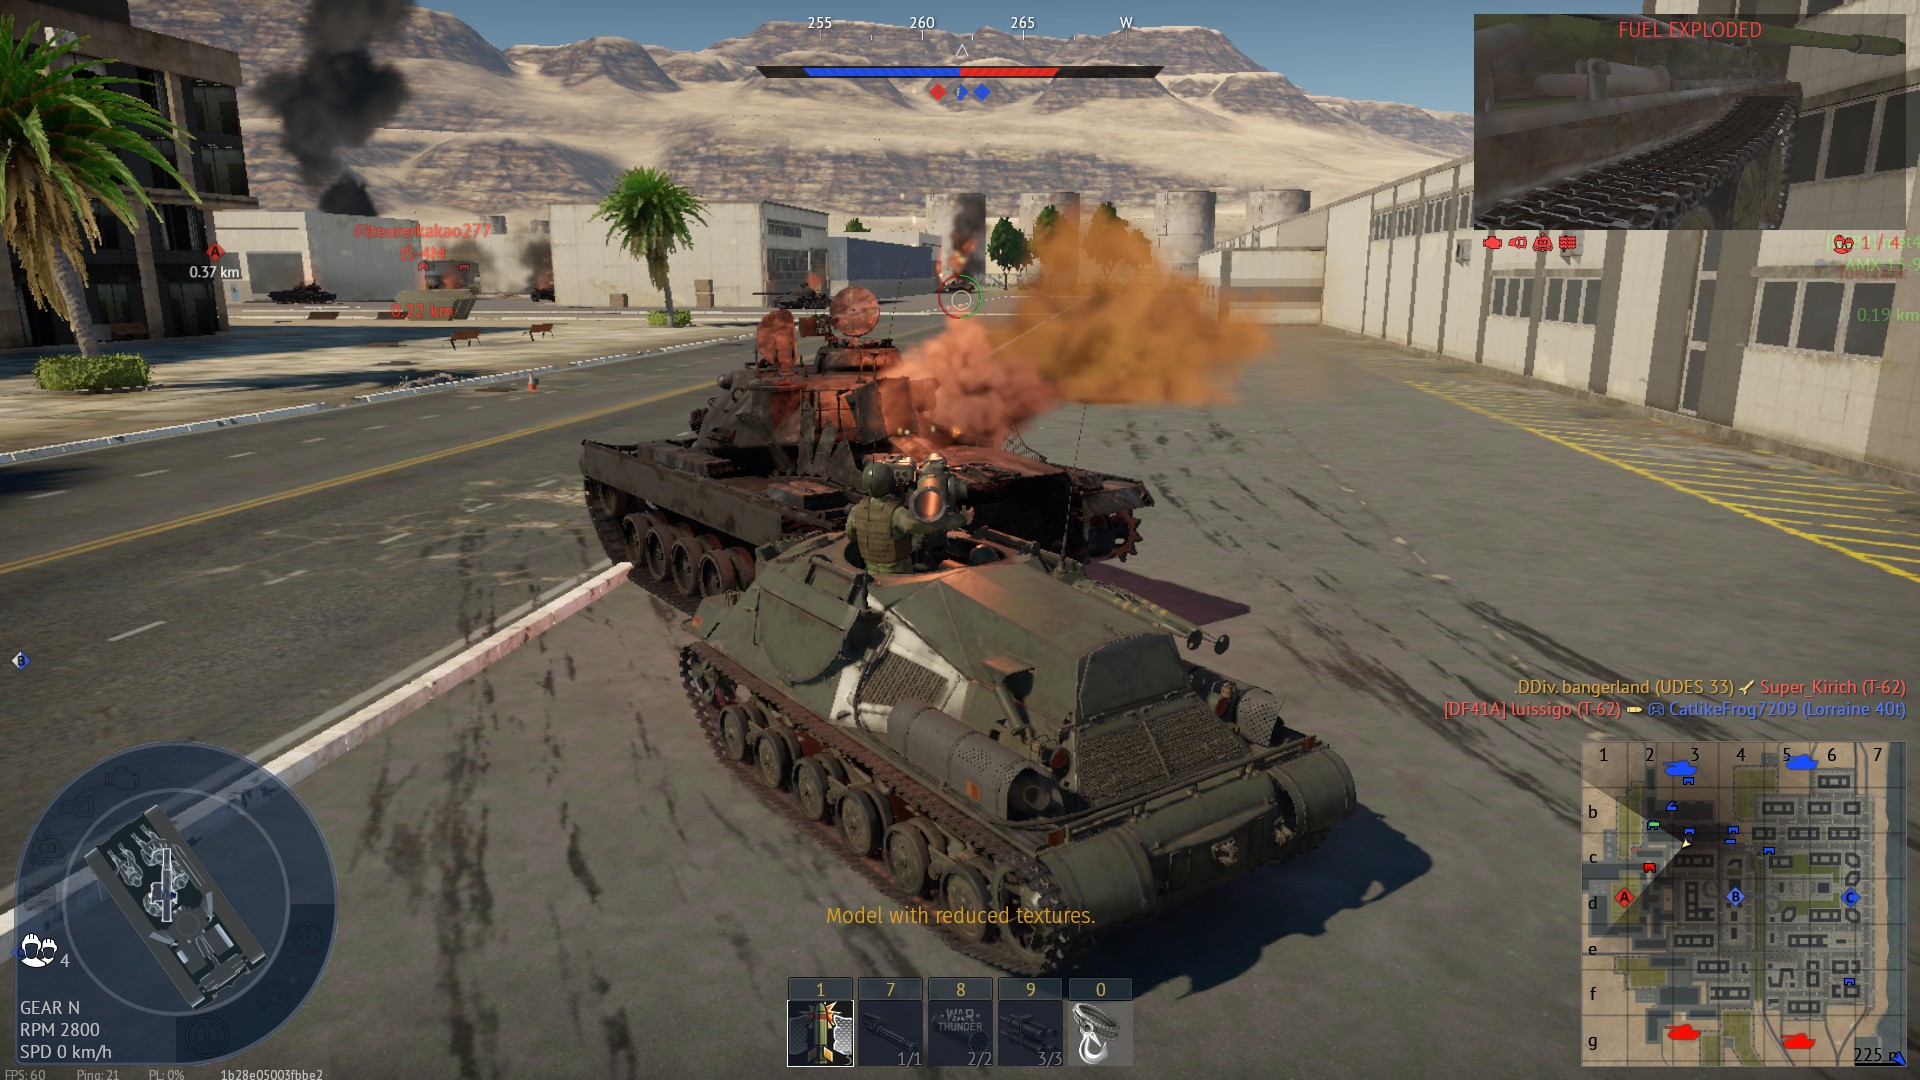
| 14:43, 29 September 2022 | UDES 33 cover control.jpg (file) |  |
454 KB | Demonstrates that UDES 33 can control a street by staning behind a dead tank. It only exposes the launcher to avoid being spotted or obliterated. Category:In-game screenshots | 1 |
| 14:43, 29 September 2022 | UDES 33 countersnipes.jpg (file) |  |
482 KB | An example of using UDES 33 to snipe off mountain, as people do not pay any attention. Category:In-game screenshots | 1 |
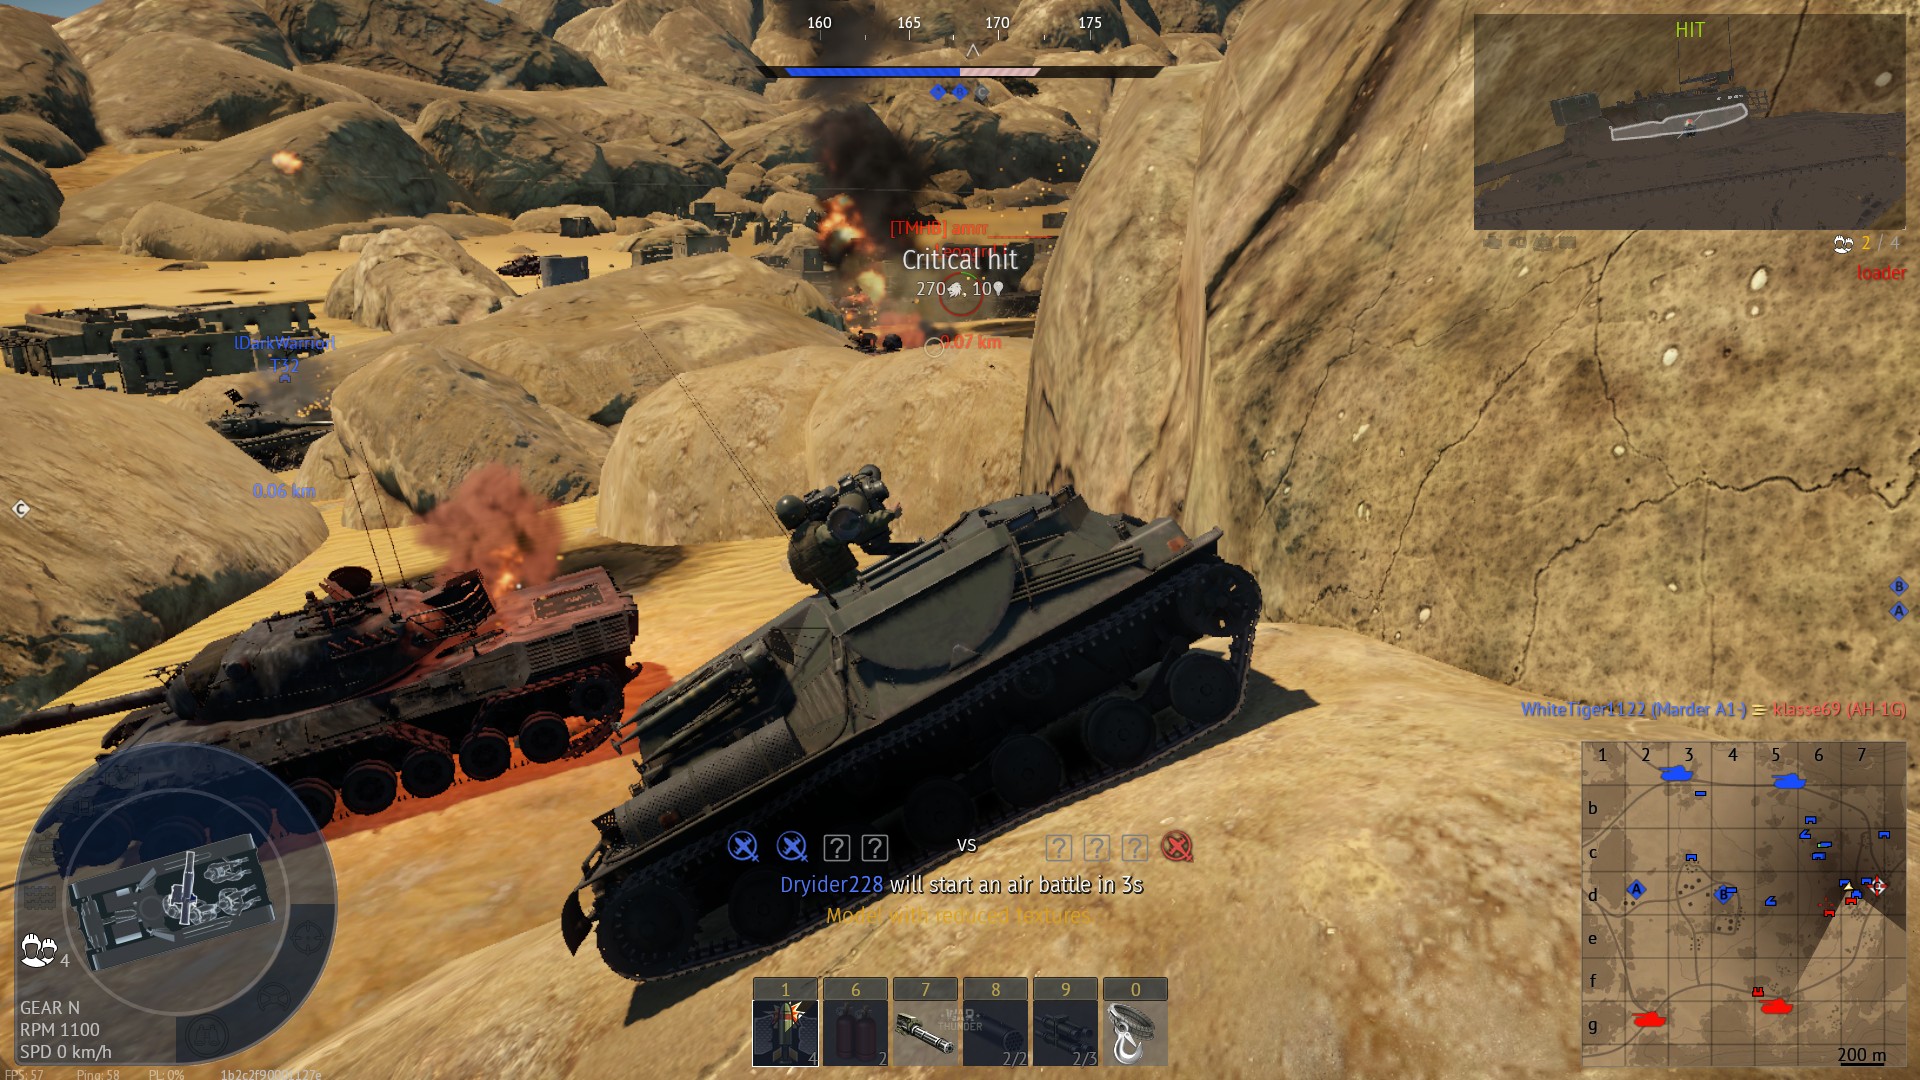
| 14:43, 29 September 2022 | UDES 33 attacks from rocks.jpg (file) |  |
537 KB | An example of climbing rocks as UDES 33 to surprise enemies. Category:In-game screenshots | 1 |
| 23:39, 13 July 2022 | ZT3A2 lean on a mountain to land a shot.jpg (file) |  |
545 KB | Carrier has problems with guiding missile blind, so it crawls up the mountain to gain enough LOS control to blindside the leopard 1. The shot is done broadside to increase aim capabilities as well. Category:In-game screenshots | 1 |
| 19:37, 10 May 2022 | Zachlam medium range entrench.jpg (file) |  |
507 KB | A demonstation of Zachlam hulldown in a city. This random dumpster cannot be shot through by tanks, so they can't really stop it from firing behind it. Zachlam does not stand next to it to improve chances of a hit. This screenshot is from AB, range of... | 1 |
| 19:37, 10 May 2022 | Zachlam indirect fire sniper scope example.jpg (file) |  |
352 KB | An example of Zachlam firing missile above cover in AB using sniper scope. It was first fired up, then the scope is pointed at the enemy tank. The range is ~190 m. Category:In-game screenshots | 1 |
| 19:37, 10 May 2022 | Zachlam horizontal exposure check.jpg (file) |  |
506 KB | Screenshots that demonstrates how to check if enemy can hit you with APHE. If the missiles get too close to the horizon line, this is basically an instant death hazard in AB. This is also relevant for HEAT, but then the binocular must be put as low as... | 1 |
| 19:37, 10 May 2022 | M51 heat long range attack over cover.jpg (file) |  |
408 KB | M51 is pinned by a Tiger II, but M51 has HEAT, so it can fire HEAT over it's own cover without being shot by the Tiger II. Tiger II is destroyed. Category:In-game screenshots | 1 |
| 19:37, 10 May 2022 | Zachlam indirect suppressing fire from capture point safe.jpg (file) |  |
503 KB | Zachlam rushes safe fortified position which cannot be directly attacked without destroying its allies first. Such position is awkward, but nonetheless allows it to suppress one of directions of attack by filling the streets with missile barrages. AB... | 1 |
| 19:37, 10 May 2022 | Zachlam indirect suppressing fire from capture point risky.jpg (file) |  |
703 KB | Zachlam rushes fortified objective, then proceeds to spam ATGM every 8 seconds into incoming heavy tanks. They can't do anything, even though Zachlam is exposed. Success! AB mode, attack range 160 m. Needs more range in RB to work. [[Category:In-game... | 1 |
| 19:37, 10 May 2022 | Zachlam medium range hill sniping.jpg (file) |  |
435 KB | Zachlam controls corridor in AB, which enemies must pass to attack the capture point. Since AB allows rearm outside of the capture point, it does not require as much skill as in RB. The enemy team is halted. Category:In-game screenshots | 1 |
| 14:06, 6 April 2022 | Type 60 atm indirect shot.jpg (file) |  |
570 KB | Indirect ATGM shot over hill with type 60 ATM. ATGM curves down right at 220 m mark, so turret is hit. Category:In-game screenshots | 1 |
| 13:25, 6 April 2022 | Type 60 ATM control capture point.jpg (file) |  |
684 KB | Type 60 ATM forces enemy to choose between being destroyed by it or teammates or abandoning a capture point. Be sure to hide afterwards to not get shot by HE. Category:In-game screenshots | 1 |
| 13:25, 6 April 2022 | Type 60 ATM control capture point AB only.jpg (file) |  |
715 KB | Type 60 ATM attacks control point from angle that is rarely contested. This is only possible in AB with the pre-launch technique due to ranges. Category:In-game screenshots | 1 |
| 21:18, 21 January 2022 | Autoloader safety Bkan 1C.jpg (file) |  |
447 KB | Demonstration of how the gun must be angled on this artillery tank as to avoid being ammo racked. Category:In-game screenshots | 1 |
| 02:56, 14 January 2022 | Hulldown in Pvkv m-43 (1946).jpg (file) | .jpg) |
551 KB | SPG angles to left and up to avoid getting deleted by enemy team. Range is also very important, as at close range that won't help much. Category:In-game screenshots | 1 |
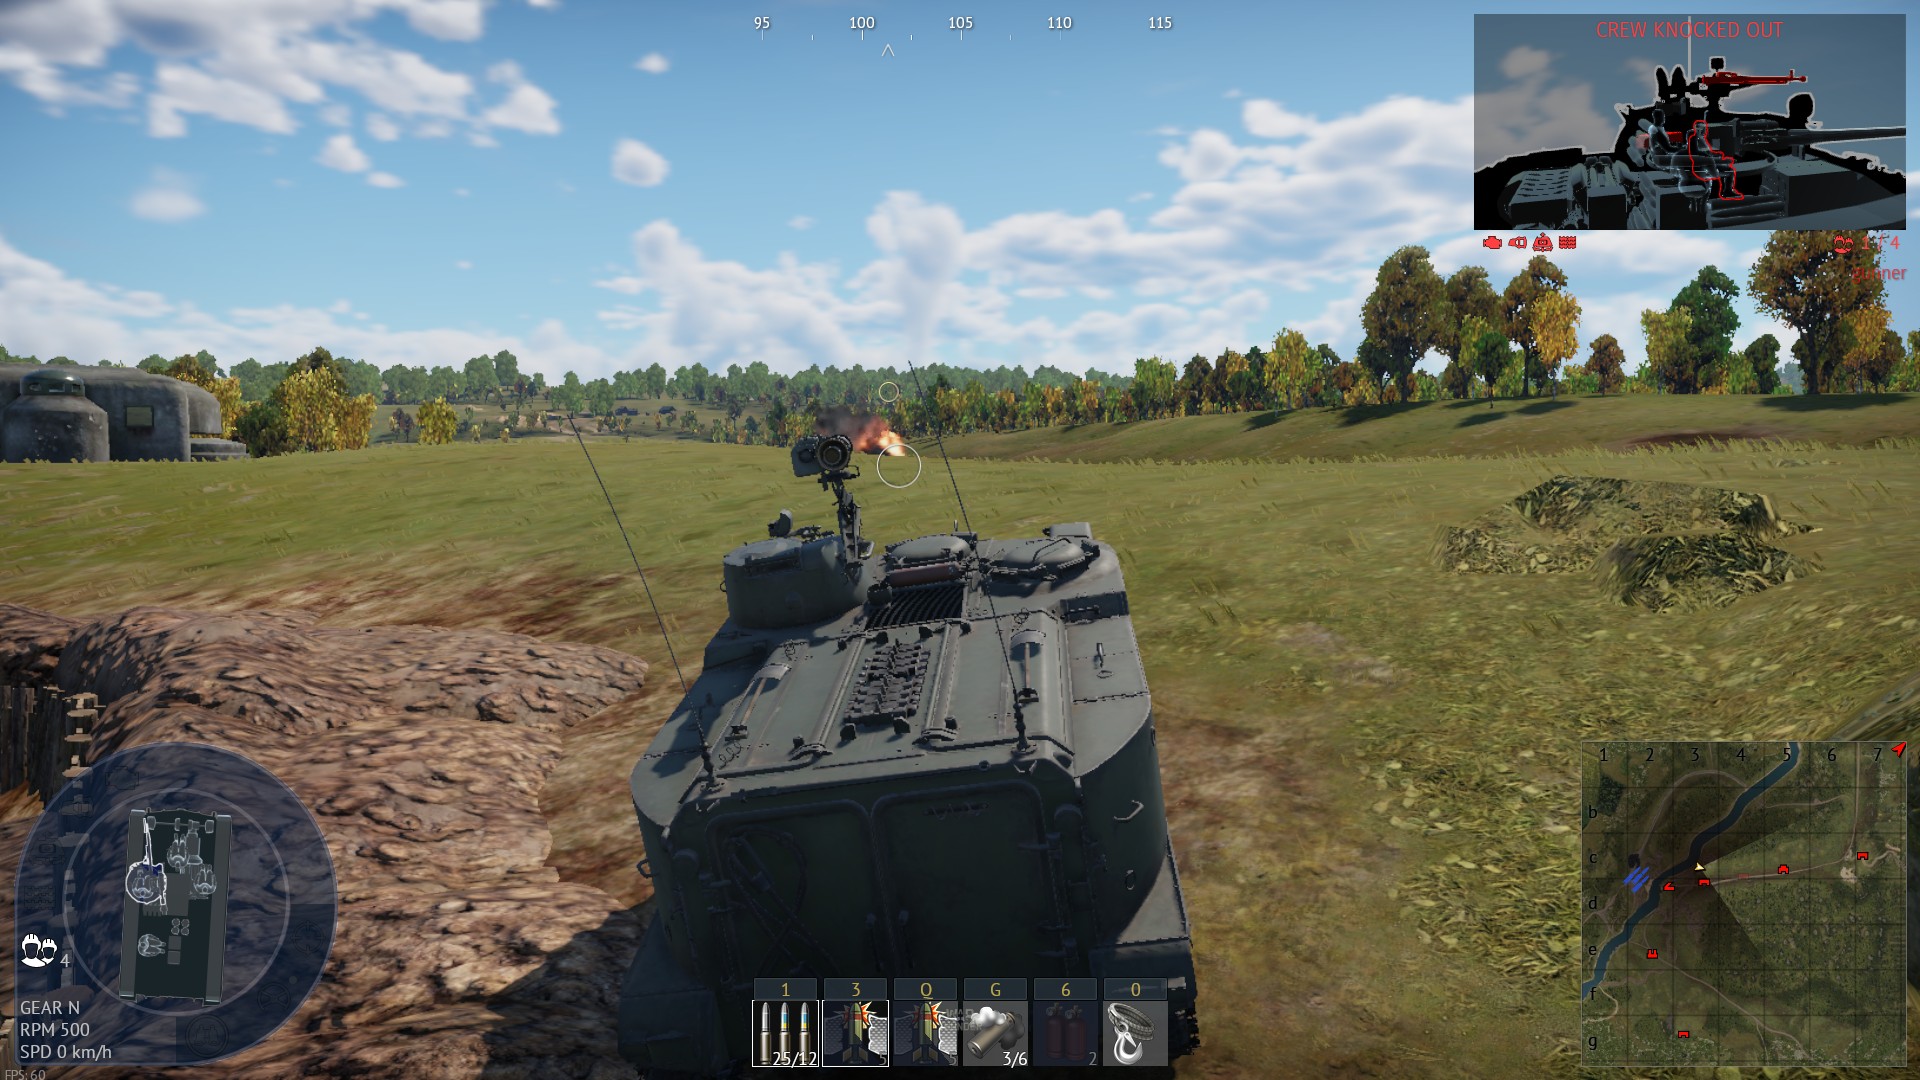
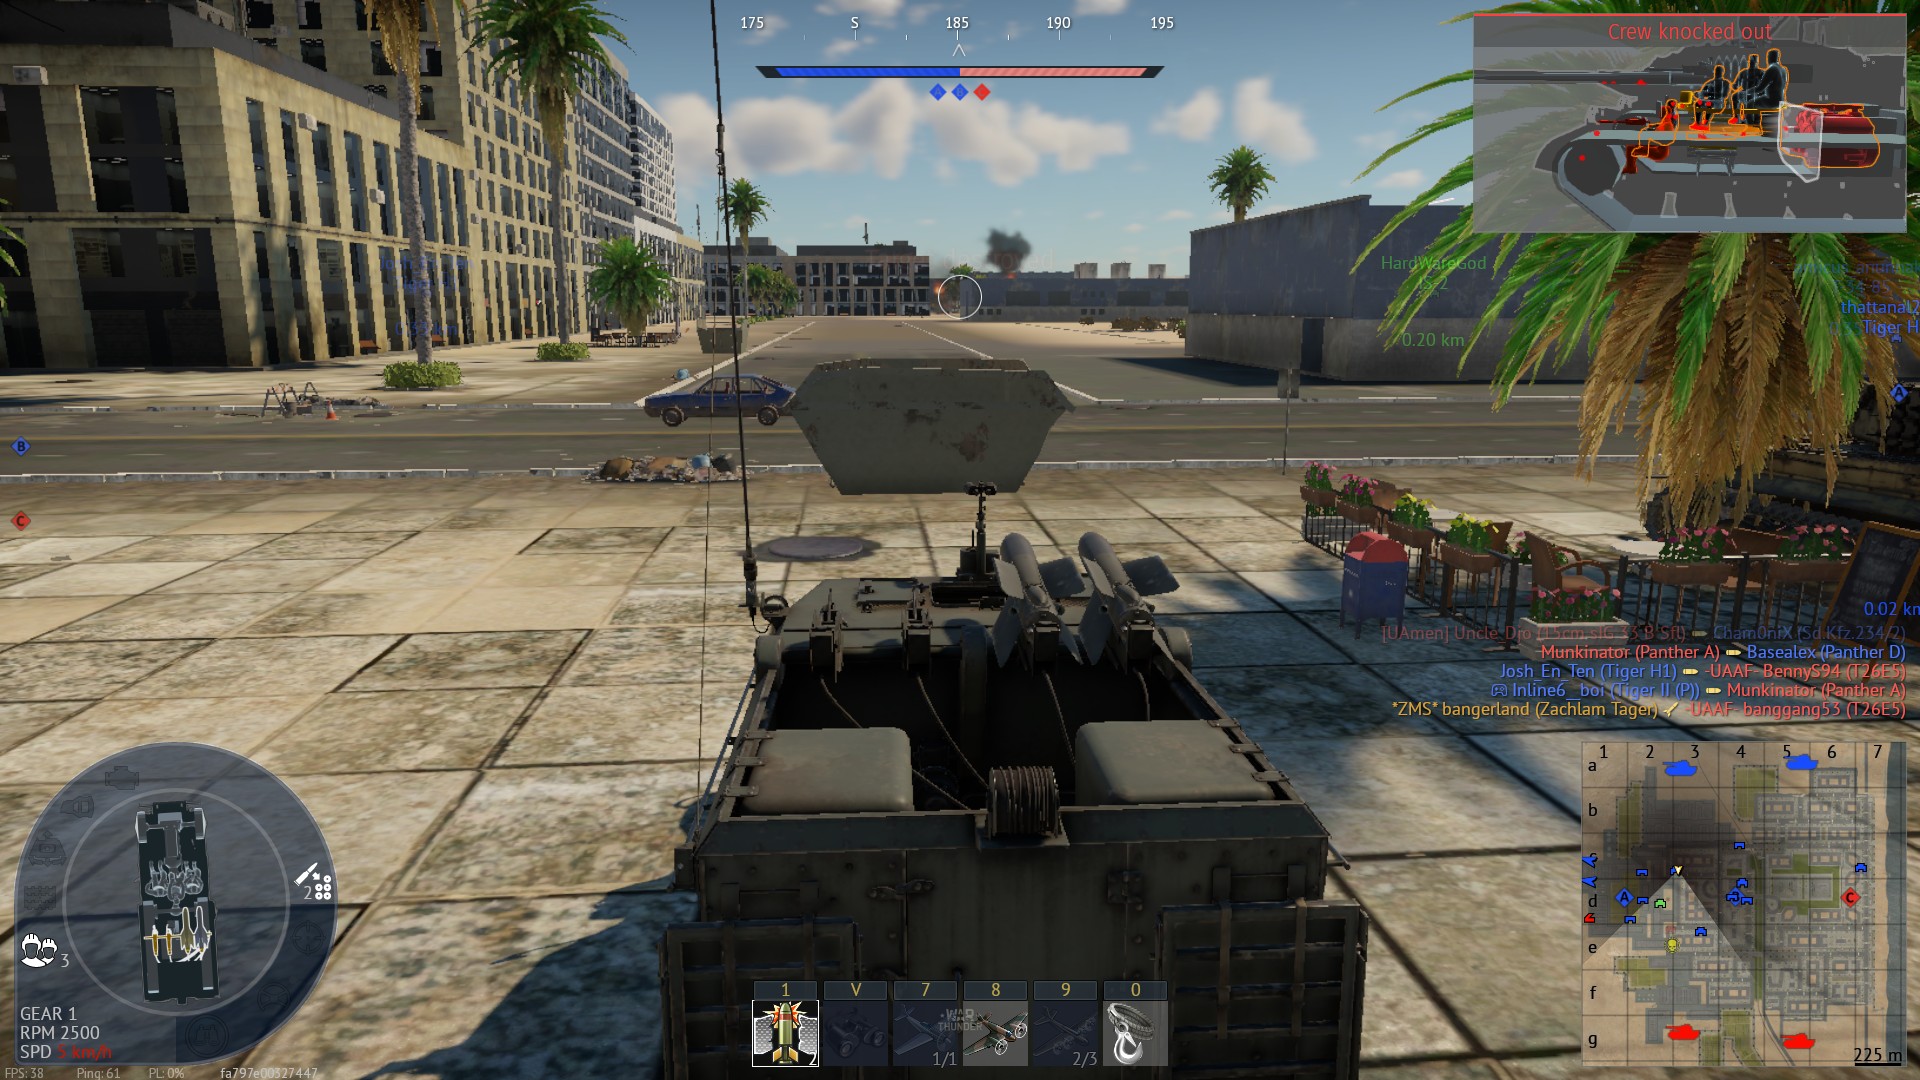
| 17:50, 3 January 2022 | Pbv 301 holds a capture point.jpg (file) |  |
514 KB | The "spaa" manages to stop entire enemy team and dooms at least 3 tanks in process (visible on screenshot) Category:In-game screenshots | 1 |
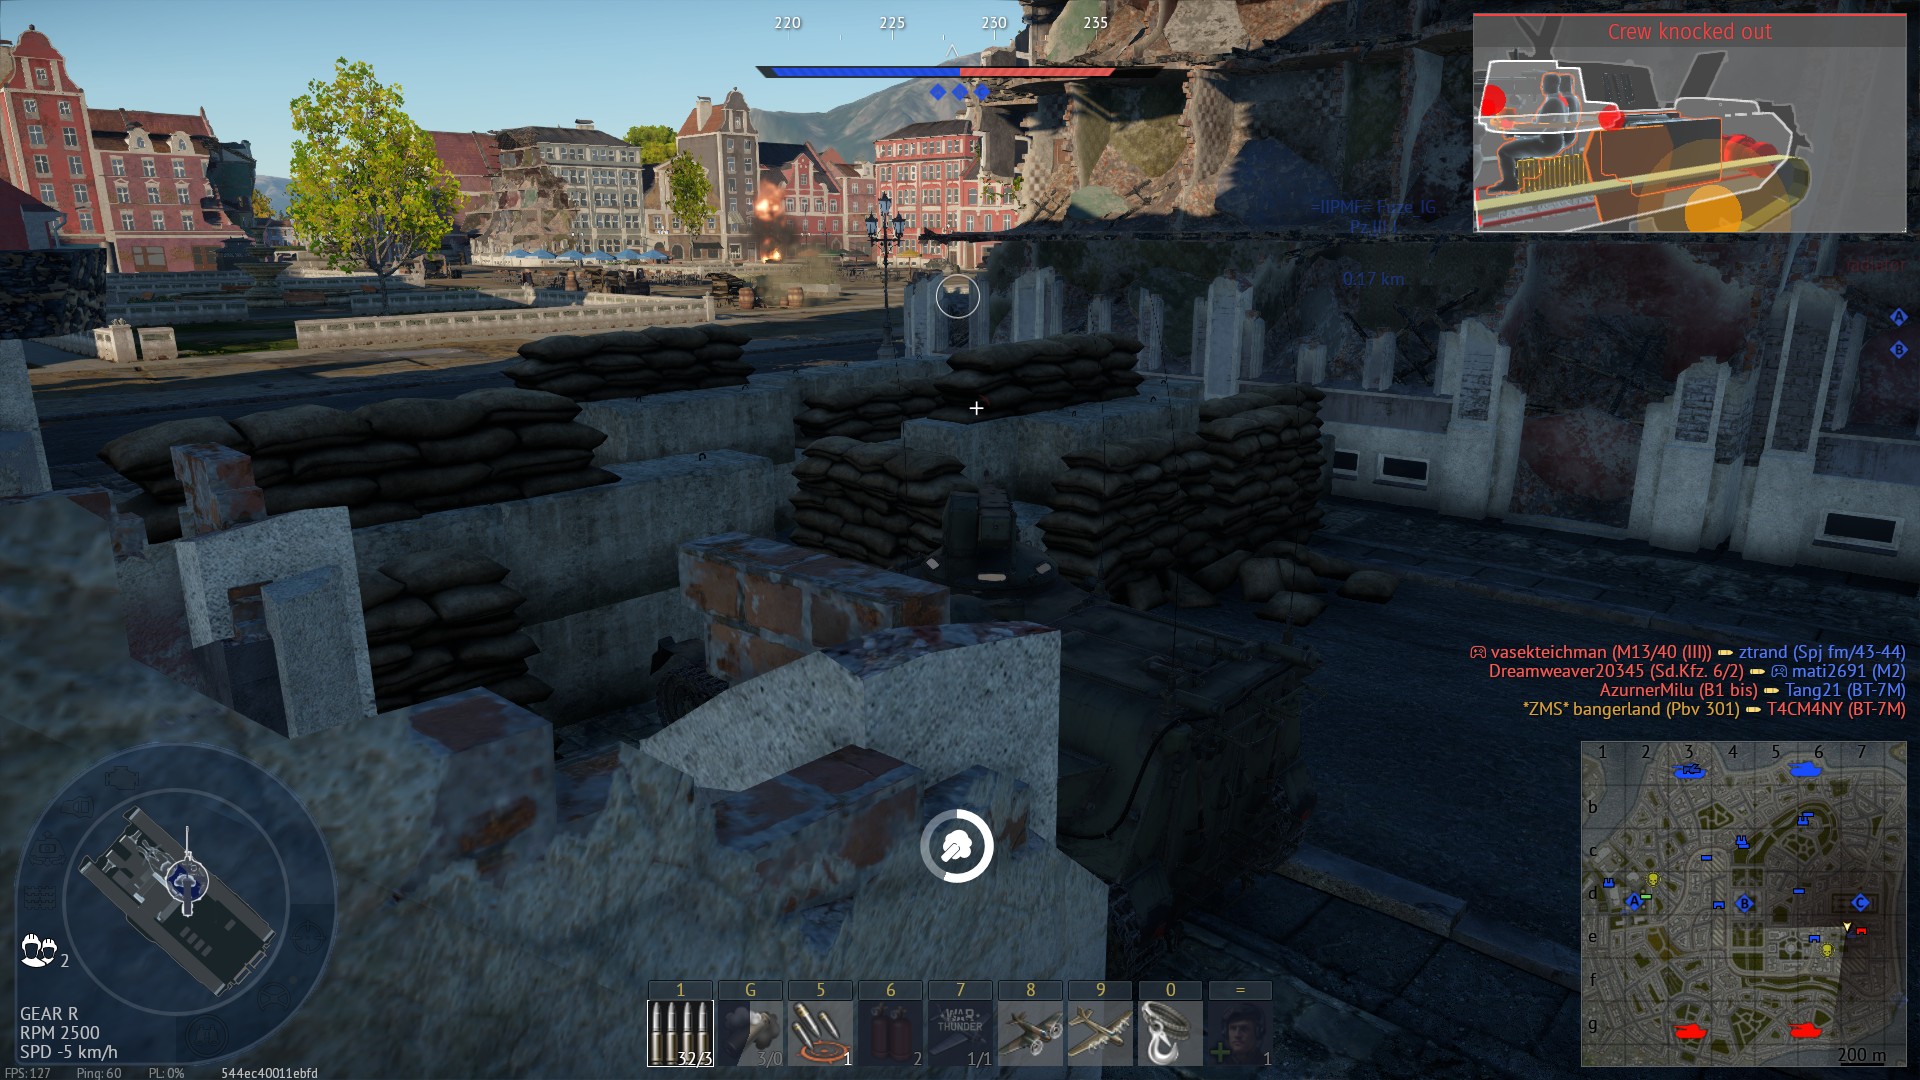
| 17:24, 3 January 2022 | Pbv 301 ambushes other tanks over a wall.jpg (file) |  |
499 KB | Pbv 301 can fire over medium sized walls, which means it can attack through impassable roadblocks and such. The risk of dying when doing this is minimal. Category:In-game screenshots | 1 |
| 17:09, 3 January 2022 | Pbv 301 supports from behind an ally.jpg (file) |  |
472 KB | Pbv 301 fires from behind another sweden tank (completely safely) Category:In-game screenshots | 1 |
| 20:48, 17 December 2021 | Striker firing over a ridge setup good.jpg (file) |  |
667 KB | A screenshot of striker trying to bombard a capture point on 38th parallel. This one wins because it fires from a rock which allows it to regulate its launch angle and to see above the wall. It also allows for a natural no-brainer firing arc onto a riv... | 1 |
| 20:46, 17 December 2021 | Striker firing over a rigde setup bad.jpg (file) |  |
675 KB | A screenshot of striker trying to bombard a capture point on 38th parallel. This one fails because it fires from flat high ground ~90 m away without any vision whatsoever. Category:In-game screenshots | 1 |
| 20:44, 17 December 2021 | Striker deadzone - medium range emergency shot.jpg (file) |  |
513 KB | A screenshot of striker using insane parking strats in order to overcome its deadzone. Category:In-game screenshots | 1 |
| 20:43, 17 December 2021 | Striker deadzone - close range emergency shot.jpg (file) |  |
694 KB | Striker fighting within deadzone range on an open spot. Watchtower remains are used as a stepping stool to allow striker to decrease dead zone from 100m to 50m, achieving a countershot. Category:In-game screenshots | 1 |
| 20:42, 17 December 2021 | Striker deadzone control okay.jpg (file) |  |
609 KB | Example of striker fighting within its deadzone range (<100m). On this screenshot striker uses backward incline to fire forward, instead of upwards, thus becoming useful. Category:In-game screenshots | 1 |
| 20:41, 17 December 2021 | Striker deadzone control bad.jpg (file) |  |
624 KB | An example of striker fighting in deadzone range (<100m). On this screenshot it utterly fails. Category:In-game screenshots | 1 |
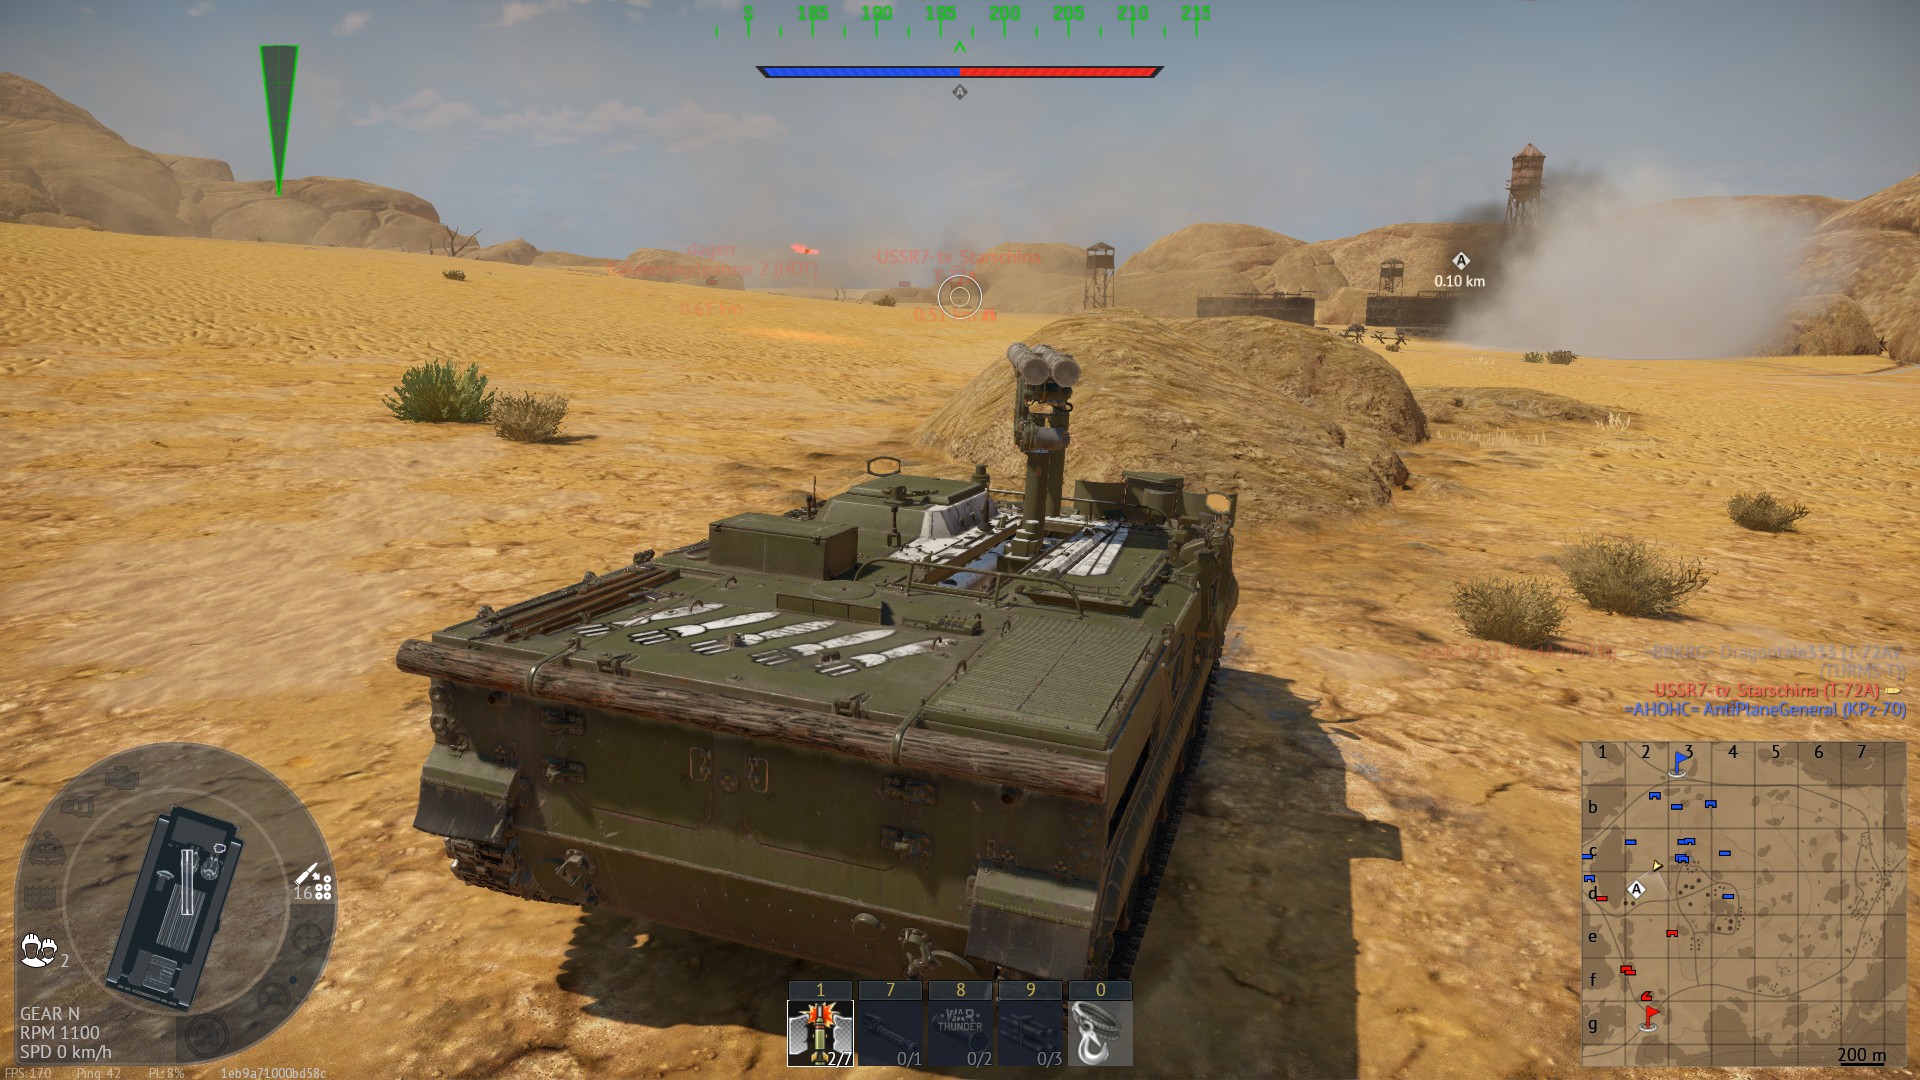
| 17:49, 2 September 2021 | Khrizantema-S desert hulldown AB.jpg (file) |  |
480 KB | By using launcher trick, solid cover and deep hulldown, Khrizantema can hide from other ATGM tanks and snipers and focus on advancing MBT's.Category:In-game screenshots | 1 |
| 17:48, 2 September 2021 | Khrizantema-S urban hulldown AB.jpg (file) |  |
540 KB | Khrizantema is short enough to hide behind building debris, but it's launcher is tall enough to aim above it, so in AB it's possible to fight other tanks over that. Category:In-game screenshots | 1 |
| 18:42, 24 August 2021 | Shturm-S ESS combat 3.jpg (file) |  |
311 KB | Screenshot is to be used with other "ESS combat" ones. Sometimes enemies will charge into smoke to find you. Thermal scope can also be used to sidestep them until the reload is finished, and even SPAAs like Falcon might not think about just randomly fi... | 1 |
| 18:42, 24 August 2021 | Shturm-S ESS combat 2.jpg (file) |  |
300 KB | Screenshot is to be used with other "ESS combat" ones. Step 2 is to enter sniper mode and to turn on Thermal scope and fire at incoming enemy tanks. When comparing vision to screenshot 1, you will notice that Shturm-S can see through it's own ESS, so i... | 1 |
| 18:42, 24 August 2021 | Shturm-S ESS combat 1.jpg (file) |  |
254 KB | Screenshot is to be used with other "ESS combat" ones. Step one is to use ESS and back off into a smoke wall. It is also recommended to move out of the firing line if possible, but even without doing that, the opponent may only hit the engine because o... | 1 |
