File list
This special page shows all uploaded files.
| Date | Name | Thumbnail | Size | Description | Versions |
|---|---|---|---|---|---|
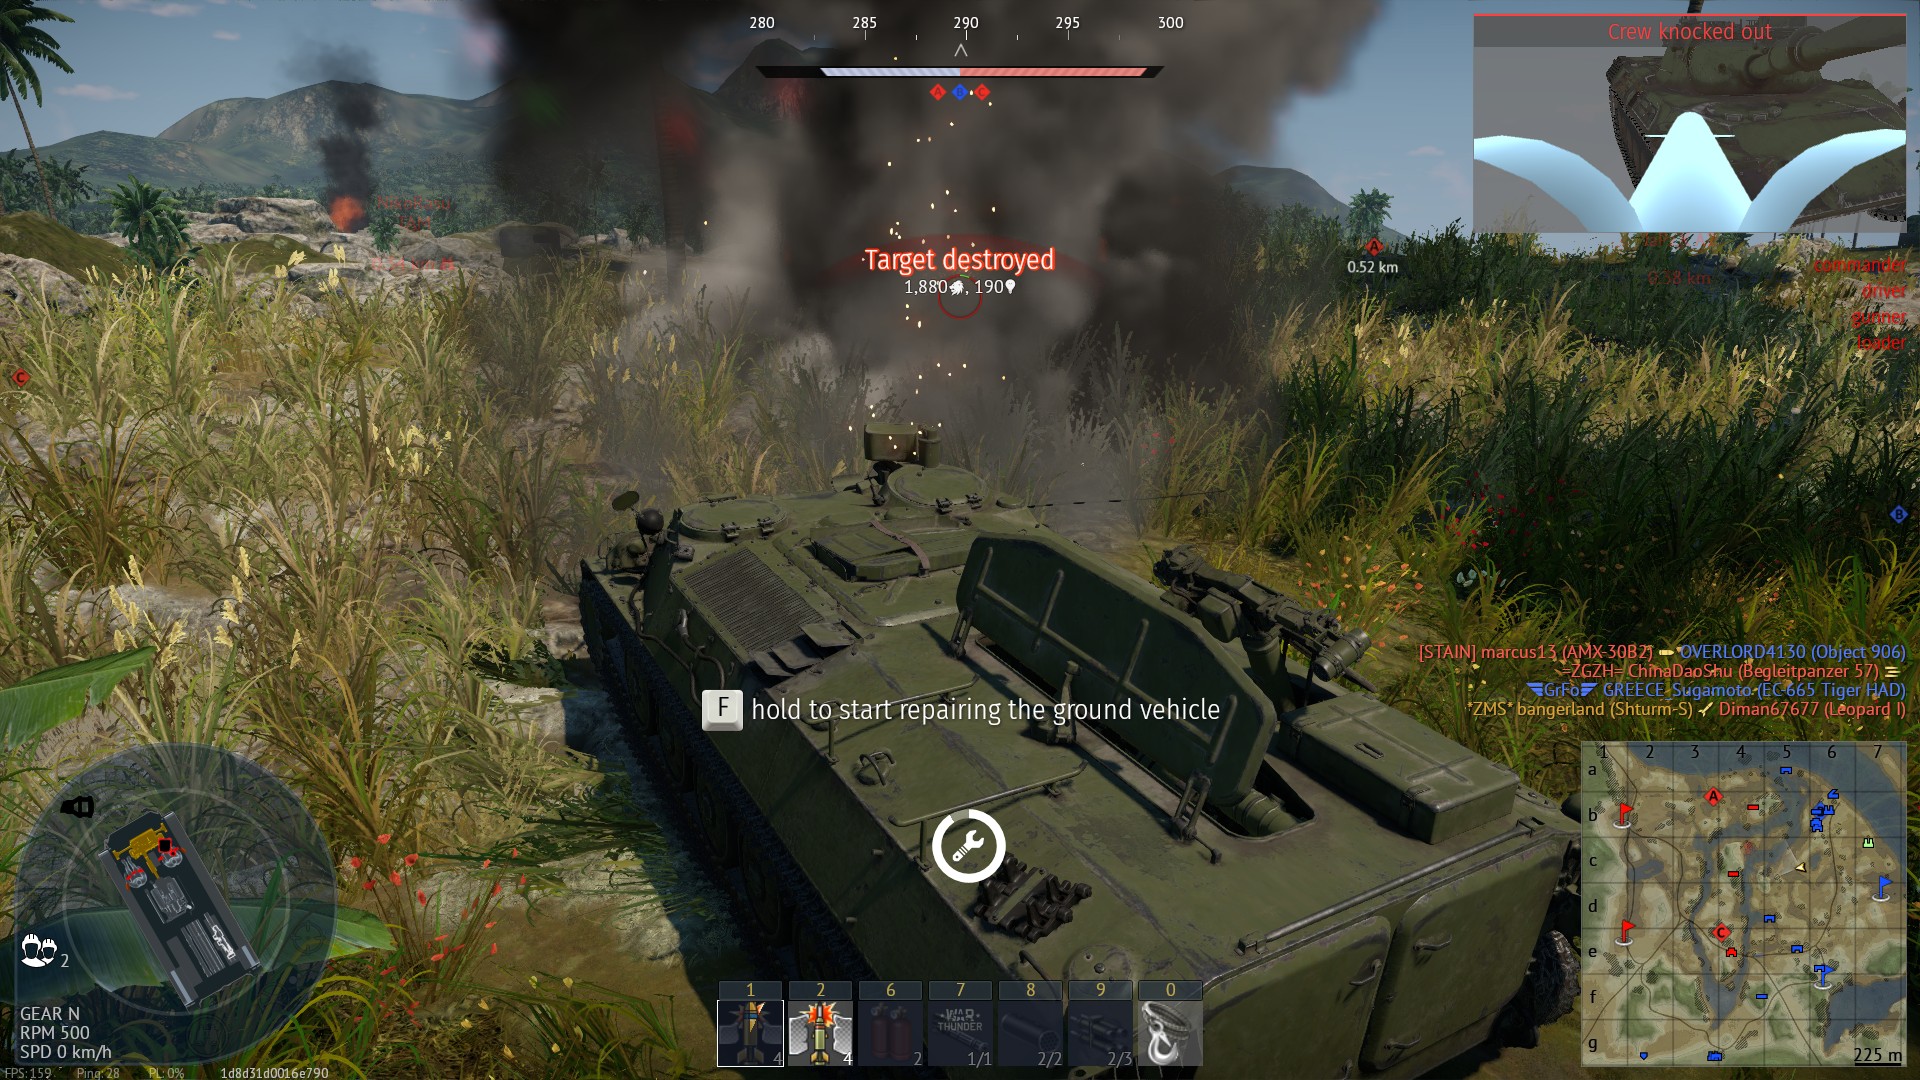
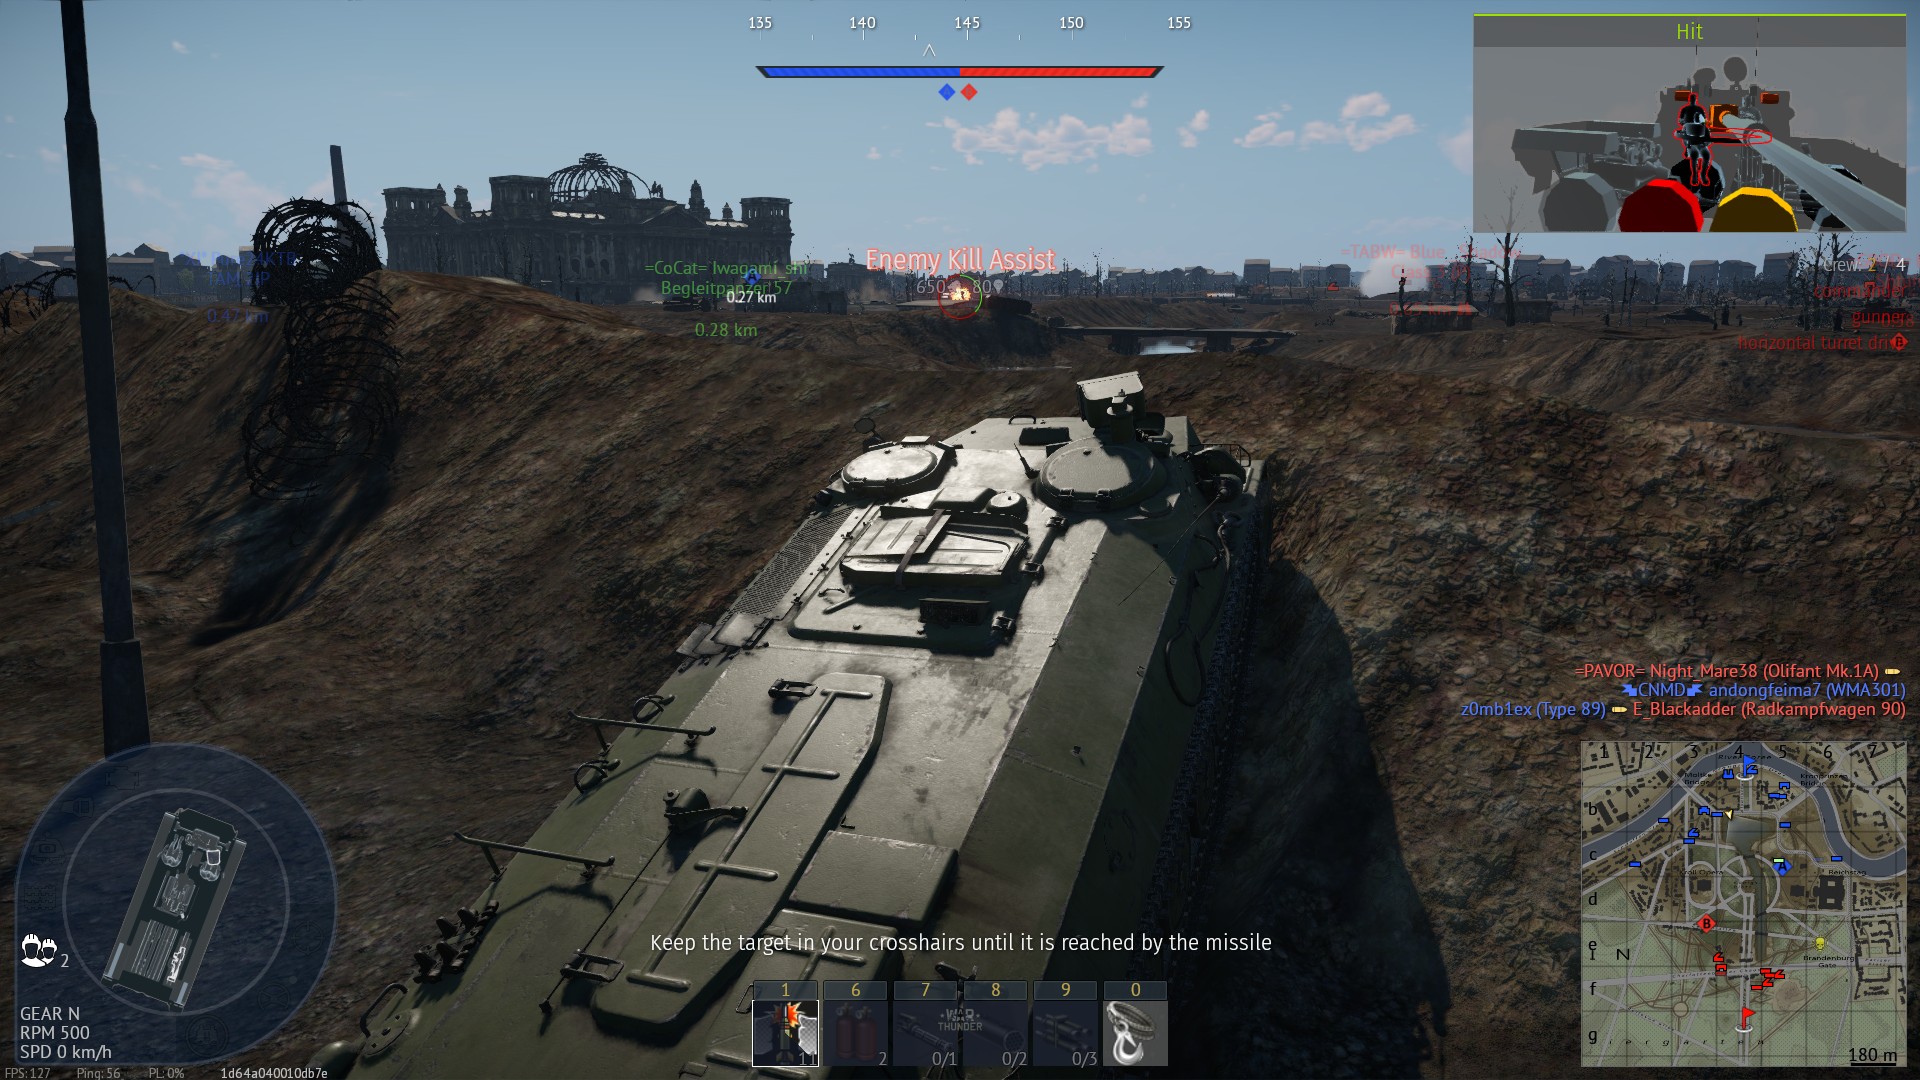
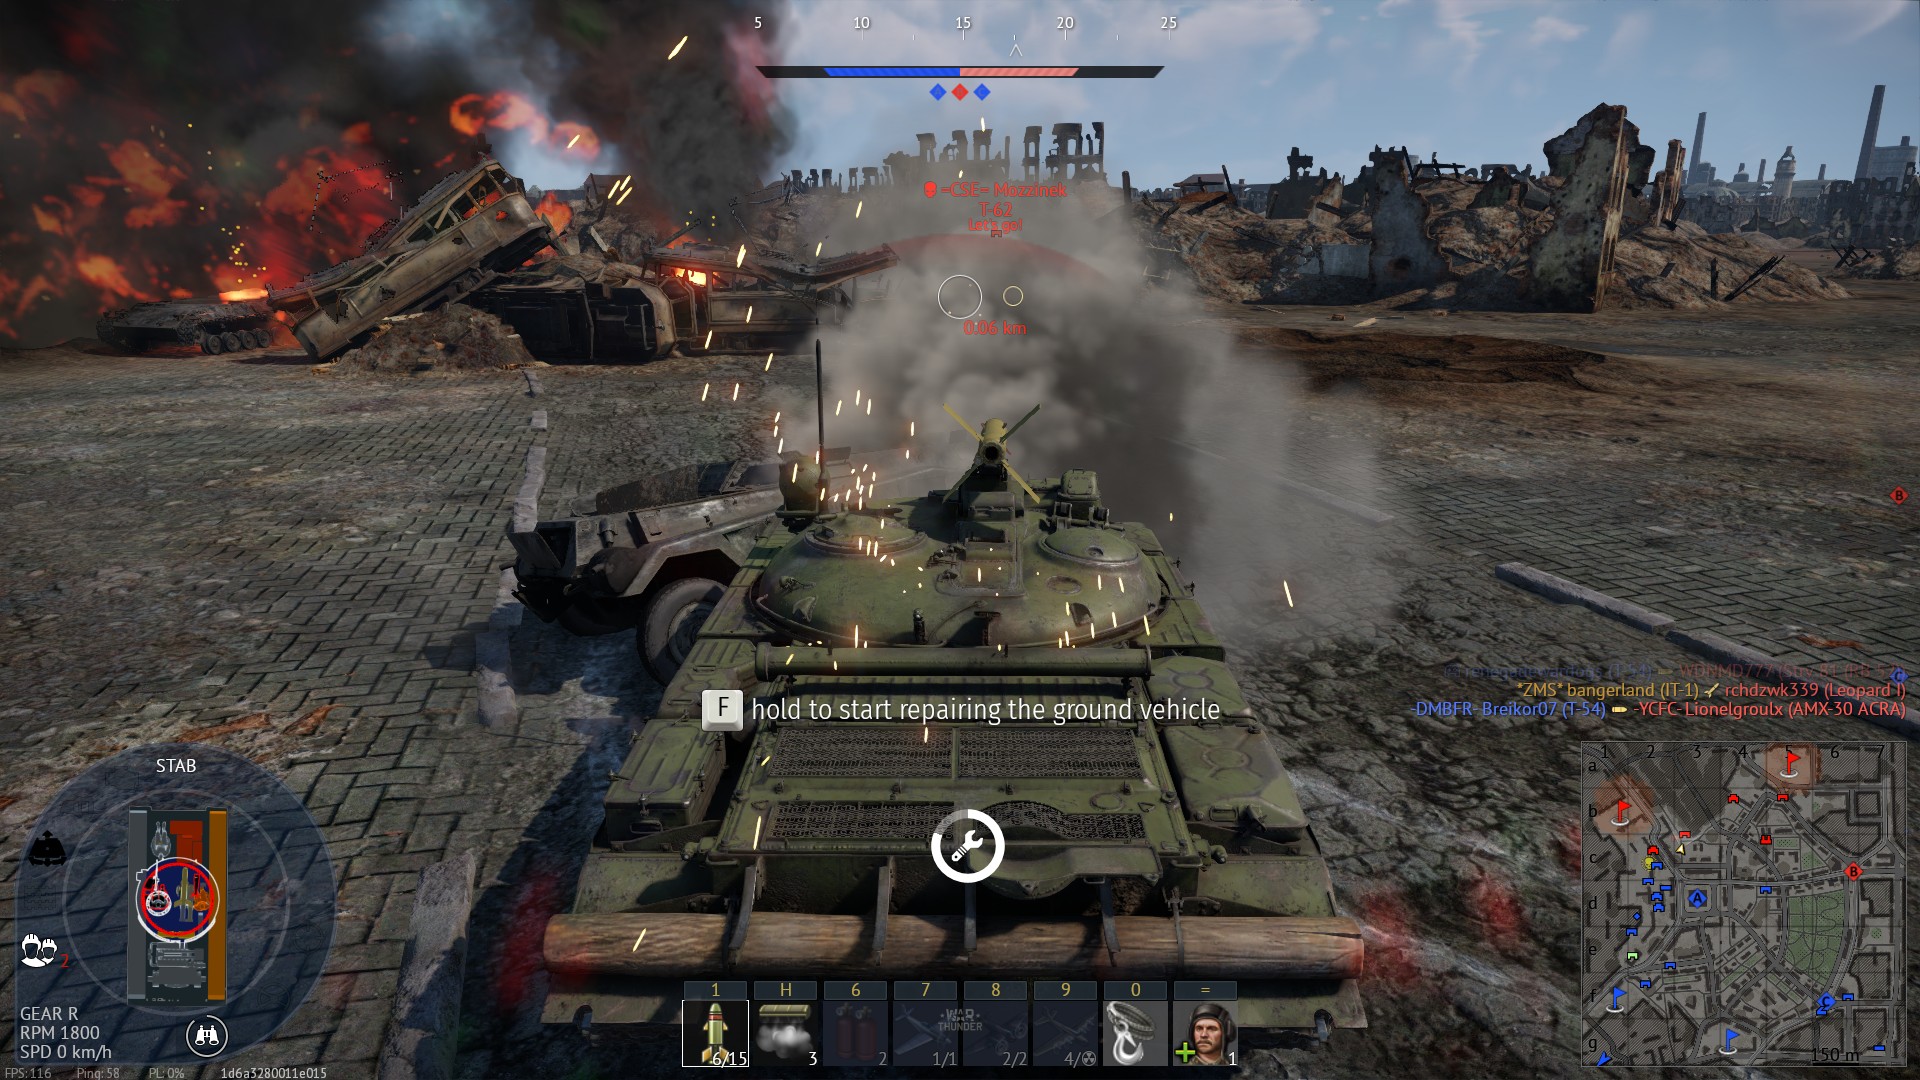
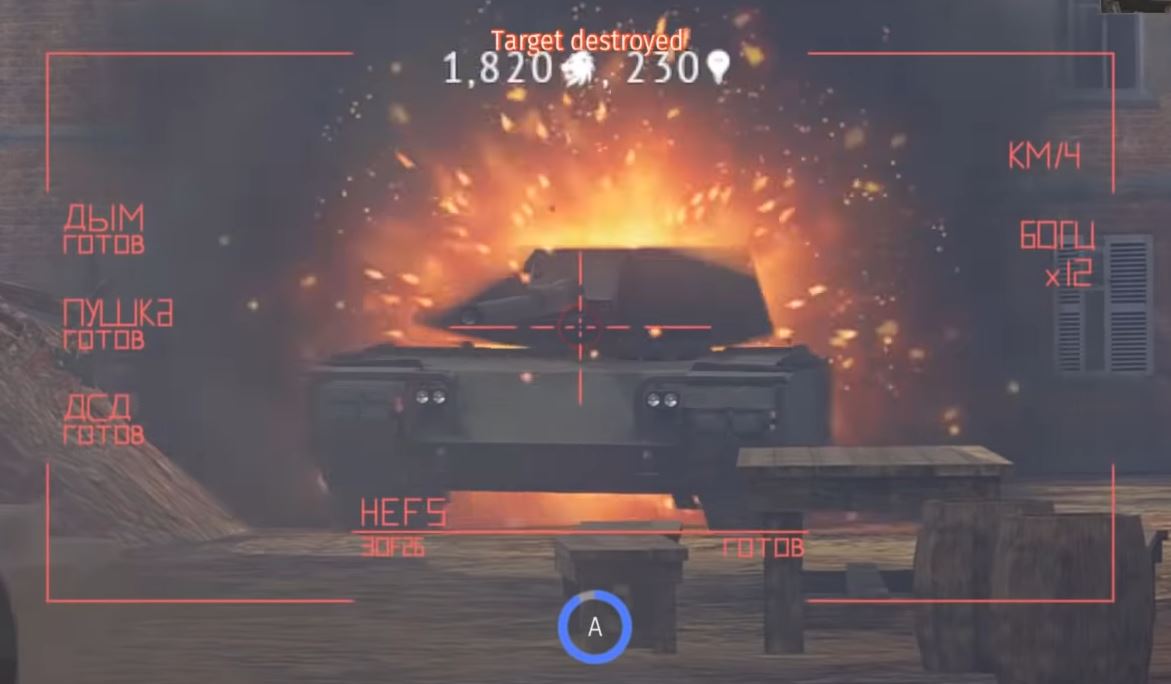
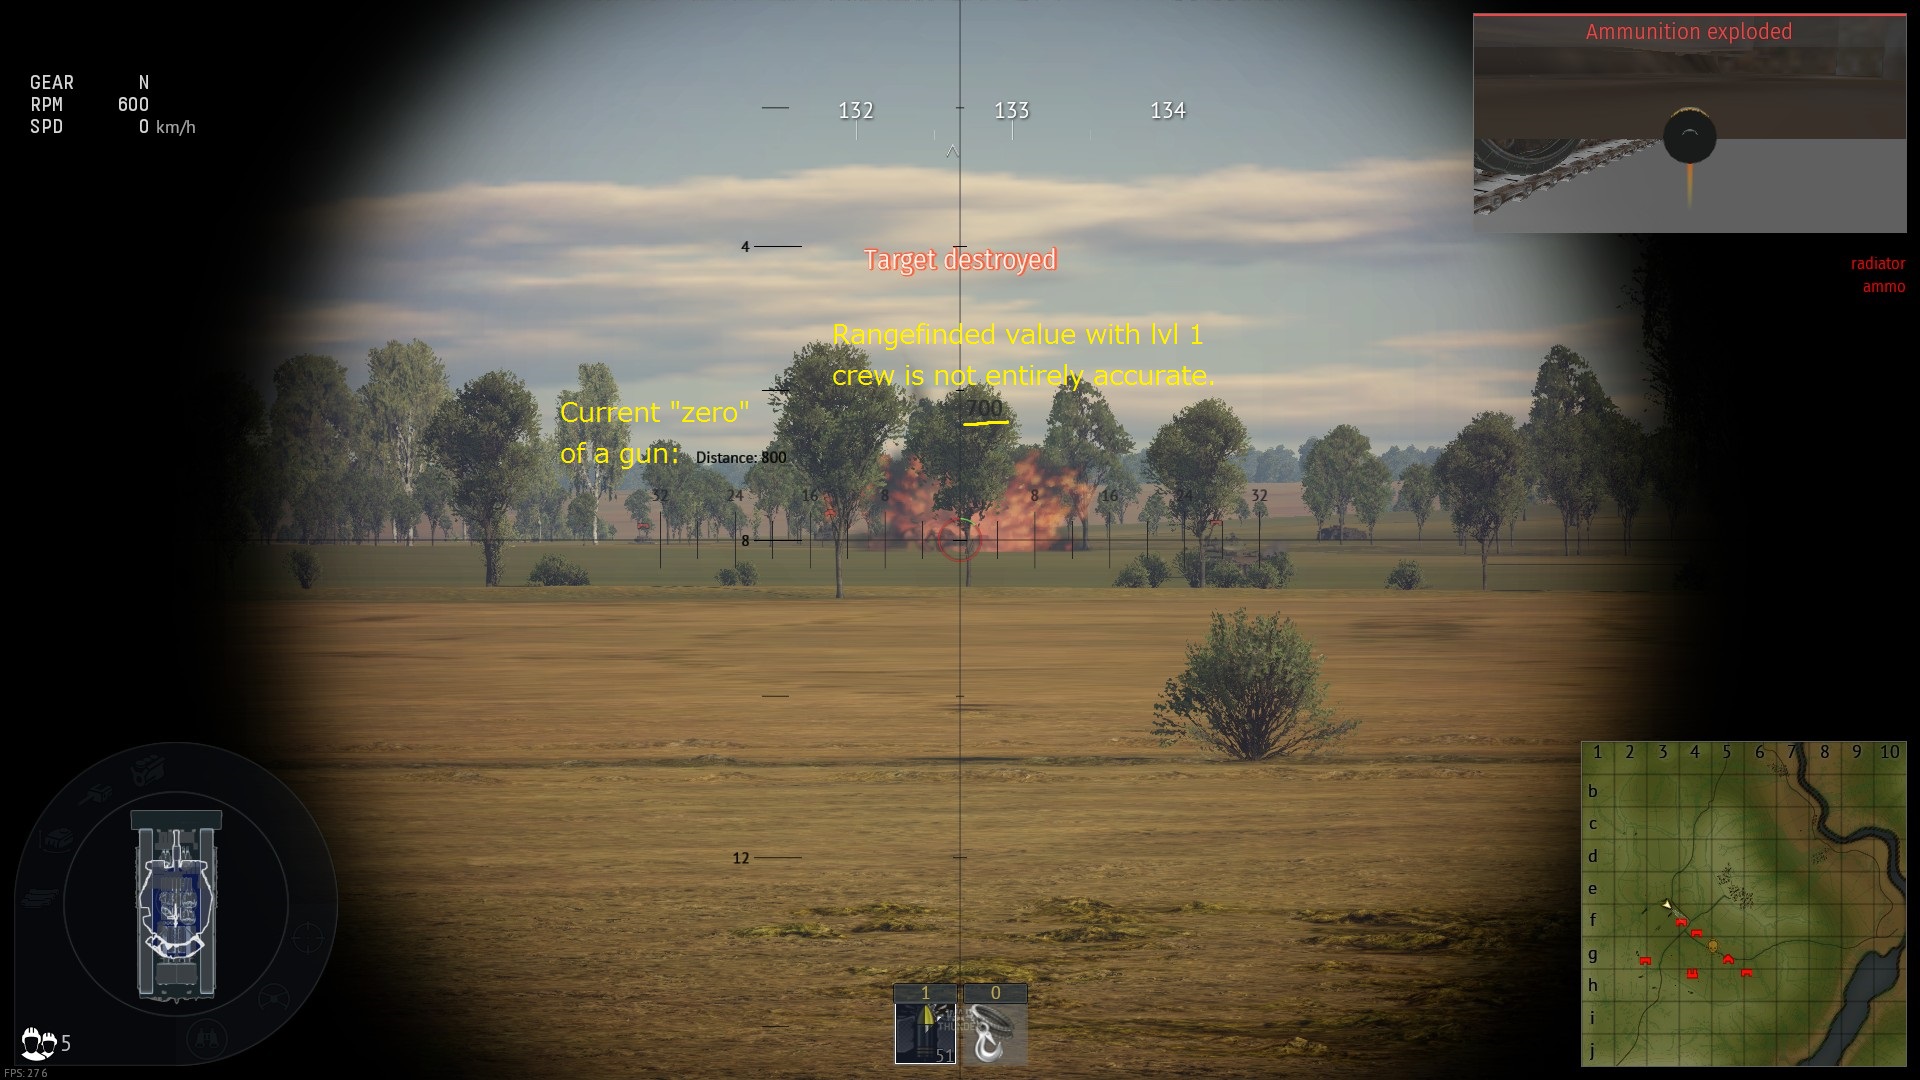
| 18:42, 24 August 2021 | Shturm-S snipe stage 3.jpg (file) |  |
633 KB | Screenshot is to be used with other "snipe stage" ones. Step 3 is to leave binocular view and press "fire" again without touching any controls and observe enemy tank exploding. Do note that this screenshot also demonstrates adamant following of AB rule... | 1 |
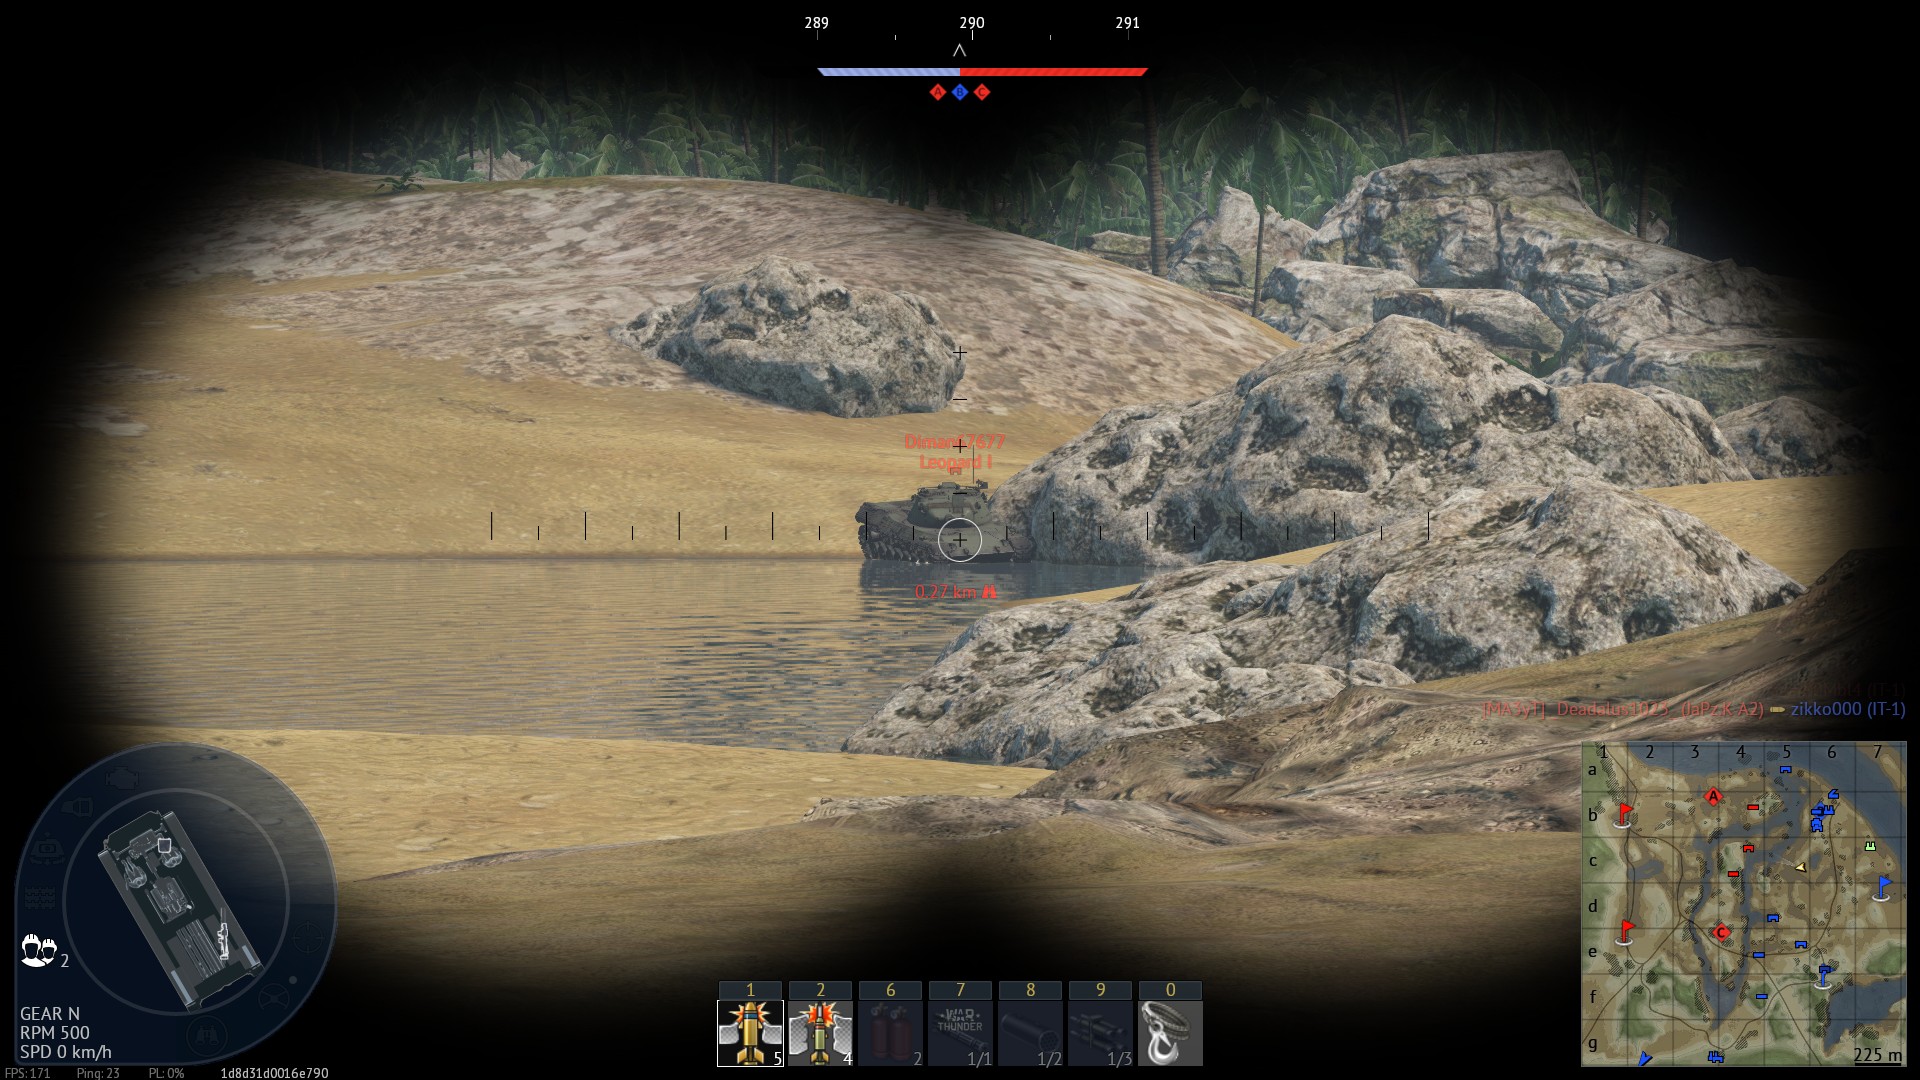
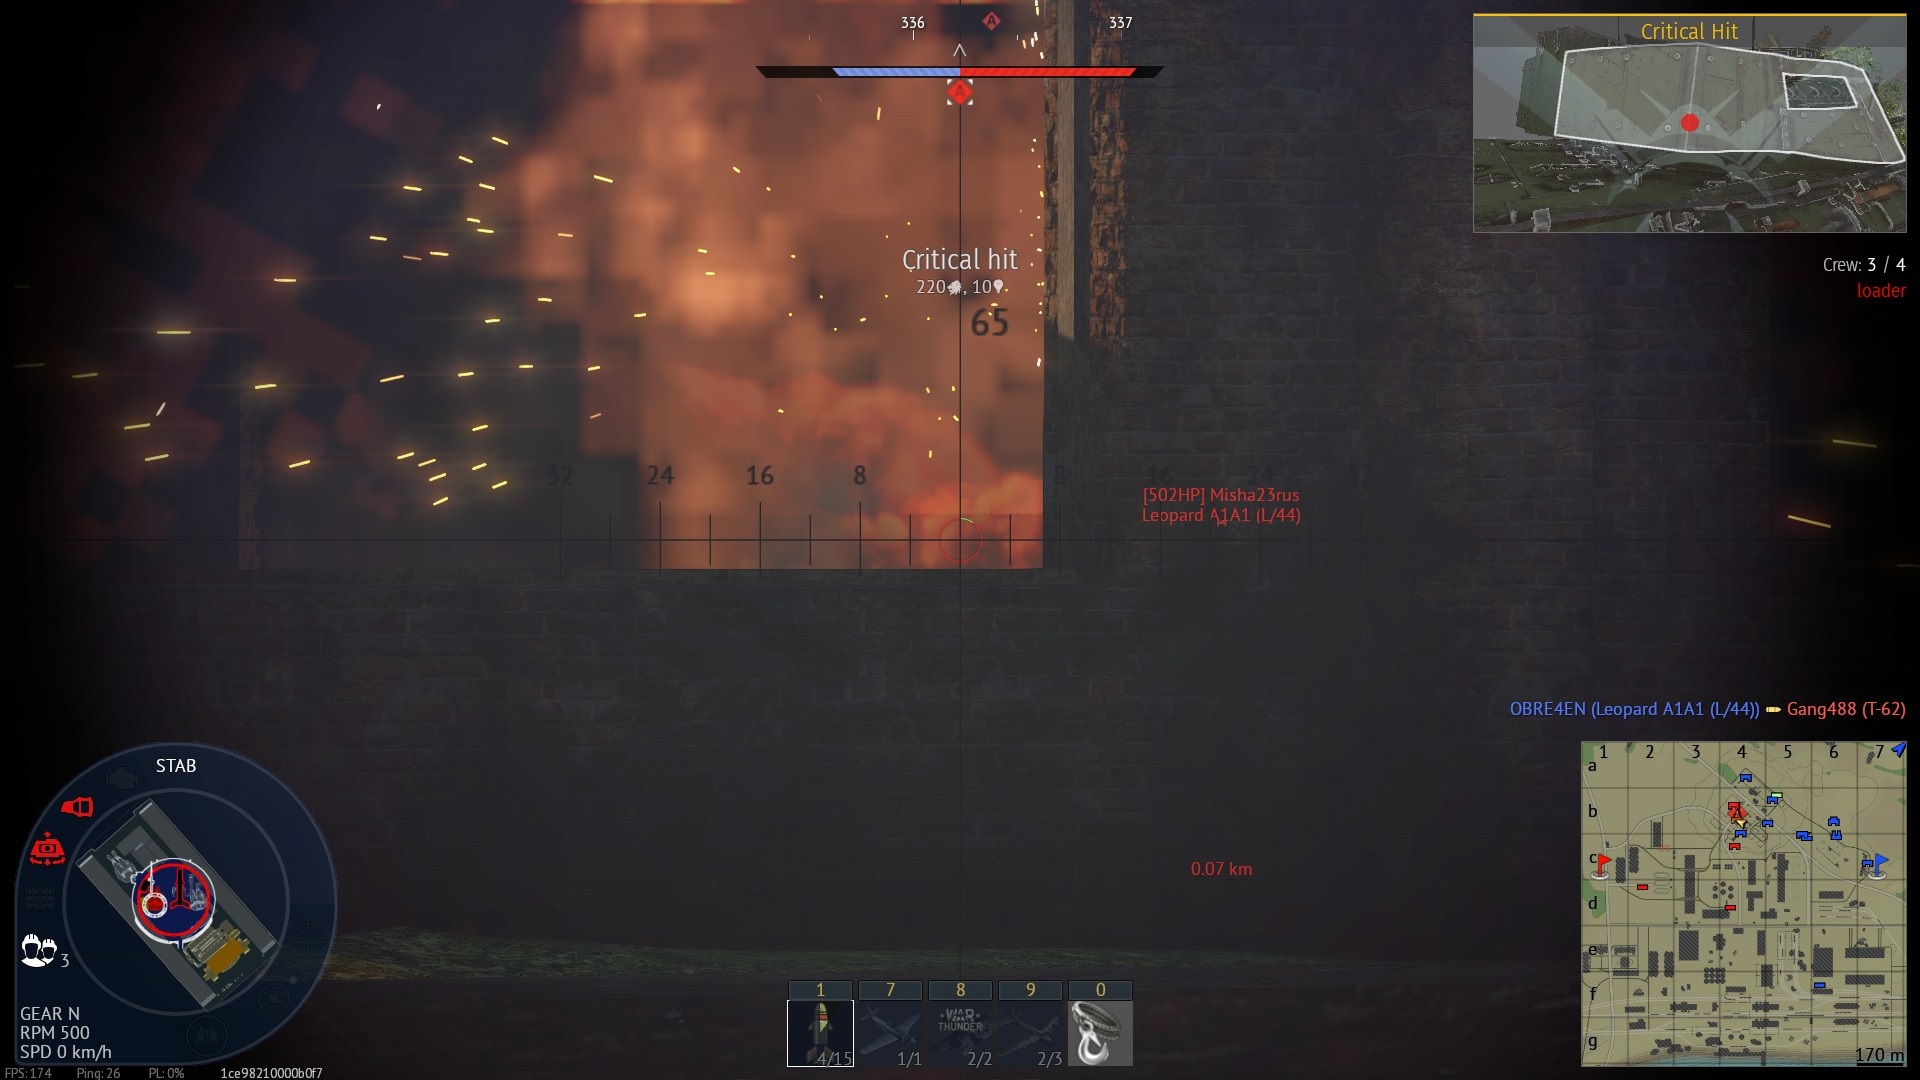
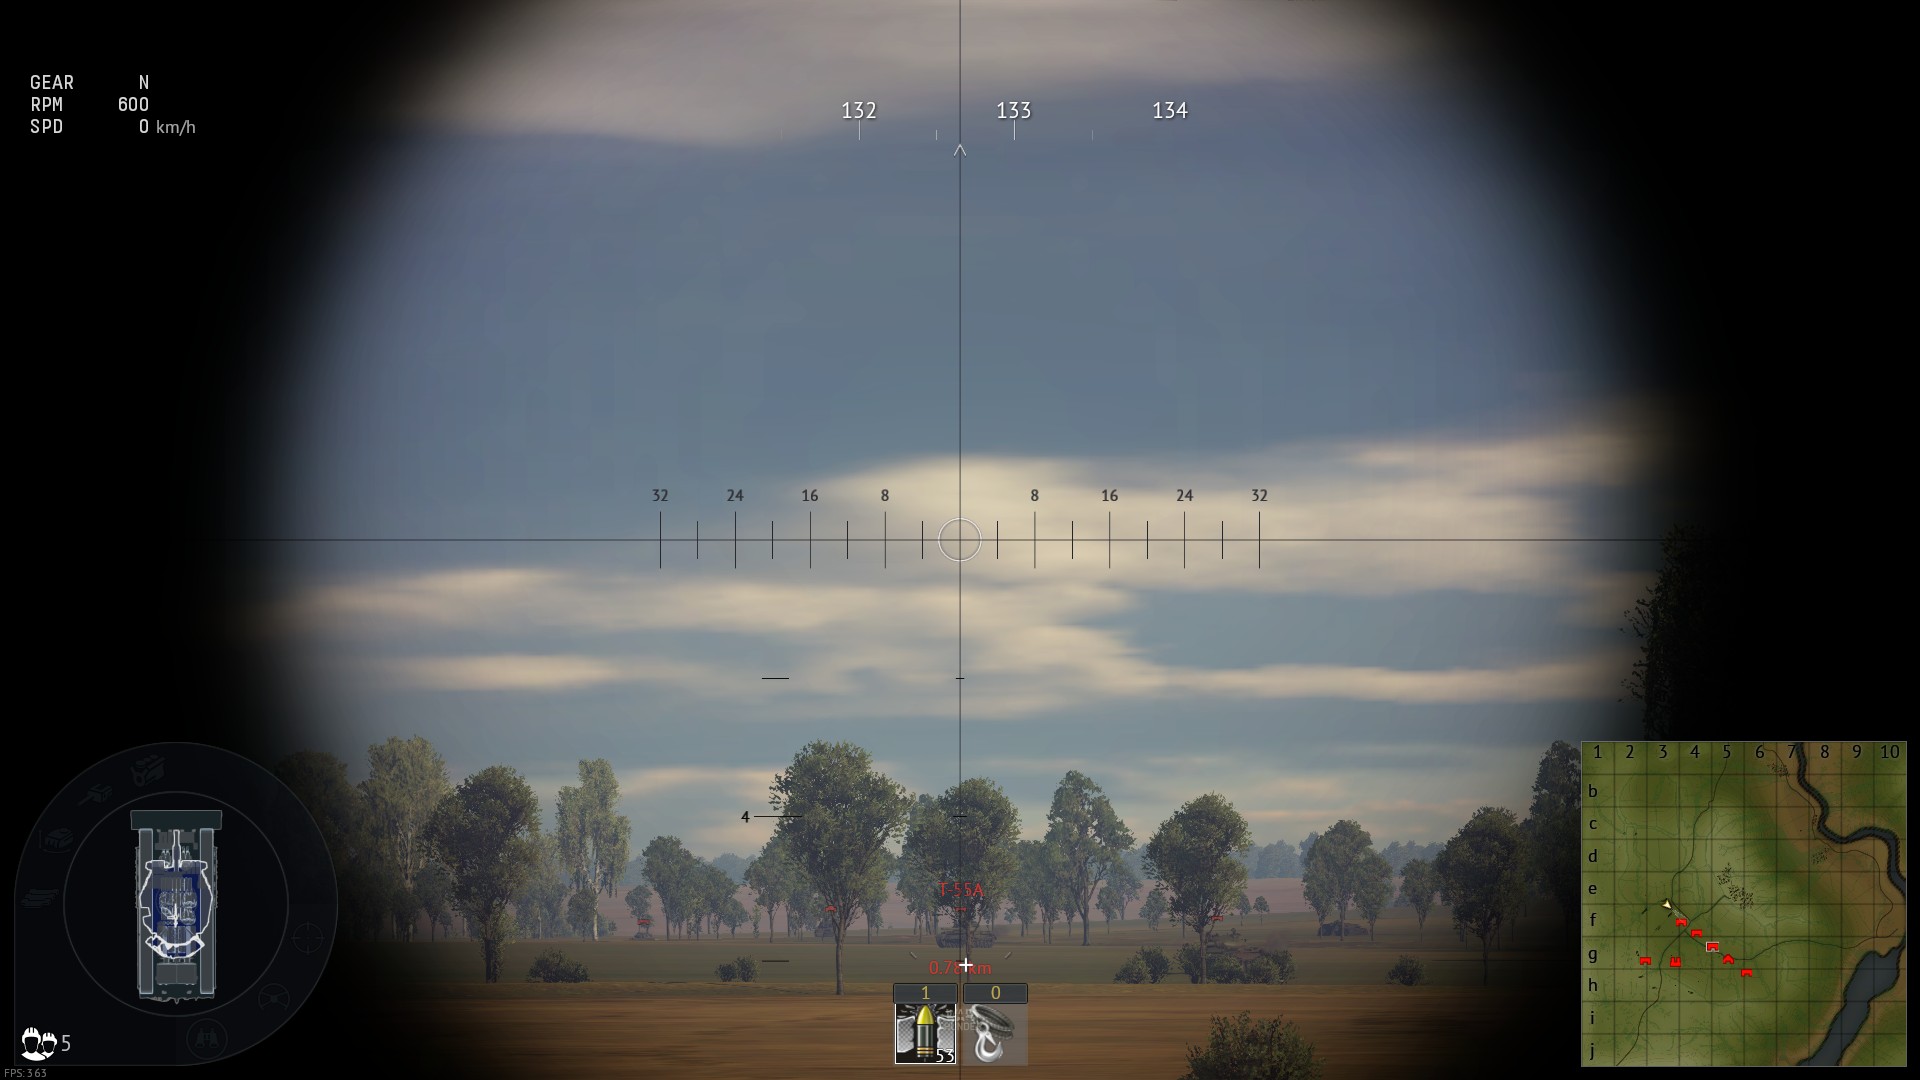
| 18:42, 24 August 2021 | Shturm-S snipe stage 2.jpg (file) |  |
485 KB | Screenshot is to be used with other "snipe stage" ones. Second stage is to enter binocular view, as it has clear vision above Shturm-S and hold "fire" button on enemy tank to aim AB aim reticule at the enemy. Category:In-game screenshots | 1 |
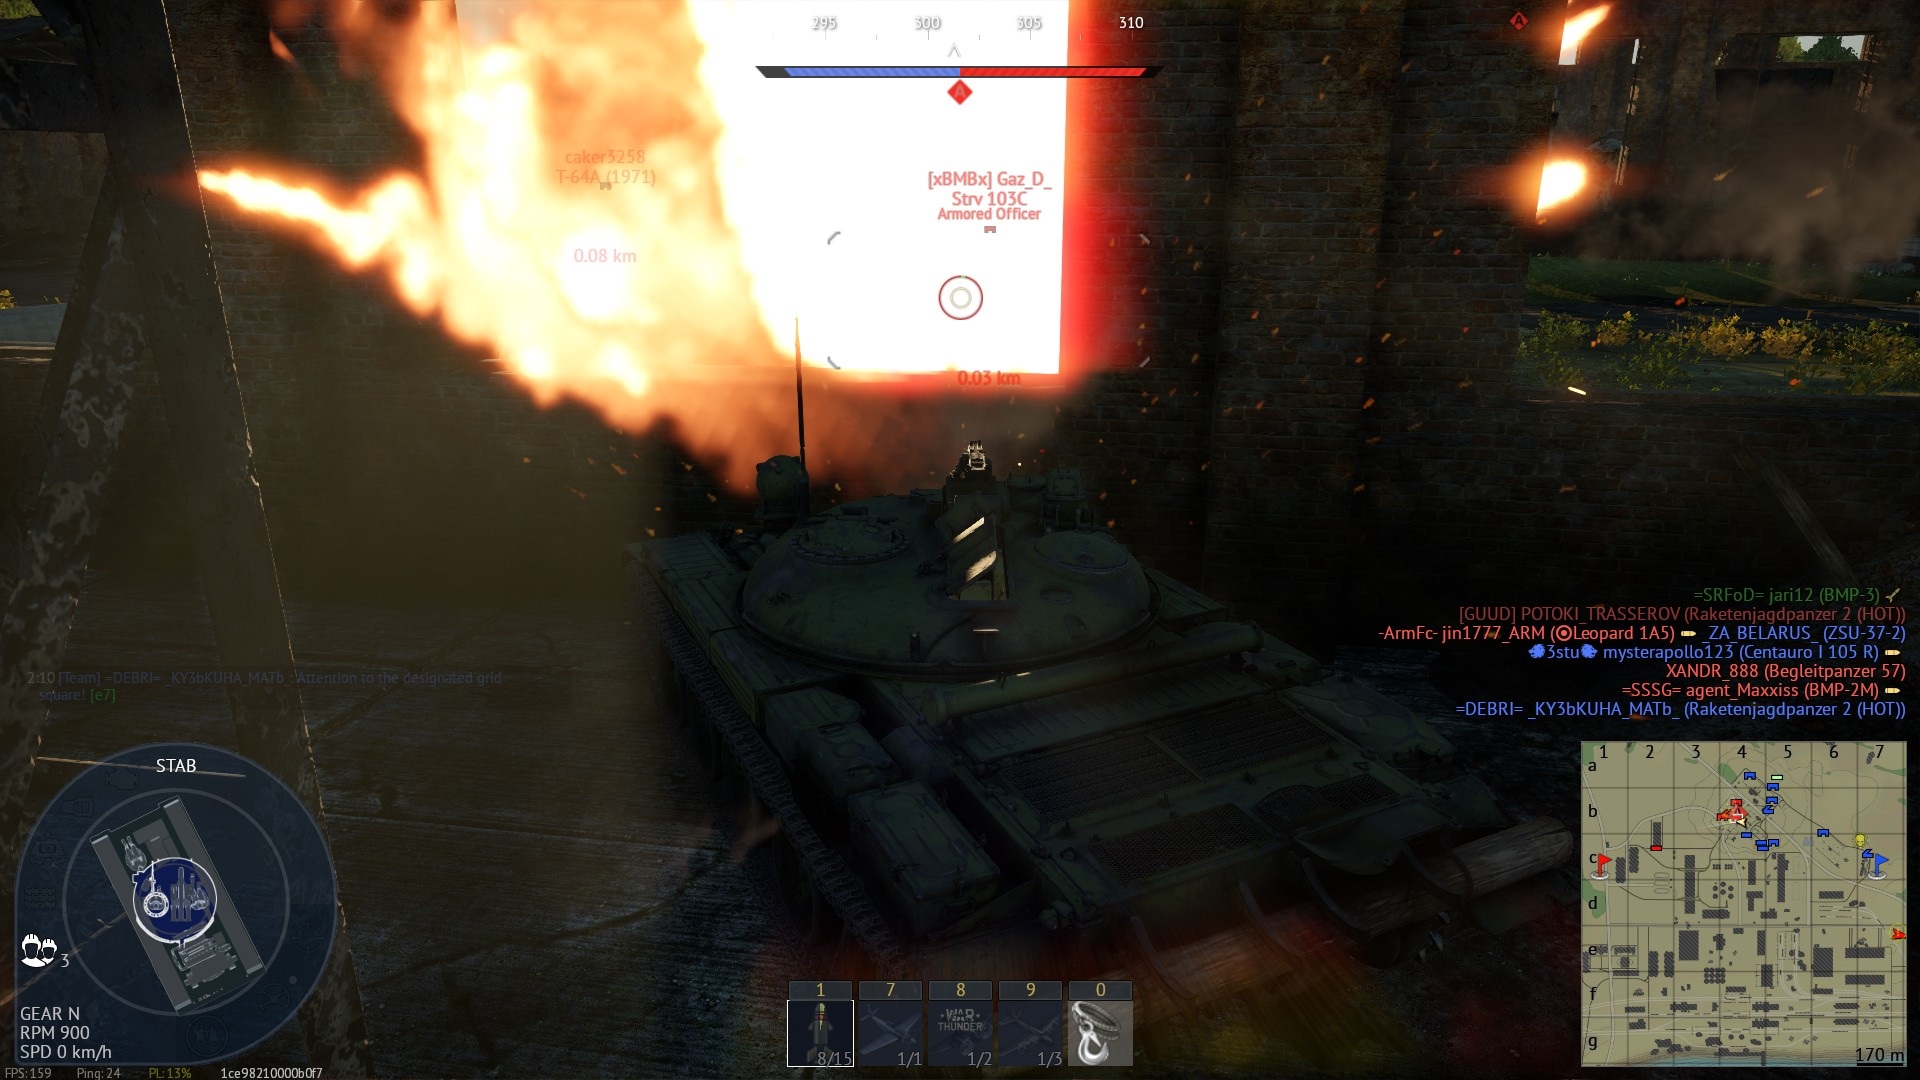
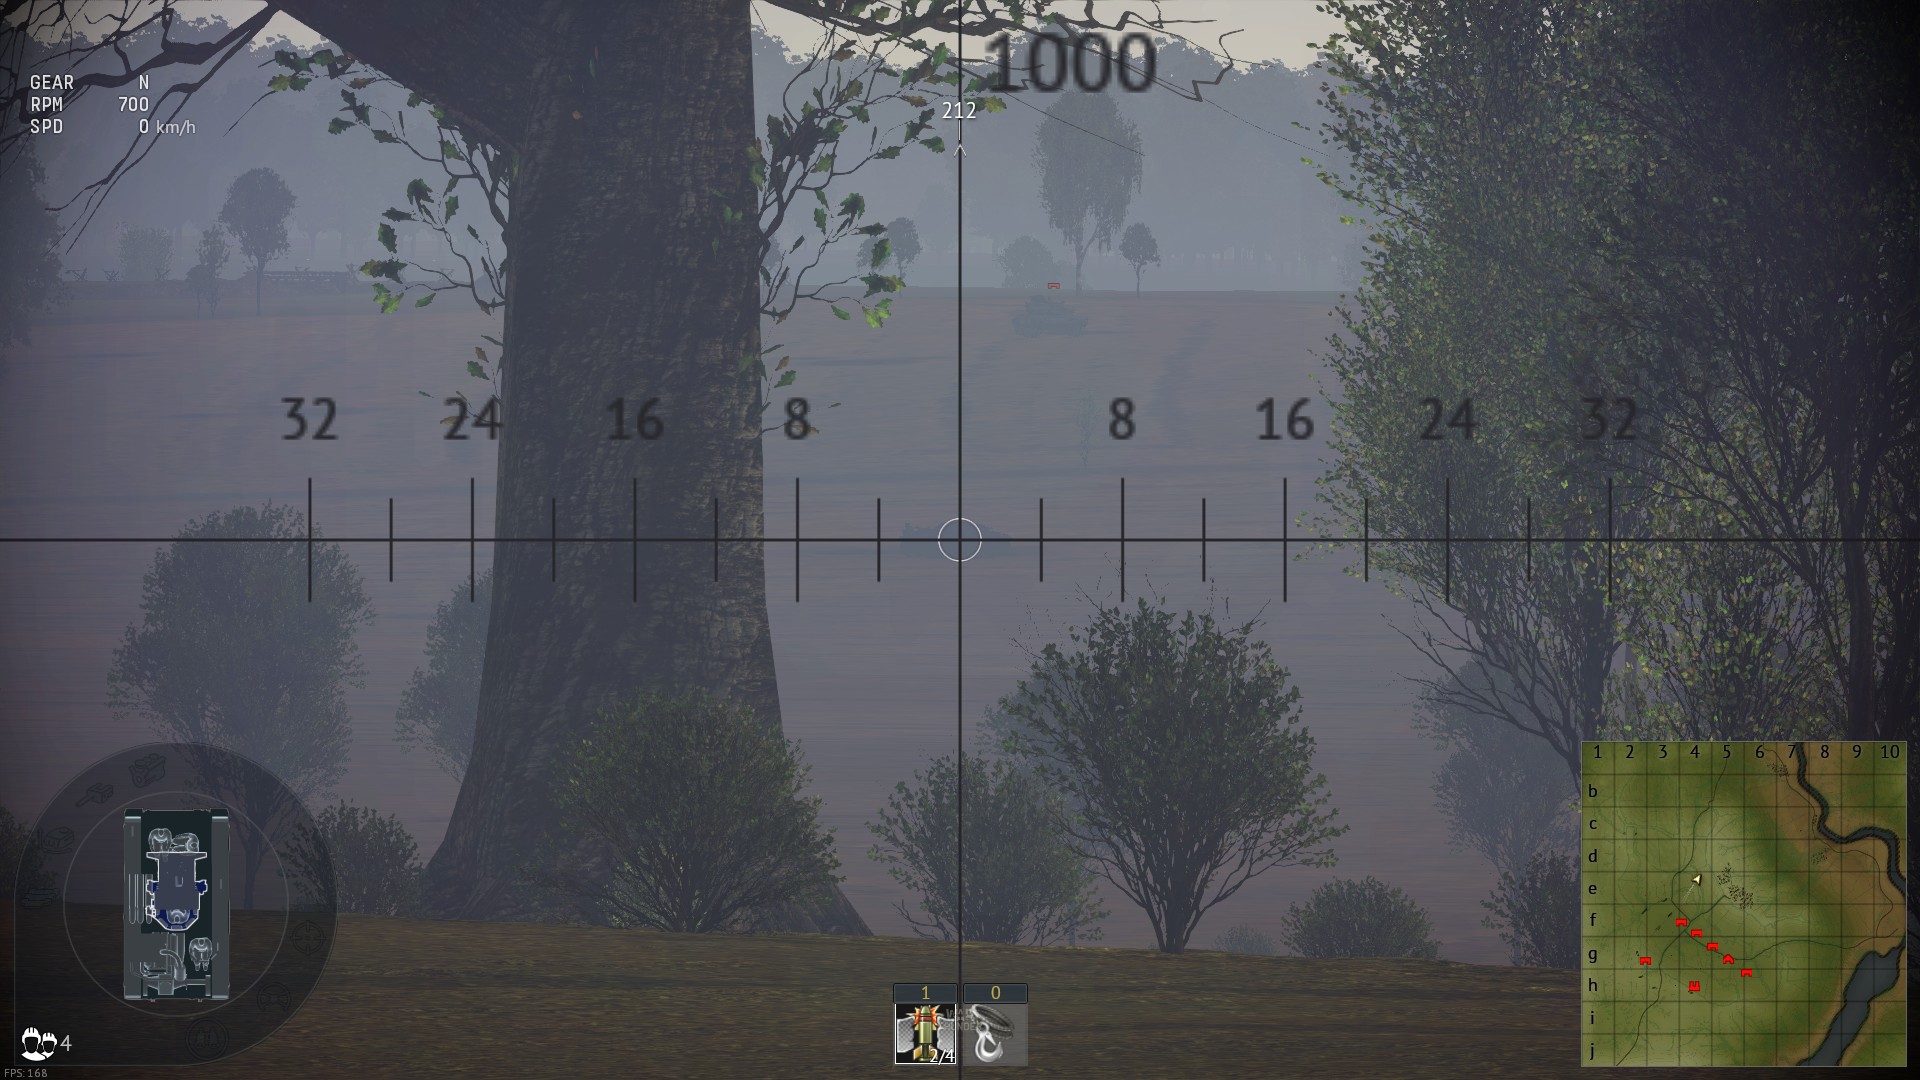
| 18:42, 24 August 2021 | Shturm-S snipe stage 1.jpg (file) |  |
690 KB | Screenshot is to be used with other "snipe stage" ones. First stage is to pull the camera (and only camera) out of cover while being unsnipeable from the sides. Once the mark of the tank becomes bright red, tank should stop moving. [[Category:In-game s... | 1 |
| 18:42, 24 August 2021 | Shturm-S stepping on a ledge.jpg (file) |  |
659 KB | Shturm-S can snipe from low ground by using small objects to pull tself up. Feasible in both AB and RB. Category:In-game screenshots | 1 |
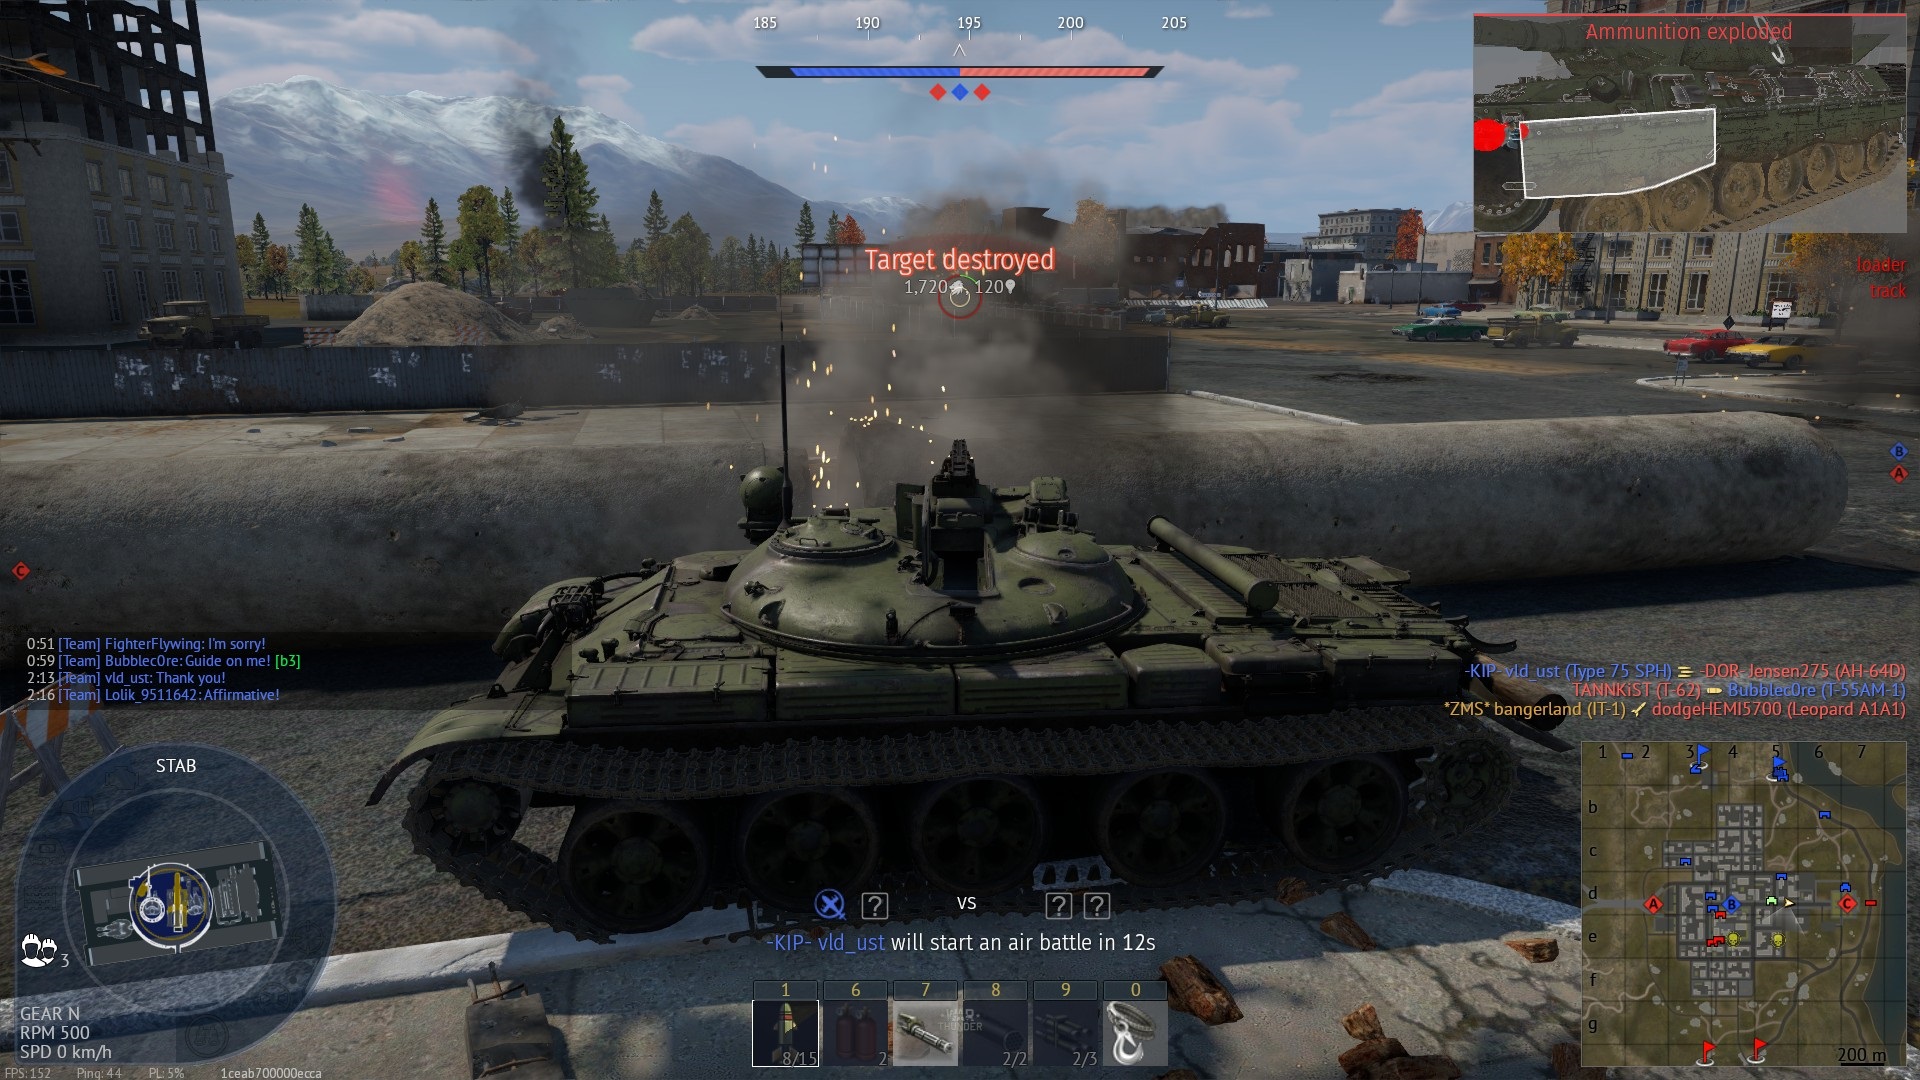
| 18:42, 24 August 2021 | Shturm-S obliterated by CM25.jpg (file) |  |
669 KB | Demonstration of what happens if you do not follow the rules from questionnaire in AB section of Shturm-S tactics. Category:In-game screenshots | 1 |
| 18:42, 24 August 2021 | Shturm-S HE missiles efficiency AB.jpg (file) |  |
516 KB | Since Shturm-S's HE is very agile, it can be used in melee range in AB, for example, for guarding corridors like this one. Category:In-game screenshots | 1 |
| 18:42, 24 August 2021 | Demonstration of Shturm-S launcher aim usefulness for AB.jpg (file) |  |
576 KB | Shturm-S is hidden behind a rock (left portion of a screen is the rock) with no way to reply to a heavy tank camping just outside of it's camera reach. Launcher aim abuse allows it to destroy the camping tank. Category:In-game screenshots | 1 |
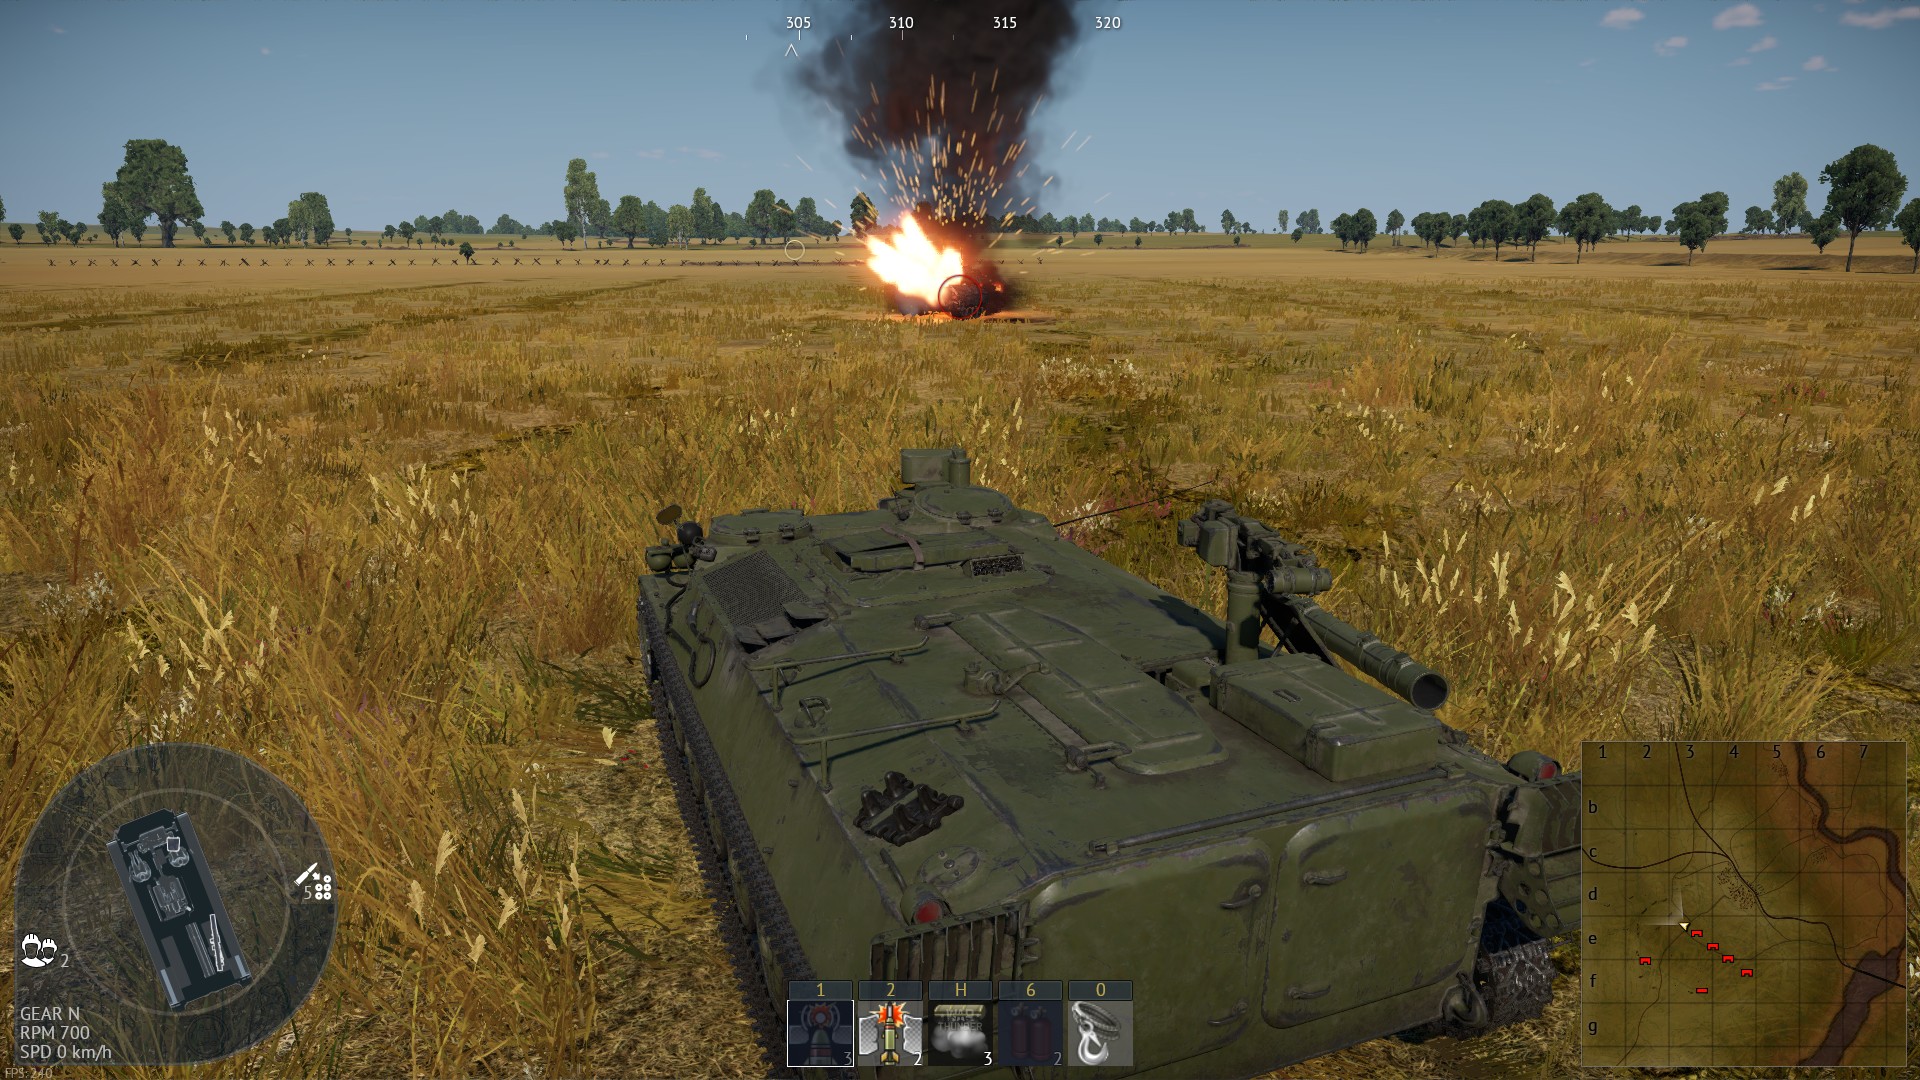
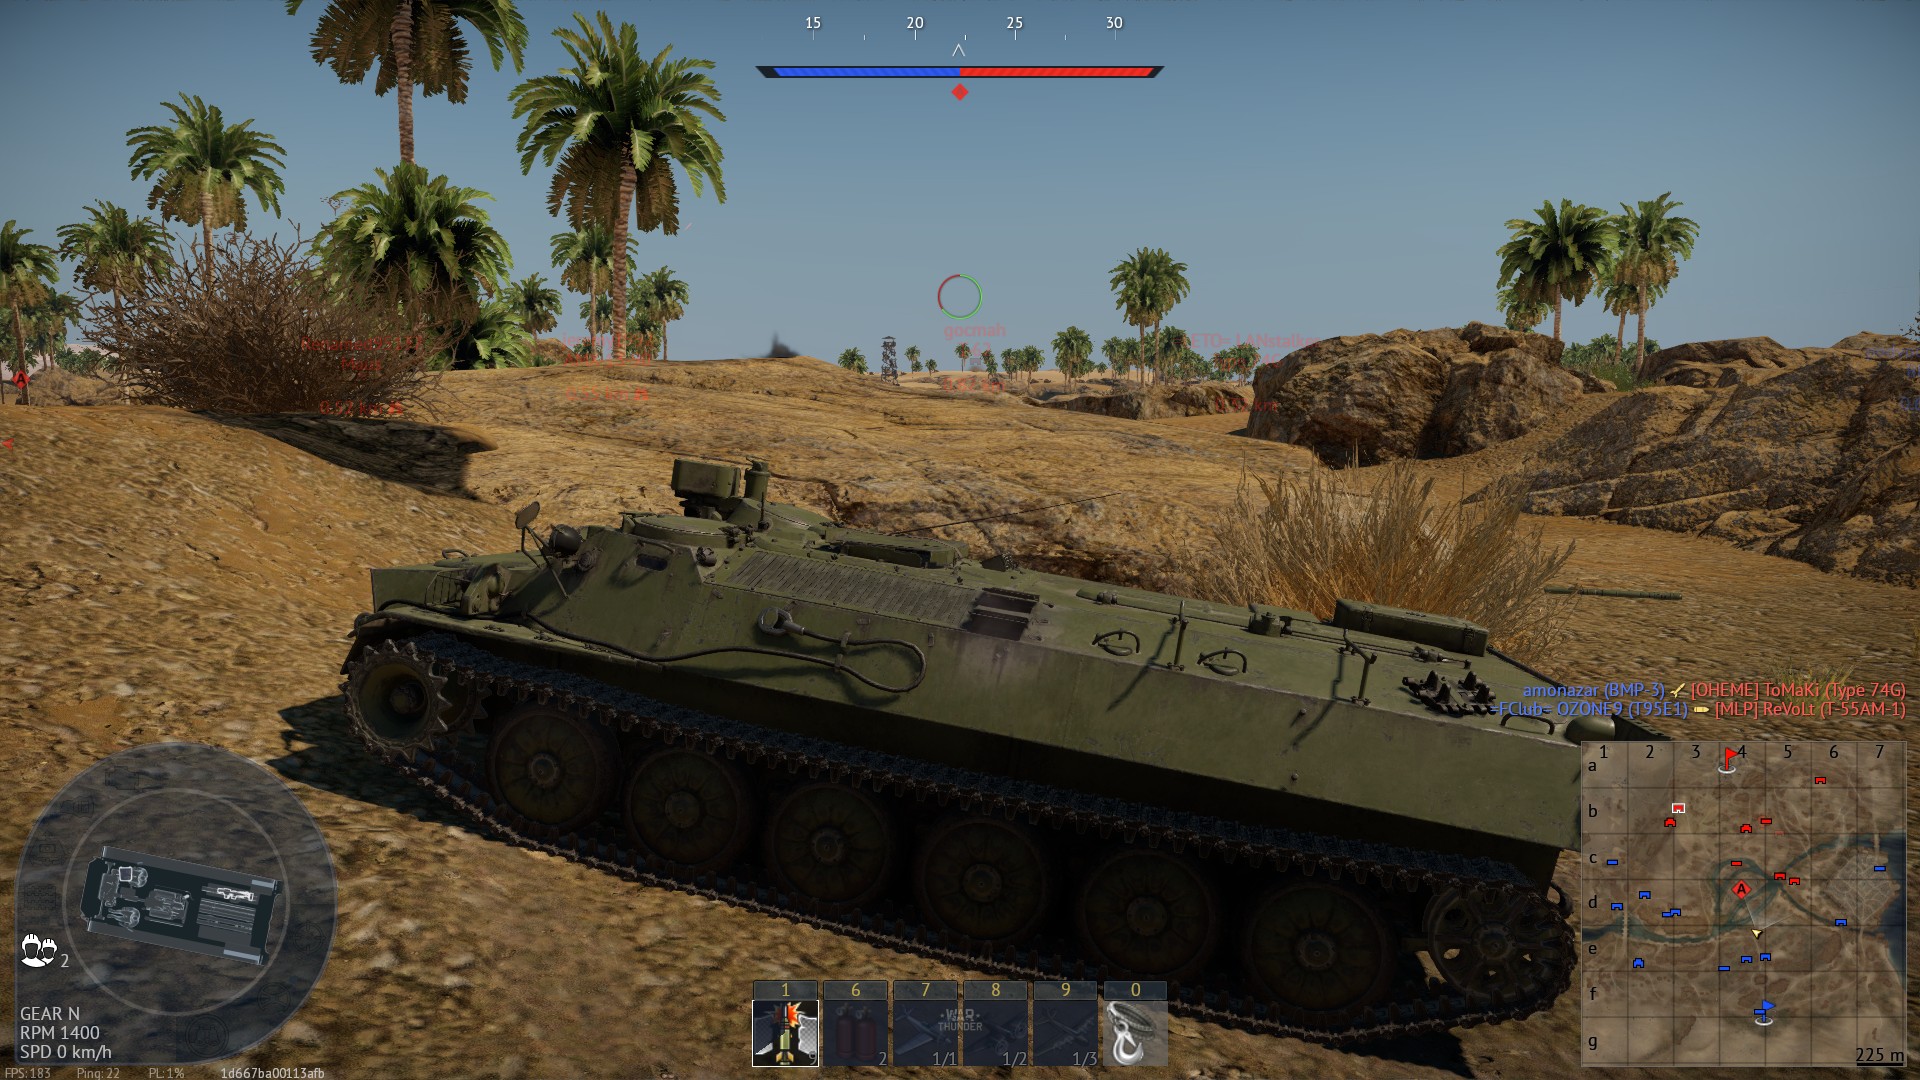
| 18:41, 24 August 2021 | Shturm-S maximum range for launcher aim RB.jpg (file) |  |
613 KB | Demonstration of use of "launcher aim" for shturm-S. No horizontal turret drive. Crew is untrained, but maximum targeting. Category:In-game screenshots | 1 |
| 21:03, 13 August 2021 | Shturm-S using generic sniping spot in AB.jpg (file) |  |
744 KB | Shturm-S is using high ground while being angled while only firing via binoculars while using HE. All together it allows it to survive AB snipers in this spot and even countersnipe ATGM tank.Category:In-game screenshots | 1 |
| 18:22, 13 August 2021 | Shturm-S hanging on a hill AB sniping spot.jpg (file) |  |
500 KB | Carrier is using generally overlooked/unusable vantage point in AB. Category:In-game screenshots | 1 |
| 17:44, 13 August 2021 | Shturm-S sniping off plateau.jpg (file) |  |
449 KB | It is physically impossible to get sniped here for Shturm-S as the plateau is protecting it, so it can be used in AB by it. Category:In-game screenshots | 1 |
| 17:37, 13 August 2021 | Shturm-S checks sides.jpg (file) |  |
548 KB | Demonstration of Shturm-S checking sides to avoid countersnipe. AB mode. Category:In-game screenshots | 1 |
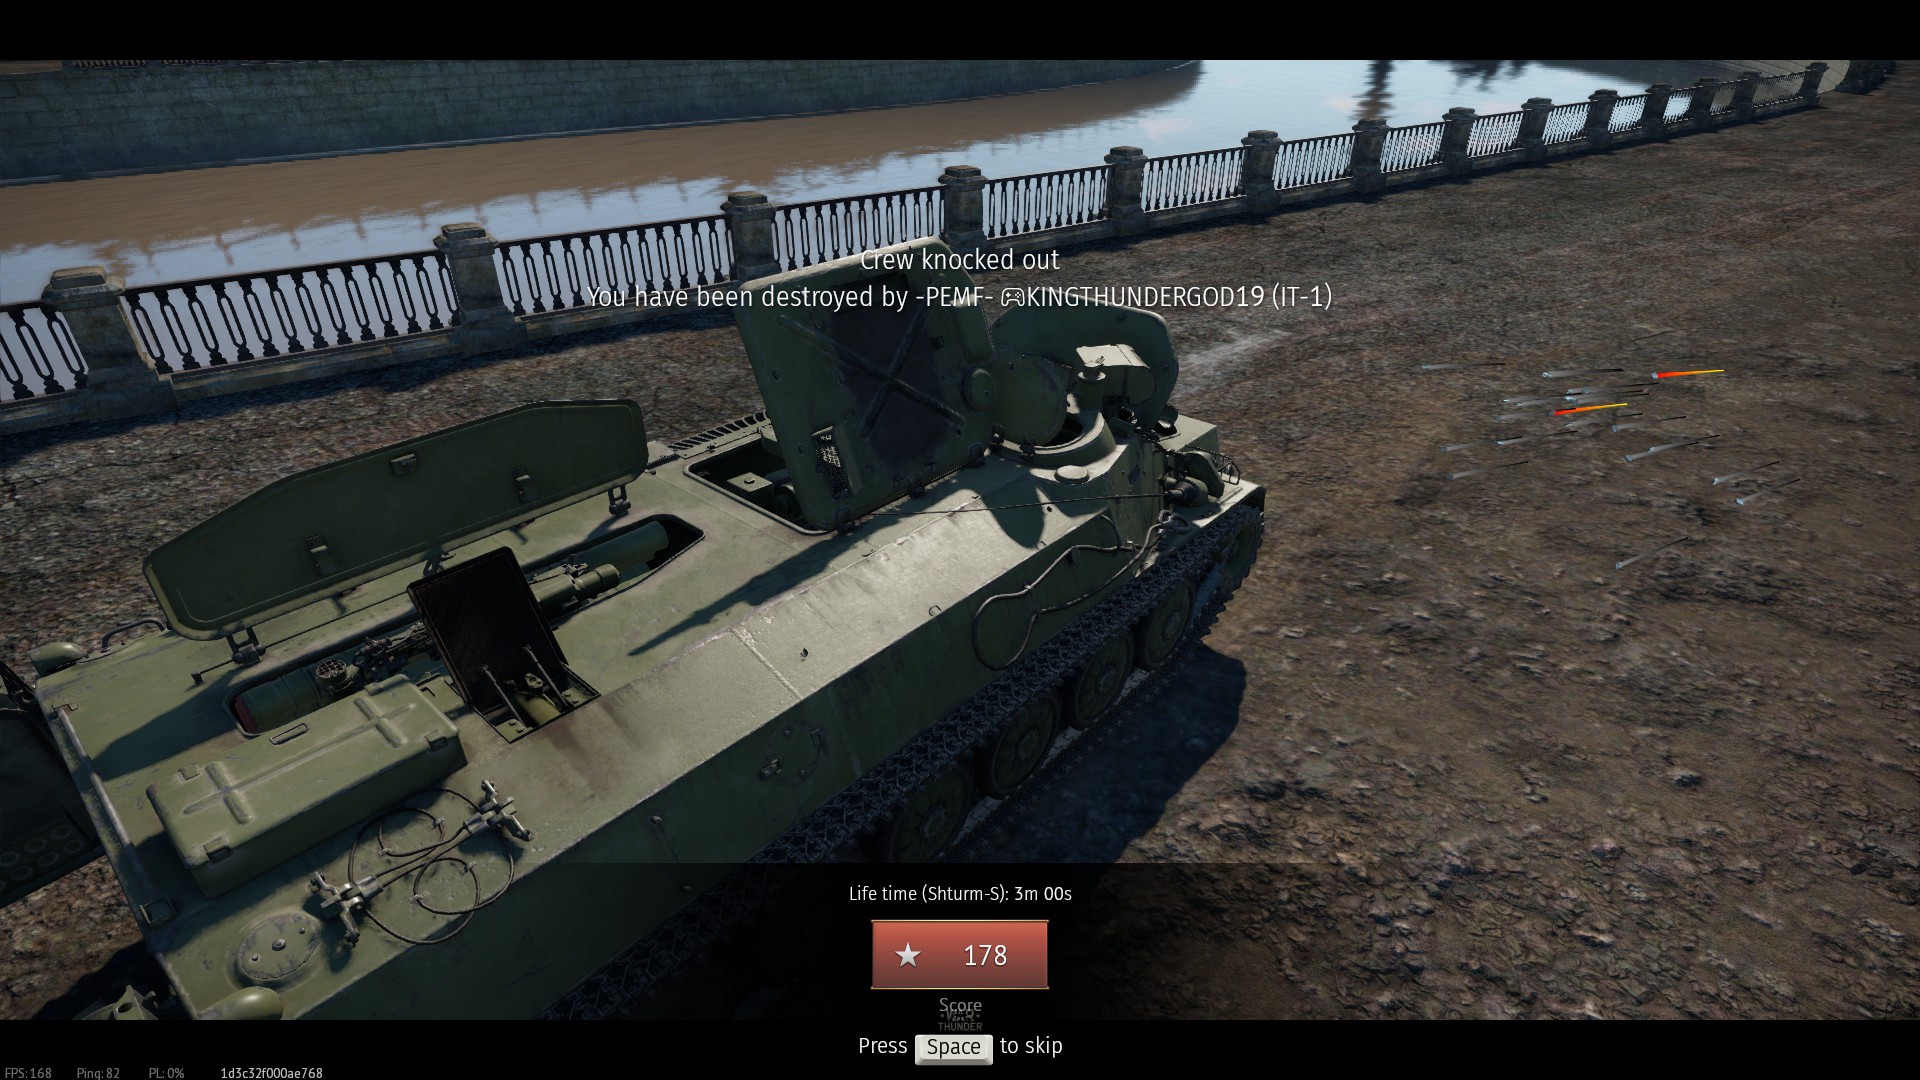
| 17:21, 13 August 2021 | Shturm-S obliterated by IT-1 missing shot from 20 m.jpg (file) |  |
499 KB | As name suggests, IT-1 overpressure wave has ridicilous range and Shturm-S has poor 8 mm of armour, meaning it's HEAT pressure attack is super effective.Category:In-game screenshots | 1 |
| 17:16, 13 August 2021 | Shturm-S swimming.jpg (file) |  |
416 KB | Self-explanatory. Category:In-game screenshots | 1 |
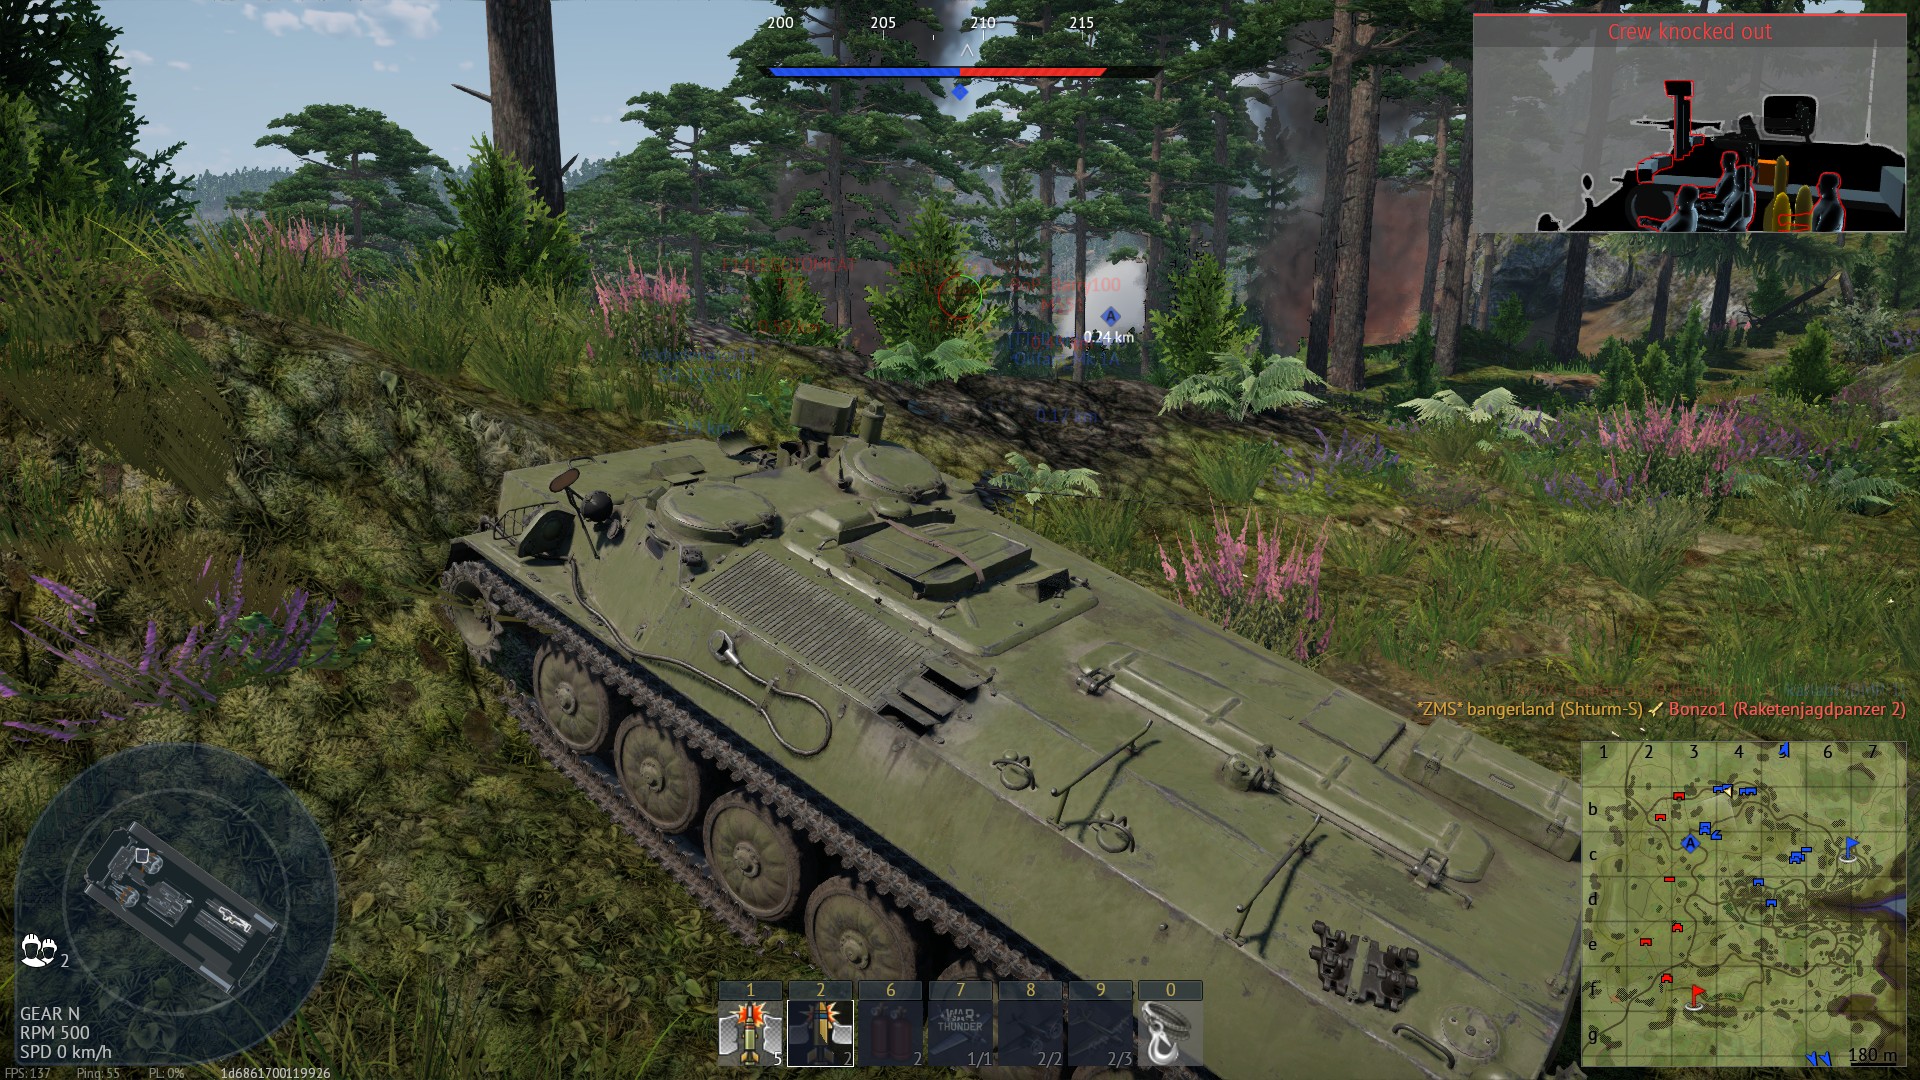
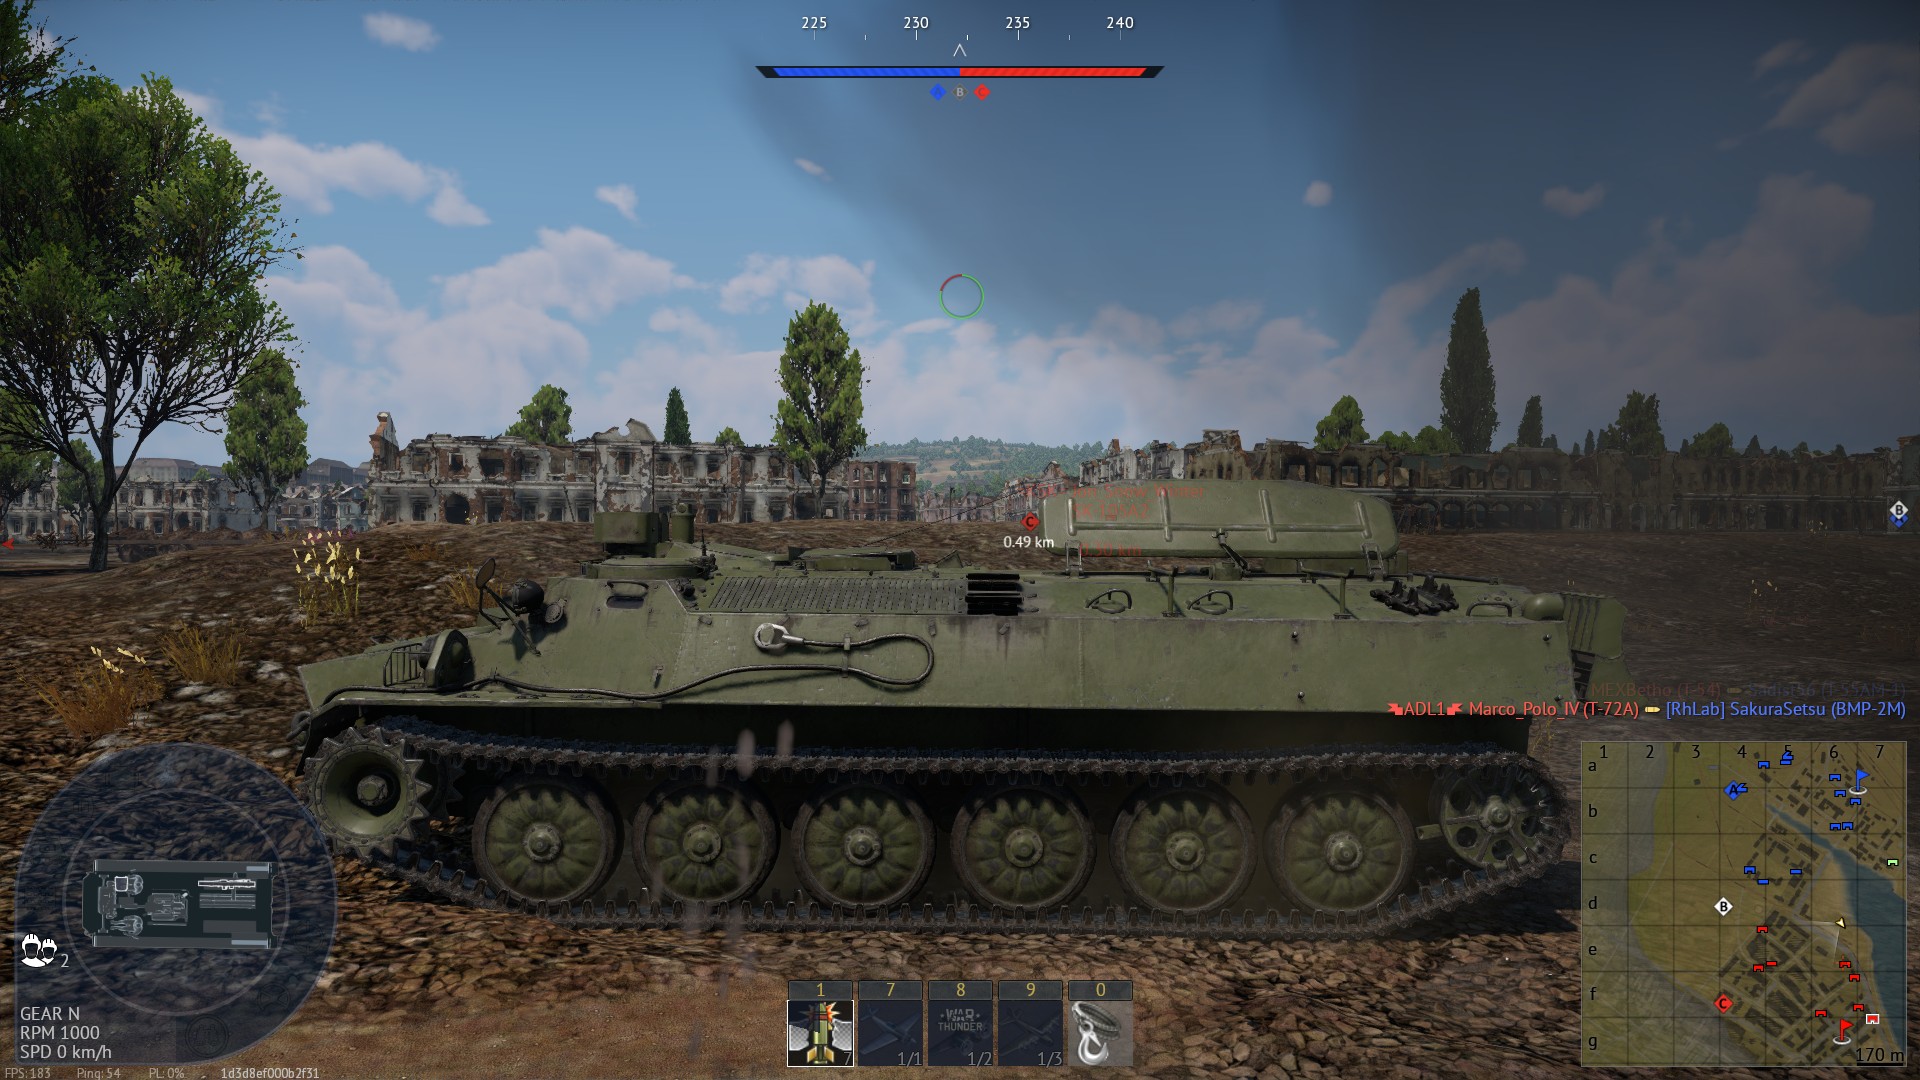
| 17:11, 13 August 2021 | Shturm-S low profile demonstration.jpg (file) |  |
470 KB | Self-explanatory. Only the launcher is exposed in such a spot. Category:In-game screenshots | 1 |
| 22:31, 12 August 2021 | It-1 uses light tank remains as a shield.jpg (file) |  |
554 KB | A random wheeled tank is used as a shield for IT-1 against HEAT-FS. Category:In-game screenshots | 1 |
| 15:53, 10 August 2021 | Unupgraded bmp1 kills it1 camp squad.jpg (file) |  |
762 KB | Original BMP-1 missile can be launched vertically and softly guided, thus BMP-1 launches it over the wall to annihilate IT-1 squad from complete safety. Screenshot is made in AB mode. Category:In-game screenshots | 1 |
| 15:50, 10 August 2021 | IT-1 full hulldown shot win.jpg (file) |  |
330 KB | IT-1 fired high and used sniper scope to ensure that missile doesn't curve down or anything like that, thus not hitting it's own cover. Category:In-game screenshots | 1 |
| 15:48, 10 August 2021 | IT-1 full hulldown shot fail.jpg (file) |  |
467 KB | IT-1 shot its own cover for aiming too low. Category:In-game screenshots | 1 |
| 15:46, 10 August 2021 | IT-1 deep hulldown.jpg (file) |  |
653 KB | IT-1 deep hulldown at a random spot. Category:In-game screenshots | 1 |
| 15:45, 10 August 2021 | It-1 short hulldown.jpg (file) |  |
638 KB | IT-1 hulldown with exposed turret. Category:In-game screenshots | 1 |
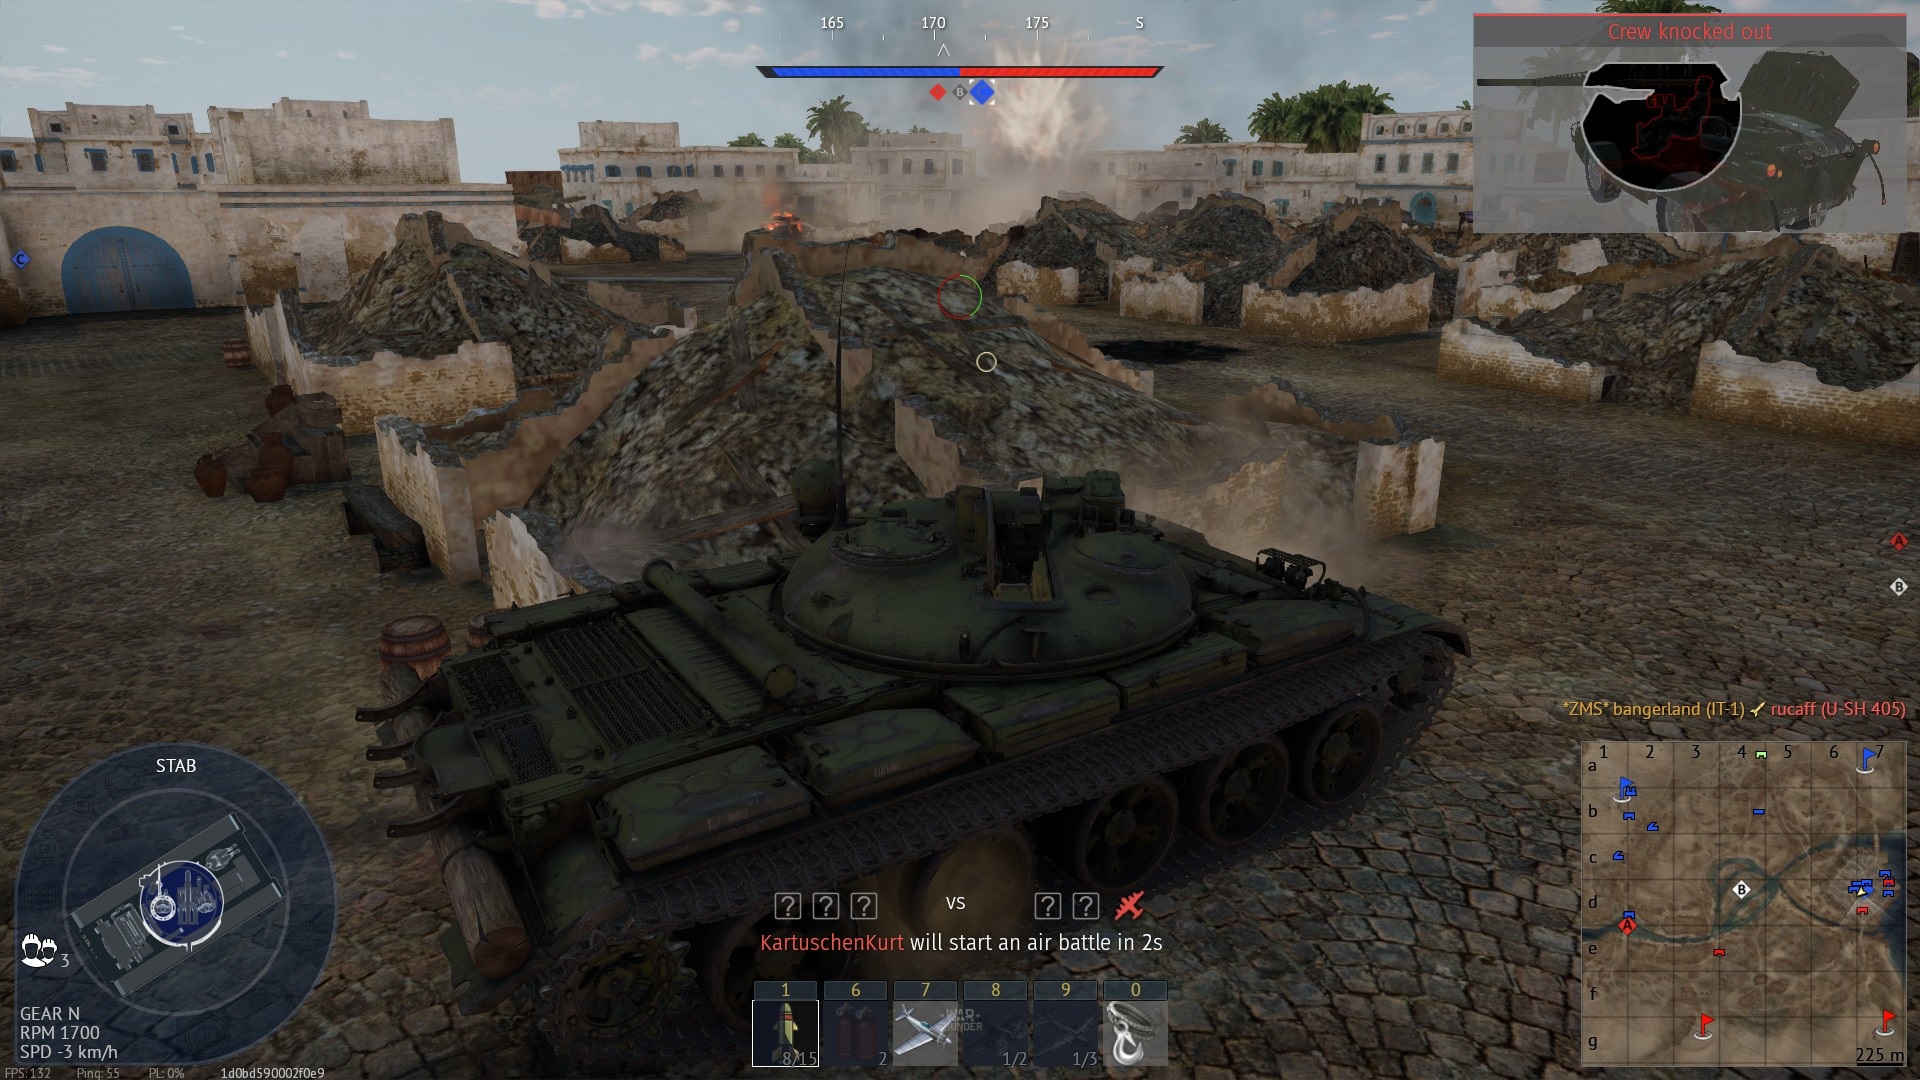
| 15:41, 10 August 2021 | It-1 atgm area of effect.jpg (file) |  |
641 KB | Demonstration of area of effect of IT-1 ATGM. Seems a little bit random, but general area is outlined with red lines. Category:In-game screenshots | 1 |
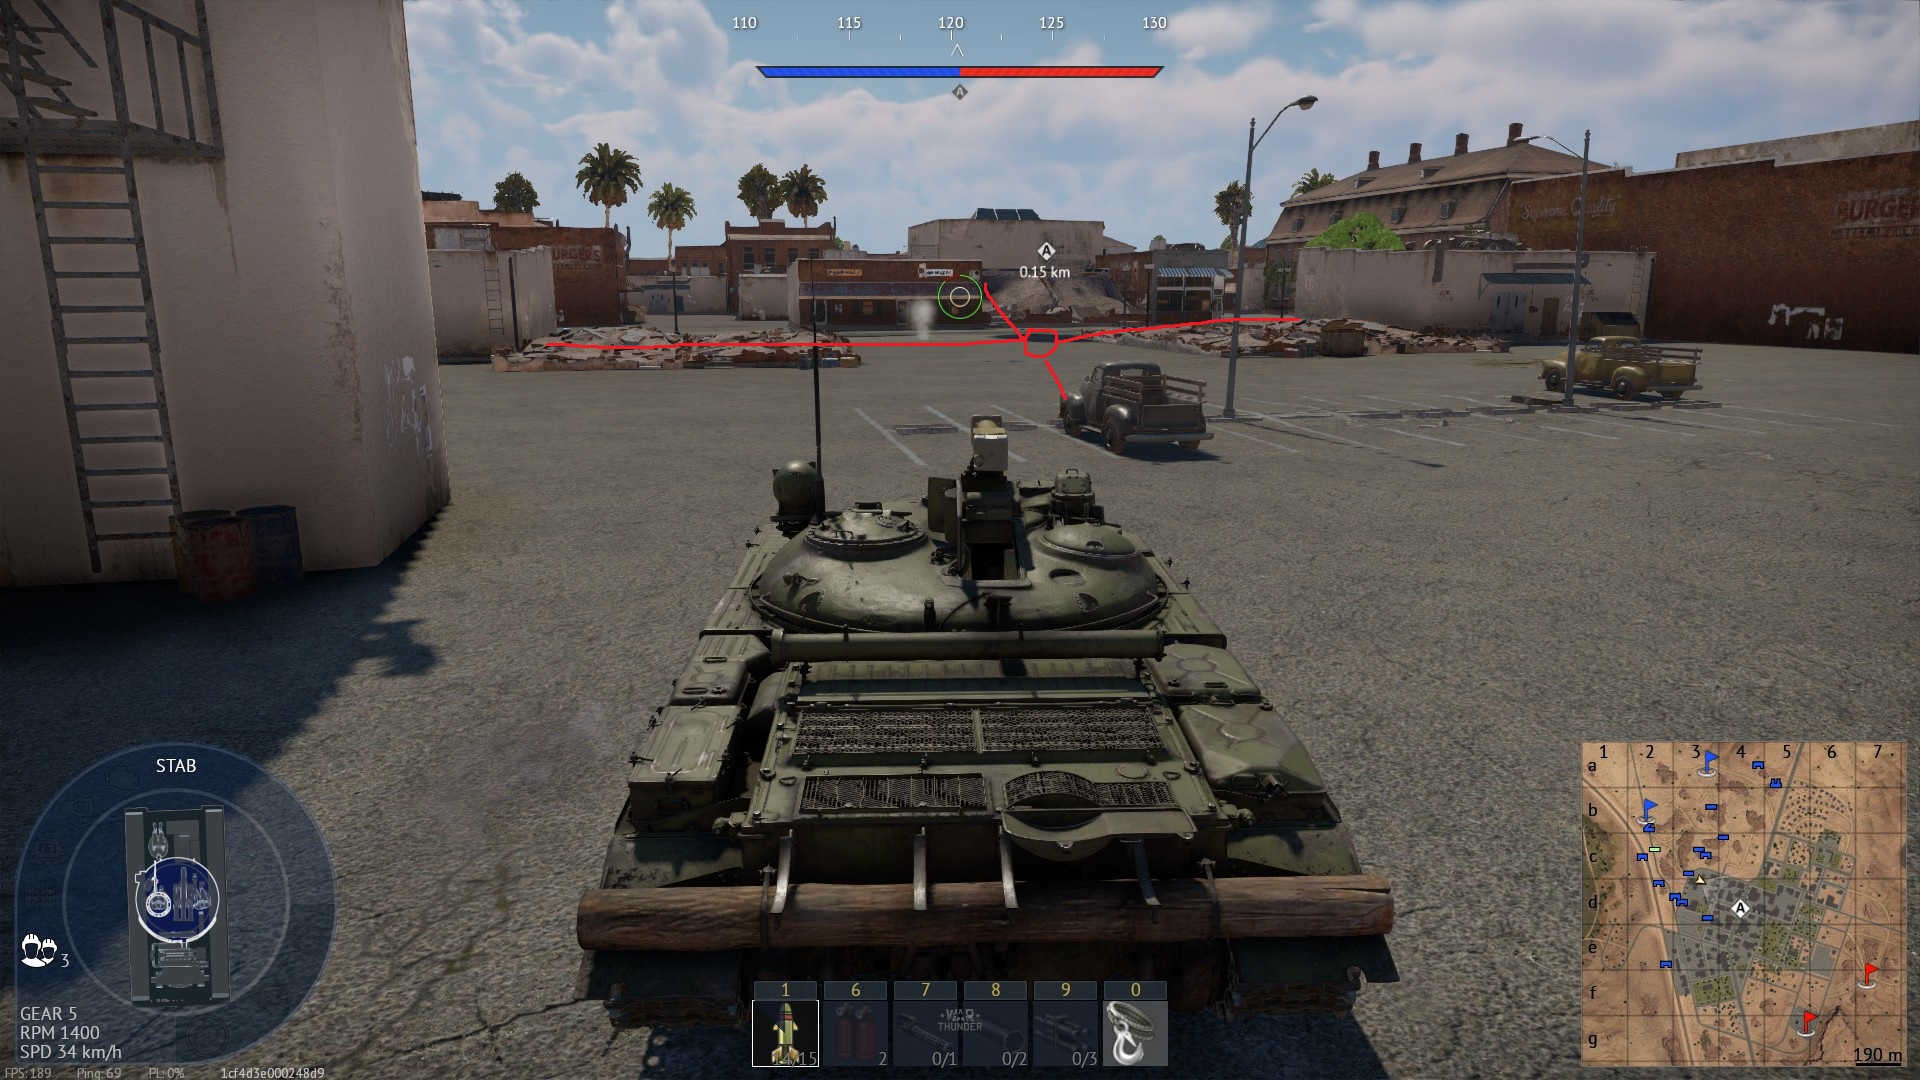
| 15:39, 10 August 2021 | IT-1 fights in town against U-SH.jpg (file) |  |
642 KB | IT-1 destroys town to find and destroy U-SH Category:In-game screenshots | 1 |
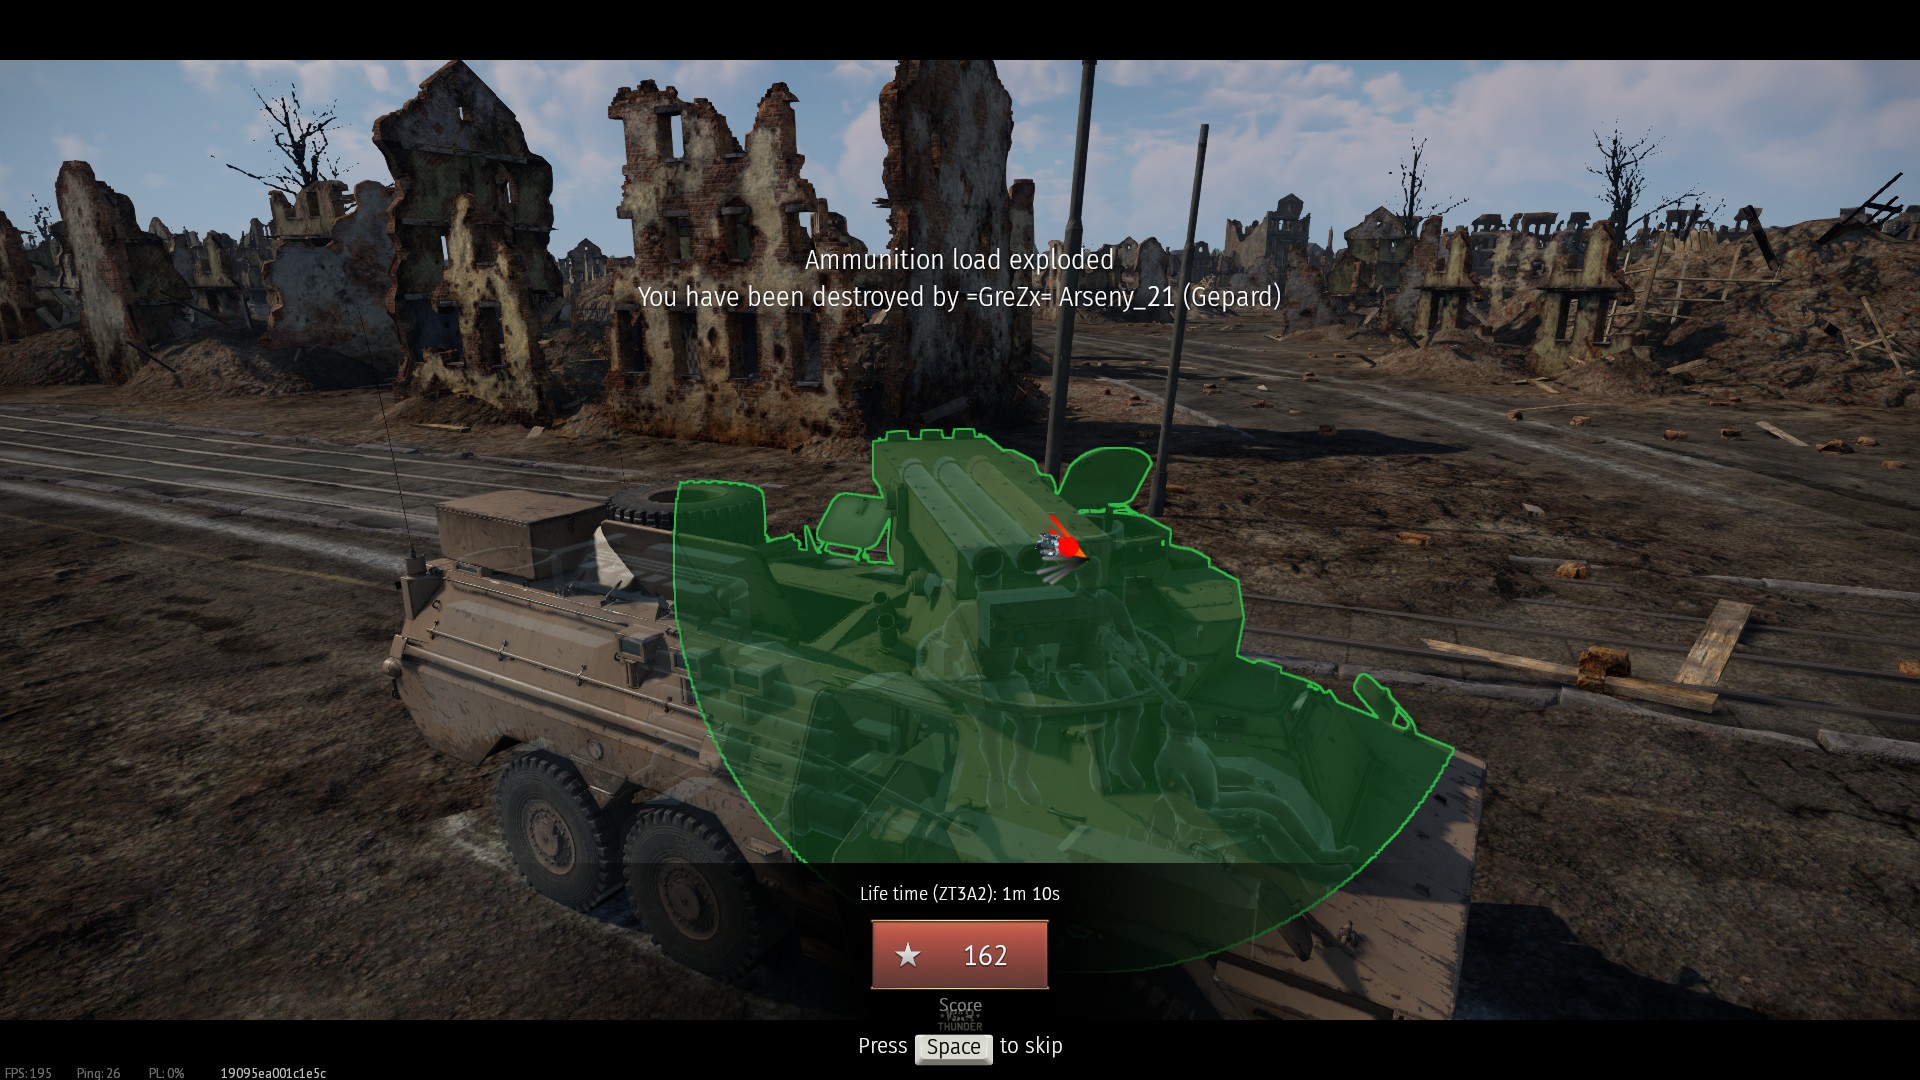
| 00:46, 29 June 2021 | ZT3A2 fragility example.jpg (file) |  |
471 KB | Gepard 35 mm HE-I detonates ammo rack of ZT3A2. | 1 |
| 00:37, 29 June 2021 | ZT3A2 Climbed impossible spot and sniped.jpg (file) |  |
555 KB | Maximum movement upgrades on ZT3A2 used to climb near unreachable spot for west team to snipe unfortunate people attacking C cap. Arcade mode. | 1 |
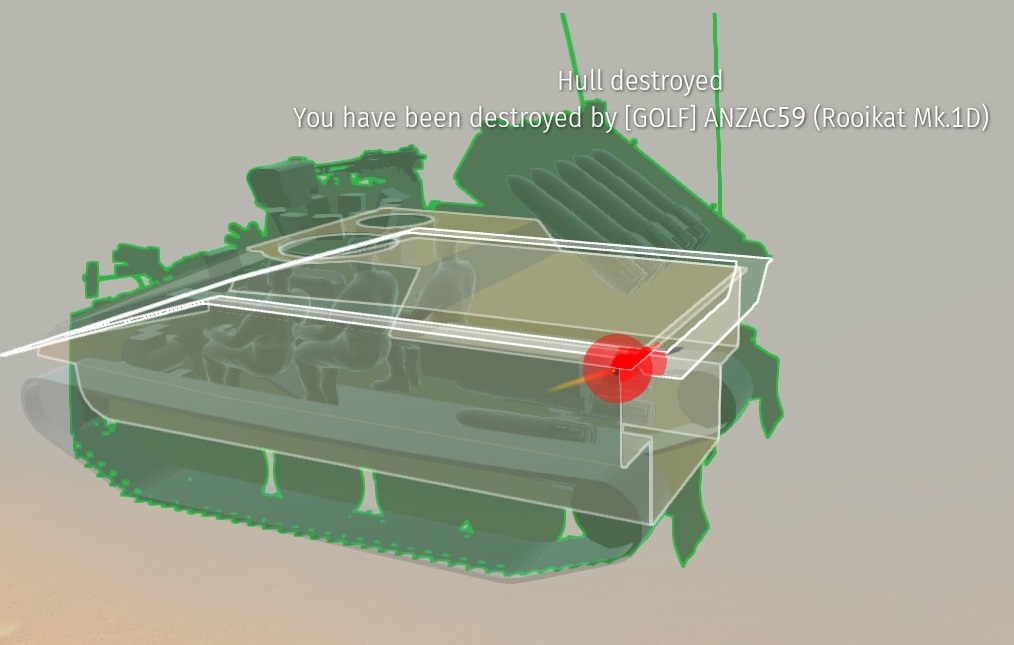
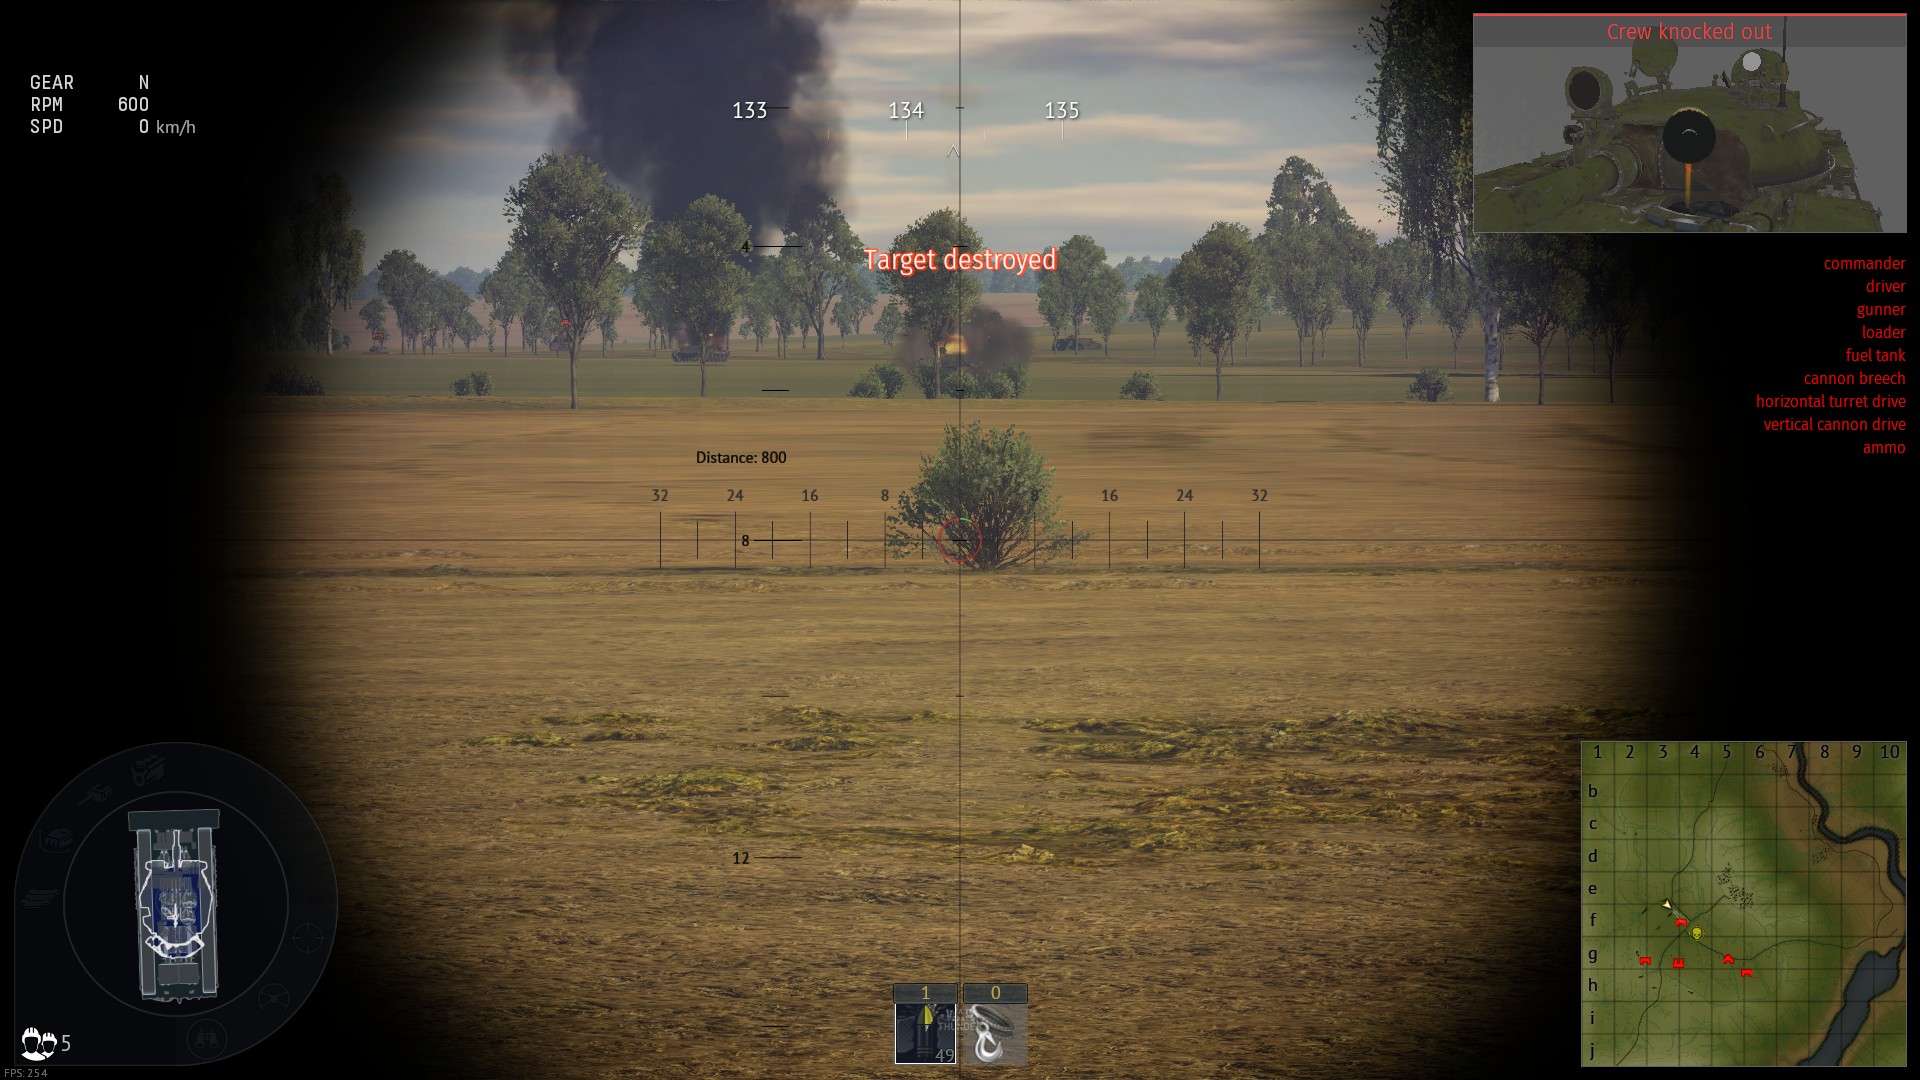
| 17:57, 15 September 2020 | Rooikat hullbreaks striker with 76mm APFSDS.jpg (file) |  |
104 KB | Death replay camera doesn't cooperate, so i'll at least try to cut down the original screenshot in order to make important pieces bigger (at the cost of authentity). --~~~~ | 2 |
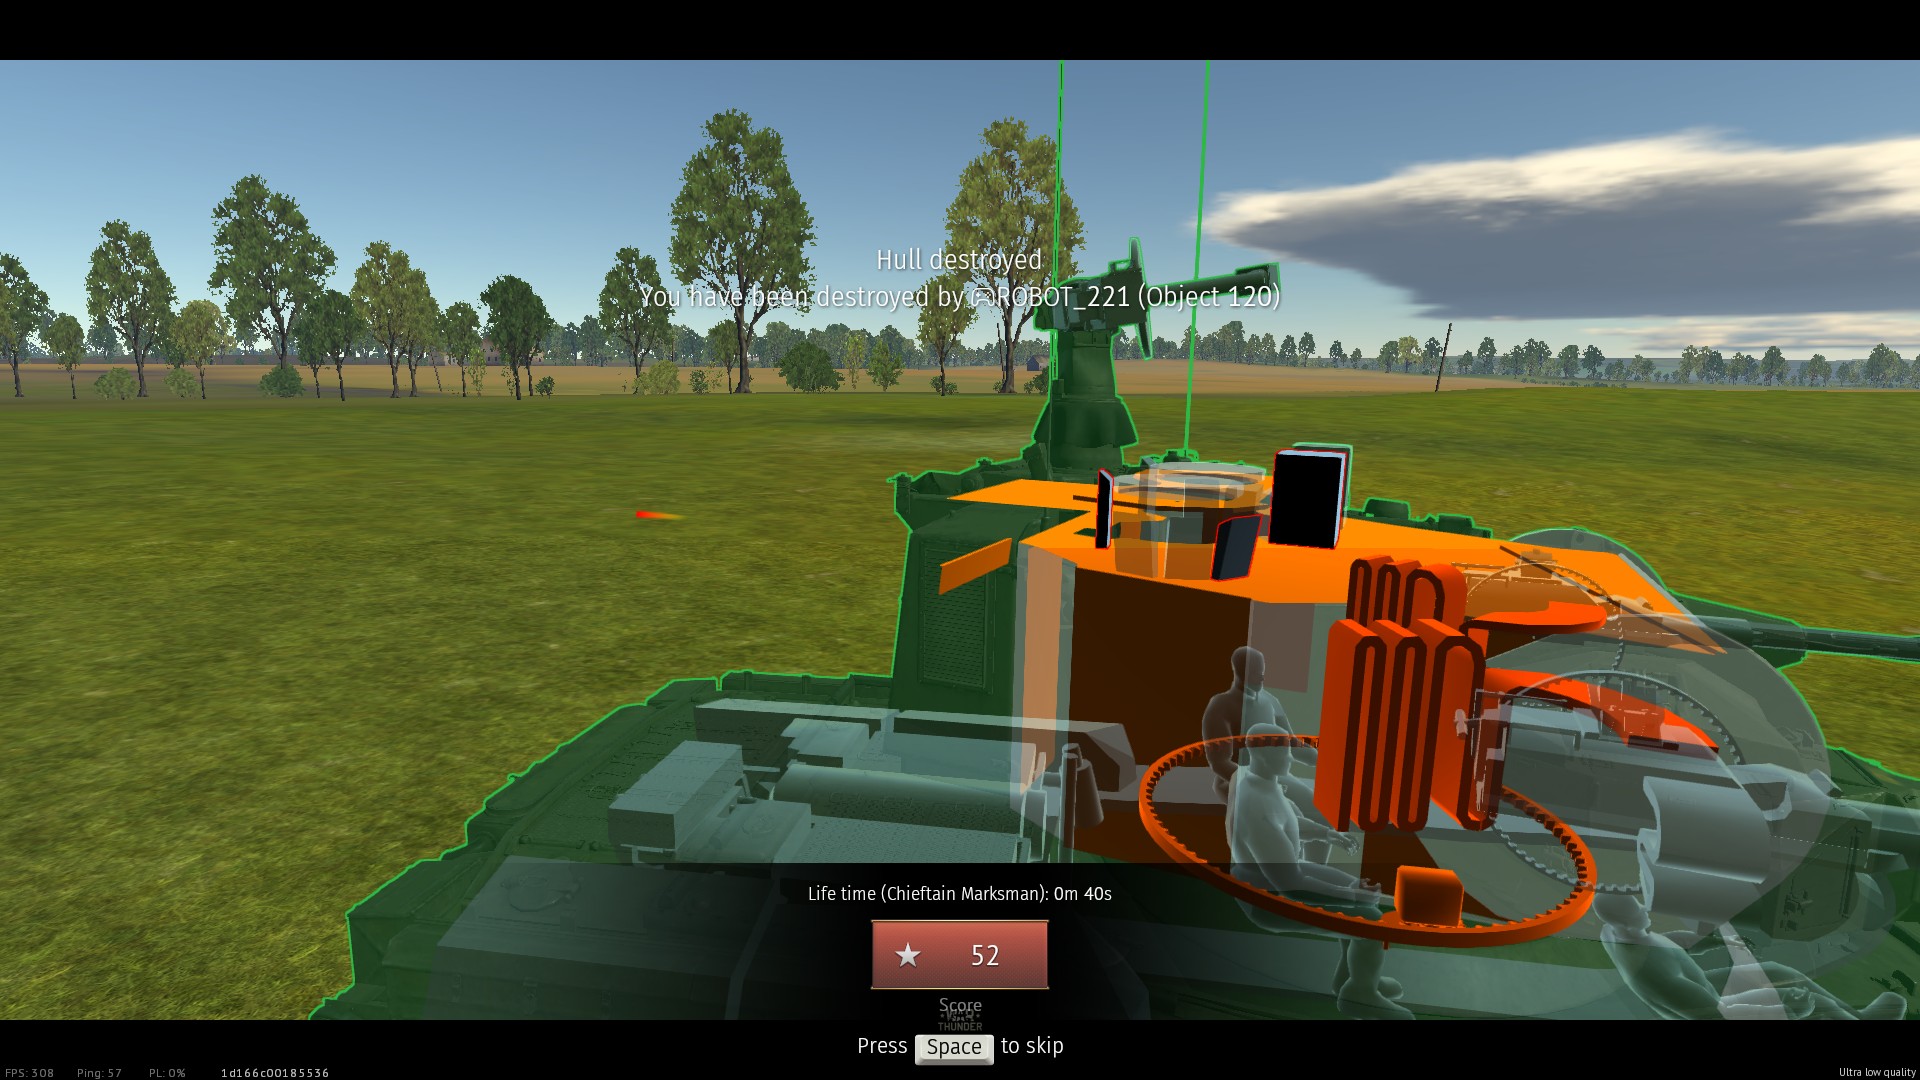
| 00:53, 12 September 2020 | Chieftain marksman hullbreak.jpg (file) |  |
400 KB | Object 120 hullbreaks Chieftain Marksman. No fatal damage was done to any components, which means, that hullbreak was triggered by just doing damage to turret. Seems to be a "feature" of update "raining fire". Category:In-game screenshots | 1 |
| 13:16, 6 July 2020 | Type 89 rush.PNG (file) |  |
40 KB | Short map example for type 89. Red is path of type 89 trying to get to sniper spot with his buddies. Yellow is representing sector in which type 89 is trying to keep enemy sniper down in his hulldown spot. | 1 |
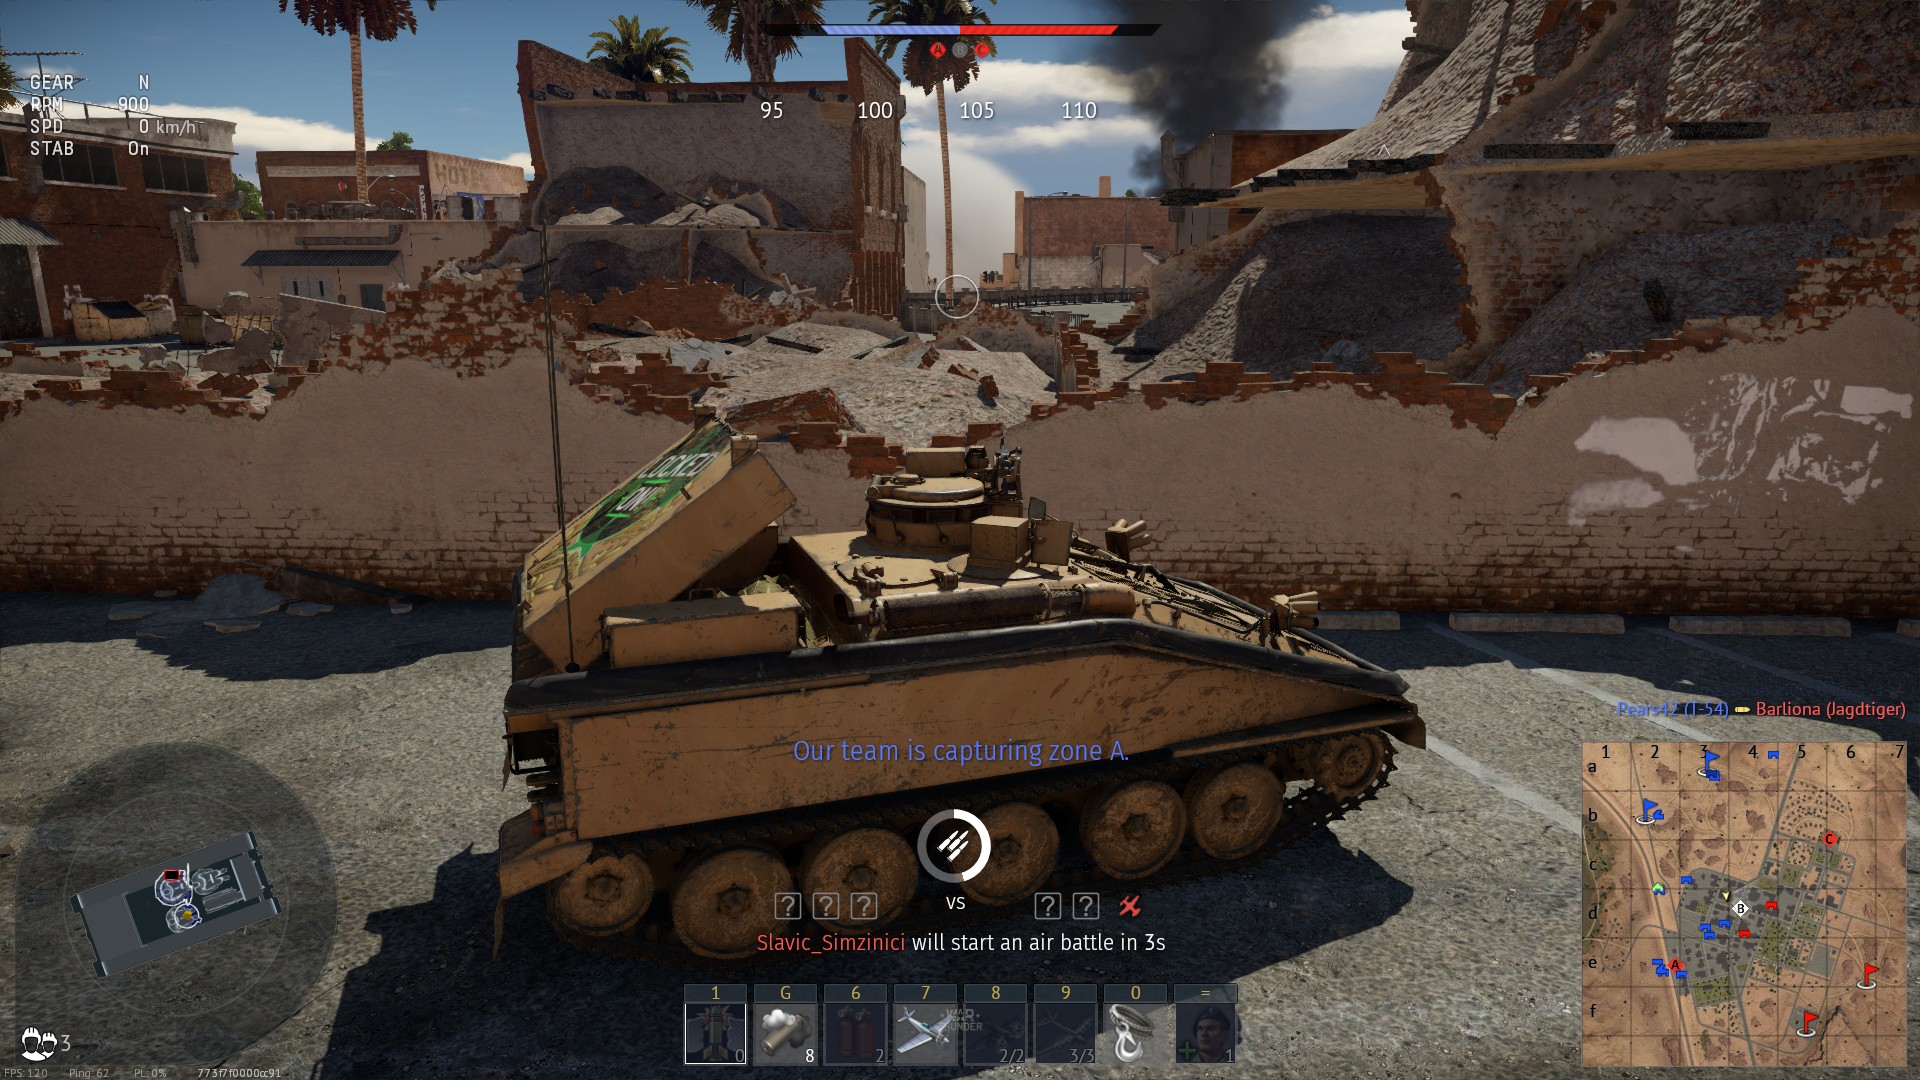
| 20:15, 12 November 2019 | Striker perfect cover.jpg (file) |  |
572 KB | Screenshot displays perfect type of combat cover for Striker Category:In-game screenshots | 1 |
| 15:55, 26 October 2019 | Ho-Ri frontal weak spot demonstration.jpg (file) |  |
412 KB | The squares which are supposed to protect radiators of Ho-Ri are showing enemy tanks where to fire to penetrate Ho-Ri. Slightly above them there are windows which are even easier to penetrate. Category:In-game screenshots | 1 |
| 23:01, 25 October 2019 | Type 75 SPH firing over cover long range AB.jpg (file) |  |
231 KB | Type 75 SPH uses gun adjustment to fire over cover like artillery. Can only be done from long range of about 1.1+ km, probably can only be done in arcade mode. Category:In-game screenshots | 1 |
| 17:28, 25 October 2019 | Screenshot of an MBT mockup custom scope.JPG (file) |  |
68 KB | Screenshot displays the use of a "modern" custom scope for a tank. Category:In-game screenshots | 1 |
| 17:28, 25 October 2019 | Type 75 MLRS custom scope in work.jpg (file) |  |
222 KB | Screenshot displays use of a custom tank scope for type 75 MLRS. It allows to attack hostile tank directly without an issue.Category:In-game screenshots | 1 |
| 17:28, 25 October 2019 | Type 75 MLRS default scope is bad.jpg (file) |  |
197 KB | Screenshot is used to display that sometimes default scope for a tank is really, really bad. Category:In-game screenshots | 1 |
| 17:28, 25 October 2019 | Challenger 2 scope zero in for arcade mode.jpg (file) |  |
257 KB | Screenshot used to display the convenience of manual gun adjustment in Arcade battle. There is no AB hit marker past 1 KM, so challenger 2 would still have to aim manually. Category:In-game screenshots | 1 |
| 17:28, 25 October 2019 | Centurion AVRE Compensating for excessive gun zero-in.jpg (file) |  |
421 KB | Screenshot displays, that if player adjusts the gun too hard they will have to aim in reverse ways to hit the target. Category:In-game screenshots | 1 |
| 17:28, 25 October 2019 | Centurion AVRE gun zero in for Realistic mode.jpg (file) |  |
448 KB | Screenshot displays player using gun adjustment to be able to aim directly at hostile tank and attack it.Category:In-game screenshots | 1 |
| 17:28, 25 October 2019 | Centurion AVRE cannot aim at the tank.jpg (file) |  |
216 KB | Screenshot used as an example to show that sniper scope on AVRE can become useless without zero-in of a gun. AB mode targeting displays that the tank won't be hit. Category:In-game screenshots | 1 |
| 17:27, 25 October 2019 | Settings for gun adjustment.jpg (file) |  |
255 KB | Screenshot displays minimalistic settings, required to use "gun adjustment"Category:In-game screenshots | 1 |
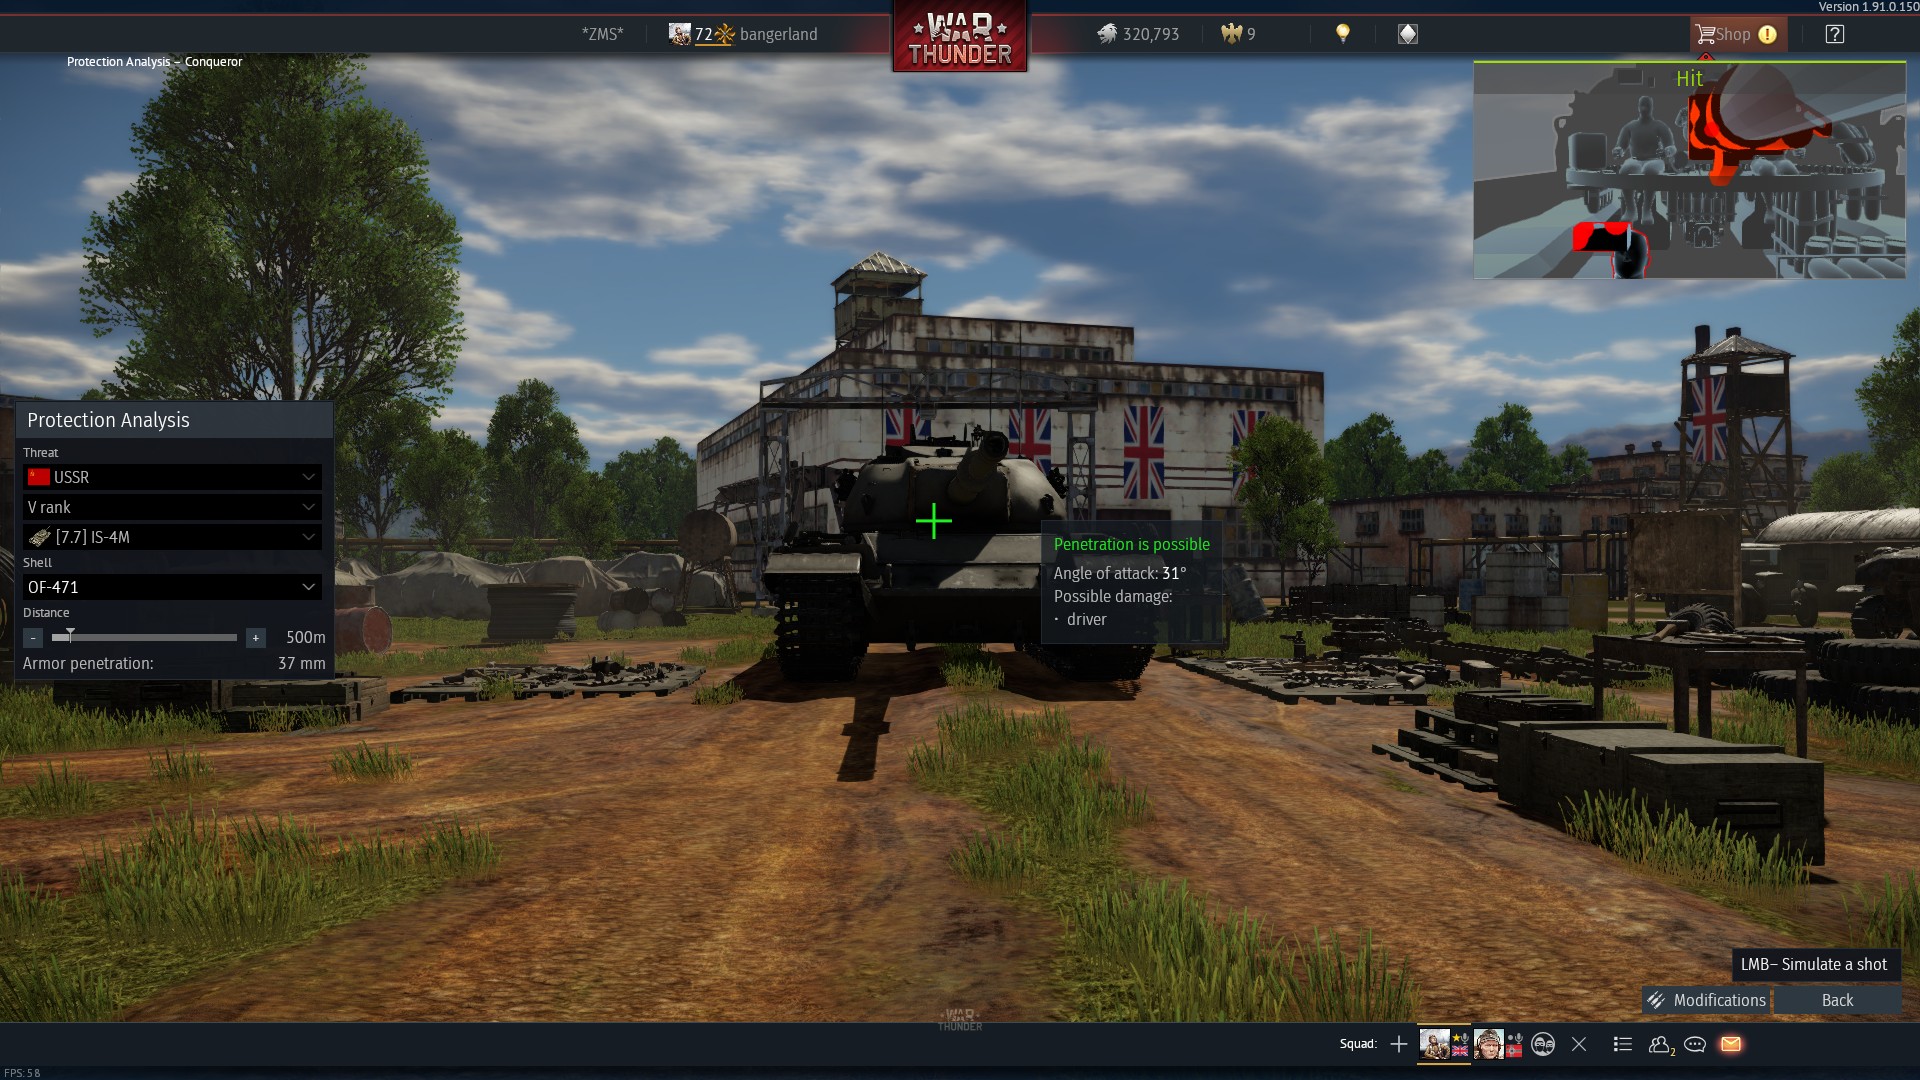
| 20:04, 24 October 2019 | Weak HE damages conqueror via trapshot protection analysis.jpg (file) |  |
519 KB | Demonstration of how HE can damage conqueror even if it's not powerful enough to fully penetrate the roof. The breech and driver both take damage. Category:In-game screenshots | 1 |
| 10:42, 19 October 2019 | X13 zoom example better lenses.jpg (file) |  |
420 KB | X13 zoom example. Made with M901. | 1 |
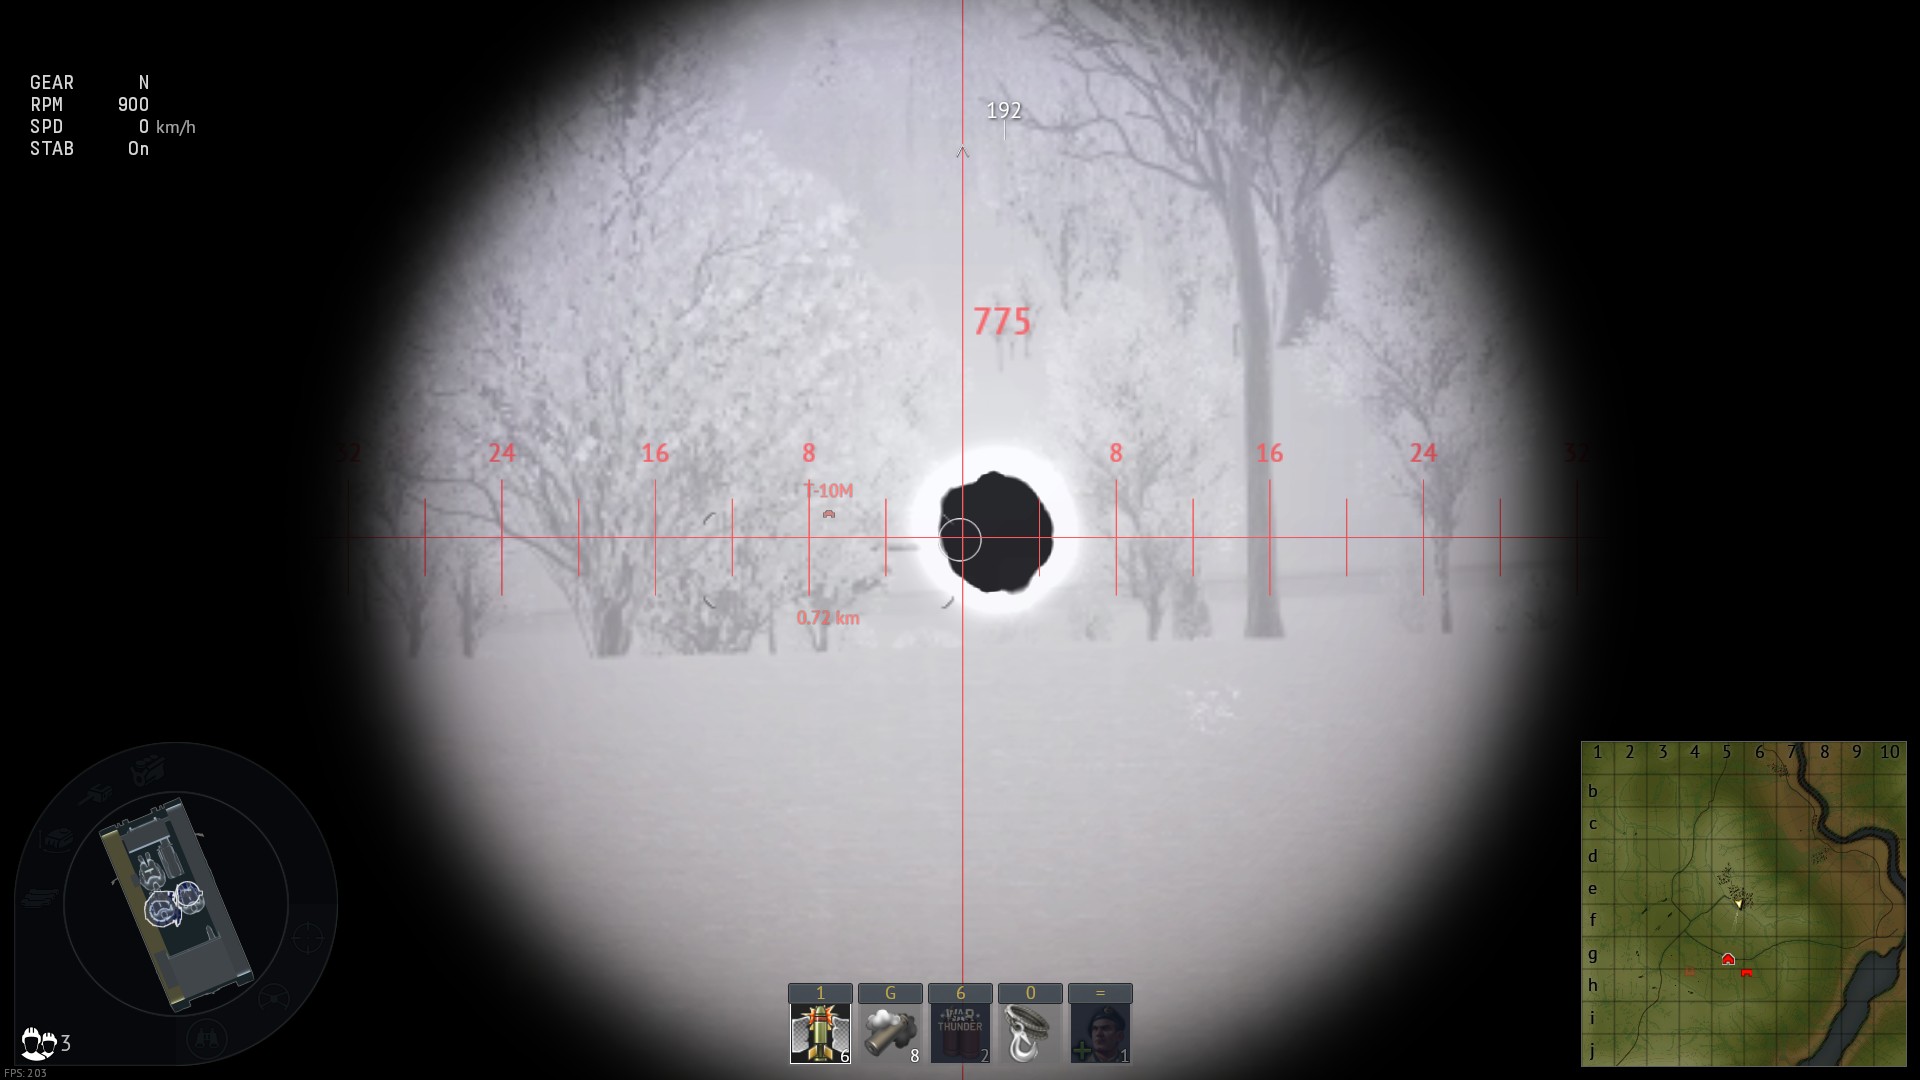
| 22:52, 18 October 2019 | Striker found a tank with Thermal scope.jpg (file) |  |
191 KB | Self explanatory. Mode of thermal is Black hot. Category:In-game screenshots | 1 |
| 13:42, 15 September 2019 | Type 89 uses aphe to destroy soviet medium tank through suspension.jpg (file) |  |
412 KB | Type 89 aims at suspension wheel to set off APHE, which enters weak belly armour of soviet tank. Result is the kill with no hit cam. Very weird, but works. Category:In-game screenshots | 1 |
| 23:15, 14 September 2019 | Type 75 SPH proximity fuse used on Type 60 ATM.jpg (file) |  |
585 KB | Type 75 SPH uses proximity fuse on type 60 ATM that is completely hidden behind a hill. It exploded above the vertical ATGM tank, surprising and destroying it. Category:In-game screenshots | 1 |
| 23:00, 14 September 2019 | Type 75 SPH proximity fuse used on Ho-Ri.jpg (file) |  |
374 KB | Proximity fuse of type 75 explodes mid-air before hitting Ho-Ri armour and penetrates ventilation to hit ammo rack. Ho-Ri explodes. Category:In-game screenshots | 1 |
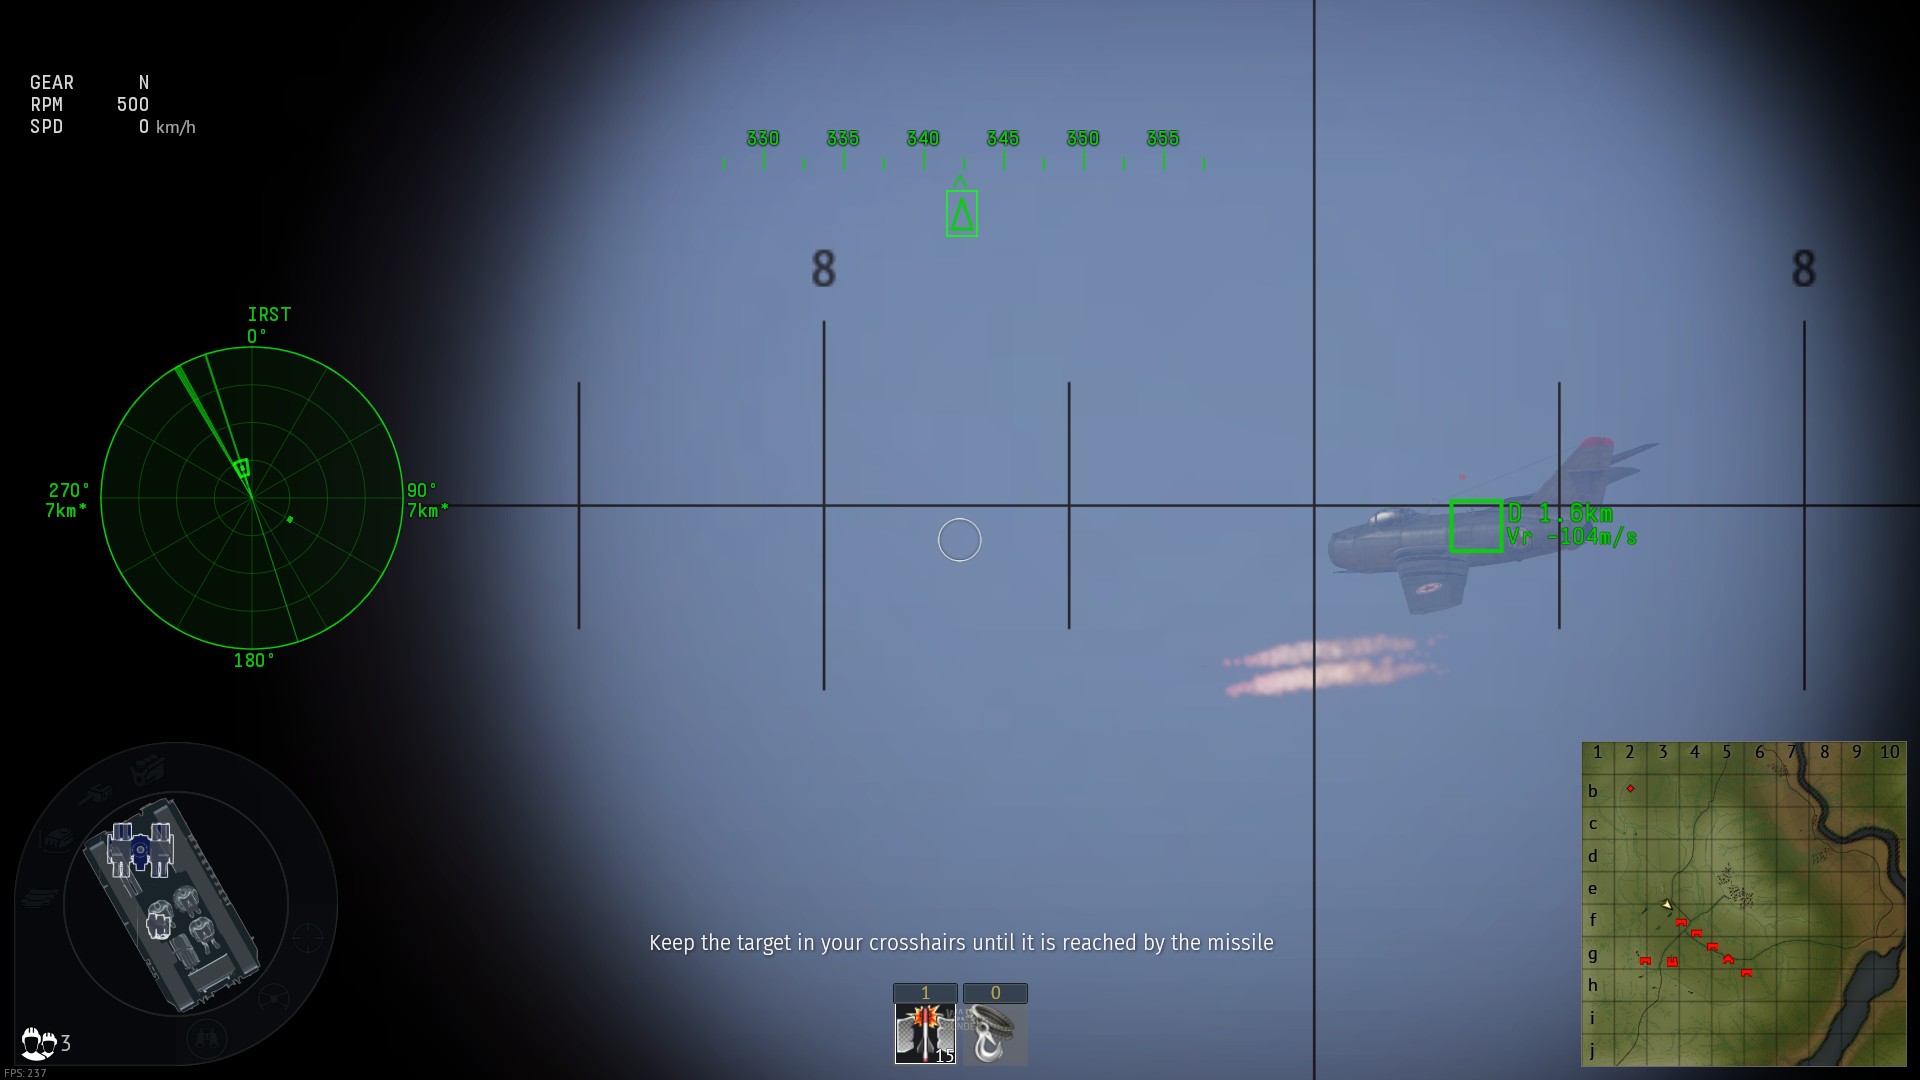
| 19:44, 11 September 2019 | Stormer HMV passive system lock on.jpg (file) |  |
331 KB | Since stormer target tracking got fixed, uploading a picture that makes more sense. | 2 |
| 19:36, 11 September 2019 | Stormer HVM hit with weird lock-on data.jpg (file) |  |
170 KB | Since IRST and SAM tracking is now fixed, this version of screenshot represents what's going on a bit better - User is using way too high zoom level and turret is going crazy. | 2 |
| 19:24, 11 September 2019 | Passive IR Search System UI.png (file) |  |
188 KB | Updated IRST radar screenshot - targets now look more distinct with the new update. | 2 |
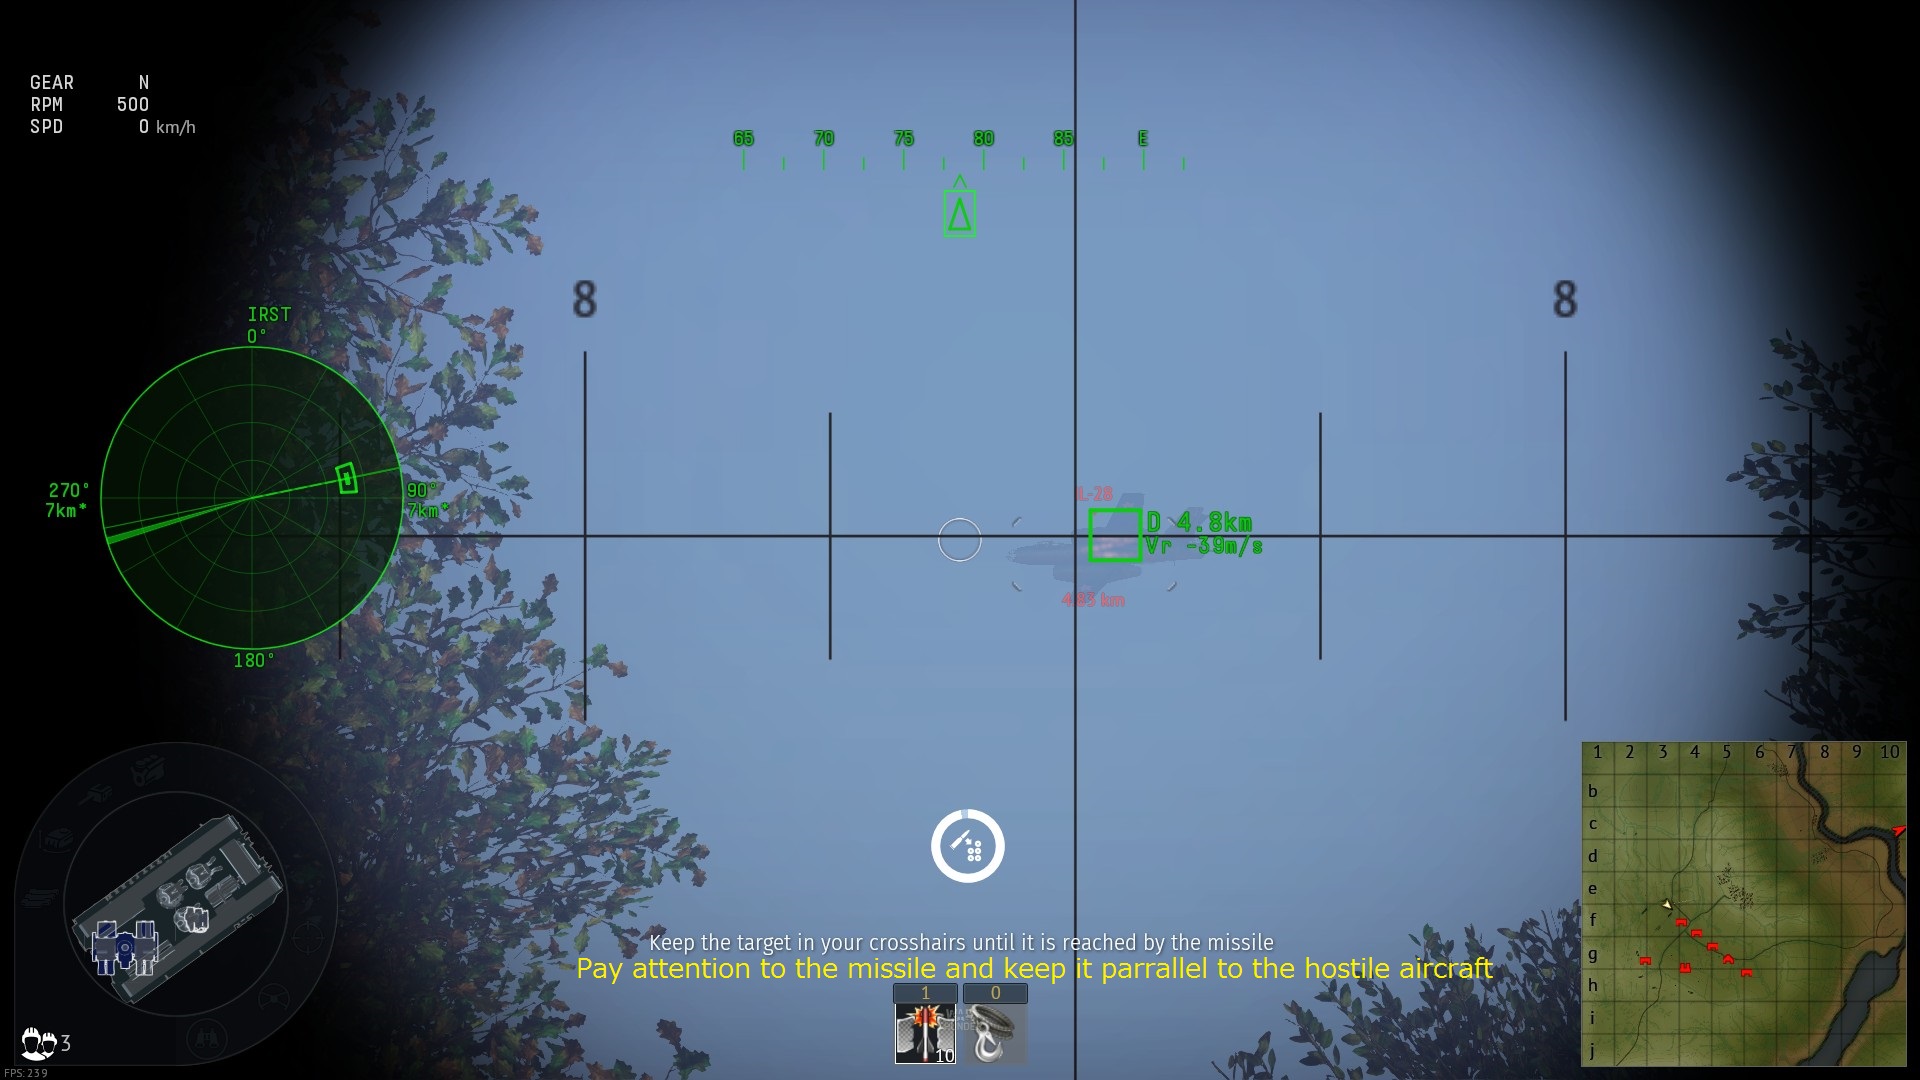
| 17:28, 11 September 2019 | Radar detection ATGM helicopter.jpg (file) |  |
522 KB | Previous screenshot is obsolete as arrow-pointing-at-SPAA was removed. Now Counter-radar has it's own window, which displays where exactly, relative to the aircraft, is the hostile signal coming from. | 2 |
| 00:17, 15 August 2019 | Vertical ATGM tactics - exploit high ground.jpg (file) |  |
935 KB | Screenshot shows type 60 ATM setting up to attack from normally impossible attack angle. Category:In-game screenshots | 1 |
