Bkan 1C
Contents
Description
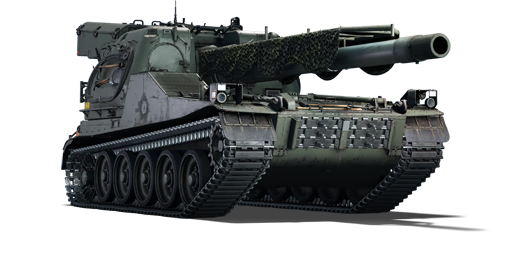
The Bandkanon 1C is a rank Swedish tank destroyer with a battle rating of (AB), (RB), and (SB). It was introduced in Update "Winged Lions".
The Bkan 1C is based on a lengthened S-tank chassis.
General info
Survivability and armour
The inside of this vehicle is effectively split into 5 areas: engine, left tower, right tower, the gun and the autoloader. The side armour and overall survivability is negligible and enemies should only be engaged frontally if at all possible.
The engine compartment can deflect heavy MG fire, but autocannons fired straight at the LFP will probably penetrate the armour and immobilize the SPG. It is separated from the rest of the tank and is likely to block overpressure damage, as well as to stop APHE from reaching the fuel. The driver is also shielded with additional 5 mm RHA plates, so it is rare to lose him to a random shot. It is also rather rare for the enemies to focus on the engine when attacking frontally, as the giant gun is very distracting, but engine hits should be avoided, at least if the gun cannot attack the entirety of the enemy squad, as a lucky hit there can set everything on fire and stop ongoing repairs. If the source of the fires is indeed the engine, then it is possible to unload the entire autoloader onto enemy before fire even reaches the back crew due to the RHA plates in its way but, eventually, it must be dealt with.
The towers on the sides of the back house two crew members each, the right tower also houses vertical gun drives. It is very important to keep the left tower hidden, as the gunner resides there, and neither of the towers can block HMG even at what's considered medium range in war thunder, as they are completely flat. It is also possible to destroy the entire tank by hitting the bottom of the tower with extremely powerful APHE, or sufficiently strong HE/HESH, but the further the BR goes, the less tanks will be able to deal any significant damage with their default preloaded ammunition.
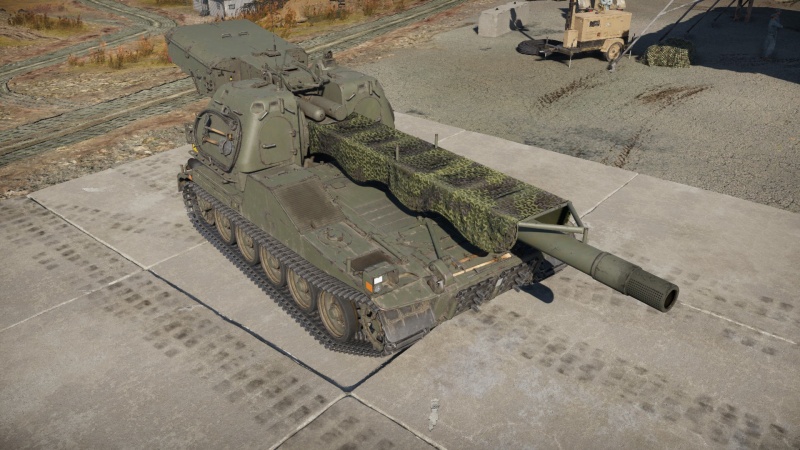
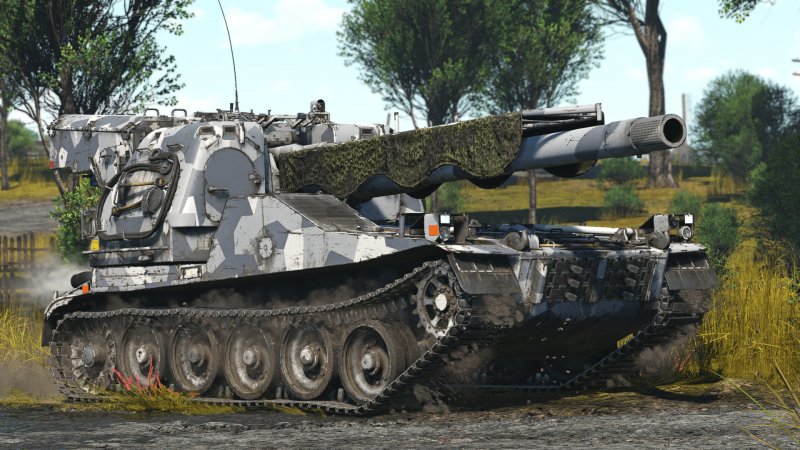
The gun is covered by a net and can only traverse along the hull. It is very rare to have the gun itself taken out, unless intentionally targeted, whether its because the decoy took a hit instead, or because the enemy aims at the gun breech instead. Because the gun looks incredibly intimidating, most people fire straght in the middle of the SPG and take out no crew and only damage the gun breech or the vertical drives (which can be repaired back almost immediately). When the gun breech is damaged, the gun is effectively out, as even after the field repair the gun will constantly jam and do nothing, so do not bother with it and do a manual repair, in which case at about 50% of breech repair progress it will stop failing to fire. For this reason, it is not recommended directly fighting SPAA or autocannon light tanks, because they are scared of this weapon more than of anything and can disable it even by an accident.
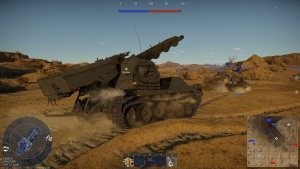
The autoloader is hidden on the top behind the gun. Unfortunately, it has to be placed way too high and is generally exposed when fighting head-on. While it's extremely angled and will deflect stray shots, and the intentionally aimed ones are often absorbed by either the gun or the towers, it is not rare for american tanks to just fire at the autoloader and to actually hit it. Sometimes, if the SPG tries to rush through the fire without turning towards the enemy, an enemy APHE might not bounce off the chassis and instead overpenetrate the first armour layer and activate upon exiting the compartment, then sufficiently powerful explosion will detonate the autoloader, which is why any enemy should be faced head-on and any angles should be cut, if possible. If the gun breech was destroyed, the gun should be immediately pulled up to hide the autoloader behind the non-critical compartments, whether the SPG is retreating or doing a manual repair. (Refer to the picture for an example)
Due to the compartment separation, a hull-down Bkan 1C can bully APDS-equipped tanks by only exposing the right side and the gun, as they won't ever be able to deal any real damage unless they load HE/HESH or somehow land a hit on the autoloader. It's also possible to use negative inclination (by facing downhill) against such tanks to resist heavy machine guns, since they do not use APHE and aim for the crew or the autoloader, so the fuel explosion is unlikely and the SPG does not become any more exposed than it already is.
Armour type:
| Armour | Front (Slope angle) | Sides | Rear | Roof |
|---|---|---|---|---|
| Hull | ___ mm | ___ mm Top ___ mm Bottom |
___ mm | ___ - ___ mm |
| Turret | ___ - ___ mm Turret front ___ mm Gun mantlet |
___ - ___ mm | ___ - ___ mm | ___ - ___ mm |
| Cupola | ___ mm | ___ mm | ___ mm | ___ mm |
Notes:
Mobility
| Game Mode | Max Speed (km/h) | Weight (tons) | Engine power (horsepower) | Power-to-weight ratio (hp/ton) | |||
|---|---|---|---|---|---|---|---|
| Forward | Reverse | Stock | Upgraded | Stock | Upgraded | ||
| Arcade | Expression error: Unexpected * operator. | 852 | Expression error: Unexpected round operator. | __.__ | |||
| Realistic | 531 | Expression error: Unexpected round operator. | __.__ | ||||
The Bandkanon is slow, there is no way around it. Even at its best it is only as fast as a heavy tank and generally drive forward at 20 km/h on demand, then accelerate towards its maximum speed of around 30 km/h. Despite reverse gear being advertised as equally powerful, it isn't, and the SPG will accelerate with it two to three times slower.
The tank has neutral steering, but it's way too slow to be relied on in a heat of battle. However, when the spaded Bkan 1C reaches forward gear 5 it can spin around at ludicrous speeds and can effectively do 360 spins towards any tank that is attacking it. Unfortunately, it won't work if the SPG is stuck in the mud, and in RB it is generally only possible on clean flat surfaces (like any roads). For that reason, having maxed out "tank driving" crew skill is almost required to operate the Bkan 1C.
Modifications and economy
Armaments
Main armament
The Bkan 1C can be effectively classified as an artillery tank, as it can only use a HE shell. Its gun has an insane 3.2 seconds automatic autoloader, which allows it to casually miss a shot only for the enemy tank to roll out into yet another HE aimed straight at the weak spot. No other heavy weapon reloads this fast. This also means that the only crew members truly important for the SPG are the driver and the gunner, as the reload time will always stay the same.
The gun is very accurate even when stock and will only miss near-impossible shots, but has terrible optics. The gun is not stabilized, but with the maxed out targeting it's difficult to even notice, unless driving over terribly uneven terrain. This is highly contrasted with the Ikv 91 which has all of the aiming devices in the world and great optics, but sometimes manages to miss regardless.
The resupply time on a capture point is ~7 seconds. It's important to note that the gun's recoil is strong enough to break the manual repair and the resupply process. This means, unfortunately, that it cannot just endlessly bombard an enemy team while reloading like some other tanks and can be eventually drained of all its ammunition, as it only has 14 shots.
Horizontally, the gun can only aim in front of the hull and won't go past the headlights (on the hull edges). For this reason it is necessary to face the enemy at all the times, aside from the autoloader safety concerns.
Vertically, the gun will easily go up as high as 40 degrees, which is usually enough, whether when attacking high ground, moving down or bombing an enemy team from a capture point on another end of the map. It, however, will refuse to aim down more than 2 degrees and any fights against low ground or over uneven terrain should be avoided.
Even if it's certain that the gun can indeed fire down from the chosen uneven position, avoid moving as to not accidentally lock the gun just a degree too high above the target. Avoid panicking, as the gun can and will reload faster than 99% of the enemies will be able to move out, unless they all do this simultaneously.
The sgr m/60 HE shell has a muzzle velocity of a default APHE that most tanks use, which means that it is easier to aim than a regular HE shell, but also that if enemies can be aimed at, they can also aim at the Bkan 1C, so retaliatory fire is inevitable.
The only way to avoid a counter is to annihilate enemy tanks faster than they can fire, which heavy HE can do. However, HE can only deal with tanks via overpressure damage and will not simply instantly destroy heavy tanks if the blast wave won't hit their bottom (by attacking the track from underneath the tank itself), suspension, roof, or other weak spots. Some american medium tanks are also built to deny such ammunition and should be avoided as much as possible.
The HE-VT shell has very limited uses due to the muzzle velocity and ammunition load concerns, but it can save the Bkan 1C from light tanks when they are attacking from the low ground or over cover, as even a proximity HE detonation can often destroy them. Sometimes, it can be used to bombard SPAA, light tanks or other lightly armoured SPGs when they are hiding behind a hill. In extreme cases, it can be used to get rid of a strafing aircraft, as the proximity fuse will make hitting it slightly easier (but will fail as soon as they fire anything beside cannons).
| 155 mm kan m/60 | Turret rotation speed (°/s) | Reloading rate (seconds) | |||||||||||
|---|---|---|---|---|---|---|---|---|---|---|---|---|---|
| Mode | Capacity | Vertical | Horizontal | Stabilizer | Stock | Upgraded | Full | Expert | Aced | Stock | Full | Expert | Aced |
| Arcade | 14 | -2°/+38° | ±10° | N/A | 8.8 | 12.2 | 14.8 | 16.4 | 17.4 | 3.20 | 3.20 | 3.20 | 3.20 |
| Realistic | 5.9 | 7.0 | 8.5 | 9.4 | 10.0 | ||||||||
Ammunition
| Penetration statistics | |||||||
|---|---|---|---|---|---|---|---|
| Ammunition | Type of warhead |
Penetration @ 0° Angle of Attack (mm) | |||||
| 10 m | 100 m | 500 m | 1,000 m | 1,500 m | 2,000 m | ||
| sgr m/60 | HE | 58 | 58 | 58 | 58 | 58 | 58 |
| zonar m/65 | HE-VT | 58 | 58 | 58 | 58 | 58 | 58 |
| Shell details | |||||||||
|---|---|---|---|---|---|---|---|---|---|
| Ammunition | Type of warhead |
Velocity (m/s) |
Projectile Mass (kg) |
Fuse delay (m) |
Fuse sensitivity (mm) |
Explosive Mass (TNT equivalent) (g) |
Ricochet | ||
| 0% | 50% | 100% | |||||||
| sgr m/60 | HE | 850 | 48 | 0 | 0.1 | 7,500 | 79° | 80° | 81° |
| Shell details | |||||||||||
|---|---|---|---|---|---|---|---|---|---|---|---|
| Ammunition | Type of warhead |
Velocity (m/s) |
Projectile Mass (kg) |
Fuse delay (m) |
Fuse sensitivity (mm) |
Explosive Mass (TNT equivalent) (g) |
Arming distance (m) |
Trigger radius (m) |
Ricochet | ||
| 0% | 50% | 100% | |||||||||
| zonar m/65 | HE-VT | 850 | 48 | 0 | 0 | 7,500 | 300 | 3 | 79° | 80° | 81° |
Ammo racks
| Full ammo |
1st rack empty |
Visual discrepancy |
|---|---|---|
| 14 | 1 (+13) | No |
Usage in battles
Arcade mode
In general, even a stock Bkan 1C can fight on a frontline and obliterate tanks from 500 m to 1,500 m alike, but until the "parts" are researched, it is best to stick with allies or a capture point as much as possible despite low maximum speed. This is due to enemies instinctively (or by aim assist) spam firing into the gun breech, which will leave the SPG useless until it is repaired.
The stock Bkan 1C is rather sluggish and you probably should park in such a way that allows it to back off. The main way to fight is to present the right side to the enemy and try to explode them before they did anything. That way, they will fire at the commander tower and technically waste a shot (with maybe disabling the turret drive, which can be repaired back almost instantly), or fire at the gun and only damage the gun breech, so you can promptly run away and/or repair (do not forget to immediately pull the gun up when doing so to avoid being shot into autoloader and destroyed). If enemy pre-fired HE/HESH shells, you were simply out of luck to begin with.
Eventually, you want to end up on a capture point to reload. Try to plan your ammunition spending if you aren't being ambushed at literally every step, so that you can have at least 4 shells to clear a capture point. Do not get too enthusiastic with bombing a random Leopard 1 across the map - even though it makes its job infinitely more frustrating and risky, it's not worth being obliterated by an enemy on or around a cap due to a lack of ammunition.
Try to avoid being flanked, but if that's impossible, or you see via "radio communication" that someone is very eager to flank and obliterate you specifically, drive forward until you hit the gear 5, then let go of gas and turn. Initially the move will be rather sloppy, but when the Bkan 1C is spaded and the crew driving skill is maxed out this trick will allow it to spin 90 degrees near instantaneously and to continue spinning for almost 300 degrees on flat terrain, allowing you to potentially obliterate several tanks in a 360-no-scope manner.
The gun is bad when fighting over hills due to poor gun depression, unlike early Sweden tanks, so it's better to attack from low ground, go into a city or to just start counter-sniping from long range (preferably with a capture point nearby and with accuracy upgrades, but can be done even from the spawn if you can tolerate the poor optics quality). The hills still can protect the autoloader when the gun is pulled up, at the cost of stealth.
While the gun can literally liquify any tank by just randomly firing at it, try to retain patience and upon the first miss try to aim better while the gun reloads, if not for your own safety, then to conserve ammunition. Avoid fighting over cluttered street or through the forest, unless firing straight from the capture point to waste less ammunition, as the Bkan 1C does not have an MG to clean the shell flight path. Do not attack kinetic tanks over a cluttered street if you aren't sure you can annihilate them within 2-3 shots, even if they do not see you. Even the most dense tanker will notice that something explodes next to them when it happens for the 5th time.
When fighting heavy tanks, you can try to pretend that you are weak and bait them into chasing you, then attack their bottom by attacking the tracks, as it's the easiest, and sometimes safest, way to destroy them. If that's impossible just attack their roof (by hitting the commander cupola, for example). Area denial also works well against ATGM light tanks, such as BMP-1, because being attacked by an ATGM means almost certain death to the Bkan 1C due to how its armour works.
Do remember that a lot of German players on rank IV love to whip out their obsolete toys just to trash an opponent that bested them and SPGs like 8,8 cm Flak 37 Sfl. or 15cm sIG 33 B Sfl are insanely dangerous, both due to being nearly indestructible by normal means (leaving you to be the only one to be able to deal with them in one shot in an average team) and due to being able to fire lethal APHE or HE shots at angles at which the Bkan 1C cannot fire back (due to the increased muzzle velocity of its HE).
Notable enemies
The Jagdpanther will sustain HE shells with its front glacis and it's very difficult to hit its roof. At close range its bottom armour can be attacked with normal HE shells by hitting the tracks from underneath it. Avoid attacking into high ground or hulldown position if it is there, you won't win.
Many american rank V medium/heavy tanks - At the rank V, a lot of the US-made tanks receive upgraded roof armour, which is often able to withstand HE shells unless hit straight into commander cupola or inner sides of the tracks, and all american tanks have 12.7 mm HMG on top of them (and almost all US commanders use them immediately upon seeing any tank), which is effectively a death sentence if they can see the gunner tower. T32E1 is a heavy tank with extra steps against HE shells; T29 can survive a lot of roof shot attempts despite being technically vulnerable; M48A1 (which is also used by other nations and is often seen when playing against Germany) is only really vulnerable to cupola shots or from the sides.
Pros and cons
Pros:
- 3,2 seconds autoloader on a 155 mm weapon. There is no other big weapon reloading faster than this currently in the game
- All of the ammunition is stored inside the autoloader, so there is no ammo starvation
- It is difficult to take this SPG out with a single shot with kinetic shells from the front, unless the ammo rack is detonated
- HE shells have higher muzzle velocity than the ones of the competition, making them easier to aim
- In certain conditions, can sustain an insane amount of kinetic damage
- Can carry HE-VT shells
- Ironically, gets only stronger with the higher BR, as APHE gets phased out with APDS and APFSDS which can't destroy it (until ERA tanks make it effectively obsolete)
Cons:
- Only 14 shots
- Gun recoil breaks manual repair and resupply on a capture point
- Poor depression of the gun, limiting its use as a close range support
- Poor gunsight zoom of X4
- High muzzle velocity of HE shells means that any WW2 tank will beat it in an artillery fight over a hill
- Armour will not sustain autocannon fire, can be vulnerable to HMG at the close to medium range, vulnerable to HE/HESH shells
- No turret, which is usually a downside for a tank forced to fight at a close to medium range, but spaded Bkan 1C can quickly spin around if its commander and crew are good enough (particularly in AB)
History
Describe the history of the creation and combat usage of the vehicle in more detail than in the introduction. If the historical reference turns out to be too long, take it to a separate article, taking a link to the article about the vehicle and adding a block "/History" (example: https://wiki.warthunder.com/(Vehicle-name)/History) and add a link to it here using the main template. Be sure to reference text and sources by using <ref></ref>, as well as adding them at the end of the article with <references />. This section may also include the vehicle's dev blog entry (if applicable) and the in-game encyclopedia description (under === In-game description ===, also if applicable).
Media
- Skins
- Videos
See also
External links
| Sweden tank destroyers | |
|---|---|
| Strv m/41 derivatives | Spj fm/43-44 · Sav m/43 (1944) · Sav m/43 (1946) · Pvkv II · Pvkv III |
| Ikv 72/103 | Ikv 72 · Ikv 103 |
| Pvkv m/43 | Pvkv m/43 (1946) · Pvkv m/43 (1963) |
| ATGM | UDES 33 · Pbv 302 (BILL) · Pvrbv 551 |
| Other | SAV 20.12.48 · Bkan 1C |
| Norway | VIDAR |


