Difference between revisions of "Black Night"
(Edits) |
U106177021 (talk | contribs) (→Usage in battles: Added some info on how the vehicle plays in battle) (Tag: Visual edit) |
||
| Line 191: | Line 191: | ||
== Usage in battles == | == Usage in battles == | ||
<!-- ''Describe the tactics of playing in the vehicle, the features of using vehicles in the team and advice on tactics. Refrain from creating a "guide" - do not impose a single point of view but instead give the reader food for thought. Describe the most dangerous enemies and give recommendations on fighting them. If necessary, note the specifics of the game in different modes (AB, RB, SB).'' --> | <!-- ''Describe the tactics of playing in the vehicle, the features of using vehicles in the team and advice on tactics. Refrain from creating a "guide" - do not impose a single point of view but instead give the reader food for thought. Describe the most dangerous enemies and give recommendations on fighting them. If necessary, note the specifics of the game in different modes (AB, RB, SB).'' --> | ||
| − | + | In summary, the Black Night plays in a similar way to the base Challenger 2. This is due to having the same armour configuration, without the option of add-on armour. Where the Black Night differs however is the active protection system. This APS will protect the vehicle well not only from ground launched missiles, but also from air launched missiles provided they are not above the systems maximum elevation. | |
| + | |||
| + | The Black Night will perform best as a sniper or support tank. With the modern thermal systems and laser rangefinder, locating and ranging at long distance is precise. As with the other Challengers, playing hull down is ideal. | ||
| + | |||
| + | Where playing at range is not an option, such as urban maps, care should be taken to cover the hull as much as possible. Covering the hull can be achieved by using other vehicles or terrain. Where there is no cover available, the Black Night is best played slowly, taking time to ensure locations are clear before pushing into them. | ||
=== Pros and cons === | === Pros and cons === | ||
Revision as of 11:21, 18 December 2022
Contents
Description
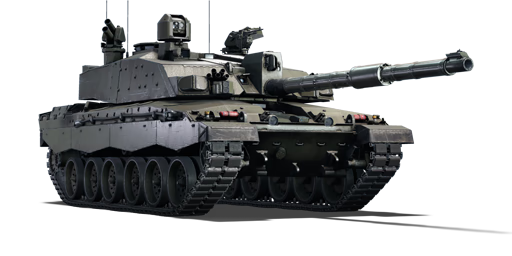
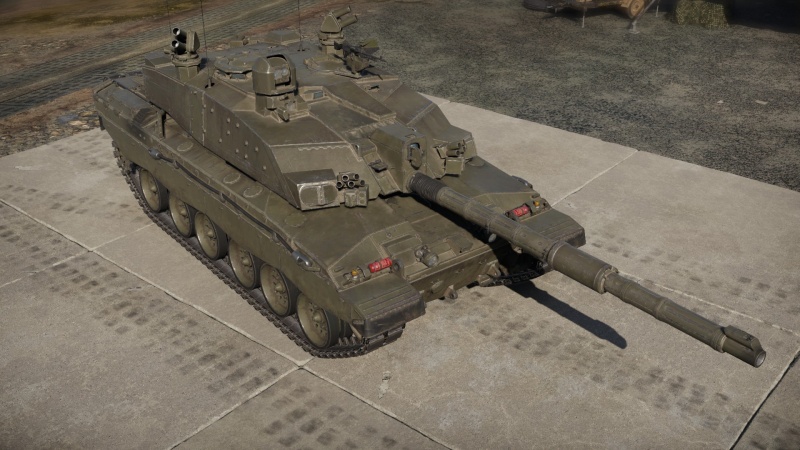
The Challenger 2, Black Night is a rank British medium tank with a battle rating of (AB), (RB), and (SB). It was introduced in Update "Wind of Change".
General info
Survivability and armour
Armour type:
- Rolled homogeneous armour
- Cast homogeneous armour (turret inner wall, hatches)
| Armour | Front (Slope angle) | Sides | Rear | Roof |
|---|---|---|---|---|
| Hull | 38 mm (79-82°) Upper glacis - Top 50 mm (60°) Upper glacis - Bottom 70 mm (28°) Lower glacis 60 mm Driver hatch |
25+38 mm Top - Front 25+50 mm Top - Rear 38 mm (14°) + 4 mm Bottom |
50 mm (30°) | 38 mm (10°) Front glacis 20 mm Fighting compartment 25 mm (16-20°) Sides 10 mm Engine vents |
| Turret | 50+50+38 mm (50°) 30 mm (0-52°) Gun mantlet |
10+38 mm (7°) Front 20+38 mm (7°) Rear |
20 mm (17°) + 38 mm (7°) | 38 mm (8-15°) Front 38+10 mm Centre 25 mm (7°) Rear |
| Cupola | 60 mm | 60 mm | 60 mm | 44 mm |
Notes:
- Suspension wheels, tracks, and torsion bars are 20 mm thick.
- Belly armour is 16 mm thick.
- A 5 mm internal plate separates the crew from the engine.
- Ammunition is surrounded by 5 mm casings
- A 25 mm plate separates the driver from the crew compartment.
- Additional composite armour is as follows:
| Composite armour | Front (Slope angle) | Sides |
|---|---|---|
| Hull | Upper Kinetic: 420-1,000 mm Chemical: 700-950 mm Lower Kinetic: 100-400 mm Chemical: 350-570 mm |
|
| Turret | Cheeks Kinetic: 440-720 mm Chemical: 780-1,000 mm |
Internal Composite Kinetic: 190-740 mm Chemical: 300-1,000 mm |
Mobility
| Game Mode | Max Speed (km/h) | Weight (tons) | Engine power (horsepower) | Power-to-weight ratio (hp/ton) | |||
|---|---|---|---|---|---|---|---|
| Forward | Reverse | Stock | Upgraded | Stock | Upgraded | ||
| Arcade | Expression error: Unexpected * operator. | 1,886 | Expression error: Unexpected round operator. | __.__ | |||
| Realistic | 1,076 | Expression error: Unexpected round operator. | __.__ | ||||
Modifications and economy
Armaments
Main armament
| 120 mm L30A1 | Turret rotation speed (°/s) | Reloading rate (seconds) | |||||||||||
|---|---|---|---|---|---|---|---|---|---|---|---|---|---|
| Mode | Capacity | Vertical | Horizontal | Stabilizer | Stock | Upgraded | Full | Expert | Aced | Stock | Full | Expert | Aced |
| Arcade | 50 | -10°/+20° | ±180° | Two-plane | 29.5 | 40.9 | 49.6 | 54.9 | 58.4 | 6.50 | 5.75 | 5.30 | 5.00 |
| Realistic | 18.4 | 21.7 | 26.4 | 29.1 | 31.0 | ||||||||
Ammunition
| Penetration statistics | |||||||
|---|---|---|---|---|---|---|---|
| Ammunition | Type of warhead |
Penetration @ 0° Angle of Attack (mm) | |||||
| 10 m | 100 m | 500 m | 1,000 m | 1,500 m | 2,000 m | ||
| Shot L23A1 | APFSDS | 396 | 394 | 387 | 376 | 367 | 357 |
| Shell L31A7 | HESH | 152 | 152 | 152 | 152 | 152 | 152 |
| L26 | APFSDS | 493 | 491 | 487 | 481 | 474 | 468 |
| L27A1 | APFSDS | 564 | 562 | 557 | 551 | 545 | 538 |
| Shell details | |||||||||
|---|---|---|---|---|---|---|---|---|---|
| Ammunition | Type of warhead |
Velocity (m/s) |
Projectile mass (kg) |
Fuse delay (m) |
Fuse sensitivity (mm) |
Explosive mass (TNT equivalent) (g) |
Ricochet | ||
| 0% | 50% | 100% | |||||||
| Shot L23A1 | APFSDS | 1,535 | 3.89 | N/A | N/A | N/A | 78° | 80° | 81° |
| Shell L31A7 | HESH | 670 | 17.34 | 0.1 | 4 | 6,530 | 73° | 77° | 80° |
| L26 | APFSDS | 1,650 | 4.3 | N/A | N/A | N/A | 78° | 80° | 81° |
| L27A1 | APFSDS | 1,650 | 4.3 | N/A | N/A | N/A | 78° | 80° | 81° |
| Smoke shell characteristics | ||||||
|---|---|---|---|---|---|---|
| Ammunition | Velocity (m/s) |
Projectile mass (kg) |
Screen radius (m) |
Screen deploy time (s) |
Screen hold time (s) |
Explosive mass (TNT equivalent) (g) |
| L34 | 670 | 17.1 | 20 | 5 | 25 | 50 |
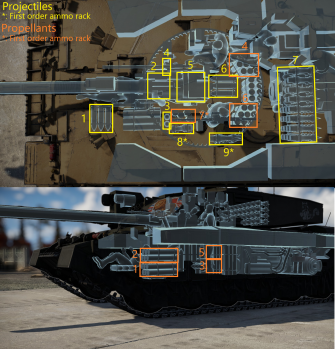
Ammo racks

| Full ammo |
Ammo part |
1st rack empty |
2nd rack empty |
3rd rack empty |
4th rack empty |
|---|---|---|---|---|---|
| 50 | Projectiles Propellants |
48 (+2) 45 (+5) |
45 (+5) 39 (+11) |
43 (+7) 31 (+19) |
41 (+9) 22 (+28) |
| 5th rack empty |
6th rack empty |
7th rack empty |
8th rack empty |
9th rack empty |
Visual discrepancy |
| 34 (+16) 14 (+36) |
29 (+21) 5 (+45) |
5 (+45) 1 (+49) |
4 (+46) N/A |
1 (+49) N/A |
No |
Machine guns
| 7.62 mm L37A2 | ||||
|---|---|---|---|---|
| Mount | Capacity (Belt) | Fire rate | Vertical | Horizontal |
| Pintle | 1,700 (100) | 650 | -10°/+25° | -90°/+50° |
| 7.62 mm L94A1 | ||||
|---|---|---|---|---|
| Mount | Capacity (Belt) | Fire rate | Vertical | Horizontal |
| Coaxial | 4,000 (2,000) | 600 | N/A | N/A |
Usage in battles
In summary, the Black Night plays in a similar way to the base Challenger 2. This is due to having the same armour configuration, without the option of add-on armour. Where the Black Night differs however is the active protection system. This APS will protect the vehicle well not only from ground launched missiles, but also from air launched missiles provided they are not above the systems maximum elevation.
The Black Night will perform best as a sniper or support tank. With the modern thermal systems and laser rangefinder, locating and ranging at long distance is precise. As with the other Challengers, playing hull down is ideal.
Where playing at range is not an option, such as urban maps, care should be taken to cover the hull as much as possible. Covering the hull can be achieved by using other vehicles or terrain. Where there is no cover available, the Black Night is best played slowly, taking time to ensure locations are clear before pushing into them.
Pros and cons
Pros:
- Has a highly effective APS (Active Protection System) which can defend ATGMs
- It has 20 smoke grenades with 4 salvos
- The Black Night has modern thermal systems equipped in the gunner view and commander view with a high resolution
- It comes equipped with a laser warning system which can give an idea of where an enemy might be attacking from
Cons:
- Only 2 x rifle-clibre machine guns
- The engine is rather weak leading to poor acceleration and mobility
- Large weak spots in armour and poor placement of ammo and charges in the tank limit the survivability
History
The Black Night demonstrator was BAE System's bid for the Challenger 2 Life Extension Programme contract, prior to the forming of the Rheinmetall BAE Systems Land (RBSL) joint venture company in July 2019.
The Black Night was fully unveiled in October 2018 and showed a focus on improving the technology of the vehicle, with a Safran PASEO panoramic Commander Primary Sight, a generation 3 Leonardo thermal imaging system (still mounted in the housing above the main gun), a laser warning system, the Iron Fist Hardkill Active Protection System, regenerative braking in the turret ring, and a new fire control system. The armour and firepower were retained from the base Challenger 2, as was the powerpack.
Rheinmetall's proposal was revealed in January 2019, featuring the Rh 120 mm L/55 gun (L55A1 in British use) and a completely new turret. When RBSL was formed, an internal decision was made in favour of Rheinmetall's design, which was seen again at DSEI 2019, putting the Black Night proposal to rest. The MoD confirmed the signing of a £800M (~$1.1B at the time) contract with RBSL for Challenger 3 using Rheinmetall's design on 7th May 2021.
Media
Excellent additions to the article would be video guides, screenshots from the game, and photos.
See also
External links
Paste links to sources and external resources, such as:
- topic on the official game forum;
- other literature.
| Britain medium tanks | |
|---|---|
| Valentine | Valentine I · Valentine IX · Valentine XI |
| Cromwell | Cromwell I · Cromwell V · Cromwell V (RP-3) |
| Cromwell derivatives | Challenger · Avenger · Comet I · Comet I "Iron Duke IV" · Charioteer Mk VII |
| Centurion | Centurion Mk 1 · Centurion Mk.2 · Centurion Mk 3 · Centurion Mk.5 AVRE · Centurion Mk 10 · Centurion Action X · FV4202 |
| Vickers MBT | Vickers Mk.1 · Vickers Mk.3 · Vickers Mk.7 |
| Chieftain | Chieftain Mk 3 · Chieftain Mk 5 · Chieftain Mk 10 |
| Challenger 1 | Challenger Mk.2 · Challenger Mk.3 · Challenger DS |
| Challenger 2 | Challenger 2 · Challenger 2 (2F) · Challenger 2 TES · Challenger 2 OES · Challenger 2E · Challenger 2 Black Night |
| Challenger 3 | Challenger 3 TD |
| Australia | A.C.I · A.C.IV · Centurion Mk.5/1 |
| South Africa | Olifant Mk.1A · Olifant Mk.2 · TTD |
| India | Vijayanta · Bhishma TWMP |
| Israel | ▄Sho't Kal Dalet |
| Jordan | Khalid |
| Sweden | ▄Strv 81 (RB 52) |
| USA | Grant I · Sherman II · Sherman Firefly · Sherman IC "Trzyniec" |


