Difference between revisions of "ZT3A2"
(Edits) |
|||
| Line 13: | Line 13: | ||
<!-- ''Describe armour protection. Note the most well protected and key weak areas. Appreciate the layout of modules as well as the number and location of crew members. Is the level of armour protection sufficient, is the placement of modules helpful for survival in combat? If necessary use a visual template to indicate the most secure and weak zones of the armour.'' --> | <!-- ''Describe armour protection. Note the most well protected and key weak areas. Appreciate the layout of modules as well as the number and location of crew members. Is the level of armour protection sufficient, is the placement of modules helpful for survival in combat? If necessary use a visual template to indicate the most secure and weak zones of the armour.'' --> | ||
| − | Armour of this vehicle is absolutely | + | Armour of this vehicle is absolutely negligible as its launchers are not protected and any ATGM, shell, or even MG AP-I detonation next to it will at the very least set ammo rack on fire or make it explode, taking the tank out in process. Frontal hull armour might sustain some MG fire from 500 m away, but it has way too many weak spots with 10 mm RHA protection to be of any use. Some might argue that the {{PAGENAME}}'s long hull might confuse enemies, but overpressure damage and missile ammo racks placed along the entirety of it make spaced armor argument irrelevant in most scenarios. |
| − | Artillery will obliterate this tank even with a | + | Artillery will obliterate this tank even with a 20 m miss and any artillery warning should be a cue to leave for anyone using the {{PAGENAME}}. |
Both commander and gunner are located in the turret, which must be exposed to fire in most cases, which makes this tank very easy to disable if not destroy outright. Sometimes, one of them will survive if tank took a glancing hit of APFSDS. | Both commander and gunner are located in the turret, which must be exposed to fire in most cases, which makes this tank very easy to disable if not destroy outright. Sometimes, one of them will survive if tank took a glancing hit of APFSDS. | ||
| Line 42: | Line 42: | ||
<!-- ''Write about the mobility of the ground vehicle. Estimate the specific power and manoeuvrability, as well as the maximum speed forwards and backwards.'' --> | <!-- ''Write about the mobility of the ground vehicle. Estimate the specific power and manoeuvrability, as well as the maximum speed forwards and backwards.'' --> | ||
| − | In arcade battles, stock {{PAGENAME}} drives 30 km/h offroad and 60 km/h on road, slowly accelerating towards 77 km/h mark. {{PAGENAME}} tends to have a lot of momentum in | + | In arcade battles, the stock {{PAGENAME}} drives at 30 km/h offroad and 60 km/h on road, slowly accelerating towards the 77 km/h mark. The {{PAGENAME}} tends to have a lot of momentum in its movement and will keep its speed for some time after going offroad, but also should be driven carefully to avoid losing all of its speed by accidentally ramming something. Its mass is also not enough to plow through thick trees, so they must be avoided. |
This tank also has an uncanny ability to drive uphill at very sharp angles, which may slow it to 5 km/h but won't stop it entirely. Unfortunately, this ability is rarely of any use in RB due to its low camera depression, but might be very beneficial in AB if done stealthy enough. | This tank also has an uncanny ability to drive uphill at very sharp angles, which may slow it to 5 km/h but won't stop it entirely. Unfortunately, this ability is rarely of any use in RB due to its low camera depression, but might be very beneficial in AB if done stealthy enough. | ||
| Line 51: | Line 51: | ||
{{Specs-Economy}} | {{Specs-Economy}} | ||
| − | Avoid researching | + | Avoid researching Adjustment of fire, as it does nothing noticeable to improve missile guidance. Research Brakes or Suspension instead to improve vehicle handling. Elevation mechanism in theory could help, but isn't necessary and can be skipped as well. |
== Armaments == | == Armaments == | ||
| Line 151: | Line 151: | ||
'''Arcade mode''' | '''Arcade mode''' | ||
| − | + | It can be used on a map with a road leading off your spawn towards capture point to quickly take over a strong defensive position. Any position that enemy has to attack into and cannot attack indirectly is worth taking over like this. For example, on the map "Middle east" it can rush into north capture point and fall down into cover of a bunker before being sniped. This position is well protected, and also allows it to abuse simplified AB ATGM controls to deny any access to the capture point for the enemy team, as it has strong vertical missile control and can snipe attacking enemy tanks by just pointing sniper scope at them after firing out and over cover. | |
| − | + | It can also be used to drive to the side of attacking enemy to sneak shots into them. You can also do this in more provocative manner by hiding behind building next to them, but be aware that you then have to rely on your team to act as a distraction and you should avoid being seen and especially avoid or destroy light tanks to not get unnecessary attention. While sneaking in AB is difficult, it is still rather easy to sneak upon Soviet players and heavy tanks in general as long as you understand the game mechanics. Do note, that in AB the {{PAGENAME}} does not have the constraints of "gun depression" and is able to fire off any kind of ground spikes, therefore it might be a good idea to climb any weird ground formation if it allows you to fire over buildings or other enemy cover. | |
| − | + | It can be used as a sniper tank, with main advantage of it being able to obliterate enemy cover with first unguided missile, which is immediately followed by a guided missile hitting their turret and a third being sent over cover if target managed to survive the first hit. Likewise, it is possible to just send all 3 missiles through forest in hopes that they will be able to brute force the foliage and hit enemy tanks anyway. It is also technically possible to drive missiles into enemy ATGM tanks over hills when they are reloading, but it might be too difficult to time correctly. Remember to immediately hide after such attacks and in general fire into enemy tank sides to avoid being countersniped. Three shots can also be used to snipe three tanks simultaneously, but low missile speed will not allow you to attack moving tanks like that, so think whom you want to take out first before firing. | |
| − | |||
| − | |||
In any case be very wary of your reload timings - locate targets, gain as much of unfair advantage over them, like short cover you can fire over and they cannot, as possible, then fully commit to your attack when they seem to lose focus. Each shot forces a 0.6 second "reload" and in that time you must point missile on your first target and decide who needs to be destroyed next, then fire next missile. After firing three shots, back off into cover before anyone decided to fire back. If enemy managed to destroy the launcher, turn around and make a complete retreat, especially if it was already empty, as it will take from 20 to 40 seconds to recover from that kind of damage. | In any case be very wary of your reload timings - locate targets, gain as much of unfair advantage over them, like short cover you can fire over and they cannot, as possible, then fully commit to your attack when they seem to lose focus. Each shot forces a 0.6 second "reload" and in that time you must point missile on your first target and decide who needs to be destroyed next, then fire next missile. After firing three shots, back off into cover before anyone decided to fire back. If enemy managed to destroy the launcher, turn around and make a complete retreat, especially if it was already empty, as it will take from 20 to 40 seconds to recover from that kind of damage. | ||
| − | Overall, in AB the {{PAGENAME}}s efficiency depends on a lot of factors outside of players control - if everyone will focus on it, you will not be able to do much, especially from long range, as it takes just one or two good hits of virtually any weapon to destroy the {{PAGENAME}}, but you should be already used to play around enemy with aim assist at this point. | + | Overall, in AB the {{PAGENAME}}'s efficiency depends on a lot of factors outside of players control - if everyone will focus on it, you will not be able to do much, especially from long range, as it takes just one or two good hits of virtually any weapon to destroy the {{PAGENAME}}, but you should be already used to play around enemy with aim assist at this point. |
=== Pros and cons === | === Pros and cons === | ||
| Line 169: | Line 167: | ||
* Is able to use tandem missiles, which penetrate ERA regardless of angle of attack | * Is able to use tandem missiles, which penetrate ERA regardless of angle of attack | ||
| − | * Has three shot launcher, which is a step down from [[Striker]], but still one more shot when compared to [[type 89]] and similar tanks | + | * Has three shot launcher, which is a step down from the [[Striker]], but still one more shot when compared to [[type 89]] and similar tanks |
* Missiles are immune to jammers | * Missiles are immune to jammers | ||
| − | * Can relocate '''very''' fast on maps with a lot of sealed roads | + | * Can relocate '''very''' fast on maps with a lot of sealed roads after having researched mobility upgrades |
* Missiles have very strong vertical mobility, which technically allows them to directly attack tanks from low/high ground and/or over obstacles with enough user skill (though this is mostly impossible to pull off in RB due to camera depression and various graphical issues) | * Missiles have very strong vertical mobility, which technically allows them to directly attack tanks from low/high ground and/or over obstacles with enough user skill (though this is mostly impossible to pull off in RB due to camera depression and various graphical issues) | ||
| − | * While clumsy, {{PAGENAME}}'s chassis are able to climb at very sharp angles (60-70 degree inclination even when stock in AB) and it can get on top of certain objects | + | * While clumsy, the {{PAGENAME}}'s chassis are able to climb at very sharp angles (60-70 degree inclination even when stock in AB) and it can get on top of certain objects the [[Striker]] or the [[Swingfire]] would not be able to climb |
* Tall profile allows it to fire directly over certain cover which other tanks normally use as a full cover, for example, destroyed building debris, potentially surprising some enemies | * Tall profile allows it to fire directly over certain cover which other tanks normally use as a full cover, for example, destroyed building debris, potentially surprising some enemies | ||
| Line 186: | Line 184: | ||
* Must make a complete stop to fire, which makes it incapable of fighting any kind of light tanks or SPAA directly | * Must make a complete stop to fire, which makes it incapable of fighting any kind of light tanks or SPAA directly | ||
* Missiles are only 20-40 m/s faster than MILAN and hostile ATGM tanks generally use missiles that are 2 to 5 times faster, SAM tanks can even make a very late response and still win the duel | * Missiles are only 20-40 m/s faster than MILAN and hostile ATGM tanks generally use missiles that are 2 to 5 times faster, SAM tanks can even make a very late response and still win the duel | ||
| − | * Reloads only after spending all three shots (but reloads all three at once), does not automatically reload during rearm like [[Striker]] | + | * Reloads only after spending all three shots (but reloads all three at once), does not automatically reload during rearm like the [[Striker]] |
* Has a lot of upgrades which do nothing to improve its fighting capabilities (like adjustment of fire) | * Has a lot of upgrades which do nothing to improve its fighting capabilities (like adjustment of fire) | ||
| Line 205: | Line 203: | ||
;Skins | ;Skins | ||
| − | * [https://live.warthunder.com/feed/camouflages/? | + | * [https://live.warthunder.com/feed/camouflages/?vehicle=uk_ratel_zt3 Skins and camouflages for the {{PAGENAME}} from live.warthunder.com.] |
;Images | ;Images | ||
Revision as of 20:59, 22 June 2021
Contents
Description
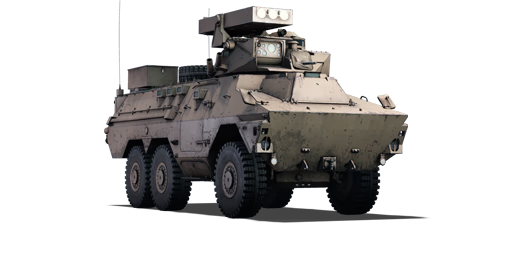
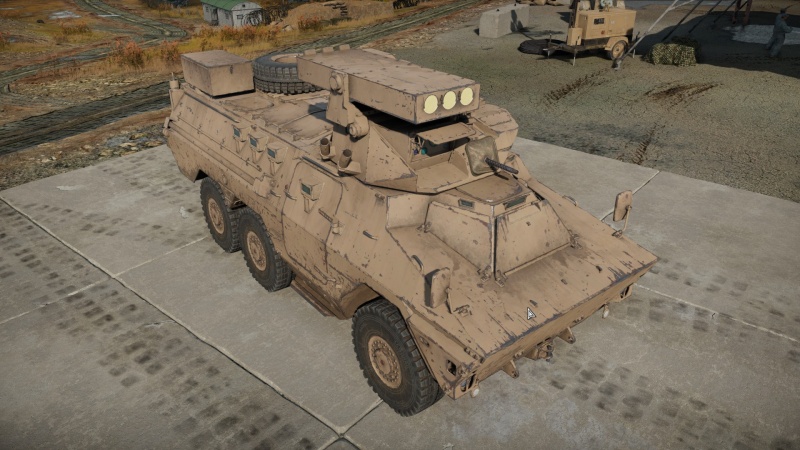
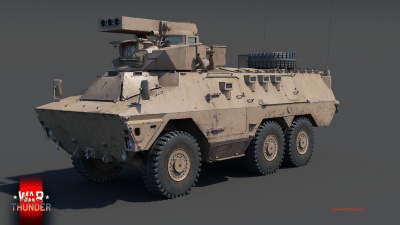
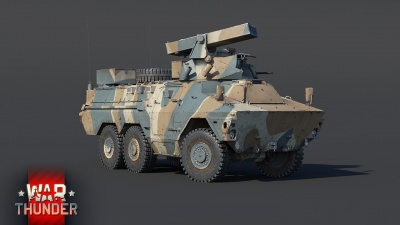
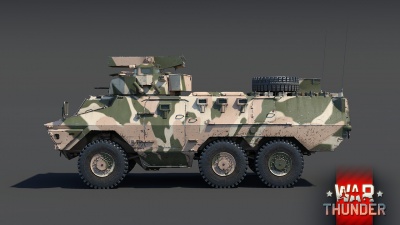
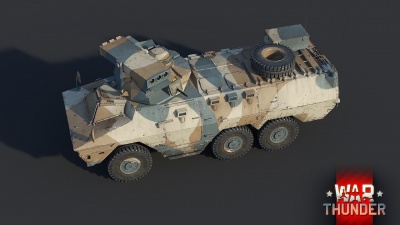
The ZT3A2 Ratel is a rank British tank destroyer with a battle rating of (AB), (RB), and (SB). It was introduced in Update "Ixwa Strike".
General info
Survivability and armour
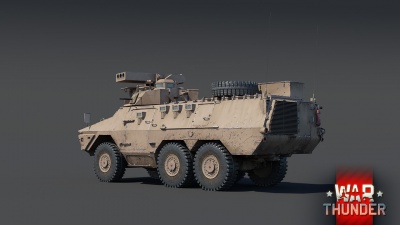
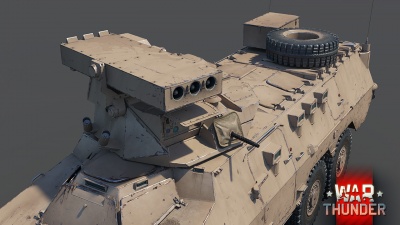
Armour of this vehicle is absolutely negligible as its launchers are not protected and any ATGM, shell, or even MG AP-I detonation next to it will at the very least set ammo rack on fire or make it explode, taking the tank out in process. Frontal hull armour might sustain some MG fire from 500 m away, but it has way too many weak spots with 10 mm RHA protection to be of any use. Some might argue that the ZT3A2's long hull might confuse enemies, but overpressure damage and missile ammo racks placed along the entirety of it make spaced armor argument irrelevant in most scenarios.
Artillery will obliterate this tank even with a 20 m miss and any artillery warning should be a cue to leave for anyone using the ZT3A2.
Both commander and gunner are located in the turret, which must be exposed to fire in most cases, which makes this tank very easy to disable if not destroy outright. Sometimes, one of them will survive if tank took a glancing hit of APFSDS.
Armour type:
| Armour | Front (Slope angle) | Sides | Rear | Roof |
|---|---|---|---|---|
| Hull | ___ mm | ___ mm Top ___ mm Bottom |
___ mm | ___ - ___ mm |
| Turret | ___ - ___ mm Turret front ___ mm Gun mantlet |
___ - ___ mm | ___ - ___ mm | ___ - ___ mm |
| Cupola | ___ mm | ___ mm | ___ mm | ___ mm |
Notes:
Mobility
In arcade battles, the stock ZT3A2 drives at 30 km/h offroad and 60 km/h on road, slowly accelerating towards the 77 km/h mark. The ZT3A2 tends to have a lot of momentum in its movement and will keep its speed for some time after going offroad, but also should be driven carefully to avoid losing all of its speed by accidentally ramming something. Its mass is also not enough to plow through thick trees, so they must be avoided.
This tank also has an uncanny ability to drive uphill at very sharp angles, which may slow it to 5 km/h but won't stop it entirely. Unfortunately, this ability is rarely of any use in RB due to its low camera depression, but might be very beneficial in AB if done stealthy enough.
| Game Mode | Max Speed (km/h) | Weight (tons) | Engine power (horsepower) | Power-to-weight ratio (hp/ton) | |||
|---|---|---|---|---|---|---|---|
| Forward | Reverse | Stock | Upgraded | Stock | Upgraded | ||
| Arcade | Expression error: Unexpected * operator. | 401 | Expression error: Unexpected round operator. | __.__ | |||
| Realistic | 249 | Expression error: Unexpected round operator. | __.__ | ||||
Modifications and economy
Avoid researching Adjustment of fire, as it does nothing noticeable to improve missile guidance. Research Brakes or Suspension instead to improve vehicle handling. Elevation mechanism in theory could help, but isn't necessary and can be skipped as well.
Armaments
Main armament
| ZT3 missile | Turret rotation speed (°/s) | Reloading rate (seconds) | |||||||||||
|---|---|---|---|---|---|---|---|---|---|---|---|---|---|
| Mode | Capacity (Belt) | Vertical | Horizontal | Stabilizer | Stock | Upgraded | Full | Expert | Aced | Stock | Full | Expert | Aced |
| Arcade | 12 (3) | -5°/+15° | N/A | Two-plane | 35.2 | 48.8 | 59.2 | 65.5 | 69.7 | 19.50 | 17.25 | 15.90 | 15.00 |
| Realistic | 23.8 | 28.0 | 34.0 | 37.6 | 40.0 | ||||||||
Ammunition
| Penetration statistics | |||||||
|---|---|---|---|---|---|---|---|
| Ammunition | Type of warhead |
Penetration @ 0° Angle of Attack (mm) | |||||
| 10 m | 100 m | 500 m | 1,000 m | 1,500 m | 2,000 m | ||
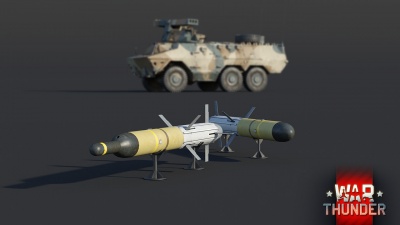
| ZT3A1 | ATGM | 650 | 650 | 650 | 650 | 650 | 650 |
| ZT3A2 | ATGM (tandem) | 800 | 800 | 800 | 800 | 800 | 800 |
| Shell details | ||||||||||
|---|---|---|---|---|---|---|---|---|---|---|
| Ammunition | Type of warhead |
Velocity (m/s) |
Range (m) |
Projectile Mass (kg) |
Fuse delay (m) |
Fuse sensitivity (mm) |
Explosive Mass (TNT equivalent) (g) |
Ricochet | ||
| 0% | 50% | 100% | ||||||||
| ZT3A1 | ATGM | 240 | 4,000 | 26 | 0 | 0.01 | 3,580 | 80° | 82° | 90° |
| ZT3A2 | ATGM (tandem) | 220 | 5,000 | 28.5 | 0.4 | 0.01 | 3,580 | 80° | 82° | 90° |
Ammo racks
| Full ammo |
1st rack empty |
2nd rack empty |
3rd rack empty |
4th rack empty |
5th rack empty |
6th rack empty |
Visual discrepancy |
|---|---|---|---|---|---|---|---|
| 4 | __ (+__) | __ (+__) | __ (+__) | __ (+__) | __ (+__) | __ (+__) | __ |
Machine guns
| 7.62 mm Browning MG4 | ||||
|---|---|---|---|---|
| Mount | Capacity (Belt) | Fire rate | Vertical | Horizontal |
| Pintle | 2,000 (250) | 500 | -10°/+20° | ±180° |
Usage in battles
Describe the tactics of playing in the vehicle, the features of using vehicles in the team and advice on tactics. Refrain from creating a "guide" - do not impose a single point of view but instead give the reader food for thought. Describe the most dangerous enemies and give recommendations on fighting them. If necessary, note the specifics of the game in different modes (AB, RB, SB).
Arcade mode
It can be used on a map with a road leading off your spawn towards capture point to quickly take over a strong defensive position. Any position that enemy has to attack into and cannot attack indirectly is worth taking over like this. For example, on the map "Middle east" it can rush into north capture point and fall down into cover of a bunker before being sniped. This position is well protected, and also allows it to abuse simplified AB ATGM controls to deny any access to the capture point for the enemy team, as it has strong vertical missile control and can snipe attacking enemy tanks by just pointing sniper scope at them after firing out and over cover.
It can also be used to drive to the side of attacking enemy to sneak shots into them. You can also do this in more provocative manner by hiding behind building next to them, but be aware that you then have to rely on your team to act as a distraction and you should avoid being seen and especially avoid or destroy light tanks to not get unnecessary attention. While sneaking in AB is difficult, it is still rather easy to sneak upon Soviet players and heavy tanks in general as long as you understand the game mechanics. Do note, that in AB the ZT3A2 does not have the constraints of "gun depression" and is able to fire off any kind of ground spikes, therefore it might be a good idea to climb any weird ground formation if it allows you to fire over buildings or other enemy cover.
It can be used as a sniper tank, with main advantage of it being able to obliterate enemy cover with first unguided missile, which is immediately followed by a guided missile hitting their turret and a third being sent over cover if target managed to survive the first hit. Likewise, it is possible to just send all 3 missiles through forest in hopes that they will be able to brute force the foliage and hit enemy tanks anyway. It is also technically possible to drive missiles into enemy ATGM tanks over hills when they are reloading, but it might be too difficult to time correctly. Remember to immediately hide after such attacks and in general fire into enemy tank sides to avoid being countersniped. Three shots can also be used to snipe three tanks simultaneously, but low missile speed will not allow you to attack moving tanks like that, so think whom you want to take out first before firing.
In any case be very wary of your reload timings - locate targets, gain as much of unfair advantage over them, like short cover you can fire over and they cannot, as possible, then fully commit to your attack when they seem to lose focus. Each shot forces a 0.6 second "reload" and in that time you must point missile on your first target and decide who needs to be destroyed next, then fire next missile. After firing three shots, back off into cover before anyone decided to fire back. If enemy managed to destroy the launcher, turn around and make a complete retreat, especially if it was already empty, as it will take from 20 to 40 seconds to recover from that kind of damage.
Overall, in AB the ZT3A2's efficiency depends on a lot of factors outside of players control - if everyone will focus on it, you will not be able to do much, especially from long range, as it takes just one or two good hits of virtually any weapon to destroy the ZT3A2, but you should be already used to play around enemy with aim assist at this point.
Pros and cons
Pros:
- Is able to use tandem missiles, which penetrate ERA regardless of angle of attack
- Has three shot launcher, which is a step down from the Striker, but still one more shot when compared to type 89 and similar tanks
- Missiles are immune to jammers
- Can relocate very fast on maps with a lot of sealed roads after having researched mobility upgrades
- Missiles have very strong vertical mobility, which technically allows them to directly attack tanks from low/high ground and/or over obstacles with enough user skill (though this is mostly impossible to pull off in RB due to camera depression and various graphical issues)
- While clumsy, the ZT3A2's chassis are able to climb at very sharp angles (60-70 degree inclination even when stock in AB) and it can get on top of certain objects the Striker or the Swingfire would not be able to climb
- Tall profile allows it to fire directly over certain cover which other tanks normally use as a full cover, for example, destroyed building debris, potentially surprising some enemies
Cons:
- Missiles do not turn well in horizontal plane and are especially unresponsive in RB
- Missiles give off annoying bright red flare instead of normal yellow light and tend to have graphical glitches upon reaching the target on most graphical settings, making them difficult to control
- Camera placement is imperfect and requires to make corrections if using cover or firing at close range, which is especially bad in RB, as the closer the target is the more inadequate the camera behaviour becomes. The only way to get rid of collision is to switch weapon control towards launcher itself, which has no control over horizontal turret traverse for some reason
- Vertical depression is non-existent on the launcher and the huge hull is not easy to angle to compensate, which is absolutely abysmal for RB (is only a minor inconvenience in AB as long as missiles can be guided with mouse pointer instead of sniper crosshairs)
- Hull must be exposed to make a direct shot and almost any responding shot to the launcher on top of the hull will destroy enough crew to count as crew knockout, even a single glancing hit from ZSU-57-2 may be enough
- Slow when drives offroad and in general drives more like a bus rather than a tank or regular armoured car
- Must make a complete stop to fire, which makes it incapable of fighting any kind of light tanks or SPAA directly
- Missiles are only 20-40 m/s faster than MILAN and hostile ATGM tanks generally use missiles that are 2 to 5 times faster, SAM tanks can even make a very late response and still win the duel
- Reloads only after spending all three shots (but reloads all three at once), does not automatically reload during rearm like the Striker
- Has a lot of upgrades which do nothing to improve its fighting capabilities (like adjustment of fire)
History
Devblog
In the early 1960s, the South African military already identified the need for anti-tank missile capabilities. Subsequently, this led to South Africa procuring the MILAN ATGM in the early to mid 1970s. However, early use experience with the MILAN highlighted the weapon's unsuitability for the African tropical conditions.
Being a wire-guided missile, the MILAN's control wire had a tendency to get caught up in the thick African bush and get severed, causing the missile to go off target and making engaging moving targets even more challenging. As a result, the decision was made to procure a laser-guided missile. However, as international arms embargoes were imposed on South Africa, simply acquiring an existing weapon off the export market wasn't possible. Therefore, South African engineers at the Kentron company went about designing their own laser-guided ATGM in the late 1970s.
The result of this undertaking was the creation of the ZT3 missile system. By the time the ZT3 system had been ready for production in 1986, plans were being drawn up for a modified Ratel 20 housing the newly developed ZT3 missile launcher in a modified Ratel 60 turret. The modified Ratel with the ZT3 missile system was developed in order to supplement the Ratel 90s in anti-tank operations as the latter often struggled to engage heavy armour in direct combat.
The Ratel ZT3-A1 entered production in 1987 and around 90vehicles of the type had been built by 1993. The ZT3-A2 was introduced in 2008 and continues its successful operation with SANDF units till the present day.
Media
- Skins
- Images
See also
Links to the articles on the War Thunder Wiki that you think will be useful for the reader, for example:
- reference to the series of the vehicles;
- links to approximate analogues of other nations and research trees.
External links
| Britain tank destroyers | |
|---|---|
| Infantry tank derivatives | Archer · Gun Carrier (3-in) |
| Light tank derivatives | Alecto I |
| M10 Achilles | Achilles · Achilles (65 Rg.) |
| Centurion derivatives | FV4005 · Conway |
| ATGM | Swingfire · Striker |
| Other | Tortoise · ▄M109A1 |
| Canada | QF 3.7 Ram |
| South Africa | G6 · ZT3A2 |


