Difference between revisions of "Sho't"
(→Ammunition: Converted to transclusion) |
|||
| Line 90: | Line 90: | ||
Shot Mk.3 APDS is another story: its flat trajectory and high velocity helps it in hitting long-distance targets or fast movers. However, the overall post-effect is still quite disappointing, so players have to remember the weakspots or ammo racks just like with the Shot Mk.1. | Shot Mk.3 APDS is another story: its flat trajectory and high velocity helps it in hitting long-distance targets or fast movers. However, the overall post-effect is still quite disappointing, so players have to remember the weakspots or ammo racks just like with the Shot Mk.1. | ||
| − | { | + | {{:20pdr OQF Mk.I (84 mm)/Ammunition|Shot Mk.1, Shot Mk.3, Shell Mk.1, 20pdr Shell SS Mk.1}} |
| − | |||
| − | |||
| − | |||
| − | |||
| − | |||
| − | |||
| − | |||
| − | |||
| − | |||
| − | |||
| − | |||
| − | |||
| − | |||
| − | |||
| − | |||
| − | |||
| − | |||
| − | |||
| − | |||
| − | |||
| − | |||
| − | |||
| − | |||
| − | |||
| − | |||
| − | |||
| − | |||
| − | |||
| − | |||
| − | | Shot Mk. | ||
| − | |||
| − | |||
| − | |||
| − | |||
| − | |||
| − | |||
| − | |||
| − | |||
| − | |||
| − | |||
| − | |||
| − | |||
| − | |||
| − | |||
| − | |||
| − | |||
| − | |||
| − | |||
| − | |||
| − | |||
==== [[Ammo racks]] ==== | ==== [[Ammo racks]] ==== | ||
Revision as of 20:51, 20 January 2023
| This page is about the Israeli medium tank Sho't. For other versions, see Sho't (Family). |

Contents
Description
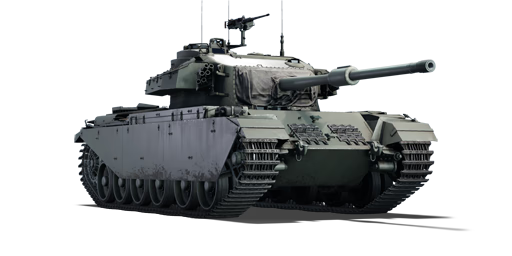
The Sho't (lit. "Whip") is a rank Israeli medium tank with a battle rating of (AB), (RB), and (SB). It was introduced in Update "Wind of Change".
The representation of the early fleet of Israeli Centurions bought from various operators, the Sho't performs identically to its British counterpart Centurion Mk.5/1, having good gun handling at its rank while suffering from somewhat insufficient protection and low mobility.
General info
Survivability and armour
Players can tell the Sho't in-game as a Centurion Mk.5 right away as the bore evacuator is unique to later variants of Centurion (QF 20 pdr Model B), as well as the additional pintle-mounted M2HB machine gun, though it lacks the headlights found on the Australian variant. The overall protection is totally identical to pre-Mk 10 Centurion variants, which also means that it has the same cramped interior and any penetrating shots can knock out the Sho't right away.
Armour type:
- Rolled homogeneous armour (Hull, Turret roof)
- Cast homogeneous armour (Turret)
| Armour | Front (Slope angle) | Sides | Rear | Roof |
|---|---|---|---|---|
| Hull | 76.2 mm (58°) Front glacis 76.2 mm (47-48°) Lower glacis |
50.8 (12°) + 6 mm | 38 mm (8-12°) | 29 mm 8-14 mm Engine deck |
| Turret | 152 mm (6-27°) Turret front 152 mm Gun mantlet |
89 mm (5-12°) | 89 mm (1-18°) | 50.8 mm Border of turret 29 mm Center of turret |
| Cupola | 152 mm | 90 mm | 29 mm | |
Notes:
- Tracks and suspension wheels are both 20 mm thick.
- The steel boxes around the turret and hull give a 4 mm additional protection, though this seems to be a negligible addition.
- Spaced armour plates are placed on the side of the Centurion, giving an additional 6 mm of side armour.
Mobility
| Game Mode | Max Speed (km/h) | Weight (tons) | Engine power (horsepower) | Power-to-weight ratio (hp/ton) | |||
|---|---|---|---|---|---|---|---|
| Forward | Reverse | Stock | Upgraded | Stock | Upgraded | ||
| Arcade | Expression error: Unexpected * operator. | 1,007 | Expression error: Unexpected round operator. | __.__ | |||
| Realistic | 575 | Expression error: Unexpected round operator. | __.__ | ||||
Since the Sho't was directly imported from various sources, it shares identical mobility and its Rolls-Royce Meteor engine; players of British or Sweden Centurions will find themselves at home right away. This also means that the overall mobility is inferior just like most unmodified Centurions.
Modifications and economy
Armaments
Main armament
The QF 20 pounder Model B cannon on Sho't is identical to other 20 pounder guns in various services; with gun stabilizer and APDS at its disposal, the gun can be used to great effect against late war and early Cold War vehicles where a stabilizer wasn't commonplace.
| 84 mm 20pdr OQF Mk.I | Turret rotation speed (°/s) | Reloading rate (seconds) | |||||||||||
|---|---|---|---|---|---|---|---|---|---|---|---|---|---|
| Mode | Capacity | Vertical | Horizontal | Stabilizer | Stock | Upgraded | Full | Expert | Aced | Stock | Full | Expert | Aced |
| Arcade | 64 | -10°/+20° | ±180° | Two-plane | 19.0 | 26.4 | 32.0 | 35.4 | 37.6 | 8.19 | 7.25 | 6.68 | 6.30 |
| Realistic | 11.9 | 14.0 | 17.0 | 18.8 | 20.0 | ||||||||
Ammunition
The stock round, Shot Mk.1, is an APCBC shell; while its penetration is sufficient to penetrate tanks like Tiger II; it will not penetrate early Cold War tanks like M48A1 or T-54s. Additionally, it doesn't have any explosive filler, so players will need to aim for weakspots or ammo racks to achieve the most devastating damage.
The second stock shell, Shell Mk.1 HE, is practically useless against any armoured targets and not even enough to trigger overpressure damage. While it is still enough to blast exposed crews, it is suggested to ignore this shell.
Shot Mk.3 APDS is another story: its flat trajectory and high velocity helps it in hitting long-distance targets or fast movers. However, the overall post-effect is still quite disappointing, so players have to remember the weakspots or ammo racks just like with the Shot Mk.1.
| Penetration statistics | |||||||
|---|---|---|---|---|---|---|---|
| Ammunition | Type of warhead |
Penetration @ 0° Angle of Attack (mm) | |||||
| 10 m | 100 m | 500 m | 1,000 m | 1,500 m | 2,000 m | ||
| Shot Mk.1 | APCBC | 232 | 229 | 216 | 201 | 187 | 173 |
| Shot Mk.3 | APDS | 384 | 380 | 363 | 343 | 324 | 306 |
| Shell Mk.1 | HE | 15 | 15 | 15 | 15 | 15 | 15 |
| Shell details | ||||||||||||
|---|---|---|---|---|---|---|---|---|---|---|---|---|
| Ammunition | Type of warhead |
Velocity (m/s) |
Projectile mass (kg) |
Fuse delay (m) |
Fuse sensitivity (mm) |
Explosive mass (TNT equivalent) (kg) |
Ricochet | |||||
| 0% | 50% | 100% | ||||||||||
| Shot Mk.1 | APCBC | 1,000 | 9.1 | - | - | - | 48° | 63° | 71° | |||
| Shot Mk.3 | APDS | 1,430 | 3.22 | - | - | - | 75° | 78° | 80° | |||
| Shell Mk.1 | HE | 600 | 7.5 | 0.2 | 0.1 | 1.13 | 79° | 80° | 81° | |||
| Smoke shell characteristics | ||||||
|---|---|---|---|---|---|---|
| Ammunition | Velocity (m/s) |
Projectile mass (kg) |
Screen radius (m) |
Screen deploy time (s) |
Screen hold time (s) |
Explosive mass (TNT equivalent) (g) |
| 20pdr Shell SS Mk.1 | 250 | 9.3 | 9 | 5 | 20 | 50 |
Ammo racks

| Full ammo |
1st rack empty |
2nd rack empty |
3rd rack empty |
4th rack empty |
5th rack empty |
|---|---|---|---|---|---|
| 64 | 63 (+1) | 59 (+5) | 52 (+12) | 44 (+20) | 37 (+27) |
| 6th rack empty |
7th rack empty |
8th rack empty |
9th rack empty |
Visual discrepancy |
|
| 29 (+35) | 9 (+55) | 5 (+59) | 1 (+63) | No |
Notes:
- Shells are modeled individually and disappear after having been shot or loaded.
- Racks 8 and 9 are first stage ammo racks. They total 8 shells and get filled first when loading up the tank.
- These racks are also emptied early: the depletion order at full capacity is 8 - 9 - 1 - 2 - etc. until 7.
- Full reload speed will be realized as long as shells are available in the ready racks 8 and 9. If the ready racks are empty, a penalty to reload speed will occur.
- Simply not firing when the gun is loaded will move ammo from racks 1-7 into racks 9 then 8. Firing will interrupt the restocking of the ready racks.
Machine guns
| 12.7 mm M2HB | ||||
|---|---|---|---|---|
| Mount | Capacity (Belt) | Fire rate | Vertical | Horizontal |
| Pintle | 1,000 (200) | 577 | -10°/+50° | ±120° |
| 7.62 mm L3A1 | ||||
|---|---|---|---|---|
| Mount | Capacity (Belt) | Fire rate | Vertical | Horizontal |
| Coaxial | 3,750 (250) | 500 | N/A | N/A |
Unlike other Centurions, the Sho't has a pintle-mounted M2HB, giving it some capabilities to fight back against aircraft or lightly-protected vehicles; while the coaxial machine gun has changed from BESA to L3A1 (M1919A4) for logistical reasons.
Usage in battles
Like other Centurions, thanks to the underpowered engine, Sho't is not a fast tank by any means and its 35 km/h top speed makes it lag behind some tanks at its rank, not to mention fast movers like Leopard 1. However, this also means that the Sho't can stay close with friendly heavy tanks (which are still common at the battle rating) and provide reliable fire support for them even on the move thanks to its gun stabilizer. Although the overall protection is not sufficient to withstand shots from enemies, the gun depression angle certainly helps to find hull-down positions and use the gun mantlet to absorb or bounce incoming shells. While some players prefer the high penetration of APDS, some might opt to use the stock APCBC for better spalling; but in most cases where the enemy has thick armour, APDS will be the go-to shell for Sho't.
Pros and cons
Pros:
- Has a two-plane gun stabilizer, making it able to shoot on the move
- Cannon with good penetration power
- Has a roof-mounted .50 cal MG
Cons:
- The ammo stowage in the front of the tank is a huge weak spot easy to target
- Slow for a medium tank being slower than some heavy tanks of the same BR
- 3 out of 4 crew members are on the same side of the tank and can be knocked out at once with a well-placed shot
History
Describe the history of the creation and combat usage of the vehicle in more detail than in the introduction. If the historical reference turns out to be too long, take it to a separate article, taking a link to the article about the vehicle and adding a block "/History" (example: https://wiki.warthunder.com/(Vehicle-name)/History) and add a link to it here using the main template. Be sure to reference text and sources by using <ref></ref>, as well as adding them at the end of the article with <references />. This section may also include the vehicle's dev blog entry (if applicable) and the in-game encyclopedia description (under === In-game description ===, also if applicable).
Media
- Skins
See also
Links to the articles on the War Thunder Wiki that you think will be useful for the reader, for example:
- reference to the series of the vehicles;
- links to approximate analogues of other nations and research trees.
External links
Paste links to sources and external resources, such as:
- topic on the official game forum;
- other literature.
| Israeli Ordnance Corps (חיל החימוש) | |
|---|---|
| Medium Tanks | M-51 · M-51 (W) |
| MBTs | |
| Magach | Magach 1 · Magach 2 · Magach 3 · Magach 3 (ERA) · ▃Magach 3 (ERA) · Magach 5 |
| Magach 6 · Magach 6A · Magach 6B · Magach 6C · Magach 6R · Magach 6M · Gal Batash | |
| Sho't | Sho't · Sho't Kal Alef · Sho't Kal Gimel · Sho't Kal Dalet · ▄Sho't Kal Dalet |
| Tiran | Tiran 4 · Tiran 4S |
| Merkava | ▃Merkava Mk.1 · Merkava Mk.1B · Merkava Mk.2B · ▃Merkava Mk.2B · Merkava Mk.2D |
| Merkava Mk.3B · Merkava Mk.3C · ▃Merkava Mk.3D · Merkava Mk.4B · Merkava Mk.4M | |
| Tank destroyers | Zachlam Tager |
| See Also | Chrysler Defense · Department of Tank Design · Morozov Design Bureau |
| Israel medium tanks | |
|---|---|
| M-51 | M-51 · M-51 (W) |
| Magach | Magach 1 · Magach 2 · Magach 3 · Magach 3 (ERA) · Magach 5 · Magach 6 |
| Magach 6A · Magach 6B · Magach 6B Gal · Gal Batash · Magach 6C · Magach 6M · Magach 6R · Magach Hydra · Magach 7C | |
| Tiran | Tiran 4 · Tiran 4S · Tiran 6 |
| Sho't | Sho't · Sho't Kal Alef · Sho't Kal Gimel · Sho't Kal Dalet |
| Merkava | Merkava Mk.1B · Merkava Mk.2B · Merkava Mk.2D · Merkava Mk.3B · Merkava Mk.3C · Ra'am Sagol |
| Merkava Mk.4B · Merkava Mk.4M · Merkava Mk.4 LIC | |
