Difference between revisions of "M16 MGMC (Japan)"
(Filled In Basic Info) |
|||
| Line 16: | Line 16: | ||
=== Survivability and armour === | === Survivability and armour === | ||
{{Specs-Tank-Armour}} | {{Specs-Tank-Armour}} | ||
| − | <!-- ''Describe armour protection. Note the most well protected and key weak areas. Appreciate the layout of modules as well as the number and location of crew members. Is the level of armour protection sufficient, is the placement of modules helpful for survival in combat? If necessary use a visual template to indicate the most secure and weak zones of the armour.'' | + | <!-- ''Describe armour protection. Note the most well protected and key weak areas. Appreciate the layout of modules as well as the number and location of crew members. Is the level of armour protection sufficient, is the placement of modules helpful for survival in combat? If necessary use a visual template to indicate the most secure and weak zones of the armour.'' --> |
| − | '' | + | '''Armour type:''' |
| − | + | *Rolled homogeneous armour | |
| − | |||
| − | |||
{| class="wikitable" | {| class="wikitable" | ||
| Line 27: | Line 25: | ||
! Armour !! Front (Slope angle) !! Sides !! Rear !! Roof | ! Armour !! Front (Slope angle) !! Sides !! Rear !! Roof | ||
|- | |- | ||
| − | | Hull || | + | | Hull || 6.35 mm (31°) ''Hood front'' <br> 12.7 mm (31°) ''Driver port'' || 6.35 mm || 6.35 mm || N/A |
|- | |- | ||
| − | | Turret || | + | | Turret || 12.7 mm || N/A || N/A || N/A |
| − | | | ||
| − | | | ||
|- | |- | ||
|} | |} | ||
| + | '''Notes:''' | ||
| − | + | * Suspension bogies are 10 mm thick, suspension wheels are 15 mm thick, and tracks are 7 mm thick. Front wheels provide 2 mm armour. | |
| − | |||
=== Mobility === | === Mobility === | ||
{{Specs-Tank-Mobility}} | {{Specs-Tank-Mobility}} | ||
| − | <!-- ''Write about the mobility of the ground vehicle. Estimate the specific power and manoeuvrability, as well as the maximum speed forwards and backwards.'' | + | <!-- ''Write about the mobility of the ground vehicle. Estimate the specific power and manoeuvrability, as well as the maximum speed forwards and backwards.'' --> |
| − | |||
| − | {{tankMobility}} | + | {{tankMobility|abMinHp=210|rbMinHp=131}} |
| + | |||
| + | As a half-track, the {{PAGENAME}} is light and thus agile. While it has a high top speed, the acceleration is quite slow: expect a cruise speed between 40 and 45 km/h instead. The reverse speed is good, allowing you to pull out of dangerous situations. Like all WW2 wheeled vehicles, you can not turn on the spot and always need space to change direction. However, thanks to the rear tracks, your turn radius remains small at small speed. But remember that the faster you drive, the bigger the turn radius will be. Changing directions in a cramped street can be difficult with the {{PAGENAME}}. The lack of neutral steering makes turning on the spot slow (4 km/h): make sure to build a little speed before turning and you'll turn faster (12 km/h). The offroad mobility is average: the {{PAGENAME}} reaches 14 km/h when fording and 18 km/h when driving uphill. The {{PAGENAME}} has a very high cruise speed on hard surfaces (solid ground, roads). While its high speed is an advantage, it can turn into a disadvantage when manoeuvring at high speed: the {{PAGENAME}} starts oversteering when you turn because of its high centre of gravity and ends up skidding uncontrollably. Be aware of this before gunning towards the frontline: limit your maximum speed and anticipate the braking phases. As it is equipped with front tires, the {{PAGENAME}} struggles on soft terrain (sand, mud, snow). Light obstacles (fences and bushes) will make you bleed speed and medium to large obstacles (posts, trees, concrete blocks and parked vehicles) will stop your vehicle: avoid them. | ||
=== Modifications and economy === | === Modifications and economy === | ||
| Line 52: | Line 49: | ||
=== Main armament === | === Main armament === | ||
{{Specs-Tank-Weapon|1}} | {{Specs-Tank-Weapon|1}} | ||
| − | <!-- ''Give the reader information about the characteristics of the main gun. Assess its effectiveness in a battle based on the reloading speed, ballistics and the power of shells. Do not forget about the flexibility of the fire, that is how quickly the cannon can be aimed at the target, open fire on it and aim at another enemy. Add a link to the main article on the gun: <code><nowiki>{{main|Name of the weapon}}</nowiki></code>. Describe in general terms the ammunition available for the main gun. Give advice on how to use them and how to fill the ammunition storage.'' | + | <!-- ''Give the reader information about the characteristics of the main gun. Assess its effectiveness in a battle based on the reloading speed, ballistics and the power of shells. Do not forget about the flexibility of the fire, that is how quickly the cannon can be aimed at the target, open fire on it and aim at another enemy. Add a link to the main article on the gun: <code><nowiki>{{main|Name of the weapon}}</nowiki></code>. Describe in general terms the ammunition available for the main gun. Give advice on how to use them and how to fill the ammunition storage.'' --> |
{{main|M2HB (12.7 mm)}} | {{main|M2HB (12.7 mm)}} | ||
| − | |||
| − | |||
{| class="wikitable" style="text-align:center" width="100%" | {| class="wikitable" style="text-align:center" width="100%" | ||
| Line 66: | Line 61: | ||
|- | |- | ||
! ''Arcade'' | ! ''Arcade'' | ||
| − | | rowspan="2" | | + | | rowspan="2" | 4,800 (200) || rowspan="2" | 577 || rowspan="2" | -10°/+90° || rowspan="2" | ±180° || rowspan="2" | N/A || 52.84 || 73.13 || 88.80 || 98.20 || 104.47 || rowspan="2" | 18.20 || rowspan="2" | 16.10 || rowspan="2" | 14.84 || rowspan="2" | 14.00 |
|- | |- | ||
! ''Realistic'' | ! ''Realistic'' | ||
| − | | | + | | 35.70 || 42.00 || 51.00 || 56.40 || 60.00 |
|- | |- | ||
|} | |} | ||
==== Ammunition ==== | ==== Ammunition ==== | ||
| + | |||
| + | * '''Common:''' {{Annotation|API-T|M20 armour-piercing incendiary tracer}}{{-}}{{Annotation|I|M1 incendiary}}{{-}}{{Annotation|AP|M2 armour-piercing}}{{-}}{{Annotation|API-T|M20 armour-piercing incendiary tracer}} - These rounds work well until the others are researched. | ||
| + | * '''API:''' {{Annotation|API-T|M20 armour-piercing incendiary tracer}}{{-}}{{Annotation|AP-I|M8 armour-piercing incendiary}}{{-}}{{Annotation|API-T|M20 armour-piercing incendiary tracer}} - These are absolutely devastating in the AA role with slightly less performance against enemy tanks than AP. | ||
| + | * '''AP:''' {{Annotation|AP|M2 armour-piercing}}{{-}}{{Annotation|AP|M2 armour-piercing}}{{-}}{{Annotation|API-T|M20 armour-piercing incendiary tracer}} - These are best against enemy tanks at close range and do good damage to planes. | ||
| + | * '''APIT:''' {{Annotation|API-T|M20 armour-piercing incendiary tracer}} - Better than API in all regards but not as good against tanks as AP, this is the belt of choice in almost all situations. Since every bullet is a tracer, it makes destroying aircraft much easier and detectability is not greatly increased over AP-I, however is increased a bit over AP. | ||
| + | |||
{| class="wikitable sortable" style="text-align:center" width="100%" | {| class="wikitable sortable" style="text-align:center" width="100%" | ||
! colspan="7" | Penetration statistics | ! colspan="7" | Penetration statistics | ||
|- | |- | ||
! rowspan="2" data-sort-type="text" | Belt | ! rowspan="2" data-sort-type="text" | Belt | ||
| − | ! colspan="6" | Penetration @ 0° Angle of Attack (mm) | + | ! colspan="6" | '''Penetration @ 0° Angle of Attack (mm)''' |
|- | |- | ||
! 10 m !! 100 m !! 500 m !! 1,000 m !! 1,500 m !! 2,000 m | ! 10 m !! 100 m !! 500 m !! 1,000 m !! 1,500 m !! 2,000 m | ||
|- | |- | ||
| − | | | + | | Common || 31 || 30 || 26 || 22 || 18 || 15 |
| + | |- | ||
| + | | API || 30 || 29 || 24 || 20 || 16 || 13 | ||
| + | |- | ||
| + | | AP || 31 || 30 || 26 || 22 || 18 || 15 | ||
| + | |- | ||
| + | | APIT || 30 || 29 || 24 || 20 || 16 || 13 | ||
|- | |- | ||
|} | |} | ||
| Line 99: | Line 106: | ||
! 0% !! 50% !! 100% | ! 0% !! 50% !! 100% | ||
|- | |- | ||
| − | | | + | | APIT || API-T || 929 || 0.04 || N/A || N/A || N/A || 47° || 56° || 65° |
|- | |- | ||
|} | |} | ||
==== [[Ammo racks]] ==== | ==== [[Ammo racks]] ==== | ||
| − | + | [[File:Ammoracks_M16_MGMC.jpg|right|thumb|x250px|[[Ammo racks]] of the {{PAGENAME}}]] | |
| − | <!-- '''Last updated:''' --> | + | <!-- '''Last updated: 1.101.0.75''' --> |
{| class="wikitable" style="text-align:center" | {| class="wikitable" style="text-align:center" | ||
|- | |- | ||
| Line 111: | Line 118: | ||
! 1st<br>rack empty | ! 1st<br>rack empty | ||
! 2nd<br>rack empty | ! 2nd<br>rack empty | ||
| − | |||
| − | |||
| − | |||
| − | |||
! Visual<br>discrepancy | ! Visual<br>discrepancy | ||
|- | |- | ||
| − | | ''' | + | | '''24''' || 12 ''(+12)'' || 0 ''(+24)'' || Yes |
|- | |- | ||
|} | |} | ||
| + | '''Notes''': | ||
| + | |||
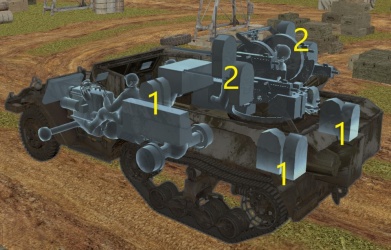
| + | * Although there are 24 ammo boxes, only 10 are modeled including 4 loaded on the machine guns. | ||
| + | * Since there are four .50 M2HB machine guns, each reload will load 4 ammo boxes onto the guns with each box containing 200 rounds. | ||
== Usage in battles == | == Usage in battles == | ||
| − | <!-- ''Describe the tactics of playing in the vehicle, the features of using vehicles in the team and advice on tactics. Refrain from creating a "guide" - do not impose a single point of view but instead give the reader food for thought. Describe the most dangerous enemies and give recommendations on fighting them. If necessary, note the specifics of the game in different modes (AB, RB, SB).'' | + | <!-- ''Describe the tactics of playing in the vehicle, the features of using vehicles in the team and advice on tactics. Refrain from creating a "guide" - do not impose a single point of view but instead give the reader food for thought. Describe the most dangerous enemies and give recommendations on fighting them. If necessary, note the specifics of the game in different modes (AB, RB, SB).'' --> |
| − | |||
=== Pros and cons === | === Pros and cons === | ||
| − | <!-- ''Summarise and briefly evaluate the vehicle in terms of its characteristics and combat effectiveness. Mark its pros and cons in a bulleted list. Try not to use more than 6 points for each of the characteristics. Avoid using categorical definitions such as "bad", "good" and the like - use substitutions with softer forms such as "inadequate" and "effective".'' | + | <!-- ''Summarise and briefly evaluate the vehicle in terms of its characteristics and combat effectiveness. Mark its pros and cons in a bulleted list. Try not to use more than 6 points for each of the characteristics. Avoid using categorical definitions such as "bad", "good" and the like - use substitutions with softer forms such as "inadequate" and "effective".'' --> |
| − | |||
'''Pros:''' | '''Pros:''' | ||
| − | * | + | |
| + | * Powerful guns that can shred planes with well-aimed bursts within 1 km | ||
| + | * API shells are powerful enough to damage or even destroy enemy light tanks and other SPAAs | ||
| + | * Fast on flat ground and can remarkably speed through terrain that would impede wheeled vehicles | ||
| + | * Can turn in place, compared to other wheeled SPAA | ||
| + | * Great acceleration | ||
| + | * Fast turret traverse allows following aircraft easily | ||
| + | * Can shrug off rifle calibre ammunition (<7.92 mm) quite easily | ||
| + | * Fast reverse speeds, can evacuate an area quickly if necessary | ||
| + | * Accurate on the move | ||
| + | * AP bullets can be used for hunting light tanks | ||
'''Cons:''' | '''Cons:''' | ||
| − | * | + | |
| + | * Armour will not resist HMG fire and shrapnel | ||
| + | * A nearby explosion will seriously damage the vehicle and injure or maim the crew | ||
| + | * Fighter aircraft can destroy this vehicle, especially cannon-armed fighters | ||
| + | * Can not hurt vehicles to a full extent of its rank and Battle Rating, excluding SPAA trucks and half-tracks | ||
| + | * Engine catches fire easily and the vehicle can be "tracked | ||
| + | * No weight to pull: Towing or pushing allies is nearly impossible unless it is a lighter vehicle | ||
| + | * Prone to tipping over when turning at high speeds or travelling across steep inclines | ||
| + | * Only 1 spare crew member | ||
| + | * Cannot turn on the spot, as it is a half-track | ||
| + | * Entire crew is exposed; a plane ramming you can knock out the crew | ||
| + | * Vulnerable to artillery barrages since it has an open top | ||
== History == | == History == | ||
Revision as of 19:06, 8 September 2021
| This page is about the SPAA M16 MGMC (Japan). For other half-track vehicles based on the M3, see M3 Half-Track (Family). |
Contents
Description
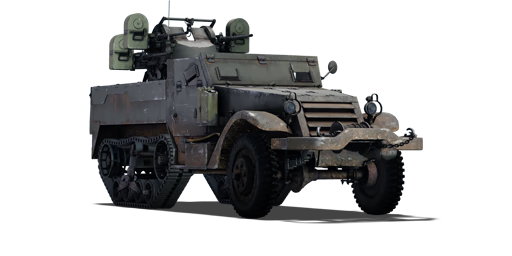
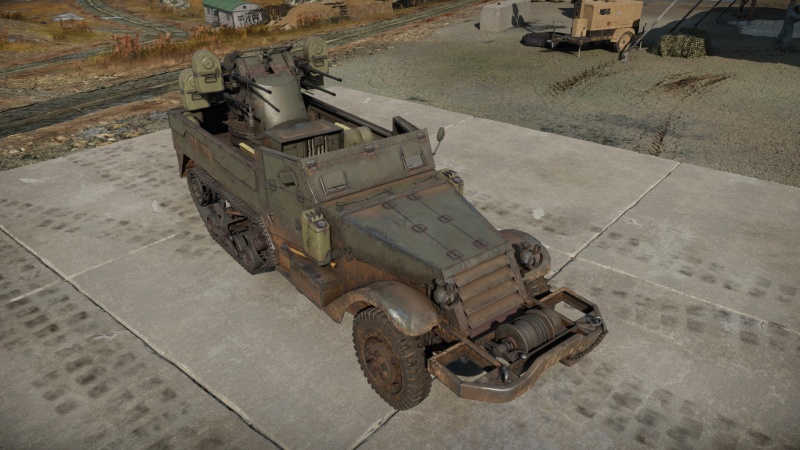
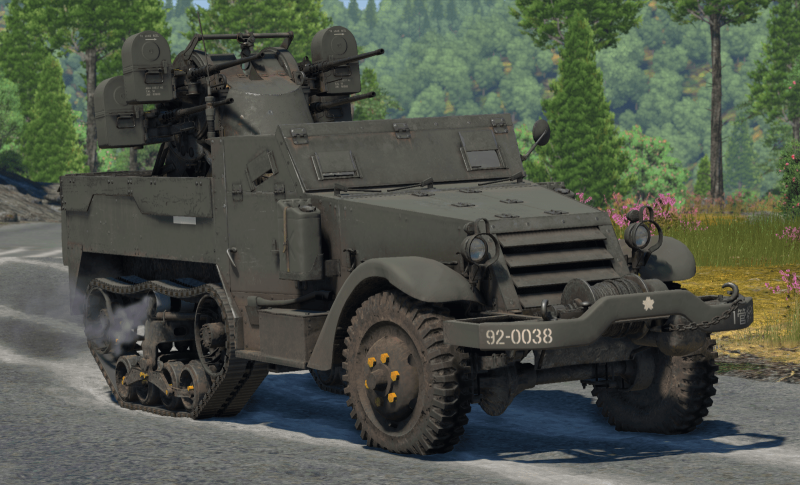
The Multiple Gun Motor Carriage M16 is a rank Japanese SPAA with a battle rating of (AB), (RB), and (SB). It was introduced in Update "Direct Hit".
General info
Survivability and armour
Armour type:
- Rolled homogeneous armour
| Armour | Front (Slope angle) | Sides | Rear | Roof |
|---|---|---|---|---|
| Hull | 6.35 mm (31°) Hood front 12.7 mm (31°) Driver port |
6.35 mm | 6.35 mm | N/A |
| Turret | 12.7 mm | N/A | N/A | N/A |
Notes:
- Suspension bogies are 10 mm thick, suspension wheels are 15 mm thick, and tracks are 7 mm thick. Front wheels provide 2 mm armour.
Mobility
| Game Mode | Max Speed (km/h) | Weight (tons) | Engine power (horsepower) | Power-to-weight ratio (hp/ton) | |||
|---|---|---|---|---|---|---|---|
| Forward | Reverse | Stock | Upgraded | Stock | Upgraded | ||
| Arcade | Expression error: Unexpected * operator. | 210 | Expression error: Unexpected round operator. | __.__ | |||
| Realistic | 131 | Expression error: Unexpected round operator. | __.__ | ||||
As a half-track, the M16 MGMC (Japan) is light and thus agile. While it has a high top speed, the acceleration is quite slow: expect a cruise speed between 40 and 45 km/h instead. The reverse speed is good, allowing you to pull out of dangerous situations. Like all WW2 wheeled vehicles, you can not turn on the spot and always need space to change direction. However, thanks to the rear tracks, your turn radius remains small at small speed. But remember that the faster you drive, the bigger the turn radius will be. Changing directions in a cramped street can be difficult with the M16 MGMC (Japan). The lack of neutral steering makes turning on the spot slow (4 km/h): make sure to build a little speed before turning and you'll turn faster (12 km/h). The offroad mobility is average: the M16 MGMC (Japan) reaches 14 km/h when fording and 18 km/h when driving uphill. The M16 MGMC (Japan) has a very high cruise speed on hard surfaces (solid ground, roads). While its high speed is an advantage, it can turn into a disadvantage when manoeuvring at high speed: the M16 MGMC (Japan) starts oversteering when you turn because of its high centre of gravity and ends up skidding uncontrollably. Be aware of this before gunning towards the frontline: limit your maximum speed and anticipate the braking phases. As it is equipped with front tires, the M16 MGMC (Japan) struggles on soft terrain (sand, mud, snow). Light obstacles (fences and bushes) will make you bleed speed and medium to large obstacles (posts, trees, concrete blocks and parked vehicles) will stop your vehicle: avoid them.
Modifications and economy
Armaments
Main armament
| 12.7 mm M2HB (x4) | Turret rotation speed (°/s) | Reloading rate (seconds) | ||||||||||||
|---|---|---|---|---|---|---|---|---|---|---|---|---|---|---|
| Mode | Capacity (Belt) | Fire rate | Vertical | Horizontal | Stabilizer | Stock | Upgraded | Full | Expert | Aced | Stock | Full | Expert | Aced |
| Arcade | 4,800 (200) | 577 | -10°/+90° | ±180° | N/A | 52.84 | 73.13 | 88.80 | 98.20 | 104.47 | 18.20 | 16.10 | 14.84 | 14.00 |
| Realistic | 35.70 | 42.00 | 51.00 | 56.40 | 60.00 | |||||||||
Ammunition
- Common: API-T · I · AP · API-T - These rounds work well until the others are researched.
- API: API-T · AP-I · API-T - These are absolutely devastating in the AA role with slightly less performance against enemy tanks than AP.
- AP: AP · AP · API-T - These are best against enemy tanks at close range and do good damage to planes.
- APIT: API-T - Better than API in all regards but not as good against tanks as AP, this is the belt of choice in almost all situations. Since every bullet is a tracer, it makes destroying aircraft much easier and detectability is not greatly increased over AP-I, however is increased a bit over AP.
| Penetration statistics | ||||||
|---|---|---|---|---|---|---|
| Belt | Penetration @ 0° Angle of Attack (mm) | |||||
| 10 m | 100 m | 500 m | 1,000 m | 1,500 m | 2,000 m | |
| Common | 31 | 30 | 26 | 22 | 18 | 15 |
| API | 30 | 29 | 24 | 20 | 16 | 13 |
| AP | 31 | 30 | 26 | 22 | 18 | 15 |
| APIT | 30 | 29 | 24 | 20 | 16 | 13 |
| Belt details | |||||||||
|---|---|---|---|---|---|---|---|---|---|
| Belt | Type of warhead |
Velocity (m/s) |
Projectile Mass (kg) |
Fuse delay (m) |
Fuse sensitivity (mm) |
Explosive Mass (TNT equivalent) (g) |
Ricochet | ||
| 0% | 50% | 100% | |||||||
| APIT | API-T | 929 | 0.04 | N/A | N/A | N/A | 47° | 56° | 65° |
Ammo racks

| Full ammo |
1st rack empty |
2nd rack empty |
Visual discrepancy |
|---|---|---|---|
| 24 | 12 (+12) | 0 (+24) | Yes |
Notes:
- Although there are 24 ammo boxes, only 10 are modeled including 4 loaded on the machine guns.
- Since there are four .50 M2HB machine guns, each reload will load 4 ammo boxes onto the guns with each box containing 200 rounds.
Usage in battles
Pros and cons
Pros:
- Powerful guns that can shred planes with well-aimed bursts within 1 km
- API shells are powerful enough to damage or even destroy enemy light tanks and other SPAAs
- Fast on flat ground and can remarkably speed through terrain that would impede wheeled vehicles
- Can turn in place, compared to other wheeled SPAA
- Great acceleration
- Fast turret traverse allows following aircraft easily
- Can shrug off rifle calibre ammunition (<7.92 mm) quite easily
- Fast reverse speeds, can evacuate an area quickly if necessary
- Accurate on the move
- AP bullets can be used for hunting light tanks
Cons:
- Armour will not resist HMG fire and shrapnel
- A nearby explosion will seriously damage the vehicle and injure or maim the crew
- Fighter aircraft can destroy this vehicle, especially cannon-armed fighters
- Can not hurt vehicles to a full extent of its rank and Battle Rating, excluding SPAA trucks and half-tracks
- Engine catches fire easily and the vehicle can be "tracked
- No weight to pull: Towing or pushing allies is nearly impossible unless it is a lighter vehicle
- Prone to tipping over when turning at high speeds or travelling across steep inclines
- Only 1 spare crew member
- Cannot turn on the spot, as it is a half-track
- Entire crew is exposed; a plane ramming you can knock out the crew
- Vulnerable to artillery barrages since it has an open top
History
Describe the history of the creation and combat usage of the vehicle in more detail than in the introduction. If the historical reference turns out to be too long, take it to a separate article, taking a link to the article about the vehicle and adding a block "/History" (example: https://wiki.warthunder.com/(Vehicle-name)/History) and add a link to it here using the main template. Be sure to reference text and sources by using <ref></ref>, as well as adding them at the end of the article with <references />. This section may also include the vehicle's dev blog entry (if applicable) and the in-game encyclopedia description (under === In-game description ===, also if applicable).
Media
Excellent additions to the article would be video guides, screenshots from the game, and photos.
See also
Links to the articles on the War Thunder Wiki that you think will be useful for the reader, for example:
- reference to the series of the vehicles;
- links to approximate analogues of other nations and research trees.
External links
Paste links to sources and external resources, such as:
- topic on the official game forum;
- other literature.
| Japan anti-aircraft vehicles | |
|---|---|
| Ke-Ni Derivatives | Ta-Se · So-Ki |
| Wheeled | Type 94 |
| Tracked | SUB-I-II |
| Radar SPAAG | Type 87 |
| Missile SPAA | Type 93 · Type 81 (C) |
| USA | ▅M16 MGMC · ▅M19A1 · ▅M42 |


