Difference between revisions of "Olifant Mk.1A"
m ('Radial' V12 is a nonsensical term, the AV1790 is a V-type engine) (Tag: Visual edit) |
(→Pros and cons) (Tag: Visual edit) |
||
| (28 intermediate revisions by 8 users not shown) | |||
| Line 1: | Line 1: | ||
| − | |||
| − | |||
| − | |||
| − | |||
| − | |||
{{Specs-Card | {{Specs-Card | ||
|code=uk_olifant_mk_1a | |code=uk_olifant_mk_1a | ||
| − | |images={{Specs-Card-Image|GarageImage_{{PAGENAME}}.jpg | + | |images={{Specs-Card-Image|GarageImage_{{PAGENAME}}.jpg}} |
}} | }} | ||
| Line 12: | Line 7: | ||
<!-- ''In the description, the first part should be about the history of the creation and combat usage of the vehicle, as well as its key features. In the second part, tell the reader about the ground vehicle in the game. Insert a screenshot of the vehicle, so that if the novice player does not remember the vehicle by name, he will immediately understand what kind of vehicle the article is talking about.'' --> | <!-- ''In the description, the first part should be about the history of the creation and combat usage of the vehicle, as well as its key features. In the second part, tell the reader about the ground vehicle in the game. Insert a screenshot of the vehicle, so that if the novice player does not remember the vehicle by name, he will immediately understand what kind of vehicle the article is talking about.'' --> | ||
The '''{{Specs|name}}''' is a rank {{Specs|rank}} British medium tank {{Battle-rating}}. It was introduced in [[Update "Ixwa Strike"]]. | The '''{{Specs|name}}''' is a rank {{Specs|rank}} British medium tank {{Battle-rating}}. It was introduced in [[Update "Ixwa Strike"]]. | ||
| − | |||
| − | |||
| − | |||
| − | |||
== General info == | == General info == | ||
| Line 67: | Line 58: | ||
|- | |- | ||
! ''Arcade'' | ! ''Arcade'' | ||
| − | | rowspan="2" | 72 || rowspan="2" | -10°/+20° || rowspan="2" | ±180° || rowspan="2" | Two-plane || | + | | rowspan="2" | 72 || rowspan="2" | -10°/+20° || rowspan="2" | ±180° || rowspan="2" | Two-plane || 11.4 || 15.8 || 19.2 || 21.2 || 22.6 || rowspan="2" | 8.71 || rowspan="2" | 7.70 || rowspan="2" | 7.10 || rowspan="2" | 6.70 |
|- | |- | ||
! ''Realistic'' | ! ''Realistic'' | ||
| − | | | + | | 7.1 || 8.4 || 10.2 || 11.3 || 12.0 |
|- | |- | ||
|} | |} | ||
==== Ammunition ==== | ==== Ammunition ==== | ||
| − | {{: | + | {| class="wikitable sortable" style="text-align:center" width="100%" |
| + | ! colspan="8" | Penetration statistics | ||
| + | |- | ||
| + | ! rowspan="2" data-sort-type="text" | Ammunition | ||
| + | ! rowspan="2" | Type of<br>warhead | ||
| + | ! colspan="6" | Penetration @ 0° Angle of Attack (mm) | ||
| + | |- | ||
| + | ! 10 m !! 100 m !! 500 m !! 1,000 m !! 1,500 m !! 2,000 m | ||
| + | |- | ||
| + | | M152 || HEATFS || 400 || 400 || 400 || 400 || 400 || 400 | ||
| + | |- | ||
| + | | M156 || HESH || 127 || 127 || 127 || 127 || 127 || 127 | ||
| + | |- | ||
| + | | M111 || APFSDS || 337 || 335 || 330 || 322 || 314 || 306 | ||
| + | |- | ||
| + | |} | ||
| + | {| class="wikitable sortable" style="text-align:center" width="100%" | ||
| + | ! colspan="10" | Shell details | ||
| + | |- | ||
| + | ! rowspan="2" data-sort-type="text" | Ammunition | ||
| + | ! rowspan="2" | Type of<br>warhead | ||
| + | ! rowspan="2" | Velocity<br>(m/s) | ||
| + | ! rowspan="2" | Projectile<br>Mass (kg) | ||
| + | ! rowspan="2" | Fuse delay<br>(m) | ||
| + | ! rowspan="2" | Fuse sensitivity<br>(mm) | ||
| + | ! rowspan="2" | Explosive Mass<br>(TNT equivalent) (g) | ||
| + | ! colspan="3" | Ricochet | ||
| + | |- | ||
| + | ! 0% !! 50% !! 100% | ||
| + | |- | ||
| + | | M152 || HEATFS || 1,173 || 10.5 || 0.05 || 0.1 || 1,270 || 65° || 72° || 77° | ||
| + | |- | ||
| + | | M156 || HESH || 732 || 14.85 || 0.05 || 0.1 || 4,310 || 73° || 77° || 80° | ||
| + | |- | ||
| + | | M111 || APFSDS || 1,455 || 3.79 || N/A || N/A || N/A || 78° || 80° || 81° | ||
| + | |- | ||
| + | |} | ||
| + | {| class="wikitable" style="text-align:center" | ||
| + | ! colspan="7" | Smoke shell characteristics | ||
| + | |- | ||
| + | ! Ammunition | ||
| + | ! Velocity<br>(m/s) | ||
| + | ! Projectile<br>Mass (kg) | ||
| + | ! Screen radius<br>(m) | ||
| + | ! Screen deploy time<br>(s) | ||
| + | ! Screen hold time<br>(s) | ||
| + | ! Explosive Mass<br>(TNT equivalent) (g) | ||
| + | |- | ||
| + | | M416 || 730 || 11.4 || 20 || 5 || 25 || 50 | ||
| + | |- | ||
| + | |} | ||
==== [[Ammo racks]] ==== | ==== [[Ammo racks]] ==== | ||
| − | [[File:Ammoracks_{{PAGENAME}}.png|right|thumb|x250px|[[Ammo racks]] of the {{PAGENAME}}]] | + | <!-- [[File:Ammoracks_{{PAGENAME}}.png|right|thumb|x250px|[[Ammo racks]] of the {{PAGENAME}}]] --> |
| − | <!-- '''Last updated: | + | <!-- '''Last updated:''' --> |
{| class="wikitable" style="text-align:center" | {| class="wikitable" style="text-align:center" | ||
|- | |- | ||
| Line 89: | Line 130: | ||
! 5th<br>rack empty | ! 5th<br>rack empty | ||
! 6th<br>rack empty | ! 6th<br>rack empty | ||
| − | |||
| − | |||
! Visual<br>discrepancy | ! Visual<br>discrepancy | ||
|- | |- | ||
| − | | '''72''' || | + | | '''72''' || __ ''(+__)'' || __ ''(+__)'' || __ ''(+__)'' || __ ''(+__)'' || __ ''(+__)'' || __ ''(+__)'' || __ |
|- | |- | ||
|} | |} | ||
| − | |||
| − | |||
| − | |||
| − | |||
| − | |||
| − | |||
=== Machine guns === | === Machine guns === | ||
{{Specs-Tank-Weapon|2}} | {{Specs-Tank-Weapon|2}} | ||
| − | |||
<!-- ''Offensive and anti-aircraft machine guns not only allow you to fight some aircraft but also are effective against lightly armoured vehicles. Evaluate machine guns and give recommendations on its use.'' --> | <!-- ''Offensive and anti-aircraft machine guns not only allow you to fight some aircraft but also are effective against lightly armoured vehicles. Evaluate machine guns and give recommendations on its use.'' --> | ||
{{main|L3A1 (7.62 mm)}} | {{main|L3A1 (7.62 mm)}} | ||
| Line 116: | Line 148: | ||
|- | |- | ||
| Coaxial || 3,000 (250) || 500 || N/A || N/A | | Coaxial || 3,000 (250) || 500 || N/A || N/A | ||
| − | |||
| − | |||
|- | |- | ||
|} | |} | ||
| Line 123: | Line 153: | ||
== Usage in battles == | == Usage in battles == | ||
<!-- ''Describe the tactics of playing in the vehicle, the features of using vehicles in the team and advice on tactics. Refrain from creating a "guide" - do not impose a single point of view but instead give the reader food for thought. Describe the most dangerous enemies and give recommendations on fighting them. If necessary, note the specifics of the game in different modes (AB, RB, SB).'' --> | <!-- ''Describe the tactics of playing in the vehicle, the features of using vehicles in the team and advice on tactics. Refrain from creating a "guide" - do not impose a single point of view but instead give the reader food for thought. Describe the most dangerous enemies and give recommendations on fighting them. If necessary, note the specifics of the game in different modes (AB, RB, SB).'' --> | ||
| − | + | ''Describe the tactics of playing in the vehicle, the features of using vehicles in the team and advice on tactics. Refrain from creating a "guide" - do not impose a single point of view but instead give the reader food for thought. Describe the most dangerous enemies and give recommendations on fighting them. If necessary, note the specifics of the game in different modes (AB, RB, SB).'' | |
=== Pros and cons === | === Pros and cons === | ||
| − | <!-- ''Summarise and briefly evaluate the vehicle in terms of its characteristics and combat effectiveness. Mark its pros and cons in a bulleted list. Try not to use more than 6 points for each of the characteristics. Avoid using categorical definitions such as "bad", "good" and the like - use substitutions with softer forms such as "inadequate" and "effective".'' --> | + | <!-- ''Summarise and briefly evaluate the vehicle in terms of its characteristics and combat effectiveness. Mark its pros and cons in a bulleted list. Try not to use more than 6 points for each of the characteristics. Avoid using categorical definitions such as "bad", "good" and the like - use substitutions with softer forms such as "inadequate" and "effective".'' -->'''Pros:''' |
| − | + | * Strong APFSDS | |
| + | * Laser range finder for long range operations | ||
| + | * Excellent gun elevation and depression angles (-10°, +20°) | ||
| + | * Enough armour to resist auto cannons and some poorly aimed shots | ||
| − | * | + | * |
| − | |||
| − | |||
| − | |||
| − | |||
| − | |||
'''Cons:''' | '''Cons:''' | ||
| − | * Poor | + | * Very poor turret traverse making reactionary shooting hard without hull aiming |
| − | * APFSDS is a | + | * Poor mobility and top speed compared to other MBTs at the BR |
| − | * | + | * APFSDS is a rank 4 modification |
| − | * | + | * Armour is very unreliable at stopping any APFSDS or HEAT rounds even from small calibre guns |
| − | * | + | * Ammo rack is in the front of the vehicle to the right of the driver and is a major weak spot |
| + | |||
| + | * | ||
== History == | == History == | ||
<!-- ''Describe the history of the creation and combat usage of the vehicle in more detail than in the introduction. If the historical reference turns out to be too long, take it to a separate article, taking a link to the article about the vehicle and adding a block "/History" (example: <nowiki>https://wiki.warthunder.com/(Vehicle-name)/History</nowiki>) and add a link to it here using the <code>main</code> template. Be sure to reference text and sources by using <code><nowiki><ref></ref></nowiki></code>, as well as adding them at the end of the article with <code><nowiki><references /></nowiki></code>. This section may also include the vehicle's dev blog entry (if applicable) and the in-game encyclopedia description (under <code><nowiki>=== In-game description ===</nowiki></code>, also if applicable).'' --> | <!-- ''Describe the history of the creation and combat usage of the vehicle in more detail than in the introduction. If the historical reference turns out to be too long, take it to a separate article, taking a link to the article about the vehicle and adding a block "/History" (example: <nowiki>https://wiki.warthunder.com/(Vehicle-name)/History</nowiki>) and add a link to it here using the <code>main</code> template. Be sure to reference text and sources by using <code><nowiki><ref></ref></nowiki></code>, as well as adding them at the end of the article with <code><nowiki><references /></nowiki></code>. This section may also include the vehicle's dev blog entry (if applicable) and the in-game encyclopedia description (under <code><nowiki>=== In-game description ===</nowiki></code>, also if applicable).'' --> | ||
| − | |||
| − | |||
| − | |||
| − | |||
| − | |||
| − | |||
| − | |||
| − | |||
| − | |||
| − | |||
| − | |||
| − | |||
| − | |||
| − | |||
| − | |||
| − | |||
| − | |||
| − | |||
| − | |||
| − | |||
| − | |||
| − | |||
| − | |||
| − | |||
| − | |||
| − | |||
| − | |||
| − | |||
| − | |||
| − | |||
| − | |||
| − | |||
| − | |||
| − | |||
| − | |||
| − | |||
| − | |||
| − | |||
| − | |||
| − | |||
| − | |||
| − | |||
| − | |||
| − | |||
| − | |||
| − | |||
| − | |||
| − | |||
| − | |||
| − | |||
=== [[wt:en/news/7052-development-olifant-mk1a-the-beast-of-desert-en|Devblog]] === | === [[wt:en/news/7052-development-olifant-mk1a-the-beast-of-desert-en|Devblog]] === | ||
Centurion tanks entered service with the South African armed forces already at the start of the Cold War in the early 1950s when South Africa purchased a few hundred Centurion Mk.3 tanks from the United Kingdom. However, operating the Centurions in the warm South African climate quickly turned out to be problematic as the tanks were prone to overheating. As a result, South Africa sold off many of its Centurions to Switzerland during the 1960s in order to acquire other equipment while many of the remaining tanks were relegated to reserve roles. | Centurion tanks entered service with the South African armed forces already at the start of the Cold War in the early 1950s when South Africa purchased a few hundred Centurion Mk.3 tanks from the United Kingdom. However, operating the Centurions in the warm South African climate quickly turned out to be problematic as the tanks were prone to overheating. As a result, South Africa sold off many of its Centurions to Switzerland during the 1960s in order to acquire other equipment while many of the remaining tanks were relegated to reserve roles. | ||
| − | With conflicts in the region flaring up during the '70s, the South African armed forces were reminded of the importance of their | + | With conflicts in the region flaring up during the '70s, the South African armed forces were reminded of the importance of their armored units and several projects were initiated to modernize the Centurions in service. These projects resulted in the creation of two interim models of domestic Centurions - the Skoikaan and Semel. In parallel however, the South African government formed a company in the private sector to develop a proper modernization package for the Centurion. |
| − | Work on the project began in the mid '70s, with South African engineers taking inspiration from the Israeli Sho't Centurions and applying similar upgrades to what would eventually become known as the Olifant tank. The first prototype of the Olifant rolled out of the factory in 1976 and underwent testing. Shortly afterwards, the Olifant | + | Work on the project began in the mid '70s, with South African engineers taking inspiration from the Israeli Sho't Centurions and applying similar upgrades to what would eventually become known as the Olifant tank. The first prototype of the Olifant rolled out of the factory in 1976 and underwent testing. Shortly afterwards, the Olifant Mk1 entered production service in 1978, with production lasting until 1984. In the early 80s, the Olifant was upgraded to the Mk.1A modification, which featured a domestic version of the L7 cannon as well as other upgrades. |
| − | The Olifant | + | The Olifant Mk1A remained in service with SANDF into the 1990s before being succeeded by the Olifant Mk 2. In total, over 150 Olifant Mk1As were produced, some seeing action during the conflicts with Angola in the early 1980s. |
== Media == | == Media == | ||
| − | <!-- ''Excellent additions to the article would be video guides, screenshots from the game, and photos.'' --> | + | <!-- ''Excellent additions to the article would be video guides, screenshots from the game, and photos.'' --><gallery mode="packed" heights="150"> |
| − | |||
| − | |||
| − | |||
| − | |||
| − | |||
| − | |||
| − | <gallery mode="packed" heights="150"> | ||
File:Olifant Mk1A WTWallpaper 01.jpg| | File:Olifant Mk1A WTWallpaper 01.jpg| | ||
File:Olifant Mk1A WTWallpaper 02.jpg| | File:Olifant Mk1A WTWallpaper 02.jpg| | ||
| Line 227: | Line 200: | ||
* ''reference to the series of the vehicles;'' | * ''reference to the series of the vehicles;'' | ||
* ''links to approximate analogues of other nations and research trees.'' --> | * ''links to approximate analogues of other nations and research trees.'' --> | ||
| + | ''Links to the articles on the War Thunder Wiki that you think will be useful for the reader, for example:'' | ||
| − | + | * ''reference to the series of the vehicles;'' | |
| − | + | * ''links to approximate analogues of other nations and research trees.'' | |
| − | * | ||
| − | |||
| − | ; | ||
| − | |||
| − | * | ||
| − | |||
| − | |||
| − | |||
| − | |||
| − | |||
| − | |||
| − | |||
| − | |||
| − | |||
| − | |||
| − | |||
| − | |||
== External links == | == External links == | ||
| Line 252: | Line 209: | ||
* ''topic on the official game forum;'' | * ''topic on the official game forum;'' | ||
* ''other literature.'' --> | * ''other literature.'' --> | ||
| + | ''Paste links to sources and external resources, such as:'' | ||
| − | * | + | * ''topic on the official game forum;'' |
| − | + | * ''other literature.'' | |
| − | |||
| − | |||
{{Britain medium tanks}} | {{Britain medium tanks}} | ||
Revision as of 13:08, 21 March 2021
Contents
Description
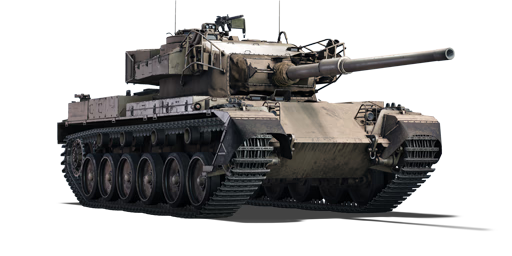
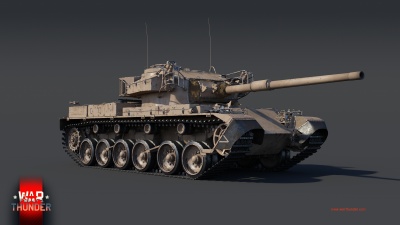
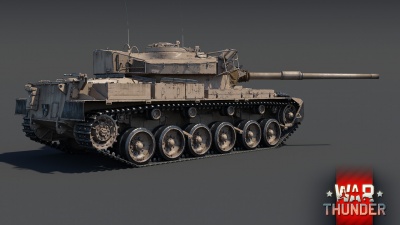
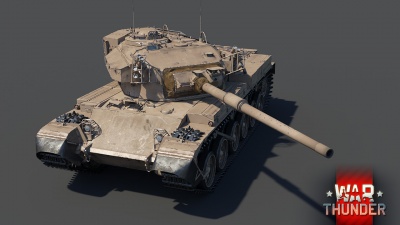
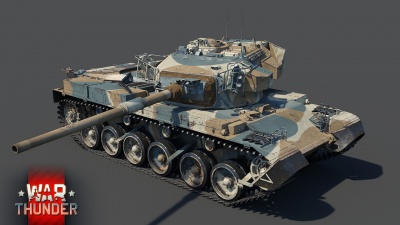
The Olifant Mk.1A is a rank British medium tank with a battle rating of (AB), (RB), and (SB). It was introduced in Update "Ixwa Strike".
General info
Survivability and armour
Describe armour protection. Note the most well protected and key weak areas. Appreciate the layout of modules as well as the number and location of crew members. Is the level of armour protection sufficient, is the placement of modules helpful for survival in combat? If necessary use a visual template to indicate the most secure and weak zones of the armour.
Armour type:
| Armour | Front (Slope angle) | Sides | Rear | Roof |
|---|---|---|---|---|
| Hull | ___ mm | ___ mm Top ___ mm Bottom |
___ mm | ___ - ___ mm |
| Turret | ___ - ___ mm Turret front ___ mm Gun mantlet |
___ - ___ mm | ___ - ___ mm | ___ - ___ mm |
| Cupola | ___ mm | ___ mm | ___ mm | ___ mm |
Notes:
Mobility
| Game Mode | Max Speed (km/h) | Weight (tons) | Engine power (horsepower) | Power-to-weight ratio (hp/ton) | |||
|---|---|---|---|---|---|---|---|
| Forward | Reverse | Stock | Upgraded | Stock | Upgraded | ||
| Arcade | Expression error: Unexpected * operator. | 1,162 | Expression error: Unexpected round operator. | __.__ | |||
| Realistic | 663 | Expression error: Unexpected round operator. | __.__ | ||||
Modifications and economy
Armaments
Main armament
| 105 mm GT-3 | Turret rotation speed (°/s) | Reloading rate (seconds) | |||||||||||
|---|---|---|---|---|---|---|---|---|---|---|---|---|---|
| Mode | Capacity | Vertical | Horizontal | Stabilizer | Stock | Upgraded | Full | Expert | Aced | Stock | Full | Expert | Aced |
| Arcade | 72 | -10°/+20° | ±180° | Two-plane | 11.4 | 15.8 | 19.2 | 21.2 | 22.6 | 8.71 | 7.70 | 7.10 | 6.70 |
| Realistic | 7.1 | 8.4 | 10.2 | 11.3 | 12.0 | ||||||||
Ammunition
| Penetration statistics | |||||||
|---|---|---|---|---|---|---|---|
| Ammunition | Type of warhead |
Penetration @ 0° Angle of Attack (mm) | |||||
| 10 m | 100 m | 500 m | 1,000 m | 1,500 m | 2,000 m | ||
| M152 | HEATFS | 400 | 400 | 400 | 400 | 400 | 400 |
| M156 | HESH | 127 | 127 | 127 | 127 | 127 | 127 |
| M111 | APFSDS | 337 | 335 | 330 | 322 | 314 | 306 |
| Shell details | |||||||||
|---|---|---|---|---|---|---|---|---|---|
| Ammunition | Type of warhead |
Velocity (m/s) |
Projectile Mass (kg) |
Fuse delay (m) |
Fuse sensitivity (mm) |
Explosive Mass (TNT equivalent) (g) |
Ricochet | ||
| 0% | 50% | 100% | |||||||
| M152 | HEATFS | 1,173 | 10.5 | 0.05 | 0.1 | 1,270 | 65° | 72° | 77° |
| M156 | HESH | 732 | 14.85 | 0.05 | 0.1 | 4,310 | 73° | 77° | 80° |
| M111 | APFSDS | 1,455 | 3.79 | N/A | N/A | N/A | 78° | 80° | 81° |
| Smoke shell characteristics | ||||||
|---|---|---|---|---|---|---|
| Ammunition | Velocity (m/s) |
Projectile Mass (kg) |
Screen radius (m) |
Screen deploy time (s) |
Screen hold time (s) |
Explosive Mass (TNT equivalent) (g) |
| M416 | 730 | 11.4 | 20 | 5 | 25 | 50 |
Ammo racks
| Full ammo |
1st rack empty |
2nd rack empty |
3rd rack empty |
4th rack empty |
5th rack empty |
6th rack empty |
Visual discrepancy |
|---|---|---|---|---|---|---|---|
| 72 | __ (+__) | __ (+__) | __ (+__) | __ (+__) | __ (+__) | __ (+__) | __ |
Machine guns
| 7.62 mm L3A1 | ||||
|---|---|---|---|---|
| Mount | Capacity (Belt) | Fire rate | Vertical | Horizontal |
| Coaxial | 3,000 (250) | 500 | N/A | N/A |
Usage in battles
Describe the tactics of playing in the vehicle, the features of using vehicles in the team and advice on tactics. Refrain from creating a "guide" - do not impose a single point of view but instead give the reader food for thought. Describe the most dangerous enemies and give recommendations on fighting them. If necessary, note the specifics of the game in different modes (AB, RB, SB).
Pros and cons
Pros:
- Strong APFSDS
- Laser range finder for long range operations
- Excellent gun elevation and depression angles (-10°, +20°)
- Enough armour to resist auto cannons and some poorly aimed shots
Cons:
- Very poor turret traverse making reactionary shooting hard without hull aiming
- Poor mobility and top speed compared to other MBTs at the BR
- APFSDS is a rank 4 modification
- Armour is very unreliable at stopping any APFSDS or HEAT rounds even from small calibre guns
- Ammo rack is in the front of the vehicle to the right of the driver and is a major weak spot
History
Devblog
Centurion tanks entered service with the South African armed forces already at the start of the Cold War in the early 1950s when South Africa purchased a few hundred Centurion Mk.3 tanks from the United Kingdom. However, operating the Centurions in the warm South African climate quickly turned out to be problematic as the tanks were prone to overheating. As a result, South Africa sold off many of its Centurions to Switzerland during the 1960s in order to acquire other equipment while many of the remaining tanks were relegated to reserve roles.
With conflicts in the region flaring up during the '70s, the South African armed forces were reminded of the importance of their armored units and several projects were initiated to modernize the Centurions in service. These projects resulted in the creation of two interim models of domestic Centurions - the Skoikaan and Semel. In parallel however, the South African government formed a company in the private sector to develop a proper modernization package for the Centurion.
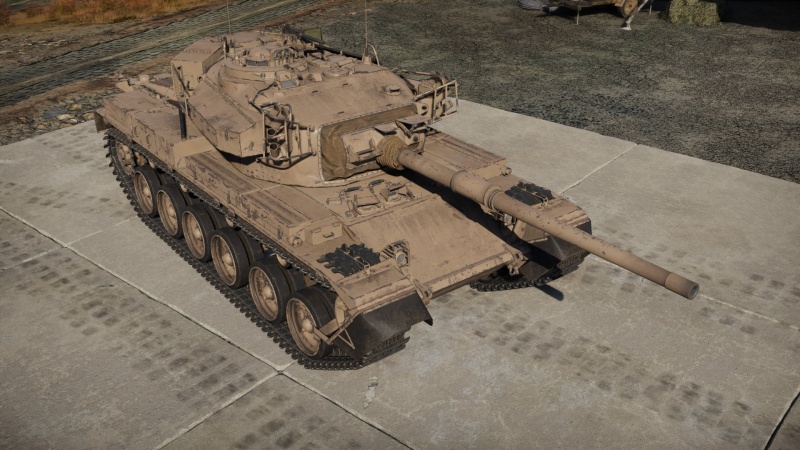
Work on the project began in the mid '70s, with South African engineers taking inspiration from the Israeli Sho't Centurions and applying similar upgrades to what would eventually become known as the Olifant tank. The first prototype of the Olifant rolled out of the factory in 1976 and underwent testing. Shortly afterwards, the Olifant Mk1 entered production service in 1978, with production lasting until 1984. In the early 80s, the Olifant was upgraded to the Mk.1A modification, which featured a domestic version of the L7 cannon as well as other upgrades.
The Olifant Mk1A remained in service with SANDF into the 1990s before being succeeded by the Olifant Mk 2. In total, over 150 Olifant Mk1As were produced, some seeing action during the conflicts with Angola in the early 1980s.
Media
See also
Links to the articles on the War Thunder Wiki that you think will be useful for the reader, for example:
- reference to the series of the vehicles;
- links to approximate analogues of other nations and research trees.
External links
Paste links to sources and external resources, such as:
- topic on the official game forum;
- other literature.
| Britain medium tanks | |
|---|---|
| Valentine | Valentine I · Valentine IX · Valentine XI |
| Cromwell | Cromwell I · Cromwell V · Cromwell V (RP-3) |
| Cromwell derivatives | Challenger · Avenger · Comet I · Comet I "Iron Duke IV" · Charioteer Mk VII |
| Centurion | Centurion Mk 1 · Centurion Mk.2 · Centurion Mk 3 · Centurion Mk.5 AVRE · Centurion Mk 10 · Centurion Action X · FV4202 |
| Vickers MBT | Vickers Mk.1 · Vickers Mk.3 · Vickers Mk.7 |
| Chieftain | Chieftain Mk 3 · Chieftain Mk 5 · Chieftain Mk 10 |
| Challenger 1 | Challenger Mk.2 · Challenger Mk.3 · Challenger DS |
| Challenger 2 | Challenger 2 · Challenger 2 (2F) · Challenger 2 TES · Challenger 2 OES · Challenger 2E · Challenger 2 Black Night |
| Challenger 3 | Challenger 3 TD |
| Australia | A.C.I · A.C.IV · Centurion Mk.5/1 |
| South Africa | Olifant Mk.1A · Olifant Mk.2 · TTD |
| India | Vijayanta · Bhishma TWMP |
| Israel | ▄Sho't Kal Dalet |
| Jordan | Khalid |
| Sweden | ▄Strv 81 (RB 52) |
| USA | Grant I · Sherman II · Sherman Firefly · Sherman IC "Trzyniec" |


