Difference between revisions of "Port Novorossiysk"
(→Map configuration: Removed "Domination" link) |
|||
| (One intermediate revision by the same user not shown) | |||
| Line 71: | Line 71: | ||
==Strategy== | ==Strategy== | ||
| + | ''Describe what focus a team should have when spawning into the map'' | ||
== Media == | == Media == | ||
| − | <!--'' | + | <!-- ''Excellent additions to the article would be video guides, screenshots from the game, and photos.'' --> |
| − | {{ | + | ;Videos |
| + | {{Youtube-gallery|aBGRGu-o9us|'''The Shooting Range #3''' - ''Map Guide'' section at 08:03 discusses the map Port Novorossiysk.}} | ||
| − | == | + | == See also == |
| − | + | ''Links to the articles on the War Thunder Wiki that you think will be useful for the reader, for example:'' | |
| + | * ''reference to related locations'' | ||
| − | == | + | == External links == |
| − | <!--'' | + | <!-- ''Paste links to sources and external resources, such as:'' |
| − | * '' | + | * ''topic on the official game forum;'' |
| − | * '' | + | * ''other literature.'' --> |
| − | |||
| − | |||
| − | + | * [[wt:en/news/3740-development-new-location-novorossiysk-en|[Devblog] New Location: Port Novorossiysk]] | |
| − | |||
| − | |||
| − | |||
[[Category:Maps_and_missions]] | [[Category:Maps_and_missions]] | ||
[[Category:Ground forces maps]] | [[Category:Ground forces maps]] | ||
Latest revision as of 12:47, 14 November 2020
| Game Modes | ||||
|---|---|---|---|---|
Contents
Overview
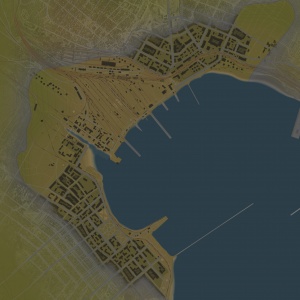
Port Novorossiysk is a ground forces map available in all modes. The map is an accurate recreation of the Port of Novorossiysk, a major Russian port on the Black Sea, and scene of heavy fighting during the Battle of the Caucasus. It was added in Update 1.59 "Flaming Arrows".
The map is rather large and features a mixture of urban fighting, in the streets between destroyed industrial buildings in the North and South of the map, with a more open field like area in the west, and a rail yard in the middle; allowing for longer range combat. Additionally tanks can engage each other at reasonably long ranges in the east of the map, by shooting across the water.
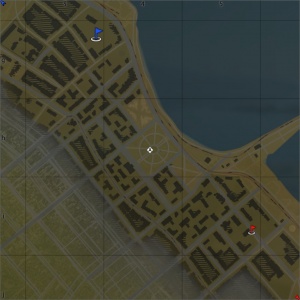
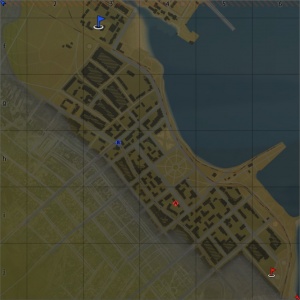
The full tank battles map (seen to the right) is 4km x 4km however, the full area is not usually playable, with the map being split into smaller areas. Dependent on the map configuration and the game mode (AB, RB or SB) the tank battle area changes location and size. The air battle area is 65km x 65km in all modes. The tank battle areas are:
Domination: 1.2km x 1.2km (in AB & RB) or 2.8km x 2.8km (in SB)
Battle: 1.7km x 1.7km (in all modes)
Conquest #1: 1.2km x 1.2km (in AB & RB) or 1.8km x 1.8km (in SB)
Conquest #2: 1.3km x 1.3km (in AB & RB) or 2km x 2km (in SB)
Conquest #3: 1.2km x 1.2km (in AB & RB) or 1.6km x 1.6km (in SB)
Game Description
Historical Background
The map is an accurate recreation of the Port of Novorossiysk, as it was in the 1940s. The Port of Novorossiysk was (and still is) a major Soviet/Russian port on the Black Sea.
As part of the Battle of the Caucasus, German and Romanian forces attacked the Port of Novorossiysk and by 11 September 1942 had complete control over the port and city. This, following the capture of Sevastopol earlier that year, left the Soviet Black Sea Fleet without its two main operating bases; forcing them to use the small and ill equipped bases at Poti and Gelendzhik. It was deemed important that Novorossiysk be recaptured so that the Black Sea fleet would have a suitable operating base.
Towards the end of 1942, the German offensive through the Caucasus slowed as it entered the mountainous terrain in the south. In early 1943, the Germans began to withdraw back and set up the "Kuban bridgehead", with a defensive line which ran north from Novorossiysk, across the Taman Peninsula.
On 01 February 1943, Soviet forces launched a series of attacks on Novorossiysk from the north east. However they were unable to breach the German defensive lines and gain a foothold in the city. Following the failed land attack an amphibious landing was planned. There would be two landing points, the main amphibious forces was to take land at Ozereika Bay, to the southwest of Novorossiysk. At the same time a smaller forces was to land at Cape Myskhako, just to the south of the city, as a diversion for the main force. The attacks were launched on the night of February 3/4, 1943.
The Soviets lacked proper landing crafts and instead had to use old barges to land their tanks and equipment. The Ozereika operation ended in disaster. The barges the Soviets were using proved too slow to make it to the beach on time and so the infantry was forced to land without the tanks. One of the ships carrying infantry was sunk before reaching the shore, with the loss of all 100 men on board; and when they arrived one of the barges was set on fire by enemy gun fire and sank with the loss of all 10 tanks on board. Another of the barges hit a defensive obstacle and sank, with the loss of 3 of its 10 tanks. The final barge was again set on fire and began drift of course, with the loss of more tanks. Less than half of the 30 tanks planned for the operation made it to shore. By 6:20 AM, the attack was called off and the troops on the beach were left to push inland, with no communication able to be established with their commanders. Rescue attempts were made but either came under fire or were unable to locate the stranded men. In total, 1,300 Soviets troops were lost or captured at the beachhead.
The Myskhako operation, however, was unexpectedly successful. The force of 250 men, originally intended purely as a diversion with no real hope of survival, managed to establish a beachhead and within hours received reinforcements, originally intended for Ozereika, bringing their force up to 800 men. They were able to expand the beachhead to 4km wide and 2km deep within the first day. The Soviet command now realised this was their best hope of salvaging the operation and poured reinforcements into the beachhead over the next three days. By February 10th, the Soviet forces had captured the whole of Stanichka village, south of Novorossiysk, and had captured 14 city blocks in the south Novorossiysk. In doing so they expanded the beachhead 34km wide and 7km deep. By February 15th over 17,000 men, 95 artillery and mortar pieces, and 850 machine guns, had landed at Myskhako.
Heavy fighting continued at the Beachhead and the situation soon descended into a stalemate. Both sides dug in and established trench lines. In some areas, the opposing trench lines were close enough to be within grenade throwing distance.
Soviet forces held the beachhead for 225 days, denying the Germans use of the port. On 10 September 1943, the Soviet forces launched their final attack on Novorossiysk. Soviet forces moved in from the northeast, while at the same time an assault was launched from the Myskhako beachhead, and another seaborne landing was launched from Gelendzhik. Finally on 16 September 1943, after nearly a week of bitter fighting the whole of Novorossiysk was liberated. The liberation cost the Soviets dearly, with 21,000 men killed on the Myskhako beachhead alone.
Notable Landmarks
Map configuration
Domination
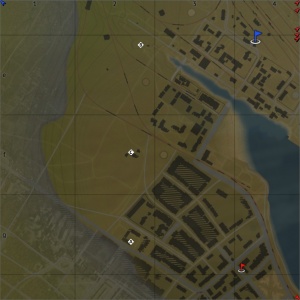
There are three Capture Points. (For AB and RB) the battle area takes place in the middle of the map. Point A is among some destroyed buildings on the edge of the urban area to the south the battle area, B is in a ditch in the north of the battle area, and C is among some destroyed buildings in the middle of the open field.
Conquest
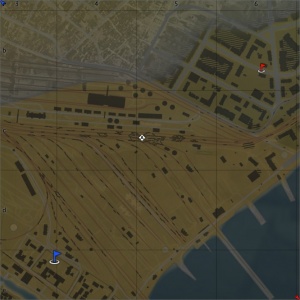
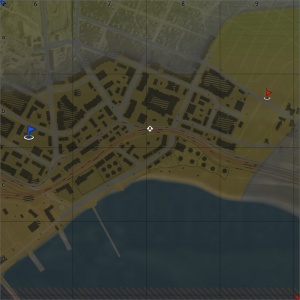
There are three configurations of the conquest mode, each with one capture point. (In AB & RB) the Conquest #1 battle area is in the middle of the map, around the rail yard, with a capture point in the middle of the rail yard, around some destroyed trains. In Conquest #2 the battle area is in the industrial area in the north of the map with the capture point in the middle of the playable area, on the railway track. Finally in the Conquest #3 configuration, the battle area is in the southern industrial area, with the capture point in an open area, among the buildings.
Battle
There are two capture points, each owned by one of the teams. (In AB & RB) the battle area is in the south of the map. One point is in the northwest of the industrial area, and the other is towards the southwest.
Strategy
Describe what focus a team should have when spawning into the map
Media
- Videos
See also
Links to the articles on the War Thunder Wiki that you think will be useful for the reader, for example:
- reference to related locations


