Difference between revisions of "CV 90120"
U103691029 (talk | contribs) m (→Main armament: Autoloader) (Tag: Visual edit) |
(Minor cosmetic changes, added Optics section) |
||
| (34 intermediate revisions by 14 users not shown) | |||
| Line 1: | Line 1: | ||
| − | + | {{Specs-Card|code=sw_cv_90120}} | |
| − | |||
| − | |||
| − | |||
| − | |||
| − | {{Specs-Card | ||
| − | |code=sw_cv_90120 | ||
| − | |||
| − | }} | ||
== Description == | == Description == | ||
<!-- ''In the description, the first part should be about the history of the creation and combat usage of the vehicle, as well as its key features. In the second part, tell the reader about the ground vehicle in the game. Insert a screenshot of the vehicle, so that if the novice player does not remember the vehicle by name, he will immediately understand what kind of vehicle the article is talking about.'' --> | <!-- ''In the description, the first part should be about the history of the creation and combat usage of the vehicle, as well as its key features. In the second part, tell the reader about the ground vehicle in the game. Insert a screenshot of the vehicle, so that if the novice player does not remember the vehicle by name, he will immediately understand what kind of vehicle the article is talking about.'' --> | ||
| − | + | [[File:GarageImage_{{PAGENAME}}.jpg|420px|thumb|left]] | |
| − | + | {{Break}} | |
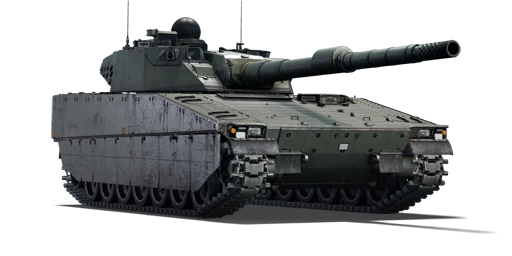
| − | + | The '''{{Specs|name}}''' is a rank {{Specs|rank}} Swedish light tank {{Battle-rating}}. It was introduced in [[Update 1.97 "Viking Fury"]]. | |
== General info == | == General info == | ||
=== Survivability and armour === | === Survivability and armour === | ||
| − | |||
<!-- ''Describe armour protection. Note the most well protected and key weak areas. Appreciate the layout of modules as well as the number and location of crew members. Is the level of armour protection sufficient, is the placement of modules helpful for survival in combat? If necessary use a visual template to indicate the most secure and weak zones of the armour.'' --> | <!-- ''Describe armour protection. Note the most well protected and key weak areas. Appreciate the layout of modules as well as the number and location of crew members. Is the level of armour protection sufficient, is the placement of modules helpful for survival in combat? If necessary use a visual template to indicate the most secure and weak zones of the armour.'' --> | ||
| − | + | The CV 90120 combines the Combat Vehicle 90's chassis with a new turret with a 120 mm CTG cannon. As a result, armour is barely present and can only withstand heavy machine gun from the front. Even autocannons can penetrate its turret and 12.7 mm machine guns can cut clean through its side armour. There is also a chance you will hull break even if no critical modules are damaged, so be aware, your main goal should be to not receive any enemy fire. | |
| − | The CV 90120 combines the Combat Vehicle 90's chassis with a new turret with a 120 mm CTG cannon. As a result, armour is barely present and can only withstand heavy machine gun from the front. Even autocannons can penetrate its turret and 12.7 mm machine guns can cut clean through its side armour. | ||
| − | |||
| − | |||
| − | |||
| − | |||
| − | |||
| − | |||
| − | |||
| − | |||
| − | |||
| − | |||
| − | |||
| − | |||
| − | |||
| − | |||
| − | |||
| − | |||
| − | |||
| − | |||
| − | |||
| − | |||
| − | |||
| − | |||
| − | |||
| − | |||
| − | |||
=== Mobility === | === Mobility === | ||
| − | |||
<!-- ''Write about the mobility of the ground vehicle. Estimate the specific power and manoeuvrability, as well as the maximum speed forwards and backwards.'' --> | <!-- ''Write about the mobility of the ground vehicle. Estimate the specific power and manoeuvrability, as well as the maximum speed forwards and backwards.'' --> | ||
| − | {{tankMobility|abMinHp=1, | + | {{tankMobility|abMinHp=1,038|rbMinHp=593}} |
| − | |||
| − | |||
| − | |||
| − | |||
| − | |||
== Armaments == | == Armaments == | ||
| − | |||
=== Main armament === | === Main armament === | ||
| − | |||
<!-- ''Give the reader information about the characteristics of the main gun. Assess its effectiveness in a battle based on the reloading speed, ballistics and the power of shells. Do not forget about the flexibility of the fire, that is how quickly the cannon can be aimed at the target, open fire on it and aim at another enemy. Add a link to the main article on the gun: <code><nowiki>{{main|Name of the weapon}}</nowiki></code>. Describe in general terms the ammunition available for the main gun. Give advice on how to use them and how to fill the ammunition storage.'' --> | <!-- ''Give the reader information about the characteristics of the main gun. Assess its effectiveness in a battle based on the reloading speed, ballistics and the power of shells. Do not forget about the flexibility of the fire, that is how quickly the cannon can be aimed at the target, open fire on it and aim at another enemy. Add a link to the main article on the gun: <code><nowiki>{{main|Name of the weapon}}</nowiki></code>. Describe in general terms the ammunition available for the main gun. Give advice on how to use them and how to fill the ammunition storage.'' --> | ||
{{main|CTG (120 mm)}} | {{main|CTG (120 mm)}} | ||
| Line 67: | Line 24: | ||
{| class="wikitable" style="text-align:center" width="100%" | {| class="wikitable" style="text-align:center" width="100%" | ||
|- | |- | ||
| − | ! colspan="5" | [[CTG (120 mm)|120 mm CTG]] || colspan="5" | Turret rotation speed (°/s) || Reloading rate (seconds) | + | ! colspan="5" | [[CTG (120 mm)|120 mm CTG]] || colspan="5" | Turret rotation speed (°/s) || colspan="4" | Reloading rate (seconds) |
|- | |- | ||
! Mode !! Capacity !! Vertical !! Horizontal !! Stabilizer | ! Mode !! Capacity !! Vertical !! Horizontal !! Stabilizer | ||
! Stock !! Upgraded !! Full !! Expert !! Aced | ! Stock !! Upgraded !! Full !! Expert !! Aced | ||
| − | ! | + | ! Stock !! Full !! Expert !! Aced |
|- | |- | ||
! ''Arcade'' | ! ''Arcade'' | ||
| − | | rowspan="2" | | + | | rowspan="2" | 40 || rowspan="2" | -8°/+22° || rowspan="2" | ±180° || rowspan="2" | Two-plane || 28.6 || __.__ || __.__ || __.__ || __.__ || rowspan="2" | 6.5 || rowspan="2" | __.__ || rowspan="2" | __.__ || rowspan="2" | 5.0 |
|- | |- | ||
! ''Realistic'' | ! ''Realistic'' | ||
| − | | 17.9 || 21.0 || | + | | 17.9 || 21.0 || __.__ || 28.2 || 30.0 |
|- | |- | ||
|} | |} | ||
==== Ammunition ==== | ==== Ammunition ==== | ||
| − | {{: | + | {| class="wikitable sortable" style="text-align:center" width="100%" |
| + | ! colspan="8" | Penetration statistics | ||
| + | |- | ||
| + | ! rowspan="2" data-sort-type="text" | Ammunition | ||
| + | ! rowspan="2" | Type of<br>warhead | ||
| + | ! colspan="6" | '''Penetration @ 0° Angle of Attack (mm)''' | ||
| + | |- | ||
| + | ! 10 m !! 100 m !! 500 m !! 1,000 m !! 1,500 m !! 2,000 m | ||
| + | |- | ||
| + | | DM23 || APFSDS || 410 || 408 || 401 || 393 || 384 || 376 | ||
| + | |- | ||
| + | | DM12A1 || HEATFS || 480 || 480 || 480 || 480 || 480 || 480 | ||
| + | |- | ||
| + | | slsgr m/95 || HE || 36 || 36 || 36 || 36 || 36 || 36 | ||
| + | |- | ||
| + | | slpprj m/95 || APFSDS || 625 || 622 || 613 || 601 || 588 || 575 | ||
| + | |- | ||
| + | |} | ||
| + | {| class="wikitable sortable" style="text-align:center" width="100%" | ||
| + | ! colspan="10" | Shell details | ||
| + | |- | ||
| + | ! rowspan="2" data-sort-type="text" | Ammunition | ||
| + | ! rowspan="2" | Type of<br>warhead | ||
| + | ! rowspan="2" | Velocity<br>(m/s) | ||
| + | ! rowspan="2" | Projectile<br>Mass (kg) | ||
| + | ! rowspan="2" | Fuse delay<br>(m) | ||
| + | ! rowspan="2" | Fuse sensitivity<br>(mm) | ||
| + | ! rowspan="2" | Explosive Mass<br>(TNT equivalent) (g) | ||
| + | ! colspan="3" | Ricochet | ||
| + | |- | ||
| + | ! 0% !! 50% !! 100% | ||
| + | |- | ||
| + | | DM23 || APFSDS || 1,640 || 4.30 || N/A || N/A || N/A || 78° || 80° || 81° | ||
| + | |- | ||
| + | | DM12A1 || HEATFS || 1,140 || 13.50 || N/A || 0.1 || 2,150 || 65° || 72° || 77° | ||
| + | |- | ||
| + | | slsgr m/95 || HE || 736 || 17.50 || 0.1 || 0.1 || 3,540 || 79° || 80° || 81° | ||
| + | |- | ||
| + | | slpprj m/95 || APFSDS || 1,705 || 4.30 || N/A || N/A || N/A || 78° || 80° || 81° | ||
| + | |- | ||
| + | |} | ||
==== [[Ammo racks]] ==== | ==== [[Ammo racks]] ==== | ||
| − | [[File:Ammoracks_{{PAGENAME}}.png|right|thumb|x250px|[[Ammo racks]] of the {{PAGENAME}}]] | + | <!-- [[File:Ammoracks_{{PAGENAME}}.png|right|thumb|x250px|[[Ammo racks]] of the {{PAGENAME}}]] --> |
| − | |||
{| class="wikitable" style="text-align:center" | {| class="wikitable" style="text-align:center" | ||
|- | |- | ||
| Line 94: | Line 90: | ||
! 3rd<br>rack empty | ! 3rd<br>rack empty | ||
! 4th<br>rack empty | ! 4th<br>rack empty | ||
| + | ! 5th<br>rack empty | ||
| + | ! 6th<br>rack empty | ||
! Visual<br>discrepancy | ! Visual<br>discrepancy | ||
|- | |- | ||
| − | | ''' | + | | '''40''' || __ ''(+__)'' || __ ''(+__)'' || __ ''(+__)'' || __ ''(+__)'' || __ ''(+__)'' || __ ''(+__)'' || __ |
|- | |- | ||
|} | |} | ||
| − | |||
| − | + | ==== Optics and night vision ==== | |
| + | |||
| + | {| class="wikitable" style="text-align:center" | ||
| + | ! colspan="7" | {{PAGENAME}} [[Optics]] | ||
| + | |- | ||
| + | ! rowspan="3" |Type of optic | ||
| + | ! rowspan="3" |Magnification | ||
| + | ! colspan="5" |[[Night Vision Devices]] | ||
| + | |- | ||
| + | ! colspan="3" |Image Intensifier | ||
| + | ! rowspan="2" |{{Annotation|Thermal Imager<br>Resolution|The higher the resolution the clearer and more detailed the image is}} | ||
| + | ! rowspan="2" |Notes | ||
| + | |- | ||
| + | ! {{Annotation|Resolution|The higher the resolution the clearer and more detailed the image is}} | ||
| + | ! {{Annotation|Light Mult|By how much the image intensifier amplifies the existing light, primarily useful for comparing image intensifiers}} | ||
| + | ! {{Annotation|Noise Level|How much noise is present in the image (how grainy the image is)}} | ||
| + | |- | ||
| + | ! Gunner's Sight | ||
| + | | X3.0 - X10.5 || - || - || - || 1200 x 800 || Thermal imager unlocked by "NVD" modification (tier 3) | ||
| + | |- | ||
| + | ! Commander's View | ||
| + | | X6 || - || - || - || 1200 x 800 || Thermal imager unlocked by "NVD" modification (tier 3) | ||
| + | |- | ||
| + | ! Driver's View | ||
| + | | X1 || 1200 x 800 || 7.0 || High || Not Fitted || Image intensifier unlocked by "NVD" modification (tier 3) | ||
| + | |- | ||
| + | |} | ||
=== Machine guns === | === Machine guns === | ||
| − | |||
<!-- ''Offensive and anti-aircraft machine guns not only allow you to fight some aircraft but also are effective against lightly armoured vehicles. Evaluate machine guns and give recommendations on its use.'' --> | <!-- ''Offensive and anti-aircraft machine guns not only allow you to fight some aircraft but also are effective against lightly armoured vehicles. Evaluate machine guns and give recommendations on its use.'' --> | ||
{{main|ksp 88 (12.7 mm)}} | {{main|ksp 88 (12.7 mm)}} | ||
| Line 120: | Line 142: | ||
== Usage in battles == | == Usage in battles == | ||
<!-- ''Describe the tactics of playing in the vehicle, the features of using vehicles in the team and advice on tactics. Refrain from creating a "guide" - do not impose a single point of view but instead give the reader food for thought. Describe the most dangerous enemies and give recommendations on fighting them. If necessary, note the specifics of the game in different modes (AB, RB, SB).'' --> | <!-- ''Describe the tactics of playing in the vehicle, the features of using vehicles in the team and advice on tactics. Refrain from creating a "guide" - do not impose a single point of view but instead give the reader food for thought. Describe the most dangerous enemies and give recommendations on fighting them. If necessary, note the specifics of the game in different modes (AB, RB, SB).'' --> | ||
| + | As discussed in the armour section, you have minimal armour meant to withstand small arms fire and indirect shrapnel. Your playstyle should involve sitting back and maintaining overwatch of a specific area of the battlefield. Stay far away from the heat of close quarters combat as enemy tanks will have a harder time finding and killing you. With the slpprj m/95 round, you can penetrate any vehicle in the game from the front at any range (excluding areas such as the Leopard 2A5's turret cheeks). The stock DM33 round is, although powerful, somewhat lacklustre compared to m/95, but holds its own against tanks at its BR. You will just have to play more passively and know how to hit weak spots at longer ranges. Use your mobility to flank on large maps such as Maginot Line and (if you have them researched) use your powerful thermal optics to acquire and destroy a target. If the enemy is looking at you and you are too close, reposition and try to make them lose focus on you. By playing more passively and smarter than you would a normal MBT, you can make the most of this vehicle. | ||
| − | + | With an aced reload of 5 seconds, it shares the fastest top tier reload with the [[Type 90]] and the aced [[IPM1|105 mm Abrams]], beating the [[Leclerc]] and any other tank's aced crew. This means that if you get the first shot off, and either their return shot misses or you destroy their cannon, then you can do wonders with the CV90120. It packs an INSANE amount of firepower for a light tank, dishing out 625 mm of pen every five seconds, and can by itself cripple distracted players. | |
| − | + | === Modules === | |
| − | + | {| class="wikitable" | |
| − | + | ! Tier | |
| + | ! colspan="2" | Mobility | ||
| + | ! Protection | ||
| + | ! colspan="3" | Firepower | ||
| + | |- | ||
| + | | I | ||
| + | | Tracks | ||
| + | | | ||
| + | | Parts | ||
| + | | Horizontal Drive | ||
| + | | Laser rangefinder | ||
| + | | DM12A1 | ||
| + | |- | ||
| + | | II | ||
| + | | Suspension | ||
| + | | Brake System | ||
| + | | FPE | ||
| + | | Adjustment of Fire | ||
| + | | Airstrike | ||
| + | | slsgr m/95 | ||
| + | |- | ||
| + | | III | ||
| + | | Filters | ||
| + | | | ||
| + | | Crew Replenishment | ||
| + | | Elevation Mechanism | ||
| + | | Improved optics | ||
| + | | NVD | ||
| + | |- | ||
| + | | IV | ||
| + | | Transmission | ||
| + | | Engine | ||
| + | | Smoke grenade | ||
| + | | Artillery Support | ||
| + | | slpprj m/95 | ||
| + | | | ||
| + | |- | ||
| + | |} | ||
=== Pros and cons === | === Pros and cons === | ||
| Line 132: | Line 192: | ||
'''Pros:''' | '''Pros:''' | ||
| − | * Excellent gun and reload, with access to the slpprj m/95 round, the | + | * Excellent gun and reload, with access to the slpprj m/95 round, which shares identical stats to the Italian CL3143 |
* Adequate mobility enabling you to get to an early game position and quickly change positions if spotted or injured | * Adequate mobility enabling you to get to an early game position and quickly change positions if spotted or injured | ||
* The weak armour may reduce the amount of spalling caused by being hit by enemy shells | * The weak armour may reduce the amount of spalling caused by being hit by enemy shells | ||
| − | * | + | * Access to scouting and "Airstrike" ability (reduced spawn cost for friendlies destroying enemy tanks you scouted) |
| − | |||
| − | |||
| − | |||
| − | |||
| − | |||
'''Cons:''' | '''Cons:''' | ||
| − | * | + | * Non-existent armour, can be penetrated by heavy machine guns on the side and autocannons in the front |
| − | |||
* No top machine gun for anti-helicopter and aircraft defence | * No top machine gun for anti-helicopter and aircraft defence | ||
| + | * Susceptible to hull break, ANY chemical charge such as HEAT or ATGM will almost certainly destroy the hull in a single hit | ||
* The slpprj m/95 round is a tier IV modification and will take some time to get access to it | * The slpprj m/95 round is a tier IV modification and will take some time to get access to it | ||
| − | * Difficult to hide due to the doorknob | + | * Difficult to hide due to tall profile, with the "doorknob" optic on the roof of the turret |
| − | |||
| − | |||
| − | |||
== History == | == History == | ||
<!-- ''Describe the history of the creation and combat usage of the vehicle in more detail than in the introduction. If the historical reference turns out to be too long, take it to a separate article, taking a link to the article about the vehicle and adding a block "/History" (example: <nowiki>https://wiki.warthunder.com/(Vehicle-name)/History</nowiki>) and add a link to it here using the <code>main</code> template. Be sure to reference text and sources by using <code><nowiki><ref></ref></nowiki></code>, as well as adding them at the end of the article with <code><nowiki><references /></nowiki></code>. This section may also include the vehicle's dev blog entry (if applicable) and the in-game encyclopedia description (under <code><nowiki>=== In-game description ===</nowiki></code>, also if applicable).'' --> | <!-- ''Describe the history of the creation and combat usage of the vehicle in more detail than in the introduction. If the historical reference turns out to be too long, take it to a separate article, taking a link to the article about the vehicle and adding a block "/History" (example: <nowiki>https://wiki.warthunder.com/(Vehicle-name)/History</nowiki>) and add a link to it here using the <code>main</code> template. Be sure to reference text and sources by using <code><nowiki><ref></ref></nowiki></code>, as well as adding them at the end of the article with <code><nowiki><references /></nowiki></code>. This section may also include the vehicle's dev blog entry (if applicable) and the in-game encyclopedia description (under <code><nowiki>=== In-game description ===</nowiki></code>, also if applicable).'' --> | ||
| − | + | The CV90120 is a 2010's era vehicle developed as a private venture by BAe Hagglunds as an export vehicle, coupling the Combat Vehicle 90 chassis with a 120mm cannon and assisted loading. | |
| − | |||
| − | |||
| − | |||
| − | |||
| − | |||
| − | |||
| − | |||
| − | |||
| − | |||
| − | |||
== Media == | == Media == | ||
<!-- ''Excellent additions to the article would be video guides, screenshots from the game, and photos.'' --> | <!-- ''Excellent additions to the article would be video guides, screenshots from the game, and photos.'' --> | ||
| − | + | {{Youtube-gallery|YIPHzv54GQw|'''The Shooting Range #197''' - ''Metal Beasts'' section at 00:33 discusses the CV 90120.}} | |
| − | |||
| − | |||
| − | |||
| − | |||
| − | |||
| − | {{Youtube-gallery | ||
== See also == | == See also == | ||
''Links to the articles on the War Thunder Wiki that you think will be useful for the reader, for example:'' | ''Links to the articles on the War Thunder Wiki that you think will be useful for the reader, for example:'' | ||
| − | |||
* ''reference to the series of the vehicles;'' | * ''reference to the series of the vehicles;'' | ||
* ''links to approximate analogues of other nations and research trees.'' | * ''links to approximate analogues of other nations and research trees.'' | ||
| Line 185: | Line 220: | ||
== External links == | == External links == | ||
''Paste links to sources and external resources, such as:'' | ''Paste links to sources and external resources, such as:'' | ||
| − | |||
* ''topic on the official game forum;'' | * ''topic on the official game forum;'' | ||
| + | * ''encyclopedia page on the tank;'' | ||
* ''other literature.'' | * ''other literature.'' | ||
| − | |||
{{Sweden light tanks}} | {{Sweden light tanks}} | ||
Revision as of 07:34, 10 August 2020
Contents
Description

The Combat Vehicle 90120 is a rank Swedish light tank
with a battle rating of (AB), (RB), and (SB). It was introduced in Update 1.97 "Viking Fury".
General info
Survivability and armour
The CV 90120 combines the Combat Vehicle 90's chassis with a new turret with a 120 mm CTG cannon. As a result, armour is barely present and can only withstand heavy machine gun from the front. Even autocannons can penetrate its turret and 12.7 mm machine guns can cut clean through its side armour. There is also a chance you will hull break even if no critical modules are damaged, so be aware, your main goal should be to not receive any enemy fire.
Mobility
| Game Mode | Max Speed (km/h) | Weight (tons) | Engine power (horsepower) | Power-to-weight ratio (hp/ton) | |||
|---|---|---|---|---|---|---|---|
| Forward | Reverse | Stock | Upgraded | Stock | Upgraded | ||
| Arcade | Expression error: Unexpected * operator. | 1,038 | Expression error: Unexpected round operator. | __.__ | |||
| Realistic | 593 | Expression error: Unexpected round operator. | __.__ | ||||
Armaments
Main armament
| 120 mm CTG | Turret rotation speed (°/s) | Reloading rate (seconds) | |||||||||||
|---|---|---|---|---|---|---|---|---|---|---|---|---|---|
| Mode | Capacity | Vertical | Horizontal | Stabilizer | Stock | Upgraded | Full | Expert | Aced | Stock | Full | Expert | Aced |
| Arcade | 40 | -8°/+22° | ±180° | Two-plane | 28.6 | __.__ | __.__ | __.__ | __.__ | 6.5 | __.__ | __.__ | 5.0 |
| Realistic | 17.9 | 21.0 | __.__ | 28.2 | 30.0 | ||||||||
Ammunition
| Penetration statistics | |||||||
|---|---|---|---|---|---|---|---|
| Ammunition | Type of warhead |
Penetration @ 0° Angle of Attack (mm) | |||||
| 10 m | 100 m | 500 m | 1,000 m | 1,500 m | 2,000 m | ||
| DM23 | APFSDS | 410 | 408 | 401 | 393 | 384 | 376 |
| DM12A1 | HEATFS | 480 | 480 | 480 | 480 | 480 | 480 |
| slsgr m/95 | HE | 36 | 36 | 36 | 36 | 36 | 36 |
| slpprj m/95 | APFSDS | 625 | 622 | 613 | 601 | 588 | 575 |
| Shell details | |||||||||
|---|---|---|---|---|---|---|---|---|---|
| Ammunition | Type of warhead |
Velocity (m/s) |
Projectile Mass (kg) |
Fuse delay (m) |
Fuse sensitivity (mm) |
Explosive Mass (TNT equivalent) (g) |
Ricochet | ||
| 0% | 50% | 100% | |||||||
| DM23 | APFSDS | 1,640 | 4.30 | N/A | N/A | N/A | 78° | 80° | 81° |
| DM12A1 | HEATFS | 1,140 | 13.50 | N/A | 0.1 | 2,150 | 65° | 72° | 77° |
| slsgr m/95 | HE | 736 | 17.50 | 0.1 | 0.1 | 3,540 | 79° | 80° | 81° |
| slpprj m/95 | APFSDS | 1,705 | 4.30 | N/A | N/A | N/A | 78° | 80° | 81° |
Ammo racks
| Full ammo |
1st rack empty |
2nd rack empty |
3rd rack empty |
4th rack empty |
5th rack empty |
6th rack empty |
Visual discrepancy |
|---|---|---|---|---|---|---|---|
| 40 | __ (+__) | __ (+__) | __ (+__) | __ (+__) | __ (+__) | __ (+__) | __ |
Optics and night vision
| CV 90120 Optics | ||||||
|---|---|---|---|---|---|---|
| Type of optic | Magnification | Night Vision Devices | ||||
| Image Intensifier | Thermal Imager Resolution |
Notes | ||||
| Resolution | Light Mult | Noise Level | ||||
| Gunner's Sight | X3.0 - X10.5 | - | - | - | 1200 x 800 | Thermal imager unlocked by "NVD" modification (tier 3) |
| Commander's View | X6 | - | - | - | 1200 x 800 | Thermal imager unlocked by "NVD" modification (tier 3) |
| Driver's View | X1 | 1200 x 800 | 7.0 | High | Not Fitted | Image intensifier unlocked by "NVD" modification (tier 3) |
Machine guns
| 12.7 mm ksp 88 | ||||
|---|---|---|---|---|
| Mount | Capacity (Belt) | Fire rate | Vertical | Horizontal |
| Coaxial | 1,200 (200) | 577 | N/A | N/A |
Usage in battles
As discussed in the armour section, you have minimal armour meant to withstand small arms fire and indirect shrapnel. Your playstyle should involve sitting back and maintaining overwatch of a specific area of the battlefield. Stay far away from the heat of close quarters combat as enemy tanks will have a harder time finding and killing you. With the slpprj m/95 round, you can penetrate any vehicle in the game from the front at any range (excluding areas such as the Leopard 2A5's turret cheeks). The stock DM33 round is, although powerful, somewhat lacklustre compared to m/95, but holds its own against tanks at its BR. You will just have to play more passively and know how to hit weak spots at longer ranges. Use your mobility to flank on large maps such as Maginot Line and (if you have them researched) use your powerful thermal optics to acquire and destroy a target. If the enemy is looking at you and you are too close, reposition and try to make them lose focus on you. By playing more passively and smarter than you would a normal MBT, you can make the most of this vehicle.
With an aced reload of 5 seconds, it shares the fastest top tier reload with the Type 90 and the aced 105 mm Abrams, beating the Leclerc and any other tank's aced crew. This means that if you get the first shot off, and either their return shot misses or you destroy their cannon, then you can do wonders with the CV90120. It packs an INSANE amount of firepower for a light tank, dishing out 625 mm of pen every five seconds, and can by itself cripple distracted players.
Modules
| Tier | Mobility | Protection | Firepower | |||
|---|---|---|---|---|---|---|
| I | Tracks | Parts | Horizontal Drive | Laser rangefinder | DM12A1 | |
| II | Suspension | Brake System | FPE | Adjustment of Fire | Airstrike | slsgr m/95 |
| III | Filters | Crew Replenishment | Elevation Mechanism | Improved optics | NVD | |
| IV | Transmission | Engine | Smoke grenade | Artillery Support | slpprj m/95 | |
Pros and cons
Pros:
- Excellent gun and reload, with access to the slpprj m/95 round, which shares identical stats to the Italian CL3143
- Adequate mobility enabling you to get to an early game position and quickly change positions if spotted or injured
- The weak armour may reduce the amount of spalling caused by being hit by enemy shells
- Access to scouting and "Airstrike" ability (reduced spawn cost for friendlies destroying enemy tanks you scouted)
Cons:
- Non-existent armour, can be penetrated by heavy machine guns on the side and autocannons in the front
- No top machine gun for anti-helicopter and aircraft defence
- Susceptible to hull break, ANY chemical charge such as HEAT or ATGM will almost certainly destroy the hull in a single hit
- The slpprj m/95 round is a tier IV modification and will take some time to get access to it
- Difficult to hide due to tall profile, with the "doorknob" optic on the roof of the turret
History
The CV90120 is a 2010's era vehicle developed as a private venture by BAe Hagglunds as an export vehicle, coupling the Combat Vehicle 90 chassis with a 120mm cannon and assisted loading.
Media
See also
Links to the articles on the War Thunder Wiki that you think will be useful for the reader, for example:
- reference to the series of the vehicles;
- links to approximate analogues of other nations and research trees.
External links
Paste links to sources and external resources, such as:
- topic on the official game forum;
- encyclopedia page on the tank;
- other literature.
| Sweden light tanks | |
|---|---|
| L-60 | Strv m/38 · Strv m/39 · Strv m/39 TD · Strv m/40L |
| Strv m/41 | Strv m/41 S-I · Strv m/41 S-II |
| Ikv 91 | Ikv 91 · Ikv 91-105 |
| CV 90 | Strf 9040B · Strf 9040C · Strf 9040 BILL |
| CV 90105 · CV 90120 | |
| Wheeled | Pbil m/40 · U-SH 405 |
| Other | Strv m/31 · Strv 74 · Pbv 501 |
| Finland | Vickers Mk.E · ▄T-26E · BT-42 · ▄PT-76 · CV 9030FIN · CT-CV 105HP |
| Denmark | CV 9035DK |
