Difference between revisions of "D4Y1"
m (→Description) |
(→History: Added History for the D4Y1) (Tag: Visual edit) |
||
| (29 intermediate revisions by 9 users not shown) | |||
| Line 1: | Line 1: | ||
| + | {{Specs-Card|code=d4y1}} | ||
{{About | {{About | ||
| about = Japanese dive bomber '''{{PAGENAME}}''' | | about = Japanese dive bomber '''{{PAGENAME}}''' | ||
| + | | and | ||
| usage = other versions | | usage = other versions | ||
| − | | link | + | | link-1 = D4Y2 |
| − | + | | link-2 = D4Y3 Ko | |
| − | |||
| − | |||
| − | | | ||
}} | }} | ||
== Description == | == Description == | ||
<!-- ''In the description, the first part should be about the history of and the creation and combat usage of the aircraft, as well as its key features. In the second part, tell the reader about the aircraft in the game. Insert a screenshot of the vehicle, so that if the novice player does not remember the vehicle by name, he will immediately understand what kind of vehicle the article is talking about.'' --> | <!-- ''In the description, the first part should be about the history of and the creation and combat usage of the aircraft, as well as its key features. In the second part, tell the reader about the aircraft in the game. Insert a screenshot of the vehicle, so that if the novice player does not remember the vehicle by name, he will immediately understand what kind of vehicle the article is talking about.'' --> | ||
| − | The '''{{Specs|name}} | + | [[File:GarageImage_{{PAGENAME}}.jpg|420px|thumb|left]] |
| − | + | {{break}} | |
| − | + | The '''{{Specs|name}}''' is a rank {{Specs|rank}} Japanese dive bomber {{Battle-rating}}. This aircraft was introduced in [[Update 1.75 "La Résistance"]]. | |
| − | |||
| − | |||
| − | |||
| − | |||
== General info == | == General info == | ||
| − | === Flight | + | === Flight Performance === |
| − | + | ''Describe how the aircraft behaves in the air. Speed, manoeuvrability, acceleration and allowable loads - these are the most important characteristics of the vehicle.'' | |
| − | |||
| − | |||
| − | |||
| − | {| class="wikitable" style="text-align:center" | + | {| class="wikitable" style="text-align:center" |
| − | ! | + | |- |
| + | ! colspan="8" | Characteristics | ||
| + | |- | ||
| + | ! colspan="8" | ''Stock'' | ||
| + | |- | ||
! colspan="2" | Max Speed<br>(km/h at 4,750 m) | ! colspan="2" | Max Speed<br>(km/h at 4,750 m) | ||
| − | ! rowspan="2" | Max altitude<br>( | + | ! rowspan="2" | Max altitude<br>(meters) |
! colspan="2" | Turn time<br>(seconds) | ! colspan="2" | Turn time<br>(seconds) | ||
| − | ! colspan="2" | Rate of climb<br>( | + | ! colspan="2" | Rate of climb<br>(meters/second) |
| − | ! rowspan="2" | Take-off run<br>( | + | ! rowspan="2" | Take-off run<br>(meters) |
| + | |- | ||
| + | ! AB | ||
| + | ! RB | ||
| + | ! AB | ||
| + | ! RB | ||
| + | ! AB | ||
| + | ! RB | ||
| + | |- | ||
| + | | 520 || 509 || {{Specs|ceiling}} || 23.9 || 24.5 || 5.6 || 5.6 || 300 | ||
| + | |- | ||
| + | ! colspan="8" | ''Upgraded'' | ||
|- | |- | ||
| − | ! | + | ! colspan="2" | Max Speed<br>(km/h at 4,750 m) |
| + | ! rowspan="2" | Max altitude<br>(meters) | ||
| + | ! colspan="2" | Turn time<br>(seconds) | ||
| + | ! colspan="2" | Rate of climb<br>(meters/second) | ||
| + | ! rowspan="2" | Take-off run<br>(meters) | ||
|- | |- | ||
| − | ! | + | ! AB |
| − | + | ! RB | |
| + | ! AB | ||
| + | ! RB | ||
| + | ! AB | ||
| + | ! RB | ||
|- | |- | ||
| − | + | | 589 || 552 || {{Specs|ceiling}} || 22.2 || 23.0 || 14.4 || 9.3 || 300 | |
| − | | 589 || 552 || 22.2 || 23.0 || 14.4 || 9.3 | ||
|- | |- | ||
|} | |} | ||
| − | ==== Details ==== | + | ====Details==== |
| − | + | {| class="wikitable" style="text-align:center" | |
| − | {| class="wikitable" style="text-align:center | ||
|- | |- | ||
! colspan="5" | Features | ! colspan="5" | Features | ||
|- | |- | ||
| − | ! Combat flaps | + | ! Combat flaps |
| + | ! Take-off flaps | ||
| + | ! Landing flaps | ||
| + | ! Air brakes | ||
| + | ! Arrestor gear | ||
|- | |- | ||
| ✓ || ✓ || ✓ || ✓ || ✓ <!-- ✓ --> | | ✓ || ✓ || ✓ || ✓ || ✓ <!-- ✓ --> | ||
| Line 56: | Line 73: | ||
|} | |} | ||
| − | {| class="wikitable" style="text-align:center | + | {| class="wikitable" style="text-align:center" |
|- | |- | ||
| − | ! colspan=" | + | ! colspan="5" | Limits |
|- | |- | ||
| − | ! rowspan="2" | | + | ! rowspan="2" | Wing-break speed<br>(km/h) |
| − | ! rowspan="2" | Gear (km/h) | + | ! rowspan="2" | Gear limit<br>(km/h) |
| − | ! | + | ! rowspan="2" | Combat flaps<br>(km/h) |
! colspan="2" | Max Static G | ! colspan="2" | Max Static G | ||
|- | |- | ||
| − | + | ! + | |
| + | ! - | ||
|- | |- | ||
| − | | {{Specs|destruction| | + | | {{Specs|destruction|constructions}} || {{Specs|destruction|chassis}} || 480 || ~15 || ~11 |
|- | |- | ||
|} | |} | ||
| Line 73: | Line 91: | ||
{| class="wikitable" style="text-align:center" | {| class="wikitable" style="text-align:center" | ||
|- | |- | ||
| − | ! colspan="4" | Optimal velocities | + | ! colspan="4" | Optimal velocities |
|- | |- | ||
| − | ! Ailerons | + | ! Ailerons<br>(km/h) |
| + | ! Rudder<br>(km/h) | ||
| + | ! Elevators<br>(km/h) | ||
| + | ! Radiator<br>(km/h) | ||
|- | |- | ||
| − | | < 350 || < 400 || < | + | | < 350 || < 400 || < 430 || > 200 |
|- | |- | ||
|} | |} | ||
| Line 96: | Line 117: | ||
=== Survivability and armour === | === Survivability and armour === | ||
| − | + | ''Examine the survivability of the aircraft. Note how vulnerable the structure is and how secure the pilot is, whether the fuel tanks are armoured, etc. Describe the armour, if there is any, and also mention the vulnerability of other critical aircraft systems.'' | |
| − | |||
| − | |||
| − | |||
| − | |||
| − | |||
| − | |||
| − | |||
== Armaments == | == Armaments == | ||
| − | |||
=== Offensive armament === | === Offensive armament === | ||
| − | |||
<!-- ''Describe the offensive armament of the aircraft, if any. Describe how effective the cannons and machine guns are in a battle, and also what belts or drums are better to use. If there is no offensive weaponry, delete this subsection.'' --> | <!-- ''Describe the offensive armament of the aircraft, if any. Describe how effective the cannons and machine guns are in a battle, and also what belts or drums are better to use. If there is no offensive weaponry, delete this subsection.'' --> | ||
| − | |||
{{main|Type 97 navy (7.7 mm)}} | {{main|Type 97 navy (7.7 mm)}} | ||
| Line 118: | Line 129: | ||
=== Suspended armament === | === Suspended armament === | ||
| − | |||
<!-- ''Describe the aircraft's suspended armament: additional cannons under the wings, bombs, rockets and torpedoes. This section is especially important for bombers and attackers. If there is no suspended weaponry remove this subsection.'' --> | <!-- ''Describe the aircraft's suspended armament: additional cannons under the wings, bombs, rockets and torpedoes. This section is especially important for bombers and attackers. If there is no suspended weaponry remove this subsection.'' --> | ||
{{main|Navy Type Number 25 Model 2 (250 kg)|Number Type 2 50 Model 1 GP(SAP) (500 kg)}} | {{main|Navy Type Number 25 Model 2 (250 kg)|Number Type 2 50 Model 1 GP(SAP) (500 kg)}} | ||
| Line 124: | Line 134: | ||
The '''''{{PAGENAME}}''''' can be outfitted with the following ordnance: | The '''''{{PAGENAME}}''''' can be outfitted with the following ordnance: | ||
| − | |||
* 1 x 250 kg Navy Type Number 25 Model 2 bomb (250 kg total) | * 1 x 250 kg Navy Type Number 25 Model 2 bomb (250 kg total) | ||
* 1 x 500 kg Number Type 2 50 Model 1 GP(SAP) bomb (500 kg total) | * 1 x 500 kg Number Type 2 50 Model 1 GP(SAP) bomb (500 kg total) | ||
=== Defensive armament === | === Defensive armament === | ||
| − | |||
<!-- ''Defensive armament with turret machine guns or cannons, crewed by gunners. Examine the number of gunners and what belts or drums are better to use. If defensive weaponry is not available, remove this subsection.'' --> | <!-- ''Defensive armament with turret machine guns or cannons, crewed by gunners. Examine the number of gunners and what belts or drums are better to use. If defensive weaponry is not available, remove this subsection.'' --> | ||
| − | {{main|Type 92 (7.7 mm)}} | + | {{main|Type 92 navy (7.7 mm)}} |
The '''''{{PAGENAME}}''''' is defended by: | The '''''{{PAGENAME}}''''' is defended by: | ||
| − | * 1 x 7.7 mm Type 92 machine gun, dorsal turret (582 rpg) | + | * 1 x 7.7 mm Type 92 navy machine gun, dorsal turret (582 rpg) |
== Usage in battles == | == Usage in battles == | ||
| − | + | ''Describe the tactics of playing in an aircraft, the features of using vehicles in a team and advice on tactics. Refrain from creating a "guide" - do not impose a single point of view, but instead, give the reader food for thought. Examine the most dangerous enemies and give recommendations on fighting them. If necessary, note the specifics of the game in different modes (AB, RB, SB).'' | |
| − | |||
| − | |||
| − | + | ===Manual Engine Control=== | |
| − | |||
| − | |||
| − | |||
| − | |||
| − | === Manual Engine Control === | ||
{| class="wikitable" style="text-align:center" | {| class="wikitable" style="text-align:center" | ||
|- | |- | ||
| Line 158: | Line 159: | ||
! rowspan="2" | Turbocharger | ! rowspan="2" | Turbocharger | ||
|- | |- | ||
| − | ! Oil | + | ! Oil |
| + | ! Water | ||
| + | ! Type | ||
|- | |- | ||
| − | | Controllable || Controllable<br>Not auto controlled || Controllable<br>Not auto controlled || Controllable<br>Not auto controlled || Separate || Not controllable<br>1 gear || Not controllable | + | | Controllable || rowspan="2" | Controllable<br>Not auto controlled || rowspan="2" | Controllable<br>Not auto controlled || rowspan="2" | Controllable<br>Not auto controlled || rowspan="2" | Separate || rowspan="2" | Not controllable<br>1 gear || rowspan="2" | Not controllable |
| + | |- | ||
| + | |} | ||
| + | |||
| + | ===Modules=== | ||
| + | {| class="wikitable" | ||
| + | ! colspan="1" | Tier | ||
| + | ! colspan="2" | Flight performance | ||
| + | ! colspan="1" | Survivability | ||
| + | ! colspan="2" | Weaponry | ||
| + | |- | ||
| + | | I | ||
| + | | Fuselage repair | ||
| + | | Radiator | ||
| + | | | ||
| + | | Offensive 7 mm | ||
| + | | | ||
| + | |- | ||
| + | | II | ||
| + | | | ||
| + | | Compressor | ||
| + | | Airframe | ||
| + | | New 7 mm MGs | ||
| + | | | ||
| + | |- | ||
| + | | III | ||
| + | | Wings repair | ||
| + | | Engine | ||
| + | | | ||
| + | | Turret 7 mm | ||
| + | | 13 in (mod35) | ||
| + | |- | ||
| + | | IV | ||
| + | | | ||
| + | | Engine injection | ||
| + | | Cover | ||
| + | | New 7 mm MGs (turret) | ||
| + | | | ||
|- | |- | ||
|} | |} | ||
=== Pros and cons === | === Pros and cons === | ||
| − | <!-- | + | <!--Summarise and briefly evaluate the vehicle in terms of its characteristics and combat effectiveness. Mark its pros and cons in the bulleted list. Try not to use more than 6 points for each of the characteristics. Avoid using categorical definitions such as "bad", "good" and the like - use substitutions with softer forms such as "inadequate" and "effective".--> |
| − | |||
'''Pros:''' | '''Pros:''' | ||
| − | * | + | * Nimble, can outturn certain enemy fighters |
| − | |||
| − | |||
| − | |||
| − | |||
| − | |||
| − | |||
| − | |||
| − | |||
| − | |||
| − | |||
| − | |||
| − | |||
| − | |||
'''Cons:''' | '''Cons:''' | ||
| − | * | + | * Very weak offensive armament |
| − | |||
| − | |||
| − | |||
| − | |||
| − | |||
| − | |||
| − | |||
| − | |||
| − | |||
== History == | == History == | ||
| − | + | Nicknamed the the "Judy" by allied pilots, the D4Y1 at the beginning of the war was one the fastest planes in all of the Pacific. | |
| − | |||
| − | |||
| − | |||
| − | The D4Y1 was a carrier based dive bomber | + | The D4Y1 was a carrier based dive bomber. Powered by a 1,200 hp "Aichi AE1A Atsuta V12" engine. The D4Y1 was modeled after the German He 118 with the engine being modeled after the DB 601 which was used in the BF110. Due to the Japanese Navy requiring an extreme range for the aircraft, it was designed without any armor or self sealing fuel tanks to lighten the plane so it would use less fuel. The lack of armor and protection decreased the weight, making them extremely quick and nimble but fragile if taking enemy fire. Combined with the unreliable engine the D4Y1 would see many upgrades in the following models adjusting many of the flaws. |
| − | In 1943 with the introduction of the F6F Hellcat, the D4Y's became a sitting duck. | + | In 1943 with the introduction of the F6F Hellcat, the D4Y's became a sitting duck. Where as with the F4F Wildcat, the D4Y's could just outrun them, the F6F would catch them with ease. During the "Great Marianas Turkey Shoot" a single F6F pilot Alexander Vraciu would shoot down 6 D4Y's within minutes. 400 Japanses planes would be shot down that day, but a D4Y did land a direct hit on the battleship USS South Dakota. |
The D4Y's would become one of the most iconic planes the Japanese Military would use during World War 2. | The D4Y's would become one of the most iconic planes the Japanese Military would use during World War 2. | ||
| − | Only a single complete D4Y1 survives today, located at the "Yasukuni | + | Only a single complete D4Y1 survives today, located at the "Yasukuni Jinja Yūshūkan shrine" in Tokyo it can be seen completely restored. |
== Media == | == Media == | ||
| − | + | ''Excellent additions to the article would be video guides, screenshots from the game, and photos.'' | |
| − | + | == See also == | |
| − | + | ''Links to the articles on the War Thunder Wiki that you think will be useful for the reader, for example:'' | |
| − | |||
| − | |||
| − | |||
| − | |||
| − | |||
* ''reference to the series of the aircraft;'' | * ''reference to the series of the aircraft;'' | ||
| − | * ''links to approximate analogues of other nations and research trees.'' | + | * ''links to approximate analogues of other nations and research trees.'' |
| − | + | == External links == | |
| − | + | ''Paste links to sources and external resources, such as:'' | |
| − | |||
| − | |||
| − | |||
* ''topic on the official game forum;'' | * ''topic on the official game forum;'' | ||
| − | * ''other literature.'' | + | * ''encyclopedia page on the aircraft;'' |
| − | + | * ''other literature.'' | |
| − | |||
| − | |||
{{Japan bombers}} | {{Japan bombers}} | ||
Revision as of 17:09, 15 April 2020
Contents
| This page is about the Japanese dive bomber D4Y1. For other versions, see D4Y2 and D4Y3 Ko. |
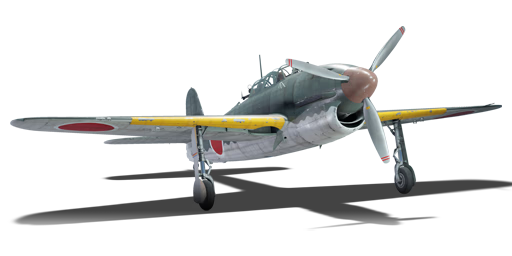
Description

The D4Y1 is a rank Japanese dive bomber
with a battle rating of (AB), (RB), and (SB). This aircraft was introduced in Update 1.75 "La Résistance".
General info
Flight Performance
Describe how the aircraft behaves in the air. Speed, manoeuvrability, acceleration and allowable loads - these are the most important characteristics of the vehicle.
| Characteristics | |||||||
|---|---|---|---|---|---|---|---|
| Stock | |||||||
| Max Speed (km/h at 4,750 m) |
Max altitude (meters) |
Turn time (seconds) |
Rate of climb (meters/second) |
Take-off run (meters) | |||
| AB | RB | AB | RB | AB | RB | ||
| 520 | 509 | 23.9 | 24.5 | 5.6 | 5.6 | 300 | |
| Upgraded | |||||||
| Max Speed (km/h at 4,750 m) |
Max altitude (meters) |
Turn time (seconds) |
Rate of climb (meters/second) |
Take-off run (meters) | |||
| AB | RB | AB | RB | AB | RB | ||
| 589 | 552 | 22.2 | 23.0 | 14.4 | 9.3 | 300 | |
Details
| Features | ||||
|---|---|---|---|---|
| Combat flaps | Take-off flaps | Landing flaps | Air brakes | Arrestor gear |
| ✓ | ✓ | ✓ | ✓ | ✓ |
| Limits | ||||
|---|---|---|---|---|
| Wing-break speed (km/h) |
Gear limit (km/h) |
Combat flaps (km/h) |
Max Static G | |
| + | - | |||
| 480 | ~15 | ~11 | ||
| Optimal velocities | |||
|---|---|---|---|
| Ailerons (km/h) |
Rudder (km/h) |
Elevators (km/h) |
Radiator (km/h) |
| < 350 | < 400 | < 430 | > 200 |
| Compressor (RB/SB) | ||
|---|---|---|
| Setting 1 | ||
| Optimal altitude | 100% Engine power | WEP Engine power |
| 4,500 m | 970 hp | 1,218 hp |
Survivability and armour
Examine the survivability of the aircraft. Note how vulnerable the structure is and how secure the pilot is, whether the fuel tanks are armoured, etc. Describe the armour, if there is any, and also mention the vulnerability of other critical aircraft systems.
Armaments
Offensive armament
The D4Y1 is armed with:
- 2 x 7.7 mm Type 97 navy machine guns, nose-mounted (600 rpg = 1,200 total)
Suspended armament
The D4Y1 can be outfitted with the following ordnance:
- 1 x 250 kg Navy Type Number 25 Model 2 bomb (250 kg total)
- 1 x 500 kg Number Type 2 50 Model 1 GP(SAP) bomb (500 kg total)
Defensive armament
The D4Y1 is defended by:
- 1 x 7.7 mm Type 92 navy machine gun, dorsal turret (582 rpg)
Usage in battles
Describe the tactics of playing in an aircraft, the features of using vehicles in a team and advice on tactics. Refrain from creating a "guide" - do not impose a single point of view, but instead, give the reader food for thought. Examine the most dangerous enemies and give recommendations on fighting them. If necessary, note the specifics of the game in different modes (AB, RB, SB).
Manual Engine Control
| MEC elements | ||||||
|---|---|---|---|---|---|---|
| Mixer | Pitch | Radiator | Supercharger | Turbocharger | ||
| Oil | Water | Type | ||||
| Controllable | Controllable Not auto controlled |
Controllable Not auto controlled |
Controllable Not auto controlled |
Separate | Not controllable 1 gear |
Not controllable |
Modules
| Tier | Flight performance | Survivability | Weaponry | ||
|---|---|---|---|---|---|
| I | Fuselage repair | Radiator | Offensive 7 mm | ||
| II | Compressor | Airframe | New 7 mm MGs | ||
| III | Wings repair | Engine | Turret 7 mm | 13 in (mod35) | |
| IV | Engine injection | Cover | New 7 mm MGs (turret) | ||
Pros and cons
Pros:
- Nimble, can outturn certain enemy fighters
Cons:
- Very weak offensive armament
History
Nicknamed the the "Judy" by allied pilots, the D4Y1 at the beginning of the war was one the fastest planes in all of the Pacific.
The D4Y1 was a carrier based dive bomber. Powered by a 1,200 hp "Aichi AE1A Atsuta V12" engine. The D4Y1 was modeled after the German He 118 with the engine being modeled after the DB 601 which was used in the BF110. Due to the Japanese Navy requiring an extreme range for the aircraft, it was designed without any armor or self sealing fuel tanks to lighten the plane so it would use less fuel. The lack of armor and protection decreased the weight, making them extremely quick and nimble but fragile if taking enemy fire. Combined with the unreliable engine the D4Y1 would see many upgrades in the following models adjusting many of the flaws.
In 1943 with the introduction of the F6F Hellcat, the D4Y's became a sitting duck. Where as with the F4F Wildcat, the D4Y's could just outrun them, the F6F would catch them with ease. During the "Great Marianas Turkey Shoot" a single F6F pilot Alexander Vraciu would shoot down 6 D4Y's within minutes. 400 Japanses planes would be shot down that day, but a D4Y did land a direct hit on the battleship USS South Dakota.
The D4Y's would become one of the most iconic planes the Japanese Military would use during World War 2.
Only a single complete D4Y1 survives today, located at the "Yasukuni Jinja Yūshūkan shrine" in Tokyo it can be seen completely restored.
Media
Excellent additions to the article would be video guides, screenshots from the game, and photos.
See also
Links to the articles on the War Thunder Wiki that you think will be useful for the reader, for example:
- reference to the series of the aircraft;
- links to approximate analogues of other nations and research trees.
External links
Paste links to sources and external resources, such as:
- topic on the official game forum;
- encyclopedia page on the aircraft;
- other literature.
| Japan bombers | |
|---|---|
| Navy | |
| Carrier-based attack bomber | |
| B5N | B5N2 |
| B6N | B6N1 · B6N2 · B6N2a |
| B7A | B7A2 · B7A2 (Homare 23) |
| Carrier-based dive bomber | |
| D3A | D3A1 |
| D4Y | D4Y1 · D4Y2 · D4Y3 Ko |
| Shipboard Observation seaplane | |
| F1M | F1M2 |
| Land-based Attack bomber | |
| G4M | G4M1 |
| G5N | G5N1 |
| G8N | G8N1 |
| Flying boat | |
| H6K | H6K4 |
| H8K | H8K2 · H8K3 |
| Land-based Bomber | |
| P1Y | P1Y1 |
| Army | |
| Light | Ki-32 |
| Ki-48-II otsu | |
| Heavy | Ki-21-Ia · Ki-21-I hei |
| Ki-49-I · Ki-49-IIa · Ki-49-IIb · Ki-49-IIb/L | |
| Ki-67-I Ko · Ki-67-I otsu | |
| Other countries | ▅B-17E |
