Difference between pages "F4U-4" and "Type 90 (B)"
m (→Pros and cons) (Tag: Visual edit) |
(Edits) |
||
| Line 1: | Line 1: | ||
| + | {{About | ||
| + | | about = Japanese medium tank '''{{PAGENAME}}''' | ||
| + | | other | ||
| + | | usage-1 = the other version | ||
| + | | link-1 = Type 90 (Family) | ||
| + | | usage-2 = other uses | ||
| + | | link-2 = Type 90 (Disambiguation) | ||
| + | }} | ||
{{Specs-Card | {{Specs-Card | ||
| − | |code= | + | |code=jp_type_90b |
| − | | | + | |images={{Specs-Card-Image|GarageImage_{{PAGENAME}}.jpg|ArtImage_{{PAGENAME}}.png}} |
| − | |||
| − | {{ | ||
| − | | | ||
| − | | | ||
| − | |||
}} | }} | ||
== Description == | == Description == | ||
| − | <!--''In the description, the first part | + | <!-- ''In the description, the first part should be about the history of the creation and combat usage of the vehicle, as well as its key features. In the second part, tell the reader about the ground vehicle in the game. Insert a screenshot of the vehicle, so that if the novice player does not remember the vehicle by name, he will immediately understand what kind of vehicle the article is talking about.'' --> |
| − | + | The '''{{Specs|name}}''' ({{Annotation|90式戦車B型|Kyūmaru Shiki Sensha, 'B' Gata}}) is a small alteration on the [[Type 90]] equipping mounting plates on the hull to allow for the Type 92 mine roller. | |
| − | |||
| − | The '''{{Specs|name}}''' | ||
| − | + | It was introduced in [[Update 1.95 "Northern Wind"]]. Essentially being a backup to the previous [[Type 90]], it does everything the same and offers only minor plates to the hull which won't exactly improve survivability. The only real downside of the plates is the inability to mount a dozer blade like its previous model. | |
== General info == | == General info == | ||
| − | === | + | === Survivability and armour === |
| − | <!--''Describe | + | {{Specs-Tank-Armour}} |
| − | {| class="wikitable | + | <!-- ''Describe armour protection. Note the most well protected and key weak areas. Appreciate the layout of modules as well as the number and location of crew members. Is the level of armour protection sufficient, is the placement of modules helpful for survival in combat? If necessary use a visual template to indicate the most secure and weak zones of the armour.'' --> |
| + | |||
| + | [[File:Type 90 Density Visualisation.png|thumb|Type 90 [[Protection Density Visualisation]]]] | ||
| + | The Type 90 MBT sacrifices protection and survivability in order to attain a smaller profile and a lighter vehicle overall (vehicle weight is important in Japan in order to pass over their many bridges). As such, most 'improved' rounds available to other 10.0-10.3 MBTs (such as the [[Leopard 2A5]]'s DM33, or the [[Leclerc]]'s OFL 120 F1) will punch through even the Type 90's turret cheeks or upper front plate. It's important to keep in mind that even some autocannon ammunition will easily penetrate some of the weaker sections of the Type 90 from the front. | ||
| + | |||
| + | Despite the mediocre protection, the Type 90 has one main survivability feature: its primary ammunition is stored in blowout-protected compartments, sparing the crew from side shots on the rear of the turret, providing no more than 19 rounds are carried. Unfortunately, however, due to the autoloaded cannon the Type 90 is crewed by only 3, increasing the chances of being disabled from an initial shot. | ||
| + | |||
| + | {| class="wikitable" | ||
|- | |- | ||
| − | ! | + | ! Armour !! Front (Slope angle) !! Sides !! Rear !! Roof |
|- | |- | ||
| − | + | | Hull || 25 mm (78°) ''Driver's hatch'' <br> 40 mm (47-83°) ''Upper glacis'' <br> 40 mm (44°) ''Lower glacis'' || 35 mm <br> 10 mm ''Side Skirts'' <br> 25 mm ''Top'' || 25 mm (17-70°) ''All rear'' <br> 15 mm ''Engine grille'' || 20 mm (0-8°) ''Hull roof incl. engine deck'' <br> 15 mm ''Engine grille'' | |
|- | |- | ||
| − | + | | Turret || 40 mm ''Cheeks incl. Gunner optics'' <br> 35 mm ''Mantlet'' <br> 35 mm ''Rear Mantlet Plate'' || 35 mm ''Forward'' <br> 33 mm + 80 mm (air) + 40 mm ''Middle Spaced Armour'' <br> 12 mm + 80 mm (air) + 35 mm ''Rear Spaced Armour'' || 25 mm ''Turret'' || 35 mm (83°) ''Forehead Armour'' <br> 20 mm ''Rear turret incl. cupola'' | |
| − | |||
| − | |||
| − | |||
| − | |||
| − | |||
| − | |||
| − | |||
| − | |||
| − | |||
| − | |||
| − | |||
| − | |||
| − | |||
| − | |||
| − | |||
| − | | | ||
| − | |||
| − | |||
| − | |||
| − | |||
| − | |||
| − | |||
| − | |||
| − | |||
| − | |||
| − | |||
| − | |||
| − | |||
| − | |||
| − | |||
|- | |- | ||
|} | |} | ||
| − | + | {| class="wikitable" | |
| − | {| class="wikitable | ||
|- | |- | ||
| − | ! | + | ! Composite armour !! Front (Slope angle) !! Sides |
|- | |- | ||
| − | + | | Hull || '''''Upper glacis''''' <br> 320 - 450 mm ''Kinetic'' <br> 420 - 600 mm ''Chemical'' <br> '''''Lower glacis''''' <br> 37 mm - 300 mm ''Kinetic'' <br> 20 - 380 mm ''Chemical'' || N/A | |
| − | |||
| − | |||
| − | |||
| − | |||
|- | |- | ||
| − | | | + | | Turret || '''''Turret cheeks''''' <br> 400 - 450 mm ''Kinetic'' <br> 640 - 660 mm ''Chemical'' <br> '''''Gun mantlet''''' <br> 275 - 375 mm ''Kinetic'' <br> 500 - 600 mm ''Chemical'' || '''''Side forward''''' <br> 78 - 400 mm ''Kinetic'' <br> 81 - 490 mm ''Chemical'' <br> '''''Side middle''''' <br> 77 mm ''Kinetic'' <br> 80 mm ''Chemical'' |
|- | |- | ||
|} | |} | ||
| − | {| class="wikitable" style="text-align:center" | + | === Mobility === |
| + | {{Specs-Tank-Mobility}} | ||
| + | <!-- ''Write about the mobility of the ground vehicle. Estimate the specific power and manoeuvrability, as well as the maximum speed forwards and backwards.'' --> | ||
| + | |||
| + | {{tankMobility|abMinHp=2032|rbMinHp=1327}} | ||
| + | |||
| + | The {{PAGENAME}} is powered by a 10-cylinder two-stroke diesel engine producing a maximum of 1,500 horsepower at 2400 RPM. Combined with its relatively light weight of only 51.6 tonnes, this gives it an excellent power-to-weight ratio of 29.07. As such, the Type 90 is often one of the first vehicles to reach cap points in a match, and can comfortably flank or move into advantageous positions earlier than many of its contemporaries. This power is transferred to the drive sprockets via an automatic transmission with 7 forward and 2 backward gears, unfortunately limiting the otherwise extremely mobile vehicle to 72 km/h (RB/SB) forwards and -33 km/h (RB/SB) backwards - speeds which it will reach with ease on-road. | ||
| + | |||
| + | The {{PAGENAME}} also mounts hydropneumatic suspension, allowing it to actively change the vehicle's ride height and angle. This can be used to improve traction on angled surfaces. | ||
| + | |||
| + | === Modifications and economy === | ||
| + | {{Specs-Economy}} | ||
| + | |||
| + | == Armaments == | ||
| + | {{Specs-Tank-Armaments}} | ||
| + | === Main armament === | ||
| + | {{Specs-Tank-Weapon|1}} | ||
| + | <!-- ''Give the reader information about the characteristics of the main gun. Assess its effectiveness in a battle based on the reloading speed, ballistics and the power of shells. Do not forget about the flexibility of the fire, that is how quickly the cannon can be aimed at the target, open fire on it and aim at another enemy. Add a link to the main article on the gun: <code><nowiki>{{main|Name of the weapon}}</nowiki></code>. Describe in general terms the ammunition available for the main gun. Give advice on how to use them and how to fill the ammunition storage.'' --> | ||
| + | {{main|Type 90 L/44 (120 mm)}} | ||
| + | |||
| + | The Type 90 L/44 120 mm cannon is a license-produced clone of the Rheinmetall L/44 cannon found on the Leopard 2 series and the M1A1/M1A2. As such, it shares their excellent accuracy and firepower characteristics, with a key advantage: the Type 90 is autoloaded. This results in a flat 4 second reload, better than the peak manually loaded speeds available to the other L/44-mounting vehicles (6 seconds). Additionally, reloads are not hindered by fire or the loss of crew members. The Type 90 has two rounds available to it; the powerful JM33 APFSDS round (based off the NATO DM33 round) and the JM12A1 HEAT-FS round (based off DM12A1). These rounds are more than capable of penetrating any opponent the Type 90 may face, although when facing some later vehicles such as the M1A2 or Leopard 2A5, weak points must be targeted. | ||
| + | |||
| + | {| class="wikitable" style="text-align:center" width="100%" | ||
|- | |- | ||
| − | ! colspan="5" | | + | ! colspan="5" | [[Type 90 L/44 (120 mm)|120 mm Type 90 L/44]] || colspan="5" | Turret rotation speed (°/s) || Reloading rate (seconds) |
|- | |- | ||
| − | ! | + | ! Mode !! Capacity !! Vertical !! Horizontal !! Stabilizer |
| − | ! | + | ! Stock !! Upgraded !! Full !! Expert !! Aced |
| − | ! | + | !Autoloader |
| − | ! | ||
|- | |- | ||
| − | ! + | + | ! ''Arcade'' |
| − | + | | rowspan="2" | 42 || rowspan="2" | -7°/+10° || rowspan="2" | ±180° || rowspan="2" | Two-plane || 28.6 || 39.5 || 48.0 || 53.1 || 56.5 || rowspan="2" | 4.00 | |
|- | |- | ||
| − | | | + | ! ''Realistic'' |
| + | | 17.9 || 21.0 || 25.5 || 28.2 || 30.0 | ||
|- | |- | ||
|} | |} | ||
| + | ==== Ammunition ==== | ||
| + | {{:Type 90 L/44 (120 mm)/Ammunition|JM12A1, JM33}} | ||
| + | |||
| + | ==== [[Ammo racks]] ==== | ||
| + | [[File:Ammoracks_Type_90.png|right|thumb|x200px|[[Ammo racks]] of the {{PAGENAME}}]] | ||
| + | <!-- '''Last updated: 2.15.1.70''' --> | ||
{| class="wikitable" style="text-align:center" | {| class="wikitable" style="text-align:center" | ||
|- | |- | ||
| − | ! | + | ! Full<br>ammo |
| − | + | ! 1st<br>rack empty | |
| − | ! | + | ! 2nd<br>rack empty |
| − | ! | + | ! 3rd<br>rack empty |
| − | ! | + | ! Visual<br>discrepancy |
| − | ! | ||
|- | |- | ||
| − | | | + | | '''42''' || 39 ''(+3)'' || 19 ''(+23)'' || 1 ''(+41)'' || No |
|- | |- | ||
|} | |} | ||
| + | '''Note''': | ||
| − | {| class="wikitable" style="text-align:center" | + | * Hull empty: 19 ''(+23)'' shells. |
| + | {{Clear}} | ||
| + | |||
| + | === Machine guns === | ||
| + | {{Specs-Tank-Weapon|2}} | ||
| + | {{Specs-Tank-Weapon|3}} | ||
| + | <!-- ''Offensive and anti-aircraft machine guns not only allow you to fight some aircraft but also are effective against lightly armoured vehicles. Evaluate machine guns and give recommendations on its use.'' --> | ||
| + | {{main|M2HB (12.7 mm)|Type 74 (7.62 mm)}} | ||
| + | |||
| + | The Type 90 mounts two machine guns; one pintle-mounted 12.7 mm and one coaxial mounted 7.62 mm. These can be used as deterrent for low-flying aircraft, clearing light obstacles or crew from open-top vehicles, or spotting enemy vehicles. | ||
| + | |||
| + | {| class="wikitable" style="text-align:center" width="50%" | ||
|- | |- | ||
| − | ! colspan=" | + | ! colspan="5" | [[M2HB (12.7 mm)|12.7 mm M2HB]] |
|- | |- | ||
| − | ! | + | ! Mount !! Capacity (Belt) !! Fire rate !! Vertical !! Horizontal |
|- | |- | ||
| − | + | | Pintle || 1,000 (200) || 577 || -8°/+60° || ±120° | |
| − | |||
| − | |||
|- | |- | ||
| − | | | + | |} |
| − | | | + | {| class="wikitable" style="text-align:center" width="50%" |
| − | |||
| − | |||
| − | |||
| − | |||
| − | |||
|- | |- | ||
| − | + | ! colspan="5" | [[Type 74 (7.62 mm)|7.62 mm Type 74]] | |
|- | |- | ||
| − | ! | + | ! Mount !! Capacity (Belt) !! Fire rate !! Vertical !! Horizontal |
|- | |- | ||
| − | + | | Coaxial || 4,500 (250) || 701 || N/A || N/A | |
| − | |||
| − | |||
| − | | | ||
| − | | | ||
|- | |- | ||
|} | |} | ||
| − | |||
| − | |||
| − | |||
| − | |||
| − | |||
| − | |||
| − | |||
| − | |||
| − | |||
| − | |||
| − | |||
| − | |||
| − | |||
| − | |||
| − | |||
| − | |||
| − | |||
| − | |||
| − | |||
| − | |||
| − | |||
| − | |||
| − | |||
| − | |||
| − | |||
| − | |||
| − | |||
| − | |||
== Usage in battles == | == Usage in battles == | ||
| − | <!--''Describe the tactics of playing in | + | <!-- ''Describe the tactics of playing in the vehicle, the features of using vehicles in the team and advice on tactics. Refrain from creating a "guide" - do not impose a single point of view but instead give the reader food for thought. Describe the most dangerous enemies and give recommendations on fighting them. If necessary, note the specifics of the game in different modes (AB, RB, SB).'' --> |
| − | |||
| − | + | The {{PAGENAME}} is an extremely capable vehicle in the hands of an experienced tanker, but heed must be paid to the vehicle's weaknesses at all times. | |
| − | + | '''Rural Combat''' | |
| − | + | The {{PAGENAME}} is very capable in rural combat where cover is plentiful and flanking routes are available. It should ideally be used for early flanks where available (such as the eastern flank on [[Maginot Line (Ground Forces)|Maginot Line]]) or when unavailable, pushing quickly for early captures before moving to a nearby protected location to hold that point. It's important to be aware of which routes might be sniper-covered early, as many snipers (such as the [[Challenger 2]] or [[Ariete PSO]]) will easily penetrate the {{PAGENAME}}, even at range - avoid giving them the opportunity. | |
| − | + | '''Urban Combat''' | |
| − | The | + | The {{PAGENAME}} can prove itself to be an excellent urban combat vehicle, primarily due to its mobility and reliably fast reload. As in rural combat, an early push for a cap can prove viable before moving into a protected position, although often by the time the capture is completed enemy targets will be nearby. Early flanking (such as around the sides of [[American Desert]]) is also viable. |
| − | + | '''Notable Targets''' | |
| − | |||
| − | |||
| − | |||
| − | |||
| − | |||
| − | |||
| − | |||
| − | |||
| − | |||
| − | |||
| − | |||
| − | |||
| − | |||
| − | |||
| − | |||
| − | |||
| − | |||
| − | |||
| − | |||
| − | + | * [[Challenger 2]] - The Challenger 2 is often found as a sniper due to its pin-point accuracy, good reload and excellent turret armour. The Type 90 should never be used to face a sniping CR2 head-on, but instead should attempt to flank or force engagements at close range where weak spots are easily targeted. | |
| − | + | * [[M1A2 Abrams]] - The M1A2 Abrams has excellent frontal protection and can prove tricky to discern from earlier models in the heat of a battle. As a general rule it's preferable to aim for the gun mantlet or turret ring on any Abrams, despite the fact that JM33 will penetrate nearly anywhere on early models - better safe than sorry. | |
| − | + | * [[Leopard 2A5]] - The Leopard 2A5 is very well protected, although JM33 will punch through its hull without any significant trouble. Avoid fighting a hull-down 2A5 head-on, rather taking flanking routes when available. If no choice is presented, aim for the gun mantlet or the turret ring. | |
| − | + | * [[T-80U]] - The T-80U is extremely well protected from the front, and care should be taken when engaging - aim for the driver viewport or the lower front plate; or where these are not options try to disable its gun through the mantlet. If flanking, side shots will often despatch the T-80U quickly. | |
| − | + | * [[Leclerc]] - The Leclerc is extremely fast, with a power-to-weight ratio not far short of the Type 90's. When pushing early for caps or flanks, be aware that the Leclerc may be one of the first vehicles you'll counter. | |
| − | + | * [[Leopard 2K]] - The Leopard 2K has the best power-to-weight ratio of any MBT currently in War Thunder, and it will often be capable of getting to positions before the Type 90. Keep in mind that it can be penetrated anywhere, but aware the 'bouncy' armour; aim carefully. | |
| − | + | * [[AMX-40]] - The AMX-40 is extremely mobile and caution is advised when pushing early. Fortunately, the AMX-40 has negligible protection and JM33 will make quick work of it. | |
| − | |||
| − | |||
| − | |||
| − | |||
| − | |||
| − | |||
| − | |||
| − | |||
| − | |||
| − | |||
| − | |||
| − | |||
| − | |||
| − | |||
| − | |||
| − | |||
| − | |||
| − | |||
| − | |||
| − | |||
| − | |||
| − | |||
| − | |||
| − | |||
| − | |||
| − | |||
| − | |||
| − | |||
| − | |||
=== Pros and cons === | === Pros and cons === | ||
| − | <!--'' | + | <!-- ''Summarise and briefly evaluate the vehicle in terms of its characteristics and combat effectiveness. Mark its pros and cons in a bulleted list. Try not to use more than 6 points for each of the characteristics. Avoid using categorical definitions such as "bad", "good" and the like - use substitutions with softer forms such as "inadequate" and "effective".'' --> |
'''Pros:''' | '''Pros:''' | ||
| − | * | + | * Relatively small profile despite visual similarities to the Leopard 2A4 |
| − | * | + | * 120 mm cannon with autoloader, 4-second reload unaffected by crew or fire |
| − | + | * Extremely mobile, high power-to-weight ratio | |
| − | + | * Fitted with [[Hydropneumatic suspension]], although this can only be operated when stationary | |
| − | * | + | * JM33 APFSDS round is competitive (identical to DM33, the 'improved' round on the Leopard 2A5) |
| − | + | * Primary ammunition storage protected within blow-out containment in the rear of the turret | |
| − | |||
| − | |||
| − | * | ||
| − | '''Cons''' | + | '''Cons:''' |
| − | * | + | * Despite having composite protection in the turret and upper front plate, it's insufficient protection for many of the tanks it will face |
| − | * | + | * Only three crew, a well-placed shot can easily cause a crew knock-out |
| − | * | + | * Forced to use a mediocre round prior to researching the tier II JM33 APFSDS |
| − | * | + | * JM33 APFSDS round struggles against higher-rank opponents if not aimed at weak spots |
| − | * | + | * Can only carry 19 ammunition before additional ammo is stored in the less protected hull racks |
| − | * | + | * Slow elevation/depression speed for the main gun |
| − | * | + | * Slower turret traverse than most other MBTs |
== History == | == History == | ||
| − | <!-- ''Describe the history of the creation and combat usage of the | + | <!-- ''Describe the history of the creation and combat usage of the vehicle in more detail than in the introduction. If the historical reference turns out to be too long, take it to a separate article, taking a link to the article about the vehicle and adding a block "/History" (example: <nowiki>https://wiki.warthunder.com/(Vehicle-name)/History</nowiki>) and add a link to it here using the <code>main</code> template. Be sure to reference text and sources by using <code><nowiki><ref></ref></nowiki></code>, as well as adding them at the end of the article with <code><nowiki><references /></nowiki></code>. This section may also include the vehicle's dev blog entry (if applicable) and the in-game encyclopedia description (under <code><nowiki>=== In-game description ===</nowiki></code>, also if applicable).'' --> |
| + | Development of the Type 90 began almost immediately after the introduction of the Type 74 into service, with the Japanese High Command already looking for a superior replacement. A central aspect of the new machine would have to be the ability to take on and defeat the new Soviet T-72 main battle tank. With that in mind, Japanese engineers began working on a prototype design, which would see completion in 1980. Two prototypes of this initial design were built, tested and improved upon between 1980 - 1986. | ||
| + | |||
| + | Testing resumed in 1986 with a second batch of four prototype vehicles, featuring a number of improvements over the initial two. The most significant change included the replacement of a Japanese-made 120mm smoothbore gun with the established Rheinmetall 120 L/44, most notably used by the M1A1 Abrams and Leopard 2 at the time. The decision to change the gun from a domestic one to a licence-built alternative most likely came as a measure to reduce production costs. However, unlike the MBTs of western armies, the designers of the Type 90 opted to equip the tank with an autoloading mechanism, making it the only production vehicle that did so in combination with the Rh 120 cannon. Further testing and army trials of these prototypes was conducted during the late 80s before the Japanese army formally introduced the tank into service in 1990 as the Type 90. Production of the Type 90 began in 1990 and continued until 2009, with 341 vehicles made. | ||
| + | |||
| + | ''- From [[wt:en/news/5499-development-type-90-the-lightweight-heavy-hitter-en|Devblog]]'' | ||
| − | '' | + | == Media == |
| + | <!-- ''Excellent additions to the article would be video guides, screenshots from the game, and photos.'' --> | ||
| − | + | ;Skins | |
| − | + | * [https://live.warthunder.com/feed/camouflages/?vehicle=jp_type_90b Skins and camouflages for the {{PAGENAME}} from live.warthunder.com.] | |
| − | + | ;Videos | |
| − | + | {{Youtube-gallery|p6cWlyUnJQA|'''Top 7 off-road beasts''' discusses the {{PAGENAME}} at 4:27 - ''War Thunder Official Channel''|31ZOmtzI_2g|'''The Shooting Range #107''' - ''Metal Beasts'' section at 00:35 discusses the {{PAGENAME}}.|K-9ObimGTJI|'''JGSDF Type 90: Actual Sound Recording''' - ''DMM GAMES Official Channel''|G_jOfO3g_iA|'''JGSDF Type 90: 360° Video''' - ''DMM GAMES Official Channel''|xarYzM07uSk|[JP] '''Former SDF member spectates Type 90 at firing range''' (Part 1)|AyvnH_sBgrg|[JP] '''Former SDF member rides Type 90 at firing range''' (Part 2)}} | |
| − | {{ | ||
== See also == | == See also == | ||
<!-- ''Links to the articles on the War Thunder Wiki that you think will be useful for the reader, for example:'' | <!-- ''Links to the articles on the War Thunder Wiki that you think will be useful for the reader, for example:'' | ||
| + | * ''reference to the series of the vehicles;'' | ||
| + | * ''links to approximate analogues of other nations and research trees.'' --> | ||
| − | * | + | ;Related Development |
| − | * | + | * [[Type 90 (Family)]] |
| + | ** [[Type 90]] - <small>(base model)</small> | ||
| + | ** [[Type 90 (B) "Fuji"]] | ||
| + | * [[Type 10 (Family)]] - <small>(successor)</small> | ||
| − | * [[ | + | ;Other vehicles of similar configuration and role |
| − | * [[ | + | {{columns|2| |
| − | * [[ | + | * [[File:France flag.png|30px|link=]] [[Leclerc (Family)]] |
| − | * [[ | + | * [[File:FRG flag.png|30px|link=]] [[Leopard 2 (Family)]] |
| + | * [[File:Italy flag.png|30px|link=]] [[Ariete (Family)]] | ||
| + | * [[File:USA flag.png|30px|link=]] [[M1 Abrams (Family)]] | ||
| + | * [[File:USA flag.png|30px|link=]] [[File:FRG flag.png|30px|link=]] [[MBT-70]] / [[KPz-70]] / [[XM-803]] | ||
| + | * [[File:Britain flag.png|30px|link=]] [[Challenger (Disambiguation)|Challenger MBT]] | ||
| + | * [[File:Israel flag.png|30px|link=]] [[Merkava (Family)]] | ||
| + | * [[File:USSR flag.png|30px|link=]] [[T-72 (Family)|T-72 / T-90 (Family)]] | ||
| + | * [[File:USSR flag.png|30px|link=]] [[T-80 (Family)]] | ||
| + | * [[File:China flag.png|30px|link=]] [[ZTZ96 (Family)]] | ||
| + | * [[File:China flag.png|30px|link=]] [[ZTZ99 (Family)]] | ||
| + | }} | ||
== External links == | == External links == | ||
| − | + | ''Paste links to sources and external resources, such as:'' | |
| + | |||
* ''topic on the official game forum;'' | * ''topic on the official game forum;'' | ||
| − | + | * ''other literature.'' | |
| − | * ''other literature.'' | ||
| − | |||
| − | |||
| − | |||
| − | |||
| − | |||
| − | |||
| − | |||
| − | + | {{Japan medium tanks}} | |
| − | |||
Latest revision as of 06:23, 13 October 2024
| This page is about the Japanese medium tank Type 90 (B). For the other version, see Type 90 (Family). For other uses, see Type 90 (Disambiguation). |
.jpg)
.png)
Contents
Description
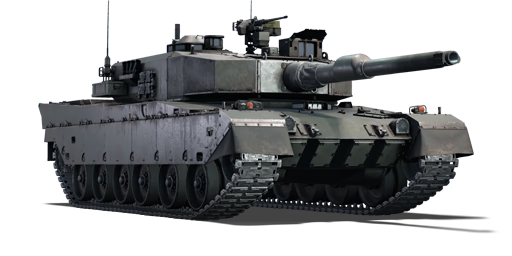
The Type 90 (B) (90式戦車B型) is a small alteration on the Type 90 equipping mounting plates on the hull to allow for the Type 92 mine roller.
It was introduced in Update 1.95 "Northern Wind". Essentially being a backup to the previous Type 90, it does everything the same and offers only minor plates to the hull which won't exactly improve survivability. The only real downside of the plates is the inability to mount a dozer blade like its previous model.
General info
Survivability and armour

The Type 90 MBT sacrifices protection and survivability in order to attain a smaller profile and a lighter vehicle overall (vehicle weight is important in Japan in order to pass over their many bridges). As such, most 'improved' rounds available to other 10.0-10.3 MBTs (such as the Leopard 2A5's DM33, or the Leclerc's OFL 120 F1) will punch through even the Type 90's turret cheeks or upper front plate. It's important to keep in mind that even some autocannon ammunition will easily penetrate some of the weaker sections of the Type 90 from the front.
Despite the mediocre protection, the Type 90 has one main survivability feature: its primary ammunition is stored in blowout-protected compartments, sparing the crew from side shots on the rear of the turret, providing no more than 19 rounds are carried. Unfortunately, however, due to the autoloaded cannon the Type 90 is crewed by only 3, increasing the chances of being disabled from an initial shot.
| Armour | Front (Slope angle) | Sides | Rear | Roof |
|---|---|---|---|---|
| Hull | 25 mm (78°) Driver's hatch 40 mm (47-83°) Upper glacis 40 mm (44°) Lower glacis |
35 mm 10 mm Side Skirts 25 mm Top |
25 mm (17-70°) All rear 15 mm Engine grille |
20 mm (0-8°) Hull roof incl. engine deck 15 mm Engine grille |
| Turret | 40 mm Cheeks incl. Gunner optics 35 mm Mantlet 35 mm Rear Mantlet Plate |
35 mm Forward 33 mm + 80 mm (air) + 40 mm Middle Spaced Armour 12 mm + 80 mm (air) + 35 mm Rear Spaced Armour |
25 mm Turret | 35 mm (83°) Forehead Armour 20 mm Rear turret incl. cupola |
| Composite armour | Front (Slope angle) | Sides |
|---|---|---|
| Hull | Upper glacis 320 - 450 mm Kinetic 420 - 600 mm Chemical Lower glacis 37 mm - 300 mm Kinetic 20 - 380 mm Chemical |
N/A |
| Turret | Turret cheeks 400 - 450 mm Kinetic 640 - 660 mm Chemical Gun mantlet 275 - 375 mm Kinetic 500 - 600 mm Chemical |
Side forward 78 - 400 mm Kinetic 81 - 490 mm Chemical Side middle 77 mm Kinetic 80 mm Chemical |
Mobility
| Game Mode | Max Speed (km/h) | Weight (tons) | Engine power (horsepower) | Power-to-weight ratio (hp/ton) | |||
|---|---|---|---|---|---|---|---|
| Forward | Reverse | Stock | Upgraded | Stock | Upgraded | ||
| Arcade | Expression error: Unexpected * operator. | 2032 | Expression error: Unexpected round operator. | __.__ | |||
| Realistic | 1327 | Expression error: Unexpected round operator. | __.__ | ||||
The Type 90 (B) is powered by a 10-cylinder two-stroke diesel engine producing a maximum of 1,500 horsepower at 2400 RPM. Combined with its relatively light weight of only 51.6 tonnes, this gives it an excellent power-to-weight ratio of 29.07. As such, the Type 90 is often one of the first vehicles to reach cap points in a match, and can comfortably flank or move into advantageous positions earlier than many of its contemporaries. This power is transferred to the drive sprockets via an automatic transmission with 7 forward and 2 backward gears, unfortunately limiting the otherwise extremely mobile vehicle to 72 km/h (RB/SB) forwards and -33 km/h (RB/SB) backwards - speeds which it will reach with ease on-road.
The Type 90 (B) also mounts hydropneumatic suspension, allowing it to actively change the vehicle's ride height and angle. This can be used to improve traction on angled surfaces.
Modifications and economy
Armaments
Main armament
The Type 90 L/44 120 mm cannon is a license-produced clone of the Rheinmetall L/44 cannon found on the Leopard 2 series and the M1A1/M1A2. As such, it shares their excellent accuracy and firepower characteristics, with a key advantage: the Type 90 is autoloaded. This results in a flat 4 second reload, better than the peak manually loaded speeds available to the other L/44-mounting vehicles (6 seconds). Additionally, reloads are not hindered by fire or the loss of crew members. The Type 90 has two rounds available to it; the powerful JM33 APFSDS round (based off the NATO DM33 round) and the JM12A1 HEAT-FS round (based off DM12A1). These rounds are more than capable of penetrating any opponent the Type 90 may face, although when facing some later vehicles such as the M1A2 or Leopard 2A5, weak points must be targeted.
| 120 mm Type 90 L/44 | Turret rotation speed (°/s) | Reloading rate (seconds) | ||||||||
|---|---|---|---|---|---|---|---|---|---|---|
| Mode | Capacity | Vertical | Horizontal | Stabilizer | Stock | Upgraded | Full | Expert | Aced | Autoloader |
| Arcade | 42 | -7°/+10° | ±180° | Two-plane | 28.6 | 39.5 | 48.0 | 53.1 | 56.5 | 4.00 |
| Realistic | 17.9 | 21.0 | 25.5 | 28.2 | 30.0 | |||||
Ammunition
| Penetration statistics | |||||||
|---|---|---|---|---|---|---|---|
| Ammunition | Type of warhead |
Penetration @ 0° Angle of Attack (mm) | |||||
| 10 m | 100 m | 500 m | 1,000 m | 1,500 m | 2,000 m | ||
| JM12A1 | HEATFS | 480 | 480 | 480 | 480 | 480 | 480 |
| JM33 | APFSDS | 481 | 478 | 470 | 461 | 450 | 440 |
| Shell details | ||||||||||||
|---|---|---|---|---|---|---|---|---|---|---|---|---|
| Ammunition | Type of warhead |
Velocity (m/s) |
Projectile mass (kg) |
Fuse delay (m) |
Fuse sensitivity (mm) |
Explosive mass (TNT equivalent) (kg) |
Ricochet | |||||
| 0% | 50% | 100% | ||||||||||
| JM12A1 | HEATFS | 1,140 | 13.5 | 0.05 | 0.1 | 2.15 | 65° | 72° | 77° | |||
| JM33 | APFSDS | 1,640 | 4.3 | - | - | - | 78° | 80° | 81° | |||
Ammo racks

| Full ammo |
1st rack empty |
2nd rack empty |
3rd rack empty |
Visual discrepancy |
|---|---|---|---|---|
| 42 | 39 (+3) | 19 (+23) | 1 (+41) | No |
Note:
- Hull empty: 19 (+23) shells.
Machine guns
The Type 90 mounts two machine guns; one pintle-mounted 12.7 mm and one coaxial mounted 7.62 mm. These can be used as deterrent for low-flying aircraft, clearing light obstacles or crew from open-top vehicles, or spotting enemy vehicles.
| 12.7 mm M2HB | ||||
|---|---|---|---|---|
| Mount | Capacity (Belt) | Fire rate | Vertical | Horizontal |
| Pintle | 1,000 (200) | 577 | -8°/+60° | ±120° |
| 7.62 mm Type 74 | ||||
|---|---|---|---|---|
| Mount | Capacity (Belt) | Fire rate | Vertical | Horizontal |
| Coaxial | 4,500 (250) | 701 | N/A | N/A |
Usage in battles
The Type 90 (B) is an extremely capable vehicle in the hands of an experienced tanker, but heed must be paid to the vehicle's weaknesses at all times.
Rural Combat
The Type 90 (B) is very capable in rural combat where cover is plentiful and flanking routes are available. It should ideally be used for early flanks where available (such as the eastern flank on Maginot Line) or when unavailable, pushing quickly for early captures before moving to a nearby protected location to hold that point. It's important to be aware of which routes might be sniper-covered early, as many snipers (such as the Challenger 2 or Ariete PSO) will easily penetrate the Type 90 (B), even at range - avoid giving them the opportunity.
Urban Combat
The Type 90 (B) can prove itself to be an excellent urban combat vehicle, primarily due to its mobility and reliably fast reload. As in rural combat, an early push for a cap can prove viable before moving into a protected position, although often by the time the capture is completed enemy targets will be nearby. Early flanking (such as around the sides of American Desert) is also viable.
Notable Targets
- Challenger 2 - The Challenger 2 is often found as a sniper due to its pin-point accuracy, good reload and excellent turret armour. The Type 90 should never be used to face a sniping CR2 head-on, but instead should attempt to flank or force engagements at close range where weak spots are easily targeted.
- M1A2 Abrams - The M1A2 Abrams has excellent frontal protection and can prove tricky to discern from earlier models in the heat of a battle. As a general rule it's preferable to aim for the gun mantlet or turret ring on any Abrams, despite the fact that JM33 will penetrate nearly anywhere on early models - better safe than sorry.
- Leopard 2A5 - The Leopard 2A5 is very well protected, although JM33 will punch through its hull without any significant trouble. Avoid fighting a hull-down 2A5 head-on, rather taking flanking routes when available. If no choice is presented, aim for the gun mantlet or the turret ring.
- T-80U - The T-80U is extremely well protected from the front, and care should be taken when engaging - aim for the driver viewport or the lower front plate; or where these are not options try to disable its gun through the mantlet. If flanking, side shots will often despatch the T-80U quickly.
- Leclerc - The Leclerc is extremely fast, with a power-to-weight ratio not far short of the Type 90's. When pushing early for caps or flanks, be aware that the Leclerc may be one of the first vehicles you'll counter.
- Leopard 2K - The Leopard 2K has the best power-to-weight ratio of any MBT currently in War Thunder, and it will often be capable of getting to positions before the Type 90. Keep in mind that it can be penetrated anywhere, but aware the 'bouncy' armour; aim carefully.
- AMX-40 - The AMX-40 is extremely mobile and caution is advised when pushing early. Fortunately, the AMX-40 has negligible protection and JM33 will make quick work of it.
Pros and cons
Pros:
- Relatively small profile despite visual similarities to the Leopard 2A4
- 120 mm cannon with autoloader, 4-second reload unaffected by crew or fire
- Extremely mobile, high power-to-weight ratio
- Fitted with Hydropneumatic suspension, although this can only be operated when stationary
- JM33 APFSDS round is competitive (identical to DM33, the 'improved' round on the Leopard 2A5)
- Primary ammunition storage protected within blow-out containment in the rear of the turret
Cons:
- Despite having composite protection in the turret and upper front plate, it's insufficient protection for many of the tanks it will face
- Only three crew, a well-placed shot can easily cause a crew knock-out
- Forced to use a mediocre round prior to researching the tier II JM33 APFSDS
- JM33 APFSDS round struggles against higher-rank opponents if not aimed at weak spots
- Can only carry 19 ammunition before additional ammo is stored in the less protected hull racks
- Slow elevation/depression speed for the main gun
- Slower turret traverse than most other MBTs
History
Development of the Type 90 began almost immediately after the introduction of the Type 74 into service, with the Japanese High Command already looking for a superior replacement. A central aspect of the new machine would have to be the ability to take on and defeat the new Soviet T-72 main battle tank. With that in mind, Japanese engineers began working on a prototype design, which would see completion in 1980. Two prototypes of this initial design were built, tested and improved upon between 1980 - 1986.
Testing resumed in 1986 with a second batch of four prototype vehicles, featuring a number of improvements over the initial two. The most significant change included the replacement of a Japanese-made 120mm smoothbore gun with the established Rheinmetall 120 L/44, most notably used by the M1A1 Abrams and Leopard 2 at the time. The decision to change the gun from a domestic one to a licence-built alternative most likely came as a measure to reduce production costs. However, unlike the MBTs of western armies, the designers of the Type 90 opted to equip the tank with an autoloading mechanism, making it the only production vehicle that did so in combination with the Rh 120 cannon. Further testing and army trials of these prototypes was conducted during the late 80s before the Japanese army formally introduced the tank into service in 1990 as the Type 90. Production of the Type 90 began in 1990 and continued until 2009, with 341 vehicles made.
- From Devblog
Media
- Skins
- Videos
See also
- Related Development
- Type 90 (Family)
- Type 90 - (base model)
- Type 90 (B) "Fuji"
- Type 10 (Family) - (successor)
- Other vehicles of similar configuration and role
External links
Paste links to sources and external resources, such as:
- topic on the official game forum;
- other literature.
| Japan medium tanks | |
|---|---|
| Type 97 | Chi-Ha · Chi-Ha Kai · Chi-Ha Kai TD · Chi-Ha Short Gun |
| Type 1 | Chi-He · Chi-He (5th Regiment) · Ho-I |
| Type 3 | Chi-Nu · Chi-Nu II |
| Type 4 | Chi-To · Chi-To Late |
| Type 5 | Chi-Ri II |
| Type 61 MBT | ST-A1* · ST-A2* · ST-A3* · Type 61 |
| Type 74 MBT | ST-B2* · Type 74 (C) · Type 74 (E) · Type 74 (F) · Type 74 (G) |
| Type 90 MBT | Type 90 · Type 90 (B) · Type 90 (B) "Fuji" |
| Type 10 MBT | TKX (P)* · TKX* · Type 10 |
| Other | Ka-Chi |
| USA | ▅M4A3 (76) W · ▅M47 |
| *Prototype | |
